Most homeowners approach a porch remodel backwards — they pick furniture before they’ve settled on floors, or choose a paint color before deciding on the materials that will actually live outside for the next twenty years. The sequence matters as much as the selection. And the selection, when you understand the material science behind each option, becomes far less overwhelming.
The porch is an architectural threshold. It’s the space where your home’s interior sensibility meets the outdoor world, which means every porch remodel choice needs to function well in both registers — aesthetically and physically. I’ve spent years studying how materials perform under outdoor exposure, and what I’ve found is that the best porch remodel ideas aren’t always the most obvious ones. Sometimes the most durable surface looks the most luxurious. Sometimes the cheapest-looking option in the showroom outlasts everything around it.
These 15 porch remodel ideas are anchored to specific material decisions — the kind that determine how your porch looks in year one and in year fifteen. There’s something here for every climate, budget, and architectural style.
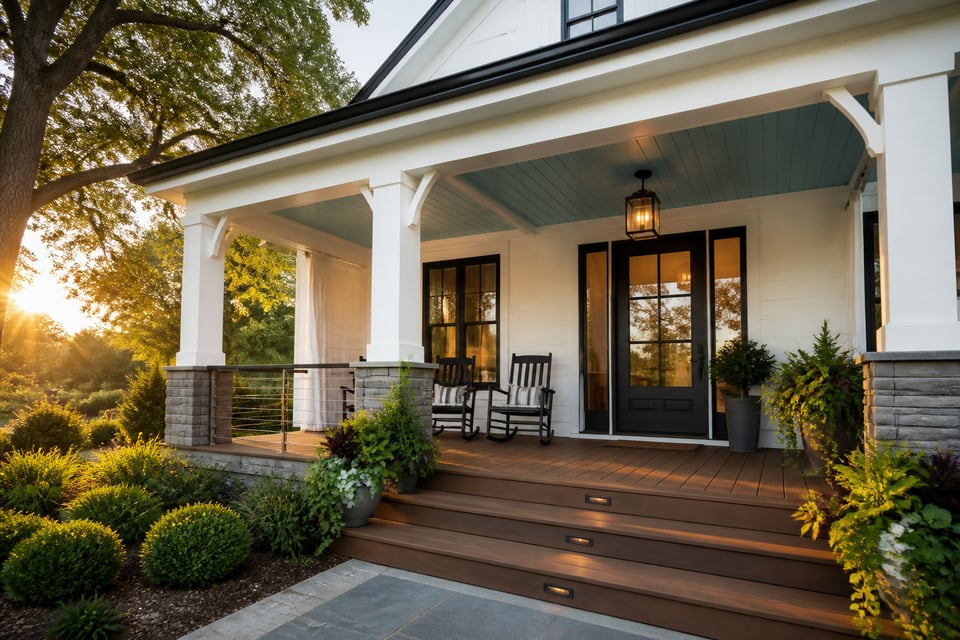
1. Composite Decking for a Low-Maintenance Porch Remodel
The three major composite decking brands — Trex, TimberTech/AZEK, and Fiberon — are remarkably similar in price range and performance tier, which means the decision shouldn’t be driven by cost. It should be driven by understanding what you’re actually buying.
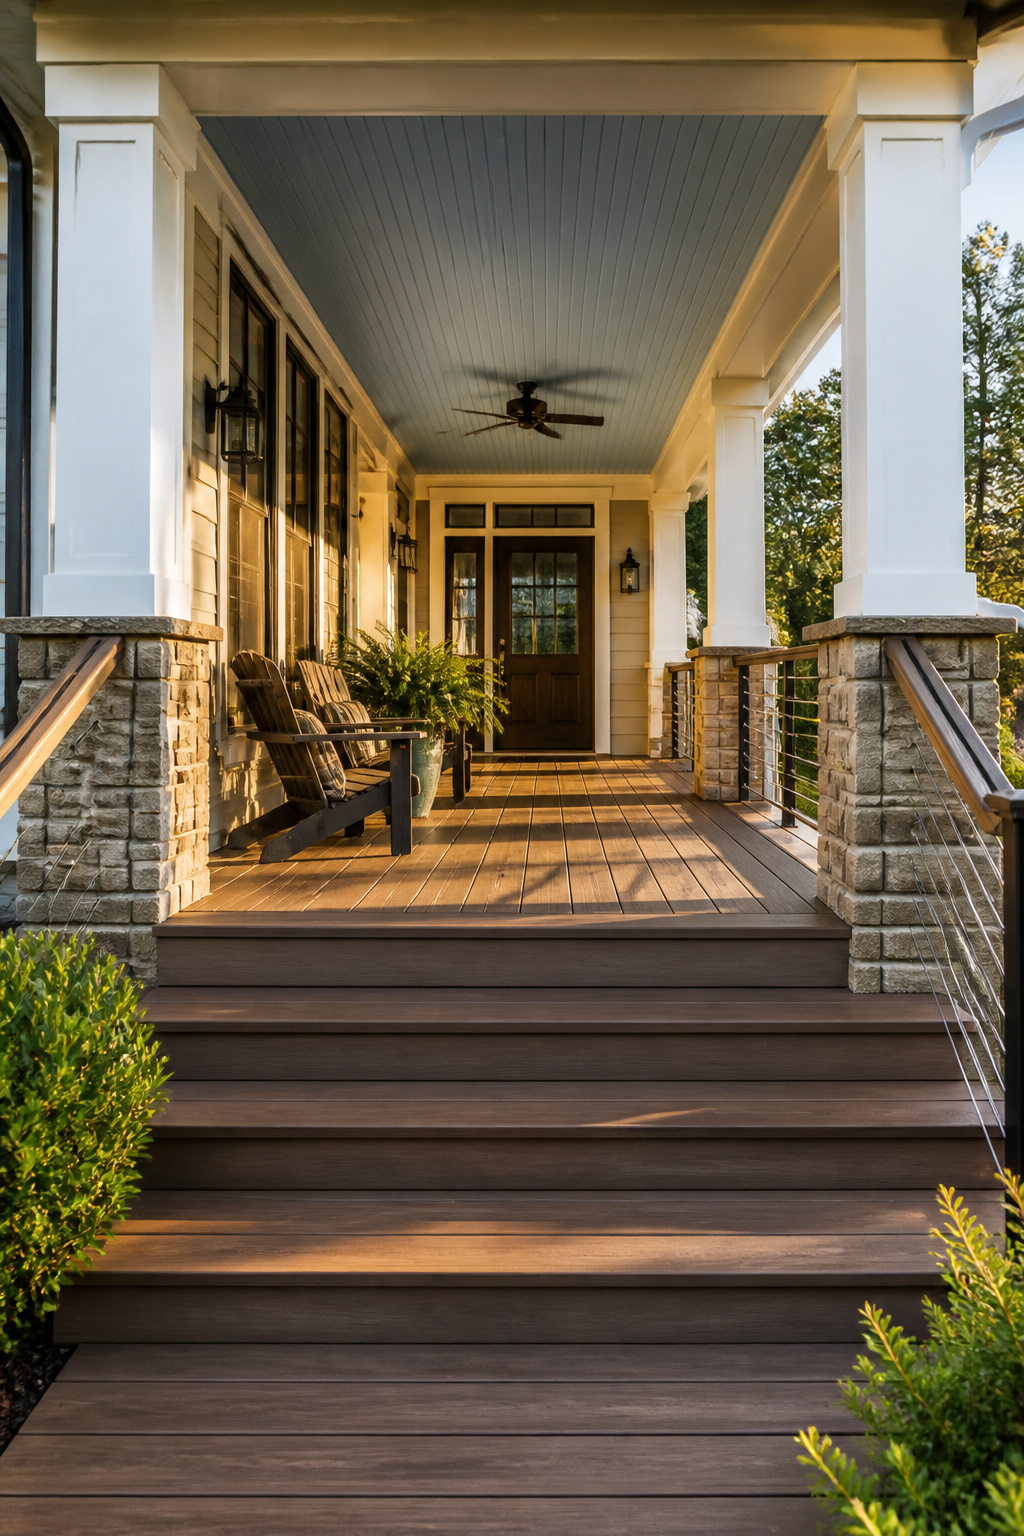
The critical distinction isn’t composite versus wood. It’s capped versus uncapped composite. A capped board has a continuous polymer shell encasing the wood-fiber core on all four sides — this shell blocks moisture, mold, and the UV degradation that turns uncapped composite a chalky, faded gray within a few years. Entry-level boards (Trex Enhance, Fiberon Good Life) are partially capped or uncapped, priced at $5-7 per square foot for materials. They’re adequate for covered porches where UV and moisture exposure are minimal. For open porches in full sun, you want premium capped composite — Trex Transcend, TimberTech AZEK, Fiberon Promenade — at $11-16 per square foot.
Installation detail that most people miss: composite expands and contracts significantly with temperature. Maintain a 1/8-inch gap at board ends and 3/16-inch gaps at structural connections. In freeze-thaw climates, hidden fasteners (Trex Hideaway clips, TimberTech’s TigerClaw) allow boards to float and are genuinely superior to face-screwing. Also check joist spacing requirements — most composites require 12-inch OC framing for diagonal runs and 16-inch for straight; ignoring this voids the warranty.
If you’re looking for deck design ideas that pair with composite materials, there are approaches that work beautifully with capped composite’s clean, modern profiles.
Total installed cost runs $25-70 per square foot depending on complexity and region.
2. Natural Cedar Planking With a Semi-Transparent Stain
There’s a reason cedar has dominated quality porch decking for generations: it’s not just beautiful, it’s chemically resistant to rot and insects without any treatment. Western red cedar contains naturally occurring thujaplicins — phenolic compounds that actively inhibit the decay fungi and boring insects that destroy other softwoods over time. No other domestically available softwood matches this combination of natural durability and visual warmth, which is why it remains a go-to material in porch remodel projects from Maine to the Pacific Northwest.
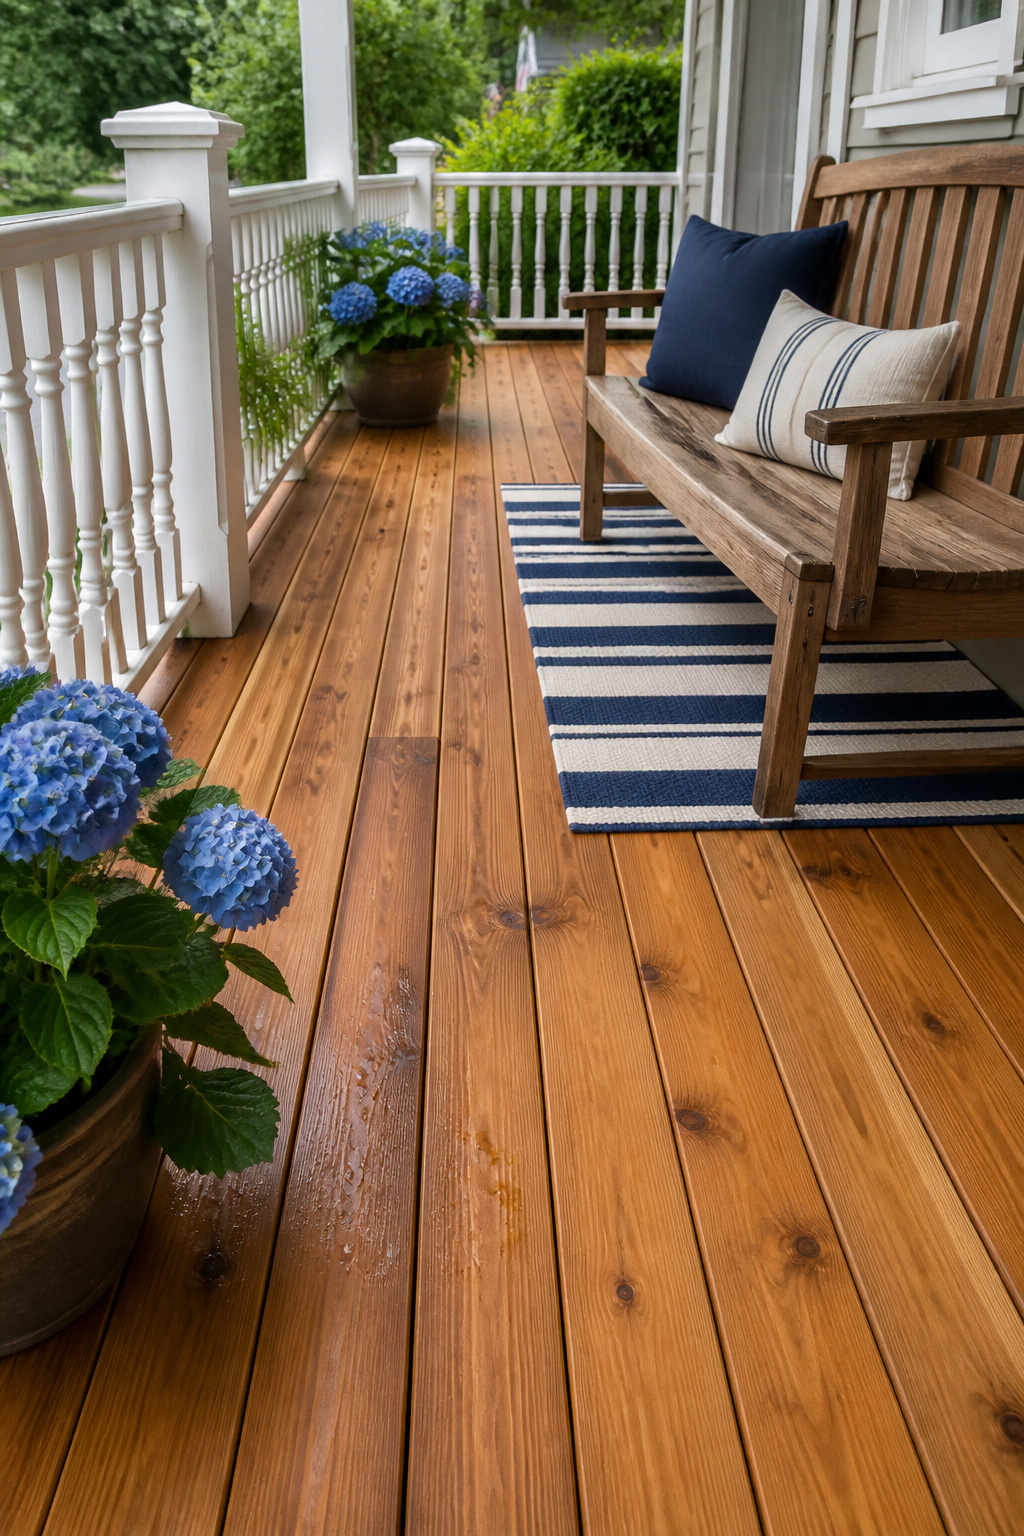
Specify kiln-dried cedar (moisture content under 19%) rather than green or air-dried stock. Green cedar shrinks and gaps as it dries on-site, creating tripping hazards and boards that cup and twist as moisture leaves unevenly. Clear-grade (knot-free) is ideal for a refined look; tight-knotted #2 grade costs 30-40% less and takes stain beautifully.
For finish, semi-transparent stain is the choice that honors the material. Unlike a solid stain or paint that forms a film on the surface, a penetrating formula (Cabot Australian Timber Oil, Armstrong Clark Semi-Transparent, CUTEK Extreme) absorbs into the wood fiber. This means no peeling, no flaking — just gradual wear and eventual recoat. Horizontal deck surfaces need attention every 2-3 years. New cedar requires an exception: let it weather for 2-6 weeks before first application so the grain opens fully and accepts the stain deeply. Staining fresh-cut cedar too soon is one of the most common causes of adhesion failure in this type of porch remodel, and it forces a costly full strip before you can reapply correctly.
3. Painted Concrete Floors as the Foundation of Your Porch Renovation
A painted concrete porch floor is one of the highest-value moves in any renovation budget — but the outcome is decided almost entirely before you open the first can. Surface preparation is everything.
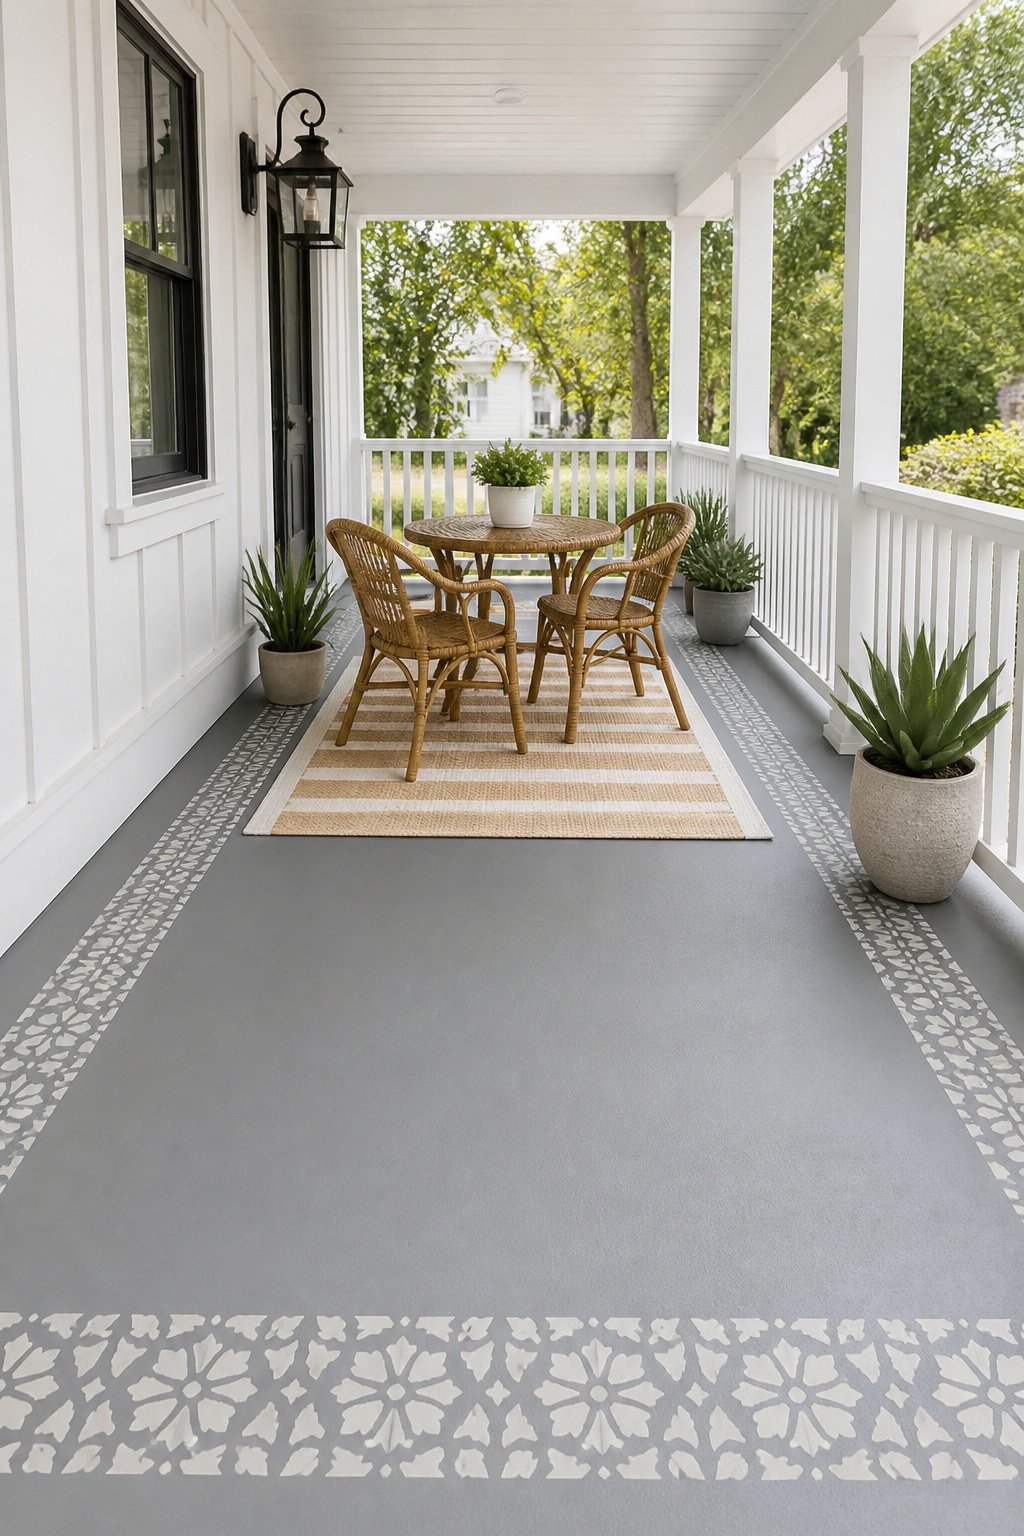
The concrete must be chemically etched (muriatic or phosphoric acid solution creates microscopic surface roughness that improves paint adhesion by 40-60%), completely clean, and genuinely dry before any coating goes down. Here’s how to test for moisture: tape a plastic sheet to the slab and leave it for 24 hours. If condensation forms on the underside, the slab is releasing moisture vapor that will push any coating off from below — guaranteed failure within weeks. Newly poured concrete needs 28-30 days to cure fully.
Epoxy vs. Latex: What the Durability Gap Actually Looks Like
Standard latex porch paint (BEHR Premium, Rust-Oleum Porch & Floor) runs $30-50 per gallon and lasts 1-3 years on horizontal surfaces. Two-part epoxy (Rust-Oleum EpoxyShield, Armor Floor Coat) runs $80-150 per kit and lasts 5-10 years — it creates a waterproof sealed surface you can genuinely pressure-wash. The prep is more demanding (pot life is limited after mixing), but the durability difference in any porch remodel is not subtle.
For visual interest: concrete stencils (Modello Designs, Royal Design Studio) can mimic encaustic tile or geometric patterns for an additional $2-5 per square foot over a solid color. Add an anti-slip grit additive to any exterior floor coating. Covered porches create condensation, and smooth painted concrete is genuinely hazardous when wet.
4. Stone Veneer Columns That Anchor the Whole Porch Design
The visual mass of a porch column does extraordinary work — it defines the architectural character of the facade more than almost any other single element. Real masonry columns require structural engineering and significant footings. Manufactured stone veneer delivers 90% of that visual mass at roughly one-third the cost and without touching the structural drawings.
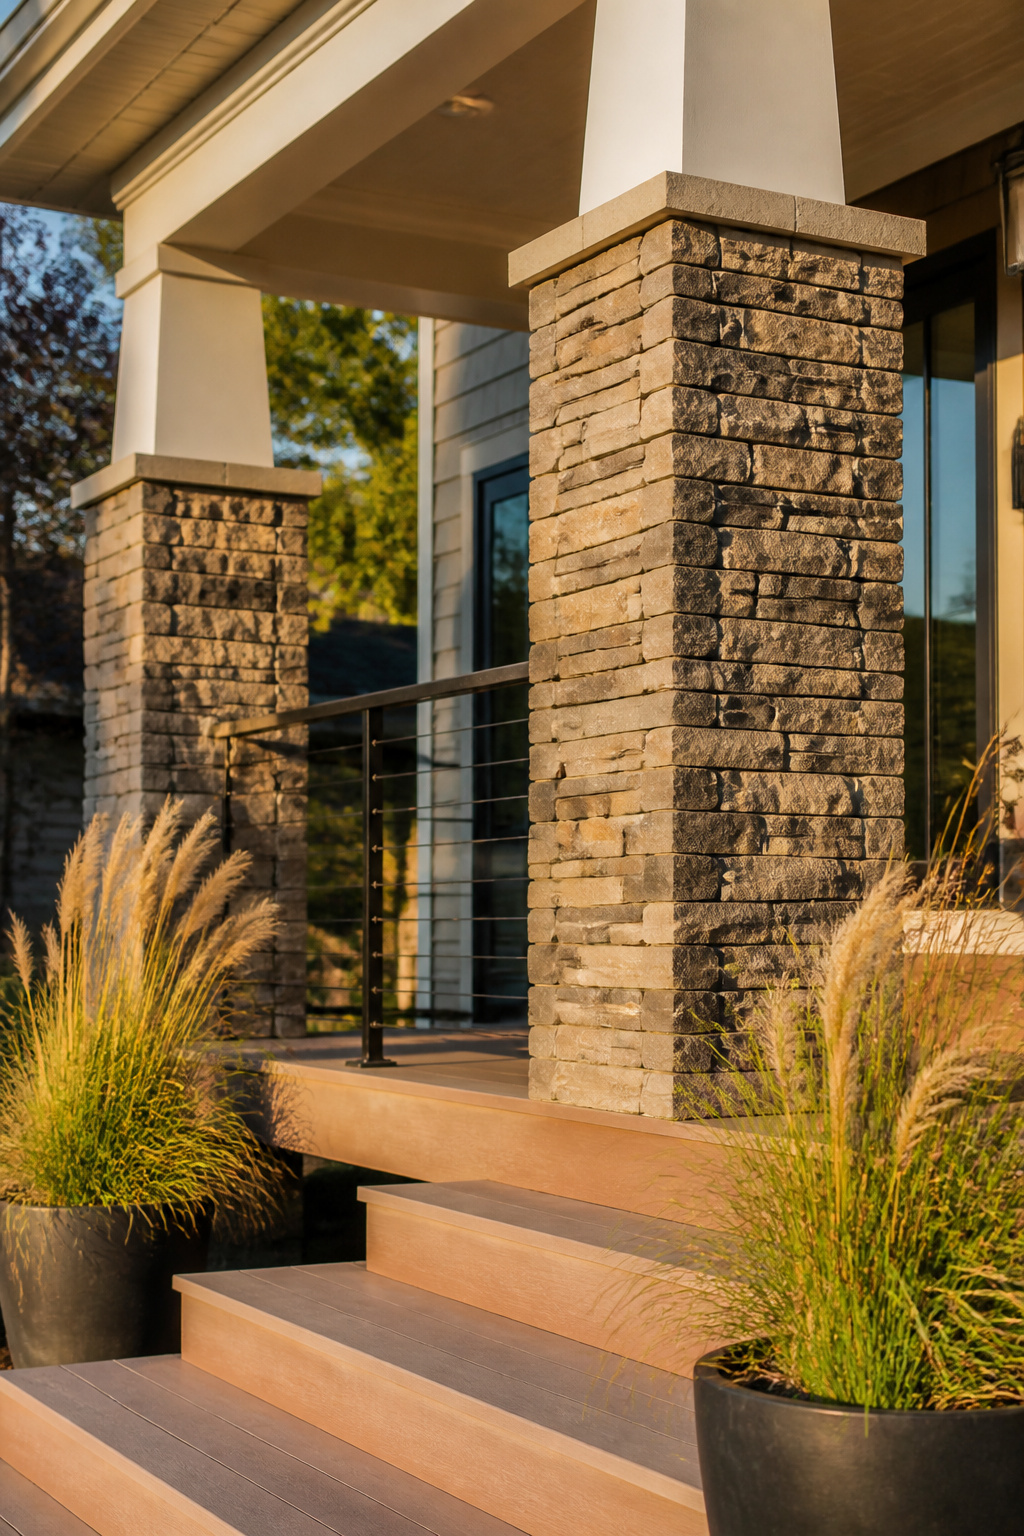
Manufactured stone veneer (Eldorado Stone, Cultured Stone by Boral) costs $5-8 per square foot for materials and runs approximately $2,000 per column fully installed on a standard 3-4 ft porch column. At roughly one inch thick and one-third the weight of natural stone, it typically requires no additional structural support on wood-framed columns. Natural stone veneer ($11-18/sq ft) is the choice for custom homes or when matching an existing natural stone foundation.
Profile choice shapes the architectural story. Ledgestone — linear horizontal courses — is the most popular choice: its strong layering creates visual groundedness and pairs naturally with craftsman, farmhouse, and transitional styles. Fieldstone reads more organic and rustic, best suited to naturalistic landscapes. Ashlar — coursed rectangular stone — carries the most formal character.
One design detail often overlooked: mortar color. A tight gray mortar reads contemporary; a wide buff mortar reads traditional. Order samples before committing — the mortar gap covers far more surface area than most people realize when looking at individual stones in a showroom. Never apply stone veneer directly to bare wood or OSB. Metal lath and a scratch coat are required; skipping them is the most expensive shortcut in masonry work.
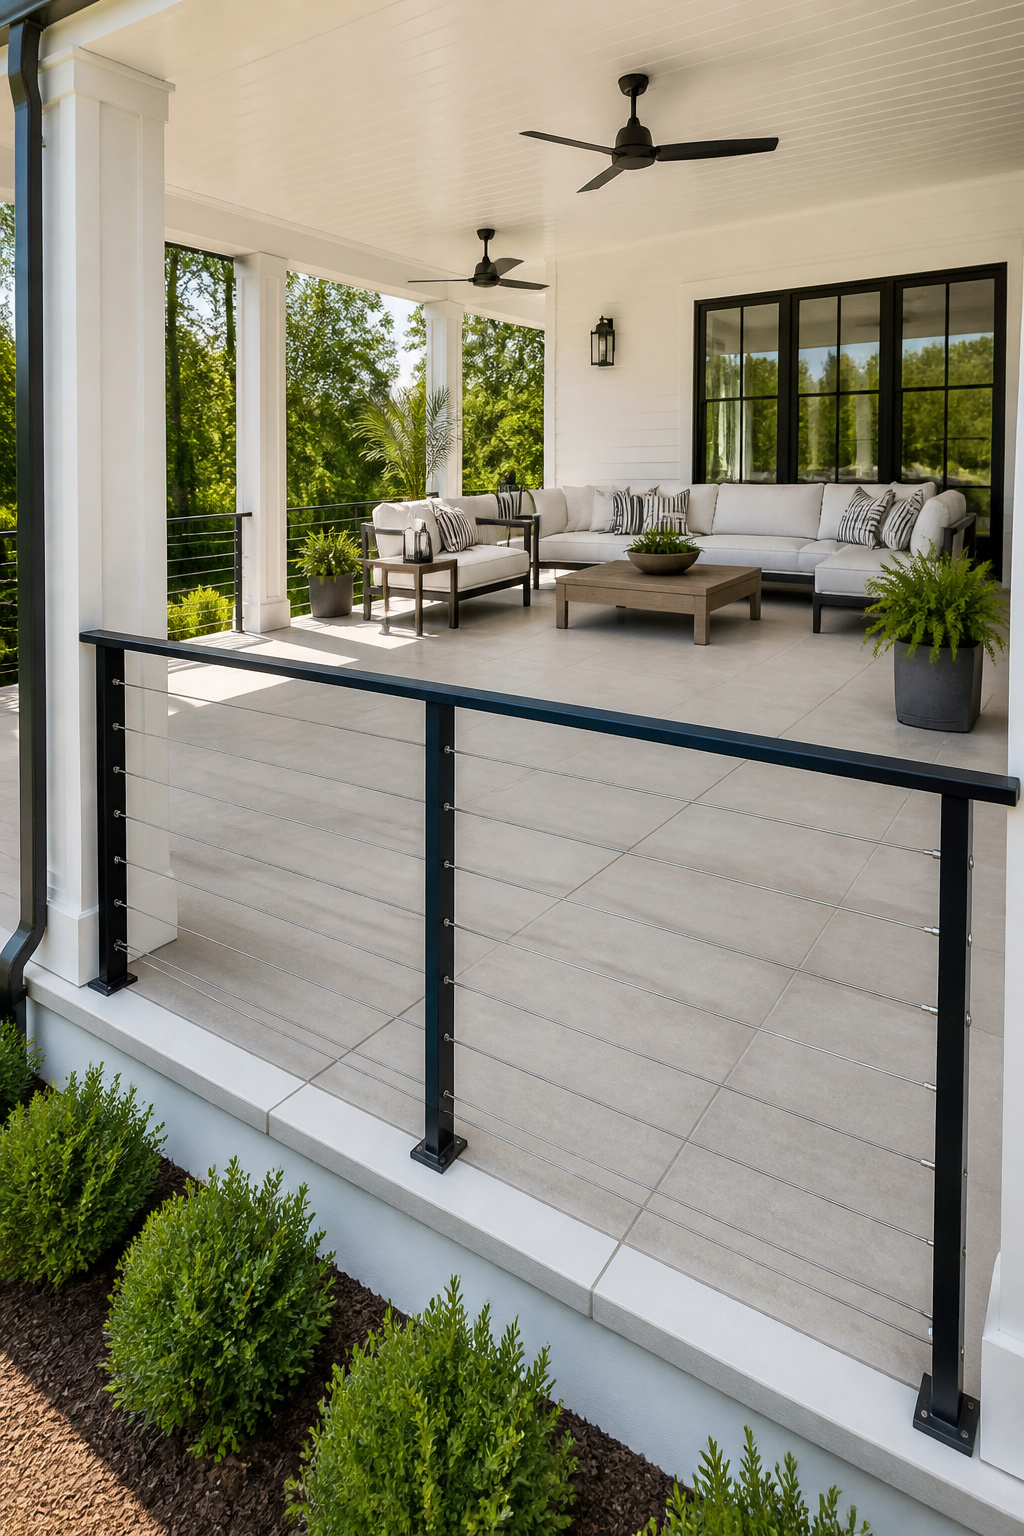
5. Cable Railing Systems for a Modern Open-View Porch
The appeal of cable railing is essentially optical: it preserves the view through the railing plane, making the porch feel larger and more connected to its surroundings. What looks effortlessly minimal is actually a system with meaningful engineering requirements — and the details that get rushed are the ones that fail.
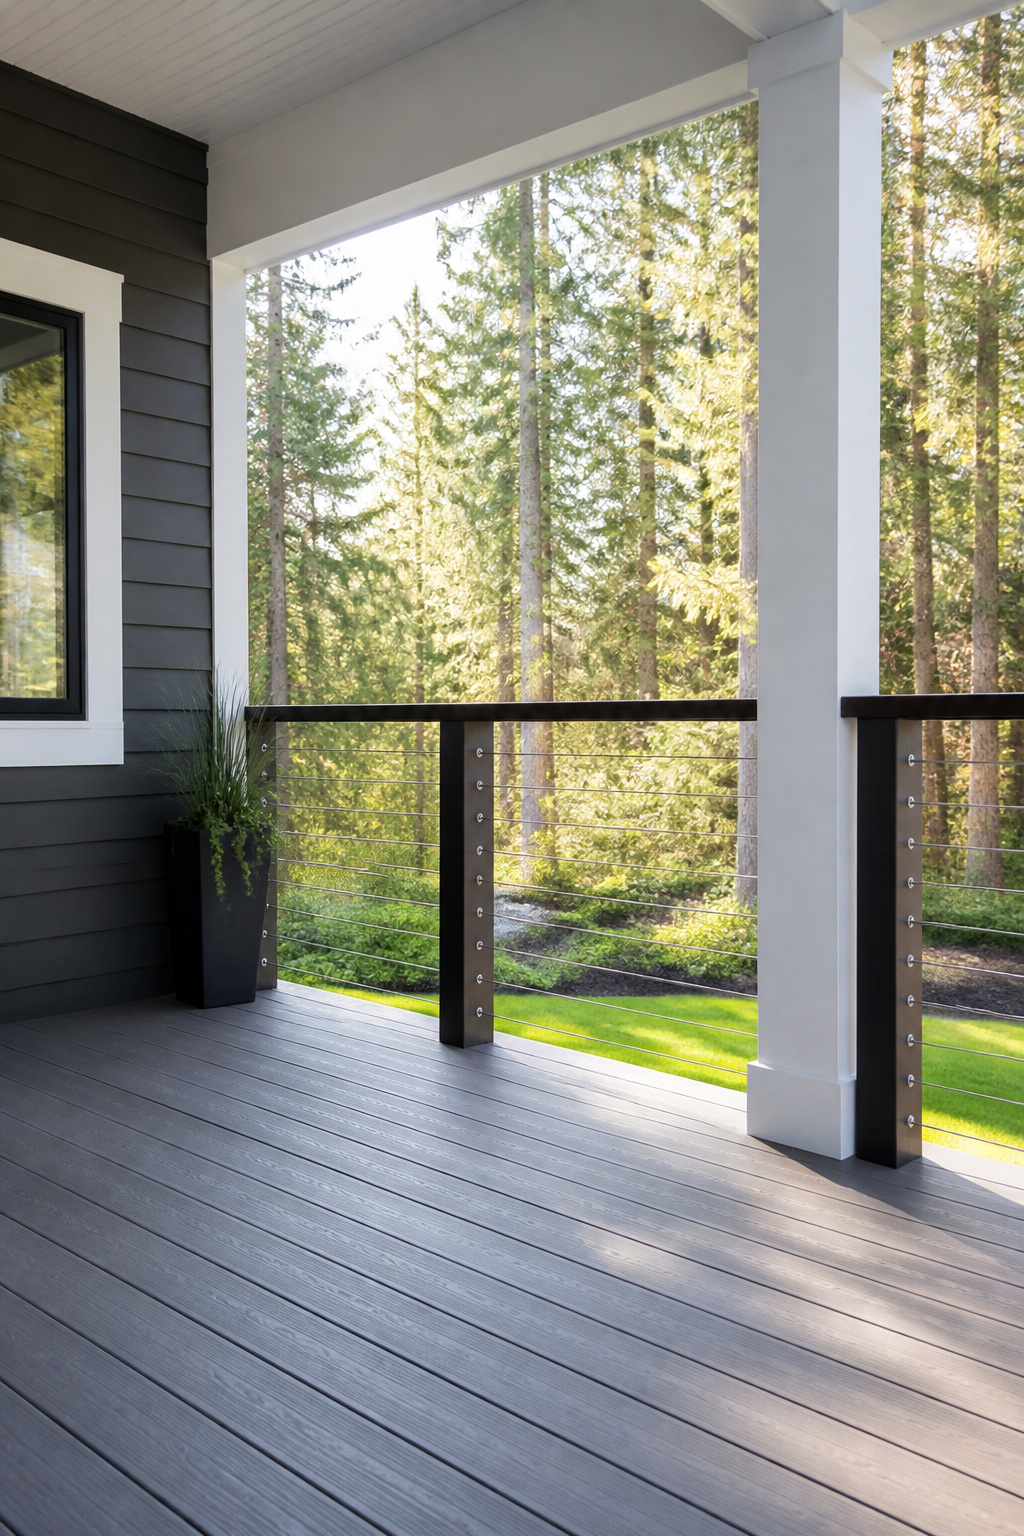
Start with stainless steel grade. Type 316 (marine-grade) contains molybdenum, which provides substantially better resistance to chloride corrosion than standard Type 304. If you’re within ten miles of saltwater — or in any high-humidity region with frequent wetting — 316 is the only appropriate specification. It costs 20-30% more in cable material, which is real money but far less than replacing a railing that’s developed visible rust within three years.
Cable diameter: 1/8-inch wire rope is the residential standard for post spans up to 4 feet. For spans over 4 feet or in high-wind locations, specify 3/16-inch — undersized cable deflects under lateral load, increasing the gap between runs past the code-required 4-inch maximum opening.
End posts are where most DIY cable rail projects go wrong. End posts bear the full tension load of the cable runs and must be through-bolted or anchored with stainless lags into solid framing — not just toe-screwed. Corner posts receive load from two directions simultaneously; these need double-post or welded steel post systems to handle it without twisting.
Full professionally installed systems run $150-285 per linear foot. Cable-only DIY kits (Feeney CableRail, Muzata) run $25-50 per foot in materials if you have posts already in place.
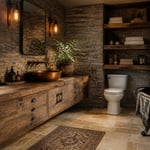
6. Reclaimed Wood Accents for Character Without a Full Demolition
There is genuinely no manufactured product that replicates what reclaimed barn wood does — the patina from decades of weathering, the grain patterns in wood species that haven’t been commercially logged in fifty years, the weight and presence of material with an actual history. Used strategically, even a small amount transforms a porch remodel in a way that new materials simply cannot.
Work with reputable suppliers — Rustic Roots Wood, Whole Log Reclaimed, Barnwood Naturals — who kiln-dry their stock and provide moisture content certification. The kiln process kills the insect larvae and fungal spores that survive in untreated barn wood. Avoid sourcing from pre-1978 agricultural buildings without lead and pesticide testing; old barns were routinely treated with lead-based preservatives.
For treatment: apply a borate pretreatment (Bora-Care or Timbor) to all surfaces before installation on covered outdoor applications. Penetrating sealers (Defy Extreme, Ready Seal) outperform film-forming products here — they allow the patina to breathe and don’t crack and peel as temperatures cycle. End grain absorbs moisture at 10-15 times the rate of face grain, so apply two extra coats to every cut end before installation.
High-impact applications: horizontal accent walls in random-width planks, ceiling panels with proper soffit ventilation, and post cladding — 3/4-inch reclaimed slats over a structural 4×4 create the visual mass of a full timber post at a fraction of the material cost. For more unexpected porch decor ideas that add real character, the layering approach translates directly to the covered porch.
7. Board-and-Batten Siding: The Budget Porch Makeover That Looks Custom
The proportioning decision in board-and-batten is the detail that separates a deliberate result from an accidental one. Traditional ratio: 3:1 to 4:1 board width to batten width. Six-inch boards with 2-inch battens, or 8-inch boards with 2-inch battens, are the proportions that have proven visually stable across generations of architecture. Keep batten spacing consistent — 12 to 16 inches on center — and the facade reads as designed. Irregular spacing looks like a mistake.

Scale adjustment matters: on a standard 8-foot ceiling porch, 2-inch battens read correctly. On a two-story porch or tall gable end, step up to 3-inch battens; the increased scale needs more visual weight to maintain balance.
For materials: LP SmartSide (engineered wood composite, $3.50-4.50/sq ft material) is the practical professional choice — pre-primed, dimensionally stable, and covered by a 5/50 year structural warranty. Hardie Panel (fiber cement, similar pricing, 30-year warranty) is heavier and requires carbide-tipped cutting tools, but it’s fire-resistant, which matters in certain climates and insurance contexts. For truly zero-maintenance board-and-batten, cellular PVC boards never rot or swell, at higher material cost but with no long-term painting obligation.
Paint selection for exterior verticals: vertical surfaces shed water and handle UV better than horizontal ones, so paint typically lasts 8-12 years here. Use 100% acrylic latex in satin or semi-gloss for easy cleaning. On PVC boards, stick to paint colors with a Light Reflective Value above 55 — darker colors absorb enough heat to cause thermal bowing that permanently warps the boards.
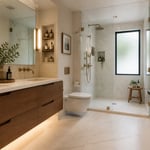
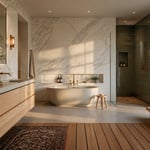
8. Travertine Tile Flooring for a Mediterranean-Inspired Porch
Travertine delivers something that no ceramic tile can: natural variation. Each tile pulls from a limestone formation laid down over thousands of years, which means the color movement, the subtle veining, the tonal shifts across a floor — none of it repeats. That quality has made travertine one of the most beloved natural stones in residential design for centuries, and it remains a strong choice for porch remodel projects with a Mediterranean or transitional aesthetic.
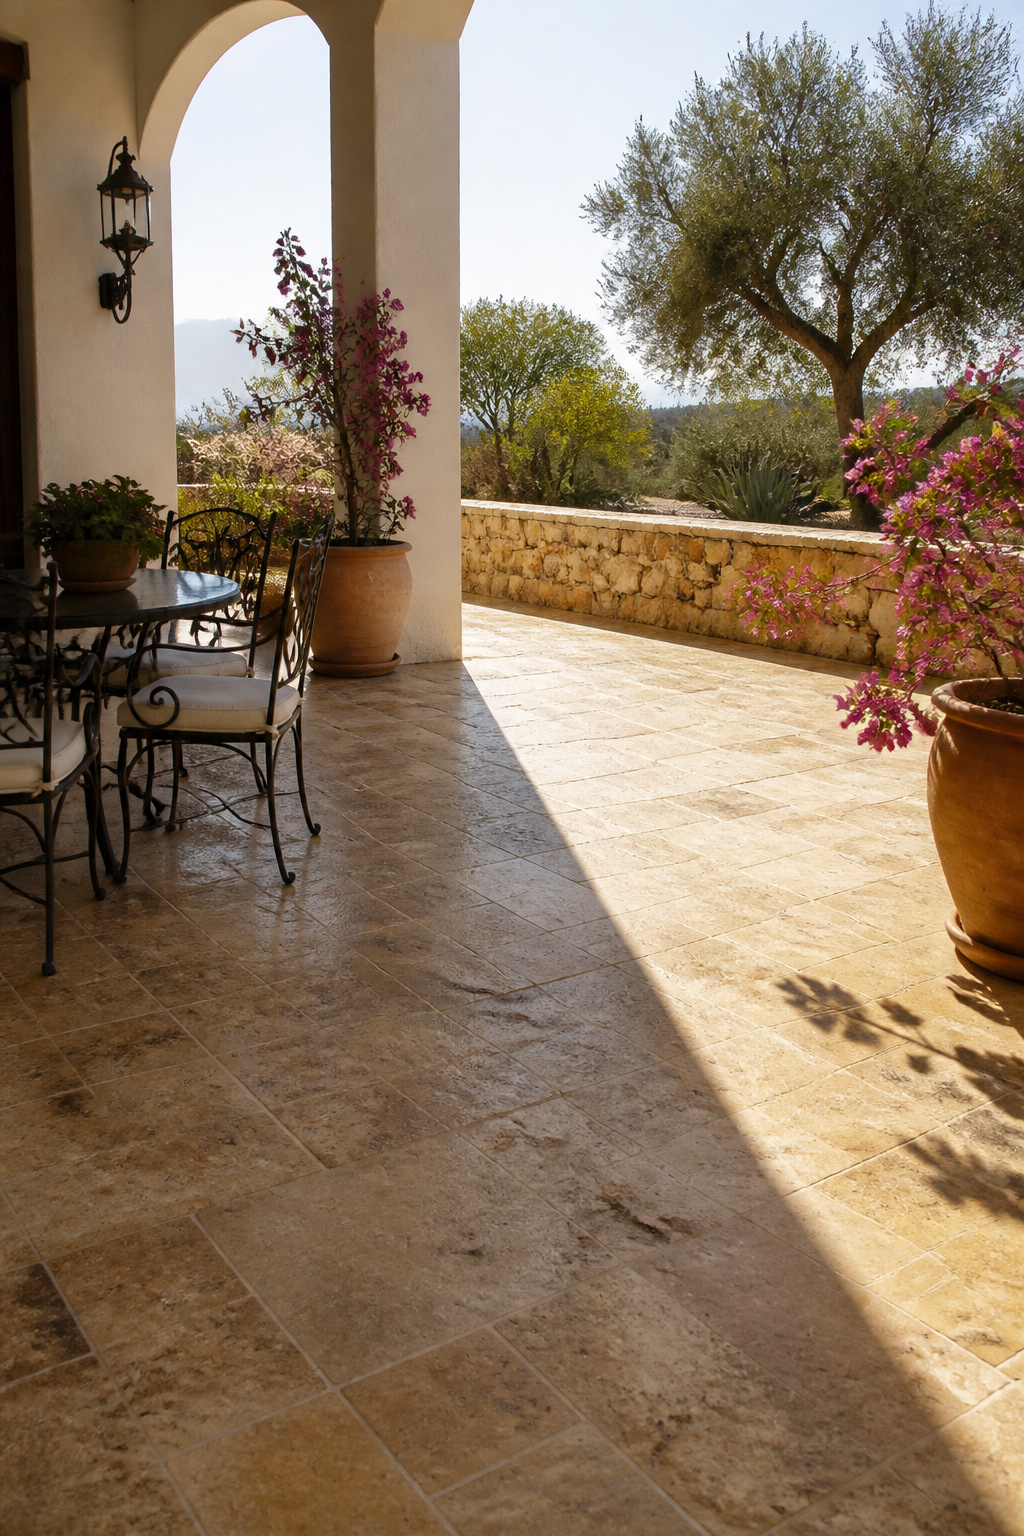
The filled versus unfilled question should have one answer for porch floors: filled. Travertine’s characteristic voids and pits are visually appealing indoors, but outdoors those openings trap debris and moisture — in any climate with freeze cycles, water infiltrates and expands, fracturing the stone from within. Specify filled travertine with pre-grouted or epoxy-filled voids.
Finish choice is equally non-negotiable for safety: polished travertine carries a SCOF (static coefficient of friction) of 0.40-0.50 — borderline dangerous when dry, genuinely hazardous when wet. Honed travertine (0.40-0.60) is acceptable on covered porches that stay dry. Tumbled or brushed travertine (0.50-0.70) is the correct specification for any porch surface exposed to rain or condensation.
For sealing, use penetrating impregnator sealers only — 511 Impregnator by Miracle Sealants, or Stonetech Bulletproof. These absorb into the stone without forming a surface film, providing stain and moisture protection without increasing slip risk. Reseal every 1-2 years outdoors. Never use wax or topical sealers on outdoor travertine; they create a glossy film that peels under UV and becomes slippery when wet.
9. Corrugated Metal Roofing for a Farmhouse or Industrial Porch Remodel
Corrugated metal roofing is one of those material choices that divides people aesthetically and unites them practically — it lasts 30-45 years, costs $5-12 per square foot installed, and requires essentially no maintenance beyond occasional debris clearing.
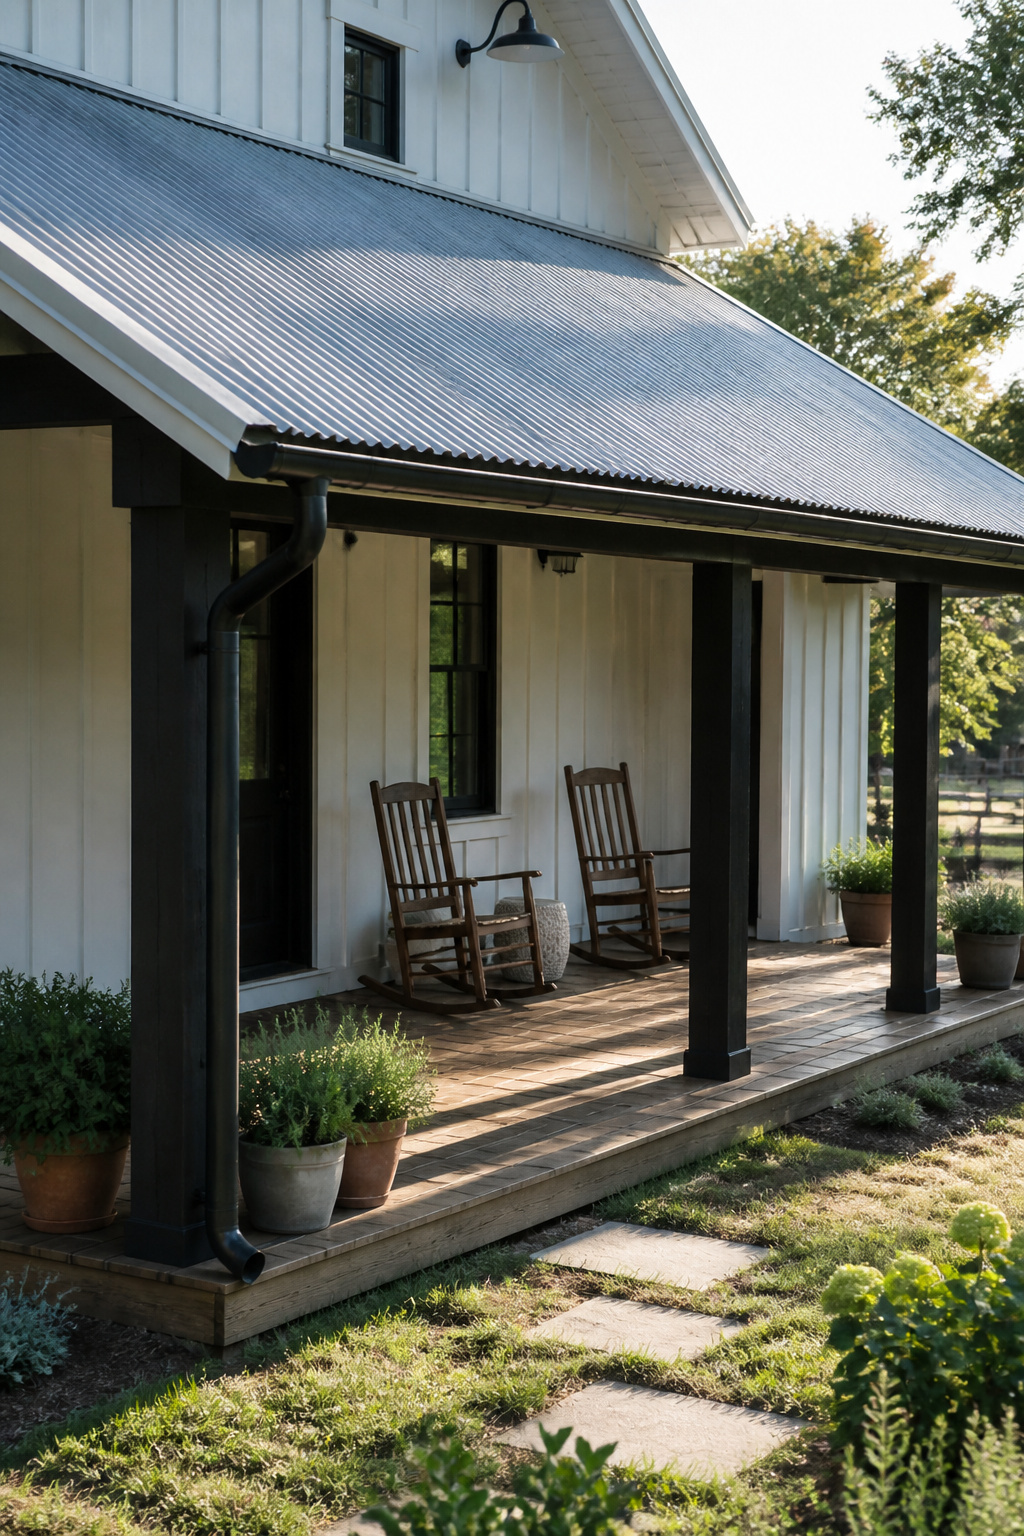
The material choice within corrugated metal shapes how the roof ages. Galvanized steel develops a matte silver patina over time that’s specifically prized in farmhouse design — the slow zinc oxidation creates surface variations that are actively attractive. Galvalume (zinc, aluminum, and silicon coating) holds its silver-gray color more consistently, without patinating, and offers better corrosion resistance at panel cuts and fastener holes. Painted steel (ideally with a Kynar 500 PVDF coating) is available in any color with 40-year color warranties and is the right choice when matching to house trim colors matters.
Gauge, Pitch, and Fastening — the Details That Determine Weathertightness
Gauge selection: 26-gauge is the standard residential specification, adequate for normal wind and hail loads. For climates with significant hail or hurricane exposure, 24-gauge is worth the cost.
Minimum pitch for corrugated metal is 3:12. Below that, water can backwash under horizontal laps during heavy rain. Use rubber-gasketed hex screws (Tek screws with neoprene washers) at every corrugation crest — missing fastener points create flutter under wind load, which fatigues the metal and creates eventual leak locations.
For noise and heat: a 1-inch rigid foam thermal break between the metal and the roof decking reduces both rain noise and summer heat gain measurably. Foam closure strips at ridges and eaves seal the corrugation valleys and are essential for insect exclusion. Once your porch furniture ideas are sorted, that corrugated roof overhead will feel more farmhouse-authentic than any painted drywall option.
10. Tongue-and-Groove Ceiling Planks in a Classic Beadboard Style
A beadboard porch ceiling is arguably the most cost-effective single upgrade in a porch renovation. It replaces a flat, uninteresting ceiling surface with an architectural element that immediately reads as deliberate and designed — and it does so for a material cost that’s modest relative to the visual return.
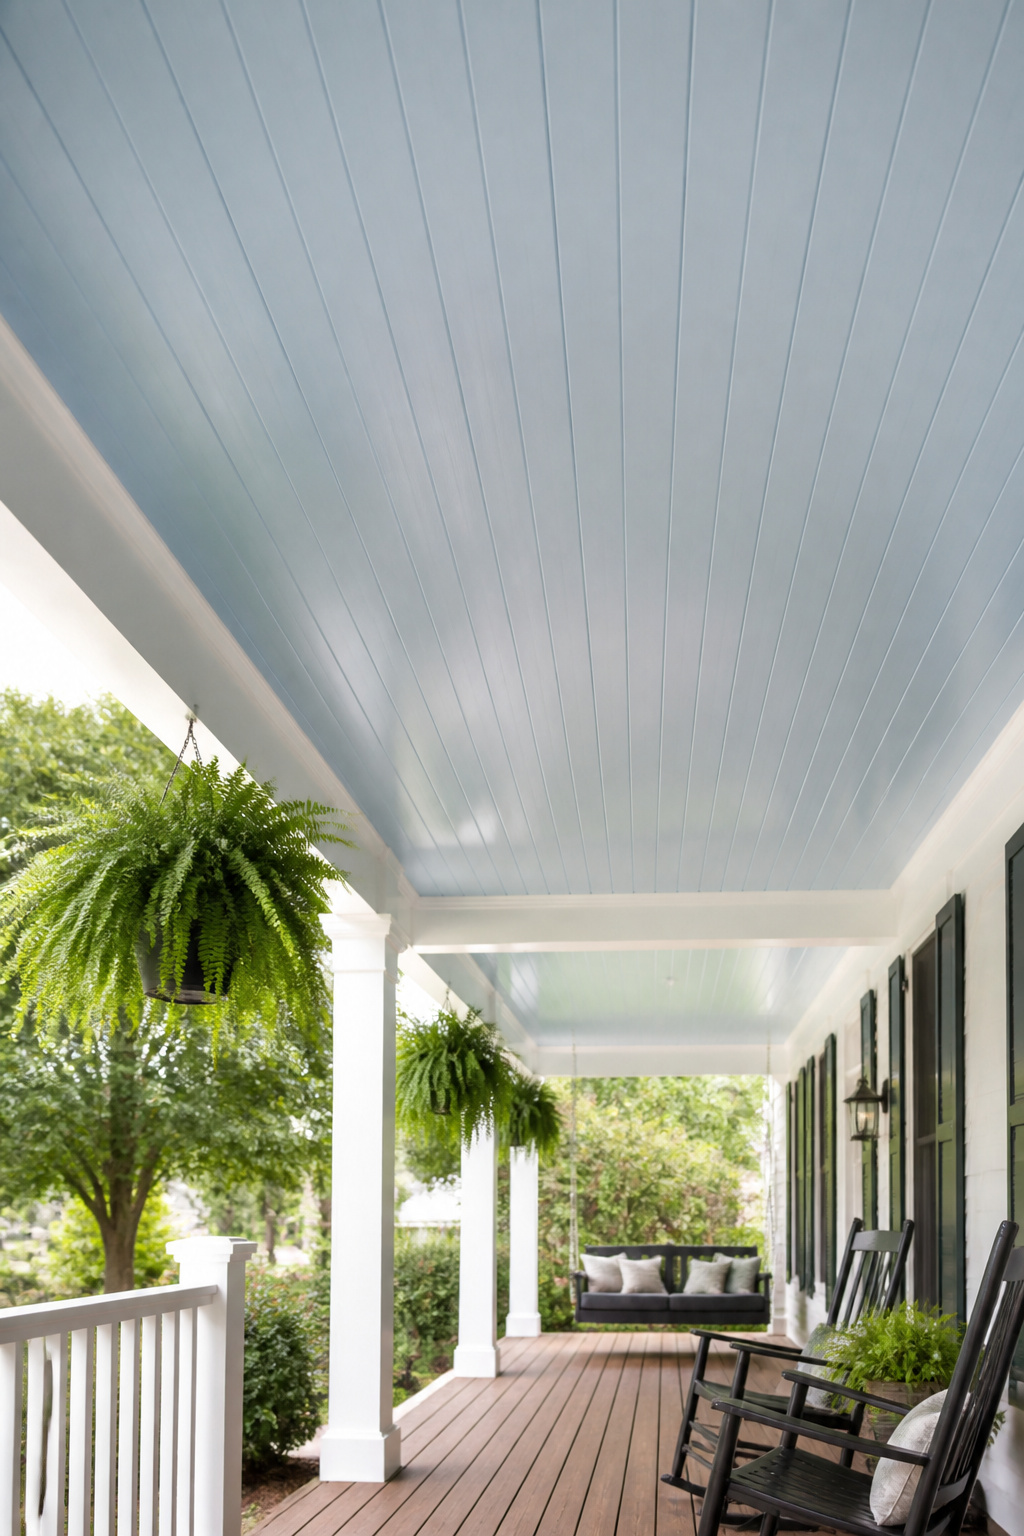
The material decision — wood versus PVC — should be driven by moisture conditions. PVC beadboard (Royal Building Products, Versatex) is impervious to moisture: it will not swell, warp, or rot regardless of humidity. This is the correct specification for screened porches, porches in high-humidity climates, and any covered porch where condensation is a regular occurrence. Solid wood tongue-and-groove planks (pine, cedar) provide authentic warmth and grain variation that PVC cannot genuinely match — but they demand more care. Prime all four sides and all cut ends before installation. Install with a half-inch perimeter expansion gap hidden beneath trim. Maintain with a 100% acrylic exterior satin or semi-gloss paint that resists mildew.
The color conversation deserves a moment: the traditional haint blue ceiling has been applied to Southern porch ceilings since at least the 1800s, rooted in Gullah Geechee cultural tradition, and practically motivated by how that soft powdery blue reflects the sky and keeps the ceiling from feeling heavy. Sherwin-Williams Comfort Gray (SW 6205), Glidden Gentle Rain, and Behr Misty all capture the effect. It works on contemporary porches as readily as traditional ones.
11. Mixed Material Railing: Wood Posts Paired With Metal Balusters
Material mixing in design is not a compromise — it’s a compositional choice that creates depth that single-material systems cannot achieve. The tension between warm wood posts and cool metal balusters follows the same visual principle at work in furniture that pairs a natural walnut top with a steel base. The contrast between the two materials is precisely what makes both feel more intentional.
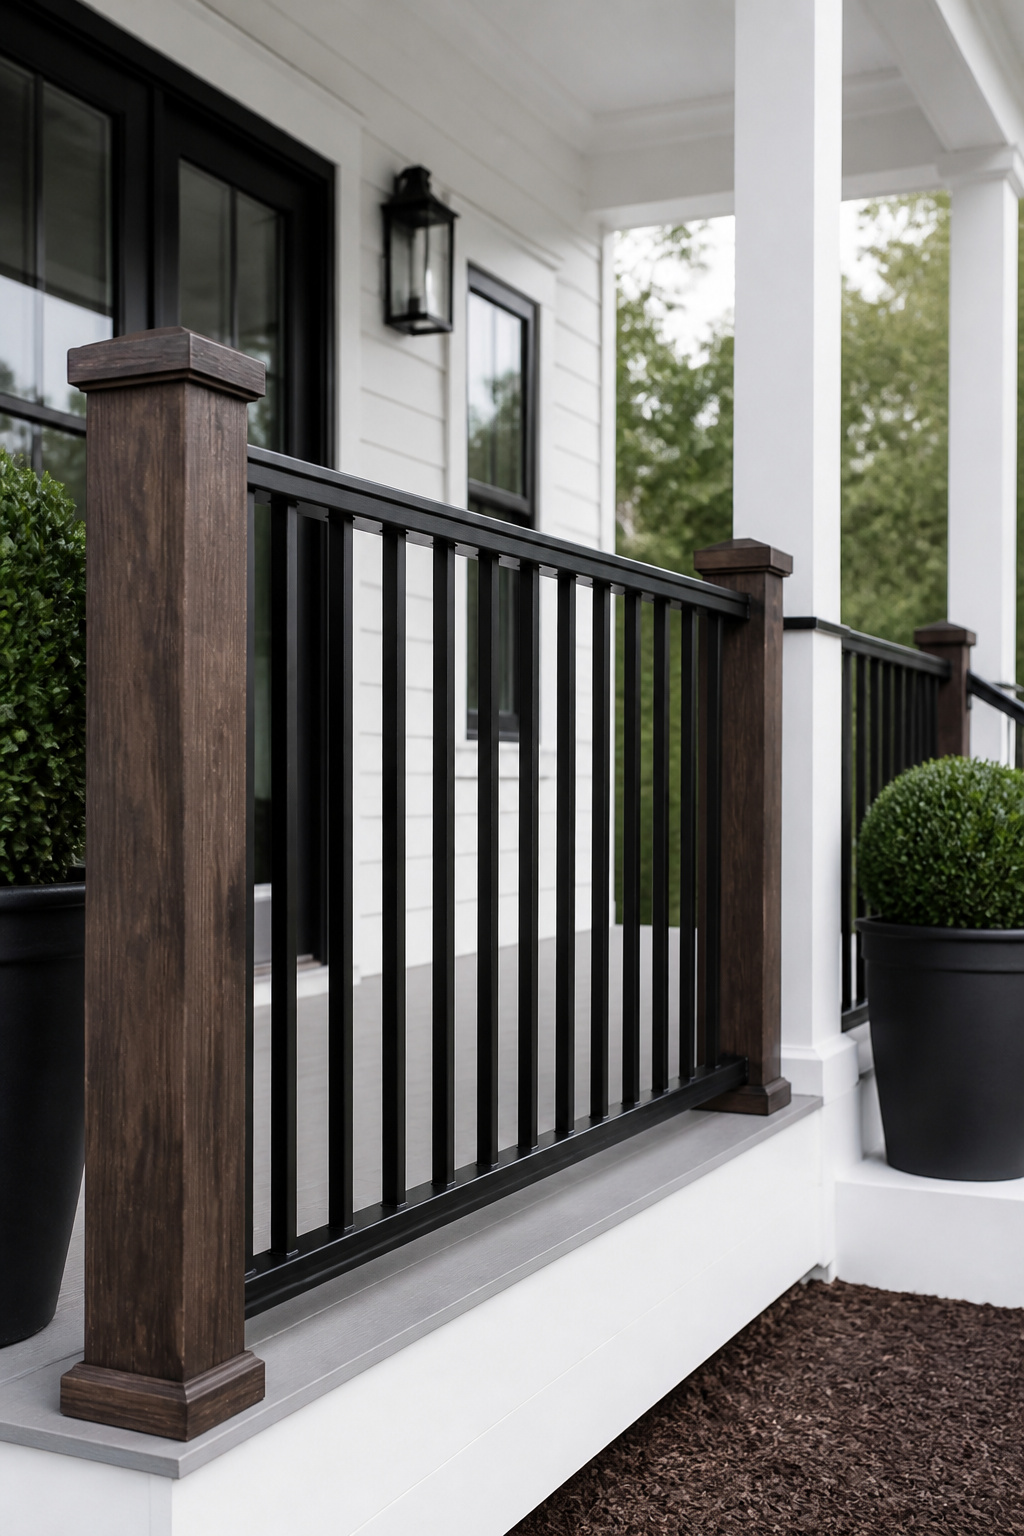
This porch remodel combination is architecture-agnostic in the best way. The finish on the metal determines the character: oil-rubbed or aged bronze with warm-stained cedar reads as craftsman or transitional; matte black aluminum with white-painted posts reads as contemporary or coastal; satin nickel with gray-stained wood lands in modern transitional territory.
For the metal baluster material: aluminum powder-coat (Deckorators, Fortress Building Products) is the professional recommendation over painted steel. Aluminum genuinely cannot rust — the powder coat protects against surface scratching, but even if it chips, there’s no underlying metal to oxidize. Aluminum balusters run $3-8 each in standard decorative profiles, and a complete system installed averages $150-200 per linear foot. Steel systems cost $400-700 per linear foot and require periodic paint touch-up at any chips to prevent rust.
Code compliance is non-negotiable: IRC requires that no opening in any guardrail allow passage of a 4-inch sphere. For diagonal baluster patterns, measure clearance at the narrowest point of the angled opening — not the widest. Also, rout a chamfer or decorative profile on the exposed edges of the wood posts — this single step transforms a structural member into a designed element worthy of the metal components it holds.
12. Exposed Aggregate Concrete for a Textured, Non-Slip Porch Floor
Exposed aggregate is the porch remodel surface that rewards you with tactile interest and genuine grip — something painted or sealed smooth concrete can never provide. The embedded stones create a naturally slip-resistant surface, and because the texture and color distribution are never perfectly uniform, every poured slab has a character entirely its own.

The process involves either seeding (broadcasting aggregate onto fresh concrete after leveling and pressing into the surface) or integral mixing (incorporating aggregate throughout the entire batch). Seeding uses less material; integral mixing produces a more uniform result and ensures the aggregate extends through the full slab depth. In both cases, a chemical surface retarder is applied immediately after finishing — it delays the surface layer from setting while the base concrete hardens. The window for the pressure-wash step (which removes the surface paste to reveal the stones) is typically 4-8 hours, depending on temperature.
Aggregate Selection and Sealing for Long-Term Performance
Aggregate choices shape the visual result significantly. Pea gravel (rounded, 3/8-inch, warm tan and gray tones) is the most common and comfortable underfoot. Crushed granite or quartz creates an angular surface with maximum grip and a faceted sparkle in sunlight. Recycled glass aggregate (from suppliers like Bedrock Industries) — available in blue, green, and amber — creates a luminous mosaic effect for an additional $3-8 per square foot, and is striking in the right application.
Sealing: use a solvent-based acrylic sealer applied in two thin coats at 100-150 square feet per gallon. One thick coat traps air and moisture beneath and delaminates as visible sheets. Reseal every 2-5 years, using the aggregate’s appearance as your indicator — once it looks dry and dull rather than richly colored, it’s time. For those planning an outdoor kitchen patio as part of a larger porch expansion, exposed aggregate transitions naturally between covered and uncovered outdoor surfaces.
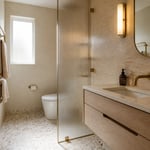
13. PVC Trim Boards for Clean Lines and Zero-Maintenance Curb Appeal
Cellular PVC trim has become the professional contractor’s choice for porch fascia, soffits, and column wraps — not because it’s visually superior to clear-grain wood, but because it eliminates the single highest-maintenance failure mode in traditional wood trim: moisture infiltration at joints, which leads to rot, paint failure, and eventually structural compromise.
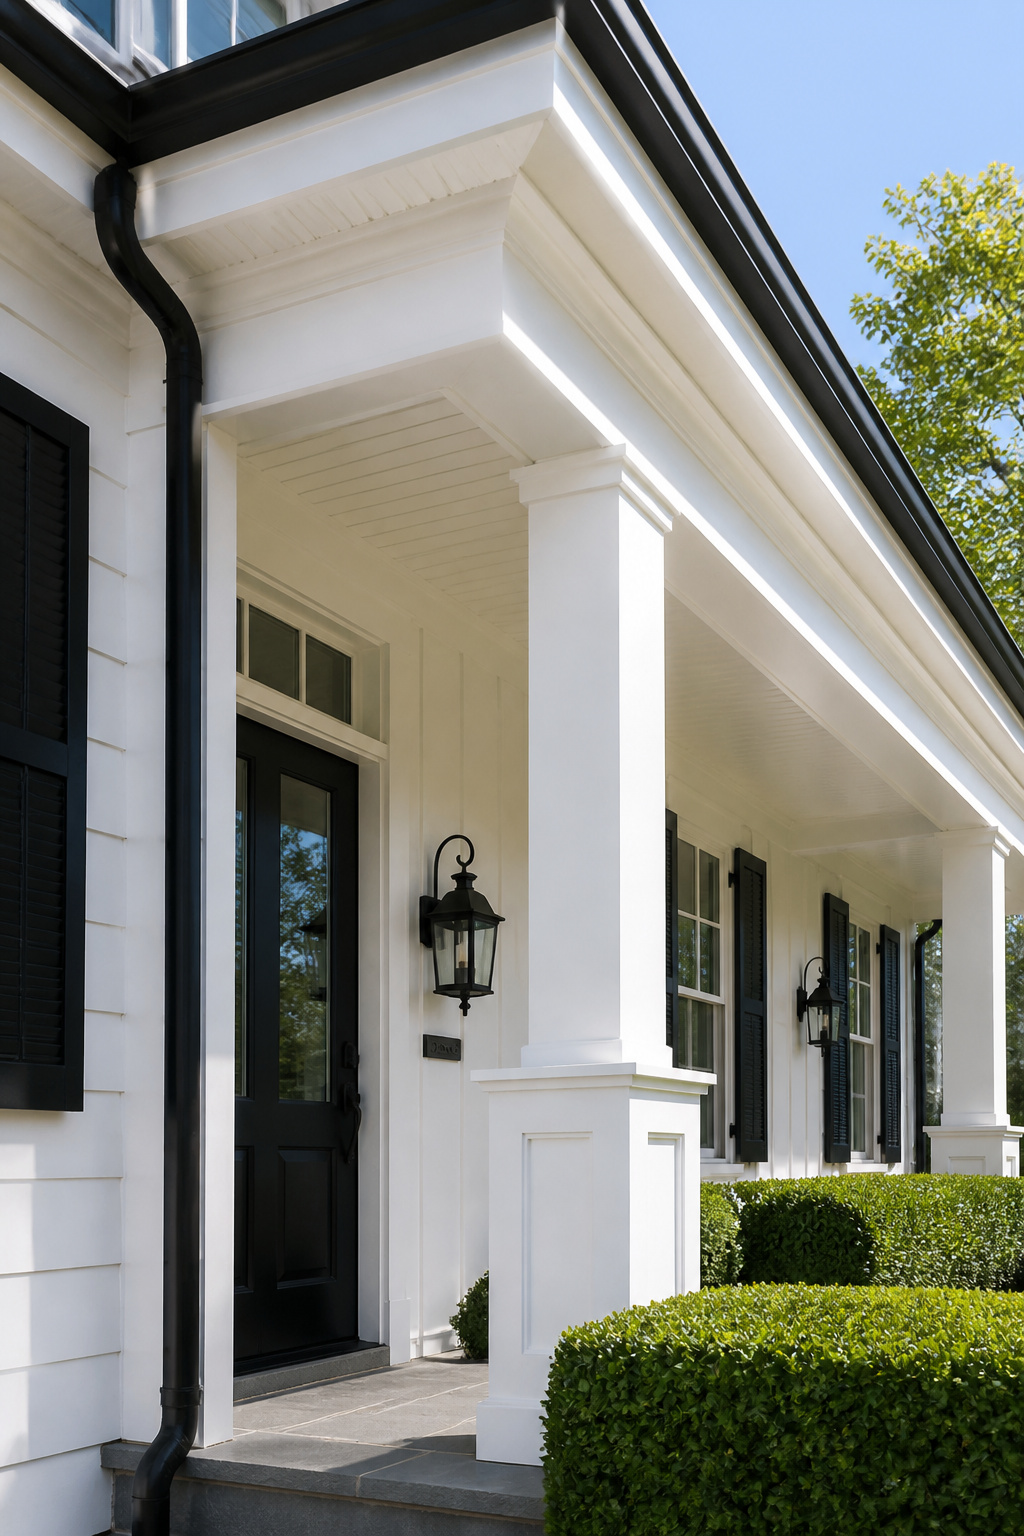
The strategic locations for PVC trim are those where wood fails first: horizontal fascia boards where water collects, column base trim within splash zone of the deck floor, and any trim within six inches of grade. At these locations, cellular PVC (AZEK, Versatex, Kleer) can sit in standing water indefinitely without structural damage — a physical property no paint or sealant on wood can replicate over the long term.
Column wraps in cellular PVC install over existing structural posts in two to three hours and immediately transform the visual weight and formality of a porch. The difference between a wrapped 4×4 and an unwrapped 4×4 is the difference between a finished porch remodel and a construction site.
Installation and Painting Details That Determine Long-Term Success
PVC expands and contracts with temperature at roughly three times the rate of wood. At installation temperatures between 60-80°F, leave a 1/16-inch gap per 18 feet of run. Below 60°F, open that to 1/8 inch per 18 feet. PVC-to-PVC joints must be glued with cellular PVC cement — mechanical fasteners alone cannot hold joints against seasonal movement.
On painting: 100% acrylic latex exterior only, and keep colors above LRV 55. Dark colors on PVC absorb enough heat in full sun to cause irreversible thermal bowing — a mistake that is visible from the street and requires full board replacement to fix.
14. Stacked Stone Fireplace as the Porch Remodel Centerpiece
An outdoor fireplace is the single addition that turns a porch from a three-season space into something you genuinely use twelve months of the year. It’s also the most architecturally significant move in any porch remodel on this list — a well-proportioned fireplace makes the porch feel like a room rather than an appendage.
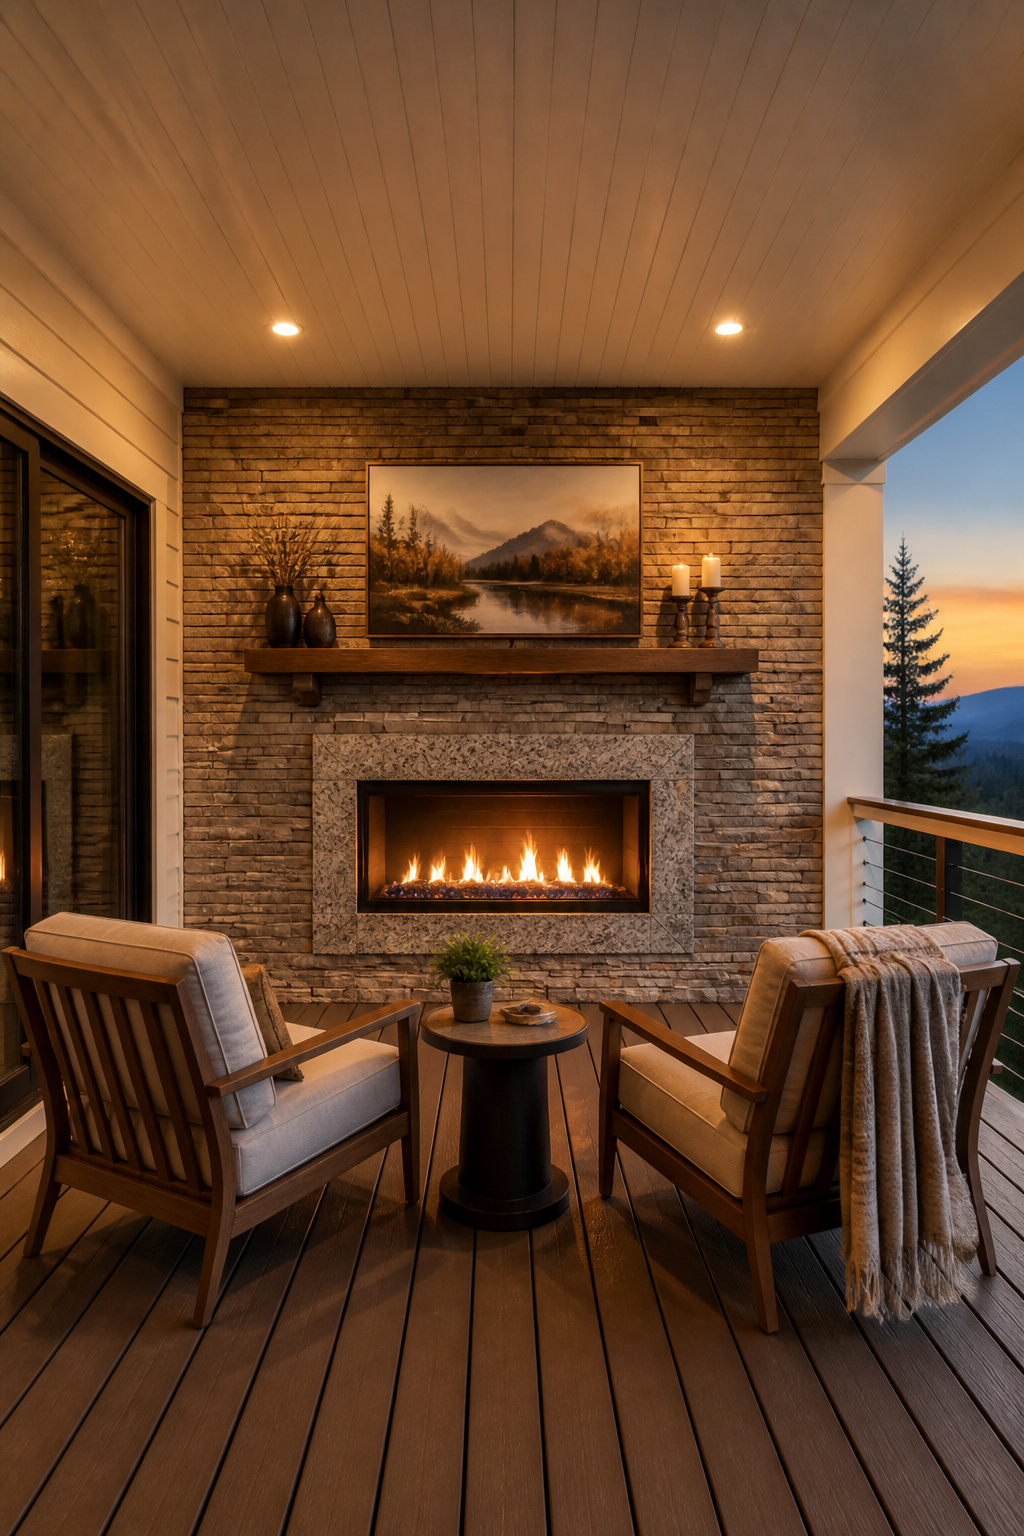
The gas versus wood-burning decision comes down to installation complexity and ongoing convenience. Gas fireplaces average $3,375 installed (range: $750-6,000). Wood-burning averages $10,500 (range: $1,000-20,000), with most of the premium driven by masonry chimney construction and clearance requirements. Gas requires a licensed gas line extension ($15-50 per linear foot) and permits in virtually every jurisdiction ($50-500), but the ongoing maintenance difference is enormous — no ash cleanup, no creosote inspection, no fire management; switch it on with a remote.
Stone Selection, Firebox Sizing, and Proportions
For the stone facade: the firebox and immediate surround — within twelve inches of the firebox opening — must use fire-rated materials. Granite, basalt, and quartzite handle thermal cycling well and do not spall; limestone and many sandstones do. The exterior facade beyond the firebox zone can use any stone veneer, and stacked ledgestone is the dominant choice because its horizontal layering creates visual gravitas.
Proportion the fireplace to the wall. A standard 36-inch wide by 29-inch tall firebox works correctly on walls between 8 and 12 feet wide. Place the mantel shelf at 54-60 inches above finished floor on an 8-foot ceiling — higher and the ceiling feels crowded; lower and the classical proportion collapses. For further outdoor fire inspiration alongside firepit ideas that warm your outdoor living space, the two elements can work as a layered system across a larger outdoor room.
15. Outdoor Porcelain Pavers: The Porch Remodel Surface That Lasts Decades
Porcelain pavers have replaced natural stone as the specification of choice in high-performance outdoor applications — not as a compromise, but as a genuine upgrade in durability, with visual quality that has reached the point where the difference between porcelain and the natural stone it references is imperceptible at normal viewing distances.
The material science here matters: porcelain pavers achieve water absorption rates below 0.5% (ASTM C373 Impervious classification). For comparison, travertine absorbs 1-6%, limestone 3-10%. Near-zero absorption means water cannot infiltrate the tile and expand during freeze cycles — which is precisely how natural stone cracks, spalls, and delaminates in cold climates. Porcelain’s vitrified surface also resists staining without any sealer, eliminating one of the primary ongoing maintenance obligations of natural stone porches.
Thickness, Installation Method, and Grout Selection
Thickness is non-negotiable for outdoor use: specify 20mm (approximately 3/4-inch) pavers. Standard 3/8-inch interior porcelain tile is not rated for outdoor foot traffic loads or freeze-thaw cycling — in a cold climate, an interior tile installed outdoors will typically fracture within one winter. The 20mm spec can be set over a mortar bed on an existing slab or sand-set over a rigid substrate; mortar-set provides better resistance to lateral movement and edge chipping.
For grout: use polymer-modified or epoxy grout (Laticrete SpectraLOCK, Mapei Ultracolor Plus FA) outdoors. Standard cement grout absorbs water, cracks in freeze-thaw cycles, and grows mildew on any porch with leaf litter. Joint sizing is also a design decision: 1/8-inch joints read formal and precise; 3/16 to 1/4-inch joints read more relaxed. For more patio ideas that complement large-format paver floors, the surface translates naturally to adjacent outdoor areas.
Choosing the Right Materials for Your Porch Remodel
Every material on this list performs well — within its appropriate climate, maintenance commitment, and installation context. The mismatches are almost always the result of choosing for aesthetics alone without accounting for the physical realities of outdoor exposure.
Climate, Budget, and Maintenance: The Three-Way Filter
Climate is the primary filter. If your region sees genuine freeze-thaw cycles, the list narrows toward materials with near-zero moisture absorption: porcelain pavers, composite decking, PVC trim and ceiling boards. These eliminate the water-infiltration failure mode that defines most porch remodel failures in cold climates. Hot, humid climates present different challenges — high UV, persistent moisture, and conditions that accelerate mildew on any material that holds moisture. Capped composite, cellular PVC, and naturally oil-rich species like cedar are the durable choices here.
Budget framework: the floor and ceiling are the highest visual-impact items in any porch remodel. The railing and trim are the highest maintenance-impact items. Allocating accordingly — spending more on the surfaces that take daily weathering and less on decorative elements that can be updated later — produces better long-term value than the reverse.
Sequencing Your Remodel: Structure Before Surface
One sequencing principle that prevents expensive mistakes: address structural elements before cosmetic ones. A rotted ledger board or compromised column footing discovered after the new floor is in place turns a renovation into a much larger project. Inspect structure first, replace what needs replacing, then proceed in order: floor, ceiling, railing, trim, paint. Every layer that follows depends on the layer before it being correct.
The porch is a generous space architecturally — it accommodates a wide range of material combinations, and most of them work when the proportioning is considered and the materials are appropriate to the exposure they’ll face. Start from the ground up, choose materials that earn their keep over years of outdoor use, and the rest of the design decisions will fall into place.