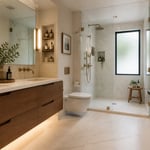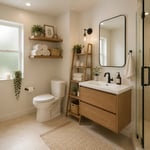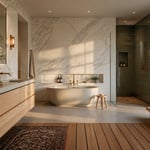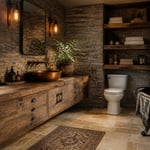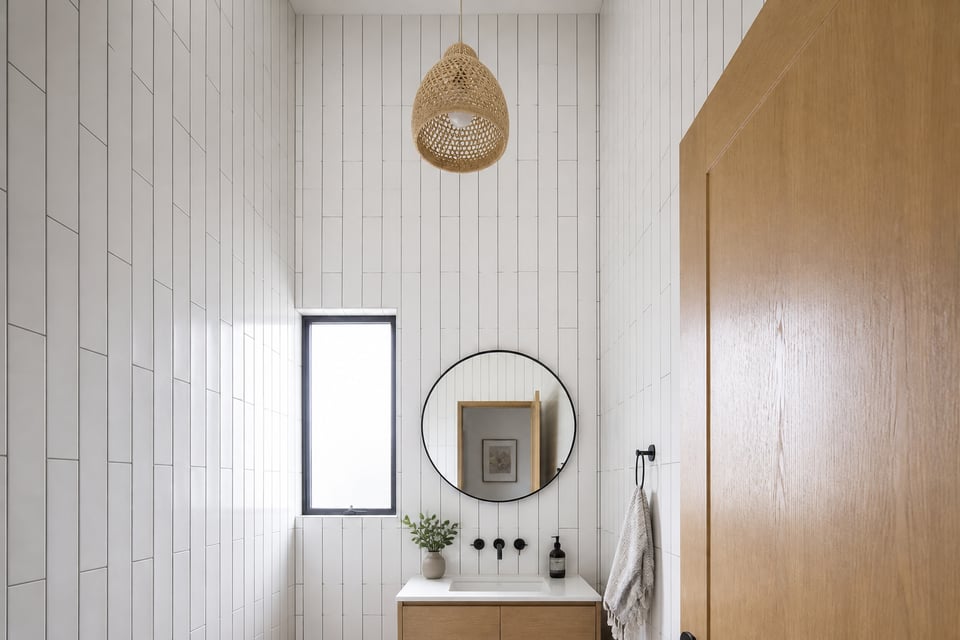
There’s a specific kind of frustration that comes with a small bathroom. It’s not the size itself — it’s the feeling that every inch is already spoken for, that there’s no obvious place to put anything, and that the room will never quite function the way you need it to. I’ve spent years designing storage systems for compact spaces, and bathrooms are where the best bathroom ideas for small spaces live. Constraint forces creativity in a way that larger rooms just don’t. The fifteen ideas here aren’t about making peace with what you have. They’re about changing how the room actually works — systematically and permanently. Some involve a weekend’s work and a few hundred dollars. Others are structural investments that pay off for years. All share one quality: they address the real problem instead of decorating around it.
1. Floating Vanities That Open Up Small Bathroom Ideas
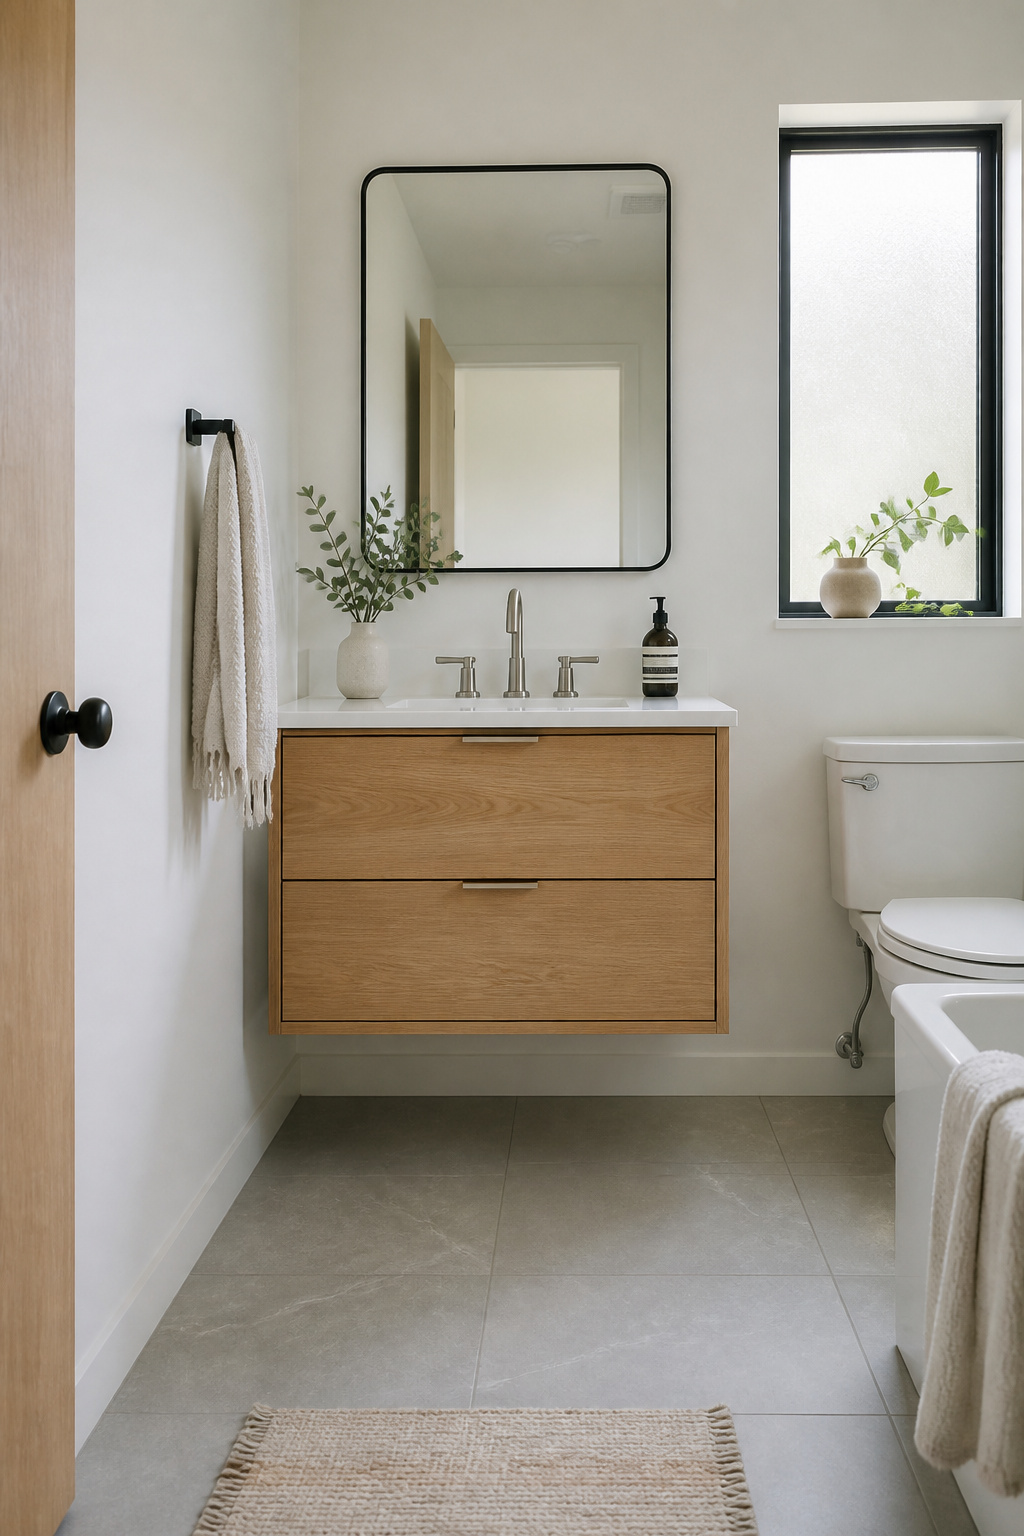
The floor is the most valuable surface in a small bathroom, and a floor-mounted vanity cabinet is consuming it. Switch to a floating wall-mounted vanity and you immediately reclaim the visual field beneath — the floor runs through uninterrupted, and the room reads as larger than its actual dimensions.
The Right Size for the Space
For small bathrooms, start at 24 inches wide. That leaves roughly 21 inches of clearance on either side in a standard 5-foot-wide bathroom. If your bathroom is narrower, look at 16-18-inch-deep shallow vanities marketed for powder rooms — they sacrifice a little counter depth to protect the floor plan without sacrificing the storage below. Mounting height of 34-36 inches from floor to countertop is the current standard, up from the old 32-inch norm, and most people over five feet eight will notice the ergonomic difference. Aim for 10-15 inches of clearance beneath the cabinet — enough to run a mop through and enough visual space to read as genuinely open.
Storage Configuration That Works
The most common mistake here is choosing a single cabinet door to save money, then spending years crouched and reaching into dark rear corners. Two-drawer configurations — one shallow drawer for daily items, one deep drawer for hair tools and backup supplies — outperform standard cabinets for daily bathroom use. Full-extension soft-close drawers add $100-$200 to the vanity cost and eliminate the frustration permanently. That’s the kind of systematic thinking that makes a small bathroom truly functional. You’ll find that good small bathroom organization strategies extend well beyond the vanity — the same methodical approach applies to every surface in the room.
Floating installation requires wall studs or blocking — the vanity can’t anchor into drywall alone. If you’re doing a gut renovation, add blocking before tile and drywall go up. Retrofitting into a finished bathroom means opening the wall, which doubles the project scope.
2. Walk-In Shower Conversions for Tight Bathroom Layouts
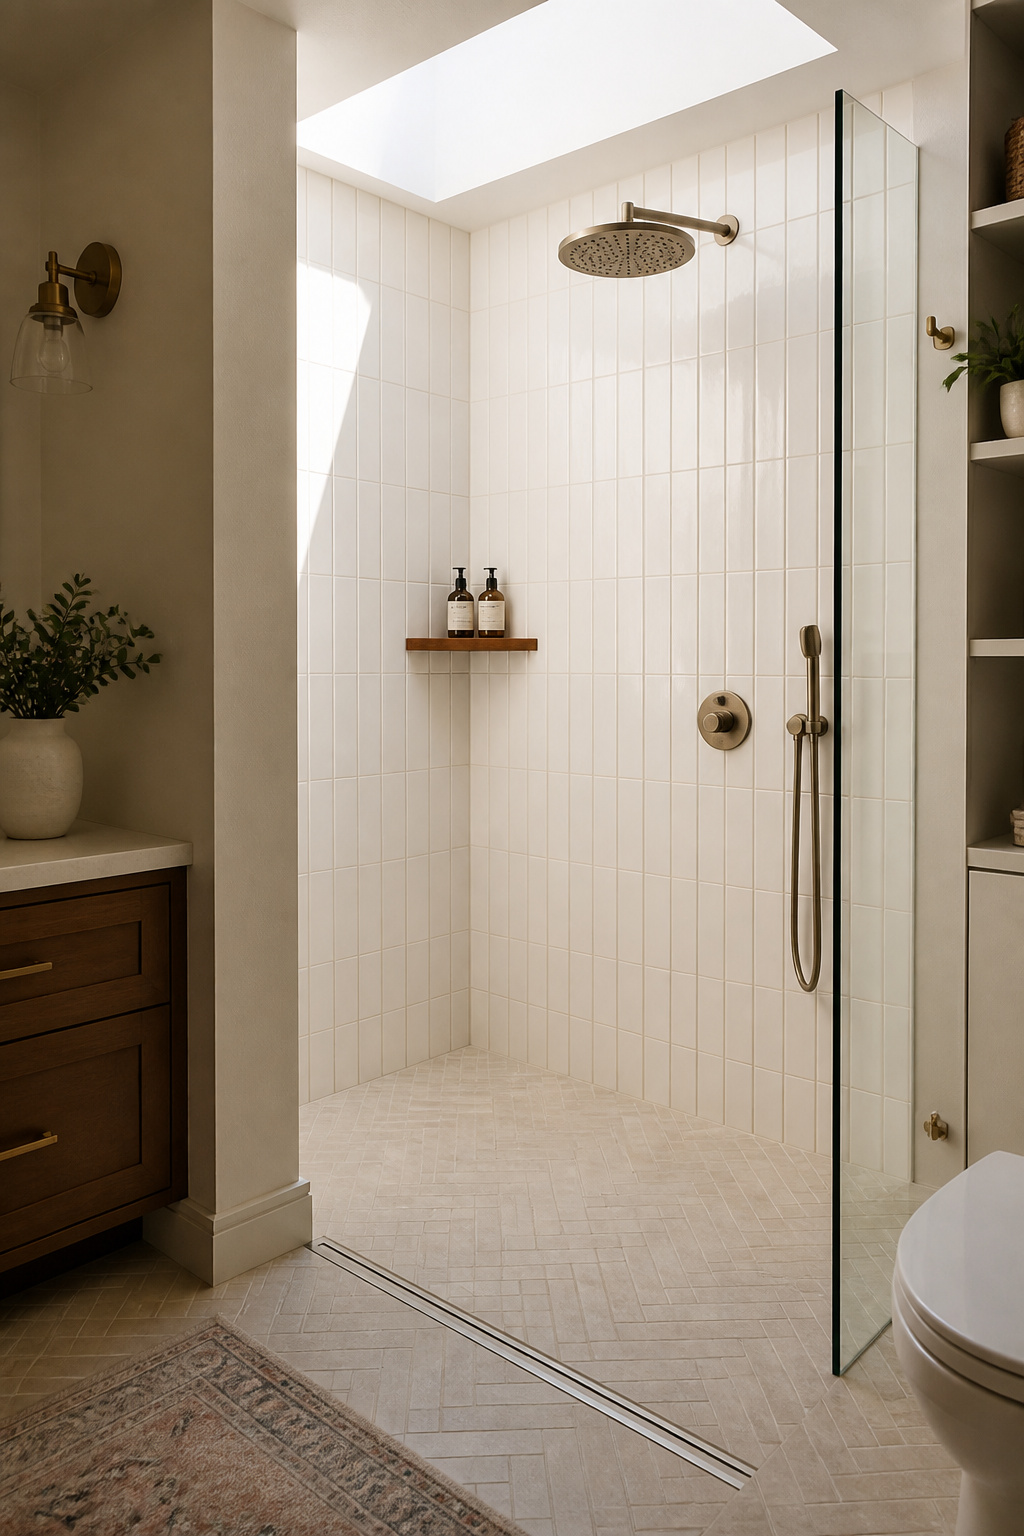
Removing a bathtub is the single biggest spatial gain available in most small bathrooms. A standard 5-foot tub occupies 30 square feet of floor plan — often 60-75% of the entire bathroom. Replace it with a walk-in shower and you reclaim 13-15 square feet while transforming the room’s daily function.
The calculation works when there’s a second bathtub elsewhere in the home. One-tub households should think carefully about resale; buyers in family-oriented markets typically expect at least one soaking tub somewhere. In a single-adult or couple household where the tub gets used twice a year, this bathroom idea for small spaces is almost always the right call.
Building code requires a 30×30-inch minimum shower — technically legal, genuinely miserable. You can’t turn around without elbows brushing walls. The practical minimum is 36×48 inches, and that’s where most designers start for a doorless curbless design. The 48-inch depth keeps water spray contained within the shower zone without needing a door or a curb.
Curbless installations require precise floor work. The floor must slope at least 1/4 inch per foot toward the drain, and a linear drain at the open entry threshold allows the entire floor to slope in one direction — far easier to tile correctly than the four-way slope a center drain requires. Waterproofing is where amateur conversions fail: a full liquid-applied membrane (Schluter KERDI, RedGard, or equivalent) on every surface before tile is non-negotiable.
Budget $2,500-$7,000 installed depending on tile and whether the drain rough-in needs rerouting. Pull permits — skipping them creates problems at resale.
3. Mirrored Walls as a Small Bathroom Idea That Works Every Time
A large mirror is the cheapest square footage you can buy. Placed opposite a window, it doubles the apparent room size and bounces natural light into every corner — two problems solved simultaneously for the cost of glass.
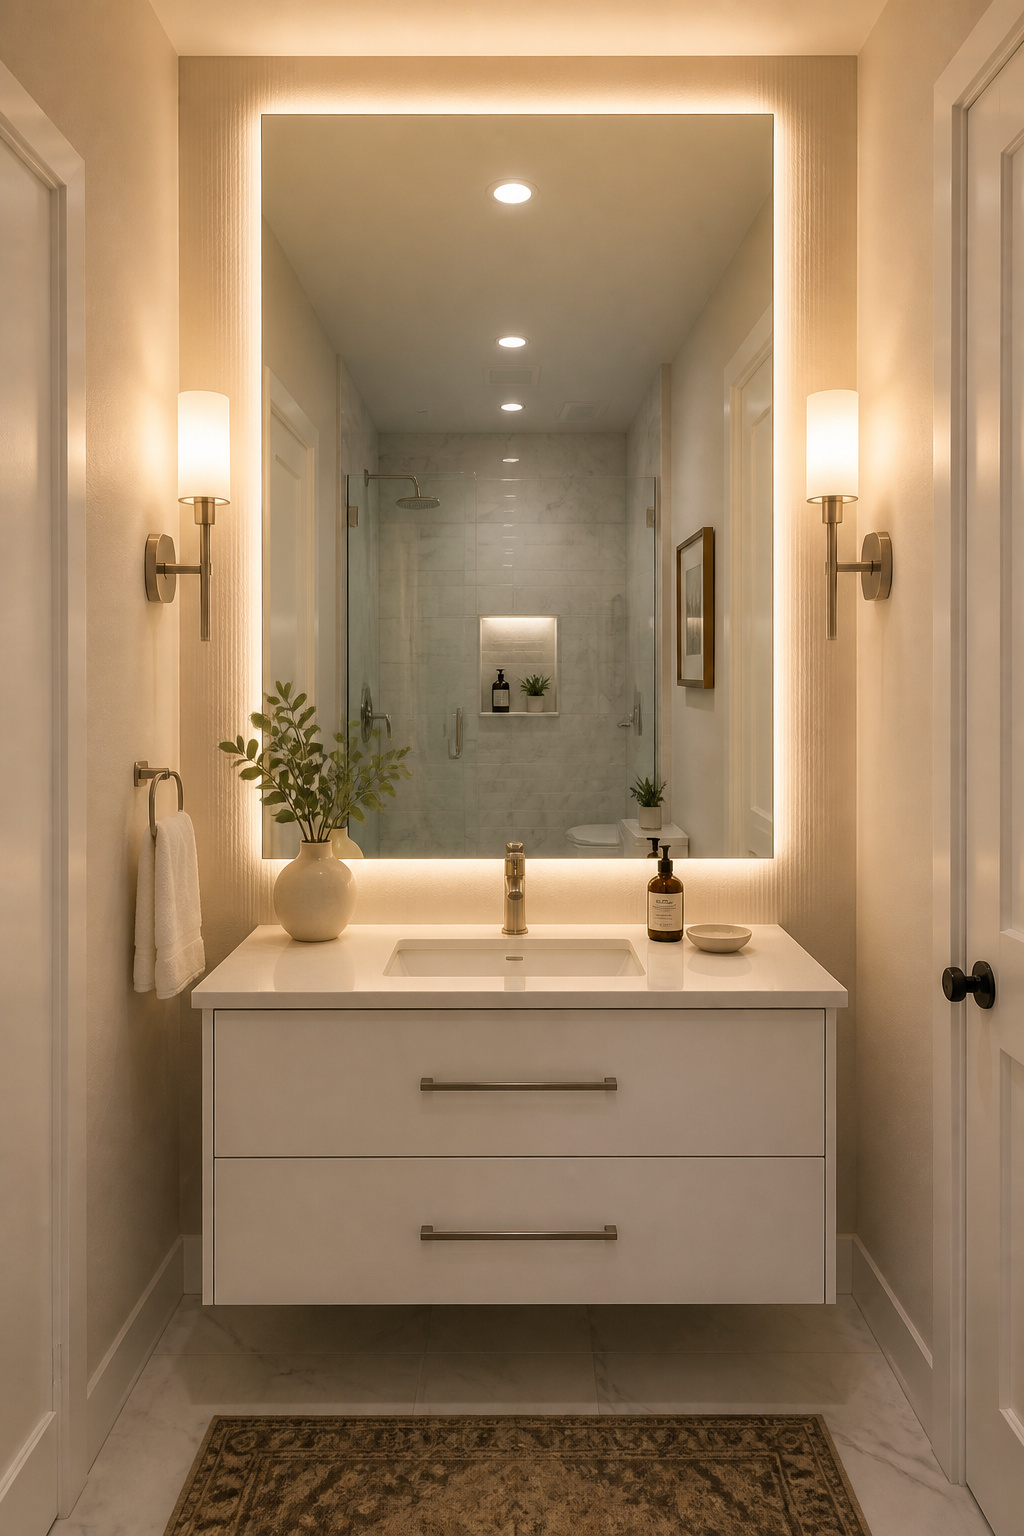
The physics are direct: the mirror reflects the room back at itself, creating perceived depth that doesn’t exist in reality. Extend it to the ceiling and every additional inch of revealed ceiling makes the room read taller. The most effective version runs from counter height to ceiling across the entire vanity wall — the room appears to be twice its actual depth.
Full-wall sheet mirror is the highest-impact option — typically $8-$20 per square foot, cut to order and installed flat against the wall. Large framed mirrors (36×48 inches and larger) are easier to hang but leave wall visible above and below, which limits the spatial effect. For small bathroom ideas that solve two problems at once, the LED backlit mirror is worth serious consideration: a 36×48-inch or larger model serves as both mirror and primary vanity light. The built-in demister pad — a thin heating element behind the glass, activated by touch — prevents post-shower fogging for $50-$150 added to the mirror price. Worth it. Useful guidance on pairing mirrors with the right overhead fixtures is available in these bathroom lighting over mirror ideas.
Anti-fog options: heated demister pads outperform hydrophilic coatings long-term. Coatings wear off after 2-3 years of regular cleaning. If you’re investing in a quality mirror, pay for the demister.
One sizing rule worth keeping: the mirror should be no wider than the vanity and no narrower than the sink basin. Outside those proportions, the mirror reads mismatched rather than scaled.
4. Pocket Doors That Eliminate Dead Space in Cramped Bathrooms
A standard 32-inch swing door sweeps a 32-inch radius arc when it opens. In a small bathroom, that arc overlaps with the toilet, the vanity, or the walking path. Every morning, you navigate around it. A pocket door eliminates that arc entirely.
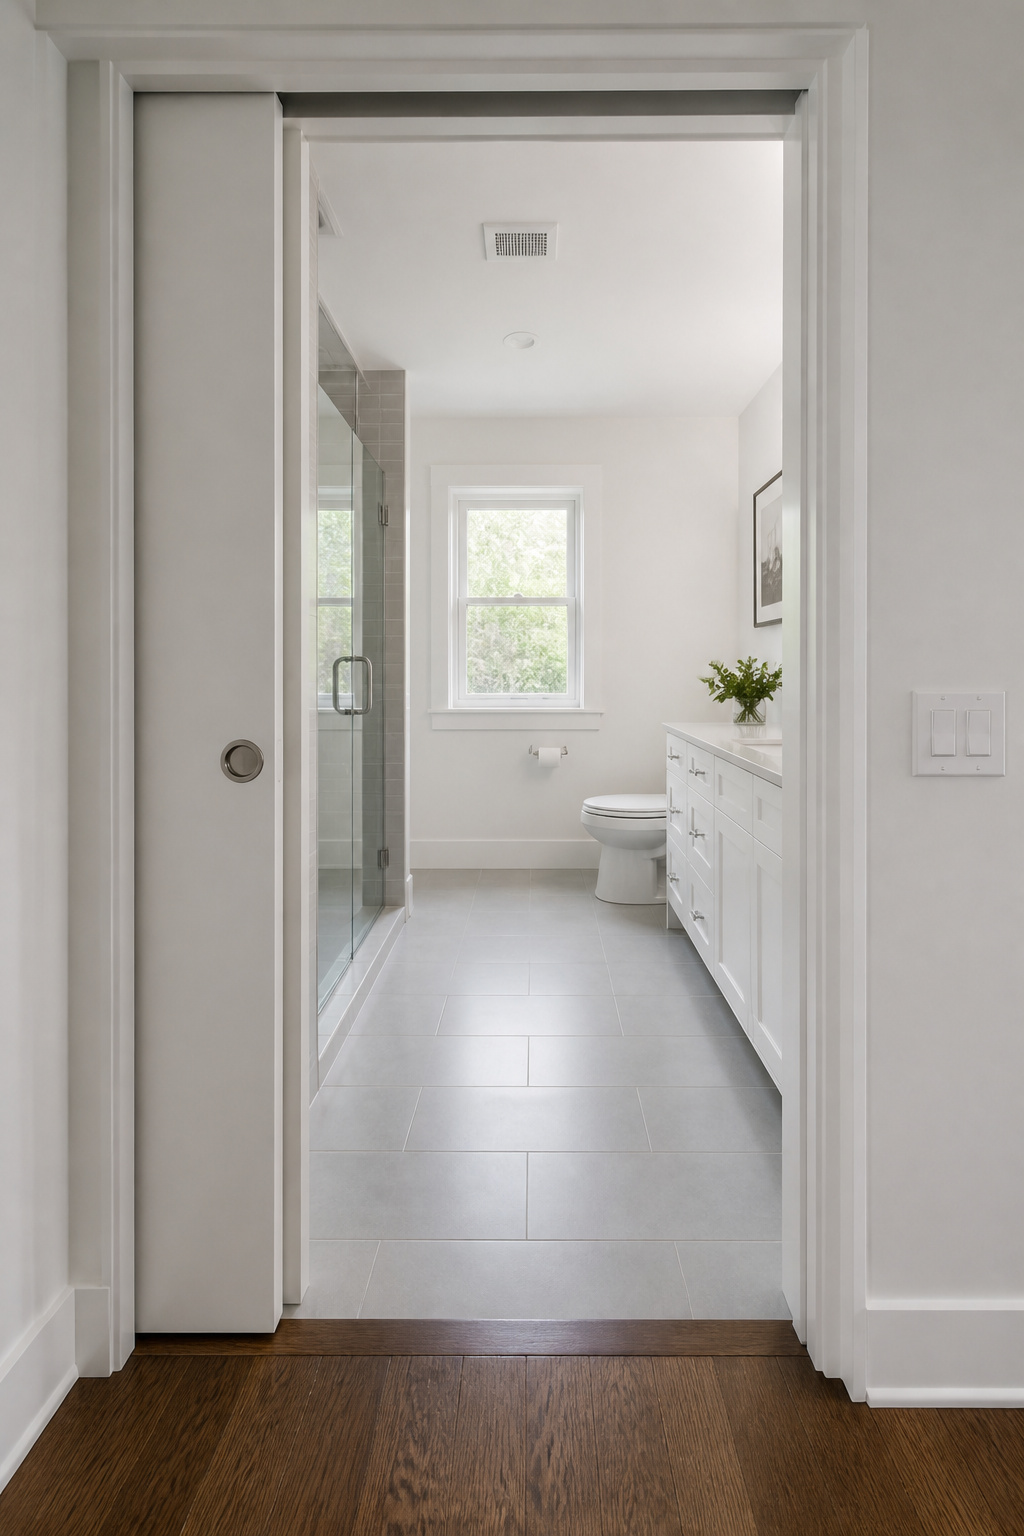
The math is simple: a swing door claims 8-10 square feet through its opening radius. A pocket door slides into the wall cavity and claims zero. In a 40-square-foot bathroom, that’s a 20-25% gain in effective floor space.
Installation Requirements
A pocket door requires wall cavity space twice the door width — a 30-inch door needs a 60-inch total opening — so you need a clear 5-foot span of wall with no plumbing, electrical runs, or structural framing in the way. If any of those obstacles exist, they need rerouting before the pocket frame goes in. Hardware kit systems from Johnson Hardware or Hettich include a steel frame and track that drops into the wall cavity after drywall removal, simplifying the rough-in considerably.
If the cavity isn’t available — exterior wall, plumbing runs through it — a barn-style sliding door mounted on the outside wall surface bypasses the cavity requirement entirely. It requires no wall cavity, just clearance equal to the door width plus 2 inches on the slide-open side. The trade-off is a 1/2-inch gap at the sides that reduces the acoustic seal. For a private ensuite, acceptable. For a shared family bathroom, less ideal.
One detail that gets skipped in most write-ups: pocket doors need a flush pull recessed into the door edge. Standard flush pulls are difficult to grip for anyone with reduced hand strength. Specify a larger flush ring or a magnetic edge pull if that’s a factor in your household.
5. Recessed Wall Niches for Shower Storage Without Protrusion
Every shower caddy is a compromise. The tension-pole version falls in the middle of showers. The adhesive-mounted version fails within a year of moisture exposure. The permanent solution is built into the wall.
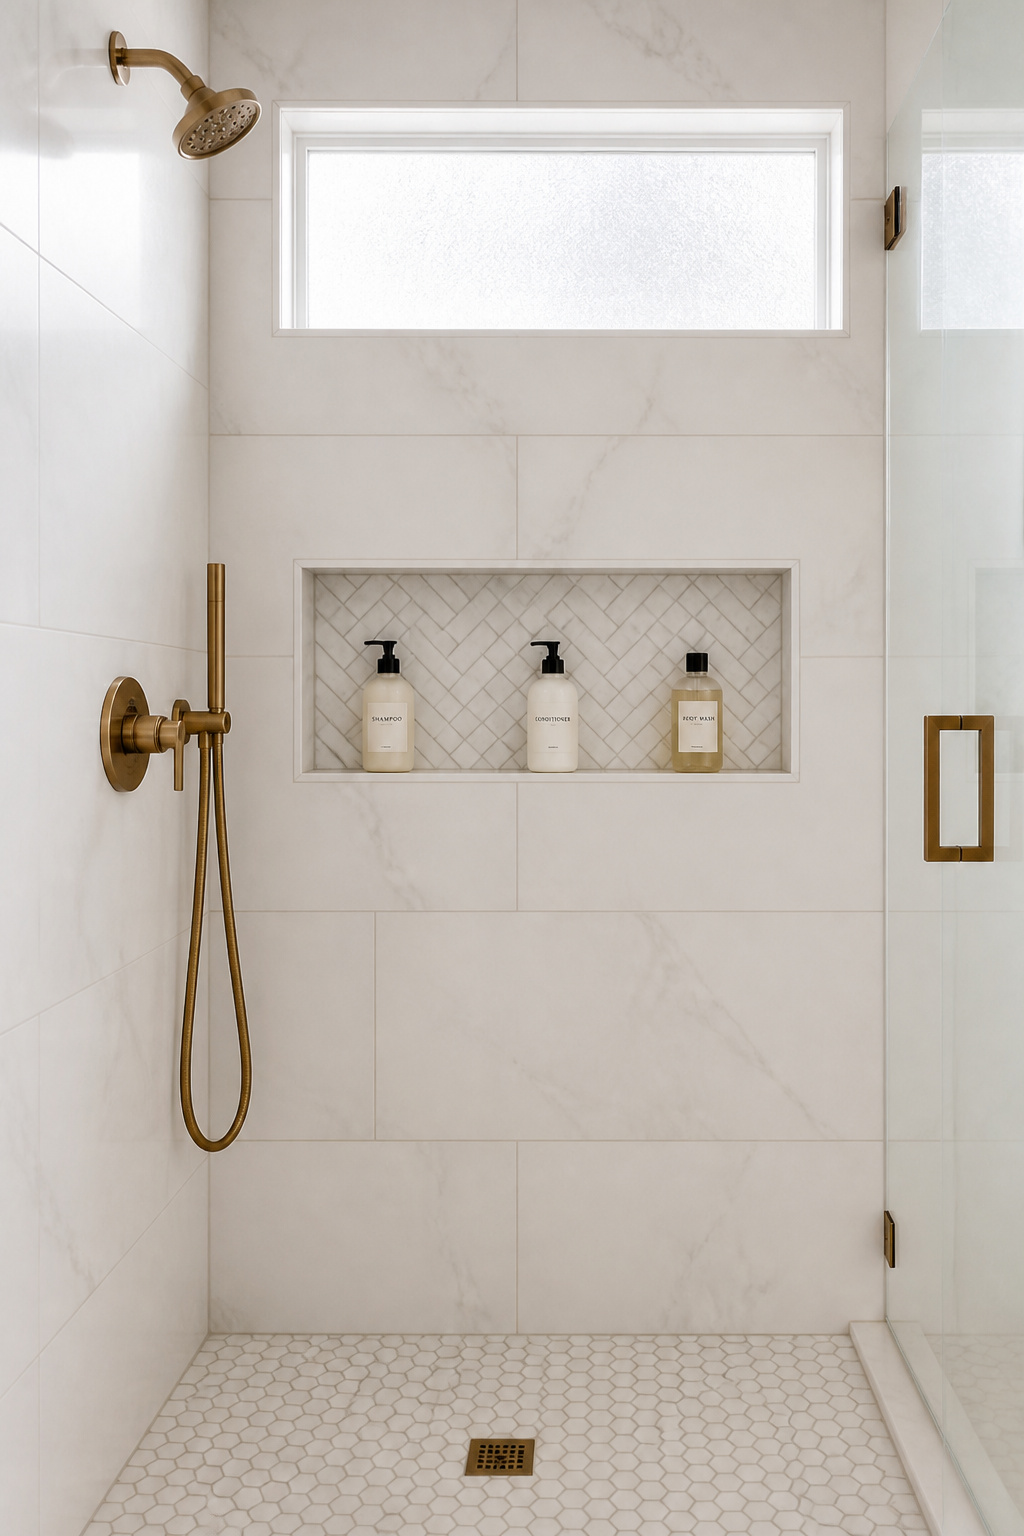
A recessed niche fits between standard studs spaced 16 inches on center, using wall cavity space that currently holds nothing but air. Among bathroom ideas for small spaces, this one delivers the highest storage gain per square inch — a single 12×24-inch niche holds 6-8 full-size bottles with no floor space cost, no protruding rack, nothing to bang an elbow into.
Interior walls (not exterior) are the right location — exterior walls contain insulation that complicates the cavity and creates a potential thermal bridge. Height of 48-54 inches from the floor puts the niche at easy reach for an average adult. For two niches in a stacked configuration — mid-height for body wash and conditioner, shoulder height for shampoo — the total provides 8-12 inches of combined shelf depth and eliminates the caddy question permanently.
Pre-sloped prefab niche inserts (Schluter KERDI-BOARD, Redi Niche) come waterproofed from the factory and tile directly. They eliminate the framing and waterproofing labor of a custom-built niche. Tile the interior in a contrasting accent or herringbone inset and it reads as deliberate design, not an afterthought.
The step most commonly skipped: the niche floor must slope 1/8 inch downward toward the shower. Standing water collects at the back of an un-sloped niche and mildew follows within weeks. Minor adjustment, major consequence.
6. Corner Shower Shelving to Replace Bulky Caddy Systems
The corner of a shower is structural dead space — neither wall does anything useful at the intersection. Built-in corner shelving converts that zone into organized product storage that looks intentional from the start.
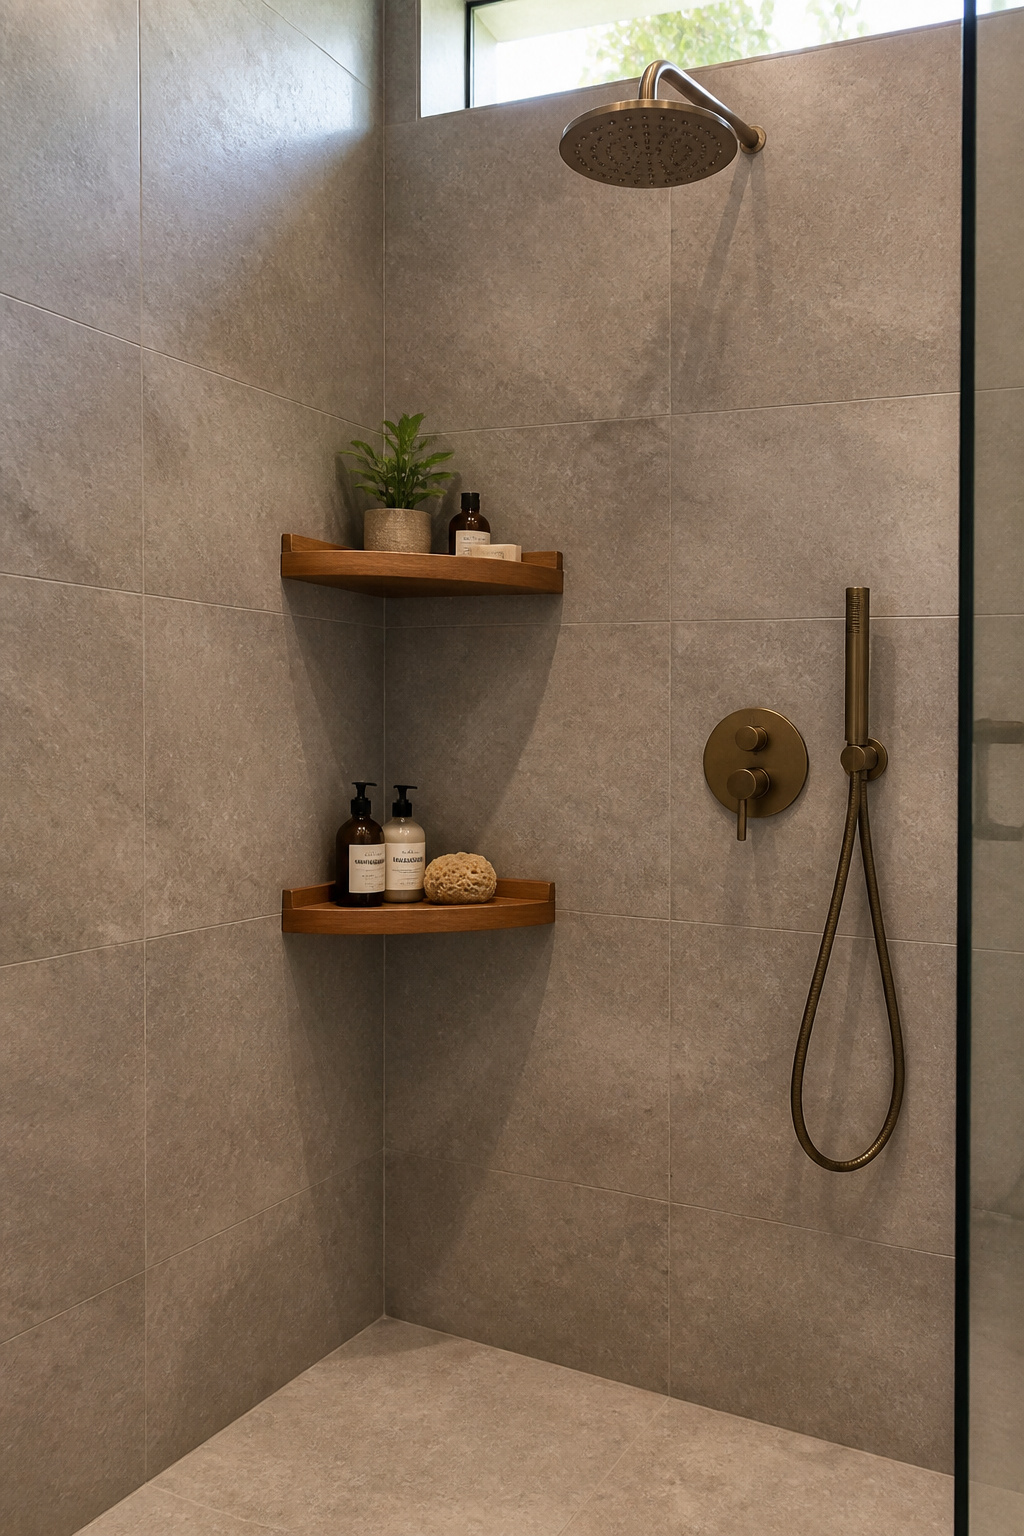
Tile-in corner shelves are the cleanest approach: framed from cement backer board and tiled flush with the shower walls, they become part of the wall rather than an addition to it. Prefab corner shelf inserts — teak, marine-grade stainless, or solid surface — are the middle ground for bathrooms where opening walls isn’t practical. They mount with silicone or hidden fasteners and read as built-in.
Among the bathroom ideas for small spaces that directly address product clutter, corner shelving delivers the best result-to-effort ratio. Material selection determines longevity: teak resists moisture through natural oil density — the same quality that makes it the choice for boat decking. Marine-grade stainless (304 or 316 grade) is the most durable metal option; standard chrome-plated steel corrodes at grout joints within 18-24 months. Solid surface (Corian or equivalent) is seamless, non-porous, and completely mold-resistant.
Practical sizing: 4-6 inches of shelf depth accommodates a full-size shampoo bottle with a 1-inch raised lip to prevent items sliding off. One shelf at 48 inches from the floor, a second at 66 inches if needed. The raised lip is the detail most DIY corner shelves skip — and then products fall and shatter.
7. Wall-Mounted Toilets: A Small Bathroom Idea Worth the Investment
A wall-hung toilet is the most expensive idea on this list and one of the most transformative. The bowl projects 14-16 inches from the finished wall rather than the 27-30 inches of a standard floor-mounted tank toilet — a savings of 12-14 inches of floor depth in the toilet zone. In a 5-foot bathroom, that’s a measurable functional gain, not a rounding error.
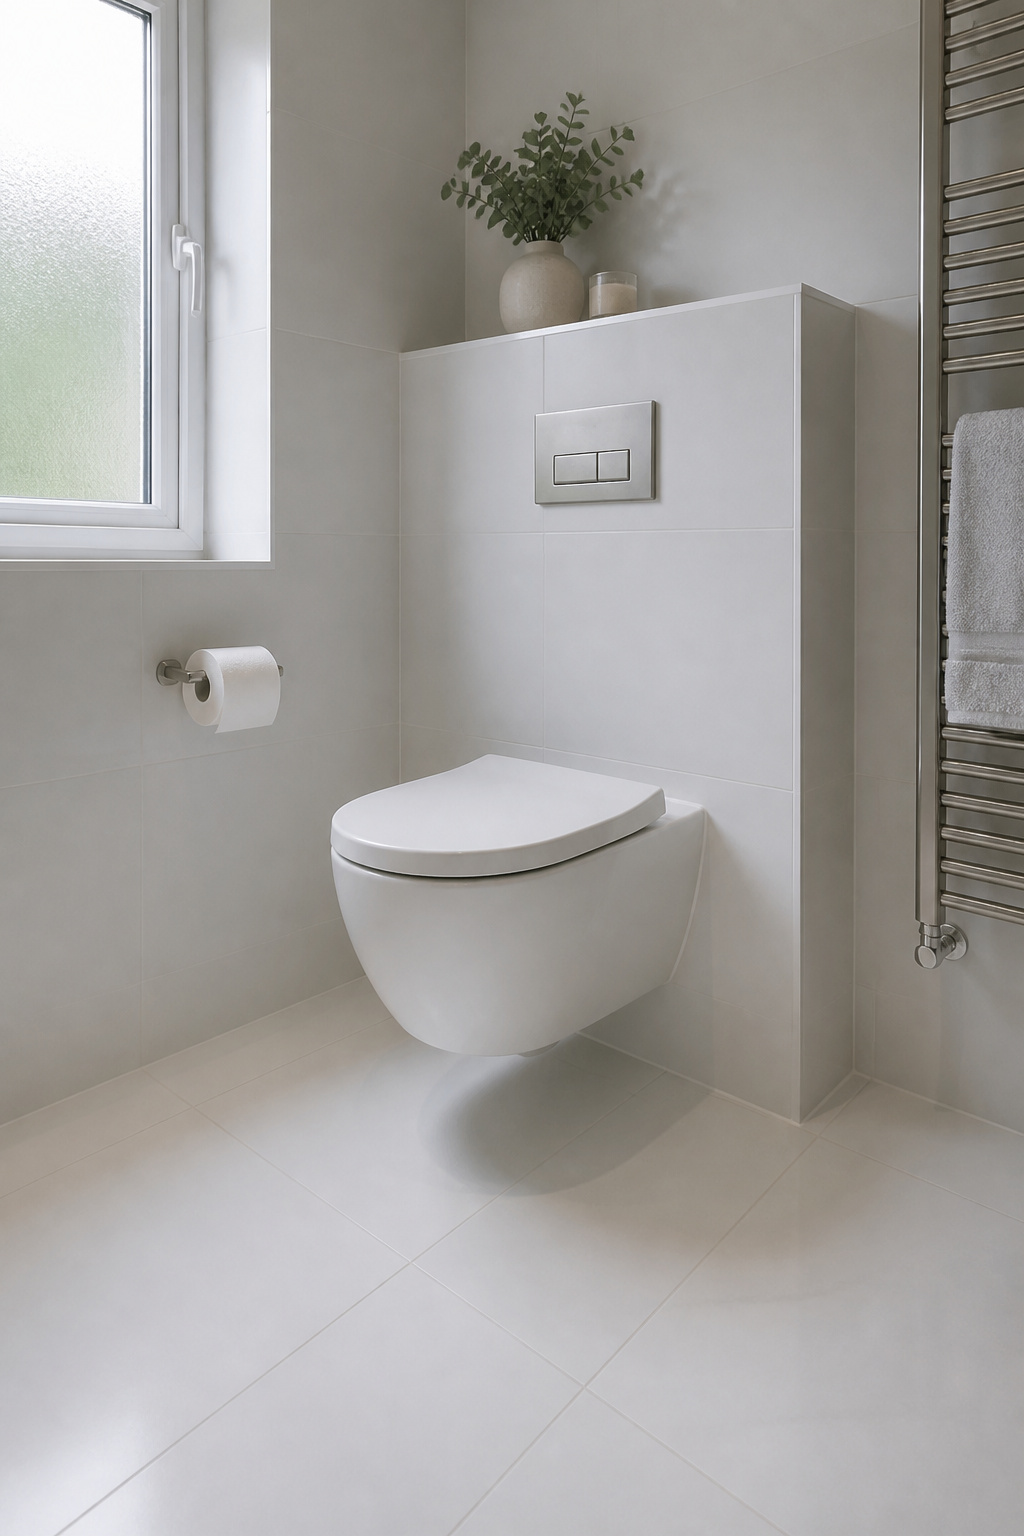
The tank disappears into the wall inside a carrier system — a steel frame mounted between studs housing a slim plastic tank inside a thickened wall section (10-12 inches minimum). The wall in front is tiled normally, with a flush plate centered at 40-45 inches from the floor. The floor beneath the bowl runs clear and unbroken, making mopping completely straightforward and the room reading perceptibly more open.
The Honest Cost Assessment
Cost is the legitimate deterrent. The carrier tank alone runs $600-$800 for a mid-range unit (Geberit, Duravit, Swiss Madison are the reliable carrier brands). Add $400-$1,200 for the bowl itself, $500-$1,000+ in plumber and finish labor, and the total installed price typically runs $1,500-$3,000. If the bathroom wall is being opened during a gut renovation, the incremental labor cost is lower — the structure is already exposed. Retrofitting a wall-hung toilet into a finished bathroom adds wall-opening, drain rerouting, and replastering — a significantly larger project.
Of all the bathroom ideas for small spaces on this list, this one makes most sense bundled into a full renovation where structural work is already happening. As a standalone retrofit, the cost/benefit math is harder to justify unless you specifically prioritize the clean floor aesthetic.
One technical note: standard US drain rough-in is 12 inches from the finished wall. Older homes may have 10-inch or 14-inch rough-ins. Confirm yours before ordering — the carrier must match.
8. Vertical Tile Patterns That Make Low Ceilings Read Taller
Tile orientation is a free design decision that most people never make deliberately. The default — 3×6 subway tile in horizontal running bond — is what everyone installs without thinking. Rotate those same tiles 90 degrees and the room changes character entirely.
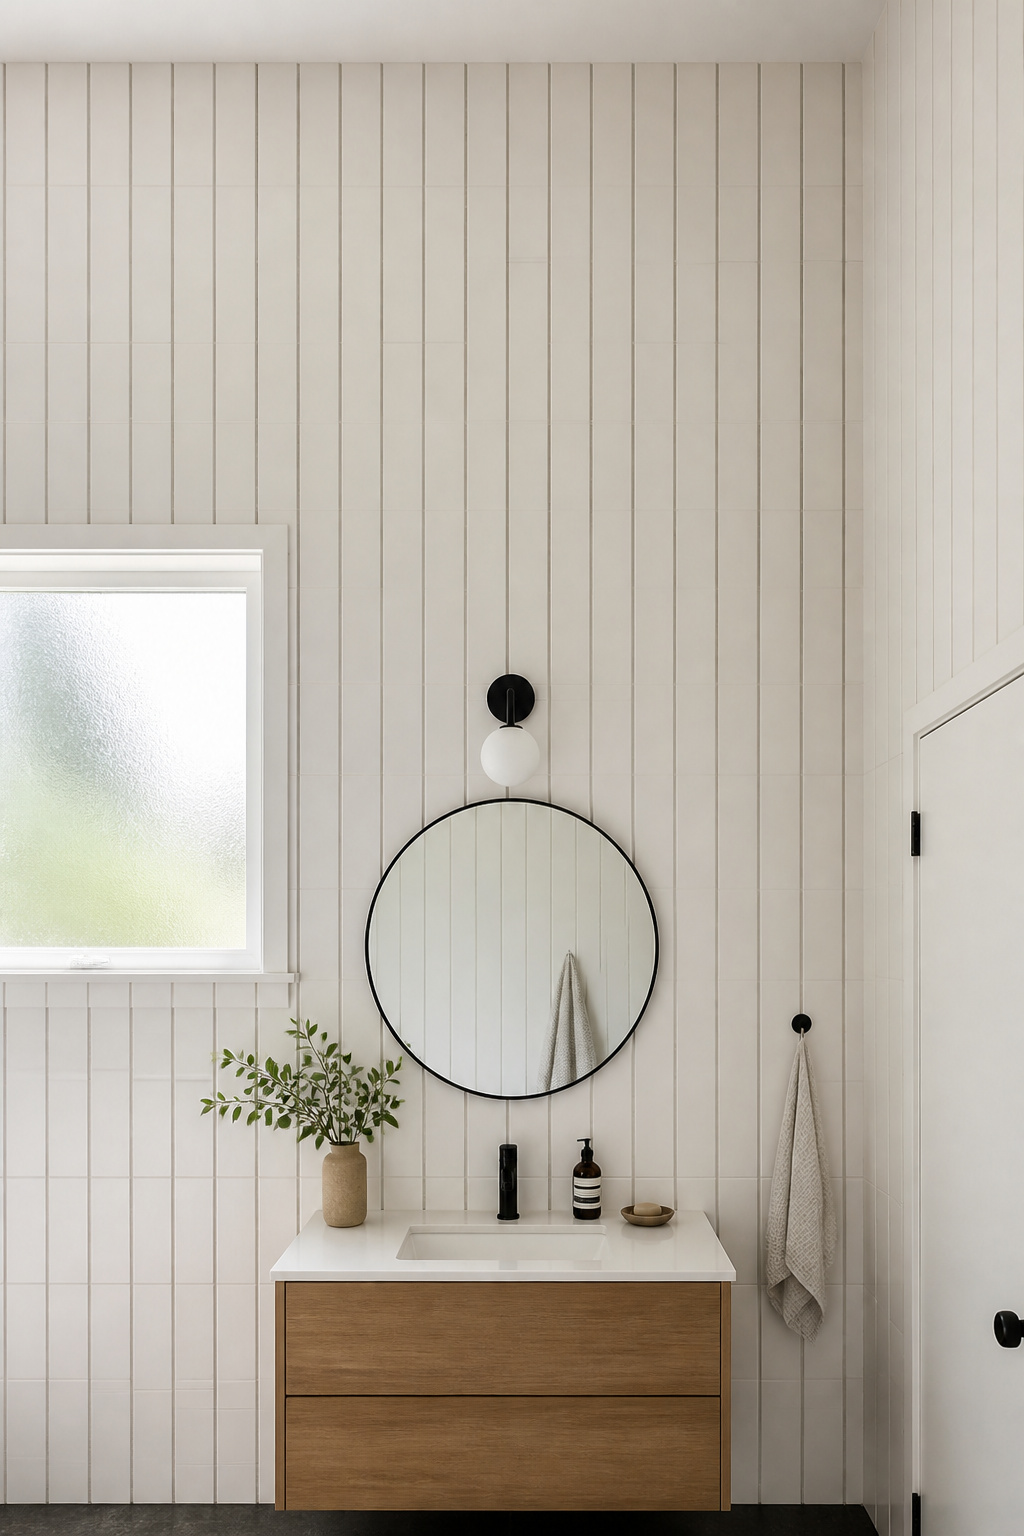
Vertical installation creates parallel lines that pull the eye upward — the same visual principle used in pinstripe suits and vertical striped wallpaper. The effect is strongest when tile runs floor-to-ceiling with no horizontal chair rail or accent band interrupting the vertical flow. Any horizontal break creates a visual stop that makes the ceiling feel lower than it is.
Choosing the Right Tile Format and Grout
Standard 3×6 subway tile in vertical stack bond creates 3-inch-wide vertical columns — effective but subtle. The upgrade is 4×12 or 4×16 elongated subway format: the 3:1 or 4:1 aspect ratio creates stronger vertical lines and a more dramatic height effect with fewer grout joints per square foot. For the most dramatic version, 12×48 large-format tile installed vertically nearly eliminates grout interruptions and reads as an almost continuous surface. These bathroom tile design ideas show what’s achievable across different formats and patterns — elongated tile in a small space is consistently one of the most effective compact bathroom ideas available.
Grout color controls the visual outcome. Matching grout to tile color makes the surface read as a continuous plane — grout lines nearly vanish, and the wall expands. Contrasting grout (charcoal on white tile) makes the vertical lines bold and graphic — an intentional statement rather than a subtle optical trick. Medium-contrast grout (gray on white) is the most forgiving: some definition without dominating, and significantly easier to keep clean than white grout in a high-humidity bathroom.
One caution: vertical stack bond is unforgiving to imperfect walls. Any wall deviation shows immediately in a precise vertical grid. If your walls aren’t plumb, a running bond offset is more forgiving.
9. Under-Sink Pull-Out Drawers to Reclaim Lost Cabinet Space
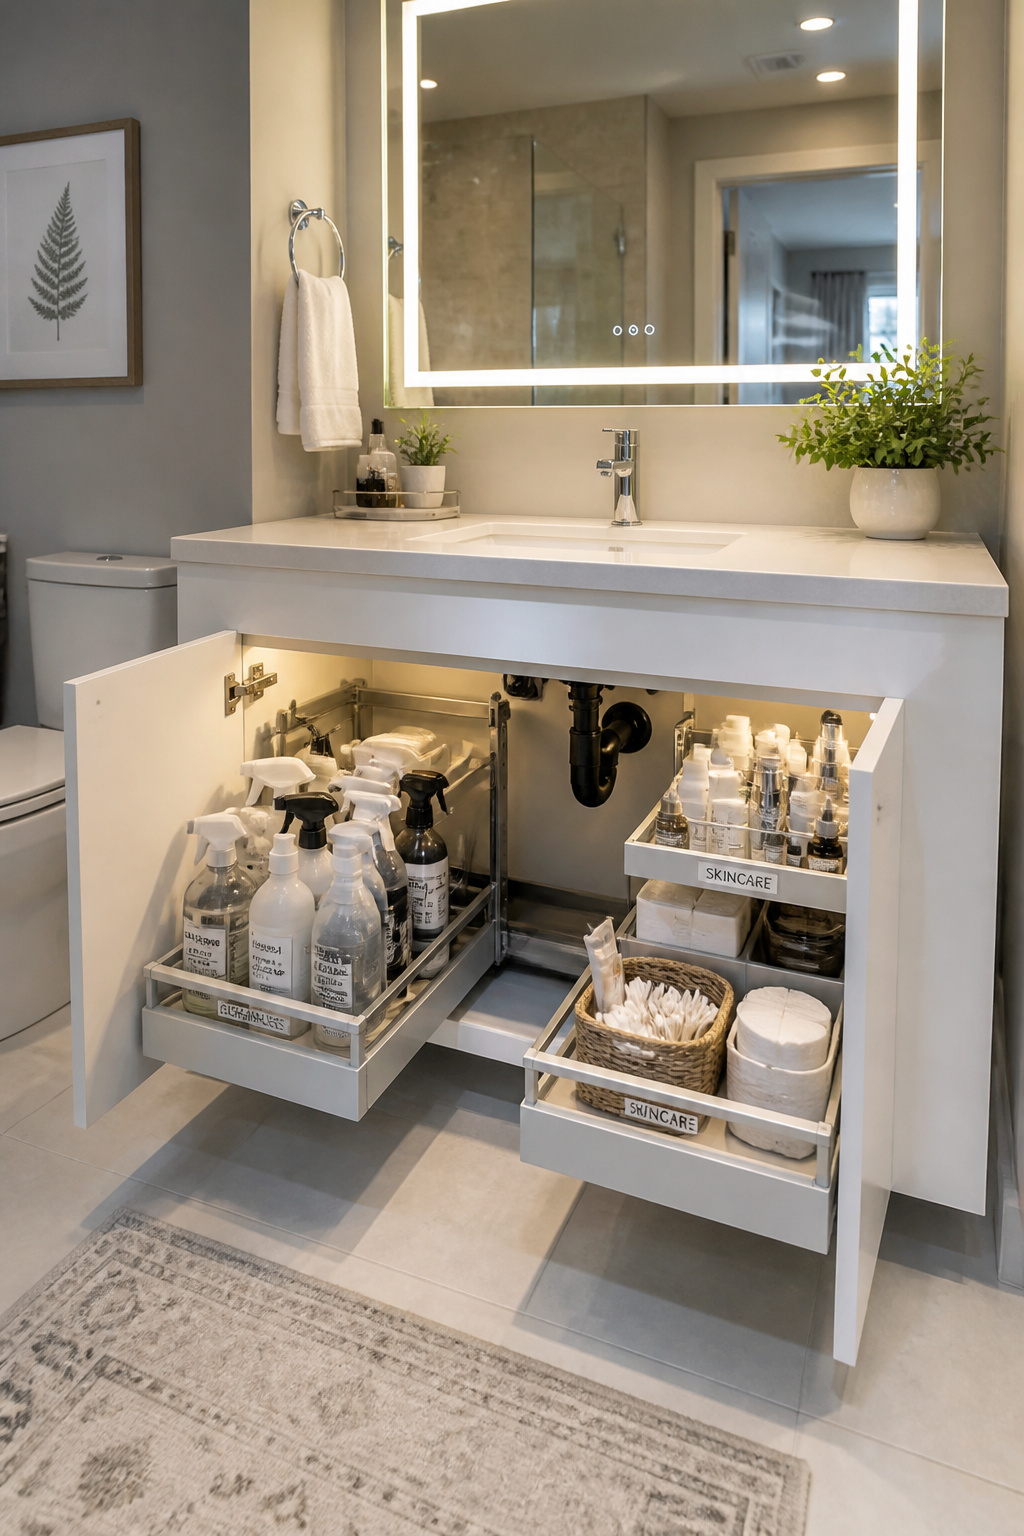
The standard under-sink cabinet wastes most of its volume. The drain pipe descends from center and angles back toward the wall. Supply lines eat the front corners. What remains is an irregular perimeter that most people fill with a disorganized pile of bottles that fall over, migrate to the back, and stay there for months.
Why Standard Cabinets Fail This Space
The geometry works against you by design: the drain pipe is unmovable, the supply lines are in the worst possible position for storage, and the cabinet door swings open to reveal a space that punishes anyone who tries to keep it organized. Most small bathroom storage problems start with this zone, and most people give up on it rather than solving it.
Purpose-built pull-out organizers address each obstacle. L-shaped organizers have a rear cutout that slides around the P-trap, leaving the full cabinet width usable on both sides. Two-tier expandable systems (Container Store Linus Pull-Out, Rev-A-Shelf sink base units) have adjustable shelf heights — raise one side to clear the drain, use the other side at standard height. Steel-framed pull-out drawer systems on full-extension slides (REALINN and Lynk Professional are reliable brands) handle 25 lbs per drawer, extend fully so the back of the cabinet is as accessible as the front, and convert this space from frustrating to functional. These bathroom cabinet storage designs show what’s achievable when purpose-built systems replace improvised organization across the whole bathroom.
The organizing rule that prevents wasted money: measure the cabinet interior first, then map where the P-trap and supply lines are before selecting a system. Most under-sink organizer returns happen because the unit won’t fit around the plumbing.
Off-the-shelf options run $25-$80. Rev-A-Shelf components ordered to your cabinet’s exact interior dimensions run $80-$200. A custom pull-out system inside a new vanity costs $400-$1,200 extra on the order but maximizes every cubic inch without compromise.
10. Glass Shower Enclosures: A Smart Bathroom Idea for Small Spaces
A shower curtain or opaque screen cuts the room in half. The bathroom stops reading as one unified space and becomes two cramped ones — the shower side and the vanity side, neither of which has room to breathe. Frameless tempered glass solves this by keeping sightlines open across the full room width.
Frameless glass transmits roughly 90% of visible light and creates zero visual obstruction. Standing at the bathroom door, you see the full width of the room — not a barrier. The shower zone and the vanity zone stay visually connected, and the room reads as the larger unified space it actually is.
Glass Specifications and Safety
Glass thickness for residential frameless enclosures: 3/8-inch (10mm) tempered glass is the IRC code minimum for frameless applications and the standard for single-door and fixed-panel configurations. Half-inch (12mm) is the premium option — heavier, more stable, slightly better acoustic dampening, and required for enclosures taller than 84 inches when using 3/8-inch glass. All shower glass must carry ANSI Z97.1 or CPSC 16 CFR 1201 certification — tempered glass breaks into small pebble-like pieces rather than sharp shards. Confirm the certification mark is permanently etched into a corner of the glass before installation.
As far as bathroom ideas for small spaces go, a frameless enclosure delivers one of the most immediate spatial transformations available without touching a single wall. Maintenance is simpler than most people expect: 15 seconds with a squeegee after every shower prevents 90% of water-spot buildup. A 50/50 water-vinegar solution applied weekly removes what the squeegee misses. Apply a hydrophobic coating (Rain-X Glass Treatment, EnduroShield) every 6-12 months and cleaning frequency drops by roughly half. Avoid bleach, ammonia, and abrasive cleaners — they etch the glass permanently.
11. Ladder Shelves as Vertical Storage for Small Bathroom Walls
A ladder shelf takes an 18×14-inch square of floor space — roughly the footprint of a bathroom scale — and converts it into four or five tiers of vertical storage at 65 inches of height. It requires no installation, no wall anchors, no commitment.
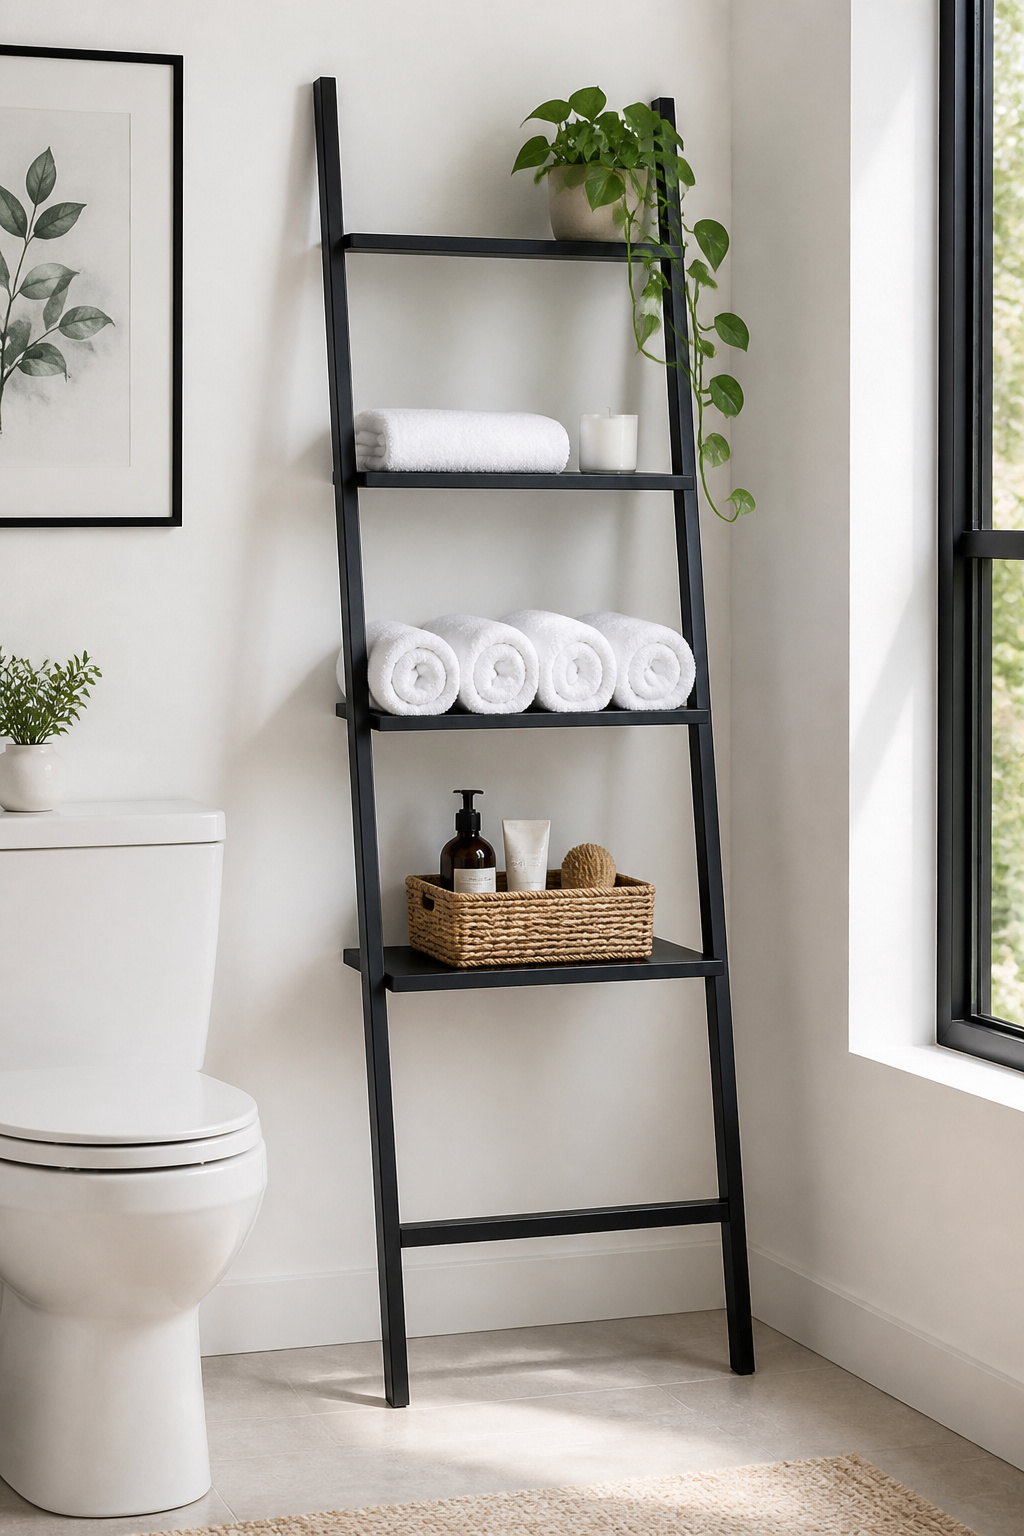
The corner beside the toilet or behind the door is almost universally empty in a small bathroom: 18-24 inches of dead floor space that serves no function. That’s exactly the footprint most ladder shelves need. Among bathroom ideas for small spaces that require zero renovation, this one delivers the highest visible impact per dollar. The leaning format makes repositioning effortless, which makes it ideal for renters or anyone not ready to commit to permanent changes.
Material choice determines longevity in a humid bathroom. Bamboo naturally resists moisture absorption — but keep it clear of direct water spray and ensure the bathroom has adequate ventilation. Bamboo in a chronically damp, unventilated space eventually molds at joints and glue lines. Powder-coated steel is the most durable choice: no swelling, no warping, no mold susceptibility. Matte black and brushed nickel finishes resist moisture and scratching better than any painted surface. Solid wood options need full polyurethane sealing before bathroom use and resealing every 2-3 years.
Styling the shelf so it reads as curated rather than cluttered requires one organizing principle: assign each tier a category and hold the line. Top tier — one plant, one candle, one object. Middle tiers — rolled towels and organized visible storage. Lower tier — daily-reach items in small baskets. Bottom rung left empty or with one basket. Visual breathing room at floor level makes the entire shelf read as intentional.
12. Light Color Palettes as Compact Bathroom Ideas That Expand Space
Paint is the cheapest intervention available in a small bathroom and one of the highest-impact. Light colors reflect more light, which makes surfaces read as more distant — a literal optical expansion of the space. The ceiling delivers the biggest return per dollar of any surface in the room.
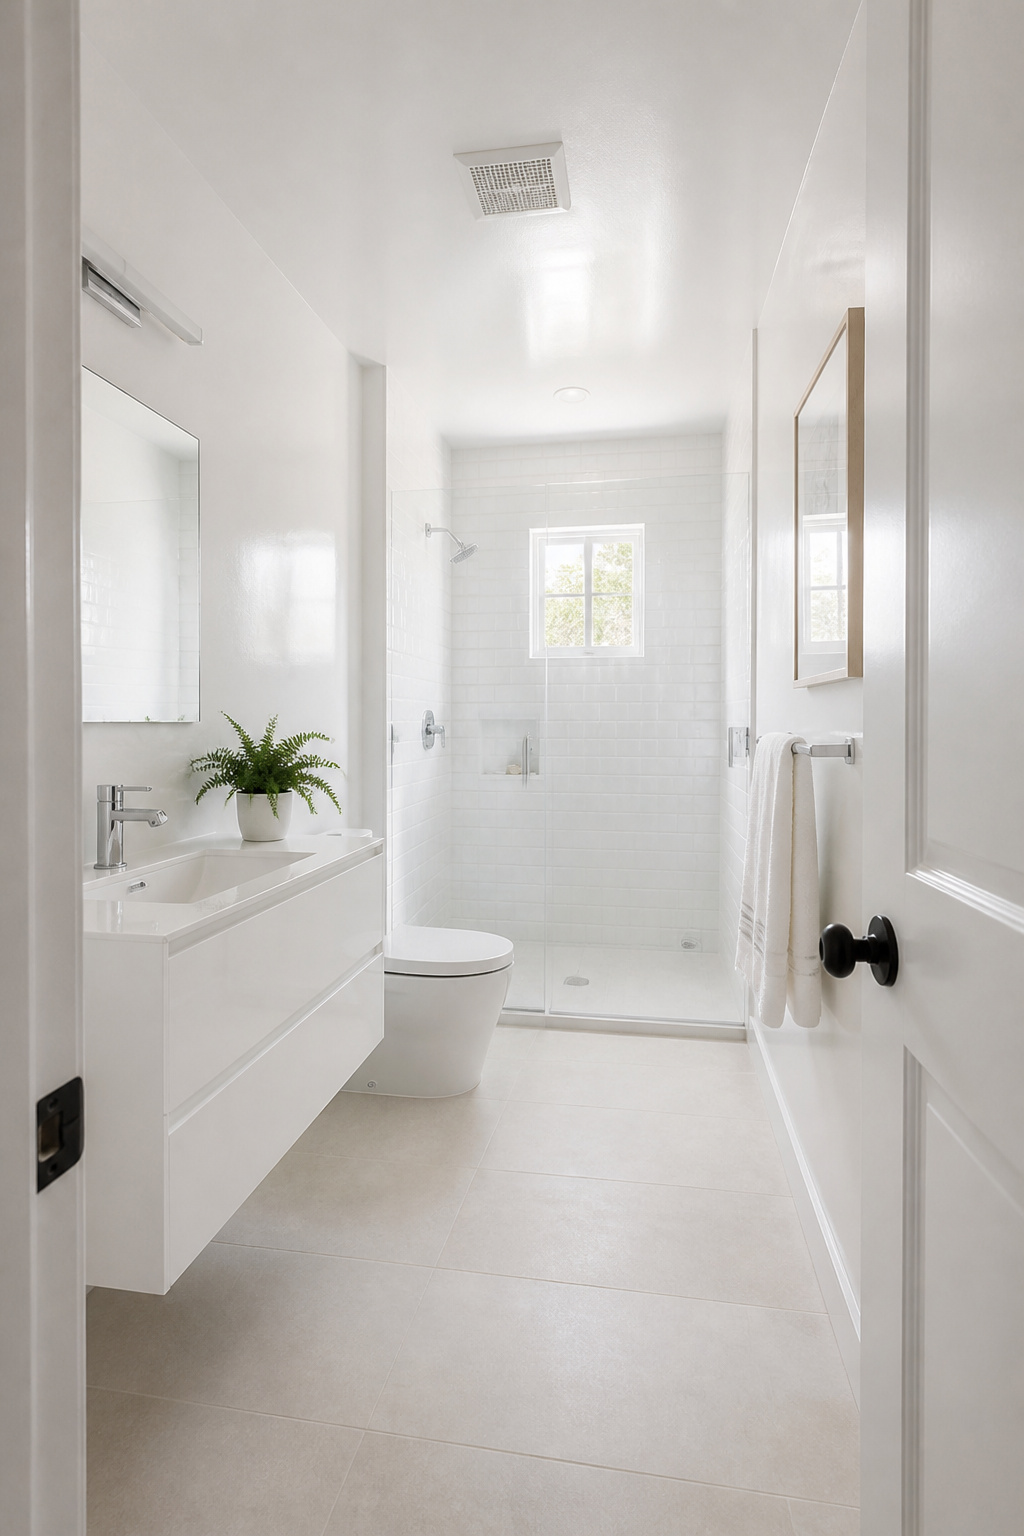
Sheen level matters as much as color. Semi-gloss is the practical choice for bathroom walls and ceiling: moisture-resistant, easy to wipe clean, and reflective enough to bounce light around the room. Flat and eggshell finishes absorb moisture and peel within 1-2 years in a high-humidity bathroom without exceptional ventilation. Satin is a reasonable compromise — slightly less reflective but easier to touch up without visible sheen variation at the repair line.
Cool whites (blue, gray, or green undertones) reflect the maximum amount of light and make surfaces read crisper and more expansive — the most effective small-space whites. Warm whites (cream, yellow, or pink undertones) read cozier and are easier to live with in rooms used for relaxation; in a bathroom, they read slightly smaller but more inviting. The test that actually works: bring the paint chip to the bathroom at different times of day. Artificial bathroom light at 2700K-3000K makes cool whites read neutral and warm whites read almost yellow. Chips in a paint store under fluorescent lighting will mislead you.
Among compact bathroom ideas, painting the ceiling the same color as the walls (or a slightly lighter version) is the most often skipped move. It removes the visual stop at the ceiling line — the room reads as a continuous light space rather than a box with a lid. In a standard 8-foot-ceiling bathroom, this single decision changes the spatial feel measurably. It costs $30 extra in paint.
13. Over-Toilet Shelving Units for Unused Vertical Real Estate
The 3 feet of vertical space above a toilet tank is one of the most reliably wasted zones in any small bathroom. It’s clear of head height, clear of water, and available in almost any layout. An over-toilet shelving unit converts that airspace into organized storage without touching a wall, moving plumbing, or requiring tools beyond a level.
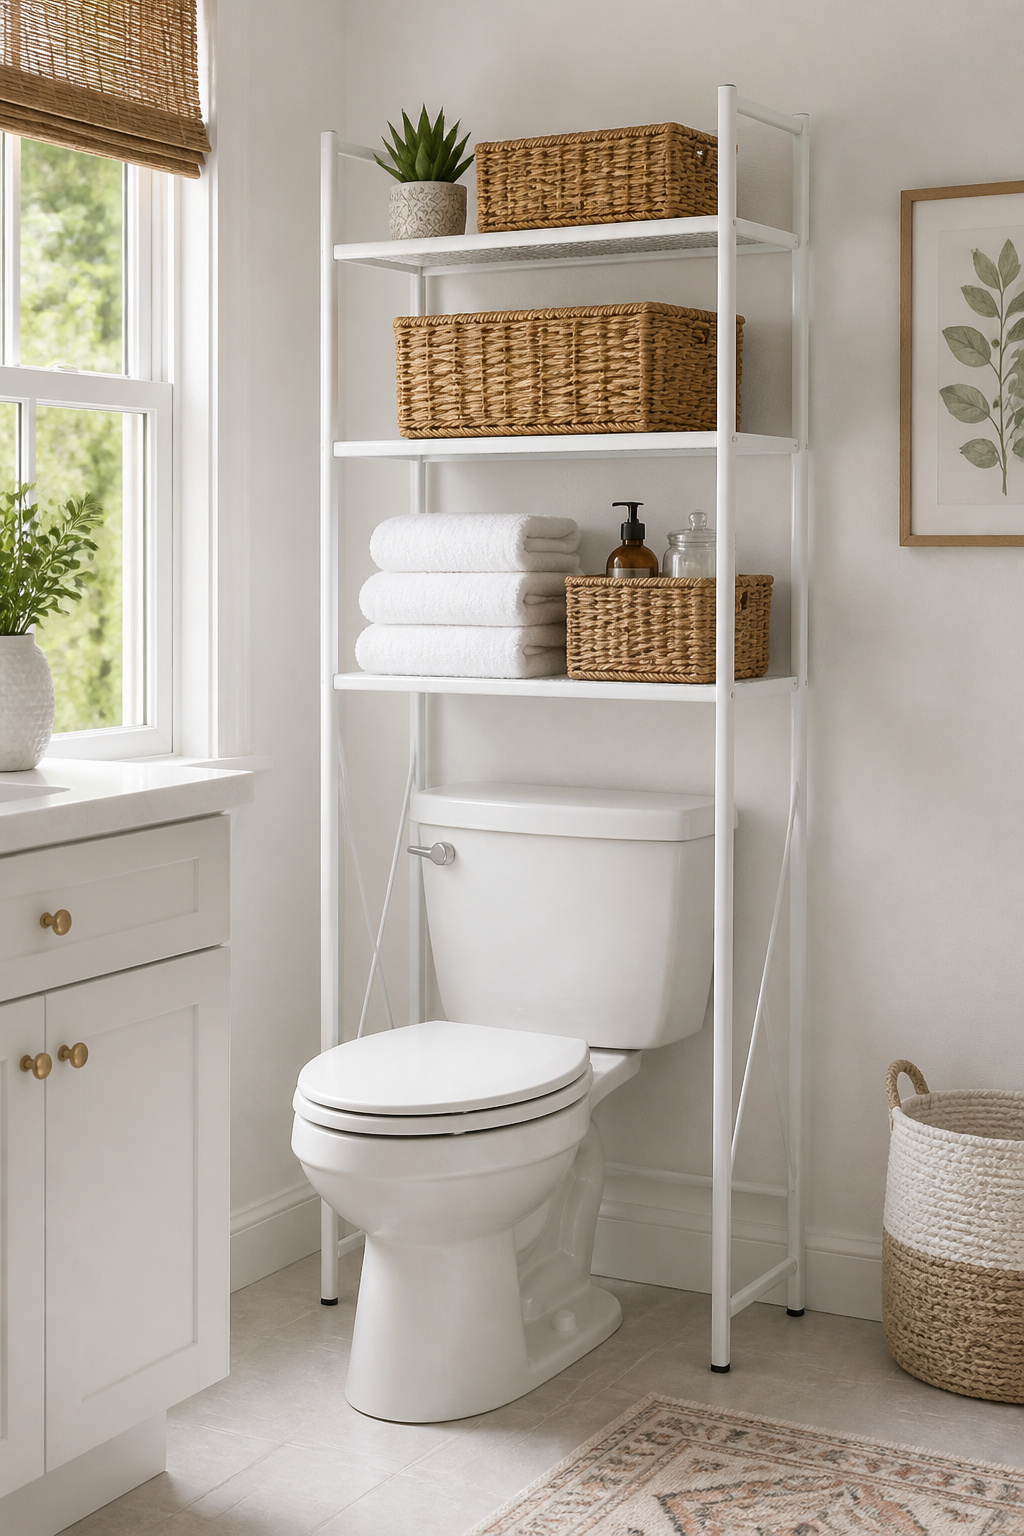
Clearance dimensions are consistent enough that any purpose-built unit fits: standard toilets are 14-18 inches wide at the tank and 15-17 inches tall. Most freestanding over-toilet units begin their first shelf at 36-40 inches from the floor, clearing the tank comfortably. Total unit height typically runs 60-67 inches, leaving 25-30 inches of ceiling clearance in a standard 8-foot bathroom.
The choice between freestanding and wall-mounted comes down to permanence. Freestanding units require no anchoring — they stand on their own legs and many include optional anti-tip wall brackets for earthquake-prone areas or households with children. Wall-mounted over-toilet cabinets look more built-in and are more stable, but require stud locations that line up with the available wall space, which isn’t always possible. For most small bathrooms, a freestanding unit with the optional wall bracket is the right compromise. These bathroom shelve over toilet tips cover both the structural and organizational dimensions of this zone in depth.
What goes where matters: top shelf for least-accessed items (spare supplies in baskets, a plant), middle shelves for daily-use toiletries and folded hand towels, shelf above the tank for lightweight baskets only — nothing that blocks tank lid access for maintenance.
14. Heated Towel Rails That Eliminate Towel Storage in Small Bathrooms
A heated towel rail does three things simultaneously: dries towels overnight so they’re fresh by morning, stores them exactly where you need them (no separate towel bar, ring, or shelf required), and adds supplemental warmth to a cold bathroom. Three functions, one wall-mounted fixture.
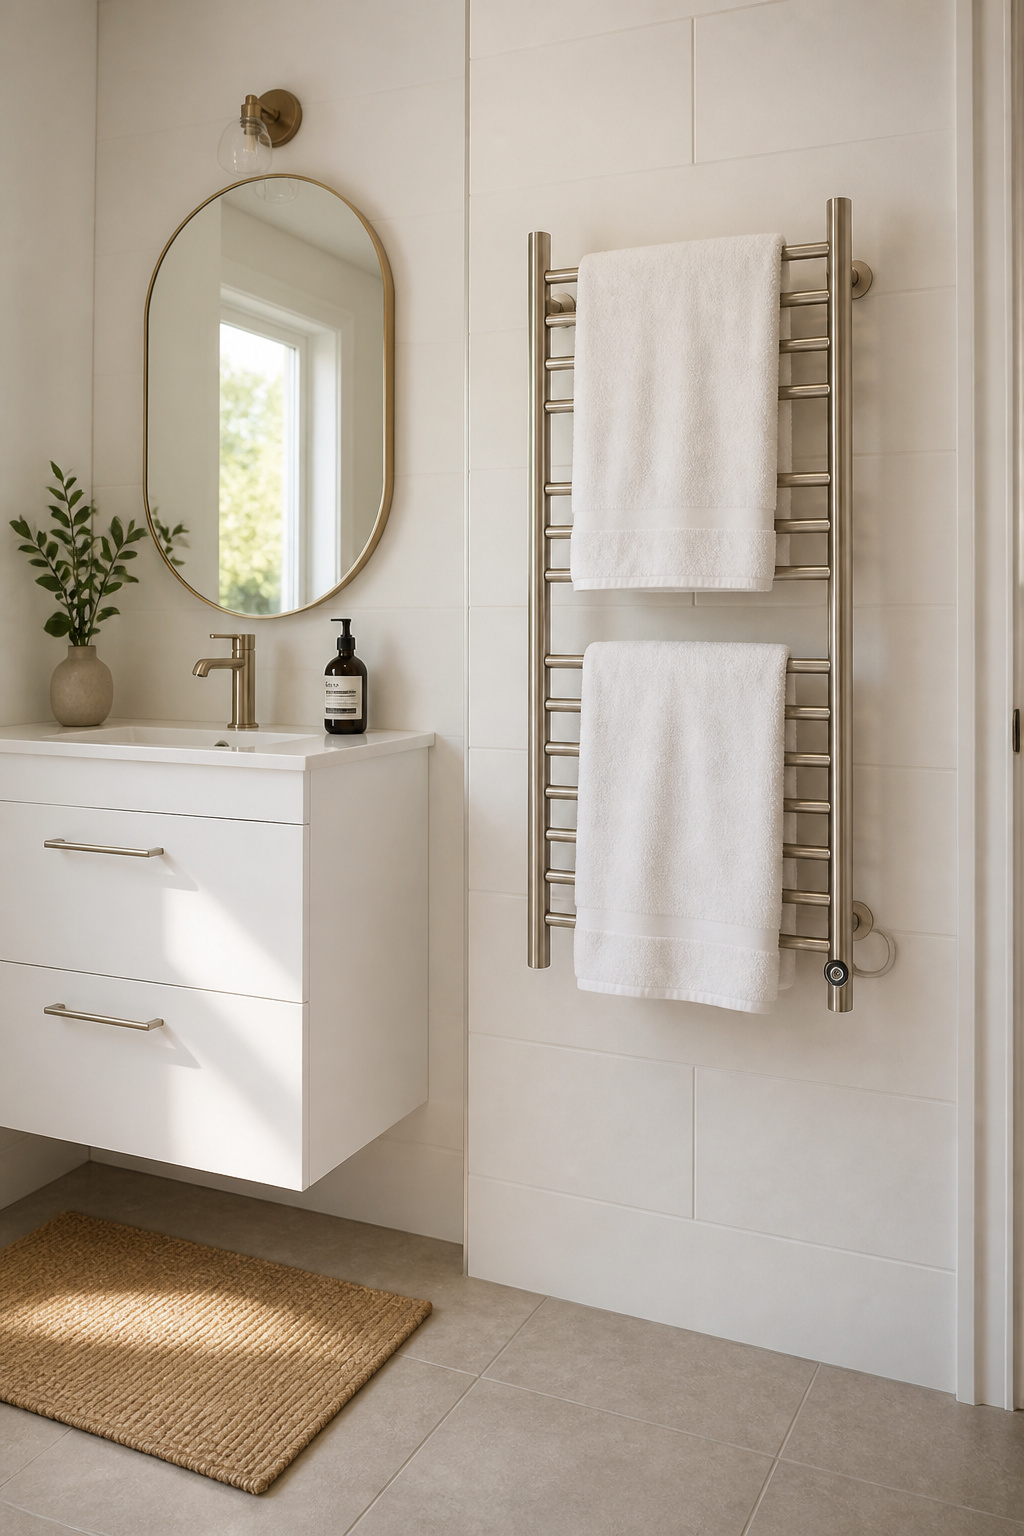
For small bathroom retrofits, electric is the practical choice. Electric heated rails connect to a standard 120V outlet and operate independently of the home’s heating system — useful in climates where heating runs only in winter but towel drying is a year-round need. Running costs are negligible: most units consume 60-200 watts, roughly $0.01-$0.02 per hour. Running one for 8 hours overnight costs about 10-15 cents.
Hydronic (hot water) rails connect to the plumbing and heating system — more efficient in cold climates where the boiler runs for months, but they require a licensed plumber for connection and output depends entirely on boiler water temperature. Not practical for retrofit installations.
Sizing for a small bathroom: a BTU rating of 1,500-2,500 provides meaningful supplemental warmth in a bathroom under 50 square feet. Most electric rails generate 300-600 BTU as supplemental output — enough to take the edge off a cold morning, not enough to replace a primary heat source. Width should accommodate your largest towels: standard bath towels are 27×52 inches, so a rail of at least 20-24 inches handles one full-size towel per bar without awkward folding.
Mount the rail centered at approximately 48 inches from the floor for comfortable daily use. Keep it clear of areas where someone regularly stands immediately after showering — outer surfaces reach 120-140°F during operation.
15. Statement Lighting as a Bathroom Idea for Small Spaces That Transforms Mood
Lighting is the most underestimated variable in small bathroom design — and the most commonly installed wrong. A single ceiling fixture creates downward shadows across the face and dark zones in every corner of the room. The bathroom ends up dim and compressed, and the size gets the blame. Usually, the size isn’t the problem.
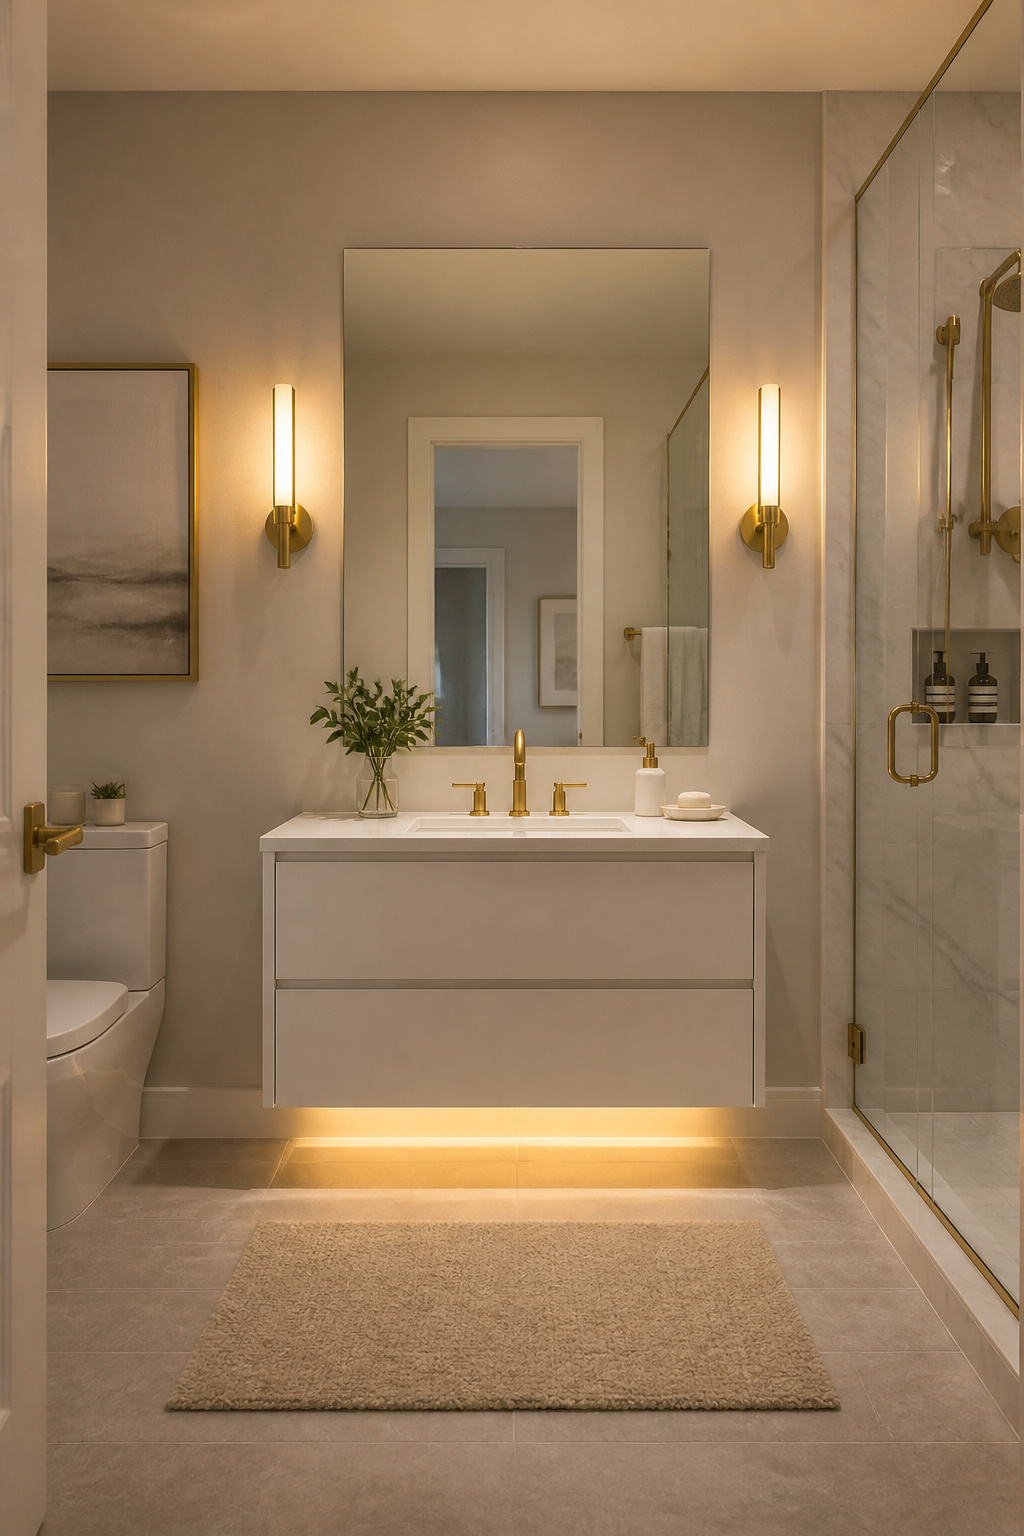
Side-mounted sconces flanking the mirror are the correct solution when wall space allows: one on each side at 60-65 inches from the floor, centered on the mirror’s vertical midpoint, spaced 36-40 inches apart. This eliminates facial shadows because light comes from beside rather than above — the same reason department store dressing rooms use side lighting and consistently look better than home bathrooms with overhead fixtures.
Layered Lighting in a Small Room
When side wall space doesn’t exist — common in a narrow bathroom where the vanity runs nearly wall-to-wall — a horizontal bath bar centered above the mirror is the next-best approach. Mount it 5-10 inches above the top of the mirror, at 75-80 inches from the floor. A 24-36-inch bar provides adequate spread for a single-sink vanity.
Color temperature determines how the room reads. The 2700K-3000K range (warm white) matches natural morning light and renders skin tones accurately — essential for grooming and makeup. CRI 90 or higher ensures colors render correctly under artificial light; a lower CRI makes clothing look different in bathroom light than in daylight. These bathroom vanity lighting tips go deeper on fixture selection, color temperature, and getting vanity lighting right as a bathroom idea for small spaces that costs relatively little.
The upgrade with the widest gap between cost and impact: dimmer switches. A $30-$60 compatible LED dimmer on vanity and ambient lighting converts a functional bathroom into an occasionally relaxing one. Add an under-vanity LED strip along the bottom of a floating vanity cabinet and you get a third light layer — a warm ambient glow that makes the vanity appear to float more dramatically and provides enough light for middle-of-the-night use without full overhead glare.
Choosing the Right Bathroom Ideas for Your Small Space
Every bathroom is a different set of constraints, and not every idea on this list suits every space. The organizing principle is the same one that applies to any storage system: identify the problem that costs you the most daily frustration, then solve that problem first.
For the smallest budget, paint and lighting pay off first. A semi-gloss light color extended to the ceiling plus a correctly placed vanity fixture costs $300-$600 total and produces a visible change immediately. These are the two bathroom ideas for small spaces with the widest gap between cost and impact.
For the household that wants the bathroom to function better without a renovation: maximize existing storage first. Under-sink pull-out organizers, an over-toilet shelving unit, and a ladder shelf beside the toilet together cost under $500, require no tools beyond a level, and take a weekend. An organized small bathroom reads better than a decorated cluttered one, every time.
For the renovation household: plan the tub-to-shower conversion and floating vanity together, because both decisions drive the plumbing rough-in positions and wall framing that everything else depends on. Bundle the structural changes into a single project, and the incremental cost of adding the lighting upgrade, the vertical tile, and the pocket door drops significantly when tradespeople are already on site.
The bathroom that functions well feels larger than its measurements. That’s the consistent result of treating the constraints seriously — not as limitations to decorate around, but as problems with specific, achievable solutions.