There’s a surface in your kitchen that does more visual work per square foot than anything else in the room — and most renovations treat it as an afterthought. The backsplash sits at eye level every time you cook, eat, or walk through. It frames your countertop, reflects your lighting, and sets the material register for the entire space. Getting it right changes a kitchen. Getting it wrong means five years of staring at something that almost works.
These sixteen kitchen backsplash ideas run the full spectrum of materials, budgets, and aesthetics — from handmade Moroccan zellige and full-height marble slab to heat-resistant brass sheet and renter-friendly peel-and-stick panels. Each one has a distinct material story, and understanding why a surface behaves the way it does is what separates a backsplash that was chosen from one that was decided. If you’ve been pinning images without knowing how to commit, this is where that changes.
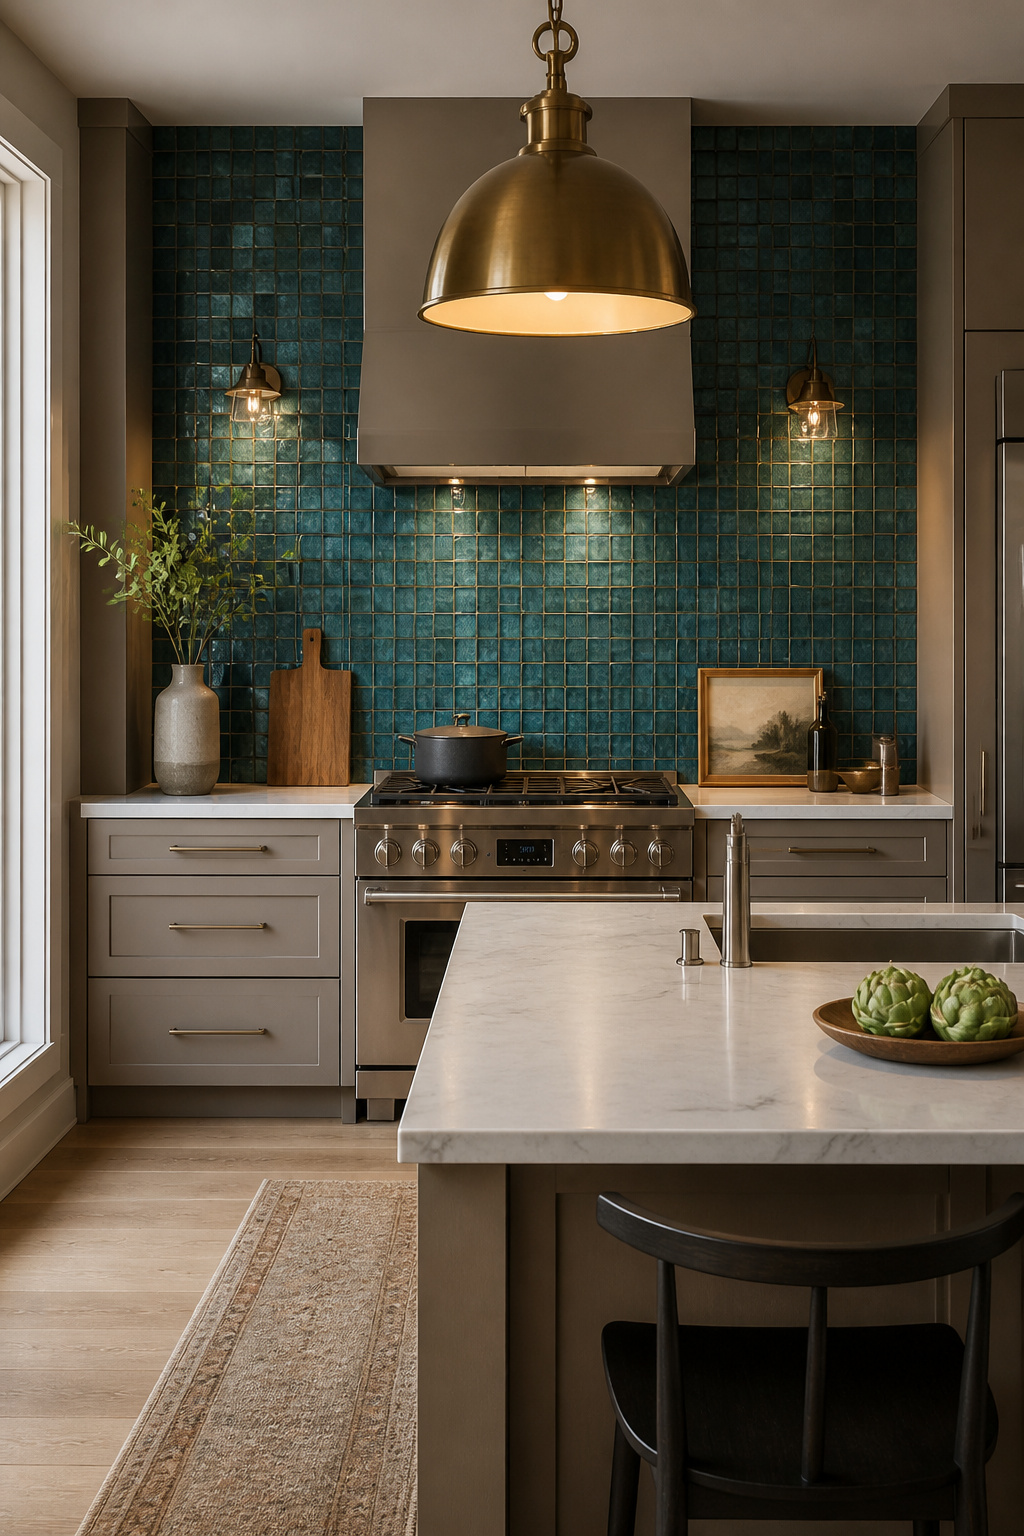
1. Zellige Tile for Organic Warmth and Artisanal Texture
Zellige is one of those materials that photographs well but performs even better in person — and that combination is rarer than it sounds. Each tile is individually handmade from natural Moroccan clay, sun-dried, glazed with mineral pigments, and kiln-fired in small batches. The result is a surface with tonal variation, slight physical warping, and chipped-edge character that no machine-made tile can replicate. These aren’t flaws. They’re the product.
The glazed surface shimmers differently as your kitchen light changes throughout the day. The warping creates micro-shadows between tiles that give the wall a living, dimensional quality. Authentic zellige runs $18–28 per square foot in materials — a standard 25-square-foot kitchen backsplash puts you at $450–$700 in tile before installation. Professional zellige tile work costs around $100 per hour because sorting non-uniform pieces into a cohesive layout is genuinely skilled work. Budget $500 per day in labor.
Zia Tile, Artistic Tile, and Apollo Tile carry quality authentic and zellige-look options. If you love the aesthetic but want more predictable pricing, zellige-look porcelain runs $8–10 per square foot and captures the color variation, if not the physical depth. For cabinet pairings, white, cream, and sage green zellige play well with almost anything — the tonal variation does the heavy lifting, so the cabinets can stay neutral. Navy and deep forest green zellige want contrast: light countertops, warm brass hardware, and nothing competing for attention.
Order 20% more tile than your square footage requires. With zellige, non-uniformity means more cuts to waste, and you want consistent dye-lot material available for repairs.
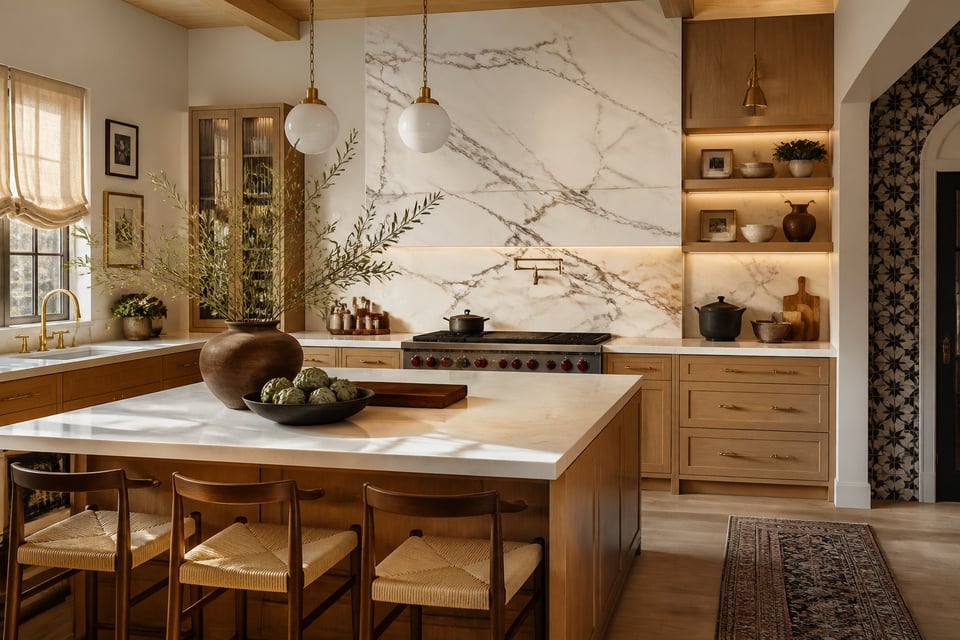
2. Full-Height Marble Slab for a Seamless Kitchen Backsplash
The monolithic effect of running the countertop slab material straight up the wall reads immediately as a luxury renovation decision. By eliminating the visual shelf that a grout line or a different surface material creates at the countertop edge, slab continuation makes the wall and countertop read as one uninterrupted surface. In open-plan kitchens visible from the living area, it lands differently from across the room than any tile kitchen backsplash can.
Book-matching takes this further: two adjacent slabs of Calacatta or Statuario marble, oriented as mirror images, create a symmetrical vein pattern that looks curated. Even without book-matching, a single slab with tight seaming reads definitively premium. Calacatta marble starts around $180 per square foot at the premium end; Carrara is more accessible at $5–15 per square foot for tile, more for slab. A full slab backsplash project, materials and fabrication combined, typically runs $900–$3,500 depending on stone selection and kitchen size.
The maintenance reality with marble backsplashes is better than with marble countertops. Acid etching happens when liquid sits on a horizontal surface — on a vertical backsplash, splatter runs down rather than pooling, which substantially reduces exposure time. Marble as a backsplash is more forgiving than marble as a countertop for most households. Sealing every 6–12 months is still essential.
For kitchen backsplash ideas with white cabinets specifically, marble slab is the elevated endpoint — there’s a strong design case for that combination in the guide to kitchen backsplash with white cabinets. If full-slab is beyond the current budget, large-format porcelain marble-look tile in 24×48 or 48×48 formats achieves 90% of the visual effect at a fraction of the fabrication cost.
3. Classic Subway Tile in a Herringbone Layout
Subway tile in a standard running bond is a commodity finish — not bad, not interesting. Among kitchen backsplash ideas, herringbone is where the same tile becomes a design decision. Setting it at a 45-degree angle draws the eye horizontally in a way that makes a narrow galley kitchen read wider, and it signals intentionality that a straight-set backsplash simply doesn’t.
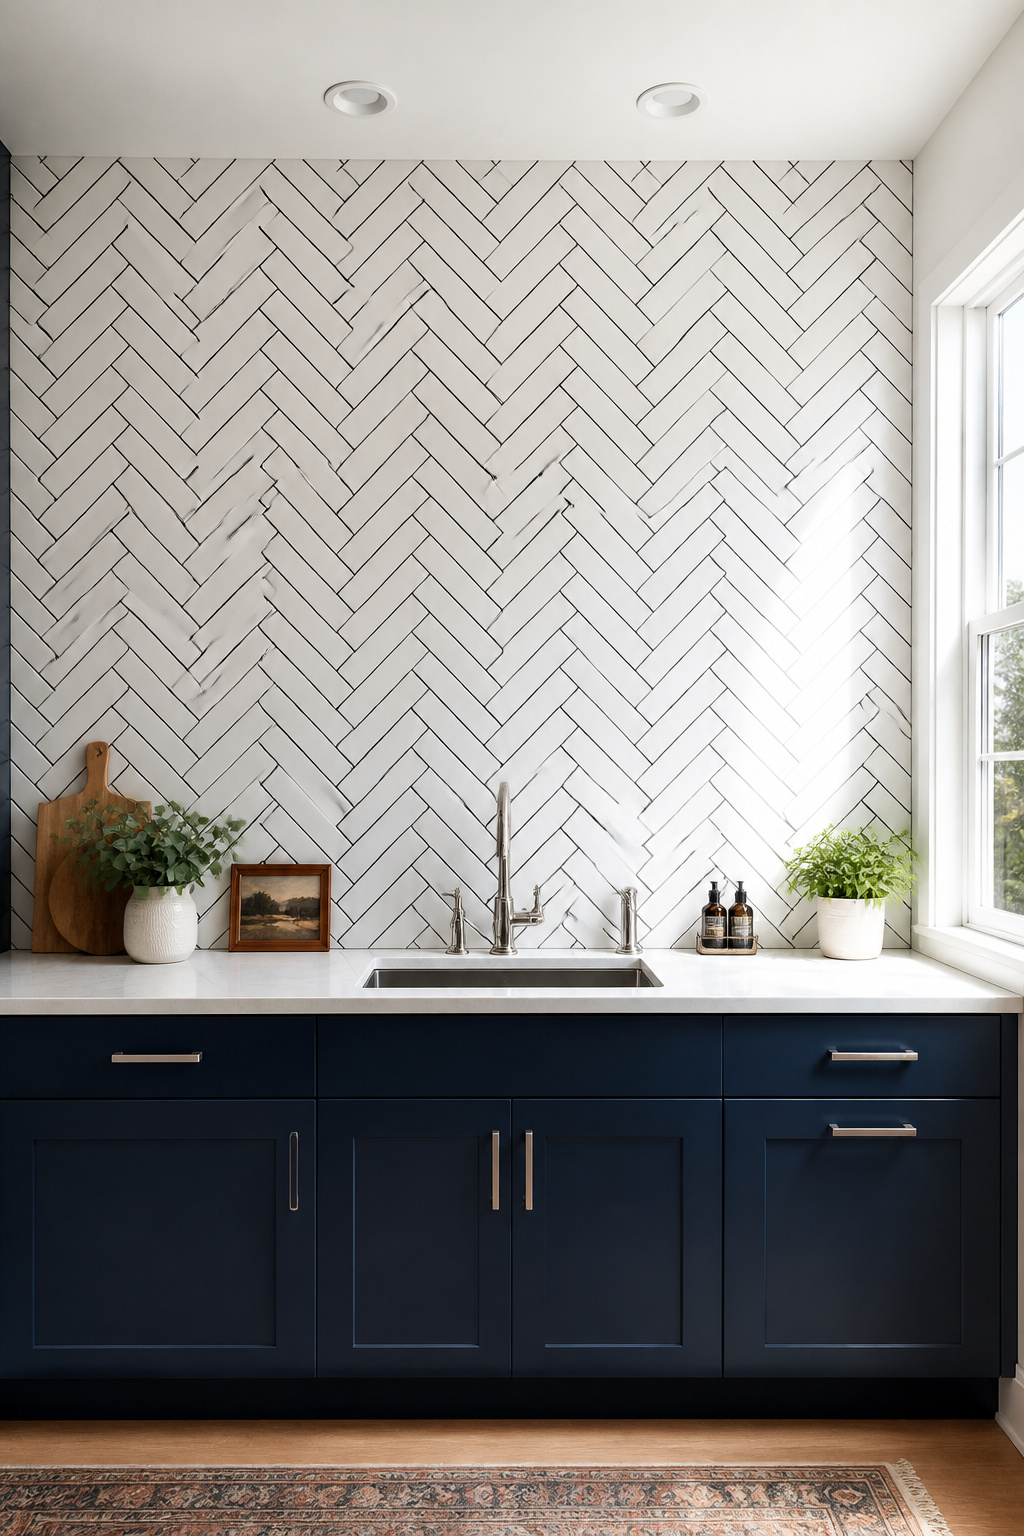
Tile dimension determines how emphatic the pattern reads. A 3×6 herringbone is balanced and familiar — the safe choice when you want the pattern without visual drama. Elongated formats (2×8 or 3×12) amplify the directional quality; the longer the tile relative to its width, the stronger the V reads across the wall. A 4×12 herringbone in a large kitchen is genuinely bold.
Grout color is where you make the final call between statement and texture. Matching grout — the same tone as the tile — makes the herringbone subtle, something you notice on second look. Contrasting grout, charcoal on white or white on dark tile, makes the pattern graphic and prominent. Neither is wrong. The question is whether you want the backsplash to announce itself or work quietly behind the rest of the kitchen.
Practical note: herringbone requires 15–20% more tile than a straight-set layout because of diagonal cut waste. And the grout line width matters: unsanded grout for joints under 1/8 inch, sanded for wider joints. Using the wrong type causes cracking over time — a small detail that creates a persistent maintenance problem.
4. Cement Tile With Bold Geometric Patterns as Backsplash Ideas for Kitchens
Encaustic cement tile is not fired in a kiln. It’s made by pressing pigmented cement into molds under hydraulic pressure, which produces a tile whose color comes from pure mineral pigments rather than a surface glaze. The result is color that goes all the way through, a matte surface with real tactile depth, and bold patterns executed in this medium for centuries. The 2025 trend toward Mediterranean-inspired geometric patterns — blue-and-white stars, Moroccan lattice, black-and-white encaustic — has given cement tile a contemporary context that removes any sense of the retro.
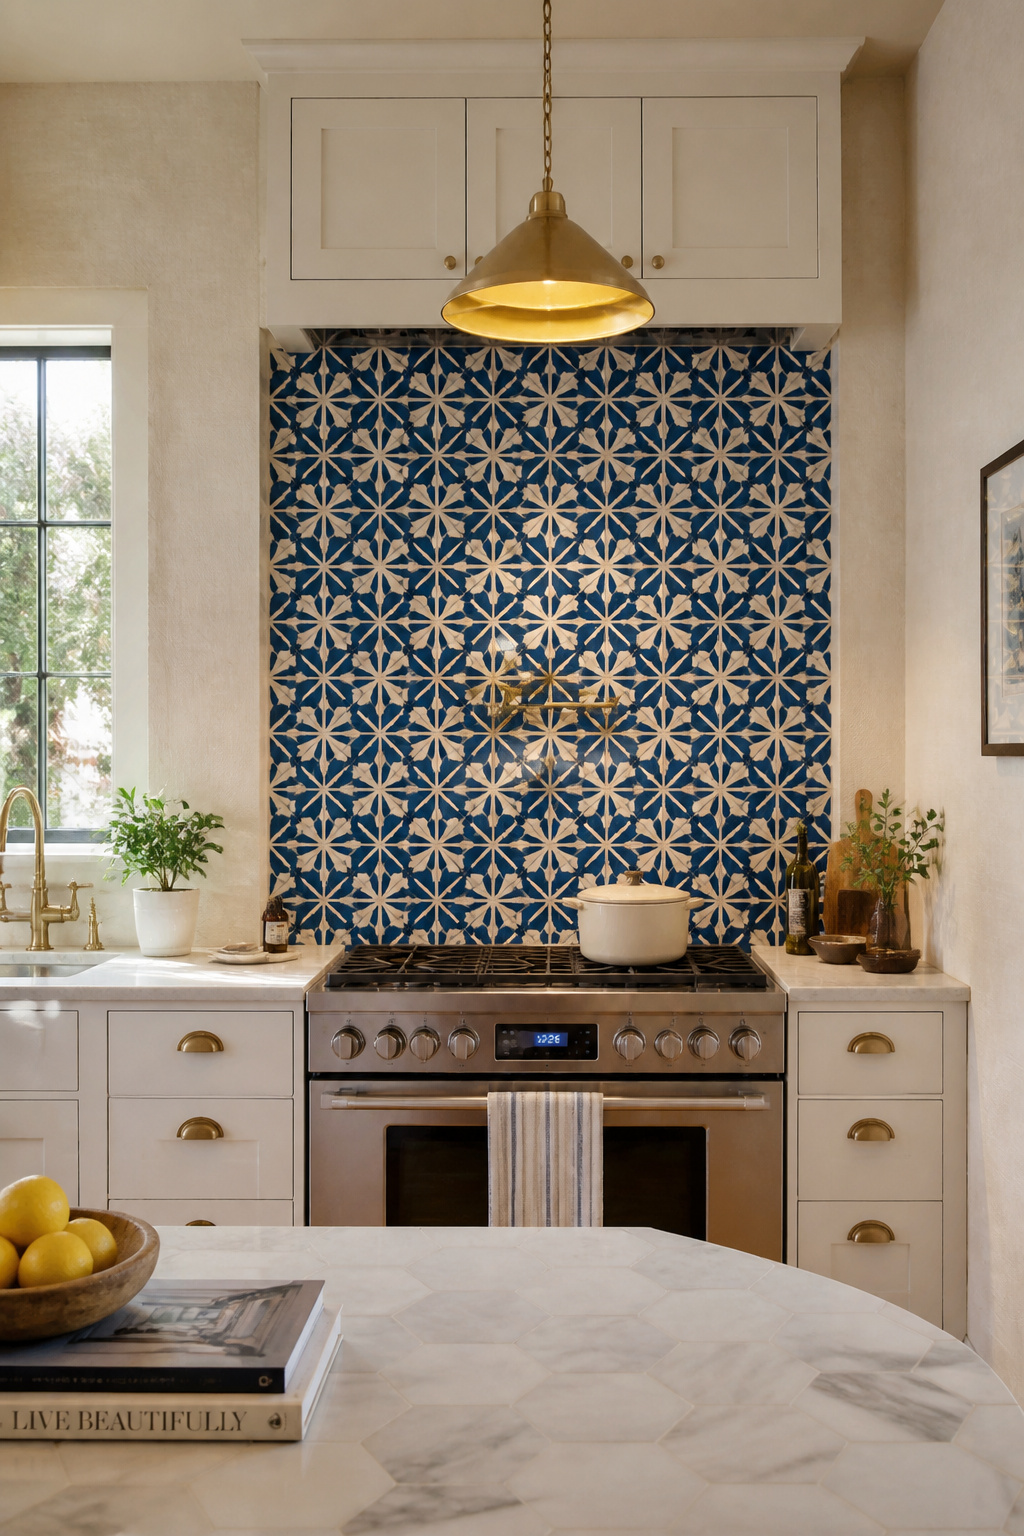
The material demands respect. Cement tile is porous in a way that ceramic is not — it will actively drink up grout pigment if you install it unsealed. The protocol is non-negotiable: apply penetrating sealer 24 hours before grouting, then apply it again after the grout has fully cured. Skip either step and you’ll have permanent staining that no cleaner removes. Reseal every 1–2 years in kitchen environments.
Scale planning separates a cement tile success from a regret. Complex 4×4 tiles with multi-color geometric patterns on a full backsplash run can overwhelm a kitchen — they need breathing room. Use patterned cement tile as an accent zone behind the range, flanked by plain-painted walls, and the pattern reads as a considered focal point rather than wallpaper. Simpler two-tone patterns in larger formats (8×8, 10×10) can run wall-to-wall. The pairing rule: the more complex the tile pattern, the plainer everything else needs to be. Plain shaker cabinets, single-material countertops, minimal hardware.
5. Reclaimed Wood Plank Behind the Range for Rustic Character
Wood as a kitchen backsplash material is not a default choice — it requires understanding before commitment. Done correctly, reclaimed wood planking creates a warmth that no tile surface replicates: the layered grain of old-growth lumber, the silver-grey of weathered pine, or the deep honey of aged oak against modern cabinetry creates a contrast that reads as collected rather than designed. Among wood kitchen backsplash ideas, this is the one that earns its place through material character.
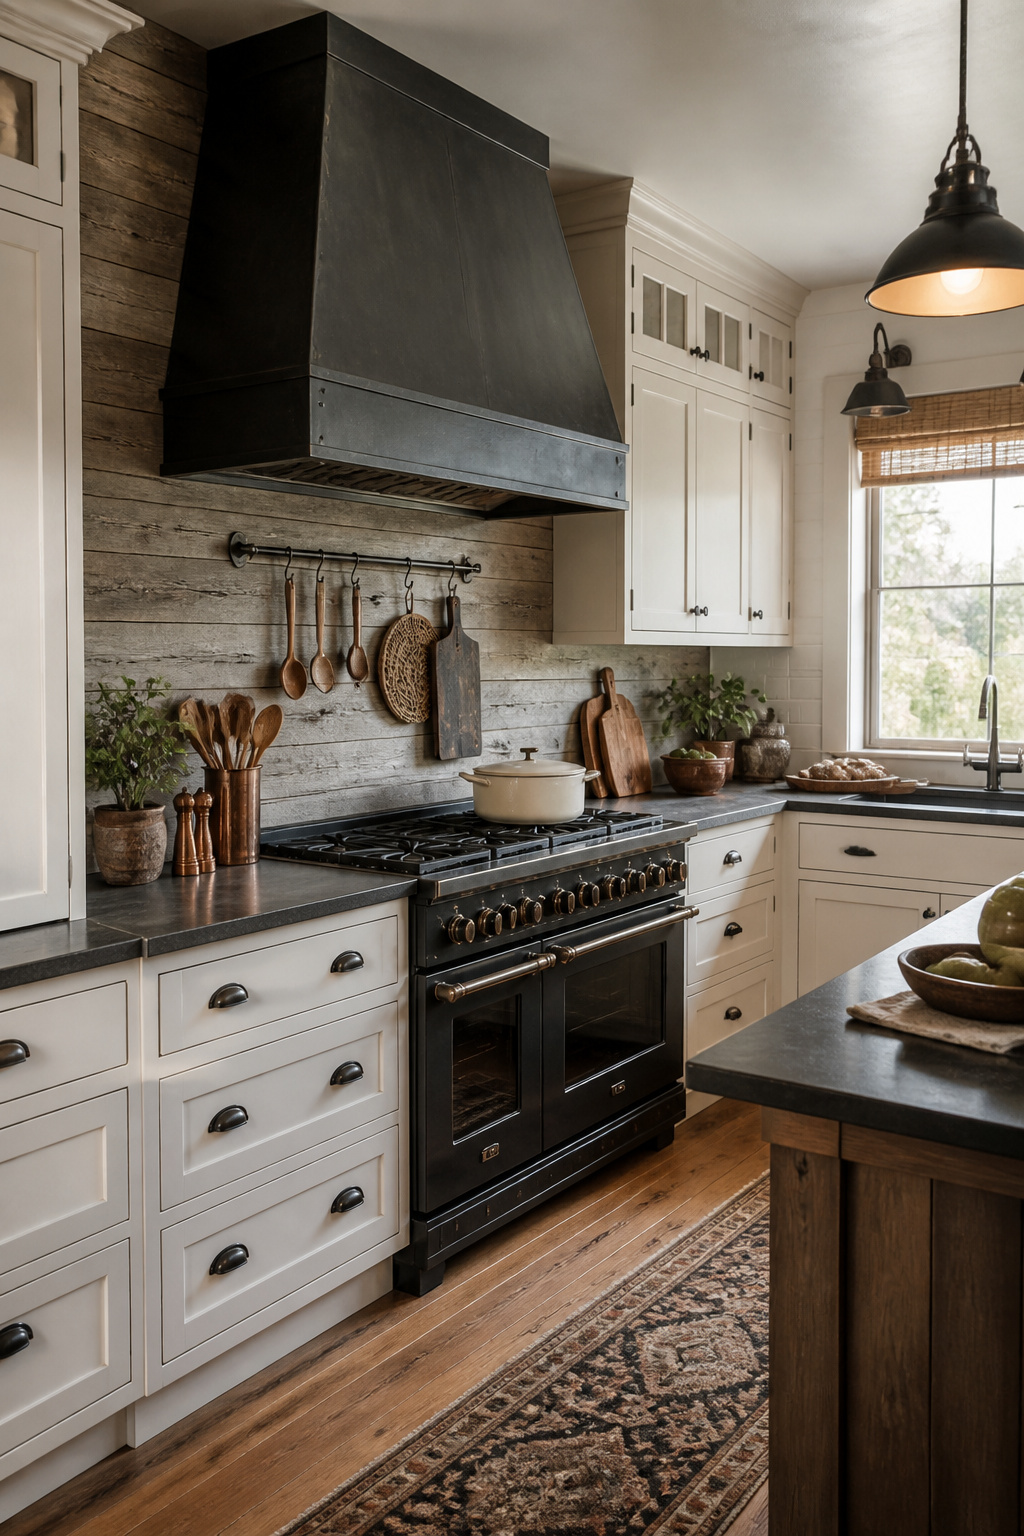
The fire code piece is essential knowledge. IRC Section G2409 requires 30 inches of vertical clearance between range burners and any combustible surface directly above. A non-combustible heat shield applied directly behind the range can reduce this to 24 inches. The practical solution most designers use: position the reclaimed wood on the flanking walls beside the range, not directly behind the burners. Always check your appliance’s installation manual — manufacturer requirements can be more restrictive than the general code.
For species, white oak at Janka hardness 1290 and teak with its natural silica content resist kitchen moisture and humidity cycling best. Pine is atmospheric but soft and prone to seasonal gapping in dry climates. Reclaimed lumber of any species should be kiln-dried after acquisition to eliminate insects and stabilize moisture content before installation.
Finish with Rubio Monocoat or Osmo Polyx penetrating oil to maintain the raw wood feel. Water-based polyurethane (2–3 coats) is more durable but the wood reads slightly glossy and less natural. Whatever finish you choose, seal the bottom seam at the countertop junction with waterproof silicone — water wicking at that joint is the primary failure mode for wood backsplashes.
6. Smoked Glass Panels That Multiply Light and Depth
Glass backsplash panels have exactly one grout joint: zero. That’s a significant practical advantage in a kitchen where grease and splatter are facts of daily life. A glass surface wipes clean with soap and water, doesn’t require sealing, and withstands temperatures up to 470°F without cracking. For contemporary kitchen backsplash ideas where maintenance ease is a priority, this is the material to consider first.
Smoked or grey-tinted back-painted glass is the version worth specifying. A solid color coat applied to the rear of the tempered glass panel means the color is protected under the glass and won’t chip, fade, or scratch. The smoked effect reduces the mirror quality of clear glass while retaining its reflectivity — the result is luminous rather than literally reflective. In smaller kitchens, this creates the perception of depth without the disco-ball quality of a mirrored backsplash.
The technical constraint that catches people: tempered glass cannot be cut or modified after tempering. Measurements must be exact and sent to the fabricator before production. Outlet positions, switch boxes, and any fixtures require precise cutouts specified at order time. A mistake in measurement means a new panel, not a quick fix on site. Cost runs $27–60 per square foot installed, with the higher end reflecting custom color matching and complex cutouts.
One honest limitation: every water spot and fingerprint shows on glass. Households that cook frequently and wipe down surfaces daily won’t find this a problem. Those who prefer a forgiving matte surface that tolerates kitchen residue without constant attention may find glass demanding despite its theoretical cleanability.
7. White Oak Shiplap for a Farmhouse Kitchen Backsplash
There’s a reason white oak has become the species of choice for kitchen applications that put wood in contact with moisture. Its Janka hardness rating of 1290 — more than three times that of Eastern white pine — means it resists denting and surface damage. Its natural tannins create inherent resistance to moisture and fungal growth: the same chemistry that made white oak the material for whiskey barrels and ship planking for centuries. In a kitchen, those properties matter at a practical level every day.
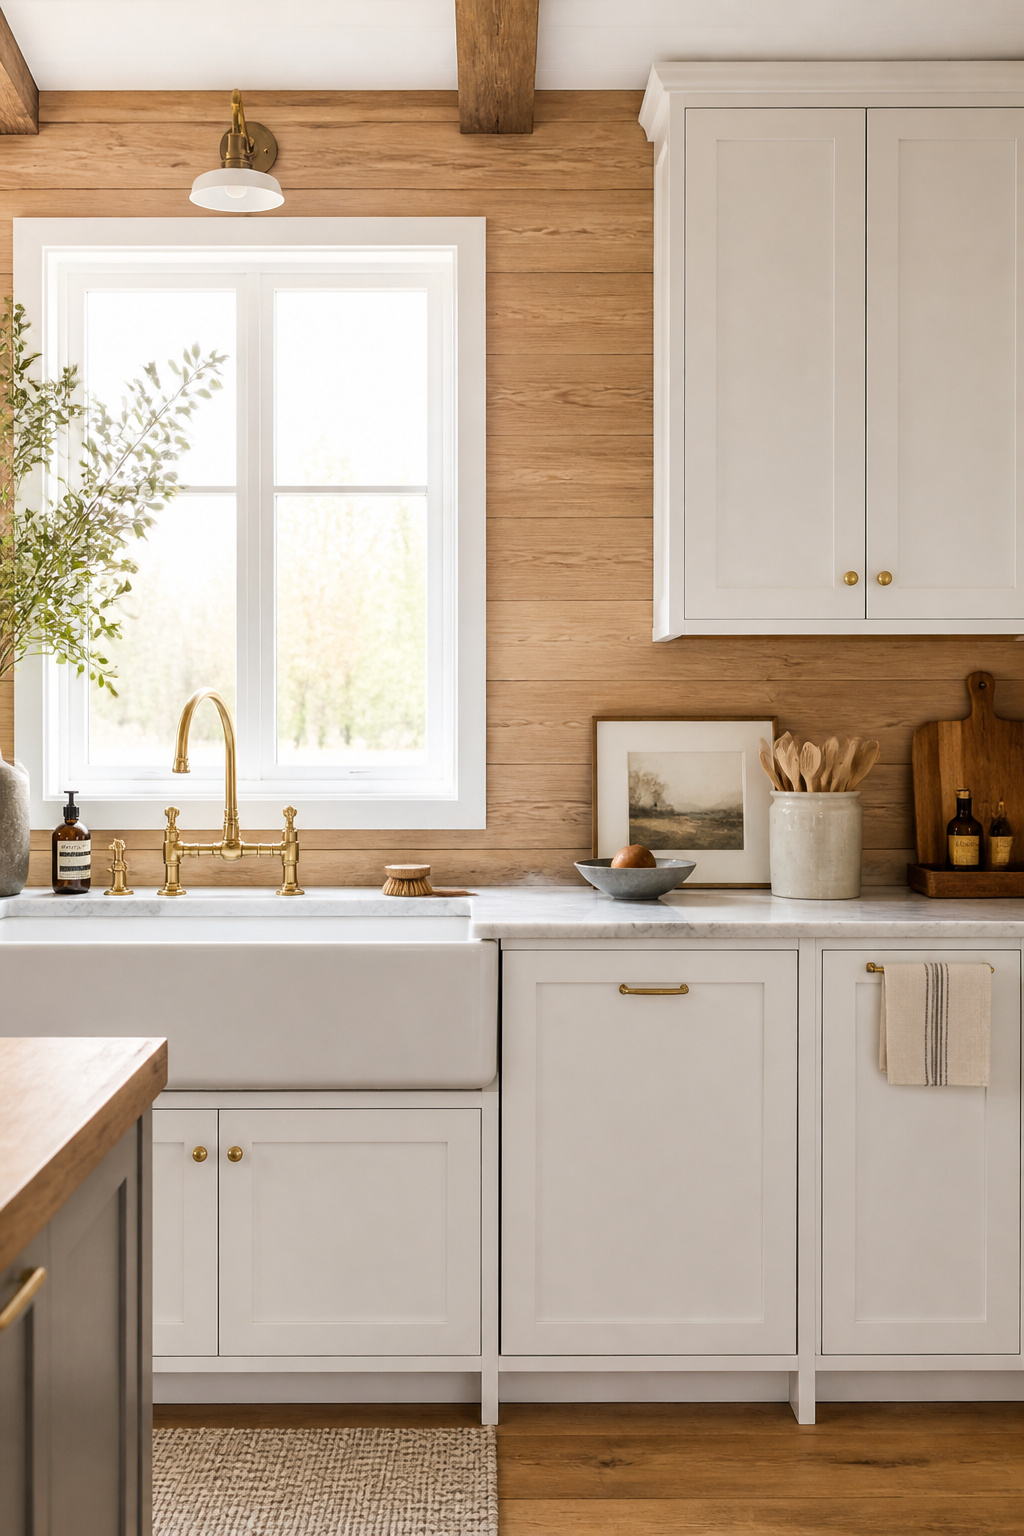
Shiplap is defined by its rabbet-cut edges, which allow boards to interlock with a consistent gap reveal of 1/8 to 3/16 of an inch. That reveal is the visual signature of the material. Horizontal installation reads as classic farmhouse; vertical shiplap reads as contemporary and slightly Scandinavian — the same material, two distinctly different aesthetics depending on orientation. The choice is worth deliberating.
Finish selection is where the aesthetic range of white oak shiplap becomes apparent. Natural penetrating oil (Rubio Monocoat, Osmo Polyx) preserves the warm cream-brown grain and keeps a raw wood feel — the most popular choice for kitchens leaning into organic warmth. White-wash or ceruse finish works white pigment into the open grain before wiping back, shifting the tone cool and Scandinavian while keeping the grain texture visible. Painted shiplap — in off-white, sage, or deep navy — sacrifices grain texture but becomes a color statement that can be refreshed as tastes change.
For kitchen backsplash ideas that extend the farmhouse aesthetic beyond shiplap specifically, there’s a strong collection of unexpected farmhouse kitchen ideas worth exploring. Whatever finish you choose, caulk the bottom seam at the countertop junction with waterproof silicone — water pools in that gap and wicks into the wood end grain if it’s left open.
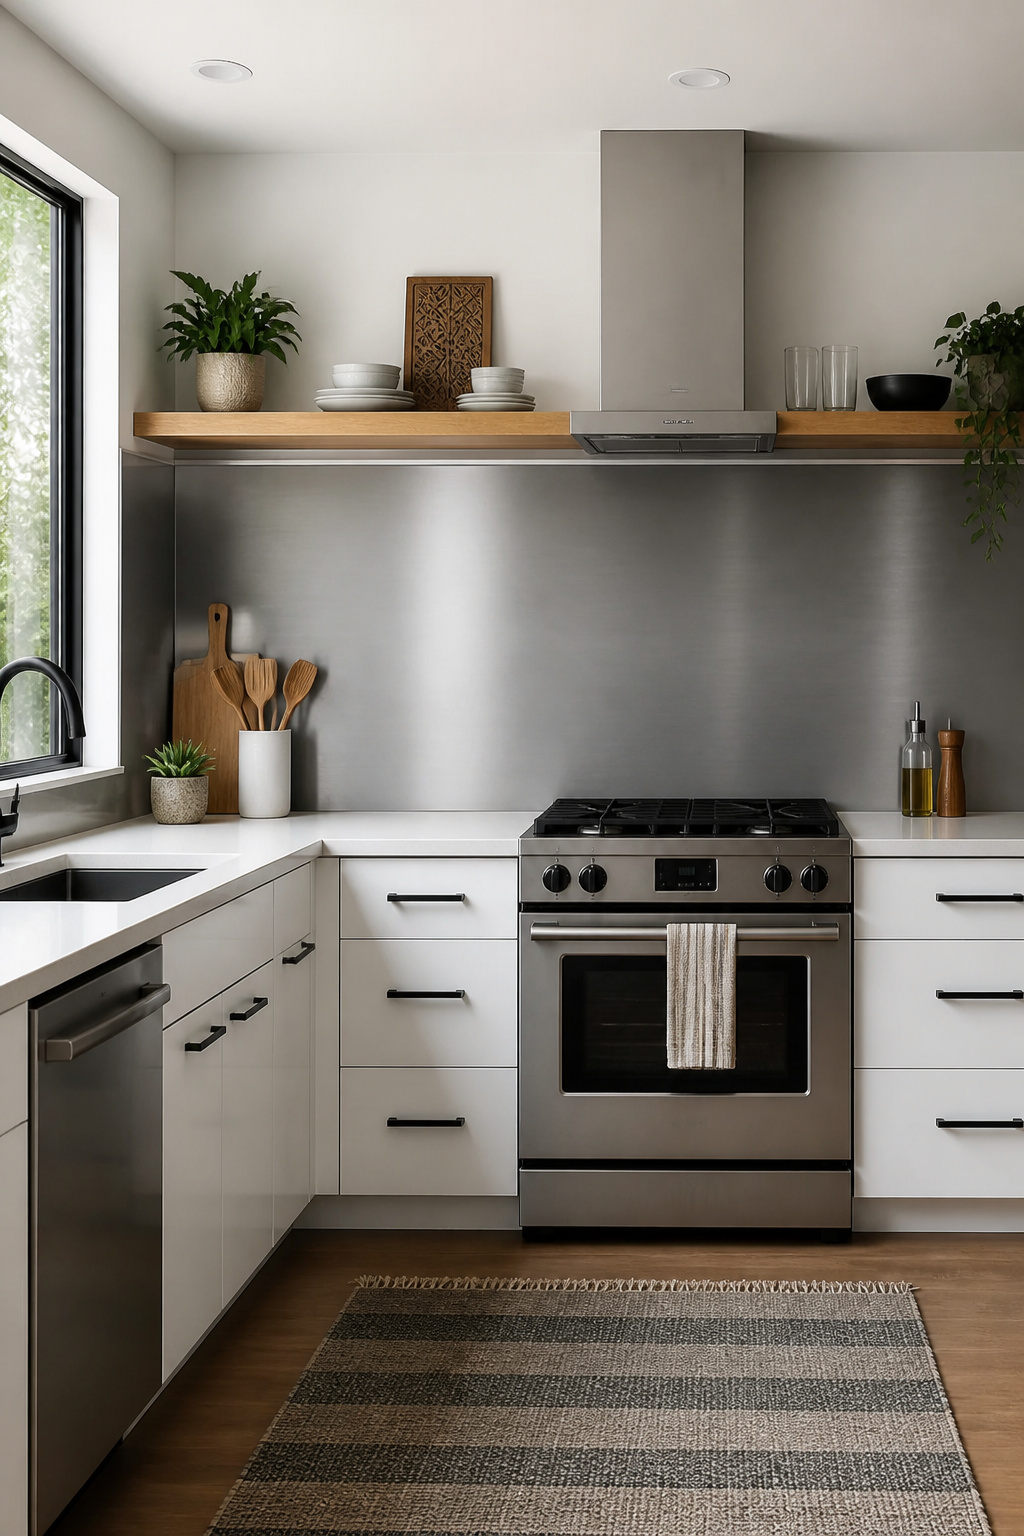
8. Brushed Brass Metal Sheet for an Industrial-Luxe Finish
Brass occupies a specific position in the material world that no alternative quite replicates: it’s warm, antimicrobial (copper alloys naturally inhibit bacterial growth), heat-resistant, and it develops a patina over time that most materials fight against but brass wears as a quality marker. A brushed brass backsplash panel brings all of that into a kitchen surface that reads simultaneously industrial and precious.
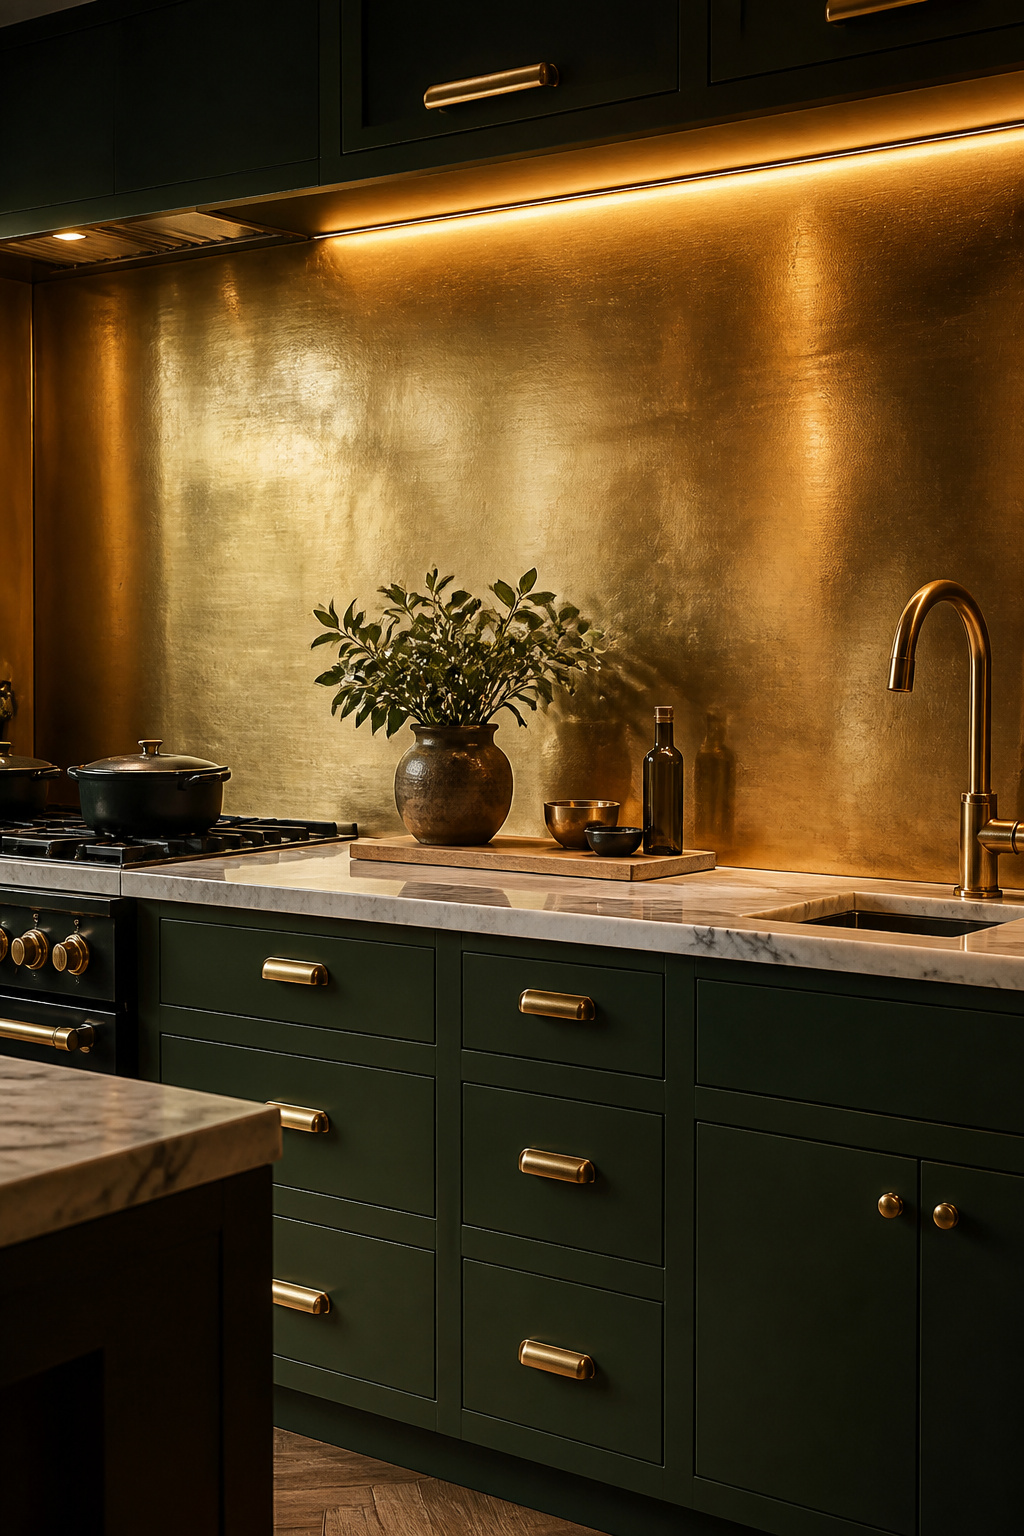
Solid brass sheet at 18–20 gauge is the premium specification — it develops an authentic patina, can be re-polished to original brightness if you change your mind, and carries the material weight that makes it feel substantial. At $80–150 per square foot installed, it’s a real commitment. But solid brass is also a material you will never have to replace. Brass-clad stainless steel is the mid-range alternative at $20–50 per square foot — more dimensionally stable, with a surface that can be polished but develops a more predictable, less organic patina.
Brushed finish is the kitchen-smart choice over polished. Polished brass requires cleaning every 2–3 weeks to maintain its mirror brightness. Unlacquered brushed brass, by contrast, develops a warmer, more complex tone as it ages — high points staying brighter, recesses deepening. Lacquered brushed brass freezes the finish and requires only soap-and-water cleaning.
The cabinet pairing matters significantly. Navy and dark forest green cabinets create high-contrast combinations that read editorial and intentional. White or off-white cabinets let the brass warm the kitchen from a neutral base. Commit to warm metals throughout the hardware scheme: brass backsplash with chrome faucets is a clash that undermines both.
9. Venetian Glass Mosaic as a Color-Rich Kitchen Backsplash Idea
The distinction between quality glass mosaic and standard glass mosaic shows at close range. Genuine Venetian glass — hand-poured rather than machine-cut — has internal color variation, micro air bubbles, and a light transmission quality that makes the tile appear to glow from within. Hold a piece up to natural light: quality Venetian glass shows internal color depth that shifts as the angle changes; standard glass mosaic is flat and opaque by comparison.
Murano glass represents the highest tier — hand-blown or poured with centuries of accumulated glassmaking knowledge embedded in the color and texture. Italian Venetian glass mosaic maintains similar quality at more accessible pricing. Both differ fundamentally from the mass-produced glass mosaic tile that dominated early 2000s kitchen renovations.
How you use glass mosaic determines whether it reads as sophisticated or dated. Small-format 1×1 multicolor mosaic — the “confetti” application — is firmly associated with the early-2000s pool aesthetic. Large-format 2×6 or 2×4 pieces in a monochromatic colorway (all deep teal in varying intensities, or grey-on-grey) reads as considered and contemporary. The 2025 direction in design press: smoked amber, deep teal, and forest green as single-color statements behind the range.
One technical detail that matters: glass mosaic requires unsanded or epoxy grout for joints under 1/8 inch. Sanded grout scratches the glass surface permanently during installation and cleaning. For kitchen backsplash inspiration ideas showing how color choices translate into finished kitchens, studying completed examples in your target palette before committing is time well spent. Total installed cost runs $19–33 per square foot for standard mosaic; intricate patterns with many cuts can push labor to $100 per hour.
10. Limewash Plaster Finish for a Textural Matte Wall
Limewash is not paint. Standard latex paint sits on the surface of a wall as a coating. Limewash — made from aged lime putty diluted with water — penetrates a porous surface and chemically bonds to it as it carbonates and dries, forming calcium carbonate that becomes part of the wall. The visual depth that results is not a painted-on effect; it’s the consequence of each translucent layer of lime interacting differently with the substrate beneath it.
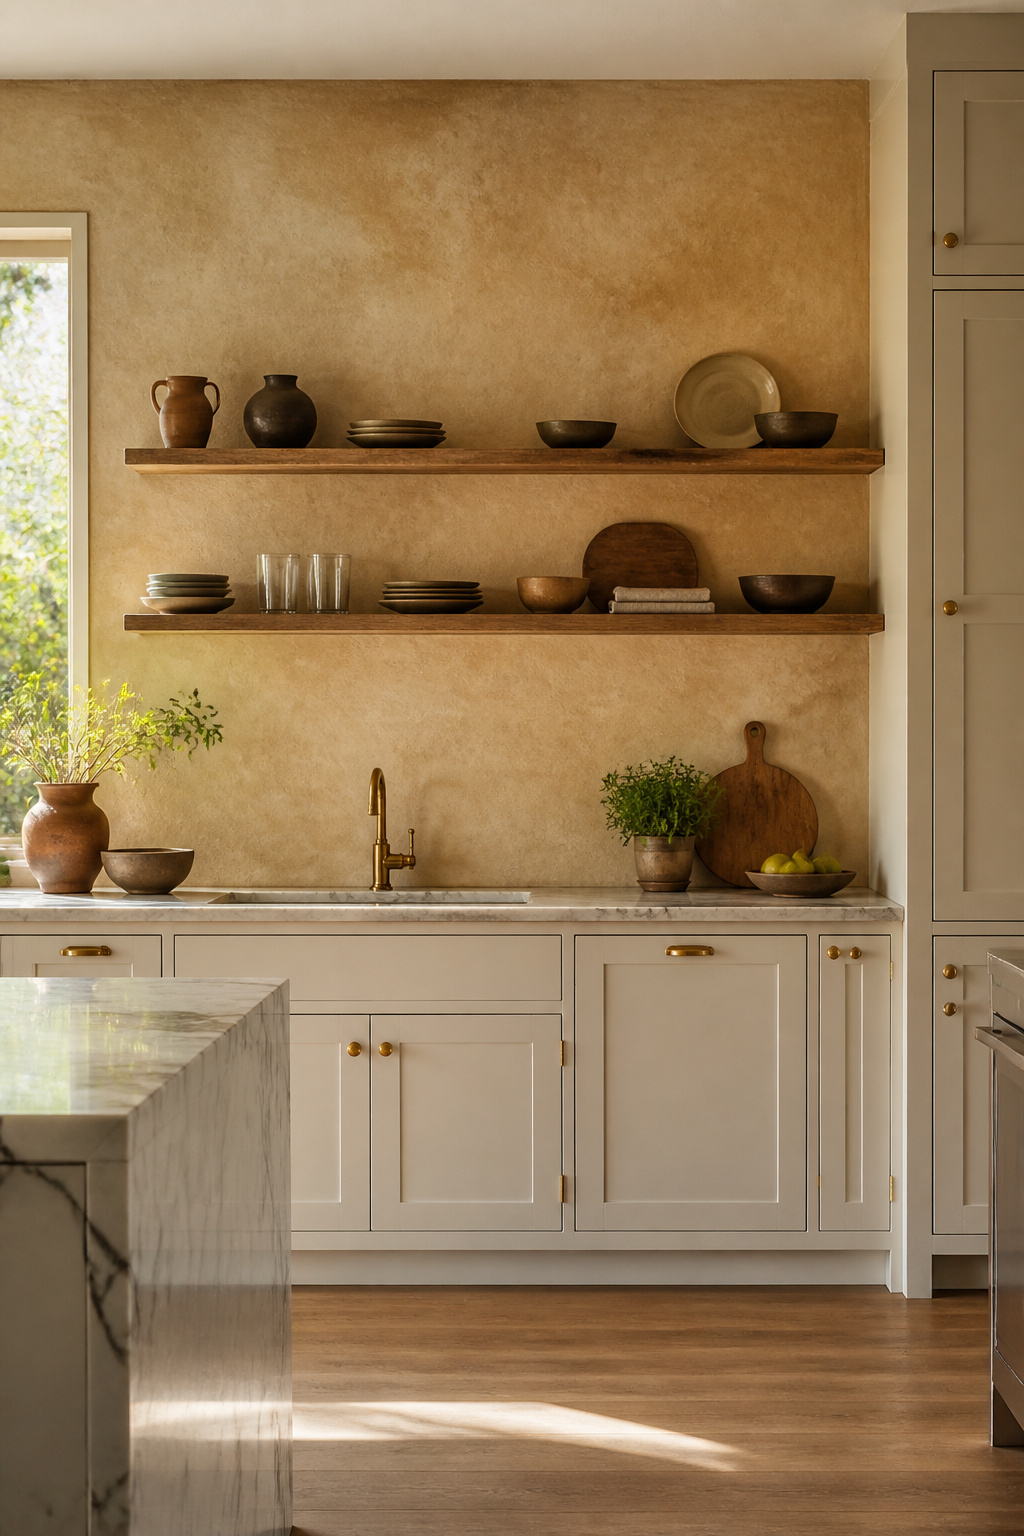
The mottled, dimensional quality — the blooming, the variation in tone, the aged quality that seems to have arrived organically — is intrinsic to the material. You cannot achieve it with any latex product, no matter how carefully applied. This is also why limewash doesn’t peel or chip the way paint does: it isn’t a separate layer.
Among limewash kitchen backsplash ideas, sealing is the detail that makes or breaks the kitchen application. Romabio Mineral Shield, a silane-siloxane topcoat, is designed specifically for high-use interior surfaces — it repels water and grease without changing the matte appearance or chalky texture. Portola’s Matte Wall Sealer is not appropriate for surfaces with direct grease or chemical contact. For a kitchen backsplash, Romabio’s system is the safer specification.
Application is a realistic DIY project. Romabio Velatura Mineralwash applies in two coats with a large natural-bristle brush using cross-hatching strokes. A standard 25-square-foot kitchen backsplash is achievable in a day. Total material cost for limewash plus topcoat runs under $200.
11. 3D Relief Tile for Sculptural Kitchen Backsplash Design
The case for 3D relief tile is fundamentally a case about light. A flat tile surface reflects light uniformly — what you see is what you get, regardless of time of day. A 3D relief tile surface — waves, scales, geometric facets, chevrons — casts shadows when light hits at an angle. Those shadows change as your lighting changes. Under-cabinet LED strips raking upward across a relief tile backsplash create drama at 7pm that the same backsplash doesn’t show at noon.
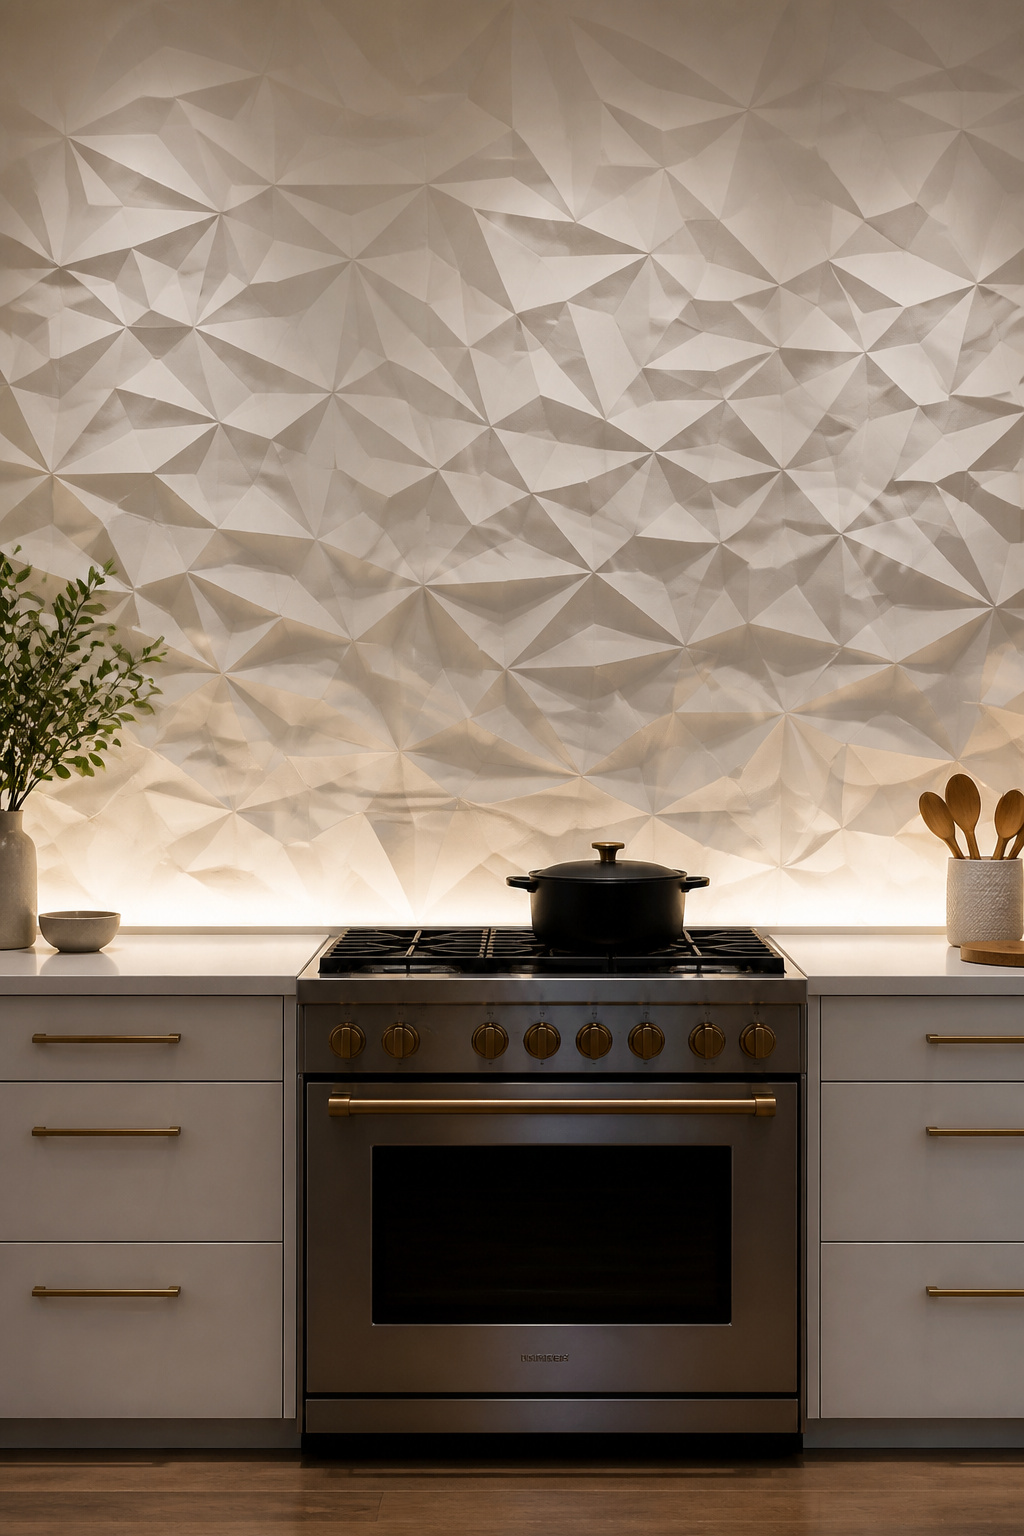
This means 3D tile is critically dependent on directional lighting to deliver its value. If your kitchen runs on diffuse overhead can lights and nothing else, the relief effect flattens almost entirely. Plan under-cabinet strip lighting or pendant fixtures that cast directional light onto the backsplash as a paired decision, not an afterthought.
Porcelain is the kitchen-appropriate material choice — vitrified, frost-resistant, and durable. Premium brands include Coem Fioranese (Italy) and Dexco Portinari. PVC and vinyl peel-and-stick 3D panels are the DIY-accessible alternative, though they lack the material substance of fired tile. Gypsum 3D panels are purely decorative and not appropriate for kitchen moisture environments.
Placement is where kitchen backsplash design decisions get made with 3D tile. A subtle linear ribbing or gentle wave pattern can run as a full backsplash without overwhelming the kitchen; bold geometric facets become exhausting at full-wall scale. The most effective use: 3D tile behind the range as a focal point, flat tile on the flanking walls. See how relief tile interacts with the broader world of kitchen tiles design ideas before committing to a pattern at scale.
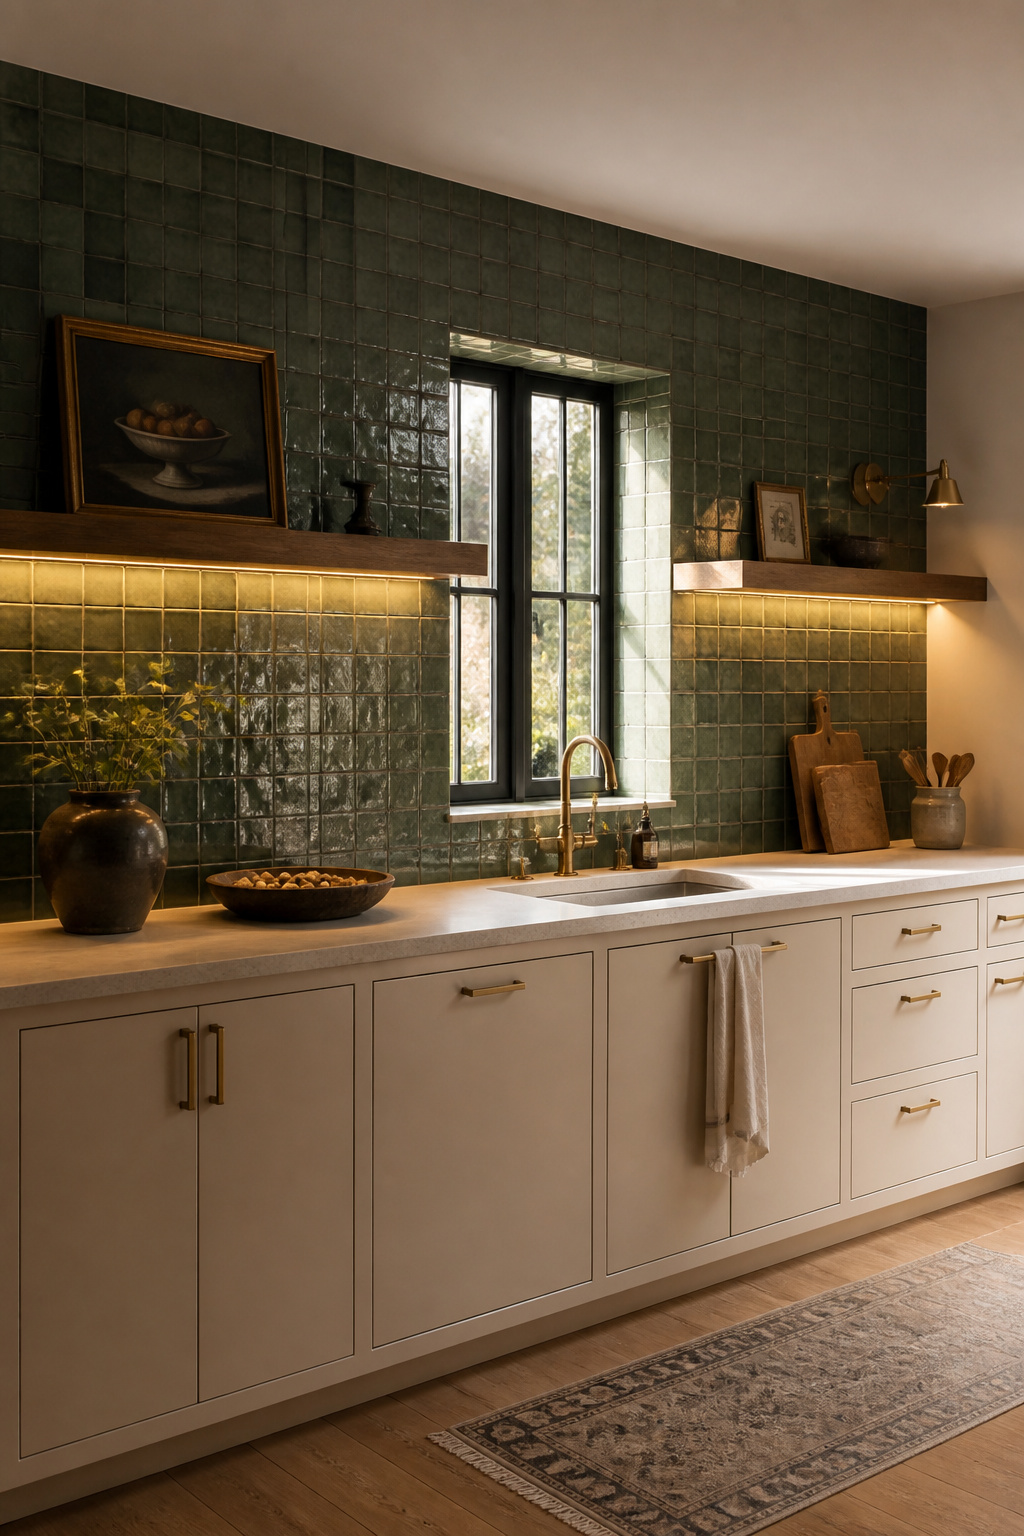
12. Honed Basalt Tile for a Dark, Dramatic Chef’s Kitchen
Basalt is a fine-grained volcanic rock, and its kitchen properties follow from its geology. It’s dense, with an absorption rate of approximately 1% compared to slate’s variable 1–5%. That density is why basalt is more chip-resistant than slate, more uniform in texture, and why it takes a honed finish consistently across an entire tile face. These are material facts that make it one of the more practical dark kitchen backsplash ideas on this list.
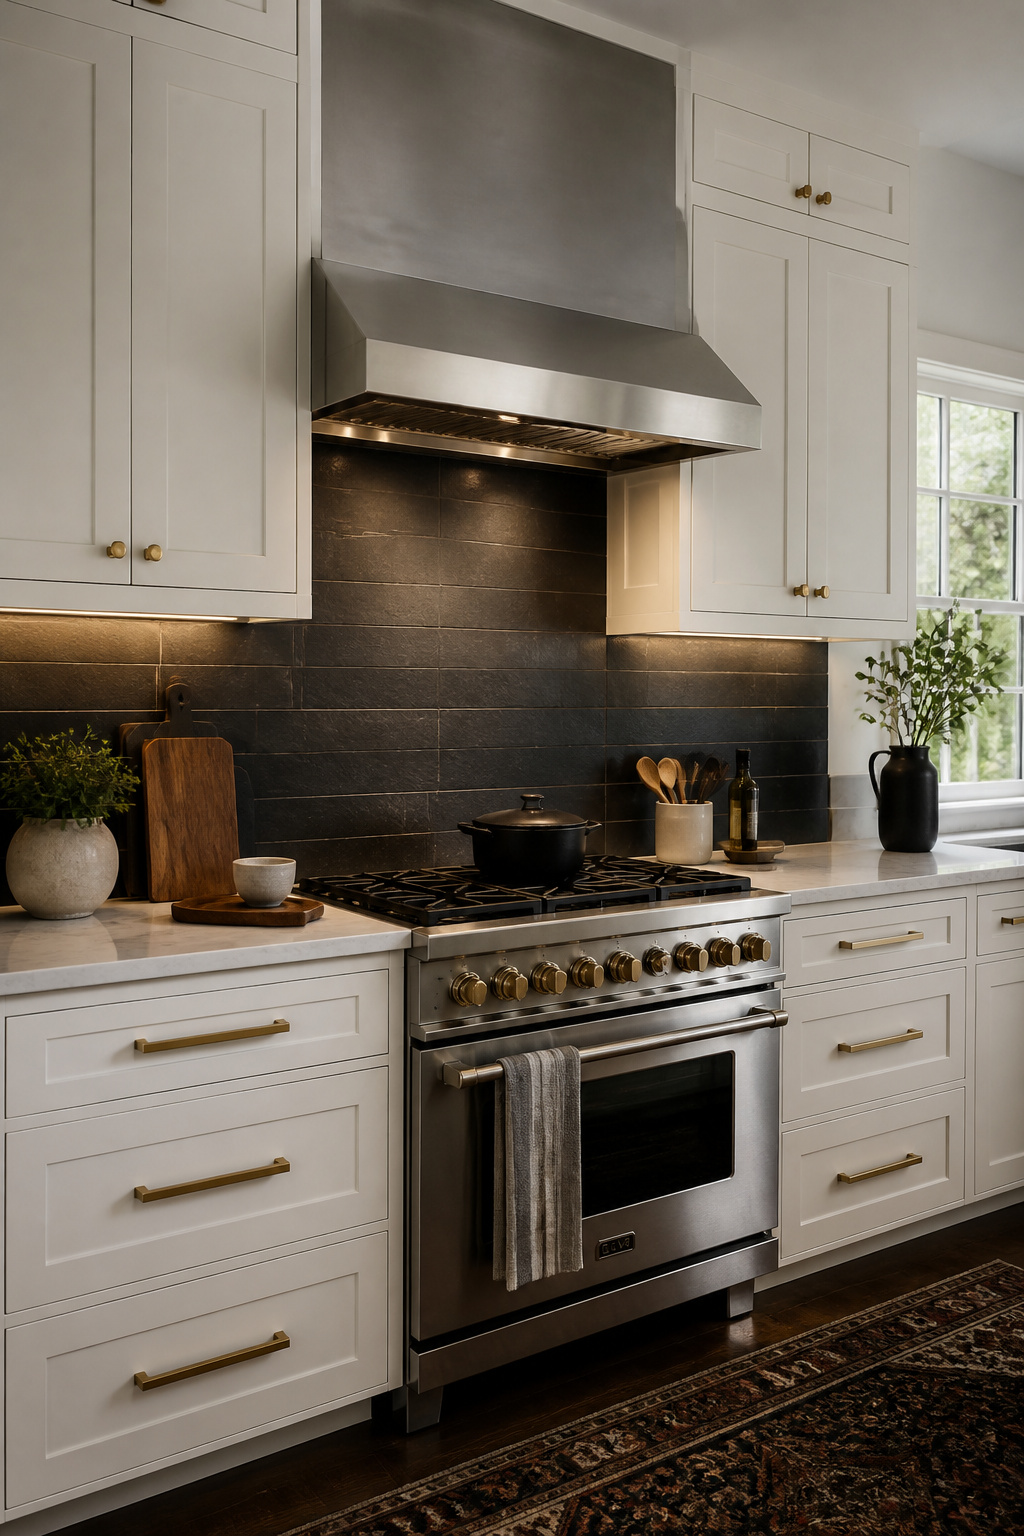
Honed basalt has a silky, matte surface quality — smooth to the touch but without the mirror reflectivity of polished stone. In dark grey to near-black tones, it creates a backsplash that reads as serious and deliberate. The chef’s kitchen aesthetic that has dominated high-end renovation design involves dark stone or tile backsplash, warm wood or white cabinetry, and brass or unlacquered metal hardware — basalt is the material specification that delivers that look in a format that holds up to daily cooking.
The lighting consideration is significant: dark stone absorbs light rather than reflecting it. A basalt backsplash in a kitchen without under-cabinet lighting will make the back wall recede and can make the kitchen feel smaller and darker than it is. Under-cabinet LED strips pointed upward onto the basalt surface create a dramatic effect that activates the stone rather than losing it to shadow. Same principle that makes basement wine cellars look rich rather than gloomy.
Sealing protocol: apply penetrating sealer (Miracle Sealants Porous Plus) 24 hours before grouting. Reapply every 3–5 years for interior kitchen use. Avoid acidic cleaners — vinegar-based products and lemon cleaners will etch the honed surface and create irreversible dull spots.
13. Terracotta Hexagons for Mediterranean Kitchen Tile Backsplash
Terracotta is fired earth — the oldest ceramic material in existence, made from clay-rich soil shaped into form and heated until it holds its shape. The warm orange-red tones are a consequence of iron oxide in the clay. The variations in tone from tile to tile result from inconsistent kiln temperatures in traditional production. Among terracotta kitchen backsplash ideas, that variation is the entire point — it’s what separates the authentic material from the porcelain look-alike.
The practical choice between authentic terracotta and porcelain terracotta-look tile comes down to maintenance commitment. Authentic terracotta absorbs at 6–10% — significantly more porous than ceramic or porcelain. It requires penetrating sealer before installation and after grouting, plus annual resealing in kitchen environments. Porcelain terracotta-look tile absorbs at under 0.5%, requires no sealing, and is visually indistinguishable from the authentic article at normal viewing distances.
If you go authentic, the sealing protocol is non-negotiable: penetrating sealer 24 hours before tiling, then again after grout cures (72 hours), then annual maintenance sealed when the water bead test shows absorption. Never use topical or acrylic film sealers — they trap moisture beneath the tile surface and cause spalling.
The contemporary terracotta palette: white or cream cabinets with terracotta hexagon backsplash and unlacquered brass hardware is the current Mediterranean kitchen formula. What makes terracotta look retro rather than current: shiny glazed tile, matching terracotta cabinet color to tile, or copper hardware. Choose matte unglazed tile, brass hardware, and keep the cabinets in a contrasting neutral.
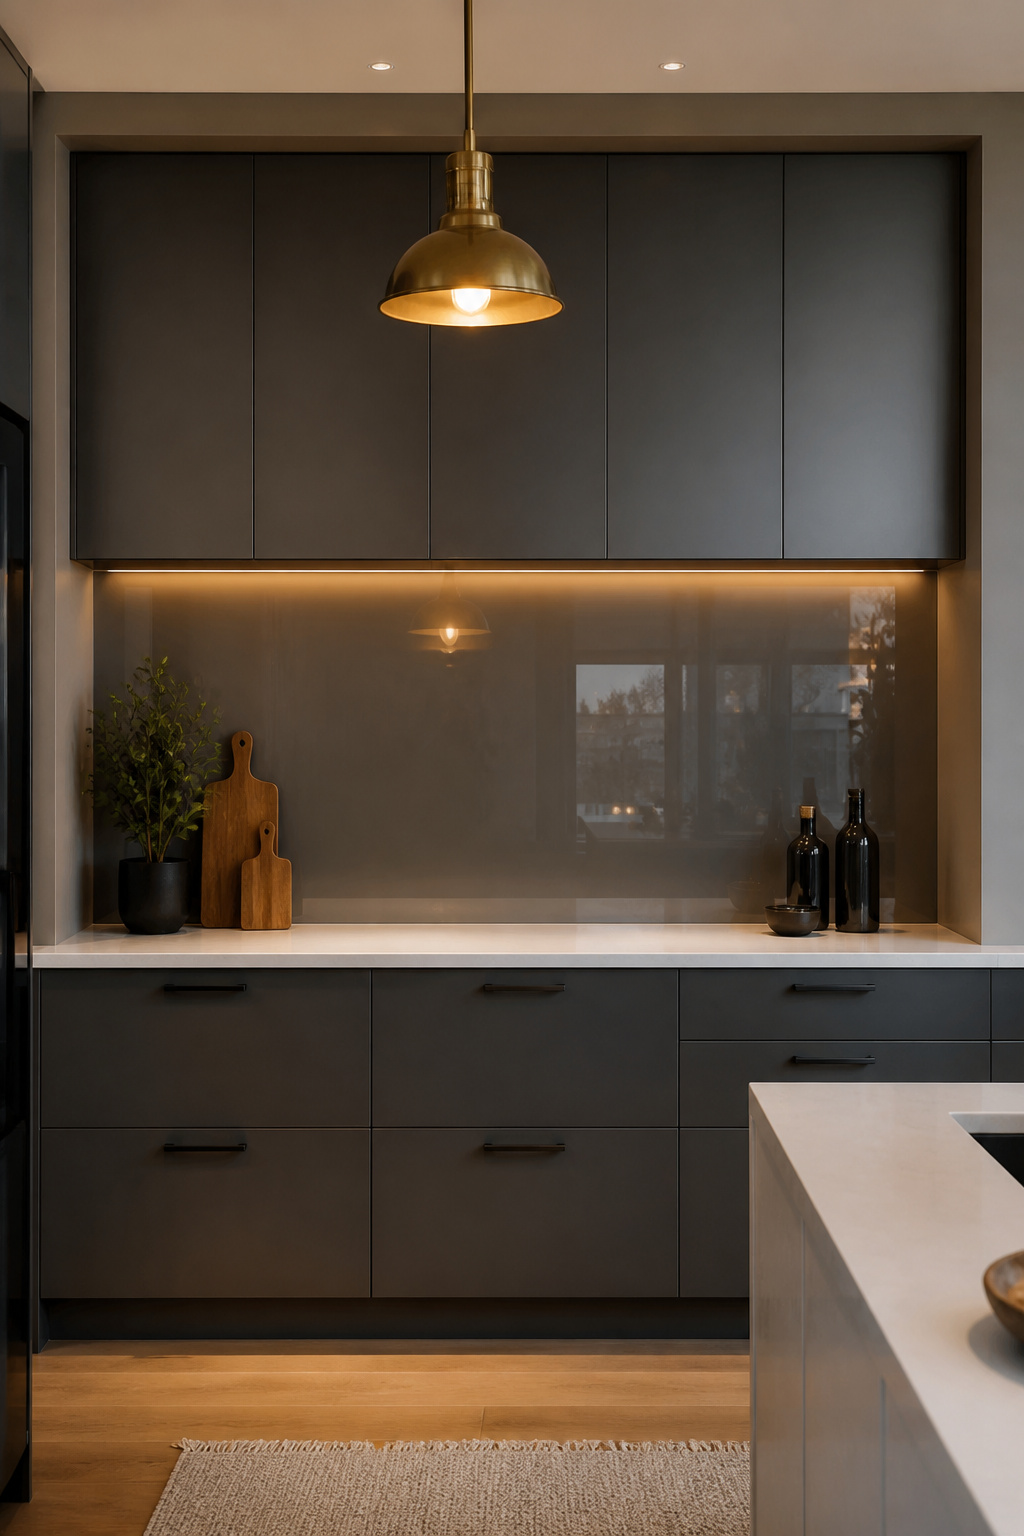
14. Raked Concrete Panels for a Modern Industrial Aesthetic
Concrete’s appeal as a backsplash material is about texture that no other surface quite matches — a slightly rough, mineral quality with micro-variation in the surface that reads as completely un-designed, in the best sense. Board-formed concrete picks up wood grain impressions from the formwork. Broom-finished concrete has parallel striations from the tool passes. Trowel-finished concrete has the subtle topography of a skilled hand working the material flat. For modern kitchen backsplash ideas in the industrial register, concrete is the authentic article.
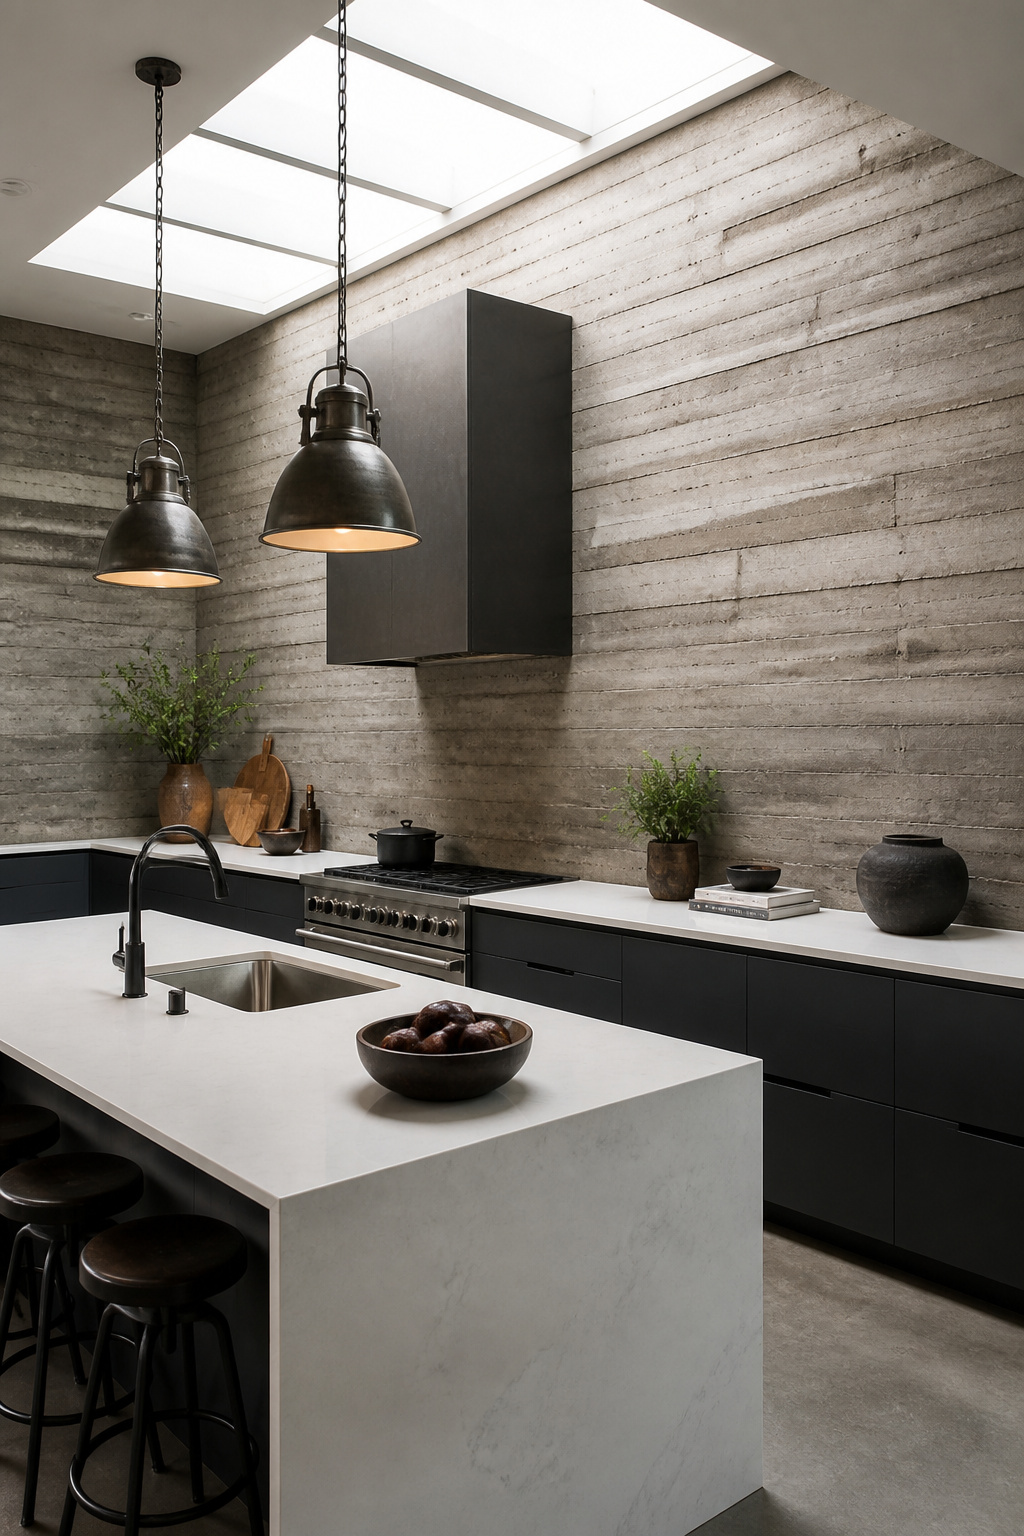
The honest comparison between real concrete and concrete-look porcelain: they’re different materials with different tradeoffs. Real concrete is porous, requires a penetrating acrylic or epoxy sealer, is prone to surface cracking near ranges, and demands a skilled applicator to deliver consistent results. GFRC (glass fiber reinforced concrete) panels are the premium fabricated alternative — made off-site under controlled conditions, more consistent than poured-in-place, and delivered as finished panels ready for adhesive installation. Large-format concrete-look porcelain tile (24×48 or 48×48) achieves 90% of the visual effect with a fraction of the complexity.
For real concrete in a kitchen: allow the full 28-day cure before applying sealer. Use food-safe penetrating acrylic sealer (check NSF certification) and reapply annually. The wall surface must be perfectly flat before application — concrete telegraphs every substrate irregularity.
DIY poured-in-place concrete is achievable at $25–50 in materials for a standard backsplash area. If you’ve done DIY tiling, the skill level is comparable — and this is genuinely one of the most satisfying projects on this list if you’re willing to learn.
15. Peel-and-Stick Panels as Budget-Friendly Backsplash Ideas
The category has earned a reputation it’s only partially deserved — early vinyl peel-and-stick tiles from the mid-2000s peeled, bubbled, and looked like what they were. Current premium products are a different material proposition. Aluminum composite peel-and-stick panels bring genuine heat resistance (metal conducts heat away from the adhesive rather than letting it accumulate), easy cleaning, and a surface that reads as intentional from normal viewing distance. Stickwoll and Aspect are the current market leaders in the aluminum category.
The material distinctions matter in a kitchen: vinyl is appropriate only for flanking walls away from the range — heat cycling from burners causes vinyl adhesives to fail within months behind a cooking surface. PVC (Smart Tiles Gel-O technology) is waterproof but similarly not heat-rated for direct range placement. Aluminum composite is the material to specify for any area within two feet of the range.
Wall preparation is where most peel-and-stick installations fail. The adhesive system requires a clean, smooth, dry, and grease-free surface. Painted drywall with any texture, or walls with light grease residue, will cause adhesion failure within weeks. Degrease with TSP substitute or denatured alcohol before installation. Prime with compatible oil-based primer on porous or problem surfaces. Install when wall temperature is between 60–80°F — cold walls prevent proper adhesive activation.
To make peel-and-stick look intentional: choose large-format panels (12×12 or larger) to minimize seam visibility; finish the exposed top edge with aluminum edge trim; seal panel joints with paintable silicone caulk. For the full range of budget-friendly kitchen backsplash ideas done right, the guide to backsplash makeover ideas on a budget covers the full range of accessible options.
16. Stacked Stone Veneer for an Organic, Textured Kitchen Wall
Stacked stone veneer brings the material language of an exterior feature wall — the rough, dimensional quality of fieldstone — into a kitchen interior. Each piece of natural quartzite, limestone, or slate ledger panel is sawn thin enough to apply to a standard wall surface while retaining the full three-dimensional texture of the stone. The result is a kitchen wall that reads as genuinely geological rather than applied.
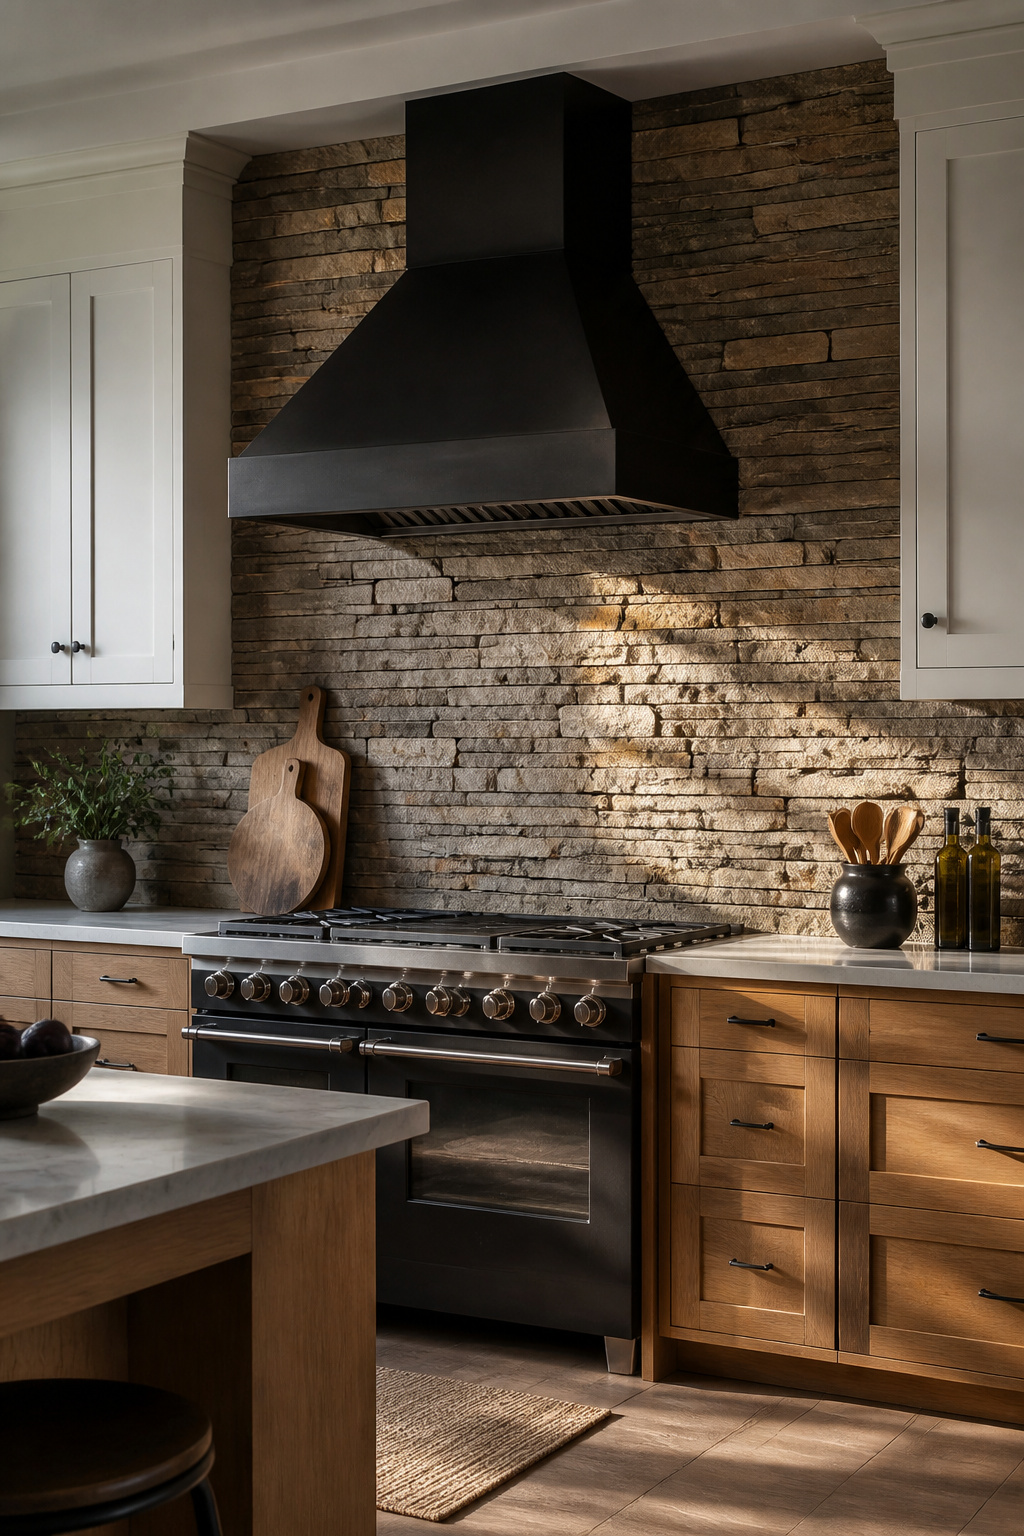
Natural stone veneer (quartzite, limestone, sandstone, or slate split or sawn into panels) gives each installation unique character — no two kitchens will have identical coloring or texture variation. Manufactured stone veneer is cast concrete colored with natural pigments — modern production has closed the visual gap considerably, and at 3+ feet of viewing distance the distinction is subtle. Manufactured veneer runs lighter (7–12 lbs/sq ft vs. 10–20 lbs/sq ft for natural) and substantially cheaper: $3–12/sq ft in material vs. $8–20/sq ft for natural stone panels.
Installation requires cement board substrate on the wall — standard drywall is not appropriate for stone veneer because moisture from grouting and cleaning will cause delamination. A half-inch cement board screwed to wall studs adds depth to the wall profile, which needs to be accounted for in outlet box extensions and cabinet clearance planning before you start.
One honest limitation of stacked stone in a kitchen: the crevices between ledger pieces accumulate grease and food particles that are genuinely difficult to clean. This material wants a strong range hood with high CFM ventilation above it. Without adequate ventilation, the textured surface in a cooking zone becomes a maintenance burden. Seal with Miracle 511 Impregnator after installation and clean with a soft brush and pH-neutral stone cleaner — not high-pressure water, which loosens mortar at the joints.
Choosing the Right Kitchen Backsplash for Your Remodel
Sixteen kitchen backsplash ideas is a lot to narrow down, and the right filter isn’t aesthetic — it’s behavioral. Think about how you actually cook, how often you clean the kitchen, and what your tolerance for maintenance looks like on a Wednesday night after dinner.
High-frequency cooking households should lean toward non-porous surfaces: porcelain tile, back-painted glass, or large-format porcelain marble-look. These surfaces wipe clean in seconds without sealing schedules or pH-specific cleaners. If you want natural stone or cement tile in an active kitchen, budget the maintenance into your decision: sealing every 6–12 months is not optional, and the right cleaner matters.
Budget is the other honest filter. Under $500 for a standard 25–30 square foot backsplash puts you in the peel-and-stick, painted shiplap, or limewash tier — all of which deliver genuinely good results when installed with care. The $500–$1,500 range covers professionally installed subway tile, cement tile as a DIY project, or glass tile. $1,500–$4,000 gets you zellige, marble tile, 3D porcelain, or natural stone veneer — the materials that distinguish a kitchen in a real estate context. Above $4,000, you’re in slab continuation, custom glass mosaic, or concrete panel territory — where the backsplash becomes the kitchen’s primary design story.
Pick the material you’ll still respect in five years. The best kitchen backsplash for your remodel is the one that fits the kitchen you actually have, not the one that photographs best on someone else’s.