A small bathroom is an honest room. Every fixture, every tile choice, every inch of wall either pulls its weight or becomes an obstacle — there’s no space to hedge. Good small bathroom design isn’t about spending more. Some of the biggest gains come from a $25 under-sink organizer or a can of paint chosen for its light reflectance value. Others require a contractor and a permit but change how a room functions for decades.
This list covers both ends. You’ll find structural moves — floating vanities, pocket doors, wet room conversions — alongside organizational fixes you can complete in an afternoon. I’ve ordered them by the type of problem they solve, not by cost. Work through these starting from whatever is causing you the most friction, and you’ll end with a bathroom that works harder than its square footage suggests.
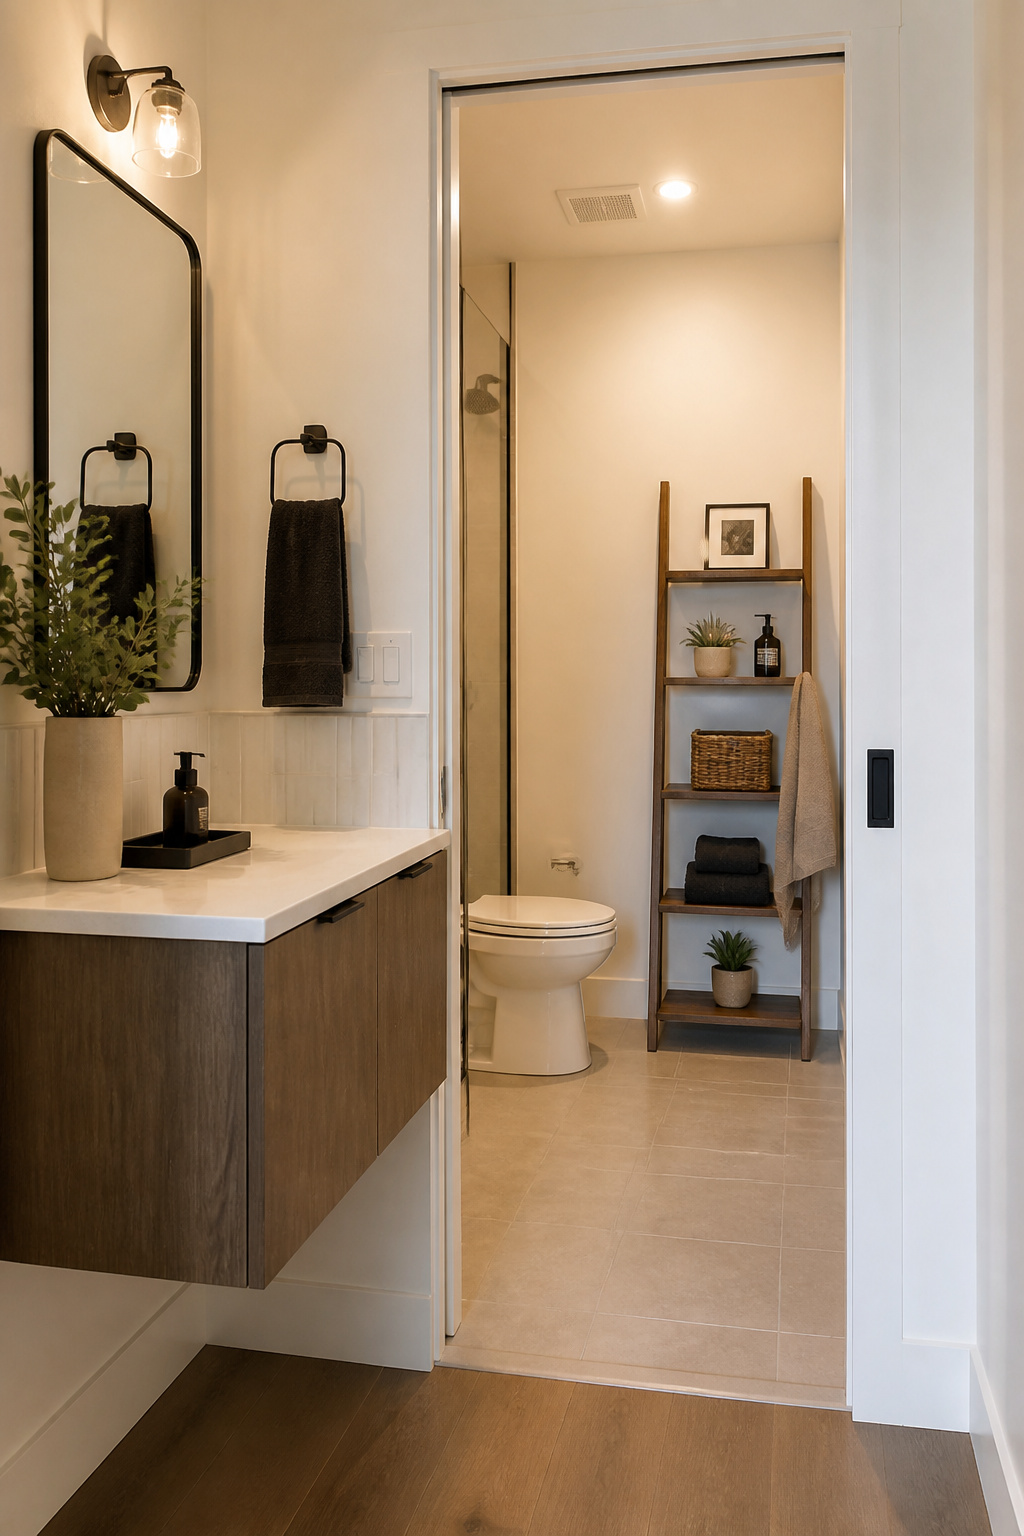
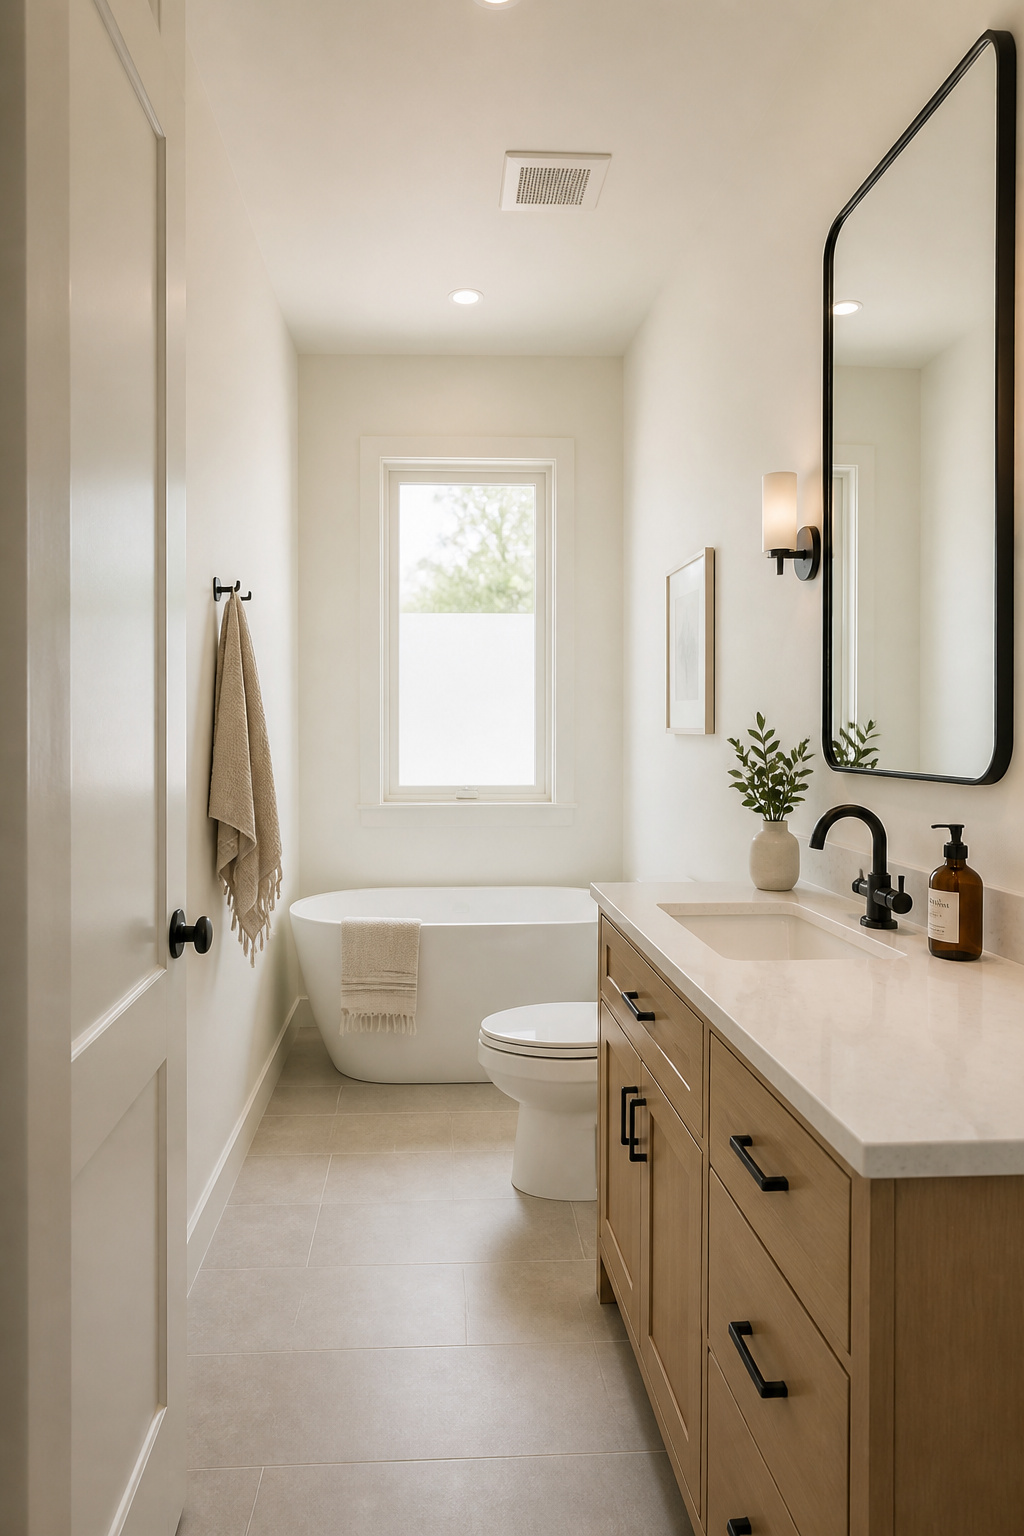
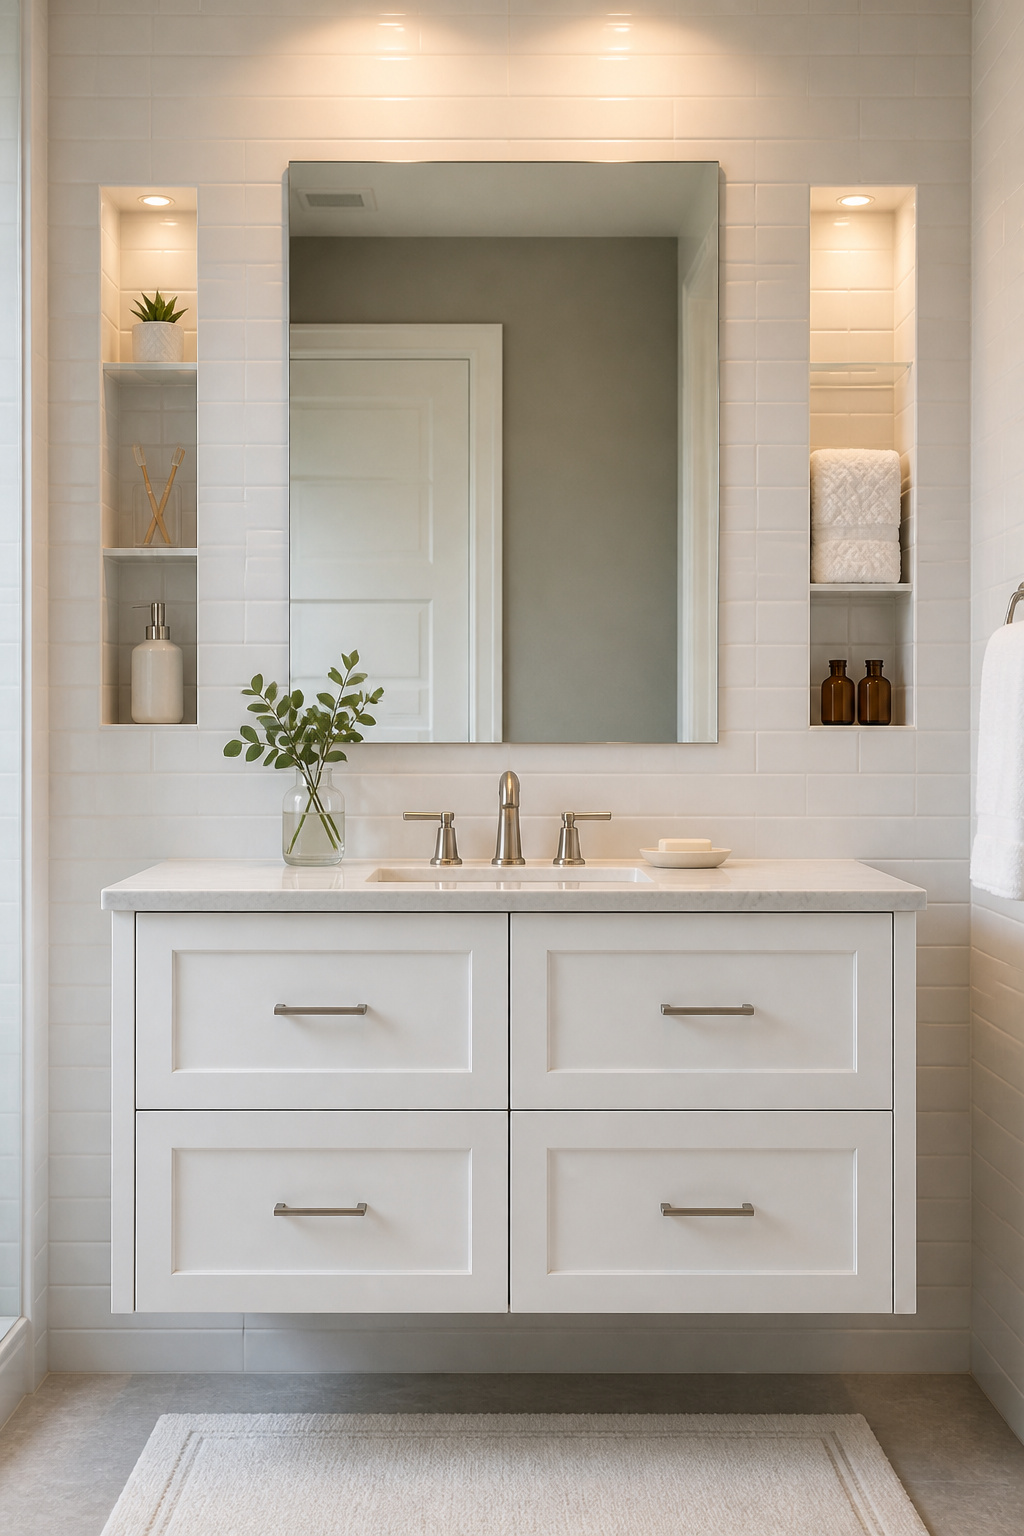
1. Floating Vanity: The Small Bathroom Design Upgrade That Creates Visual Space
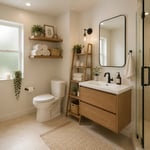
The single most transformative structural change you can make in small bathroom design is mounting the vanity to the wall. A floating vanity typically installs between 28 and 36 inches from the finished floor — most designers land at 34 to 36 inches for adult-height comfort. Standard depth runs 18 to 21 inches, but for bathrooms with tight clearance to the toilet or door swing, a 16 to 18-inch cabinet is widely available and the smarter call.
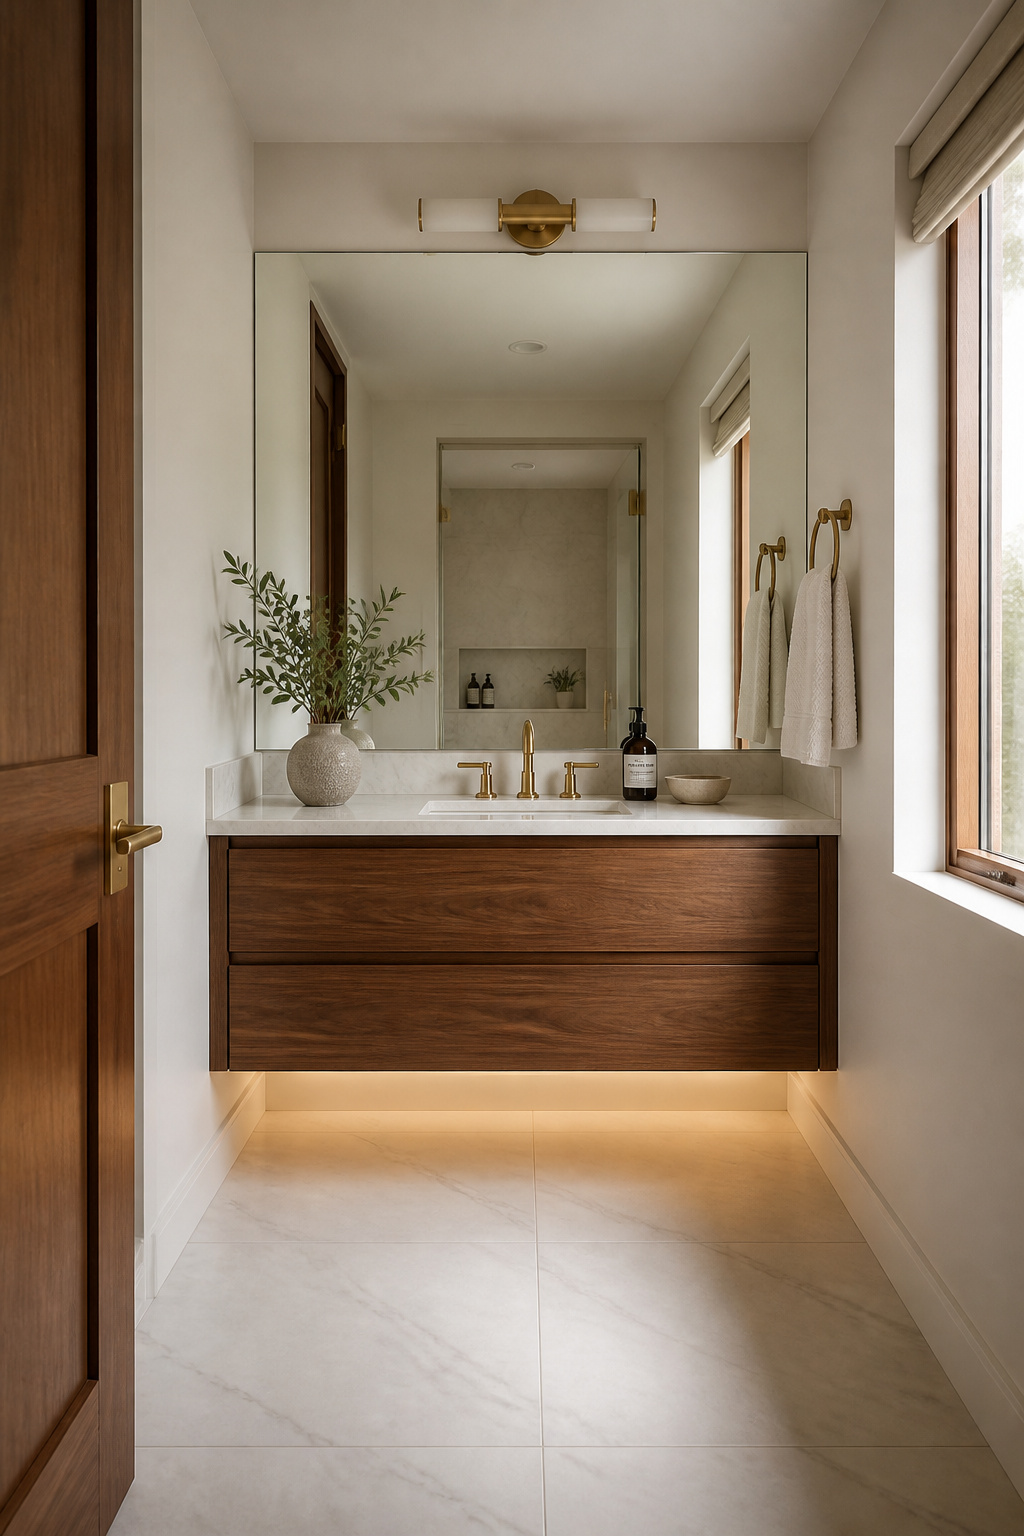
The reason this works spatially is straightforward: exposed floor below the cabinet creates visual continuity. The eye reads the floor as uninterrupted from the door to the far wall, which makes the room register as deeper than it is. Add an LED strip light underneath and the effect intensifies — the glow keeps the floor plane visible even in low ambient light.
The installation detail most homeowners miss: a floating vanity requires solid blocking between studs before the drywall goes on. Mounting only into studs causes progressive sag under the combined weight of countertop, sink, and stored items. If you’re retrofitting an existing wall, the blocking is a straightforward carpentry job but it does mean opening the drywall. Budget for it.
For cabinet storage solutions, U-shaped under-sink trays route around the drain pipe, and door-mounted organizers recover much of what a floor-level base would have provided. The net result is usually more accessible storage than before, because everything sits at counter height rather than buried at floor level. (This is the upgrade I’d prioritize first — it consistently surprises people how much it changes the feel of a room.)
2. Built-In Wall Niches That Replace Shower Caddies Entirely
Hanging caddies create clutter in two directions: they interrupt the tile pattern and accumulate soap scum in the frame tracks. A built-in niche solves both problems. It sits flush with the tile plane, adds zero projection into the shower, and looks deliberately designed rather than improvised. For small bathroom design purposes, this is the detail that makes a compact shower feel like a spa bathroom rather than a utility space.
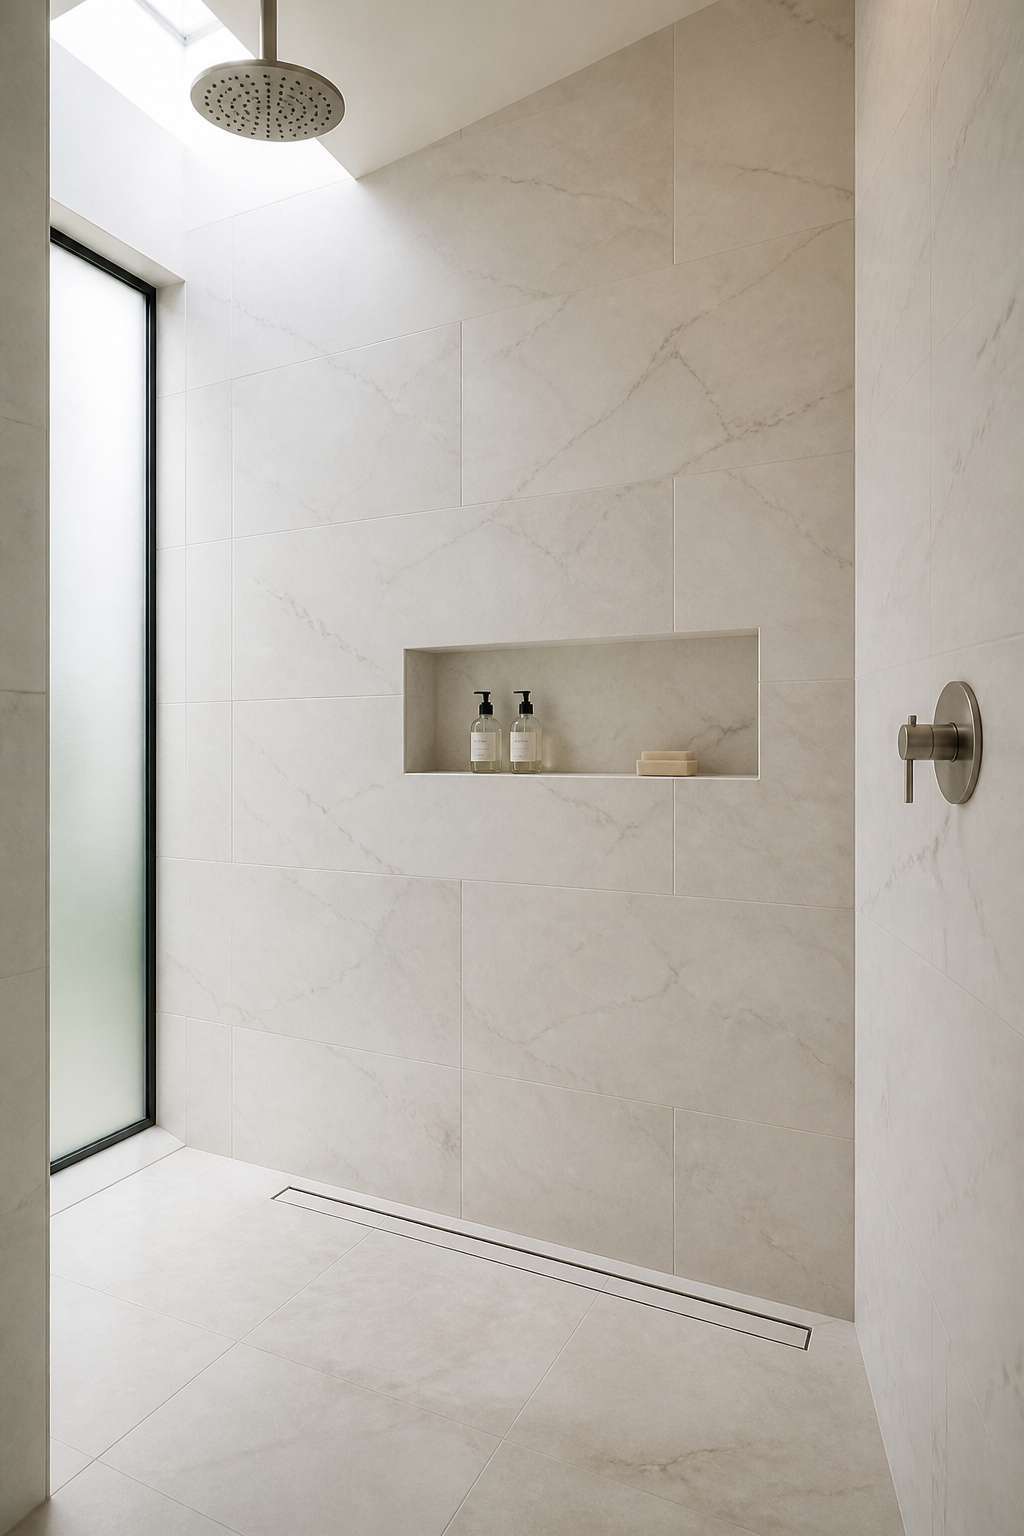
Standard stud framing sits 16 inches on center, which limits niche width. In a 2×4 wall, you have 3.5 inches of maximum depth — enough for shampoo bottles standing upright. The optimal height for daily use is 48 to 60 inches from the shower floor. When framing the rough opening, size it 3/4 to 1 inch larger than your desired finished opening on all sides to allow for tile thickness and adhesive.
Waterproofing is where niches fail when done carelessly. Two reliable systems: cement board combined with a separate liquid-applied membrane, or foam panel systems like Wedi or Schluter Kerdi-Board, which are waterproof at the core without a separate membrane layer. Either works — the non-negotiable is that inside corners receive fabric tape embedded in two-coat membrane. Water finds corners.
For the cleanest look, continue the same tile from the shower wall directly into the niche interior at consistent grout line spacing. A contrasting mosaic inside is the other common approach — it reads as intentional, and it’s manageable as a DIY detail once the structural work is done.
3. Frameless Glass Shower Enclosure to Open Up Every Sightline
A framed shower enclosure draws hard borders in every direction. The metal framework creates a visual “box within a room” that immediately makes both spaces feel smaller. Remove the frame and the shower integrates with the bathroom — the sightline runs from wall to wall without interruption, and the tile, the floor, the far wall all become visible at once.
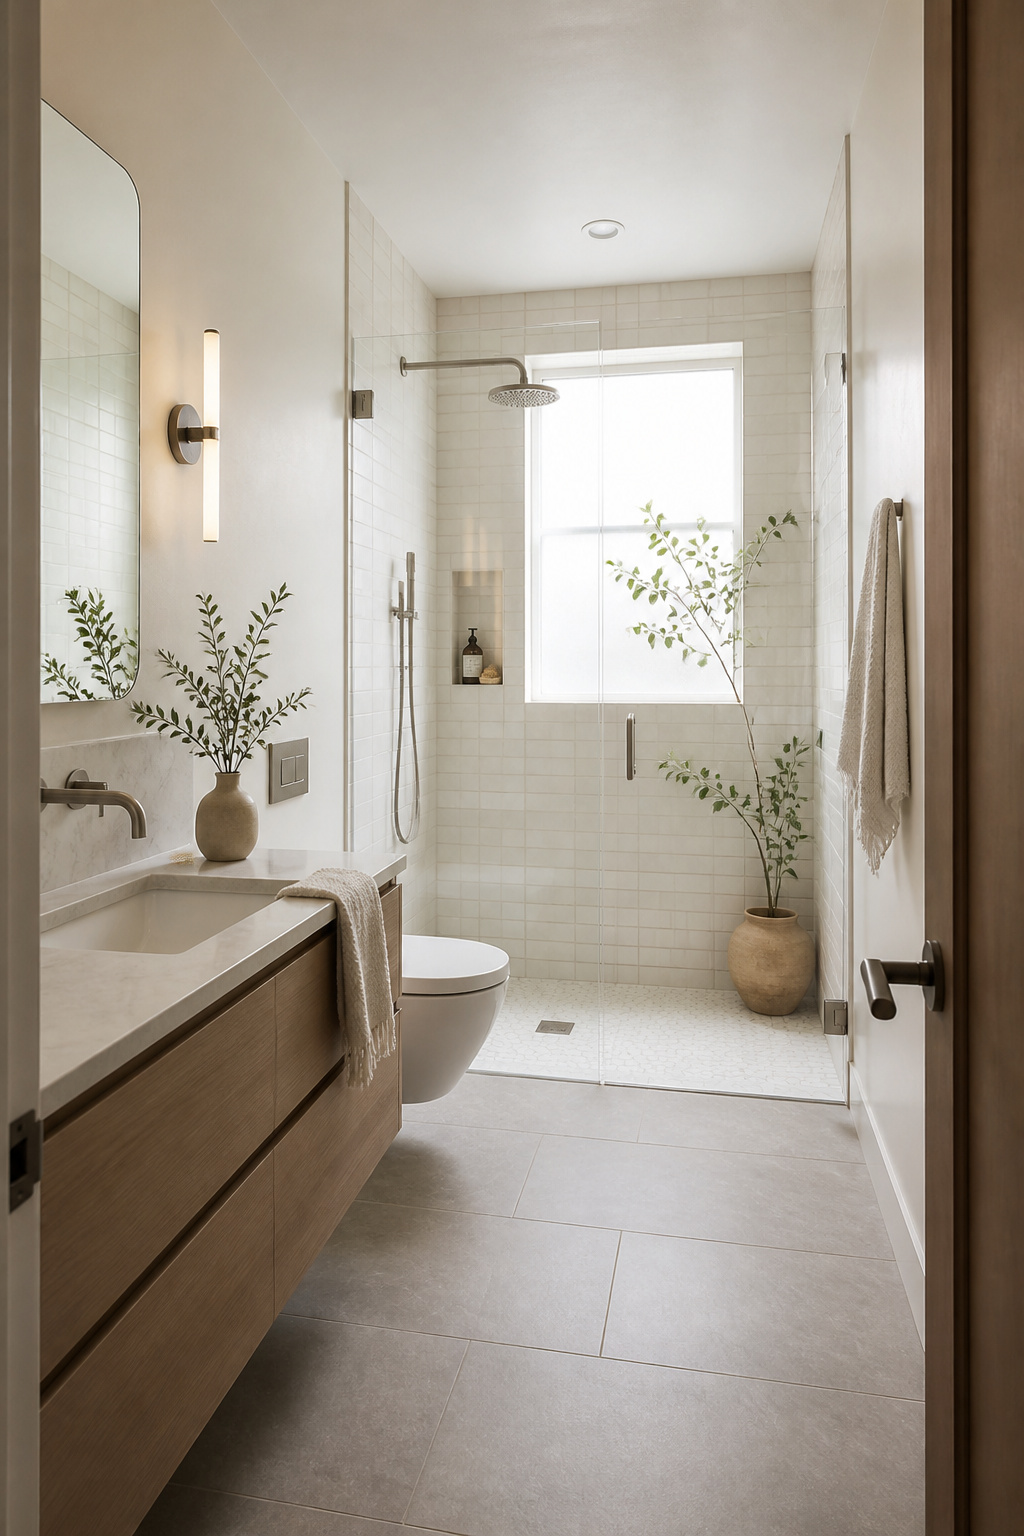
Industry standard for most residential installations is 3/8-inch (10mm) tempered glass. This thickness handles standard door widths up to about 36 inches, has a solid feel when opening and closing, and is what most frameless hardware systems are designed around. For larger doors or premium builds, 1/2-inch glass adds 20 to 30% to glass cost — typically $150 to $300 over a standard job — and requires heavier hardware. Before finalizing hardware finishes, reviewing minimalist bathroom design principles will help keep the visual profile as lean as possible.
Maintenance is the most common objection, and it’s overblown with the right routine. A 30-second daily squeegee after the last shower removes 90% of mineral deposits before they bond to the glass. A hydrophobic coating applied at installation — Diamon-Fusion and EnduroShield are the two most-specified products — reduces deep-cleaning frequency substantially. Properly maintained frameless glass holds up for 20 to 30 years.
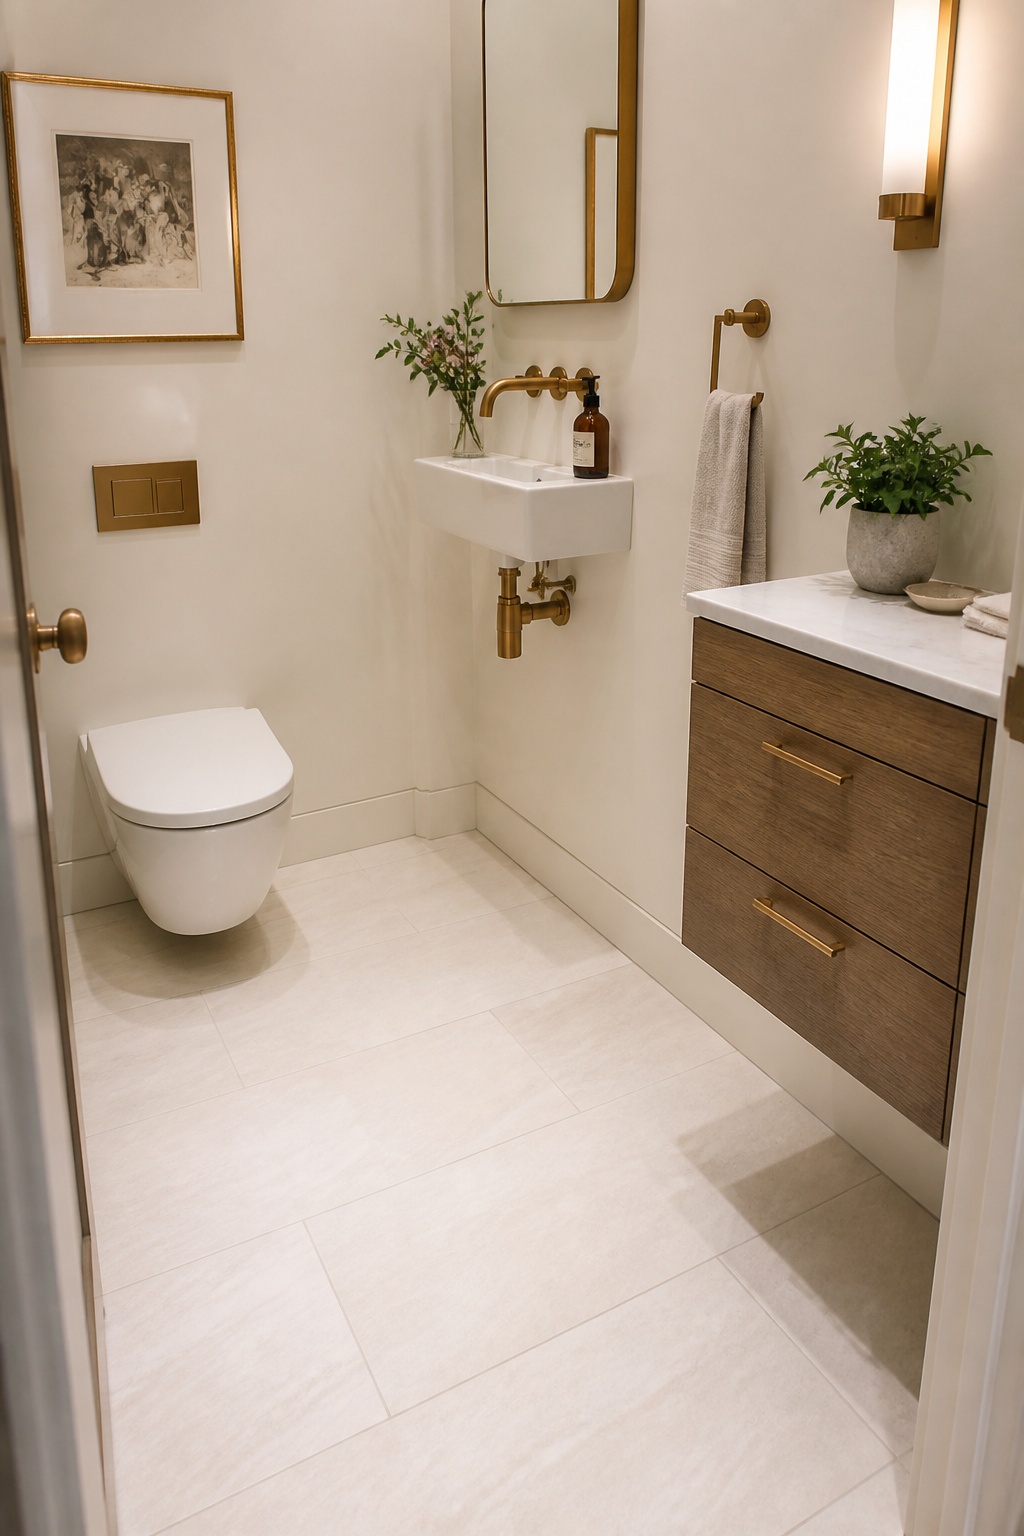
4. Corner Sink Installation That Reclaims the Most Overlooked Real Estate
A standard vanity along a wall in a small square bathroom creates three problems at once: it projects into the traffic path, narrows the walkable space, and often blocks access to the toilet or the shower. Moving the sink to the corner resolves all three. Both remaining walls open up — available for storage, for door clearance, for simply standing without feeling squeezed. It’s a compact bathroom design move that costs roughly the same as a standard vanity replacement but delivers far more spatial return.
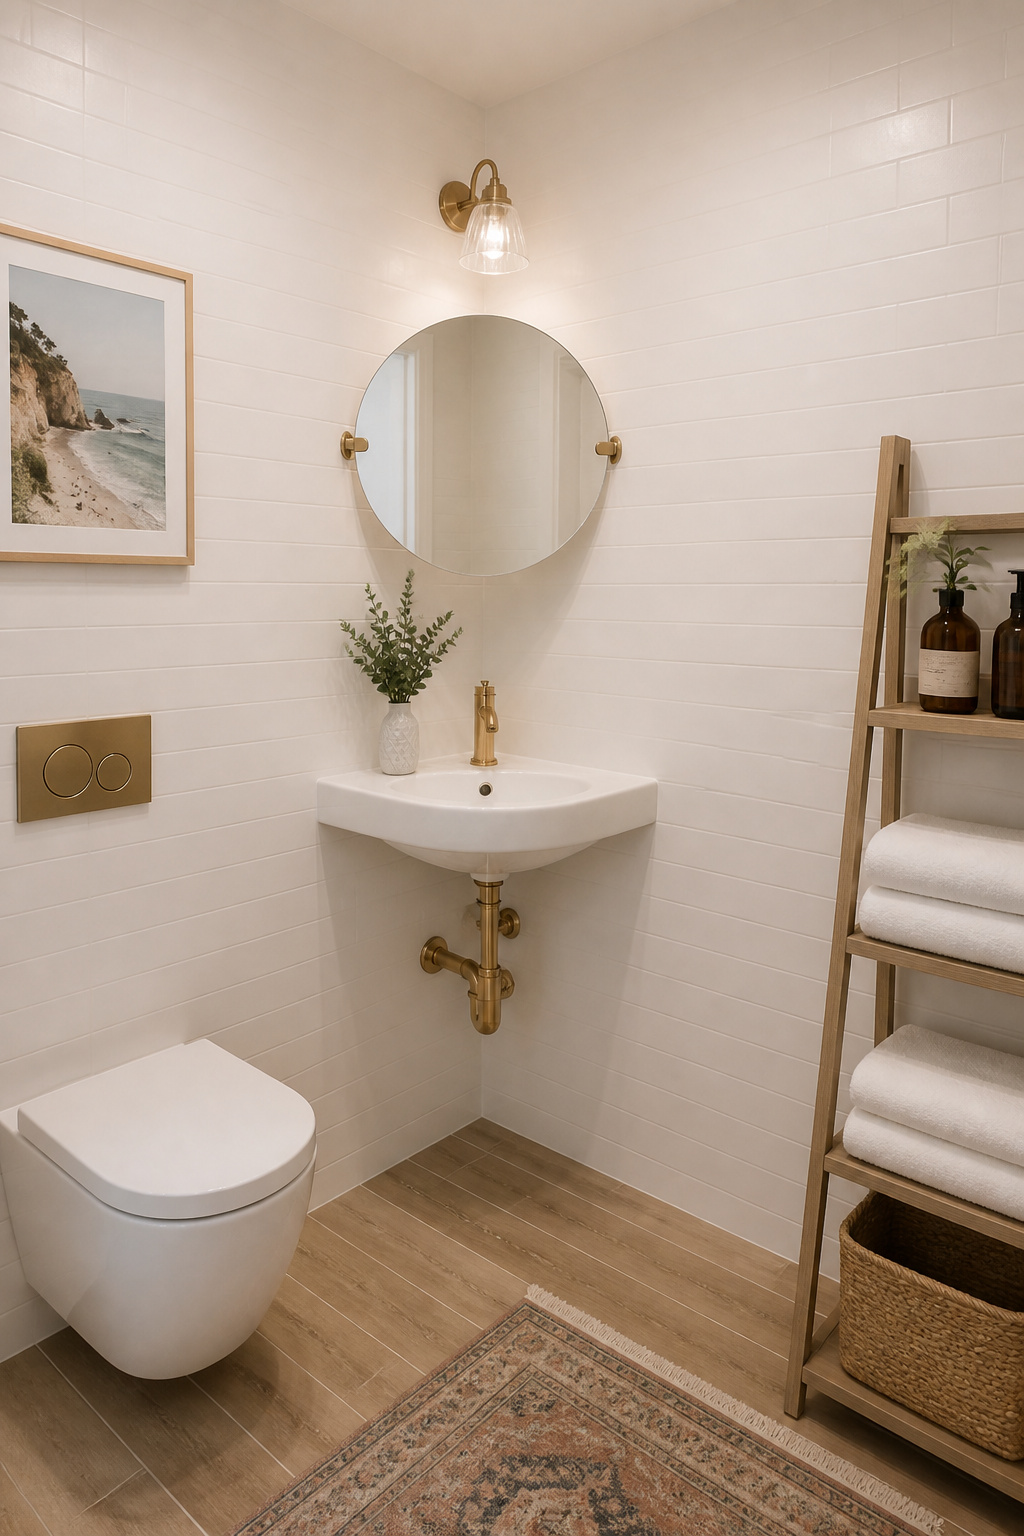
Corner sinks typically measure 16 to 20 inches on the diagonal — substantially smaller than the 18 to 22-inch projection of a standard front-mounted basin. Two installation options: pedestal or wall-mount. A pedestal corner sink is simpler to install, but it occupies the corner floor area and limits under-sink storage. A wall-mounted corner sink requires blocking into both adjacent walls, keeps the floor entirely clear, and allows for a small open shelf below if clearance permits.
The plumbing detail that catches homeowners: the drain rough-in must align to the corner location, and joist orientation can make this either straightforward or complicated depending on which corner you’re targeting. Confirm rough-in feasibility with a plumber before committing to a product. If exposed supply and drain lines are unavoidable, lean into it — a bottle-trap in brushed brass becomes a design element rather than an eyesore. American Standard and Kohler both make compact wall-mount options in the 17 to 19-inch range well-suited to tight corner installations.
5. Double-Mirror Strategy for a Compact Bathroom Design That Feels Twice as Wide
The math is simple: a mirror spanning the full vanity wall reflects the entire opposite wall back at you. The room appears twice as wide because you’re simultaneously seeing two copies of it. Add a second mirror on the opposite wall and you create indefinite reflection depth — the room appears to extend in both directions. This effect doesn’t wear off once you know how it works. The spatial perception is persistent, and it requires no permits.
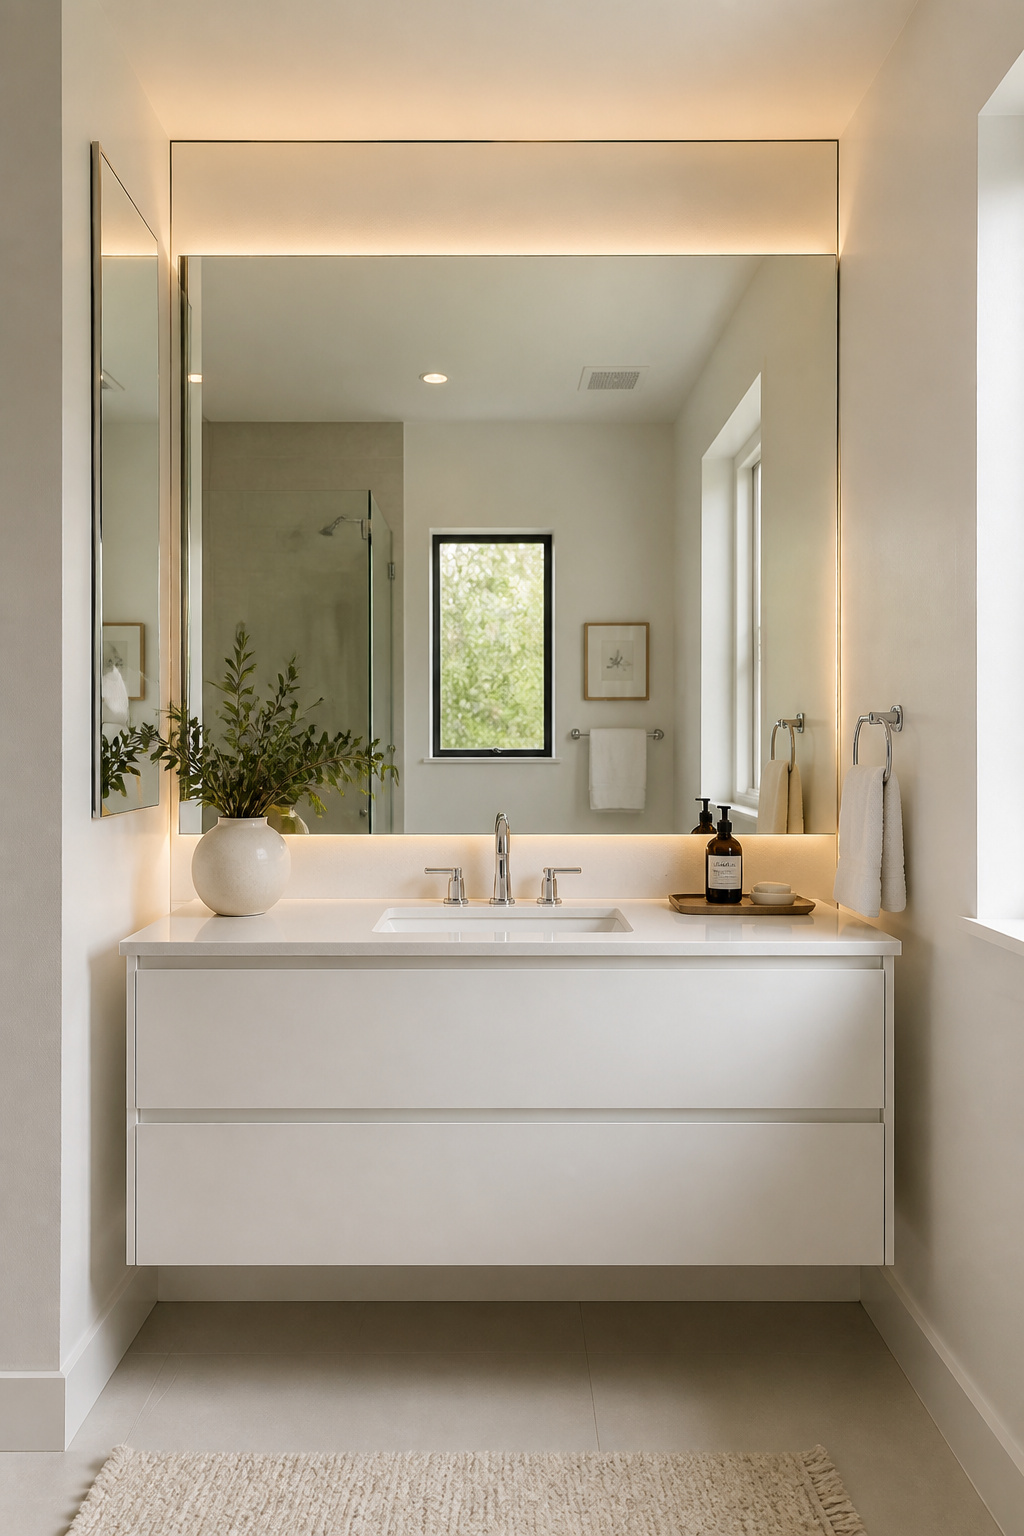
For maximum impact, the primary mirror should match the vanity width exactly or be slightly narrower — never wider, or it reads as oversized. Starting height at the backsplash and running as high as practical (typically to the ceiling or to a light fixture) maximizes the reflective surface. For bathroom lighting above the mirror, a lighted mirror with integrated LEDs at CRI 90 or above eliminates the need for a separate light bar, which reduces visual clutter and frees wall space.
A recessed medicine cabinet adds essential storage but limits mirror width to the cabinet face. The best of both: a recessed cabinet centered over the sink, flanked by flush-mounted flat mirror panels on each side. This gives you storage depth without sacrificing reflective area. If mounting mirror panels without hitting studs, J-channel mirror clips distribute the weight safely across the drywall surface — no adhesive required, no damage to the glass edge.
6. Vertical Storage Tower or Ladder Shelf Beside the Toilet
Standard toilets measure 28 to 30 inches wide. In most bathrooms, the layout allocates roughly 36 inches from the toilet centerline to the nearest wall, leaving 6 to 12 inches of clear wall space beside the tank. That strip looks like dead space. With a 12-inch-deep storage tower, it isn’t. For small bathroom design, vertical storage is often the highest-density gain available without touching a single wall.
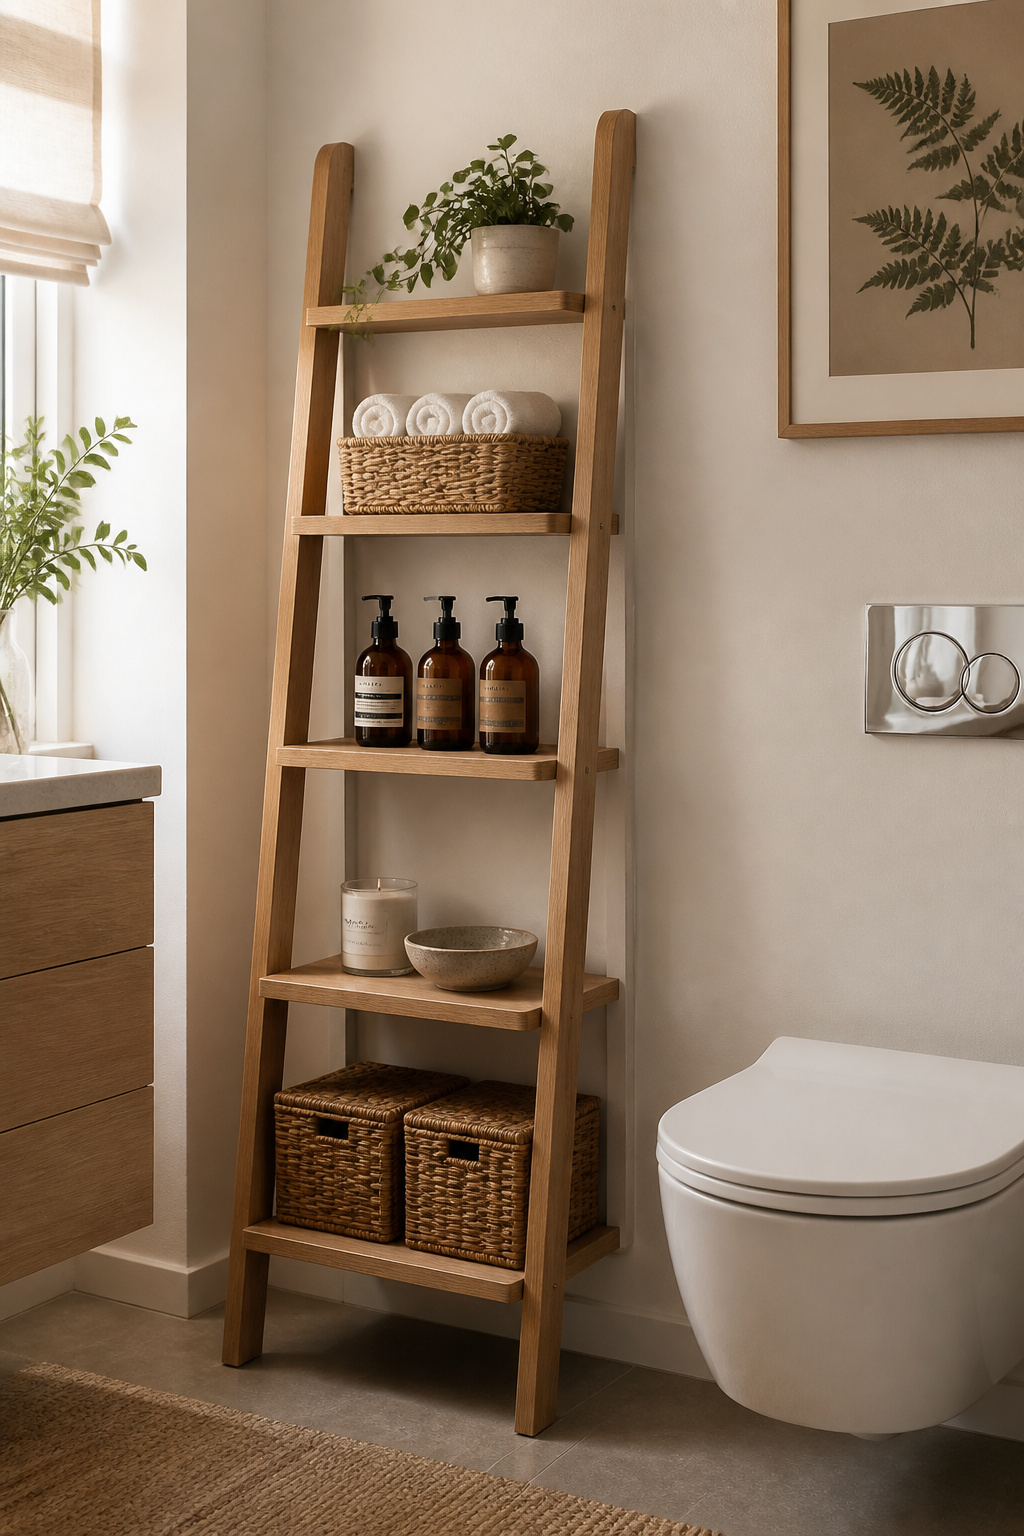
Freestanding ladder shelves in this range cost $40 to $120 and require no drilling — though they should receive a single top anchor to the wall for safety, especially in a bathroom used by children or elderly adults. Built-in towers look more intentional; IKEA’s HEMNES and GODMORGON lines offer configurations that fit this profile and accept stud mounting. Custom millwork is the premium version — it fills the exact dimensions and can match vanity finishes.
Material selection matters more in a bathroom than anywhere else. Solid wood with a quality sealer, MDF with laminate facing, or PVC-core shelving all handle moisture well. Bare particle board and unfinished MDF absorb humidity, swell at the edges, and degrade within two years. For bathroom organization ideas that use open shelving, the usual fail point isn’t the shelf itself — it’s the visual discipline required to keep it from becoming a dumping ground.
Group items by type in containers rather than storing individually: a basket for toilet paper, a tray for candles, a glass jar for cotton balls. Cap open shelves at three to five items each, and reserve the bottom shelf for closed baskets.
7. Under-Sink Cabinet Organizers That Double Your Storage in an Hour
Open the door under most bathroom vanities and you’ll find one flat shelf with a large chunk of usable space occupied by the P-trap curve and supply lines. A standard 30-inch vanity loses 10 to 14 inches of central shelf width to plumbing — the space is split into two zones that nobody uses efficiently without the right organizers.
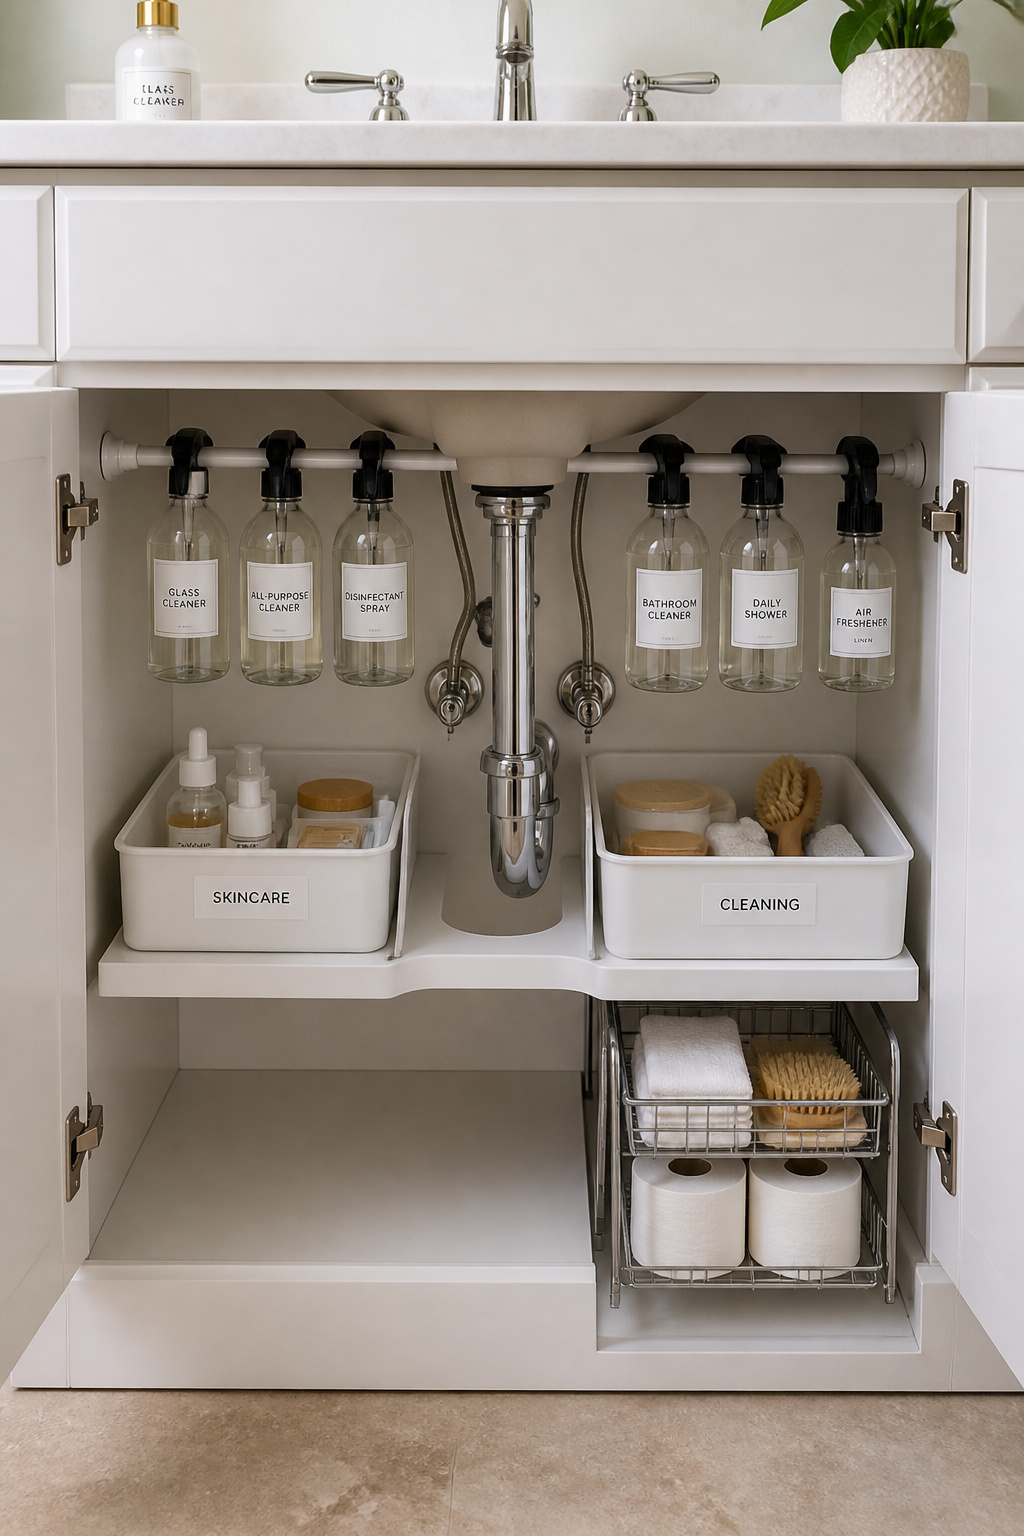
Before buying anything, measure the P-trap depth from the cabinet floor — typically 8 to 14 inches — because this determines which organizer profiles fit. U-shaped under-sink organizers from brands like mDesign and Simple Houseware ($20 to $35) route around the drain pipe and create a two-tier shelf on both sides simultaneously. They install in five minutes and immediately double the accessible storage. The bathroom storage ideas for small spaces that deliver the best return on time are almost always in this category.
For pull-out access, Rev-A-Shelf makes slide-out organizers ($65 to $120) that mount to the cabinet floor and extend forward on runners — everything at the back becomes front-accessible. One hardware trick that costs nothing: tension a rod across the interior back wall at about 8 inches from the cabinet ceiling, then hang spray bottles from their trigger loops. This keeps bottles off the floor entirely, freeing the lower area for bins and baskets. If the vanity has no drawers at all, an IKEA ALEX drawer unit beside the drain area gives you genuine pull-out drawer storage for about $130 without any cabinetry work.
8. Large-Format Floor Tiles That Make the Room Look Wider Without Renovating Walls
Count the grout lines in a small bathroom tiled with 6×6-inch square tile. In a 5×7 space, you’re looking at roughly 70 lines crossing the floor — a grid that constantly tells the eye the room is subdivided and small. Swap that for 12×24-inch format and the same floor has around 10 lines. The eye travels uninterrupted, and the room reads larger without a single wall being moved.
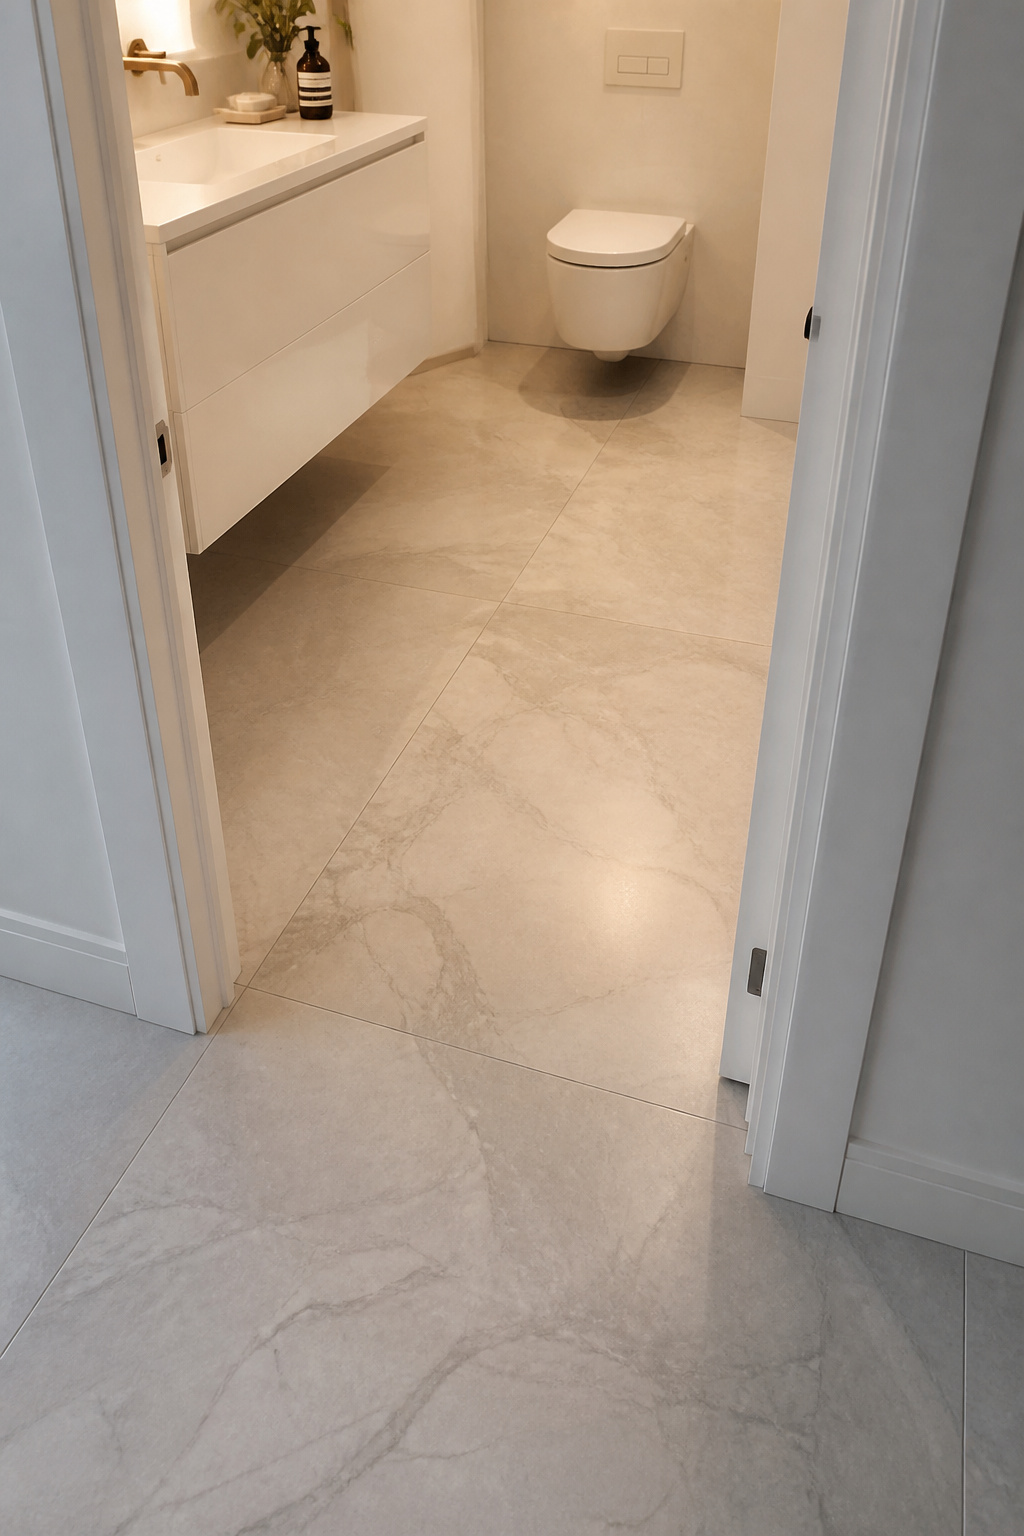
The 12×24 format is the practical sweet spot for bathrooms under 50 square feet. It produces the space-expanding effect without the awkward narrow border cuts that become unavoidable with 24×24 tile in very tight rooms. For an additional gain, lay 12×24 tiles on a 45-degree diagonal — the angled orientation makes the room read wider because the geometry doesn’t align with the room’s own walls. The trade-off is roughly 15% more labor due to additional cuts. For luxury bathroom flooring options, polished-finish large-format porcelain adds light reflection to the spatial effect — though matte finish is safer underfoot when wet.
Grout color determines whether the tile achieves the intended effect. Matching grout as closely as possible to the tile face color makes the floor read as nearly continuous — the spatial illusion holds. High-contrast grout emphasizes the tile pattern and works directly against what you’re trying to achieve. Also, large-format tile demands a flatter substrate than small tile: the tolerance for 600×600mm tile is 3mm variation over a 2-meter run. Most bathroom floors need self-leveling compound before installation. Budget for it — it’s not optional if you want the tile to lay correctly.
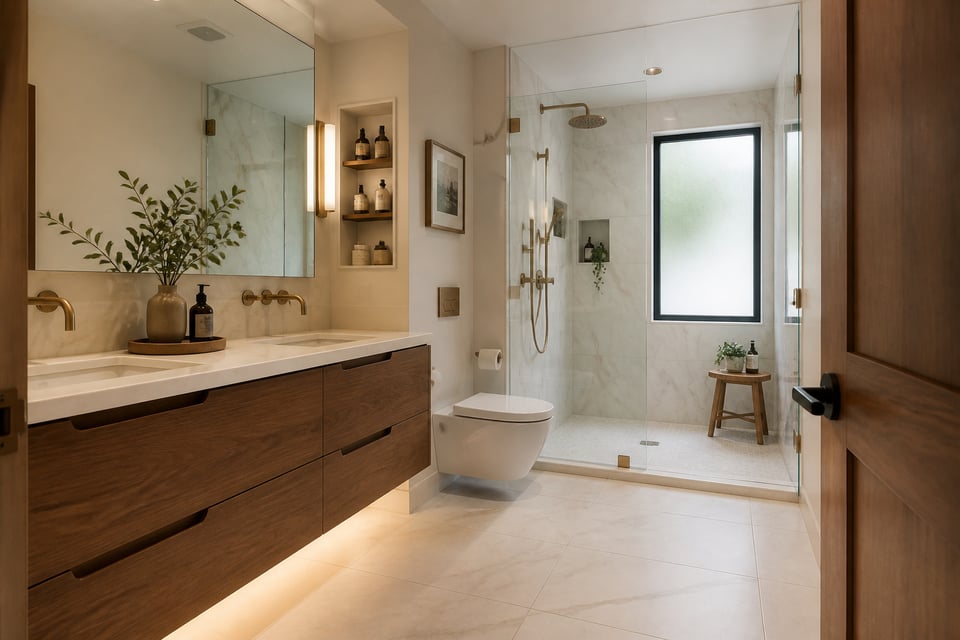
9. Wall-Mounted Toilet for the Cleanest Small Bathroom Design Win
Every inch of floor projection matters in a small bathroom. A standard floor-mounted toilet extends 28 to 30 inches from the finished wall. The TOTO Aquia wall-hung bowl projects 21.1 inches. That 7 to 9-inch recovery is significant in a bathroom under 40 square feet — it’s the difference between a layout that works and one that requires sideways movement past the toilet to reach the shower.
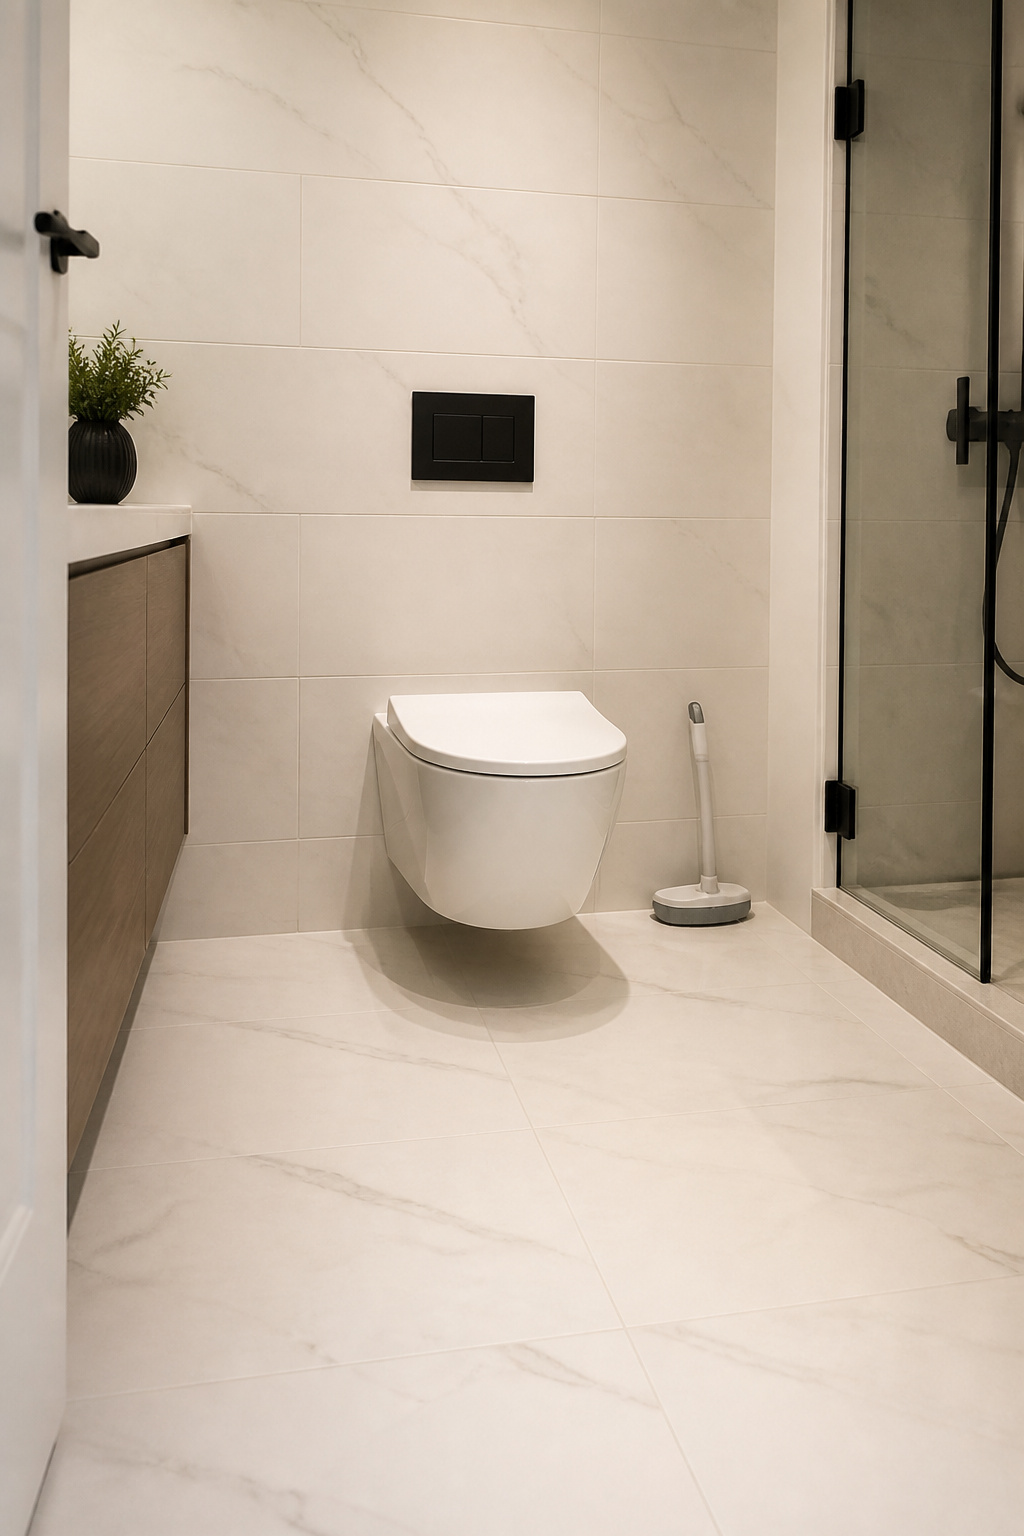
Installation requires a Geberit carrier system — Sigma and Duofix are the primary residential lines — mounted inside the wall cavity to handle structural support for the bowl. The carrier fits both 2×4 and 2×6 construction. Once drywalled and tiled, the only visible elements are the bowl and the flush actuator plate, available in brushed nickel, chrome, matte white, and other finishes. Installed cost typically runs $1,200 to $2,500 — 40 to 80% more than a comparable floor-mount installation. For small bathroom inspiration ideas that prioritize spatial gain, this investment consistently ranks among the highest-impact changes available.
The maintenance concern — “what happens when the carrier needs service?” — has a clear answer: the actuator plate provides tool-free access to the fill and flush valves without opening the wall. Geberit guarantees parts availability for 50 years from manufacture. Also, and this is the practical benefit that surprises most homeowners: mopping the entire floor becomes simple. No base to navigate around, no crevice at the floor junction to scrub. Bowl height is adjustable between 15 and 19 inches at installation.
10. Pocket Door or Barn Door That Gives Back Square Footage for Free
A 32-inch hinged bathroom door swings through a 32×32-inch arc when fully open. That’s nearly 8 square feet of floor that cannot contain anything — no storage, no furniture, no comfortable standing space if someone else needs to get past. In a 5×8 bathroom, that swing arc is close to 20% of the total floor area. A pocket door or barn door eliminates it entirely. Good small bathroom design doesn’t always require renovation — sometimes it just requires moving the door.
Pocket doors require wall cavity space equal to twice the door width alongside the rough opening — a 32-inch pocket door needs 64 inches of clear wall beside the doorway. Barn doors need the same clearance but don’t require demolition — the door slides on a surface-mounted rail, a significantly simpler retrofit. Barn door hardware and door typically run $300 to $800 depending on material and finish.
A pocket door retrofit in a non-load-bearing wall costs $1,200 to $2,200 in contractor labor, drywall, and finish work. Johnson Hardware and Hafele both make reliable residential pocket door systems. Soft-close hardware is a $90 to $200 upgrade worth specifying at installation rather than retrofitting later.
Load-bearing walls complicate things considerably. If the doorway is in a load-bearing wall, a structural assessment ($300 to $800) is required before any framing work begins, and total project cost rises to $2,500 to $4,500. If you’re unsure whether your wall is load-bearing, a general contractor can confirm it before you commit.
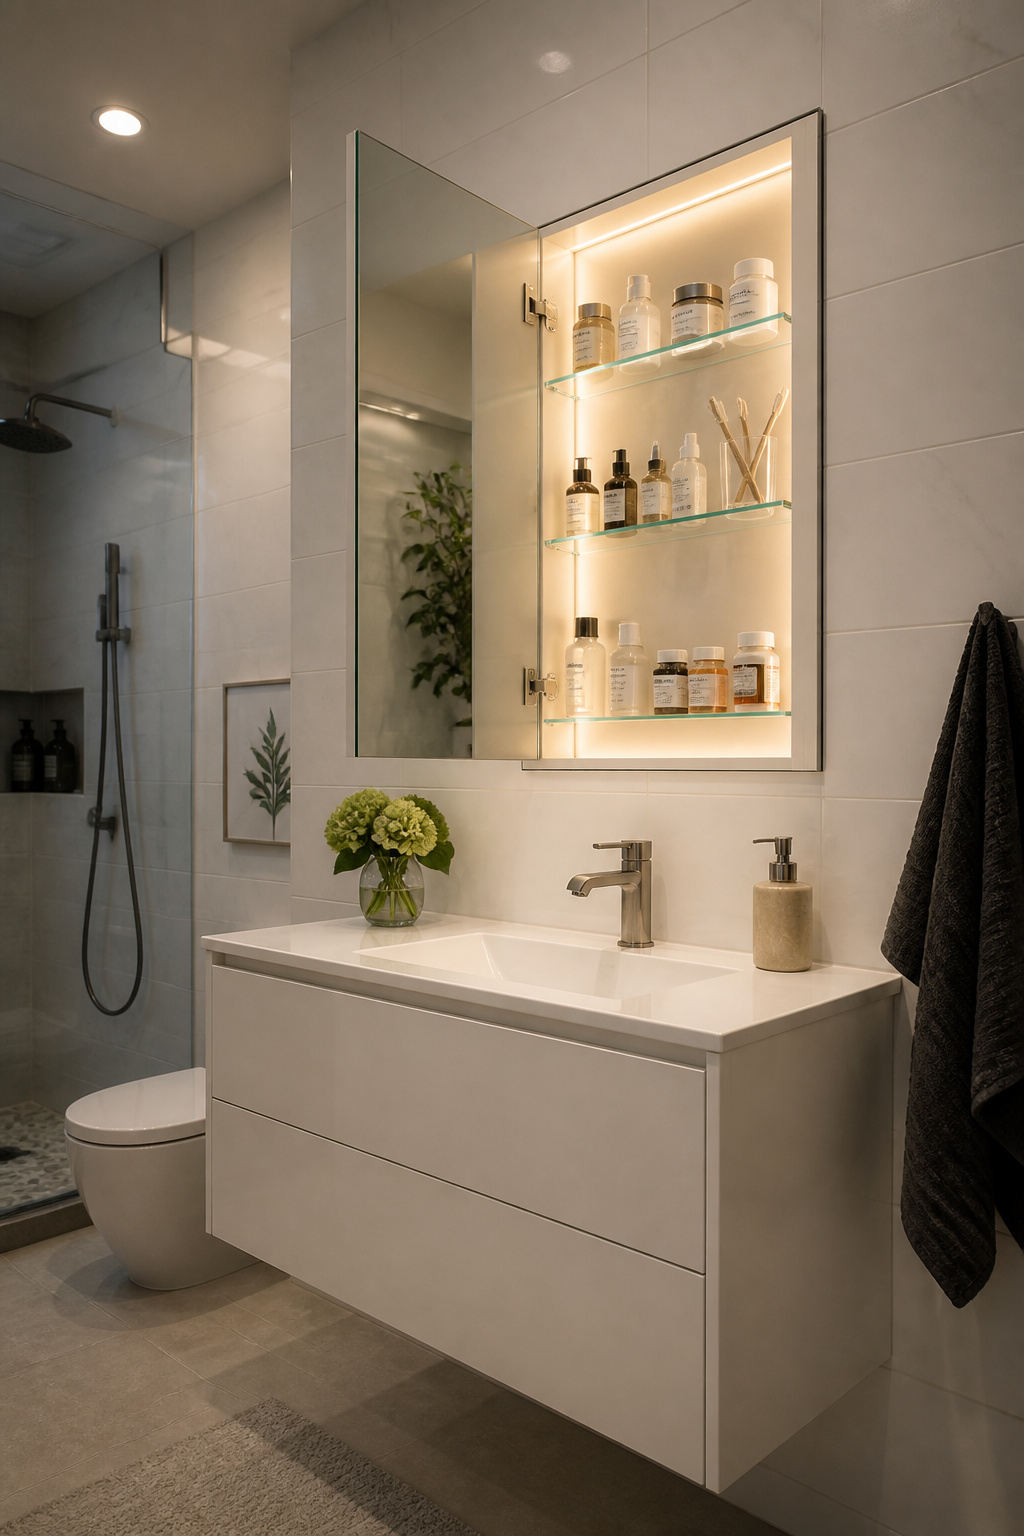
11. Recessed Medicine Cabinet Instead of a Flat Mirror
A flat mirror looks fine. A recessed medicine cabinet in the same position looks fine and stores approximately 1,000 cubic inches of items — medications, daily-use toiletries, cotton swabs, bandages — without adding a single inch of projection into the bathroom. In compact bathroom design, this is one of the cleanest double-duty upgrades available. A standard 16×26-inch recessed cabinet fits between studs on 16-inch centers, which means the rough opening is already in place in most walls.
Confirm stud spacing with a stud finder before purchasing. If studs don’t align, you have two choices: reframe the bay (a straightforward carpentry task) or select a surface-mount cabinet and accept the 3.5 to 4-inch wall projection it adds. Adjustable glass shelves at 1-inch increments are the feature worth prioritizing — they let you configure the interior around the actual heights of what you’re storing rather than forcing items to sit on a fixed layout.
For bathroom cabinet designs that do double duty, Robern and Kohler’s Verdera line integrate interior LED lighting and electrical outlets into the recessed cabinet itself — you can charge an electric toothbrush or store a hair dryer inside the mirrored space rather than occupying counter or floor space with a separate charging station.
Tri-view cabinets span 36 to 48 inches and provide substantially more mirror surface and interior volume, but they require spanning multiple stud bays and additional framing to create a continuous rough opening. That said, the result is far more storage and reflective area than a single cabinet. The key advantage of recessed over surface-mount remains the same: no wall projection in a space where every clearance inch counts.
12. Floor-to-Ceiling Shelving in the Dead Corner Next to the Shower
Frameless shower enclosures almost always leave a gap between the glass edge and the nearest wall — typically 6 to 18 inches depending on the room’s layout. That strip is too narrow for furniture, too short for a standard cabinet, and too inconvenient to use without intentional planning. It’s also one of the most consistently wasted opportunities in small bathroom design, which makes it one of the best targets for storage improvement.

IKEA’s HEMNES tall cabinet (20 inches wide, 63 inches tall, $150 to $300) and GODMORGON wall-mounted shelving (23 inches wide, 15 inches deep) fit this space well because they’re designed with bathroom humidity in mind and sized for the kind of gap we’re describing. For a custom built-in that fills the exact dimensions from floor to ceiling, expect $800 to $1,800 installed. The result reads as architectural rather than furniture in a gap. For bathroom storage solutions for small spaces that feel most intentional, built-to-dimension always outperforms the nearest standard cabinet width.
Zone storage by access frequency: the 30-to-60-inch band handles daily-use items — towels, toiletries, products you reach for every morning. Items above 60 inches can be lighter and less frequently needed — spare rolls, backup products. Near the shower, basket choice matters: open-weave wicker handles steam well because it allows air circulation. Raw or unfinished wood is the wrong choice in this location regardless of how it’s sealed — steam causes warping within a year.
13. Light and Bright Color Palette: Small Bathroom Ideas That Fool the Eye
The metric that matters for paint selection in a small bathroom is LRV — Light Reflectance Value — the percentage of visible light a color reflects back into the room. Higher LRV means the room generates more light from the same fixtures. For most small bathrooms with at least one window, target LRV 65 or above. For windowless bathrooms, that threshold rises to LRV 75 or higher, and every point matters.
Top performers in tested bathroom installations: Sherwin-Williams Alabaster SW 7008 (LRV 82), Benjamin Moore White Dove OC-17 (LRV 85), Benjamin Moore Cloud White OC-130 (LRV 87). These warm off-whites consistently outperform stark cool whites in typical bathroom lighting because the warmth counteracts the blue bias of LED fixtures. Undertone matters more than color name — a paint labeled “white” with a green undertone reads very differently than a warm cream labeled something else entirely. Test large samples under your actual installed light bulbs before committing. For bathroom decoration ideas that extend beyond paint, the color palette decision anchors every other finish choice in the room.
Beyond white: Benjamin Moore Pale Oak OC-20 (LRV 69) and Sherwin-Williams Shoji White SW 7042 (LRV 74) offer warmth with more visible color character. Soft greens — Sherwin-Williams Sea Salt at LRV 63, Benjamin Moore Quiet Moments at LRV 65 — work at the lower end of the acceptable range when the bathroom has good natural or supplemental lighting. The anchor element keeps a high-LRV small bathroom from reading as blank: one deliberately dark element — a navy vanity, black-framed mirror, or dark floor tile — gives the eye a point of focus and creates depth.
14. Skylight or Solar Tube: Borrowed Daylight Changes Everything
Electric light flattens. No matter how well-specified your fixtures are, artificial light illuminates surfaces without creating the dimensional cues that daylight provides naturally. In a windowless bathroom, the flatness is constant — the room registers its actual size without the perceptual depth that natural light creates. Homeowners who install solar tubes consistently report the same behavioral change: they stop turning on the electric lights during the day because the room already feels bright enough.
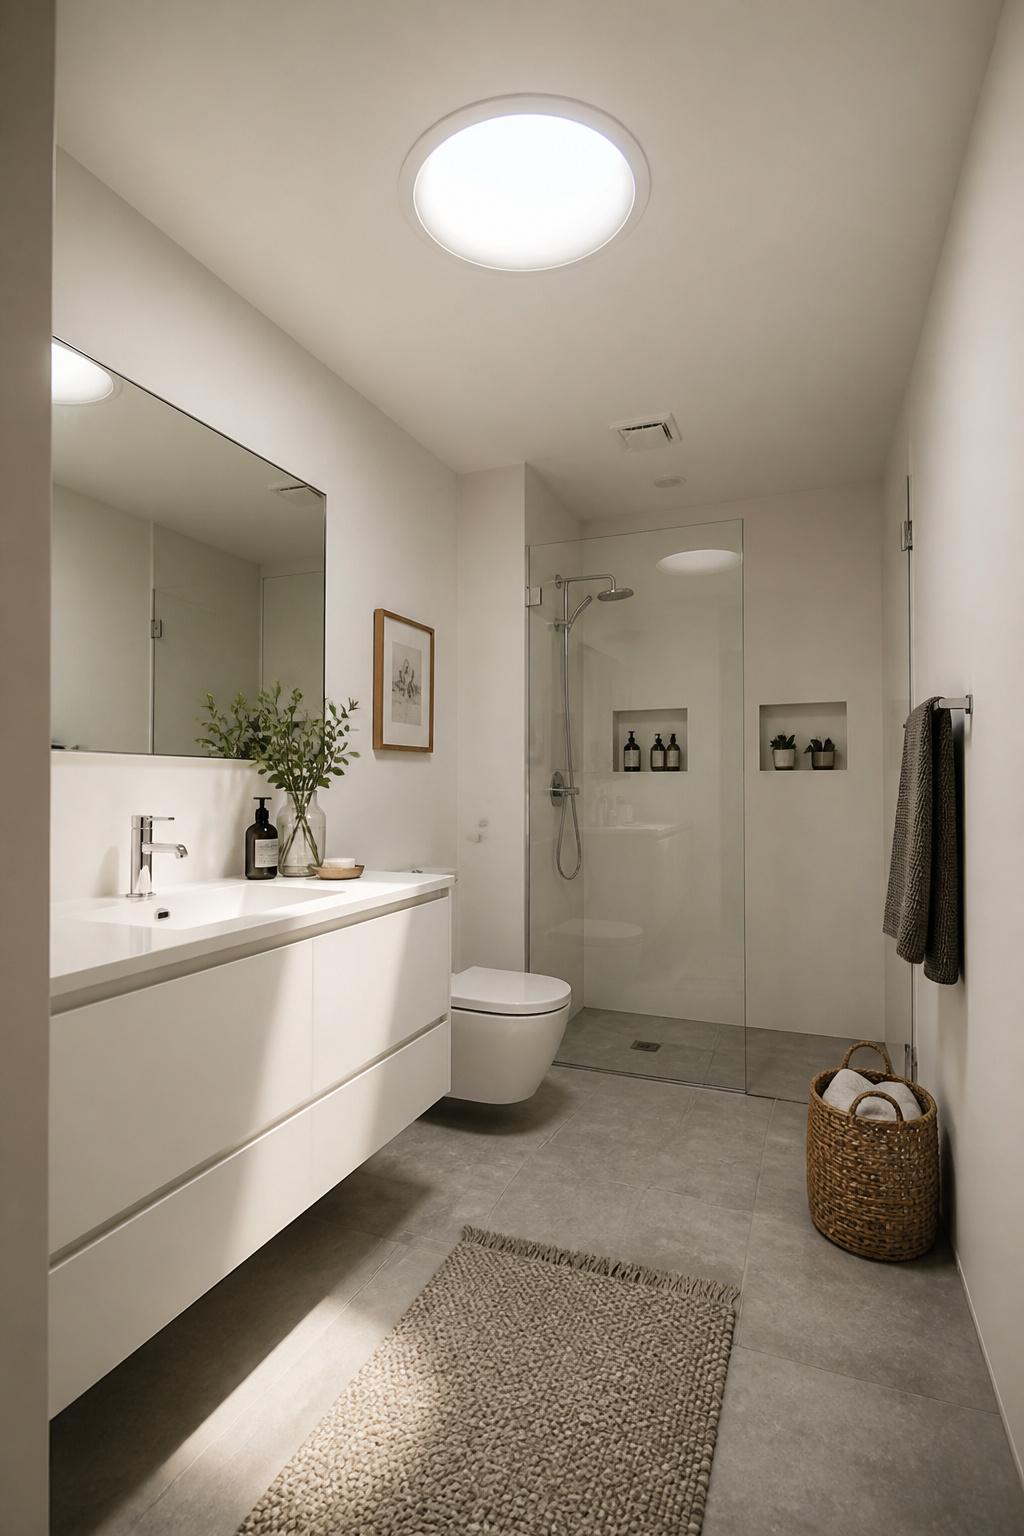
A solar tube uses a 10-to-14-inch reflective tube running from a rooftop dome down through the attic space to a ceiling diffuser. Flexible-tube versions navigate around joists and HVAC ducts, which means attic obstacles rarely block installation. Velux and Solatube are the dominant residential brands; installed cost runs $650 to $2,150 depending on tube length and whether any drywall finishing is required. An 8-inch tube illuminates approximately 150 square feet — more than sufficient for a 5×8 bathroom. For bathroom vanity lighting tips, combining a solar tube overhead with a well-specified lighted mirror at the vanity produces the most balanced and flattering light distribution in a small bathroom space.
A traditional skylight costs $2,100 to $5,800 installed and requires direct vertical access from ceiling to roof — practical for top-floor bathrooms, not feasible for most interior layouts. Where neither option is possible, the best substitute is a high-CRI LED system at 5000K with a flat-panel diffused fixture rather than a recessed spot array. The diffused panel reads more like natural light than a grid of downlights.
15. Integrated Niche Shelving Built Into the Vanity Surround
The wall flanking the mirror on both sides is almost always left as flat painted drywall. That’s a missed opportunity. A pair of shallow niches flanking the mirror — 6 to 10 inches wide, 24 to 36 inches tall, cut into the stud bay on each side — creates built-in storage that looks far more expensive than the labor cost. In small bathroom design, zero-projection storage like this is almost always the right call over floating shelves.
In a 2×4 wall, you’ll have 2.5 to 3 inches of usable niche depth after accounting for backerboard and finish material — enough for most standard toiletry items standing upright. A 2×6 wall gives you 4 or more inches, which is genuinely useful. Niches within the splash zone need a water-resistant facing: tile or stone. Niches further from the sink — beside the mirror but above the usual splash height — can be finished with paint or a backed wallpaper panel.
The comparison case: a floating shelf on the same wall projects 4 to 8 inches from the surface and can create clearance conflicts with door swings, elbow room at the sink, or the mirror itself. A recessed niche adds zero projection. That’s the specific reason niches beat shelves in small bathroom wall planning — function without consuming any of the clearance inches the room doesn’t have to spare.
One planning step that cannot be skipped: confirm the intended wall cavity contains no plumbing supply lines, drain stacks, or electrical wiring before cutting. A stud finder locates framing; a licensed electrician or plumber can confirm the cavity is clear before any demo begins.
16. Slim Profile Fixtures That Are Designed for Small Bathroom Layouts
Standard fixtures assume space that small bathrooms don’t have. A standard floor-mount toilet projecting 29 inches from the wall, paired with a standard 21-inch-deep vanity, consumes the layout before anything else is considered. In a 5×5 or 6×6 bathroom, the door swing, the standing clearance, and the towel bar placement all get compromised by starting with fixtures dimensioned for a larger room.
Compact fixture sub-categories exist for this specific problem. For toilets, the TOTO Aquia wall-hung bowl at 21.1 inches projection is one benchmark. The Duravit D-Neo Compact wall-hung at 480mm (18.9 inches) is among the shallowest available in a floor-mount-equivalent configuration. For floor-mount models, Duravit, Villeroy & Boch, and Kohler all offer “compact” designations — but the marketing language is inconsistent across brands. Always read the actual spec sheet. A model described as “compact” by one brand might project 26 inches; another’s might be 23. Those 3 inches determine whether the bathroom works.
For sinks, the relevant sub-categories are “short projection” and “cloakroom” — both typically run 16 to 18 inches wide and 12 to 14 inches deep. The spec numbers that matter most: projection from the wall, overall width, and — for toilets — tank width. Tank width is frequently omitted from marketing materials, but in a bathroom where the toilet sits close to a wall, it determines whether the installation is even possible. Pull the full dimensional drawing before specifying.
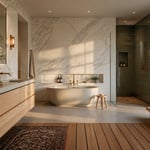
17. Wet Room Conversion for an Open-Plan Bathing Space
A conventional shower enclosure in a small bathroom creates a room-within-a-room effect that divides already limited square footage into two smaller zones. In a 5×8 bathroom with a 3×3 shower, the enclosure occupies 37% of the floor area and introduces a series of visual barriers — curb, frame, glass edge — that the eye registers as spatial interruptions. A wet room removes all of this. The effect is immediate: one open plane from wall to wall, no visual interruption at any sightline.
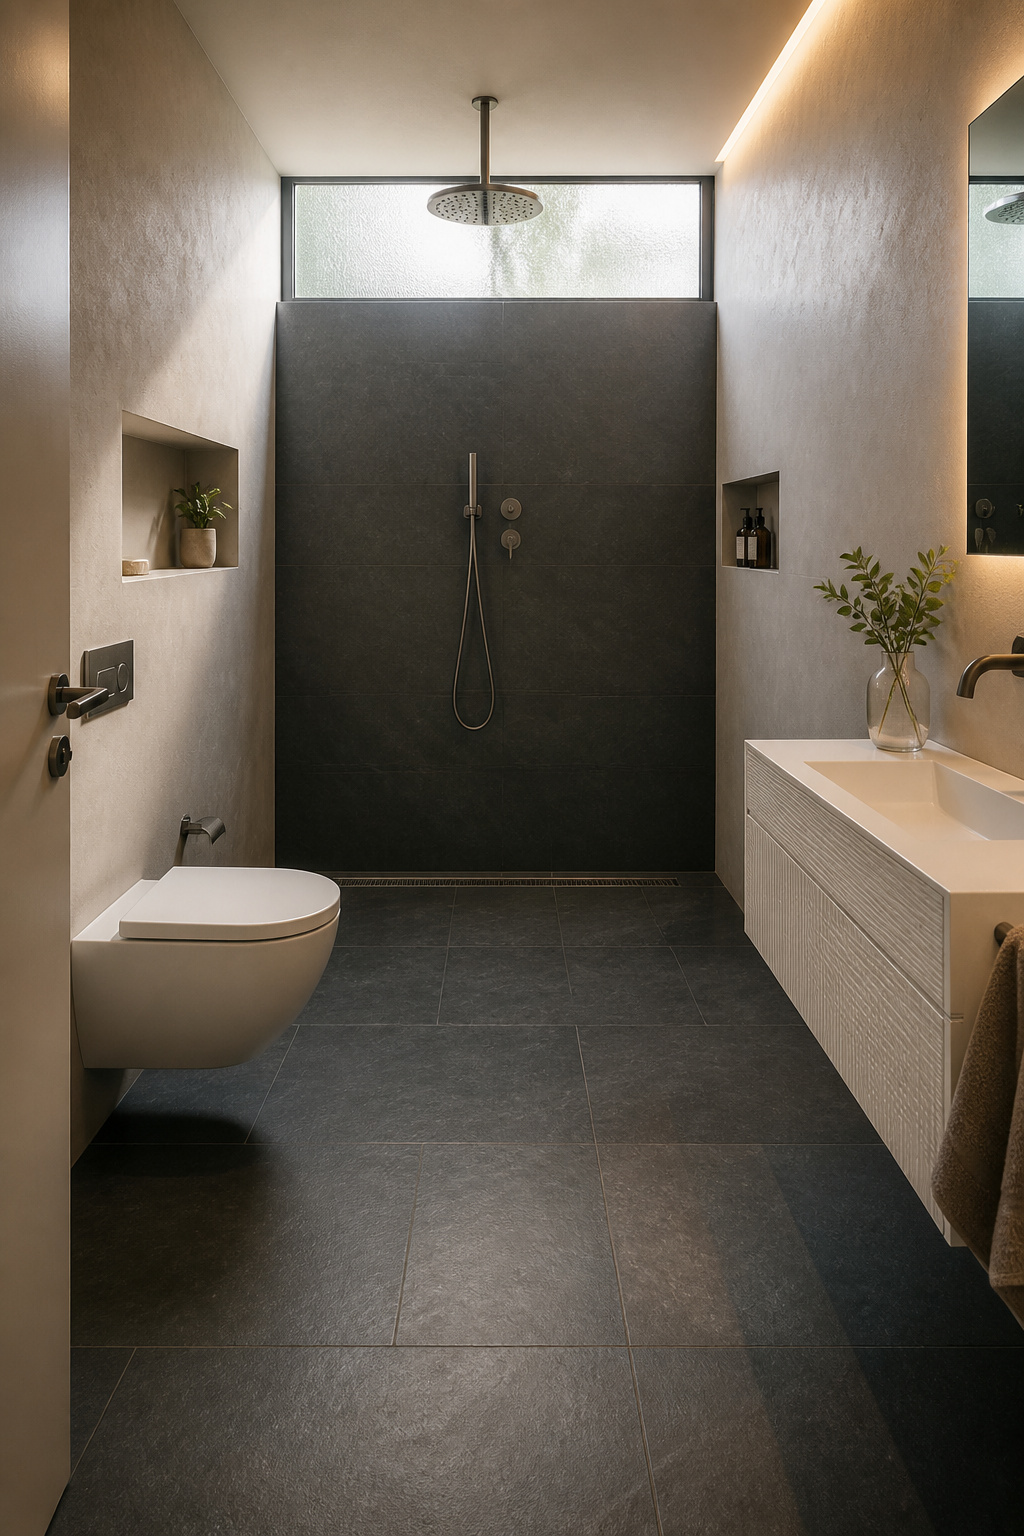
Whole-room waterproofing is the fundamental requirement. The floor, walls to a minimum height of 6 feet, and all transitions between planes need continuous membrane coverage. Two proven systems: Schluter Kerdi sheet membrane applied over substrate and covered with tile, and Wedi closed-cell foam panels, which are inherently waterproof at the core and require no separate membrane layer. A linear drain placed along the entry wall simplifies slope calculation — the entire floor drains toward one edge rather than a central point, making large-format tile installation considerably more manageable.
Underfloor heating is nearly always specified with wet room conversions — a warm floor dries the surface in 30 to 60 minutes after use. Ventilation is equally important: an 80 CFM fan rated for continuous operation is the minimum, and a humidity-triggered controller is worth the upgrade. Total project cost ranges from $8,000 to $25,000 depending on bathroom size, finish level, and whether structural or plumbing changes are needed. It’s the most disruptive small bathroom design project on this list, and the one that changes the feel of a room most completely.
18. Accent Wall That Defines the Bathroom Without Making It Feel Smaller
The instinct to paint all four walls the same medium tone produces the opposite of the intended effect. A medium tone across all surfaces creates a compression that reads immediately as smallness. The correct approach is controlled contrast: three walls held at LRV 75 or above, one wall as the deliberate feature. The high-LRV walls recede; the feature wall becomes a destination for the eye rather than another surface closing in.

Placement determines whether an accent wall works spatially. The two most effective positions: the wall behind the toilet, which the eye lands on when entering, and the wall behind the vanity, which anchors the main functional zone. Both create a focal point the eye is drawn toward, and that directional pull registers as depth — the room reads as having distinct near and far planes. For bathroom wall decoration strategies, this light-surround-dark-feature combination is the most reliably effective approach in rooms under 60 square feet.
Material choice affects how much spatial work the accent wall does. Large-format stone-look tile with prominent veining reads as genuinely three-dimensional — the veining pattern creates apparent depth on a flat surface. Textured wallpaper and limewash paint add tactile depth that reads differently at different light angles. Scale is the final variable: oversized patterns fill the wall with fewer repetitions and read as intentional rather than busy. For bathroom use, paste-the-wall vinyl wallpaper is the appropriate specification.
Designing Your Small Bathroom Around What Matters Most
Eighteen ideas is a lot to hold at once. Sort by your primary pain point and match it to a budget tier.
The visual and organizational tier ($20 to $500, weekend timeframe) covers fixes that require no permits and no contractors: fresh paint at LRV 75 or above, a larger or lighted mirror, under-sink organizers, vertical shelving beside the toilet, and accent wall updates. These changes consistently deliver outsized results relative to their cost. Start here if your bathroom functions adequately but feels dark, cluttered, or cramped.
The fixture swap tier ($500 to $2,500, one to five days) covers replacements that need basic plumbing disconnection and reconnection but no major structural work: a recessed medicine cabinet, a floating vanity, a pocket door conversion in a non-load-bearing wall. These projects change the room’s physical organization in ways that paint and organizers cannot.
The structural tier ($3,000 to $25,000, two to six weeks) covers wet room conversion, wall-mounted toilet with carrier system, new large-format tile on floor and walls, and frameless glass enclosure. These are renovation-scope projects that require licensed trades, permits, and sequenced scheduling — structural and plumbing changes first, then tile, then vanity and cabinetry, then mirrors and lighting, then accessories last.
Start where the room hurts most. A small bathroom design built around its actual problems — not around what a renovation budget demands — is one you’ll use well for years. Pick the tier that addresses your real pain point, do that work well, and stop. The next tier will still be there when you’re ready for it.