Most bathrooms branded as modern are already five years away from looking dated. They chased the surface — the fashionable grout colour, the trending tile profile, the hardware finish of the moment — rather than the fundamentals that make a space hold its ground across decades. Real bathroom design modern thinking starts with material logic, not trend catalogues.
As a mixed materials specialist, I’ve spent considerable time studying why certain material combinations endure while others collapse under the weight of their own moment. It comes down to a simple principle: materials honest about what they are — concrete that looks like concrete, oak that moves and ages like oak, brass that develops its own story over time — outlast materials that pretend to be something else. This list works from that premise.
The fifteen ideas here are not a style mood board. Each one is a specific material direction with a reason behind it — a logic grounded in how the material behaves, how it ages, and how it interacts with the surfaces around it. Some are individual choices; others become more powerful in combination. All of them have roots deep enough to outlast whatever bathroom design modern trend is currently cycling through social media.
1. Honed Concrete Accent Walls That Add Texture Without the Cold
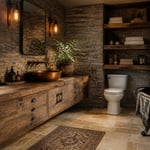
Concrete has spent decades fighting an image problem in residential spaces. Too industrial. Too cold, too hard, too relentlessly grey. All of that is true of concrete used wrongly — poured thick, left unsealed, positioned as the dominant material in a room stripped of warmth. But honed concrete used as an accent wall tells a completely different story in modern bathroom design.
The material’s greatest underappreciated quality is its thermal behaviour. Concrete absorbs heat slowly and releases it even more slowly — in a bathroom with radiant floor heating, the wall becomes a passive radiator, holding warmth from a morning shower and releasing it gradually into the space. Tile conducts heat away from the surface immediately. Honed concrete, with its matte, light-absorbing surface, also photographs darker and warmer than polished versions, which helps it read as moody rather than institutional.
For a residential application, microcement and GFRC (glass-fibre reinforced concrete) panels are almost always preferable to poured concrete. They weigh 80-90% less, require no structural reinforcement, and can be applied directly to standard plasterboard. The sealing protocol is what determines whether it survives the humidity: a penetrating sealer like Siloxa-Tek 8510 (near-100% active solids) applied in three to four wet-on-wet coats soaks into the pores and locks out moisture without leaving a surface film or changing the texture. Topical sealers such as polyurethane or epoxy create a film finish that changes the surface sheen and will eventually peel in a wet environment.
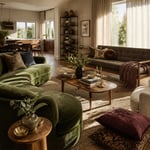
The key to preventing the brutalist read is pairing the concrete with a single warm counterpart. White oak. Teak. Aged brass on a tap. One warm material is enough to pull the grey into something that reads as considered rather than industrial.
2. Floor-to-Ceiling Stone Slabs That Eliminate the Grout Line
The grout line is doing more damage to your bathroom’s sense of scale than you might realise. Every horizontal joint breaks the wall surface, interrupting the eye’s movement and chopping the room into a grid. In a small bathroom — and most residential bathrooms are small by any honest measure — that grid adds visual mass without adding any physical dimension. Floor-to-ceiling stone slabs remove it entirely.
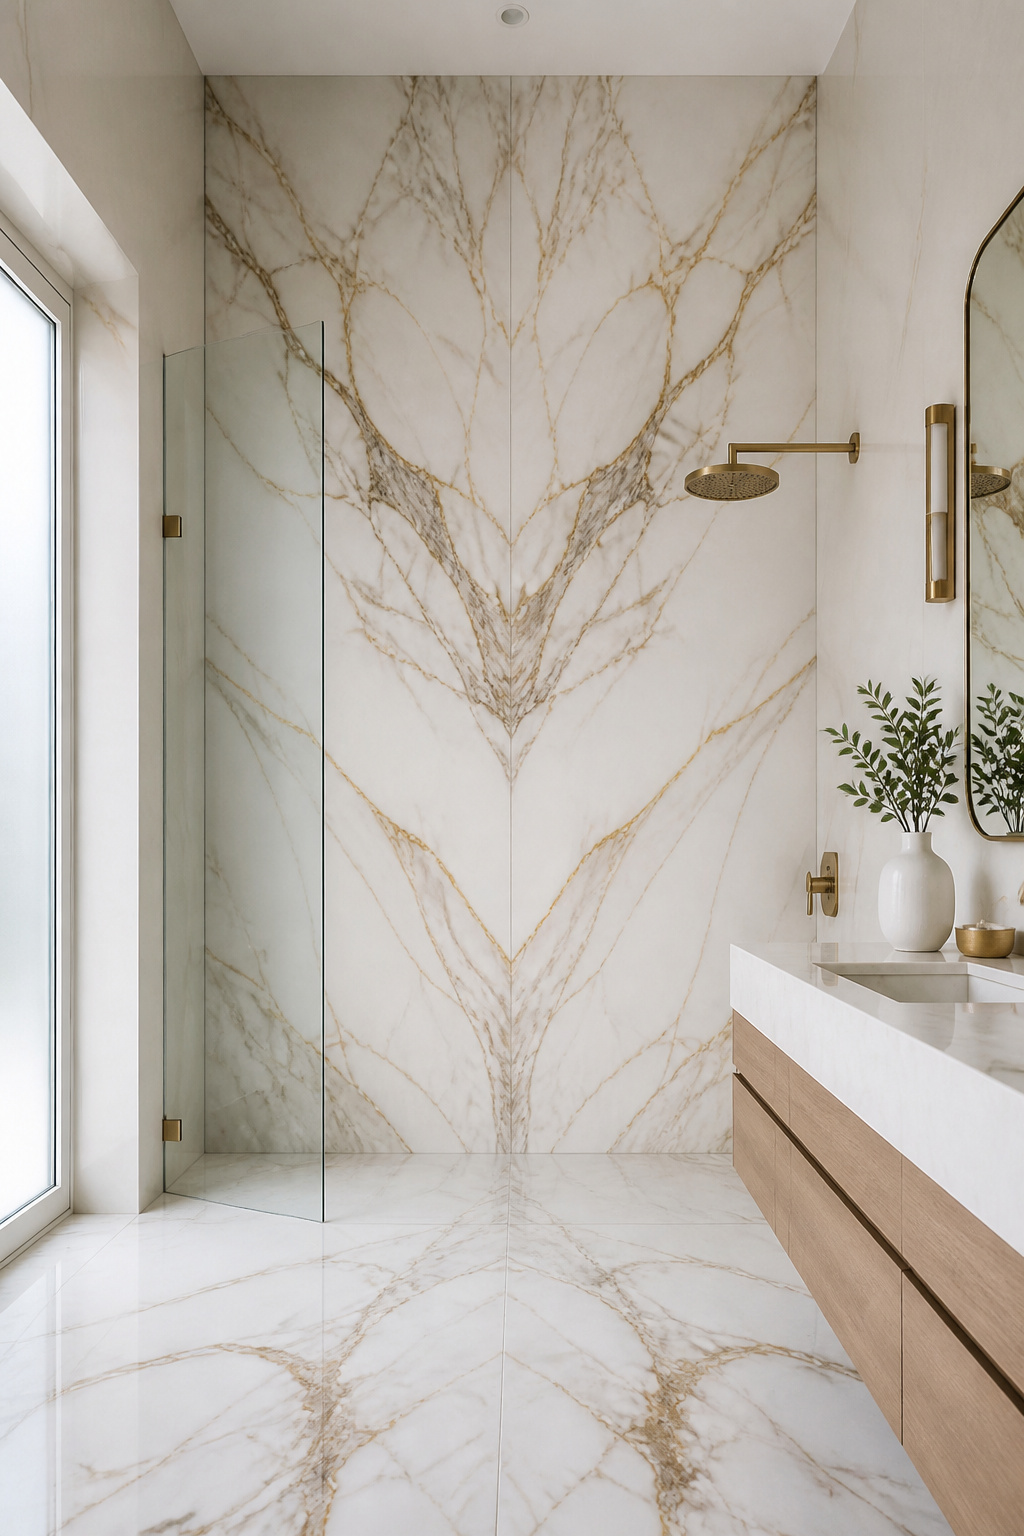
The surface that remains is a single unbroken plane. When slabs are book-matched (two panels cut sequentially from the same block and mirrored at the seam), the veining flows as a continuous geological event rather than a tiled pattern. Large-format porcelain and sintered stone panels now run up to 126 by 63 inches — enough to cover a full bathroom wall in two panels. Natural stone slabs run 3/4 to 1.25 inches thick; engineered porcelain panels as thin as 6mm are available for walls where structural weight matters.
Stone species for wet environments
The species choice is critical in a wet environment. Quartzite — the metamorphic rock, not to be confused with engineered quartz composite — has a Mohs hardness of 7 and minimal porosity, making it the most reliable natural stone for shower walls. Calacatta marble is technically softer (Mohs 3-4) and will etch from acidic cleaners, but its bold gold veining on a white ground is difficult to achieve in any engineered alternative. Seal it annually in wet zones and it performs well. Porcelino and similar large-format porcelain alternatives are factory-sealed, impervious to moisture, and require almost no maintenance.
Installation demands more care than standard tile. The substrate must be flat to within 1/8 inch in 10 feet before adhesive is applied — standard plasterboard rarely meets this without levelling compound. LHT (large and heavy tile) non-sag mortar is non-negotiable on vertical surfaces. Movement joints at every inside corner, filled with silicone rather than grout, prevent the cracking that appears within two to three years in installations that skip this step. For anyone building material confidence across the bathroom, exploring the range of bathroom tile designs that make a real visual statement is worth the time.
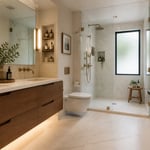
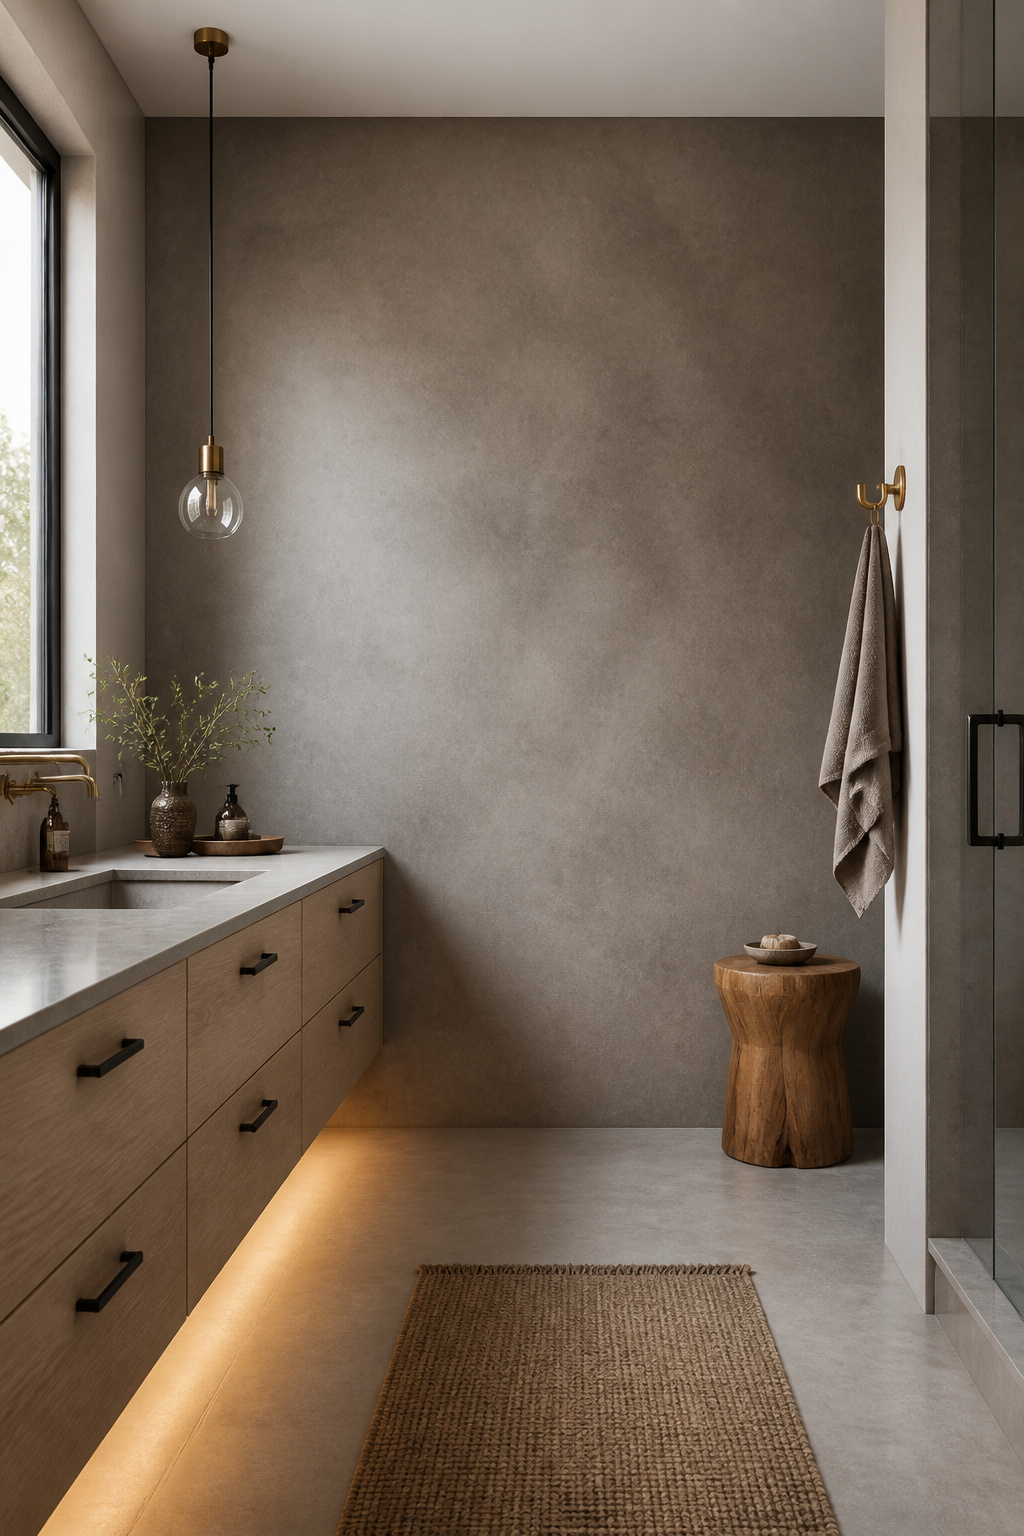
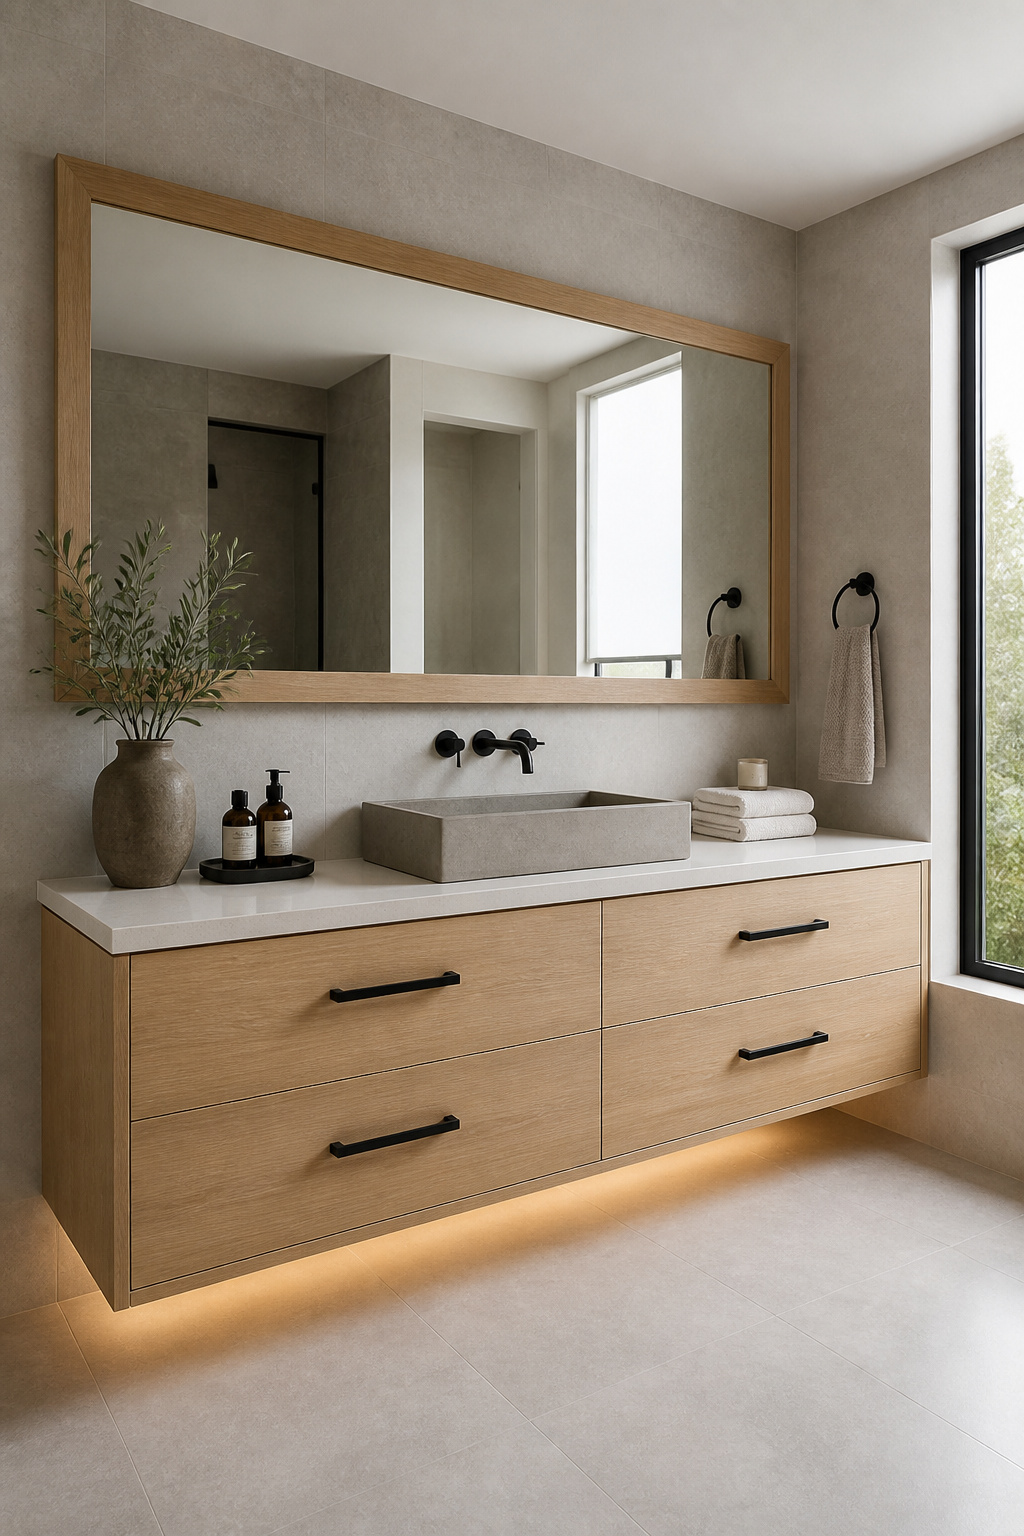
3. White Oak Floating Vanity — the Core Modern Bathroom Design Element
If there is one material choice that defines what contemporary bathroom design looks like right now — and has done so consistently enough to graduate from trend to default — it’s white oak. Not because every bathroom designer converged on the same aesthetic, but because white oak has the structural and botanical properties that make it legitimately suited to the job.
The distinctive advantage is the tylosis. White oak’s cells contain balloon-like growths that physically block the wood’s pores, reducing moisture penetration in a way that red oak simply doesn’t achieve. Combined with a Janka hardness rating of 1,360 lbf — firmer than most domestic hardwoods used for cabinetry — it handles humidity and daily cleaning without the dimensional movement or softening that would affect less robust timber choices.
The float height is where most installations get quietly wrong. A vanity hovering 6-8 inches above the floor reads as an intentional design decision. Three inches reads like it almost reached the floor and didn’t quite. The gap isn’t just about visual lightness — at 6 inches or more it becomes genuinely useful space that a mop head can reach, which matters in practical terms for anyone living with the bathroom daily. Standard counter height runs 32-36 inches; aim for the lower end of that range in a modern bathroom where visual restraint is the point.
Hardware choices that complete the material language
Matte black pulls on white oak create a graphic, unambiguous contrast that reads as modern without hedging. Brushed brass — not polished, never polished — sits closer to the Japandi end of the spectrum, warmer and more nuanced. The one rule worth keeping regardless of finish: size the hardware proportionally. A 48-inch vanity is underserved by small cabinet knobs. Use pulls sized 8-12 inches wide and let the hardware make a statement equal to the timber.
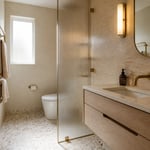
4. Wet Room Layout With a Linear Drain and Frameless Entry
The shower enclosure was always a compromise. A necessary one, before the waterproofing systems existed to do better — but a compromise nevertheless. Wet rooms remove it entirely, opening the floor plan and eliminating the glass surfaces, frame channels, and threshold edges that accumulate grime and require constant maintenance. In 2025, over 60% of luxury home renovations in the US included a curbless shower format according to Houzz’s bathroom renovation research, and the number continues to rise.
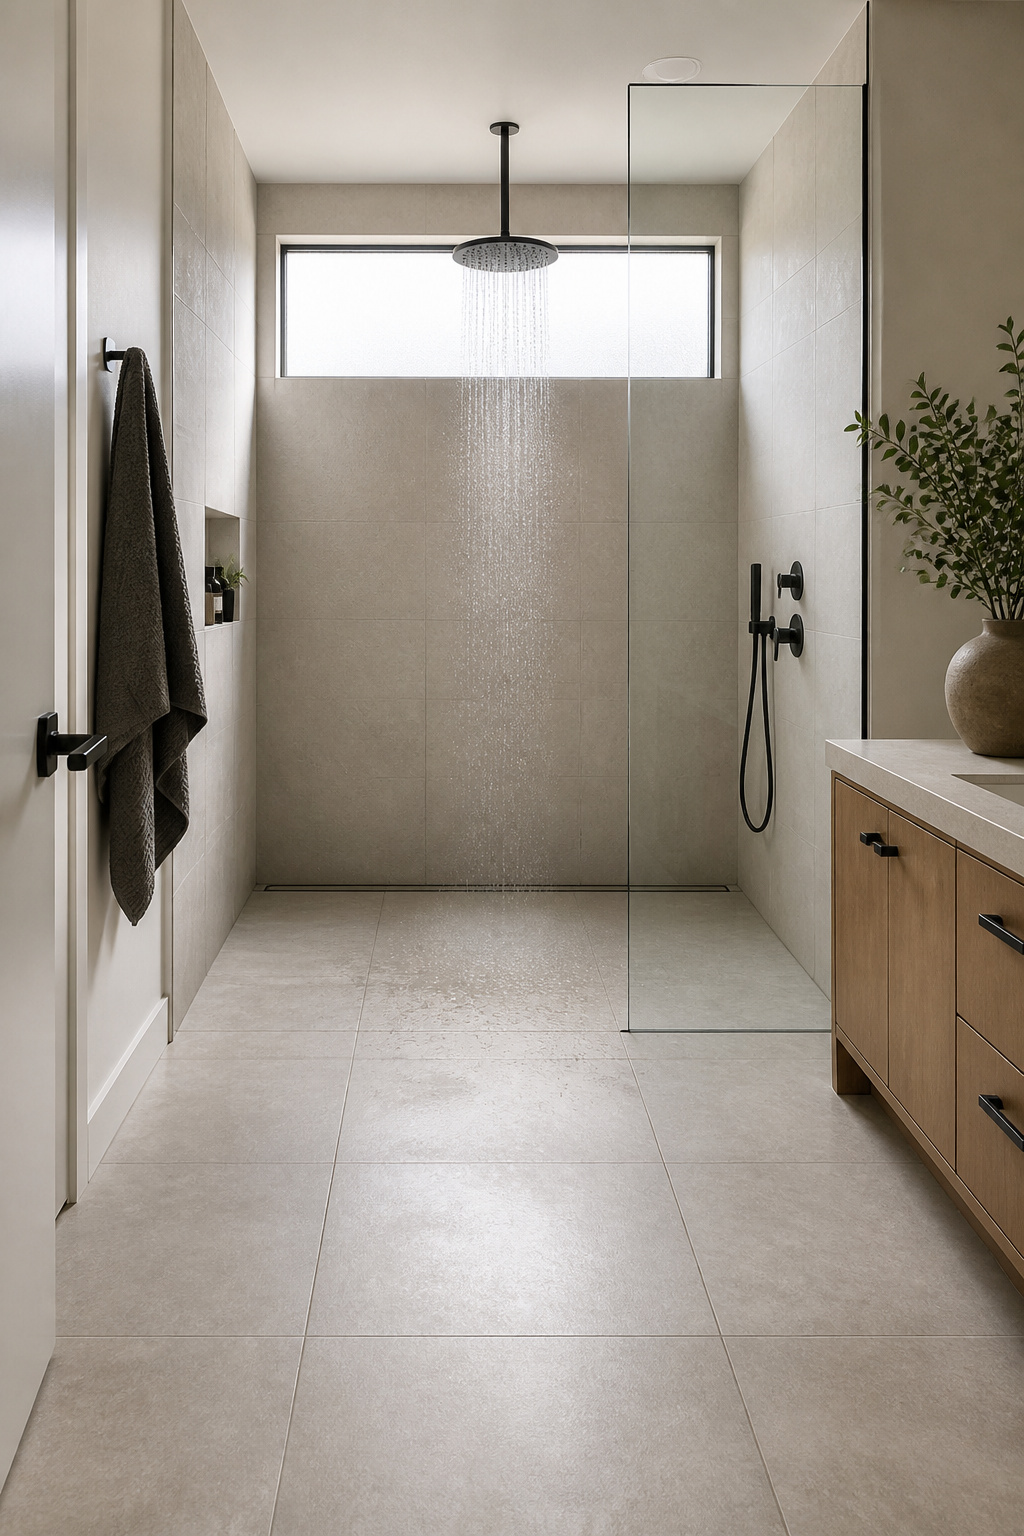
The linear drain is what makes large-format tile viable in a wet room floor. A centre point drain requires the floor to slope toward it from four directions simultaneously — a complex geometric exercise that becomes nearly impossible to execute cleanly with tiles larger than 12 inches. A linear drain running along one wall requires a single-direction slope of 1/4 inch per 12 inches, which allows 24×48 or 24×72 inch slabs to sit flat across almost the entire floor area. Most residential linear drains use a 2-inch waste line that handles approximately 9 gallons per minute — sufficient for standard shower heads and well above the typical 2-3 gallons per minute of a domestic water supply.
Waterproofing: the foundation of every modern bathroom renovation
The waterproofing is where the investment lives and where the most costly mistakes happen in any modern bathroom renovation. Tile is not waterproof. Grout is not waterproof. The membrane lives beneath the tile, applied to floor and walls in the wet zone continuously to at least 6 inches above the zone boundary. Sheet membranes like Schluter KERDI are the most reliable for wet rooms; liquid-applied membranes like Laticrete Hydro Ban are faster to apply but require careful mil-thickness consistency to perform. The drain-to-floor junction is the single most common failure point — the drain flange must bond directly into the membrane, not just sit over it.
For anyone weighing the scope of a renovation that includes structural plumbing decisions, the bathroom renovation tips that protect the investment make the decision logic clearer before committing to a layout.
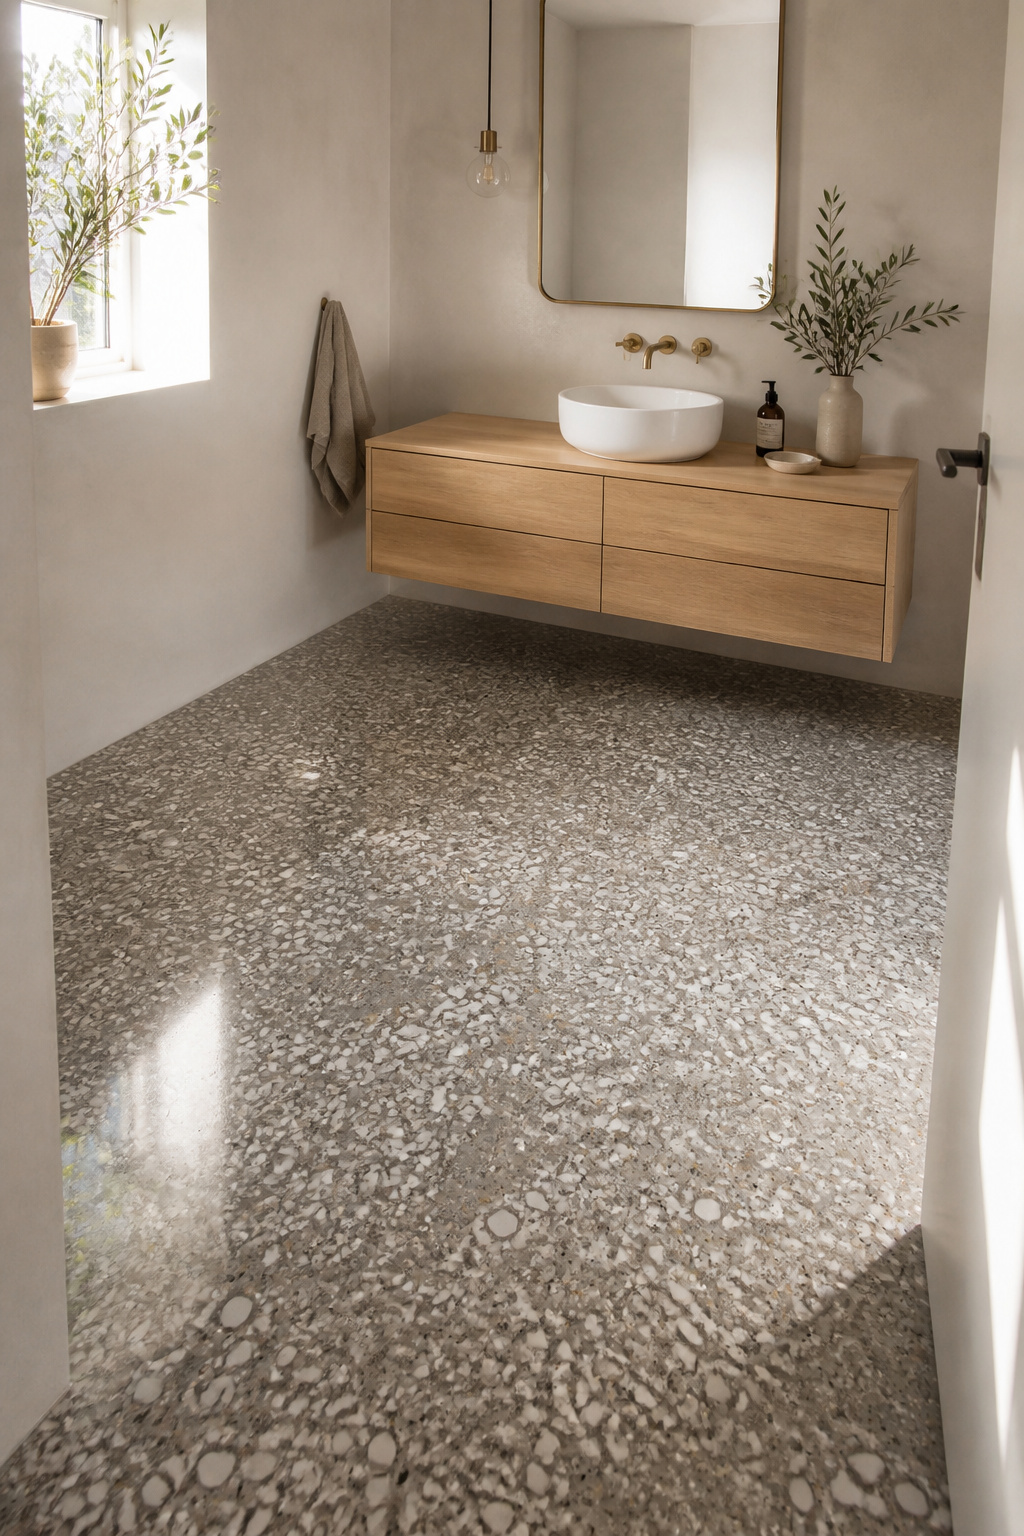
5. Terrazzo Floor: A Modern Bathroom Design Statement That Lasts Decades
Terrazzo has a timeline problem, and it works in your favour. The material was in continuous use from 15th-century Venice through to the mid-20th century in civic buildings, schools, and airports, and has been in revival for the past decade as designers rediscovered what stonemasons always knew: the aggregate-in-binder construction produces floors that look better with age rather than worse. In a design culture where almost everything else dates visibly within a few years, that is a genuinely rare quality.
The most important decision is the aggregate-and-binder combination. Precast terrazzo tiles — manufactured off-site and installed like standard tiles — are the practical choice for most residential bathrooms, running $15-35 per square foot installed. Poured-in-place epoxy terrazzo, where the material is mixed and ground on-site, costs $30-65 per square foot but allows fully custom aggregate: specific stone chips, glass fragments, shell. Seamless from any point on the floor. For the overwhelming majority of residential bathrooms, precast tiles are the right call — the cost saving is substantial and the visual difference minimal at the scale of a standard bathroom.
The aggregate is where the design decision lives. White marble chips are the classic choice — they shift tonally between warm and cool depending on the light source, giving the floor visual range across the day. Glass aggregate introduces a subtle luminosity that stone chips don’t replicate, as the light catches the edge of each glass fragment differently. The binder colour (the ground matrix between chips) matters as much as the aggregate selection. A mid-grey matrix is the most neutral and forgiving; a white binder with white aggregate produces a flat result that loses the depth that makes terrazzo worth specifying in the first place.
What makes terrazzo age better than most bathroom flooring
Maintenance is simpler than most people expect: weekly damp mopping and periodic polishing every few years. Epoxy terrazzo requires no resealing, unlike natural stone. It can last 75-100 years when properly installed — a timeframe that outlasts every other residential flooring material. For a broader look at how terrazzo sits within the full range of premium bathroom flooring options, the comparison is well laid out across bathroom flooring ideas built around lasting materials.
6. Fluted Glass Shower Partition Instead of the Standard Clear Pane
Clear glass has dominated shower enclosures for decades, and for straightforward reasons: it’s transparent, so it doesn’t visually reduce the room, and it allows light to pass unimpeded. But clear glass does nothing interesting, and in a modern bathroom that’s been thoughtfully specified — where the tile, the timber, the fixtures each have a material character worth looking at — a clear glass pane can read as an absence rather than a presence.
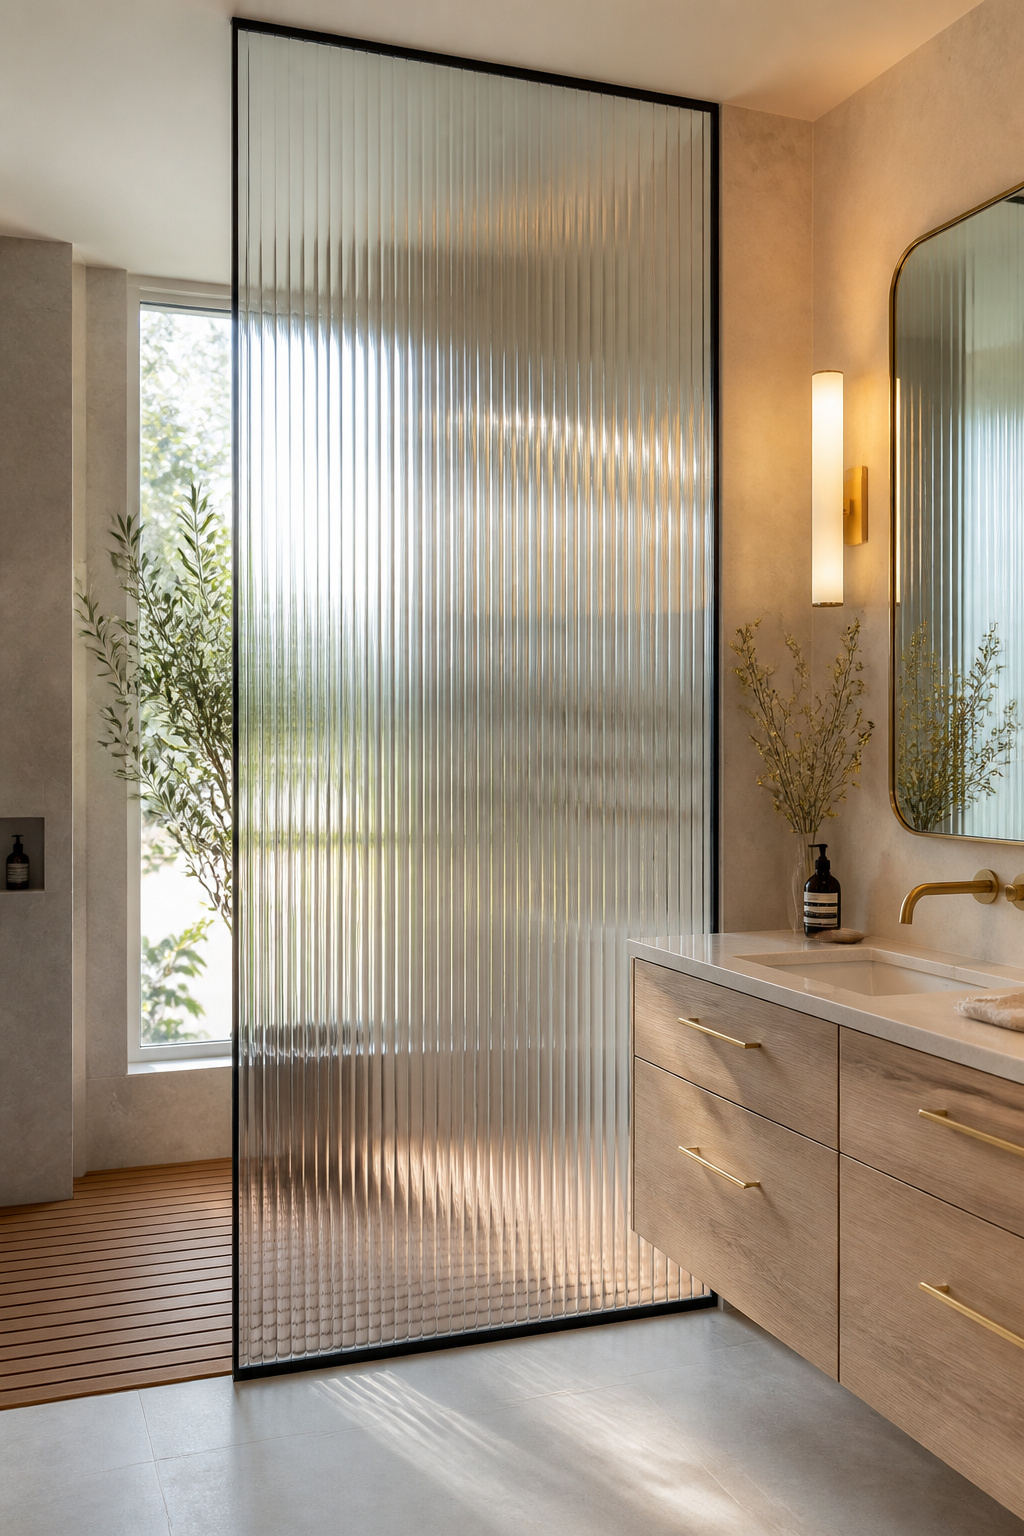
Fluted glass is a surface. The vertical ridges pass close to 100% of visible light while distorting the view sufficiently for functional privacy, and they create a surface that catches and redistributes light differently as the angle shifts throughout the day. In a bathroom facing a window, the incoming light through fluted glass produces a diffused, softly prismatic effect that clear glass can’t match. Practically, the textural surface is no harder to clean than clear glass — soap scum wipes off the smooth faces between the ridges as readily as from a flat pane.
The framing decision carries significant visual weight. A matte black steel frame around fluted glass creates a graphic pairing — the precise geometry of the frame against the textural pattern of the glass — that reads as intentional and architectural. Frameless installations with minimal hardware let the fluted texture carry all the visual weight, which works when the rest of the room is minimal enough not to compete. One installation detail worth knowing: the ridged side should face outward, away from the shower interior. The smooth face inside the shower is far easier to clean, and positioning the ridges outward means the texture is visible from the room rather than distorted by water patterns inside the enclosure.
7. Reeded Timber Panels on Vanity Faces and Bathtub Surrounds
A flat cabinet face is the most common missed opportunity in contemporary bathroom design. The timber is already on the vanity — the grain is already there — but a flat door renders all of it in a single plane, giving the material no room to develop depth or shadow. Reeded panels change that by introducing a vertical ridge pattern across the face of the door or panel, creating a shadow line between each reed that shifts as the light angle changes. It’s a modest textural intervention with a disproportionate visual payoff.
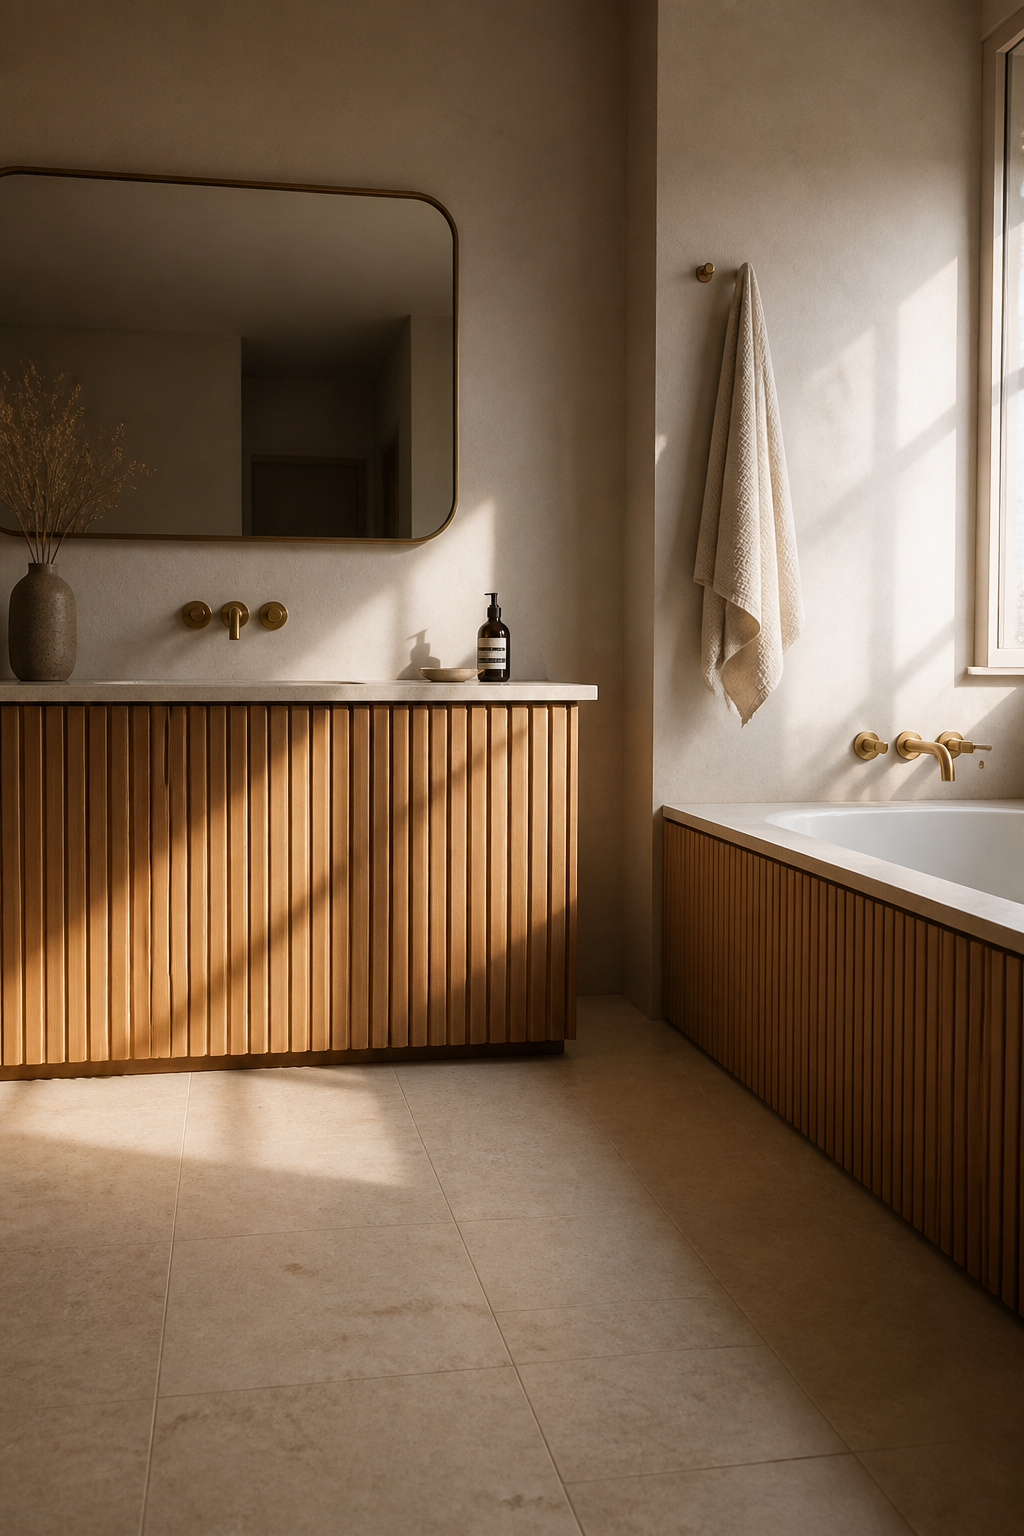
White oak is the species this works best in. The tight grain means the reeds machine cleanly with crisp edges rather than the fuzzy profile that softer or more open-grained timbers produce. The tylose-rich cell structure handles moisture in non-shower wet zones reliably when finished with a water-based polyurethane in satin or matte — and critically, water-based finishes don’t amber over time, which preserves the pale, architectural tone of white oak rather than pushing it toward the warmer read that oil-based finishes create.
Size matters here. On a 24-inch vanity, reeded panels can tip from architectural into decorative — there isn’t enough surface area for the ridge pattern to develop its full depth. At 36 inches or wider, the panels have room to perform. A bathtub surround is an ideal application: the long horizontal run of the tub creates a surface where the rhythm of the reeds has room to establish itself as structural rather than cosmetic. Keep timber to one dominant surface. A reeded oak vanity front and a reeded oak tub surround in the same modern bathroom is too much timber — the room starts reading like a sauna, and the material contrast that makes both elements interesting disappears.
8. Unlacquered Brass and Matte Black: A Defining Modern Bathroom Idea
Fixture finishes are the detail that rooms tend to get wrong more consistently than almost any other single decision. Either everything matches in a way that reads as a showroom floor rather than a lived-in space, or nothing matches in a way that reads as forgotten rather than curated. The unlacquered brass and matte black combination threads this precisely — the two finishes are clearly distinct, clearly complementary, and from the start designed to read as a conversation between them rather than a uniform surface.
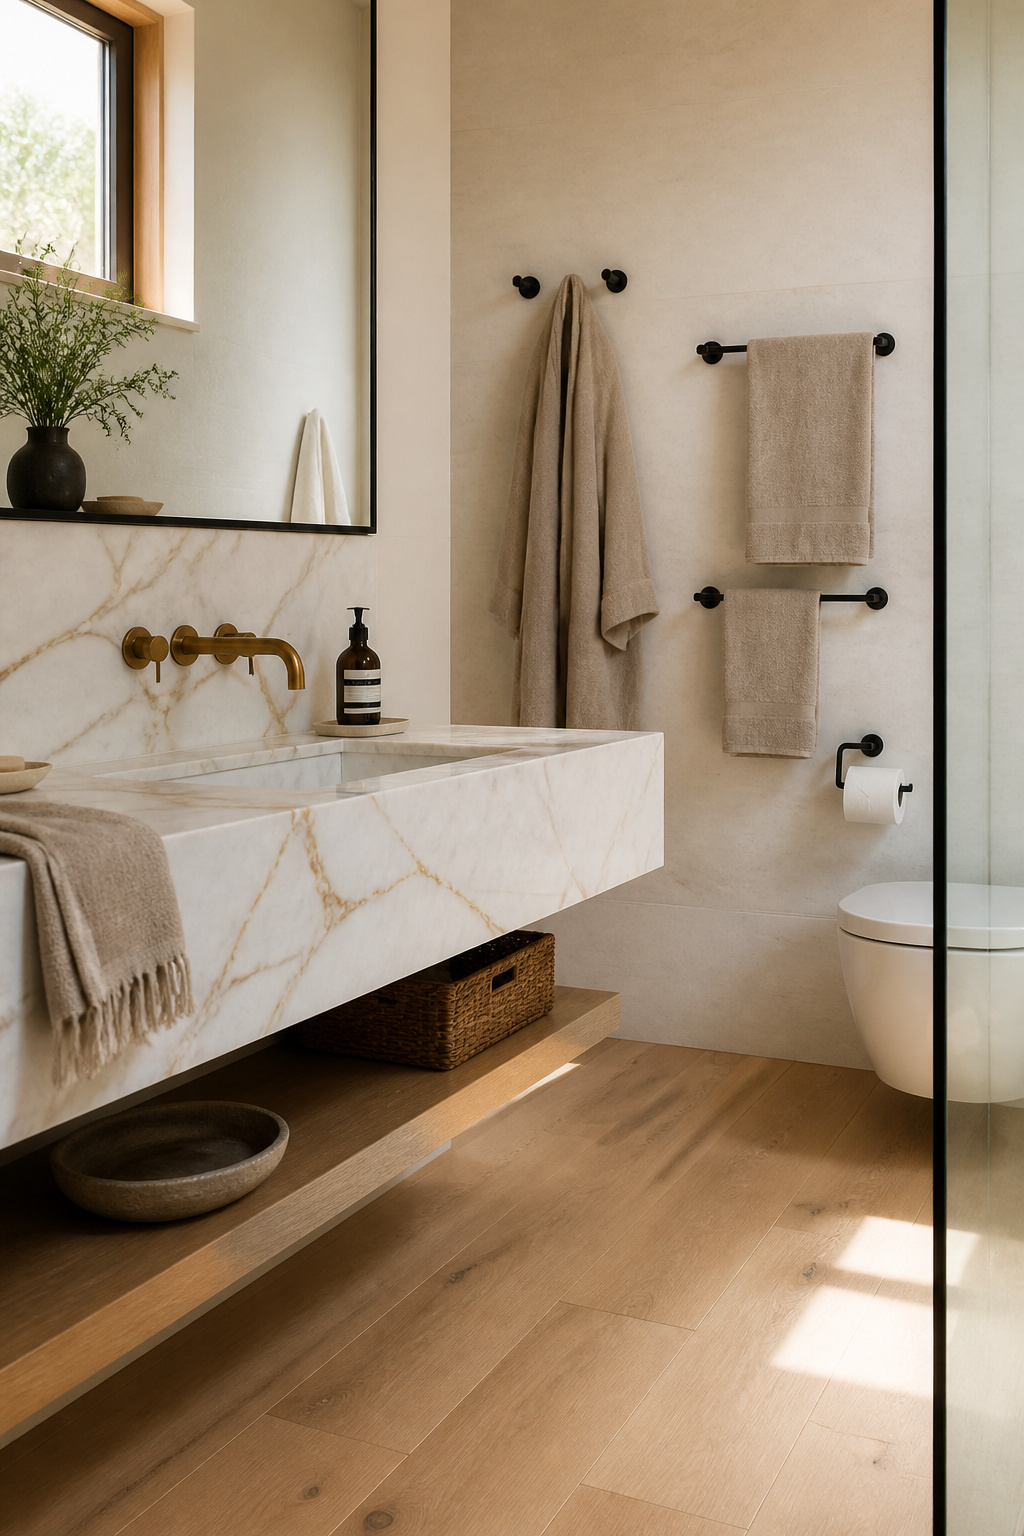
The assignment of roles is where the logic lives. Unlacquered brass should lead on fixtures — faucets, shower heads, tub fillers. These are the surfaces touched most frequently, and unlacquered brass is a living finish that patinates under the oils and water of daily use, developing an amber-brown depth over 12-24 months in a bathroom’s humidity. At roughly 0.5-1.2 micrometres per year of patination in a 70% relative humidity environment, the change is gradual enough to feel like the material is growing into the space rather than ageing out of it. Lacquered brass tries to freeze this process and fails — the lacquer scratches through unevenly, leaving raw bright patches that look far worse than a consistent patina.
Why matte black works better on hardware
Matte black works better on hardware — towel bars, toilet roll holders, hooks — where it recedes rather than commands. PVD-coated matte black absorbs 92-96% of visible light, which gives it a depth that painted finishes can’t match and a hardness (8-10 on the Mohs scale) that resists the scratching and chipping that affects lesser coatings in daily bathroom use. The hard limit: two metals per room. The eye can reconcile a pairing; a third metal reads as an accident. Maintain the two-metal rule across every surface in the room and the result is modern bathroom decoration that earns its sophistication through discipline rather than display.
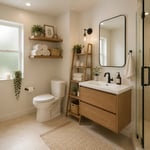
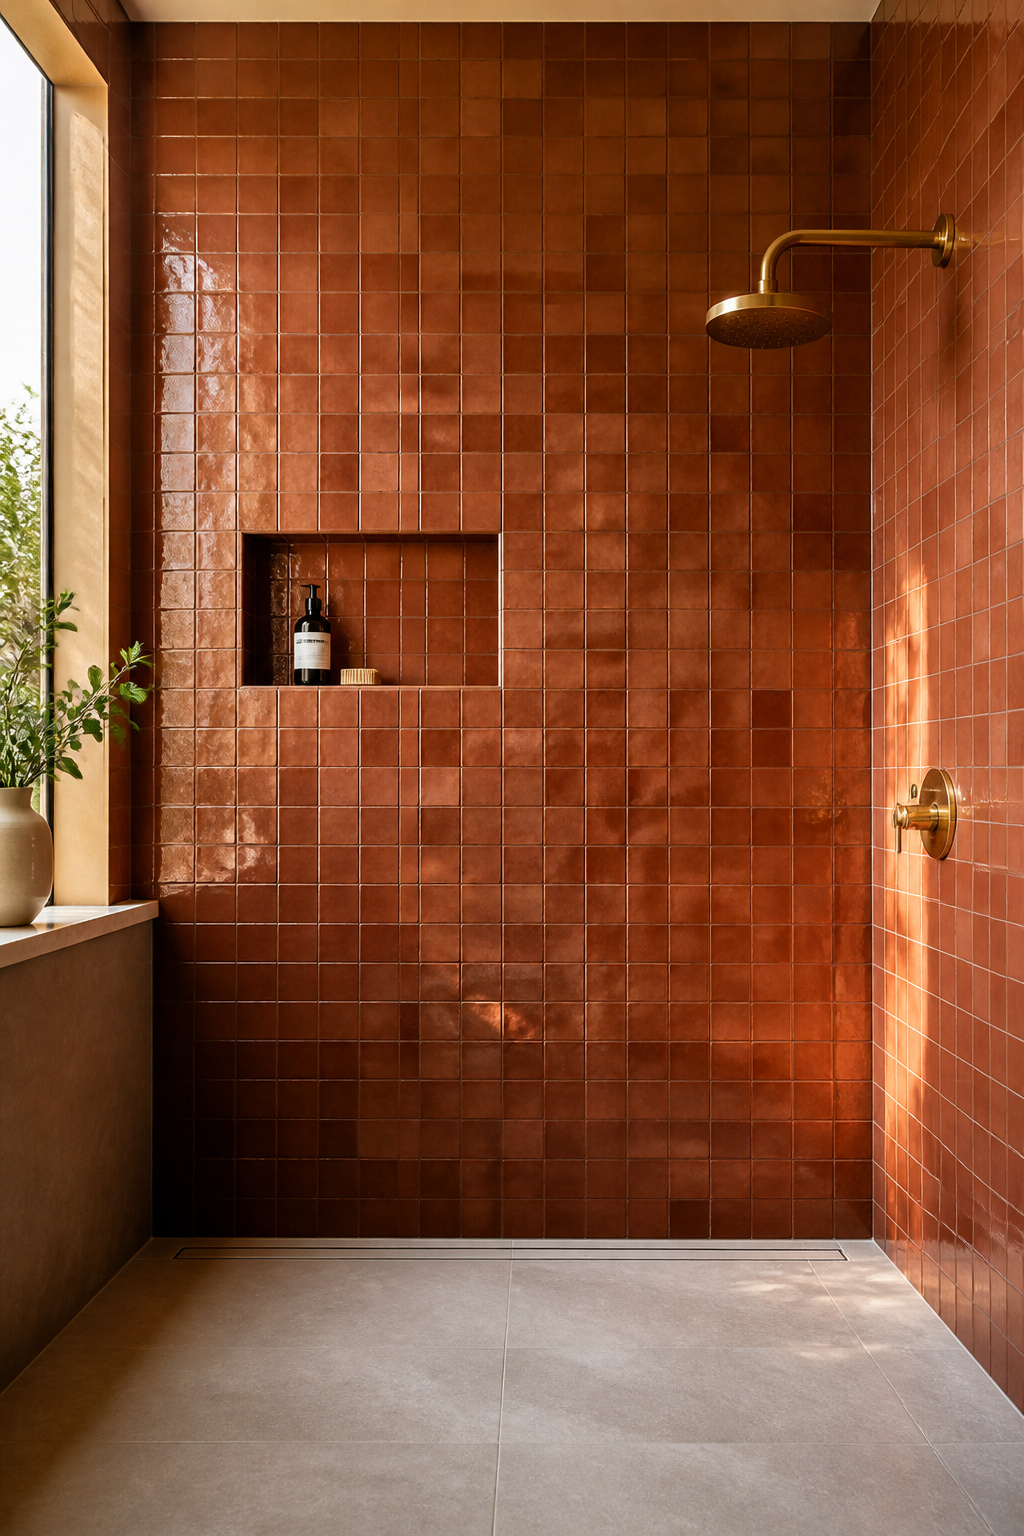
9. Recessed Niche Shelving Built Into the Shower Wall
The shower niche is one of those decisions that gets made well or gets made too late. Once the waterproofing membrane is down and the tile is on the wall, a niche is a demolition project. Made at the right stage — before the membrane, while the studs are exposed — it’s a relatively simple build that transforms shower storage from an afterthought into a composed architectural element.
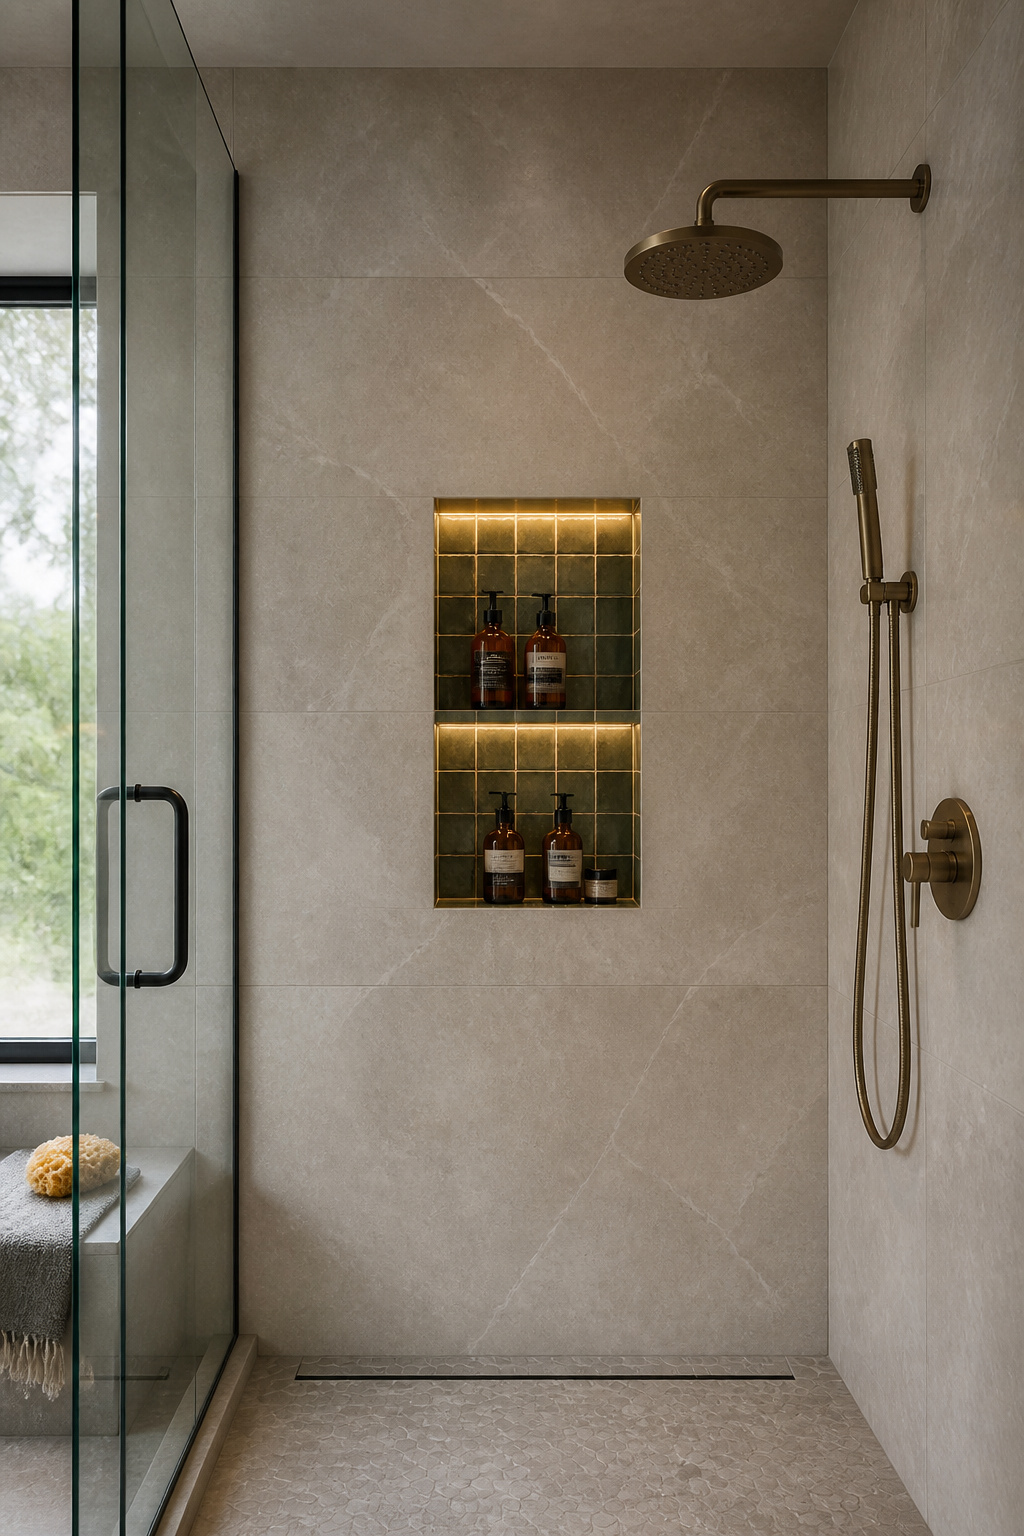
Standard dimensions are 12×24 inches — wide enough for tall shampoo bottles to stand upright, deep enough at 3.5-5 inches to accommodate most product sizes without two-row crowding. Standard 16-inch stud spacing limits the niche width to approximately 14-15 inches without structural re-framing. Height placement at 47-48 inches from finished floor puts the niche at comfortable chest height for an adult of average stature. The slight downward pitch of 1-2 degrees built into the niche floor prevents standing water — this needs to be built into the structure before tiling, not addressed after the fact with silicone.
The finishing decision is where the niche transitions from utility to design detail. Tile the interior in the same material as the surrounding shower and the niche disappears — functional, invisible, forgettable. Tile it in a contrasting material — zellige in a neutral plaster shower, a marble mosaic in a large-format stone surround — and the niche becomes a framed composition within the wall. The area is typically only 3-4 tiles wide, so a contrasting material is a small investment in cost with an impact out of proportion to its scale. Backlit niches, with an LED strip in a channel behind the niche shelf, take this further — the effect in evening light is an amber glow that makes the niche a focal point rather than just a shelf.
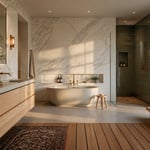
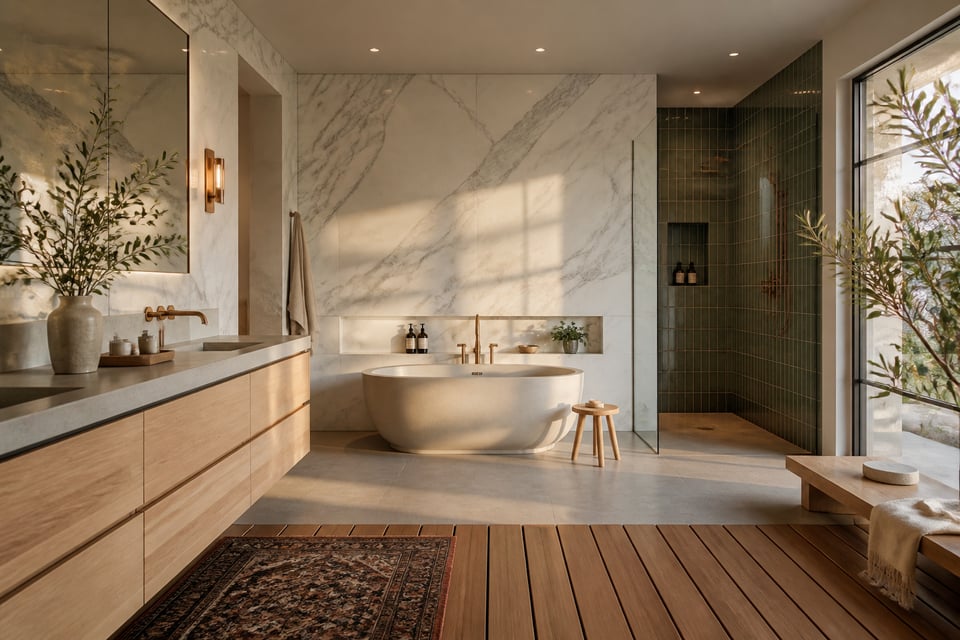
10. Freestanding Tub Positioned on a Polished Concrete Platform
A freestanding tub at floor level is a plumbing fixture. Raised on a 4-6 inch platform in front of a stone wall or a window, it becomes a piece of residential architecture. The platform is a small structural intervention that changes the visual register of the entire piece — the tub stops filling a space and begins occupying it deliberately.
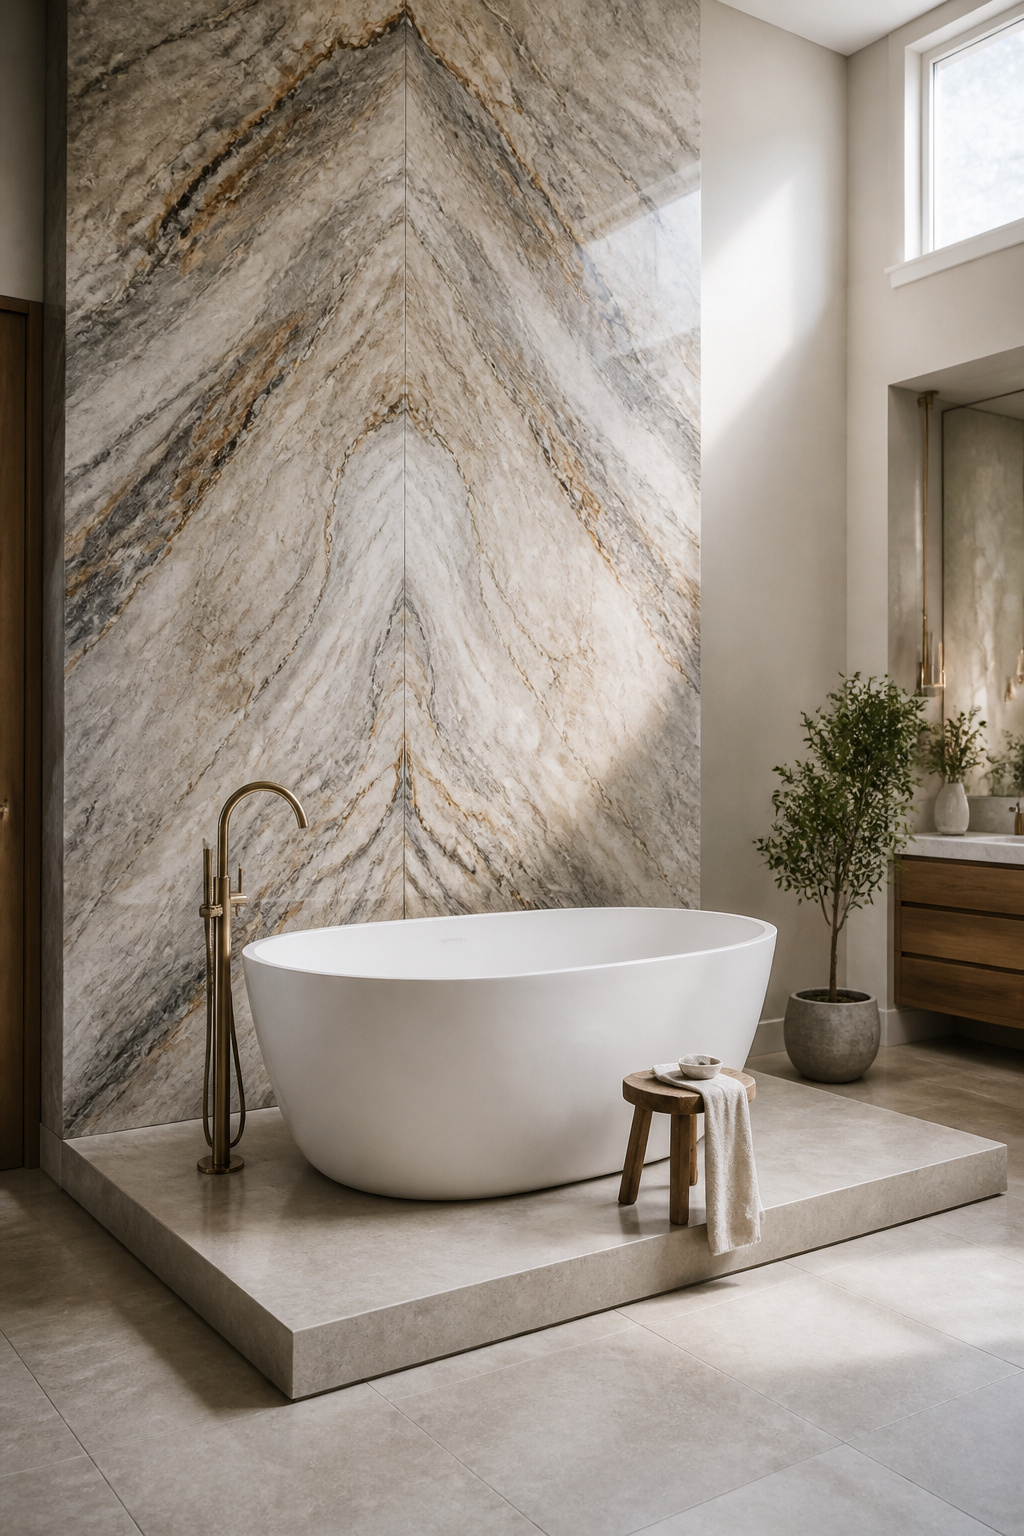
Positioning precedes selection. A freestanding tub placed against a wall negates its defining quality — it should be experienced from multiple angles, with at least 24 inches of clear floor on the long sides for comfortable entry and exit. The most powerful placement is in front of a strong architectural feature: a full-height stone wall, a window with a specific view, a concrete accent wall. The tub is the foreground element — it activates the surface behind it rather than just filling the room.
Platform material options align neatly with the bathroom’s primary material choice. A polished concrete platform in a concrete-accented room reads as a continuous ground plane; the tub rises from the floor rather than sitting on it. A travertine platform introduces warmth and texture, and filled-and-honed travertine is safe underfoot while retaining the character of the material. A single stone slab — quartzite or marble — produces the most sculptural reading, particularly when the veining wraps up the sides.
Plumbing and platform requirements
The plumbing commitment is the critical practical constraint. Floor-mounted tub fillers require supply lines stubbed up through the platform, which means the tub’s exact position must be finalized before the platform is built. Moving them after is a demolition exercise. Cast iron tubs weigh 250-400 lbs empty — the platform and floor structure must be confirmed for live load capacity before installation begins. Acrylic freestanding tubs at 70-100 lbs are the more practical choice for upper-floor installations where structural weight is a real consideration.
11. Limewash Plaster as a Contemporary Bathroom Design Alternative to Tile
Tile is the default in bathroom design because it’s reliable — waterproof, durable, easily cleaned. But the default isn’t always the best choice for every surface, and in bathrooms where the shower is fully enclosed and the primary concern is the ambient surfaces rather than the wet zone, limewash plaster produces a result that tile simply cannot: a surface that is breathable, naturally varied, and mineral rather than manufactured.
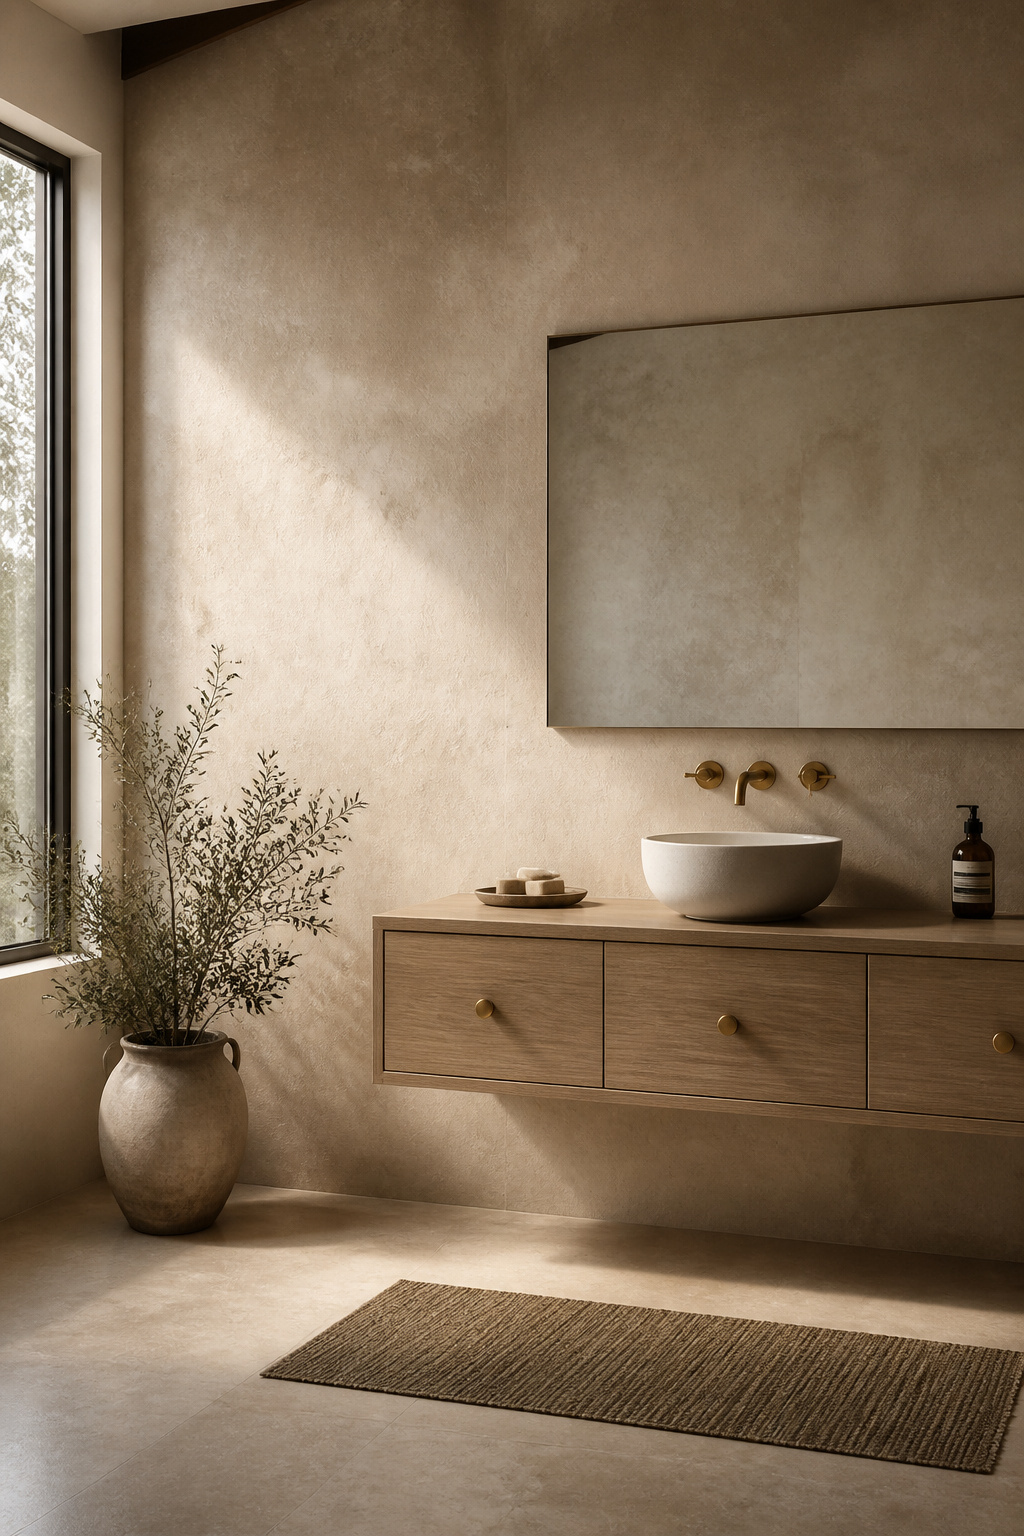
Limewash’s moisture management works through breathability rather than impermeability. Unlike a film-forming sealer or painted surface, limewash allows moisture vapour to pass through without trapping it — which means it won’t blister or peel in a steamy bathroom. Bauwerk specifically recommends their product for bathrooms and notes that it thrives in high-humidity environments. The boundary conditions are clear: do not apply inside a shower enclosure, do not apply directly behind a bath edge, do not use on any surface that receives direct water contact. Outside those zones — every other wall in the bathroom — it performs reliably.
The natural variation that defines the aesthetic comes from the chemistry of application. Limewash is applied in cross-brushed strokes that deposit the material at slightly varying thicknesses. The lime carbonates as it dries, and areas with slightly heavier application carbonate more opaquely — the result is the characteristic tonal variation that makes each limewash wall unique and unrepeatable. The colour dries 30-40% lighter than the wet application; Bauwerk’s Raw White and Casa tones are the most versatile starting points for a bathroom that needs to anchor heavier materials without competing with them.
For anyone weighing a bathroom that prioritises restraint in its material palette, the minimalistic bathroom design principles that actually endure cover the compositional logic that makes limewash effective as a dominant surface.
12. Vessel Sink Paired With a Natural Stone Plinth Base
Most vanity designs exist on a continuum between two poles: the built-in cabinet that maximises storage and disappears into the room, and the sculptural object that sacrifices storage for a visual statement that justifies the trade-off. The vessel sink and stone plinth combination occupies the far end of the second pole — and in a modern bathroom with heavy material choices throughout, the plinth has mass that a floating timber vanity doesn’t.
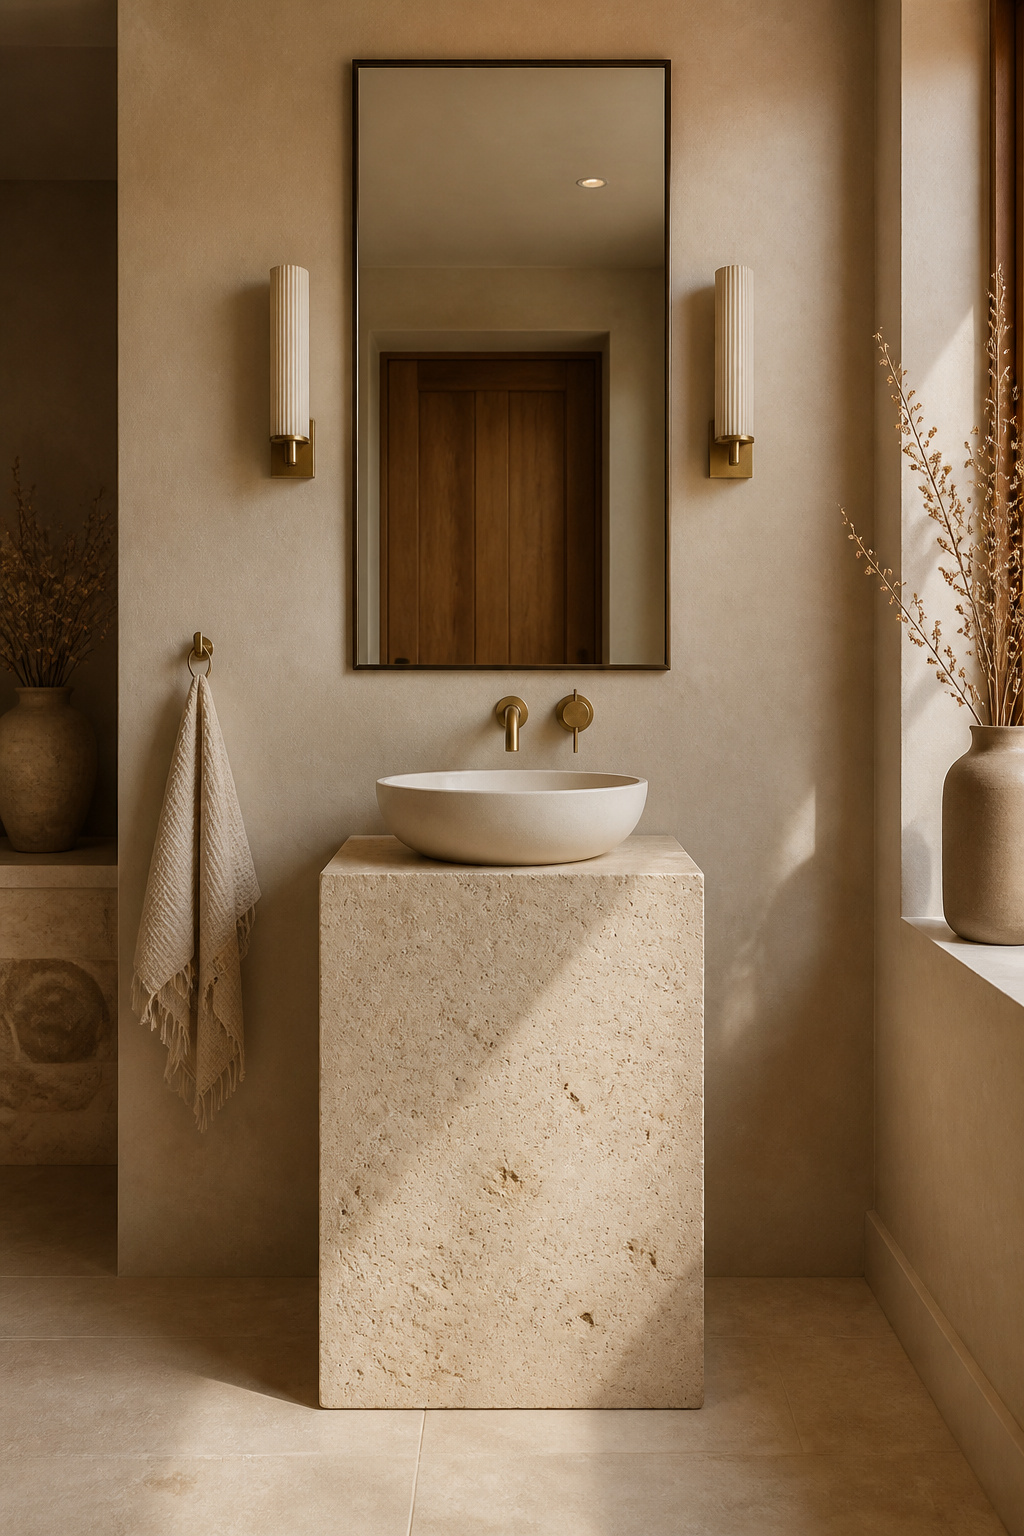
In a bathroom where the primary materials are concrete, full-height stone, or cast iron, the plinth’s mass feels appropriate — the vanity holds its visual ground rather than reading as lightweight against heavy surroundings. The plinth should be a single continuous material from floor to counter — introducing a join at the base or top adds a detail that competes with the simplicity of the form. Travertine and honed Calacatta marble are the most-used plinth materials; engineered stone composites machine better for tight-tolerance joints if the design requires precision edges rather than the slight natural irregularity of cut stone.
The counter height adjustment is the non-negotiable practical detail. A vessel sink sits 4-6 inches above the counter surface, which means the plinth counter height must be 4-6 inches lower than a standard built-in vanity — typically 30-32 inches rather than 34-36. Skipping this means a working height of 40-44 inches, which is uncomfortably high for most adults. A round ceramic vessel on a square stone base creates the most composed contrast — organic form against geometric structure. A concrete basin on a concrete plinth produces a monolithic reading that suits rooms where the whole material palette is mineral and the modern bathroom design language is uncompromisingly hard-edged.
13. Full-Height Framed Mirror as the Room’s Singular Focal Point
A bathroom mirror does a job: it shows you what you need to see while you prepare for the day. But the framing, scale, and placement of that mirror does a second job simultaneously — it either adds a considered object to the room’s material composition, or it sits on the wall and pretends not to be there. A full-height framed mirror at the right scale does the first job in a way that makes the second seem irrelevant.
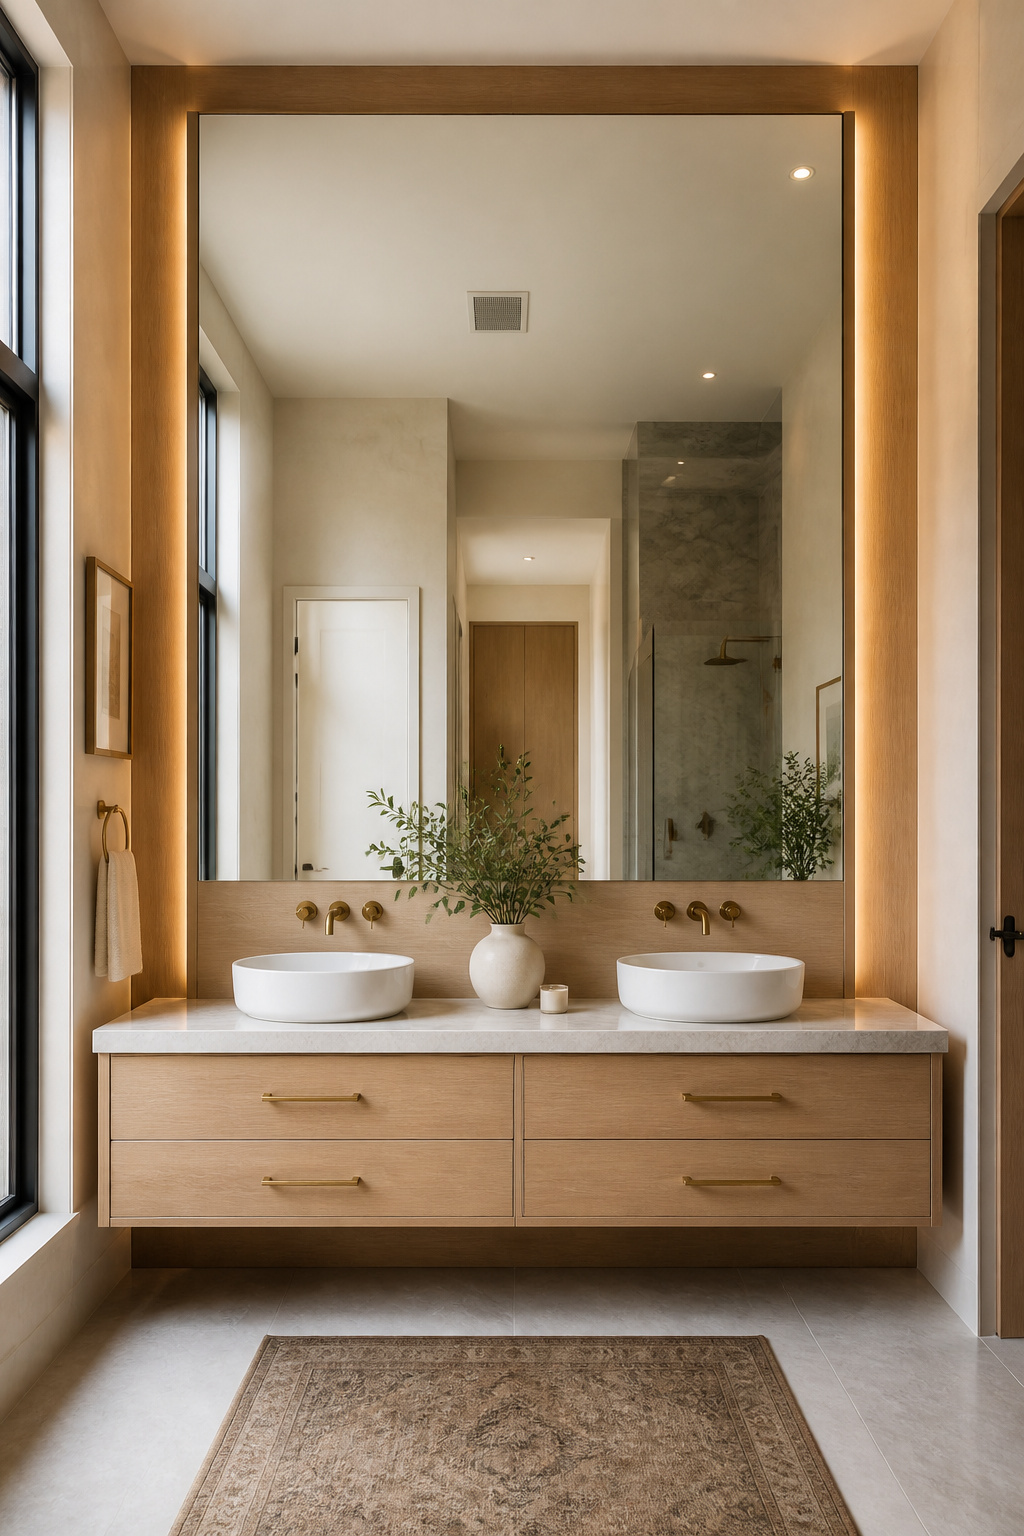
The proportion logic is straightforward. Mirror width should match vanity width within 2-4 inches — significantly narrower creates a disconnected proportion that undermines the visual relationship between the two pieces. A single large mirror running the full width of a double vanity is almost always stronger than two smaller mirrors — the unbroken reflection doubles the perceived width of the bathroom at the cost of one piece rather than two. In a room with a 9-foot ceiling, a mirror running from counter-backsplash height (approximately 32-36 inches from floor) to within 4-6 inches of the ceiling is proportionally correct.
Frame material is the secondary design decision with a disproportionate tonal effect. A 3/4-inch flat-bar steel frame in matte black defines the mirror’s edge with minimal visual weight and connects to matte black hardware elsewhere in the room. A 1-2 inch white oak edge — the mirror bonded to a panel that provides the frame — brings warmth to a surface that otherwise risks reading as purely functional. The most architectural approach is a recessed plaster frame: the mirror set into a plastered surround flush with the wall, making it feel like an aperture rather than an object.
The lighting integration is where function and design meet. Backlit mirrors with an LED panel behind the glass produce a soft perimeter glow with an invisible source. Side-lit setups — vertical LED strips flush with the frame on both sides — create the most flattering task light, eliminating the under-chin shadows that overhead lighting produces. Anti-fog demister pads are worth specifying in any modern bathroom where the mirror sits in the steam path — for more on getting the fixture side right, the bathroom lighting over mirror ideas that flatter cover the full range of approaches.
14. Zellige Tiles as a Tactile Modern Bathroom Renovation Feature
Zellige tiles don’t achieve their effect through scale or dramatic colour. The return on visual investment is disproportionate to both cost and area — a single backlit niche in authentic handmade zellige can reorient an entire room’s material palette. This is because no two zellige tiles are identical, and a field of tiles that each catch the light slightly differently creates a surface that looks alive rather than manufactured.
The distinction from machine-made ceramic begins in the source clay. Zellige is made from the specific mineral-rich clay found near Fez, Morocco, fired in olive-pit kilns using techniques refined over 800 years. The enamel glaze is applied by hand and fired to produce characteristic surface variation — deeper colour in some areas, more translucent in others, the micro-surface irregularities that catch light differently across the field. Authentic handmade tiles come with size variation of up to 3-4mm between tiles, which is not a defect but a characteristic — it’s what produces the shifting surface. The 4×4 inch format is the most common; authentic handmade zellige runs $18-28 per square foot, while mass-produced look-alikes run $7-10 and produce the flat uniformity that the authentic version specifically avoids.
Grout selection matters as much as tile selection. Mapei Ultracolor Plus FA is the most-recommended option for zellige installations because its flexibility accommodates the size variation in the tiles — standard rigid grout cracks at the inconsistent joints within months. Tone-on-tone grout lets the tile colour lead and reads as texture rather than pattern; contrasting white grout amplifies the graphic quality but is harder to live with over time. Zellige is not rated for floor use in high-traffic areas — the thickness variation creates lippage — but on walls and in shower niches it’s the material that most directly represents what’s valuable in handmade craft in a medium dominated by industrially manufactured surface.
15. Teak Slat Flooring and Bench for Warmth in a Hard-Edged Space
Most timbers in a bathroom are a calculated risk. White oak with the right finish, in the right location, works reliably — but it’s still a managed relationship between a living material and a humid environment. Teak requires no such management. Its internal tectoquinone oil content, combined with a natural silica content that resists decay, means it has been used on boat decks for centuries for exactly the reason it works in contemporary bathroom design: sustained water exposure does not cause it to swell, rot, or deteriorate.
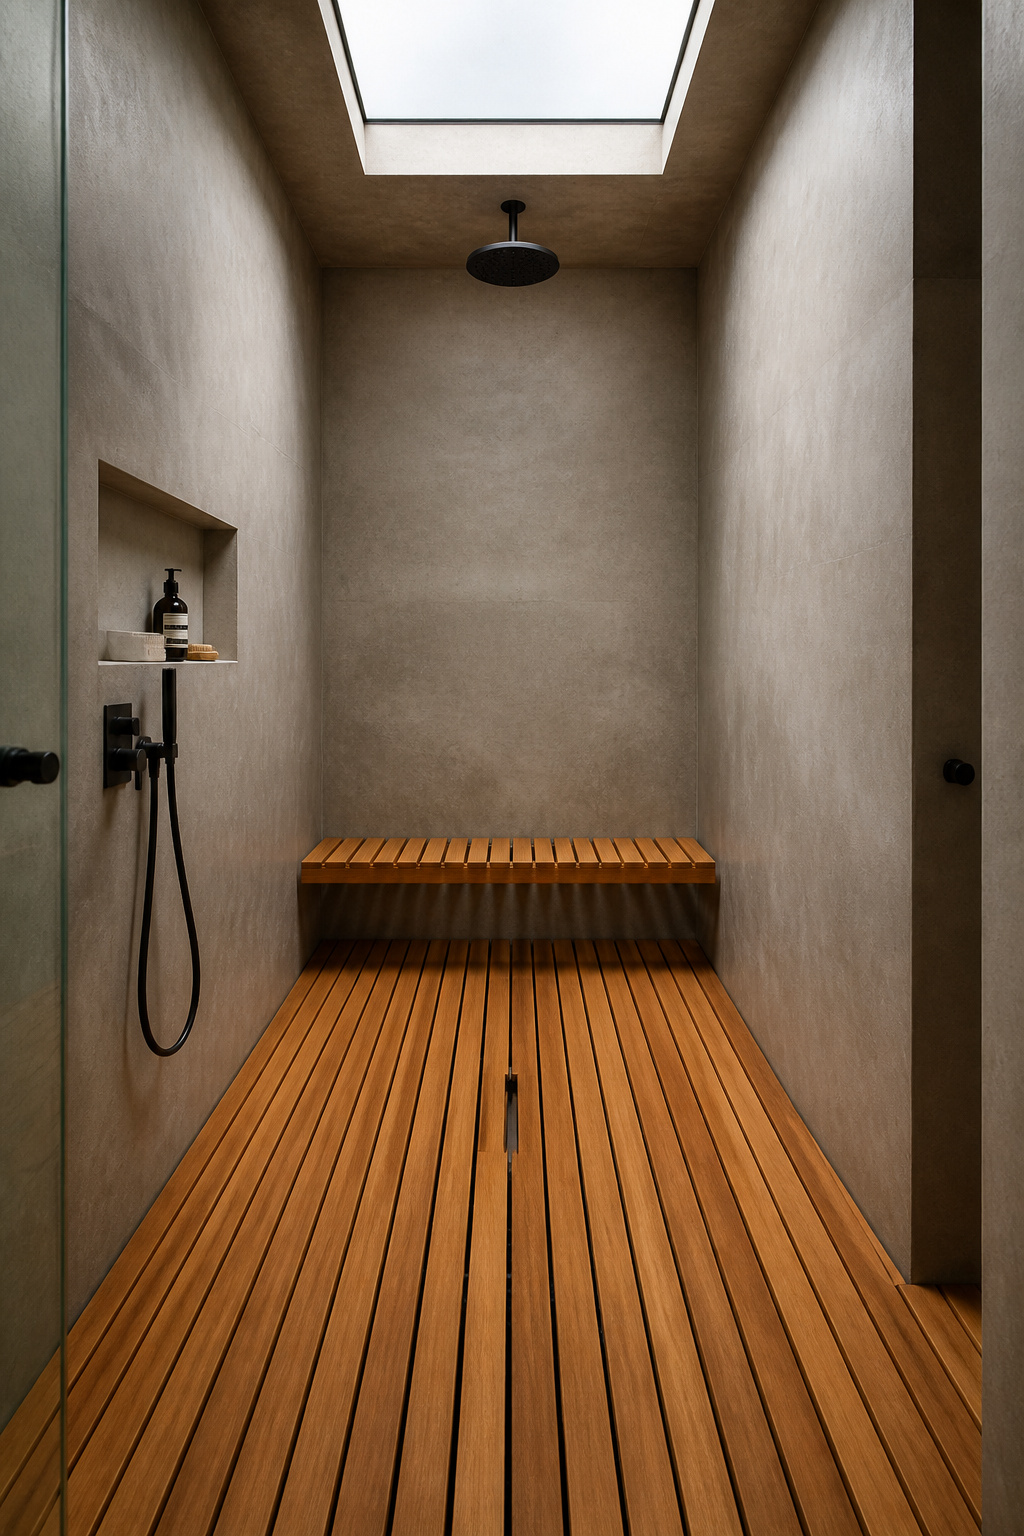
Slat construction is the practical format. Individual teak slats at 65-80mm wide and 15-20mm thick are mounted on aluminium or stainless steel support rails that keep the timber elevated above the floor surface. The 1/2-inch (12-13mm) spacing between slats allows drainage while remaining narrow enough not to create a trip hazard. The substrate beneath drains at the standard 2% fall; the teak sits level above it on the rails. The rails handle the drainage geometry — the timber handles the aesthetic.
Left unfinished, teak weathers over 12-24 months from its characteristic warm amber-gold to a silver-grey patina. Some designers spec this as the intended outcome — silvered teak in a concrete wet room has a restraint that the golden version doesn’t. For those who prefer to maintain the amber tone, a tung oil-based marine oil applied every 12 months preserves both the colour and the material’s water resistance. The combination worth working toward: teak slat flooring and a teak slat bench in a wet room with concrete walls, a linear drain, and matte black fittings. The warm grain against the cool concrete creates the most complete expression of the modern bathroom material palette — hard and soft, geological and botanical, each making the other more legible.
Choosing a Modern Bathroom Design Direction That Fits Your Home
The fifteen ideas in this piece represent a material-led rather than style-led approach to bathroom design modern thinking. That distinction matters at the decision stage: if you start with a mood board, you’re choosing aesthetics. If you start with materials, you’re choosing longevity.
For bathrooms under 80 square feet, material quality carries the room more reliably than layout innovation. There are only so many spatial decisions available in a compact floor plan, and the most meaningful upgrade is usually material specificity — trading standard tile for terrazzo, standard white for limewash, chrome hardware for unlacquered brass — rather than a full layout reconfiguration. For bathrooms above 100 square feet where a master suite arrangement is possible, the layout decisions (wet room versus enclosed shower, platform tub versus freestanding at floor level, single full-width vanity versus separate plinth-and-basin) become as important as the materials themselves.
The sequencing rule that prevents the most expensive mistakes: lock in layout before materials, and lock in materials before finishes. Plumbing positions, niche locations, drain positions — these are the hardest to change once construction begins. Material choices (stone species, timber selection, tile format) determine what fixture finishes, grout colours, and paint tones are available to you. Hardware and accessories are the final layer, and they should never be the first decision made.
Every modern bathroom design in this list has a different entry point. Start with the material that speaks most directly to how you want the room to feel — the warmth of reeded oak, the geological solidity of a full-height stone slab, the mineral atmosphere of limewash — and build the rest of the room around that choice. That logic produces bathrooms that hold their ground not just against the next trend cycle, but against the passage of time.