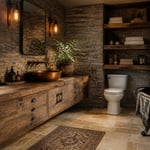
There’s a specific feeling that happens the first time you step into a bathroom where every material feels intentional — where the grain of the wood, the texture of the stone, and the weight of the fixtures all speak the same language. That feeling is what a thoughtful rustic bathroom remodel is really chasing. Not just the aesthetic shorthand of barn wood and bronze, but the deeper sense that these materials were chosen because they’ll age into something better than they started.
After years of working through material combinations — understanding how slate patina shifts under different light sources, how the iron in hand-hammered copper changes the way a room reads at dusk — I’ve found that a rustic bathroom remodel is one of the most forgiving projects in a home. Natural materials tolerate imperfect execution and reward it. A small gouge in reclaimed oak looks like character. A mineral stain on travertine looks like geology. That tolerance for the human hand is the whole point.
These 15 rustic bathroom ideas span the full range: structural moves like clawfoot tubs and stone shower surrounds, material upgrades like live-edge shelving and copper vessel sinks, and finishing touches that do more visual work than their price suggests. Some you can execute on a weekend. Others are worth calling in professionals. All of them are specific, proven, and worth understanding before you spend a dollar.
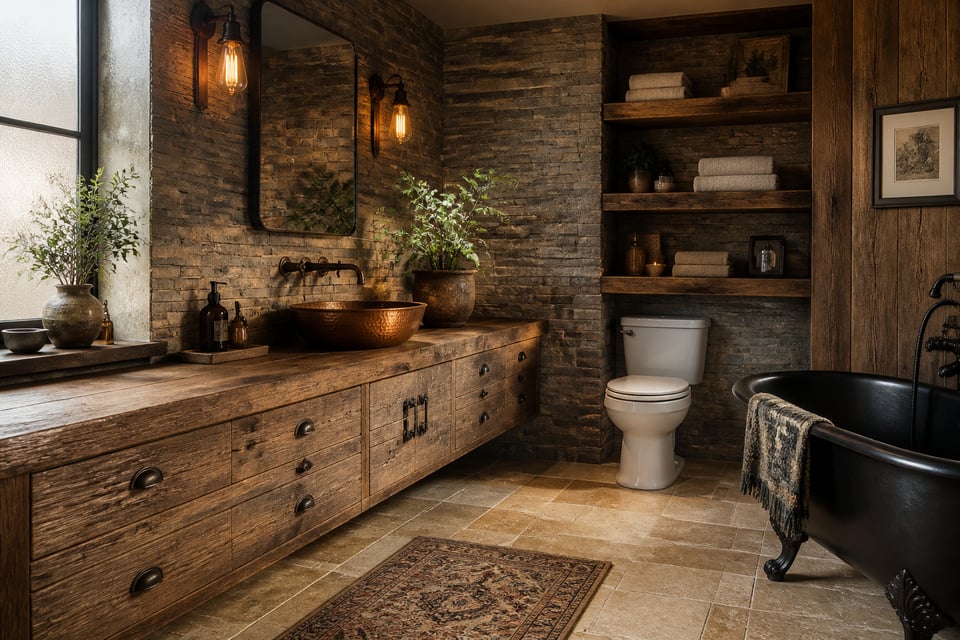
1. Reclaimed Wood Vanity With an Undermount Vessel Sink
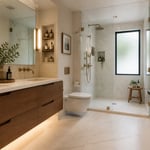
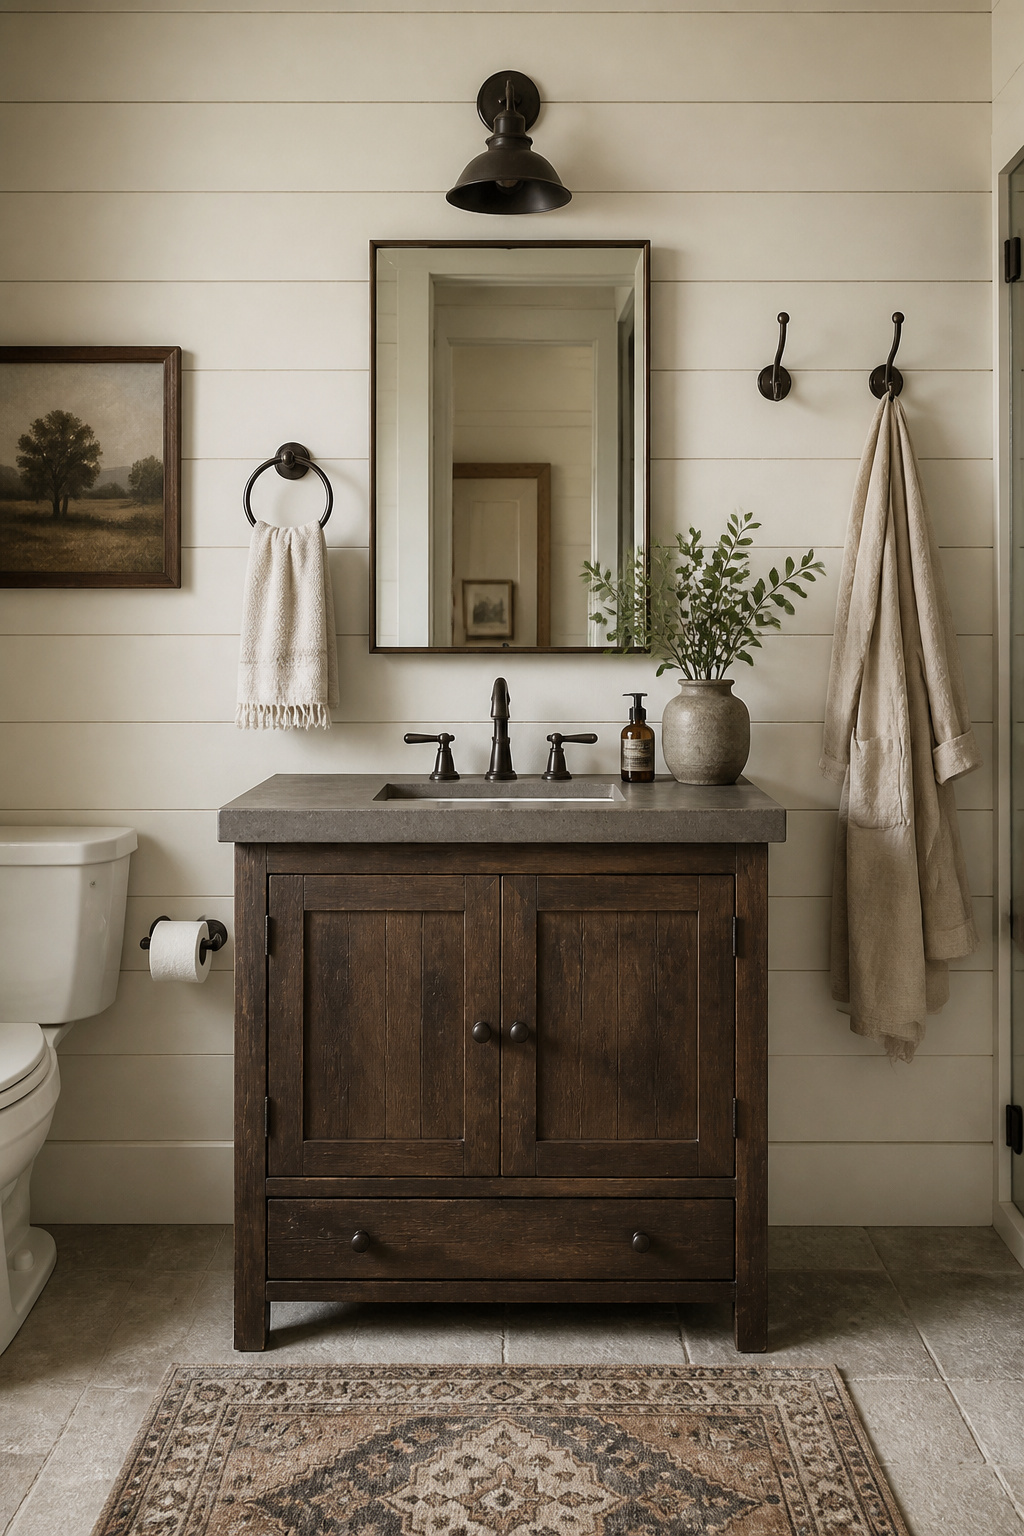
A reclaimed wood vanity is the first material most people picture when they imagine a rustic bathroom — and with good reason. But the difference between a vanity that looks great on day one and one that holds up across a decade of bathroom humidity comes down to two decisions: which species of wood, and what you seal it with.
Teak and white oak are the workhorses here. Teak contains naturally occurring oils and silica that give it the same moisture resistance shipbuilders relied on for centuries — it’s one of the few wood species that tolerates wet environments without heavy chemical intervention. White oak has a cellular structure called tyloses that physically blocks its vessels, limiting water uptake in a way red oak simply can’t match. Both read as warm, rich, and deeply textured under a vanity light. Softwoods like pine absorb moisture quickly and are prone to swelling; they’re not appropriate choices regardless of sealing.
Sealing method matters as much as species. A two-part resin forms a hard, water-resistant film that stands up to the humidity swings a bathroom produces daily. Penetrating oil (tung or Danish) soaks into wood fibers rather than coating the surface, so it looks more authentic, but needs reapplication every year or two. What you’re sealing against isn’t standing water so much as sustained humidity that quietly warps unprotected wood over time.
Vessel Sink Pairings That Complete the Look
A hammered copper bowl over dark-toned reclaimed wood lets both materials develop patina together — a symbiosis that looks better at year five than year one. A natural stone vessel in travertine or slate brings geological weight and works well when the floor and vanity share the same material story. White ceramic creates deliberate contrast, which suits modern-rustic leanings but reads as too clinical for a pure farmhouse space.
If you’re sourcing genuinely reclaimed wood rather than artificially distressed material from a big-box store, look for architectural salvage dealers who can speak to the provenance. The grain and patina on 80-year-old barn oak is unmistakably different from new distressed pine, and for a rustic bathroom vanity built around material authenticity, that difference is worth the extra effort.
2. Stone Tile Floors for Your Rustic Bathroom Remodel
The floor in a rustic bathroom works harder than any other surface. It has to be beautiful, slip-resistant, and capable of tolerating decades of wet feet. Natural stone handles all three when the finish and species are matched correctly.
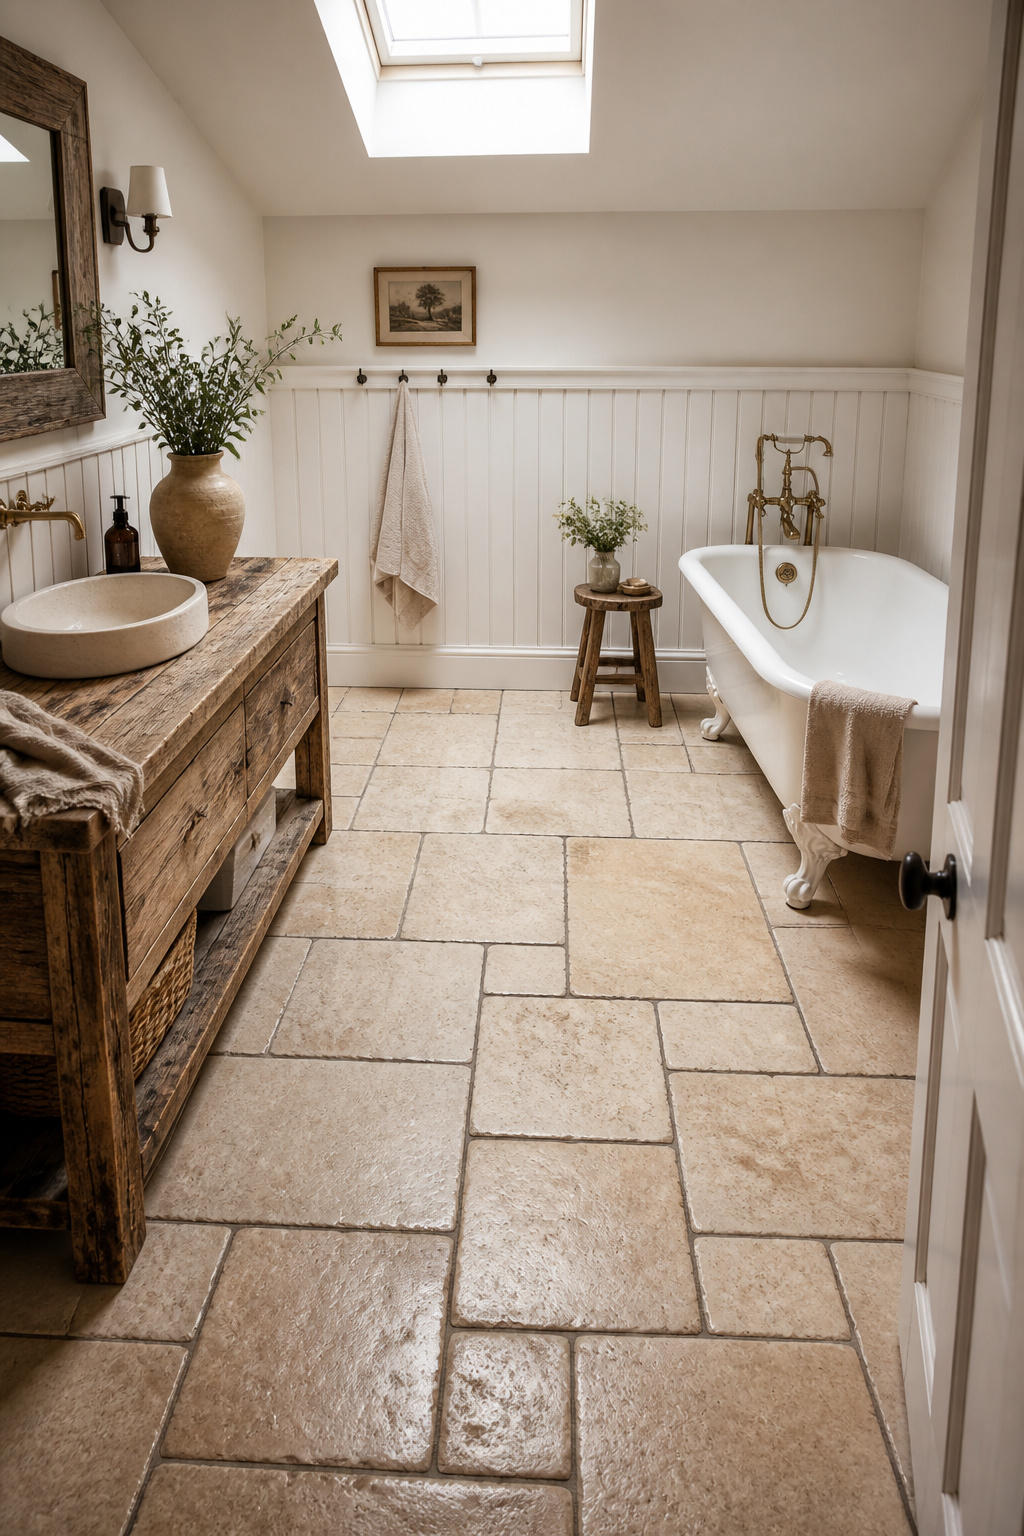
Tumbled travertine and tumbled marble are the best starting points. The tumbling process produces the slightly worn, softly rounded surface that reads as genuinely aged rather than showroom-fresh, and it delivers SCOF (Static Coefficient of Friction) ratings of 0.50–0.70 in wet conditions. That 0.50 threshold is what professionals consider the minimum for a safe wet floor. Slate is inherently textured; its natural cleft surface provides grip without any additional treatment, making it a smart choice if you want to simplify the maintenance schedule.
Polished finishes on any stone are problematic underfoot. The surface that looks stunning in a tile showroom drops into dangerously slippery territory the moment it’s wet — a common mistake, usually chosen for visual drama and regretted during winter mornings.
Grout Choice and Long-Term Maintenance
Dark charcoal grout between light travertine tiles creates contrast that makes each stone read as its own element. Tone-on-tone grout (matching closely to the stone color) produces a more unified surface that recedes and lets the room’s other elements take the lead. Epoxy grout is worth the cost premium: it’s non-porous, resists staining, and doesn’t require its own sealing schedule the way cement grout does.
For maintenance, penetrating sealers are the right category for any natural stone floor — they absorb into the material rather than forming a topcoat that can chip or peel. Travertine needs resealing every 1–2 years in bathroom use; slate’s denser structure often holds four years between applications. Avoid acidic cleaners entirely — vinegar and citrus products damage both the sealer and the stone beneath. Consistent with the bathroom tile designs that hold up best over time, the combination of the right stone and the right grout is what makes the difference.
3. Shiplap Accent Wall Behind the Bathtub
Horizontal lines in a room produce a specific response: the eye moves laterally, the space feels wider, and visual interest distributes evenly rather than competing for the same focal point. In a narrow bathroom, shiplap does more spatial work than any paint color while also introducing the texture and warmth that natural materials bring.
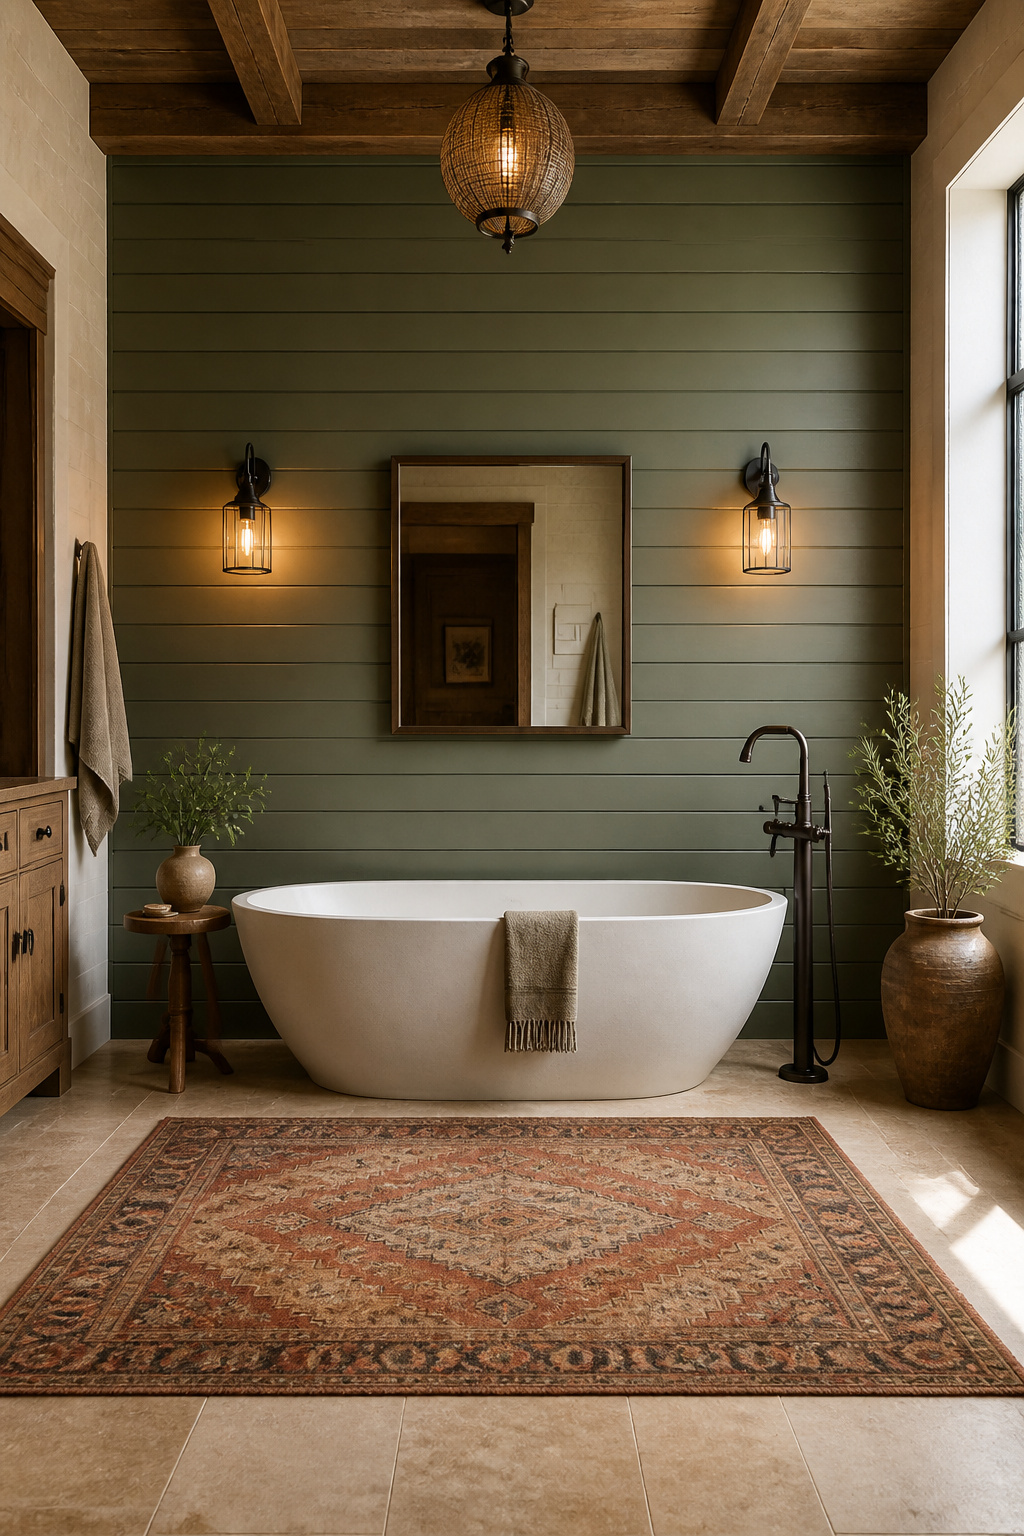
Behind the bathtub is the logical placement because the tub wall is already the room’s natural focal point. Shiplap frames that intention rather than fighting it. The shadows cast by the overlap gaps create a subtle linear rhythm that reads as architectural detail — it’s the difference between a wall that was designed and one that just got painted.
Material Selection and Paint Finishes
Material selection is where most shiplap installations succeed or fail. PVC shiplap — brands like Royal Building Products make tongue-and-groove versions in the $3–5/sq ft range — is completely waterproof and mold-resistant. It’s the right choice for any wall within six feet of the tub. For walls that stay genuinely dry, moisture-resistant MDF handles humidity well at roughly half the cost. Real pine or poplar shiplap is the most authentic-looking option, but it belongs only in genuinely dry locations and needs proper priming and semi-gloss paint to survive bathroom steam over time.
Back-prime all panels before installation and seal every cut edge with primer or caulk. Moisture enters through unprotected cut ends first — that’s where most shiplap failures start, not from the finished painted surface.
White and off-white are the classic choices because the shadow lines do the decorative work without color competition. However, there’s a strong case for sage green, soft gray-blue, or greige in a space using warm wood and bronze. The farmhouse bathroom ideas that work best in small spaces consistently rely on tone relationships between wall and material, not just individual material choices.
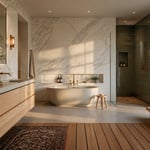
4. Clawfoot Soaking Tub as the Focal Point
A clawfoot tub is the piece that makes a rustic bathroom remodel undeniably itself. Everything else — the stone, the wood, the fixtures — is supporting cast. The tub is the reason someone pauses in the doorway.

The cast iron versus acrylic question comes down to floor structure and budget. Cast iron tubs weigh 385 pounds or more empty. A filled tub with an occupant approaches 700 pounds. Most residential floor joists handle that on the ground floor without issue, but on upper floors in older homes, that’s a structural engineer conversation before a purchase. Acrylic clawfoot tubs weigh 100–150 pounds, require zero structural work, and come in the same visual profiles. The meaningful difference is heat retention — cast iron keeps water warm 20–30 minutes longer, which matters more than it sounds during an actual soak.
Exterior finish deserves real consideration since the full tub is visible from every angle. Matte black reads as modern-rustic. Vintage white with unlacquered brass or aged bronze feet is classically farmhouse. Chalk-painted exteriors in sage green or slate blue are a legitimate DIY option for personalizing a salvage-yard find, often available at $200–600 before refinishing.
5. Rustic Bathroom Renovation With an Exposed Ceiling Beam
Few architectural moves deliver as much rustic impact as an exposed ceiling beam. They transform a bathroom from a room with a ceiling into a room with overhead structure — a visual depth that flat ceilings cannot produce. For most homeowners, genuinely exposed structural beams aren’t required to create the effect.
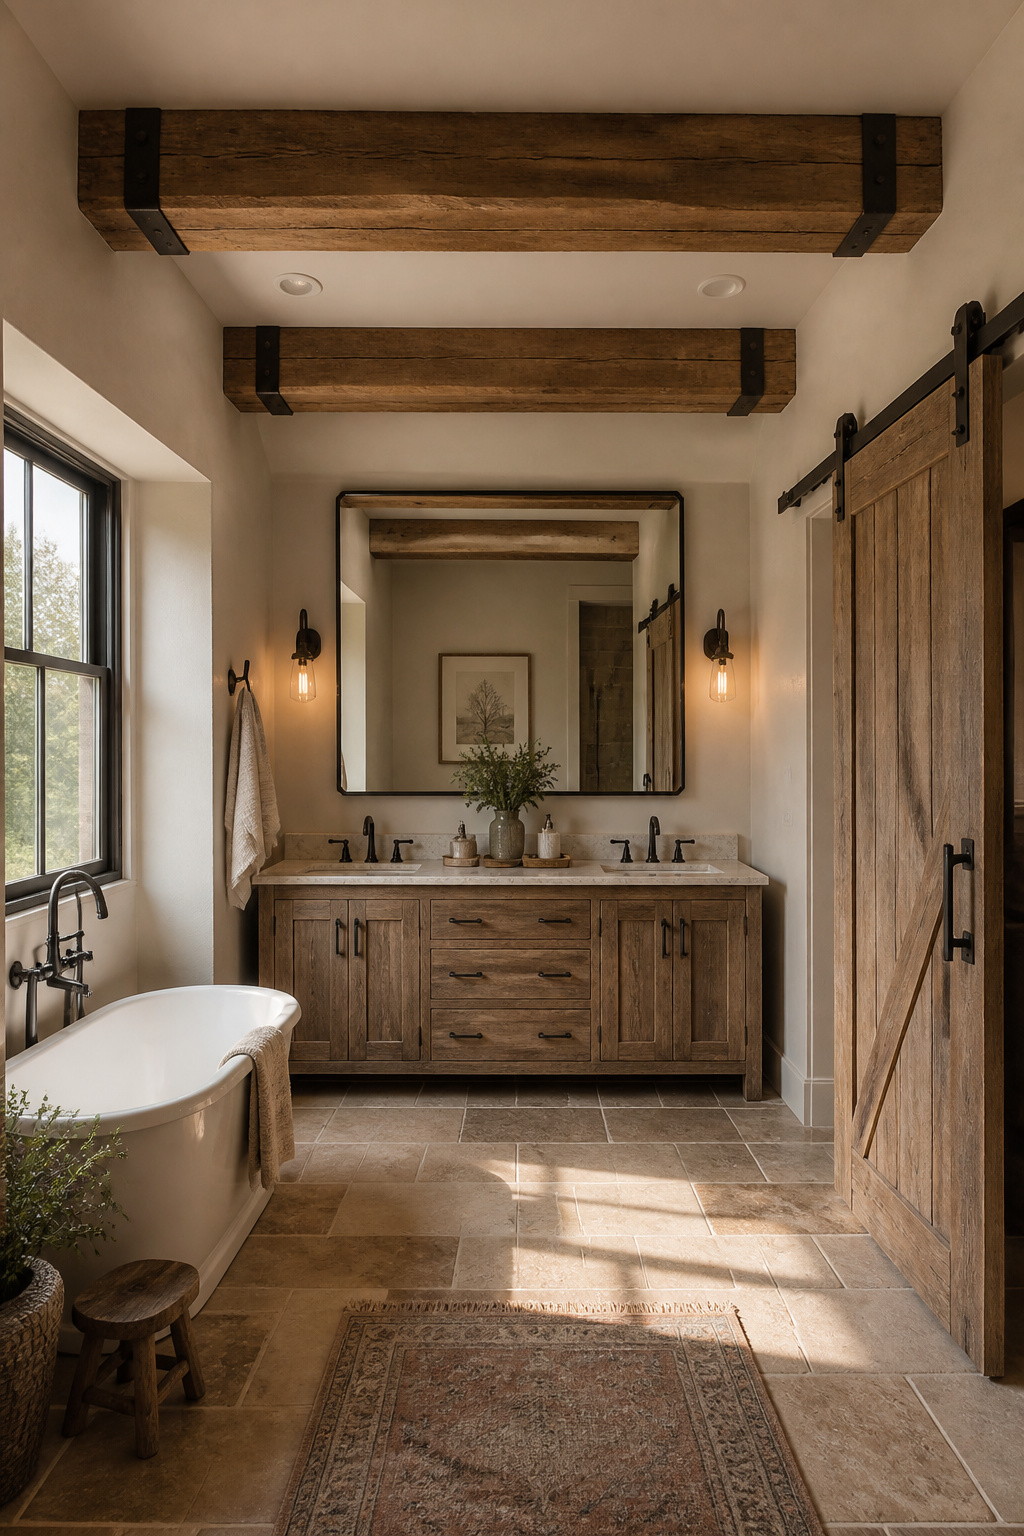
Faux wood beams — polyurethane foam cores with textured wood-appearance surfaces — have improved dramatically. Manufacturers like AZ Faux, Barron Designs, and Rustic Timber produce versions that replicate hand-hewn oak, weathered barn wood, and aged pine with convincing grain patterning. They weigh 2–8 pounds per linear foot and mount with construction adhesive and screws into ceiling mounting blocks. No structural work required, no permits for a decorative installation.
Sizing, Spacing, and Avoiding Visual Overload
Sizing and spacing follow proportional logic. For an 8-foot ceiling, beams in the 4.5 × 5.5-inch range read correctly — large enough to register as architectural, not so massive as to visually lower the ceiling. Spacing them 4–6 feet apart creates the right rhythm: tighter spacing feels cozier, wider spacing lets the ceiling read taller. If the ceiling is under 7.5 feet, skip the beams entirely — the visual oppressiveness isn’t worth the authenticity.
The common mistake is doing too much. Shiplap walls plus ceiling beams plus a reclaimed wood vanity plus stone tile can tip from layered into overwhelming. So if beams are present, the walls want to be simpler. Staining beams to match the vanity wood creates material continuity that makes this rustic bathroom renovation feel cohesive rather than assembled. Iron strap accents at mounting points cover the hardware and reinforce the handcrafted aesthetic without adding cost.
6. Oil-Rubbed Bronze and Matte Black Fixtures for a Unified Look
In a bathroom under 60 square feet, mixed metal finishes create visual noise that prevents a room from reading as designed. Chrome faucet, bronze towel bar, nickel toilet paper holder — individually inoffensive, collectively exhausting. Committing to a single finish family is the single highest-leverage decision in this category.
Oil-rubbed bronze and matte black both belong to the same visual family: dark, non-reflective, and forgiving of the daily fingerprint and water-spot accumulation that polished chrome makes visible within hours. The difference between them is behavioral. Oil-rubbed bronze is a living finish. It develops a two-tone patina as it reacts with oxygen, soap residue, and hand oils over time, lightening at contact points while deepening in recesses. Matte black is more stable — PVD-coated or powder-coated, it holds its appearance and cleans with a damp cloth.
Both finishes are far more practical than polished chrome in daily bathroom use. Water spots, fingerprints, and the residue that builds up around faucet handles all disappear against a dark matte surface in ways that polished metal makes conspicuous.
If a full replacement isn’t in the budget, metal-rated spray paint (Rust-Oleum Universal or Krylon Fusion) converts towel bars and toilet paper holders convincingly at $8–15 per can. It won’t hold up on the faucet itself, but for accessories and wall hardware, it’s a legitimate bridge while the rest of the remodel takes shape.
7. Barn Door Entry for Space-Saving Style
Standard hinged doors require 6–8 square feet of swing clearance — space that simply doesn’t exist in most bathroom footprints. Barn doors slide parallel to the wall and reclaim all of that. In a 45-square-foot bathroom, the difference between a hinged and sliding door is the difference between the space feeling cramped and feeling workable.
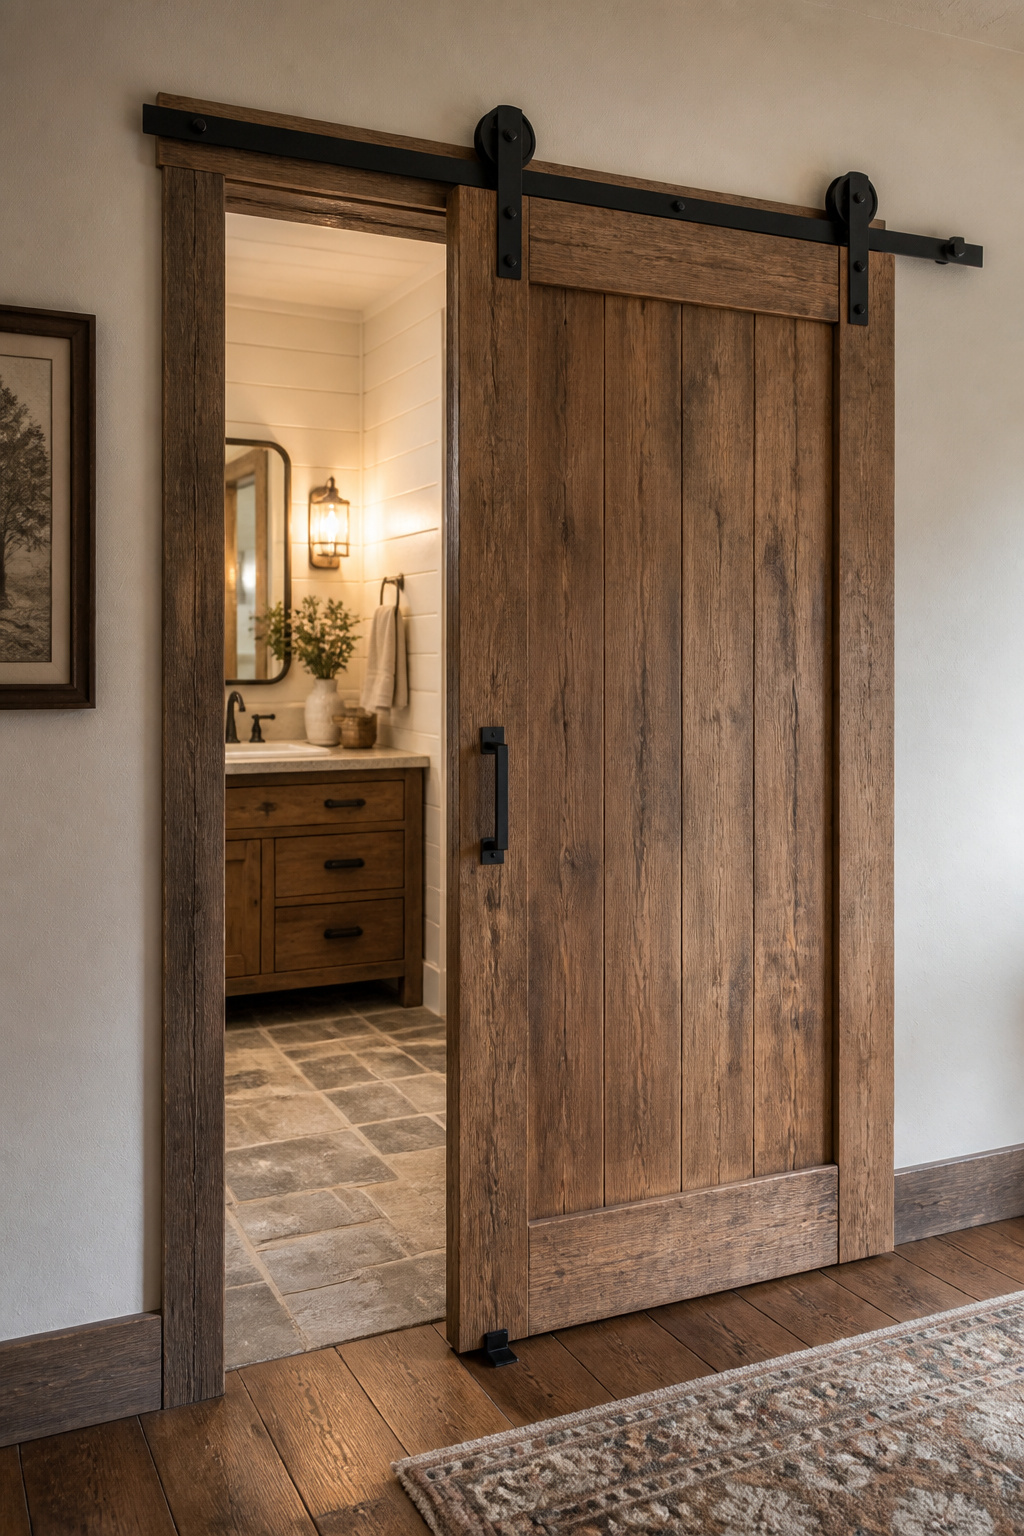
The visual logic is equally strong. Barn door hardware — the track, the rollers, the floor guide — is visible by design, and in a rustic bathroom that visibility works in your favor. Black iron hardware against a wood panel reads as the same material language as pipe towel bars and matte black faucets. The door becomes a design element rather than something to minimize.
Hardware Requirements and the Privacy Gap Solution
Hardware selection matters more than door material. Standard residential hardware is rated for 150–200 pounds; solid hardwood doors typically weigh 80–120 pounds depending on species and thickness, so hardware must be spec’d against actual door weight. The track must mount to wall studs or a solid header — drywall anchors won’t take the lateral forces a sliding door generates over years of use. The door itself needs to be 2–3 inches wider than the opening on each side for visual coverage.
Privacy gaps are the concern most often raised. Standard hardware holds the door approximately 3/8 inch off the wall, running the full perimeter. EPDM rubber weatherstripping on the vertical edges and top (foam fails in bathroom steam), plus a brush-style bottom sweep, address the perimeter. A barn door privacy latch that positively locks the door closed solves the psychological concern better than any sealing strategy. The combination makes the gap functionally insignificant.
8. Rustic Bathroom Remodel With a Natural Stone Shower Surround
A natural stone shower surround is the most convincing material commitment in a rustic bathroom remodel — and also the one that most rewards correct installation. Stone showers done right look better at year ten than year one. Stone showers installed without proper sealing look noticeably worse by year two.
Slate is the most common choice, and for good reason. Its natural cleft surface provides inherent grip, its density limits water absorption, and its layered geological appearance reads as genuinely earned rather than manufactured. Stacked stone ledger panels in slate, travertine, or quartzite offer a more accessible installation path — they cut and install like tile while delivering the depth and dimension of fieldstone.
River Rock Floors and Epoxy Grout
River rock floor inserts are worth serious consideration. The rounded stone surfaces and variable heights create a surface that water drains around rather than pooling on — inherently slip-resistant in a way that smooth tile requires a special finish to achieve. Installation requires a pre-sloped mortar bed and full grouting between stones; ungrouted gaps become mold incubators that are far easier to prevent than to remediate.
The single most important installation step is sealing before grouting. Water infiltrating behind stone leads to mold growth that requires complete tile removal to address — an expensive lesson. Penetrating stone sealer applied before grouting and annually thereafter is the correct maintenance schedule for porous stone in a wet zone. For grout, epoxy is the right category: non-porous, stain-resistant, and no additional sealing schedule required. Dark grout between stones reads more natural; white grout highlights every gap line and can look clinical in a rustic space.
9. Board-and-Batten Wainscoting for Textural Depth
Board-and-batten wainscoting adds structure and visual mass to a room in a way that paint never can. The linear grid of vertical boards creates a rhythm that organizes the lower third of a bathroom wall and makes the transition to the upper wall feel intentional rather than arbitrary.
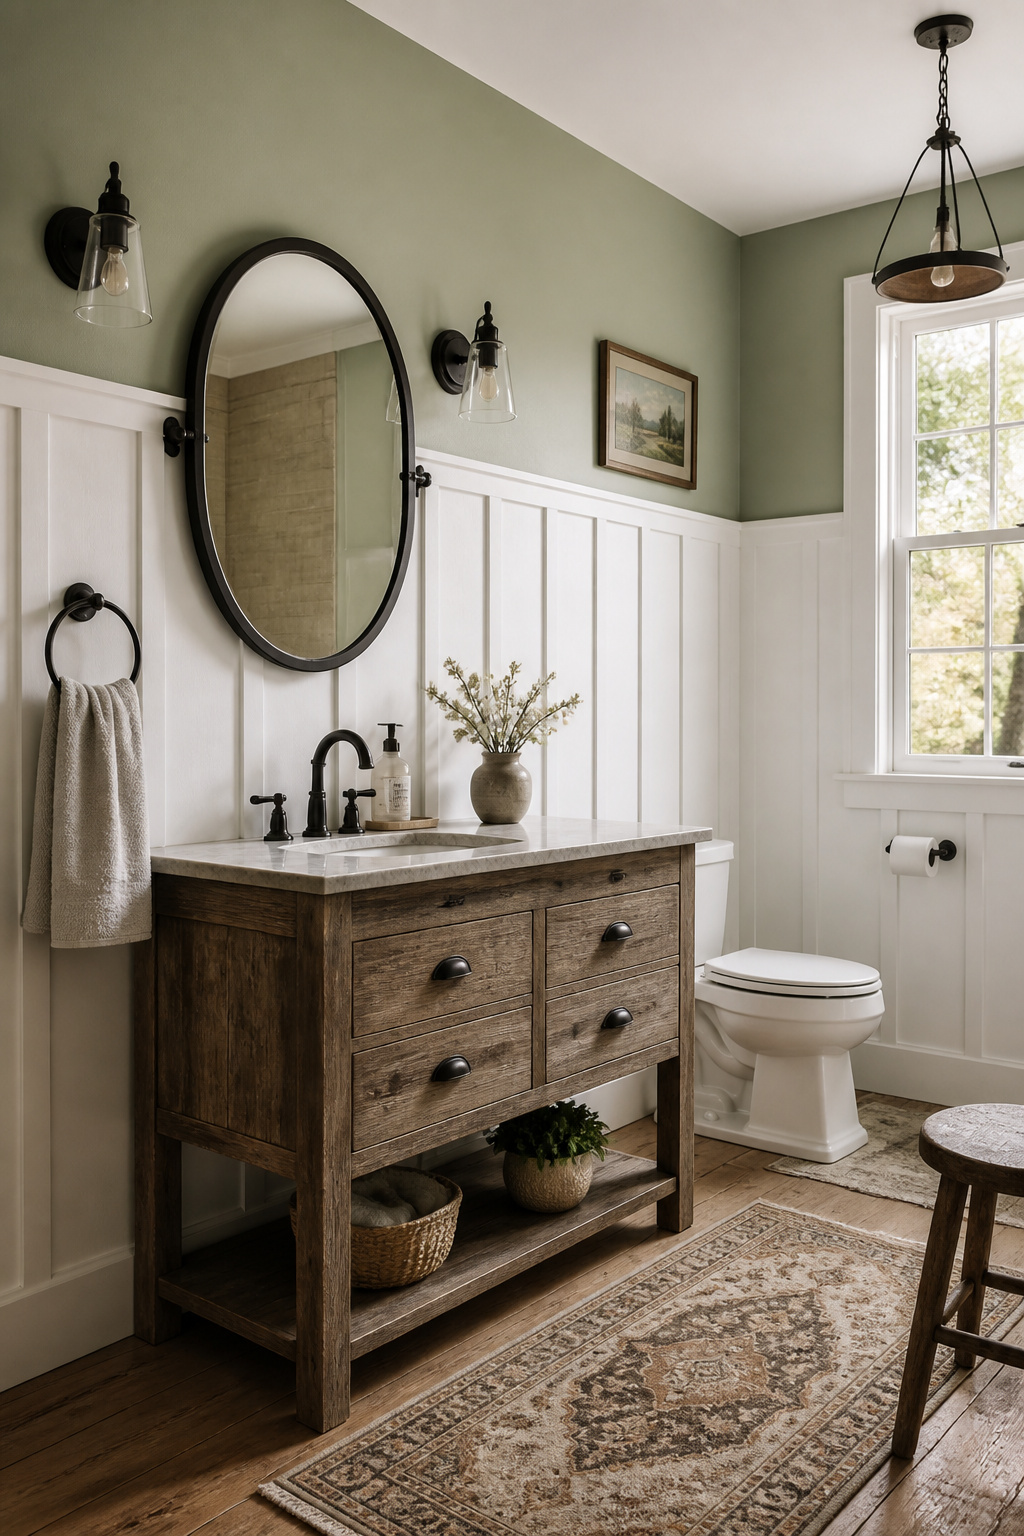
The proportion rule that most installation guides underemphasize: height must relate to ceiling height, not just personal preference. On standard 8-foot ceilings, 48–54 inches is the professional sweet spot. Higher starts to feel like the wainscoting is swallowing the room. Lower reads as timid and less architectural. On 9–10-foot ceilings, 54–60 inches is appropriate. Aligning the top rail with window sills or countertop backsplash height creates horizontal continuity — that detail is what makes board-and-batten look deliberate.
Material Selection and Paint Color
Standard MDF should not exist in bathroom wainscoting — it swells irreversibly when moisture enters from the floor edge or behind the panels. PVC trim boards are fully waterproof and accept paint identically to wood; they’re the right choice for any wainscoting within three feet of the tub or shower. Moisture-resistant MDF handles humidity significantly better at 15–20% higher cost, making it appropriate for vanity walls without direct water exposure.
Back-prime every panel before installation and seal all cut edges. Moisture enters through unprotected cut ends before it reaches the finished front face — that’s where most wainscoting failures originate.
For color, white wainscoting against a colored upper wall is the classic contrast treatment. Sage green or soft gray wainscoting with white above reads as elevated rather than literal farmhouse, and pairs naturally with the bronze fixtures and warm wood tones that anchor most rustic bathrooms.
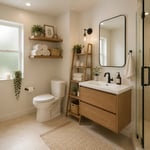
10. Live-Edge Wood Floating Shelves for Organic Storage
Of all the rustic bathroom upgrades available, live-edge wood shelves deliver the highest ratio of visual impact to cost. A single 24-inch walnut slab at eye level communicates more design intentionality than a bathroom full of matching chrome accessories. The natural contour of a live edge — the original silhouette of the tree preserved in the piece — is the clearest visual signal that a material was chosen rather than ordered.
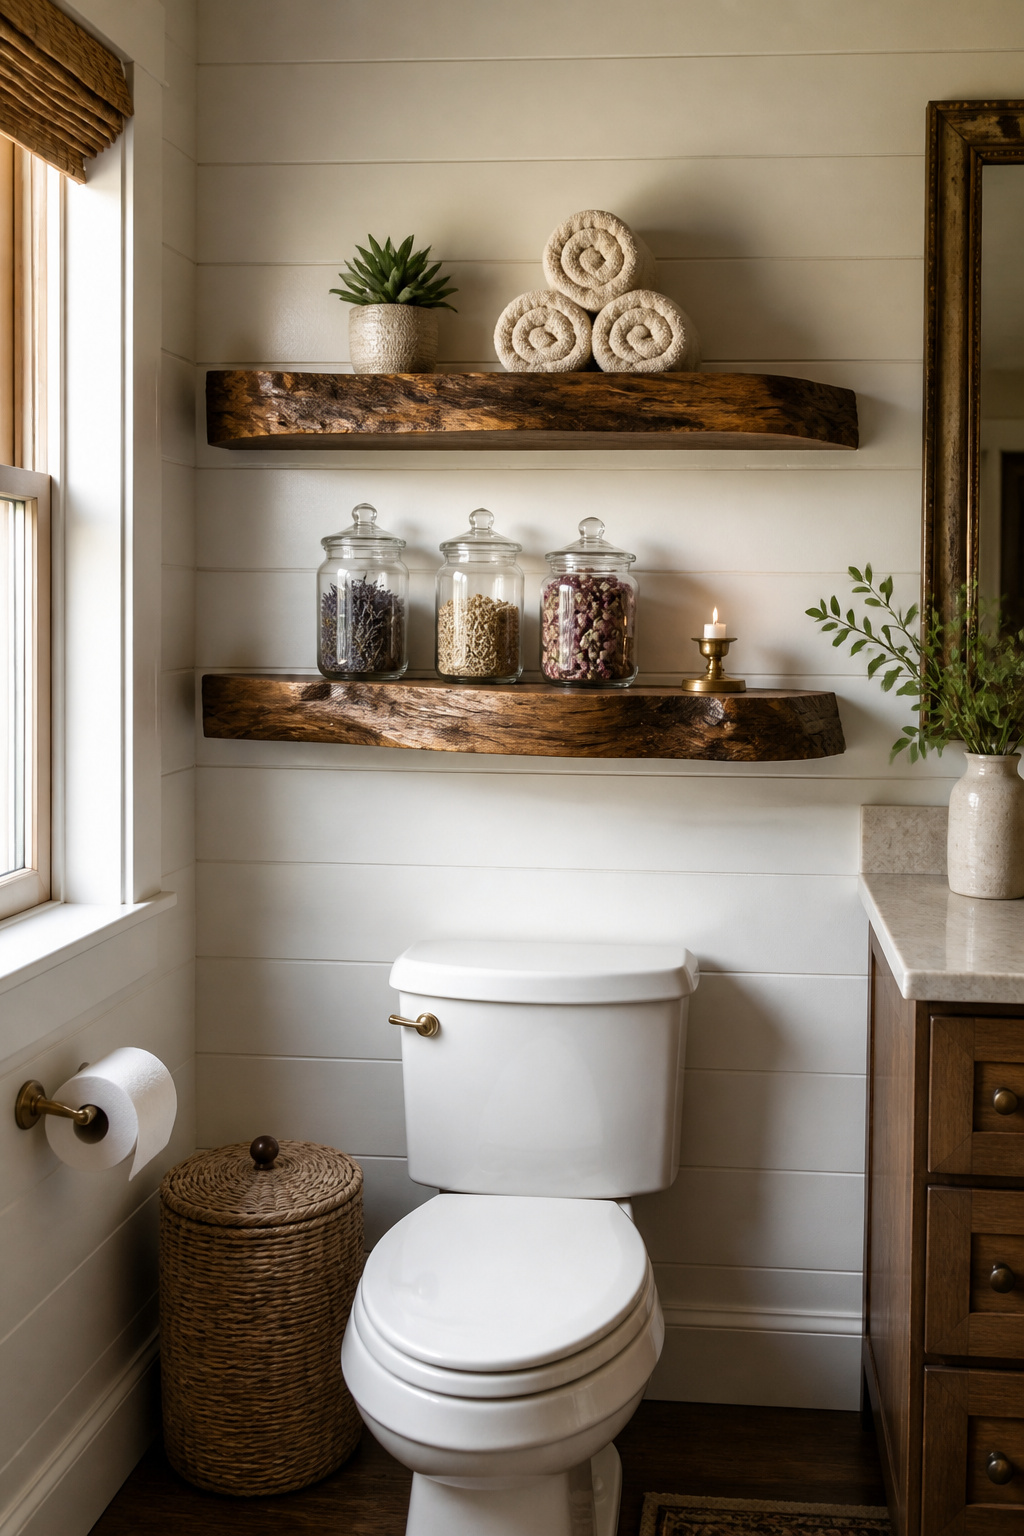
Walnut and white oak are the two species that most consistently match rustic bathroom palettes. Walnut’s deep chocolate-brown tones and tight grain pair naturally with matte black hardware and darker stone. White oak’s golden undertones and visible ray-fleck grain are more versatile, coordinating equally well with farmhouse whites, aged bronze, and greige palettes. At 1.5-inch thickness, either species has enough visual weight to read as a statement rather than a shelf.
Wood Finish, Species, and Mounting
Finish matters in a bathroom environment. Hardwax oil (VOC-free formulations from brands like Rubio Monocoat or Osmo) penetrates into wood fibers and provides genuine moisture resistance with a natural matte appearance. Unlike a surface film, it can’t chip or peel. Reapplication every two to three years keeps it performing correctly in bathroom humidity.
Mounting requires hitting studs. Weight capacity for hidden floating rod brackets anchored into studs runs approximately 50 pounds per bracket — adequate for a shelf holding toiletries and rolled towels, but not if the bracket is only in drywall. Hidden rod-style brackets give the cleanest presentation: no visible hardware, shelf appears to float. For the broader storage picture, small bathroom storage solutions often show how live-edge shelves work alongside concealed storage to deliver both material character and practical function in the same space.
11. Rustic Bathroom Makeover With Penny Tile or Hex Tile Accents
Penny tile and hex tile function as texture elements more than pattern elements in a rustic scheme — they add visual complexity without competing with stone or wood for dominance. Used strategically, they’re the detail that makes a room feel considered rather than assembled.
The most effective placement is small and specific. A shower niche tiled in penny rounds creates a framed jewelry-box effect wholly disproportionate to the square footage involved. A penny tile bathroom floor with dark charcoal grout sets the classic tone that pairs naturally with clawfoot tubs and exposed pipe hardware. A hex tile backsplash behind the vanity in a neutral tone adds texture at eye level without competing with a live-edge shelf or reclaimed wood vanity above it.
Cement vs. Porcelain and the Grout Color Decision
The material decision has real maintenance implications. Cement penny tile produces richer, more varied surface color and authentic artisan character, but it’s porous and requires sealing before grouting and annually thereafter. Glazed porcelain is dimensionally consistent, requires no sealing, and is more forgiving for DIY installation. For a rustic bathroom makeover where longevity matters as much as aesthetics, glazed porcelain is the practical choice unless professional installation support is available.
The hidden challenge with penny tile is grout quantity: all those small joints require 25–30% more grout per square foot than standard tile. Plan for it — running out mid-installation and color-matching a second grout batch is harder to solve than it sounds.
Grout color is the decisive choice. Dark charcoal with white penny tile is high-contrast and classic, each tile reading individually from across the room. Warm brown or terra cotta with cream penny tile creates a palette that coordinates naturally with travertine floors and copper sinks. Contemporary thinking on modern bathroom design has made grout tone as deliberate a choice as tile color itself — and in a rustic bathroom makeover, that specificity pays visible dividends.
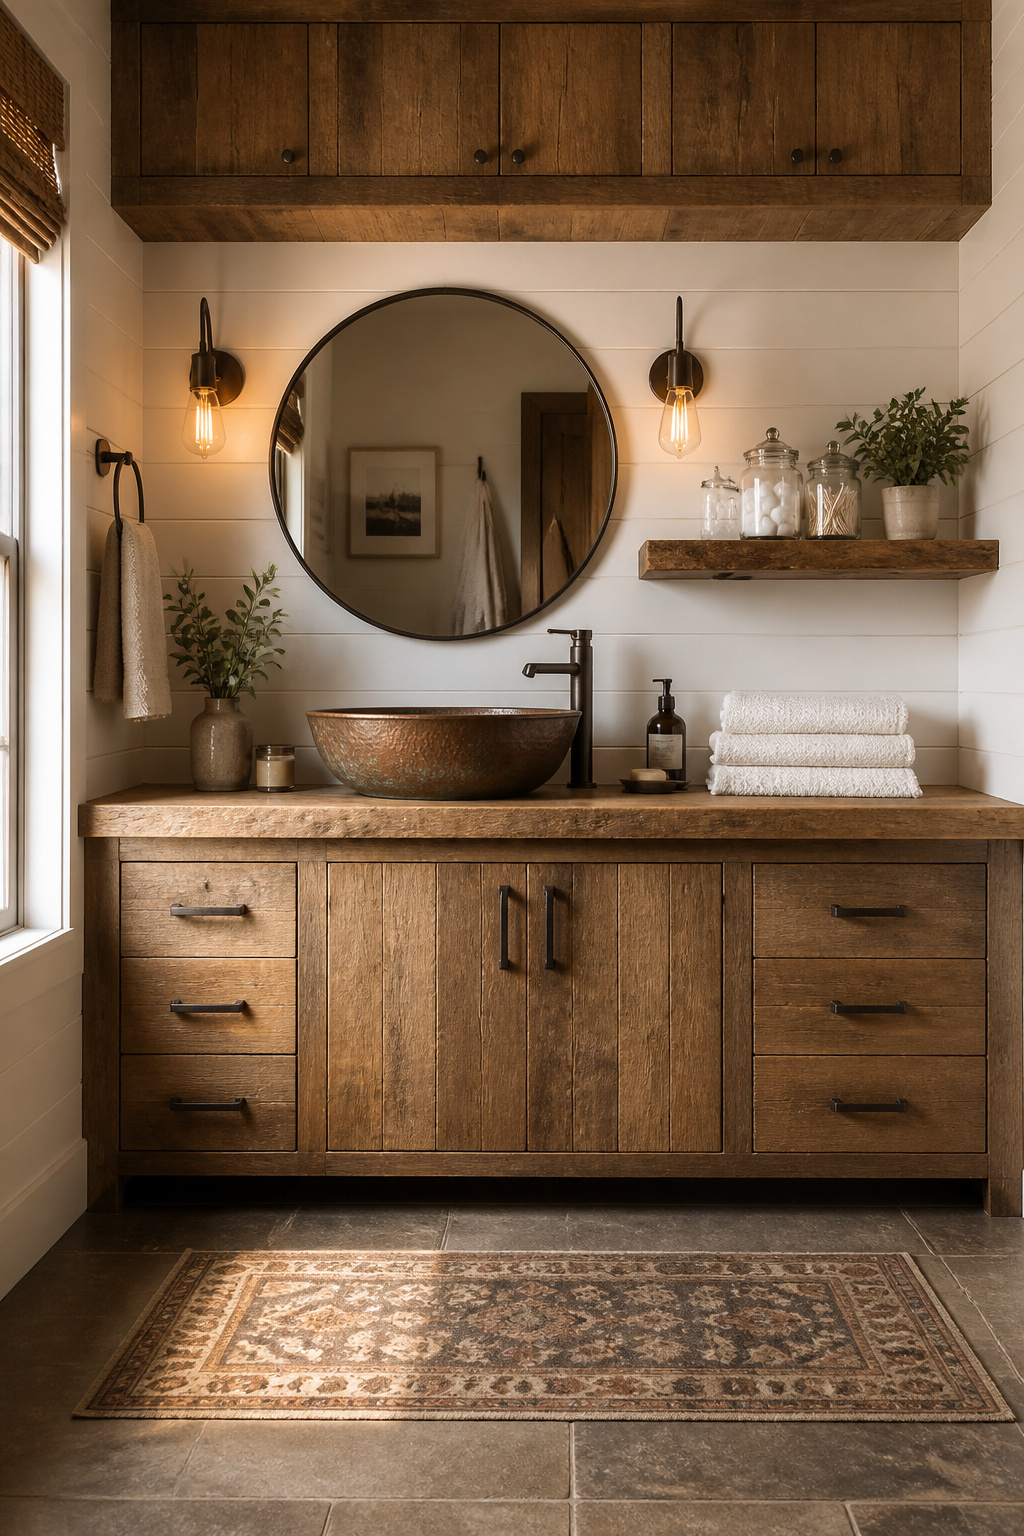
12. Hammered Copper Vessel Sink as a Statement Piece
A hammered copper vessel sink is one of the few bathroom fixtures that gets more interesting as it ages. Unlike virtually every other sink material, copper doesn’t wear out. It develops — becoming something richer than the day it was installed.
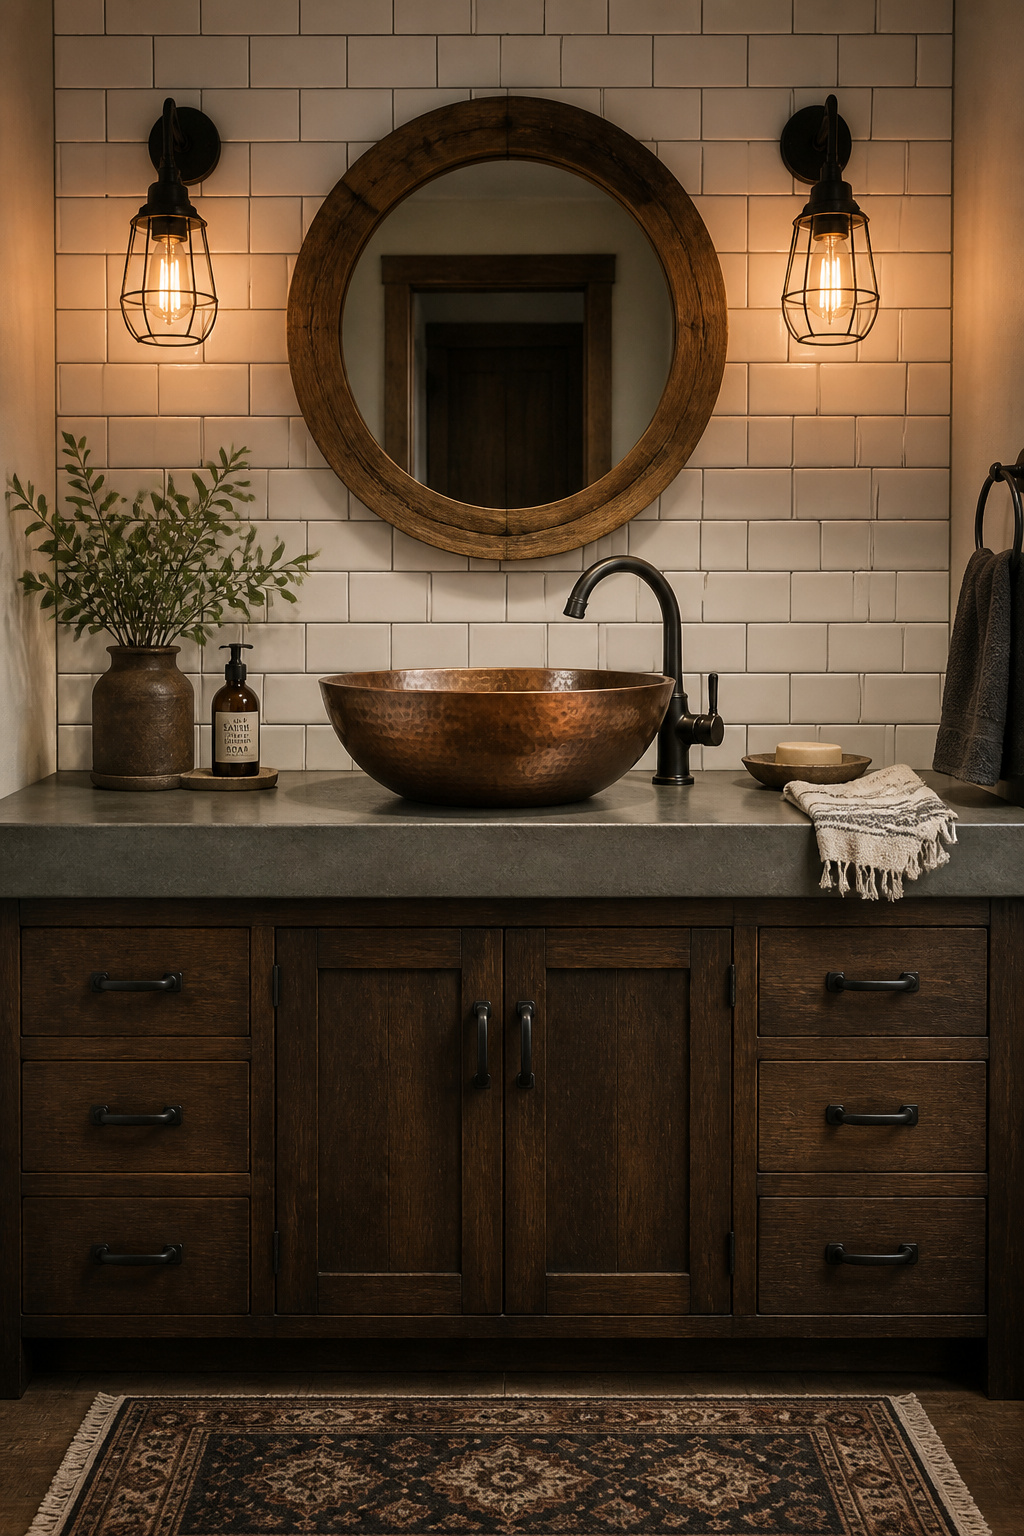
Copper patinates naturally as it oxidizes: the surface darkens from bright reddish copper toward warm brown, then develops deeper espresso tones over one to three years. The areas touched most frequently — the basin floor and the edges around the drain — develop a two-tone character that reflects actual use. The patina is also protective: oxidized copper resists further corrosion better than polished copper does. The material is essentially self-improving given time.
Drain Installation and Vanity Height Considerations
Care is simpler than most people expect. Mild dish soap and a soft cloth handle daily cleaning. Monthly application of food-grade beeswax or paste wax maintains a more consistent appearance if preferred. The one absolute to avoid: acidic cleaners. Vinegar, lemon-based cleaners, and anything citric will temporarily strip patina from contact areas, which re-patinates within weeks but unevenly.
For installation, most copper vessel sinks have 1.25–1.5-inch drain openings compatible with standard pop-up drain assemblies — verify the specific sink’s drain size before ordering a drain separately. The more consequential decision is vanity height. A vessel sink adds 5–7 inches above the countertop surface. So mounting it on a standard 34-inch vanity produces a finished basin rim at 39–41 inches, which is uncomfortably tall. Target a countertop height of 28–30 inches to achieve an ergonomic 34–36-inch finished rim.
13. Industrial Pipe Towel Bars and Wall Hardware
Black iron pipe hardware is the most satisfying expression of rustic pragmatism: visible plumbing-scale components repurposed as towel bars, robe hooks, and toilet paper holders at a price point that costs less than a single branded fixture set. The material reads as rustic rather than industrial when everything else in the room is warm and natural — stone, wood, and copper soften the industrial reference into something that feels handmade.
A DIY black steel pipe towel bar requires one 18-inch section of 3/4-inch black steel pipe, two floor flanges, two elbows, mounting screws, and two wrenches. Total material cost from a hardware store is under $20. Assembly is two pipe-wrench connections and four screws into wall studs. If the DIY approach doesn’t appeal, Pipe Decor’s ready-made sets include a coordinating towel bar, toilet paper holder, and two robe hooks for $35–60 with an electroplated rust-resistant finish.
One post-installation step applies to all DIY pipe hardware: a coat of clear polyacrylic spray before use. Untreated black iron pipe in bathroom humidity develops surface rust within 6–12 months — not structurally significant, but it stains towels and wall surfaces in ways that are difficult to reverse. One coat of clear polyacrylic maintains the matte black appearance without altering it.
Black iron pipe coordinates naturally with matte black faucets and showerheads. With oil-rubbed bronze fixtures, limit pipe hardware to accent positions (hooks, toilet paper holder) rather than the primary towel bar — at scale, the two dark finishes compete subtly in a way that reads as inconsistency rather than design.
14. Rustic Bathroom Remodel With a Farmhouse Apron-Front Sink
Farmhouse sinks belong in bathrooms — they just need to arrive at the right scale. Kitchen versions at 30–33 inches read overwhelming in a vanity context. The 24-inch single-basin apron-front, which most farmhouse sink manufacturers offer specifically for bathroom use, fits the footprint of a standard 30-inch vanity while delivering the apron’s visual presence at the correct scale.
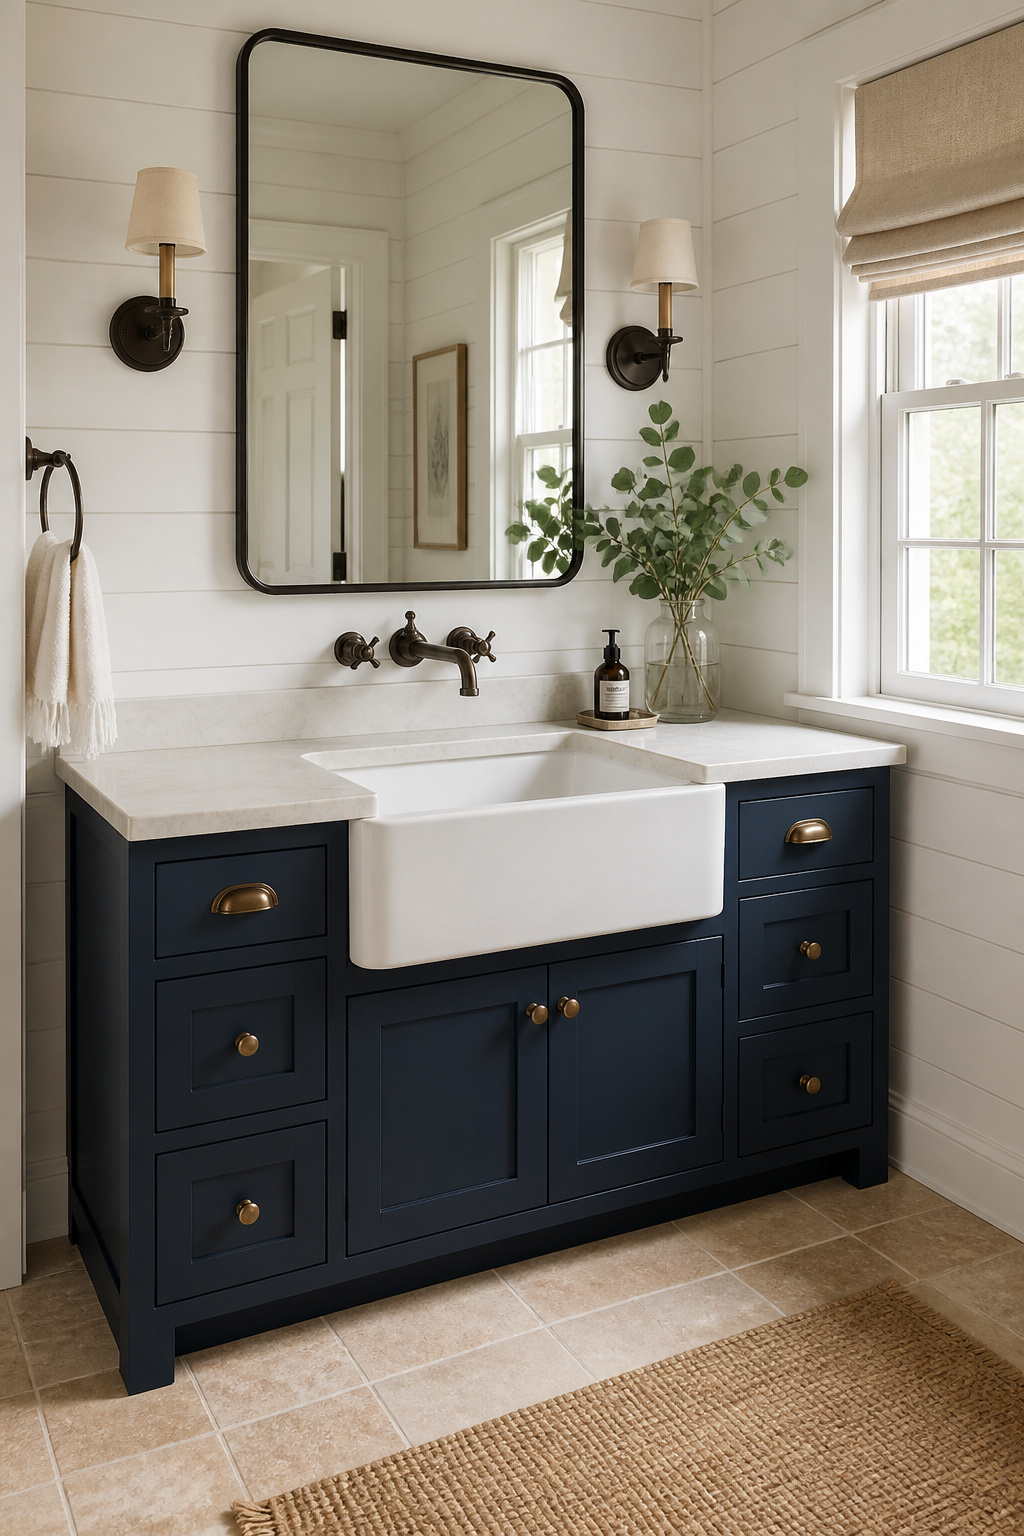
The apron adds 4–6 inches of visual height to the vanity area, giving it the visual mass of furniture rather than a bathroom fixture. That’s exactly the material weight a rustic bathroom remodel is building toward. The added depth — farmhouse sinks run 8–10 inches deep versus 5–7 for standard undermount basins — is also a genuine functional advantage for washing hair or handling larger items.
Fireclay vs. Cast Iron and Cabinet Modifications
The fireclay versus cast iron question has a clear answer for most bathrooms: fireclay. Both materials look identical in a showroom. In use, fireclay is fired at temperatures that fuse the glaze into the ceramic body rather than applying it as a separate coating. Where a cast iron enamel chip exposes bare iron that can rust, a fireclay chip exposes more ceramic. Color stability is also better in fireclay: cast iron enamel can yellow over decades, while fireclay holds its original white essentially indefinitely. Quality fireclay models run $400–1,000.
Cabinet modification is required for any apron-front installation — the vanity face must be cut away to accommodate the apron. Verify the sink’s exact dimensions against the cabinet opening before ordering; farmhouse sinks have less dimensional flexibility than undermount basins, and the fit requirements are more exacting. For the broader context of material decisions in a farmhouse bathroom renovation, the sink choice often anchors the direction for everything else — it’s the commitment that tells the other materials what kind of room they’re contributing to.
15. Edison Bulb Vanity Lighting for Warm Rustic Ambiance
Lighting is the invisible material — the thing that determines how every other material in the room reads. The same reclaimed wood vanity under 4000K cool-white light looks flat and gray. Under 2200K Edison bulb light, it glows. Color temperature is a design decision as consequential as the tile choice, and in rustic bathrooms, it’s the one most often made without enough thought.
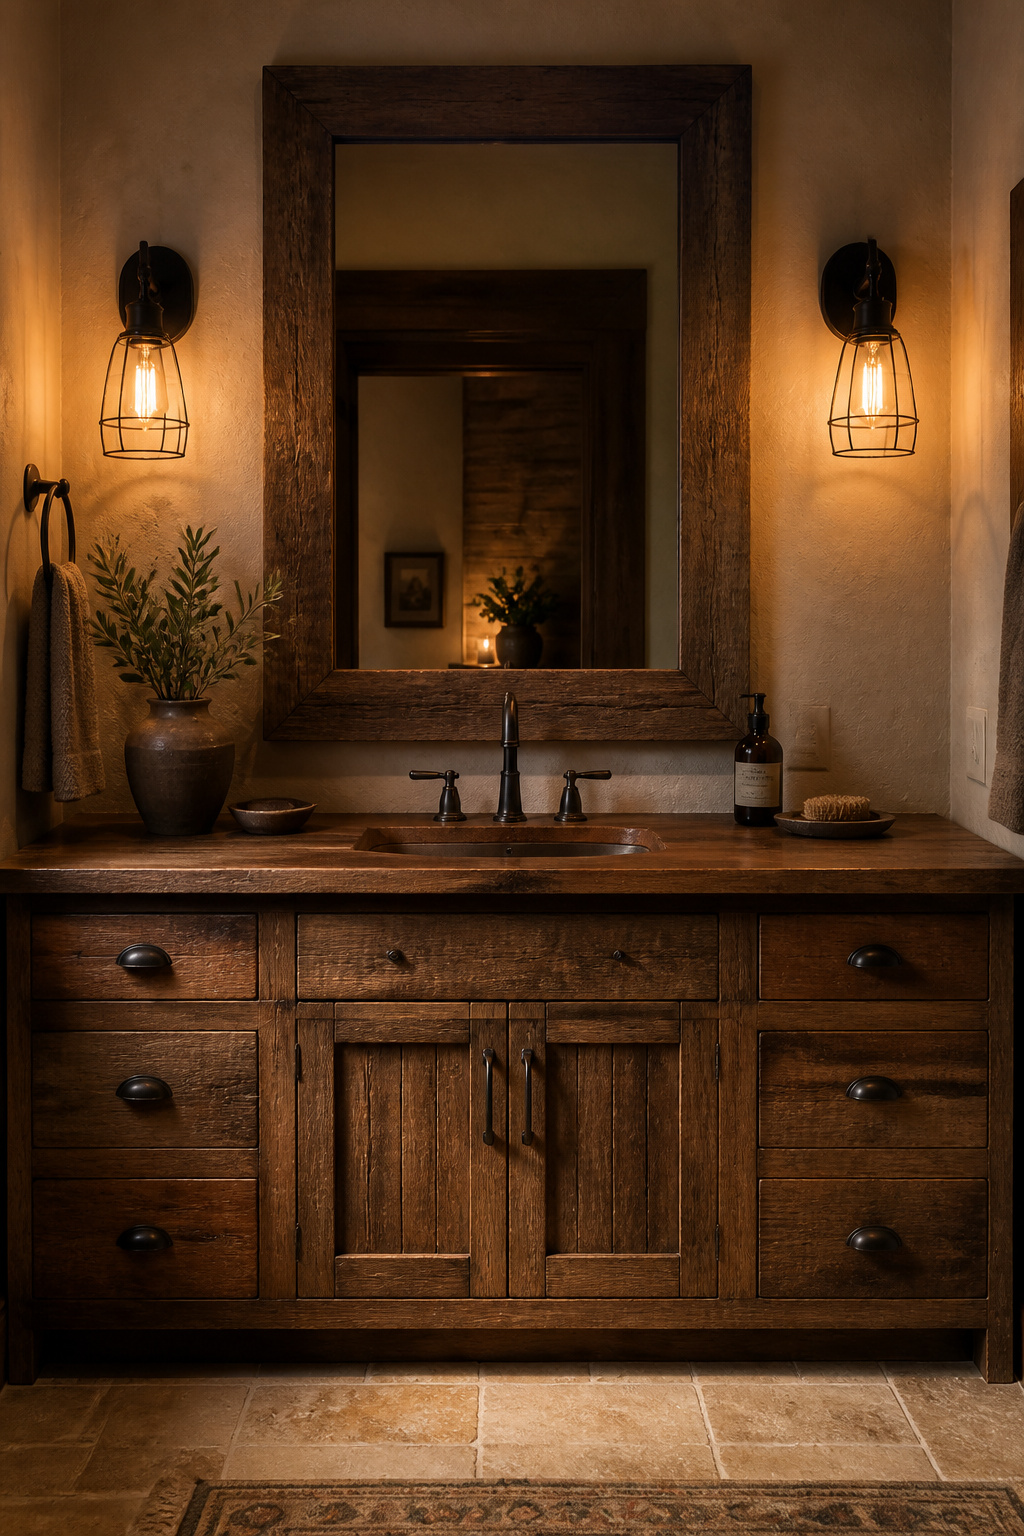
Edison LED bulbs operate at 2200–2700K — meaningfully warmer than the 3000K that most “warm white” LEDs produce. At 2200K, the light has the golden quality of late afternoon through linen. That quality transforms natural materials: wood grain reads deeper, stone texture gains dimensionality, bronze and copper fixtures glow rather than simply reflect. The return on switching from cool-white to warm Edison bulbs in an existing bathroom is immediate and requires no construction. It’s the upgrade I’d prioritize in any rustic bathroom above anything else that doesn’t require a saw.
Fixture Styles and Dimmer Control
Cage wall sconces flanking the mirror are the standard vanity configuration — they deliver even light at face level without the overhead shadows that ceiling-mounted fixtures create. Pipe bracket fixtures with reclaimed wood backer boards bring the hardware vocabulary of iron and aged wood directly to the light fixtures, completing the material story the rest of the bathroom is telling. All bathroom fixtures must carry at minimum a damp-location rating; the spray zone immediately around a shower requires wet-rated fixtures. Standard indoor fixtures are not rated for bathroom steam and will fail prematurely regardless of bulb choice.
For the full technical picture on sconce placement height and how fixture spacing affects shadow quality, bathroom vanity lighting tips covers the decisions that most guides treat as afterthoughts. The right fixture at the wrong height undermines the warm atmosphere the bulb choice is working to create. A dimmer switch on every circuit is the most cost-effective mood upgrade available — the same Edison fixtures that provide bright task lighting in the morning become atmospheric evening light at 30% power. One installation per circuit.
Planning Your Rustic Bathroom Remodel: How to Choose What’s Right
The list above covers substantial ground, which creates its own decision challenge. Not every rustic bathroom remodel benefits from fifteen simultaneous material interventions — in a smaller space, layering too many elements produces density rather than character.
The highest visual impact per dollar starts with items that require no construction: fixture finish replacement (a matching matte black set costs $50–150), Edison bulb swaps ($30–80 per fixture), and black pipe hardware ($20–60 for a complete DIY set). These three changes alone shift a bathroom’s atmosphere measurably before any tile or lumber is involved. That matters because it means you can test the rustic direction before committing to the structural work.
The mid-range moves — shiplap accent wall, board-and-batten wainscoting, live-edge shelves, barn door entry — require time and moderate material investment but are within DIY reach for someone with basic carpentry confidence. They produce structural visual changes that paint and accessories cannot replicate.
The structural interventions — stone shower surround, clawfoot tub, natural stone floors, farmhouse apron-front sink — are where contractors add the most value. These are installation sequencing problems as much as material purchases. Plumbing before tile. Tile before vanity. Fixtures last. The order of operations matters as much as any individual material decision, and getting it wrong is expensive.
The most durable rustic bathroom remodels are built around two or three strong material relationships, not fifteen individual elements. Choose your foundation — stone floor and reclaimed wood vanity, or ceiling beams and shiplap, or clawfoot tub and natural stone surround — and let the rest serve those anchors. Natural materials do the work from there.