Does your bathroom feel tired and outdated, but your wallet cringes at the thought of a complete renovation? You’re not alone. The bathroom might be one of the most frequently used spaces in your home, but transforming it doesn’t have to drain your savings account.
With strategic changes and clever DIY approaches, you can achieve a stunning bathroom refresh that looks anything but budget. From simple swaps to weekend projects, these 19 budget bathroom makeovers prove that creativity and thoughtful planning can deliver professional-looking results without the professional price tag.
1. Paint Power: A Fresh Coat for Walls or Vanity
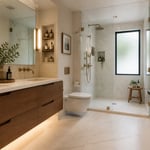
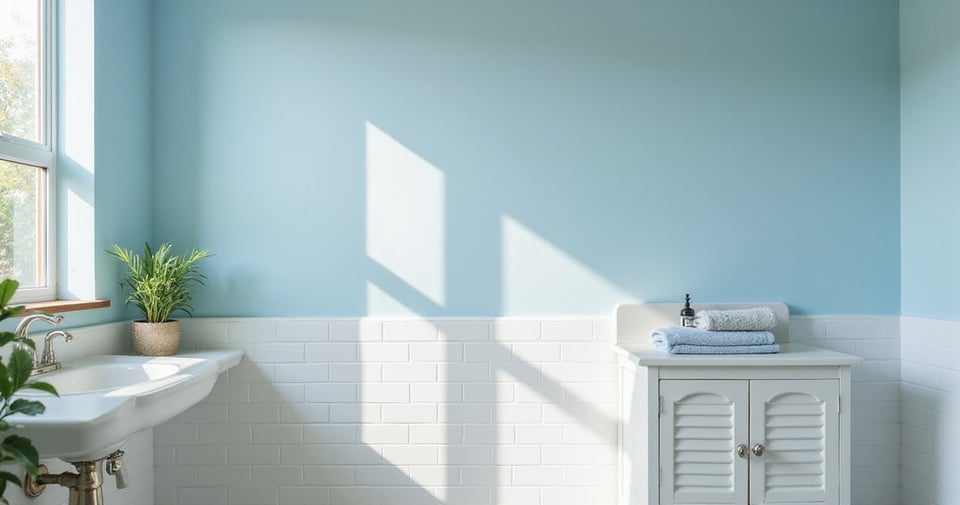
One of the most transformative changes you can make in any bathroom is applying fresh paint. It’s relatively inexpensive yet dramatically alters both the mood and perceived cleanliness of the space. For bathroom walls, select paint specifically formulated for high-humidity environments—typically high-quality acrylic or latex with a satin, semi-gloss, or gloss finish. These moisture-resistant options prevent mold growth while standing up to regular cleaning.
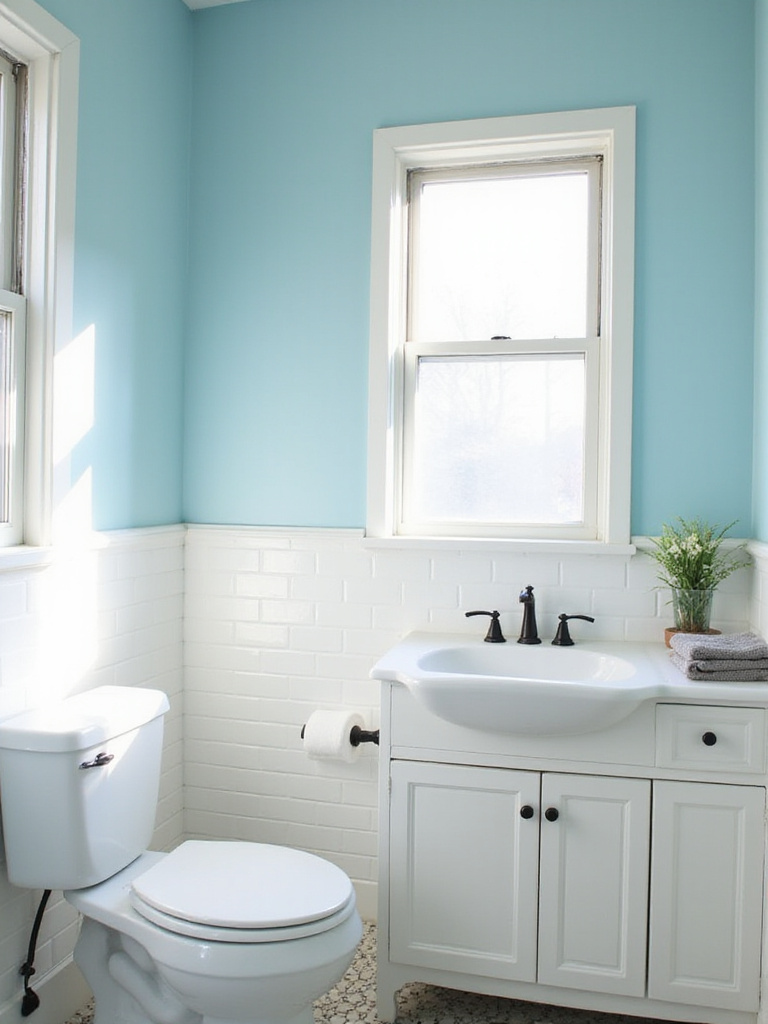
Don’t overlook your vanity as a painting opportunity. With proper preparation (cleaning, light sanding, and priming), you can completely transform dated cabinetry using high-quality cabinet or enamel paint. Consider rich navy blues, emerald greens, or even dramatic black for a luxurious feel—small bathrooms can handle bold colors without overwhelming the space.
Pro Tip: Before painting, thoroughly clean all surfaces with a cleaner that removes soap scum and grease. Use painter’s tape to protect trim, mirrors, and fixtures, and cover the floor with drop cloths to prevent spatter damage.
The inspiration for this collection of budget bathroom makeovers struck when I noticed how dramatically a single gallon of quality paint could transform even the most dated spaces.
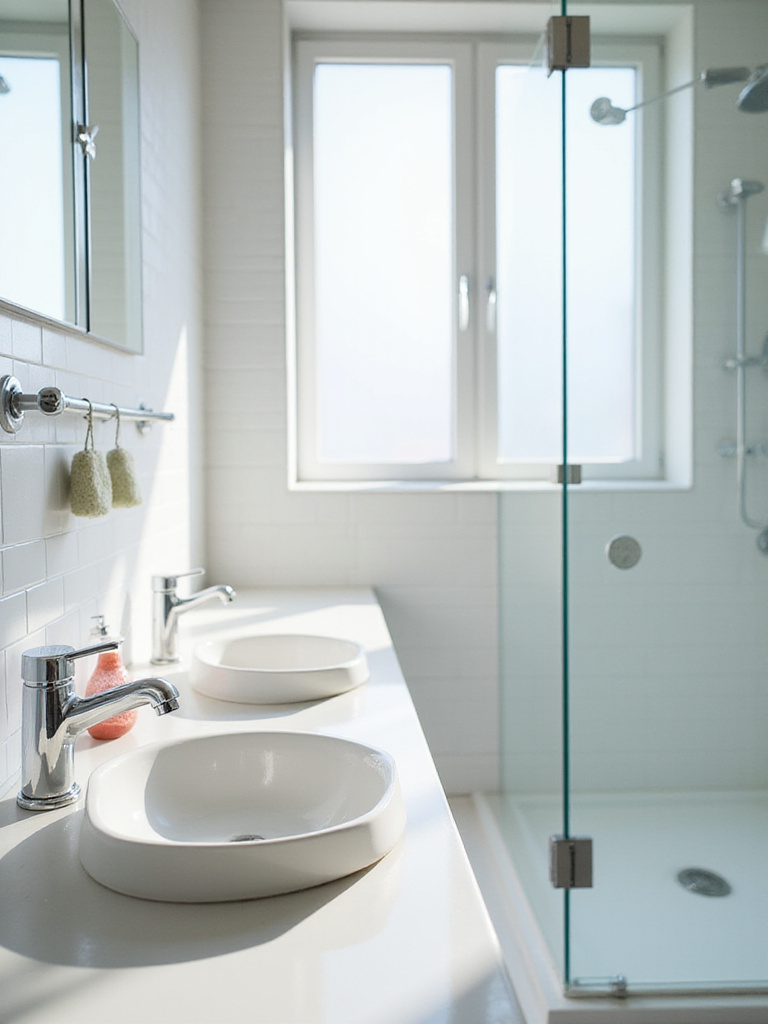
2. Hardware Heroes: Swap Out Knobs, Pulls, and Faucets
The magic of this budget bathroom makeover lies in focusing on the metallic details. Think of hardware as your bathroom’s jewelry—small but impactful elements that add sparkle and personality. Replacing dated knobs, pulls, and faucets instantly modernizes your vanity and sink area without requiring significant construction skills or expense.
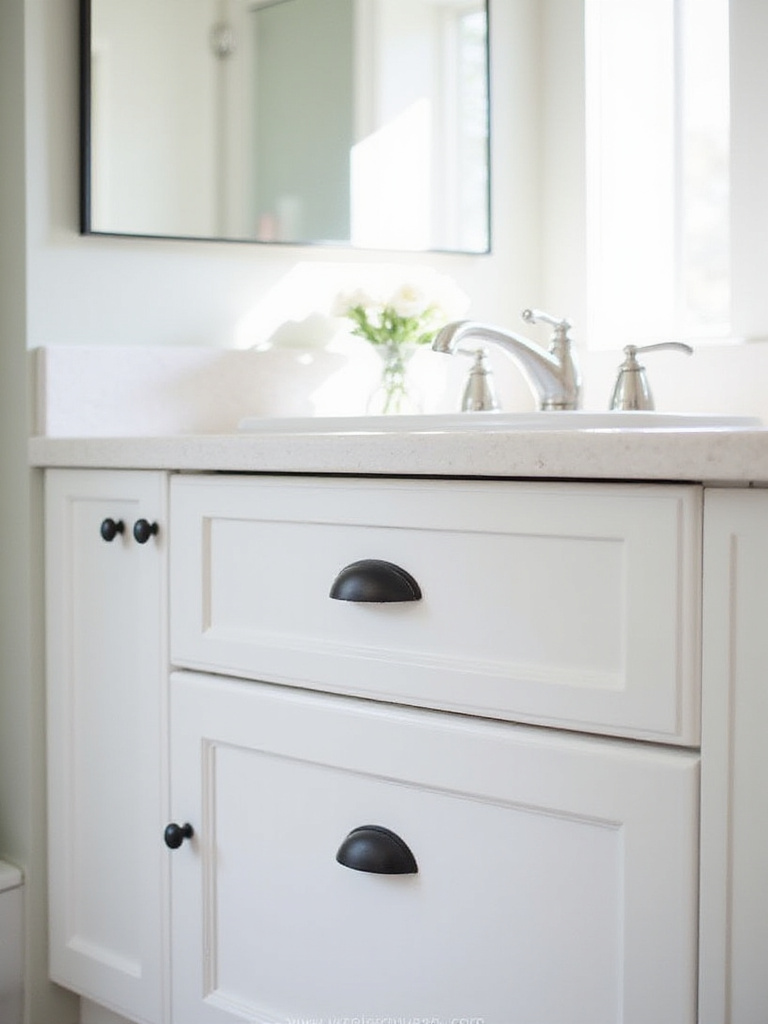
You’ll find stylish options at home improvement stores, online retailers, and even discount outlets at surprisingly affordable prices. For unique character, explore architectural salvage yards or thrift stores where one-of-a-kind pieces often hide. When selecting new cabinet pulls, always measure the center-to-center distance of existing holes to ensure your new hardware fits perfectly without requiring additional drilling.
While designed for the bathroom, we’ve seen creative uses of these hardware updates inspire homeowners to continue the refresh throughout adjacent spaces, creating cohesive design flows.
3. Mirror, Mirror: Upgrade Your Reflection Spot
Unlike mass-produced alternatives, this technique allows you to transform a basic, unframed builder-grade mirror without replacing it entirely. Adding a frame using simple wood trim molding from a hardware store creates a custom, polished look for a fraction of the cost of a new framed mirror. Pre-made mirror frame kits are also available for standard sizes, offering foolproof installation.
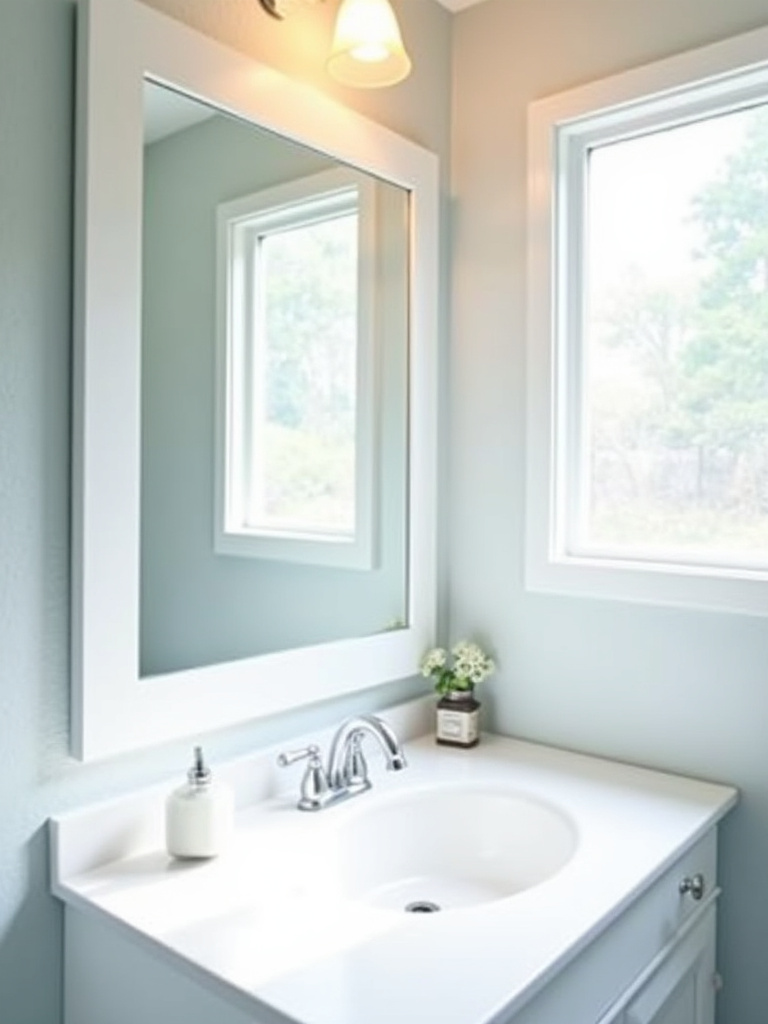
Beyond framing, consider improving the lighting around your mirror to enhance both appearance and functionality. Plug-in sconces or LED strips provide better illumination for grooming tasks while adding decorative elements without expensive electrical work. For a truly unique budget bathroom makeover, replace your standard mirror with a characterful vintage find from a thrift store or flea market.
Designer Secret: To frame an existing wall mirror, measure the exact width and height of the mirror glass. Purchase molding and cut it at 45-degree angles (mitered corners) to create a frame that fits precisely around these dimensions.
The versatility reveals itself when you pair this mirror update with complementary lighting, creating a focal point that elevates the entire room’s design.
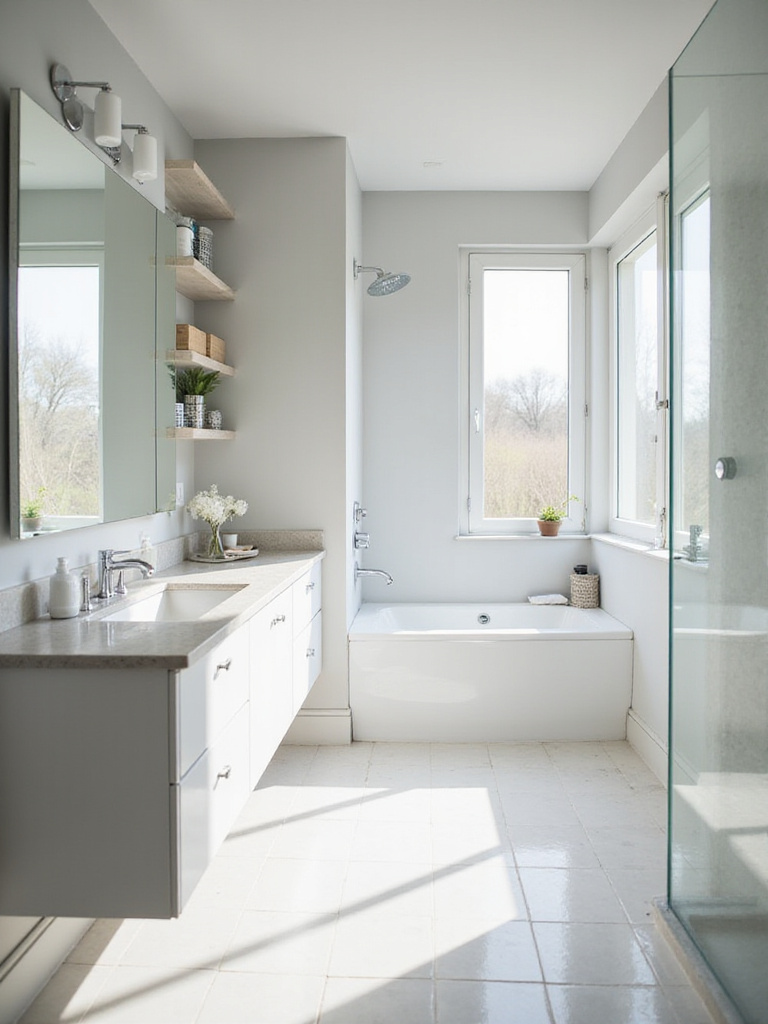
4. Illuminate & Invigorate: Install New Lighting Fixtures
What surprises clients most about budget bathroom makeovers is how dramatically lighting changes everything. Dated or insufficient fixtures can make a space feel dark and unwelcoming, while new lighting creates ambiance and improves functionality without requiring major structural changes. Proper illumination makes small bathrooms feel larger, highlights updated finishes, and creates a more luxurious atmosphere.
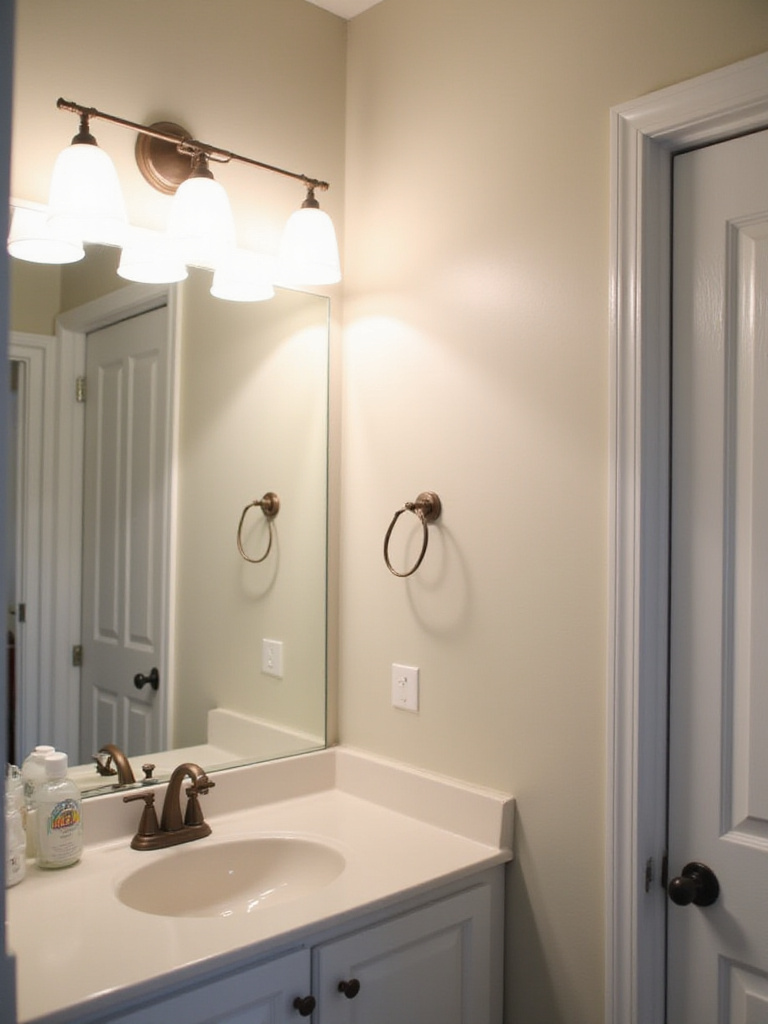
While replacing the main vanity fixture offers significant impact, consider additional budget-friendly lighting improvements. Add plug-in LED strip lights under cabinets or around mirrors (ensuring they’re damp-rated for bathroom use), or simply replace old bulbs with energy-efficient LEDs in a suitable color temperature. For the most flattering effect, replace outdated “Hollywood strip” lights with sconces on either side of the mirror, which eliminate unflattering shadows.
The subtle fragrance fills the room while new lighting transforms the space, creating an atmosphere that evolves throughout the day as natural light interacts with your fixtures.
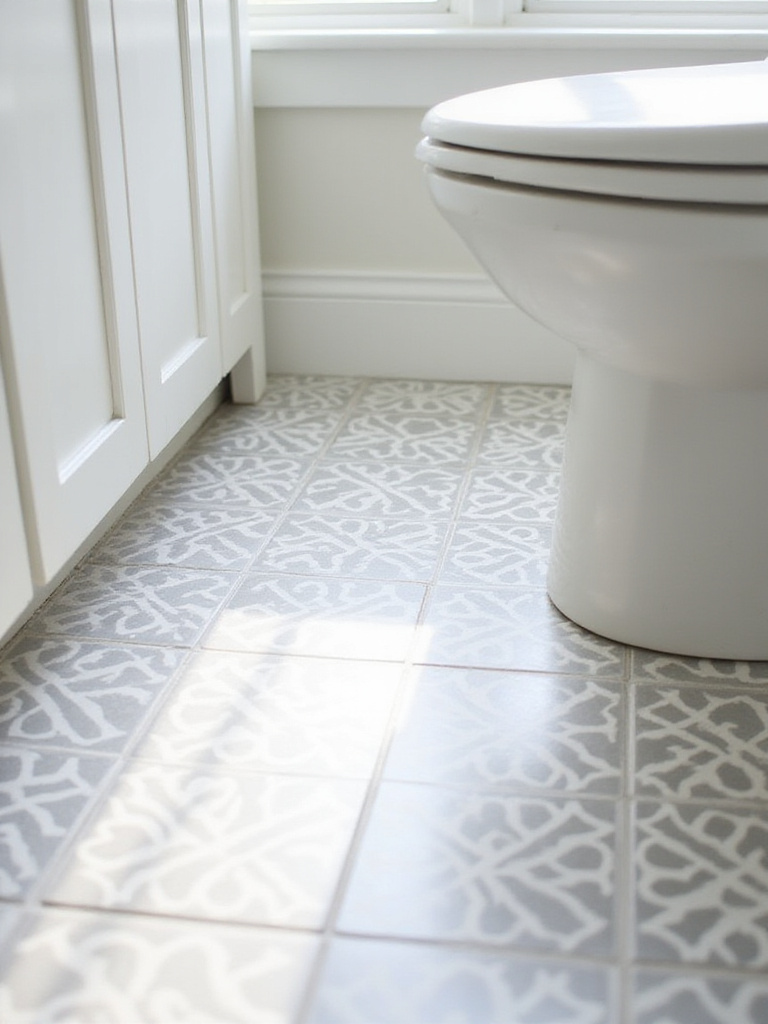
5. Grout Glow-Up: Clean or Paint Your Grout Lines
The unexpected environmental benefit of this budget bathroom makeover comes from avoiding tile replacement. Dingy, discolored grout lines can make even beautiful tiles look old and dirty. Refreshing your grout through deep cleaning or coloring is a high-impact, low-cost way to revitalize tiled surfaces without the expense and waste of replacement.
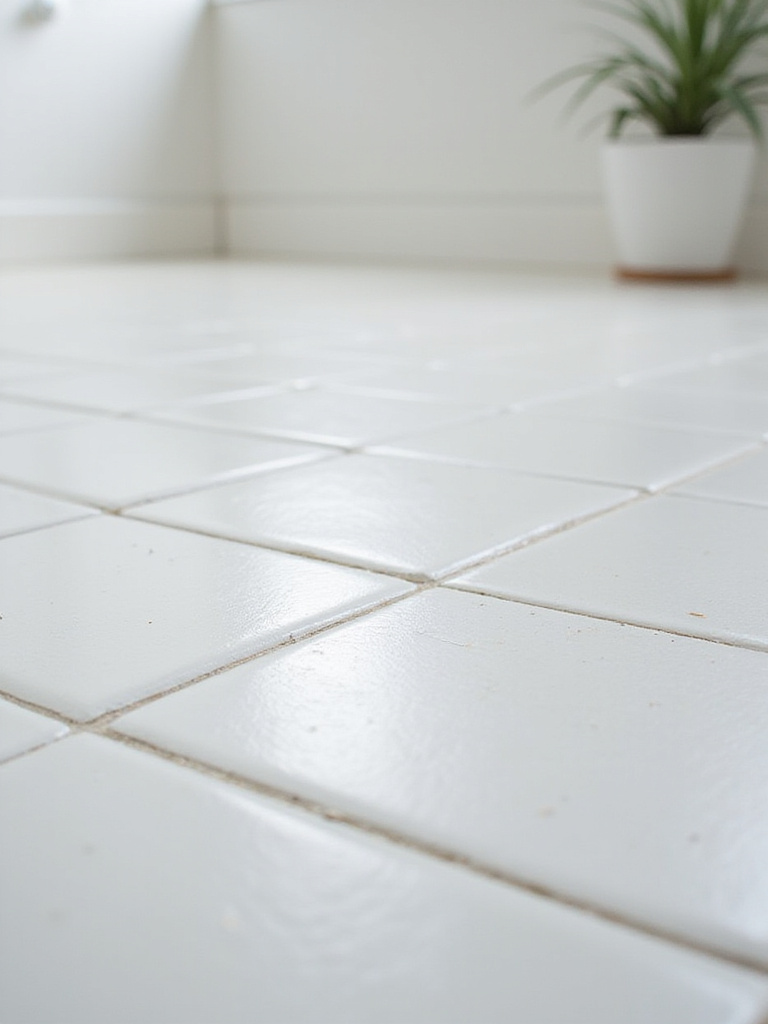
You have two main options: deep clean existing grout to restore its original color, or use grout paint/stain to change the color entirely. Cleaning involves scrubbing with appropriate cleaners to remove built-up grime, while painting applies a colorant over existing grout. For dramatic effect, consider painting light grout lines a dark color (like charcoal or black) to create a bold, graphic look that highlights your tile pattern—especially effective with white subway tiles.
How to Clean Grout:
- Sweep or vacuum the area first
- Apply cleaning solution and let sit 5-10 minutes
- Scrub vigorously with a stiff brush
- Wipe clean with a damp cloth, rinsing frequently
- Work in small sections until complete
- Rinse thoroughly and let dry before sealing
The craftsmanship reveals itself in details like freshly restored grout lines, which can make decade-old tile look newly installed.
6. Declutter & Deep Clean: The Free First Step
The environmental story behind successful budget bathroom makeovers began with understanding that sometimes less truly is more. Before purchasing anything, declutter and deep clean your bathroom—this free process immediately improves appearance by removing visual noise and grime. A clean, organized bathroom feels larger, brighter, and more inviting without spending a penny, while also revealing what truly needs attention.
Focus your decluttering efforts on key areas: medicine cabinets, under-sink storage, and shower spaces. Remove expired products, empty bottles, and items that belong elsewhere. For deep cleaning, tackle often-missed spots like grout lines, fixtures with hard water stains, ventilation fans, and cabinet interiors. For stubborn buildup, try a paste of baking soda and water or hydrogen peroxide.
The challenge of awkward spaces becomes easier when you start with a completely decluttered bathroom, creating a blank canvas for your budget-friendly transformation.
7. Go Green: Introduce Bathroom-Friendly Plants
Beyond aesthetics, the ecological impact of adding plants to your bathroom matters because they naturally filter air pollutants while adding life and texture. Many houseplants thrive in bathroom humidity, which mimics their native tropical environments and reduces watering needs. Even bathrooms with limited natural light can accommodate shade-tolerant varieties.

Plants deliver significant visual impact for minimal cost in your budget bathroom makeover. They soften hard surfaces, fill empty vertical space, and create a spa-like atmosphere. Some species, including Snake Plants and Spider Plants, actively purify air by filtering common household toxins found in cleaning products. For maximum effect, group several different plants on a small shelf or windowsill, creating a lush, layered look.
Best Bathroom Plants:
- Snake Plant (tolerates low light, purifies air)
- Pothos (thrives in humidity, cascades beautifully)
- ZZ Plant (nearly indestructible, handles low light)
- Boston Fern (loves humidity, adds texture)
- Aloe Vera (practical for minor burns, loves bright bathrooms)
The unexpected pairing that always works is combining humidity-loving plants with budget bathroom makeovers, creating a living element that evolves over time.
8. Textile Transformation: New Towels, Curtains, and Rugs
The tactile experience changes the entire room’s energy when you introduce fresh textiles to your bathroom. Unlike permanent fixtures, items like towels, shower curtains, and bath mats are relatively inexpensive and easily swapped. They bring color, pattern, texture, and softness into a space dominated by hard, cold surfaces. A new shower curtain functions as a large piece of art, while plush towels add instant luxury.
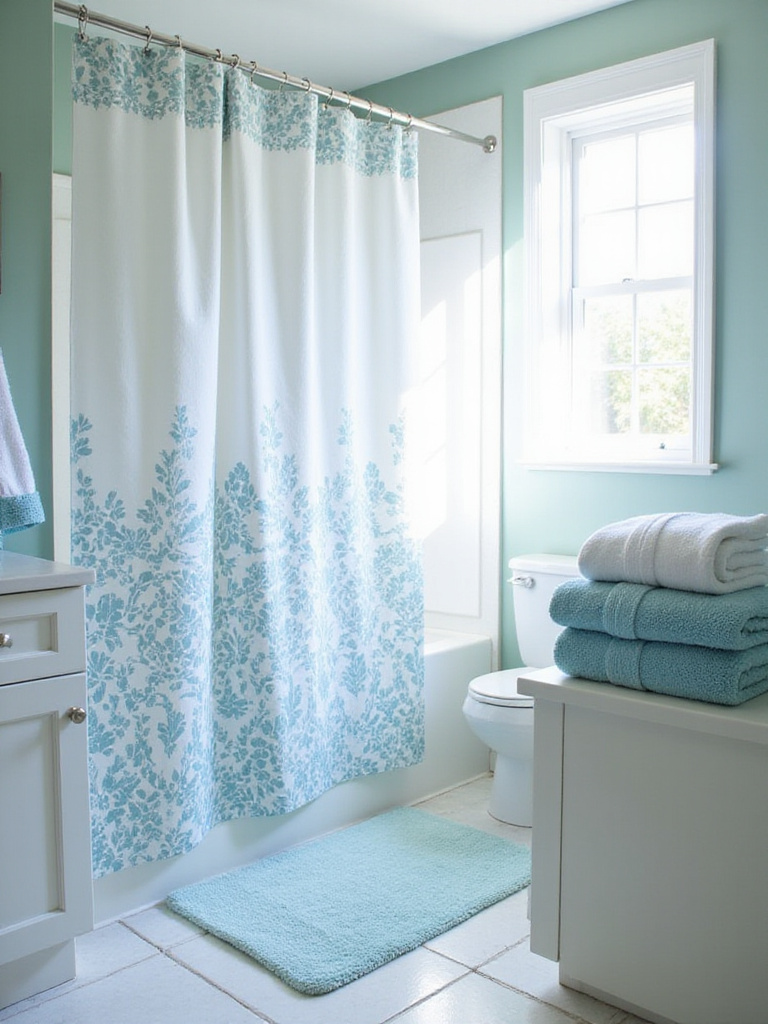
To maximize your budget, shop strategically by watching for sales, exploring clearance sections, and comparing prices across retailers. Start with your shower curtain as the anchor piece, then select coordinating towels and rugs that complement its colors or patterns. Mixing textures—like ribbed towels with a waffle-weave bath mat—adds visual interest without requiring perfect matching.
The designer’s secret here is to use textiles as the quickest way to refresh your budget bathroom makeover seasonally, allowing for trend experimentation without commitment.
9. Floor Fantasy on a Dime: Try Peel-and-Stick Vinyl Tiles
The sustainable journey of this material involves significantly less waste and environmental impact than full floor replacement. Peel-and-stick vinyl tiles offer a fantastic budget bathroom makeover solution for covering old, dated, or damaged flooring. Modern options are designed with moisture resistance in mind, making them suitable for bathrooms when installed correctly on clean, dry surfaces.
These tiles come in an incredible variety of patterns and finishes that mimic expensive materials like marble, wood, or encaustic tile at a fraction of the cost. For maximum impact, consider creating a statement floor using bold geometric patterns or a classic checkerboard design. While durability varies with quality, a well-installed floor using good-quality tiles can last several years in a residential bathroom.
Installation Tips:
- Thoroughly clean and dry the subfloor before beginning
- Remove all dirt, dust, and debris
- Ensure the surface is completely smooth
- Start from the center of the room and work outward
- Use a roller to ensure proper adhesion
- Consider adding seam sealer for extra moisture protection
The revival of this classic form comes with a twist when you use peel-and-stick tiles to create contemporary patterns that transform your budget bathroom makeover.
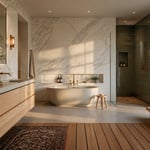
10. Refresh Tired Surfaces: Refinish Your Tub or Tile
What separates artisanal quality from mass-produced solutions is attention to detail, and refinishing your tub or tile demonstrates this perfectly. If your bathtub or tiled walls are structurally sound but look worn, chipped, or dated, refinishing (also called reglazing or resurfacing) offers a budget-friendly alternative to replacement. This process repairs minor imperfections and applies a durable protective coating that makes surfaces look new again.
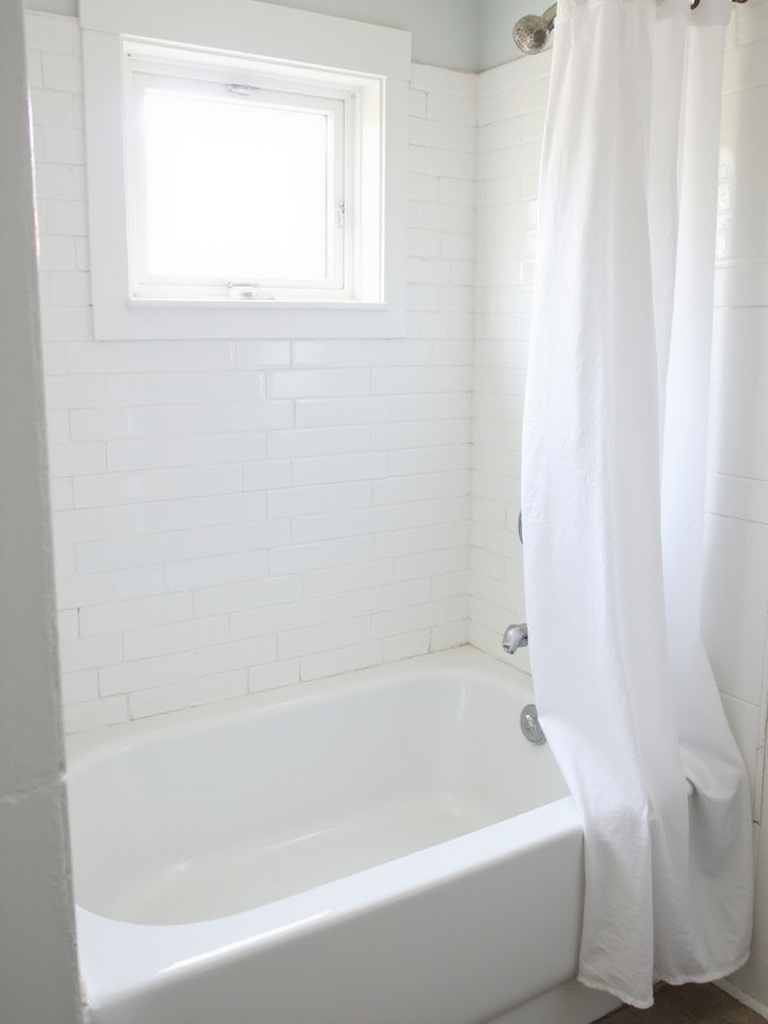
The cost comparison is striking—while replacement can run thousands of dollars and take weeks, refinishing typically costs a few hundred dollars and completes within a day, with 24-48 hour curing time. Though DIY kits exist, professional refinishing generally provides more durable results using industrial-grade materials. For a truly custom look, consider refinishing in a color beyond basic white to add personality to your budget bathroom makeover.
The maker’s journey from apprentice to master influenced the development of refinishing techniques that allow budget bathroom makeovers to achieve professional results.
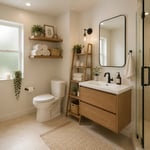
11. Shelf Success: Add Stylish and Functional Storage
The artisan collective that creates truly successful budget bathroom makeovers understands that storage is both functional and decorative. Adding shelving is a highly effective way to introduce organization while enhancing style. Simple floating shelves made from pine or MDF can be painted or stained to match your decor. Alternatively, repurposed crates, salvaged wood, or inexpensive wire units transform into unique storage solutions.
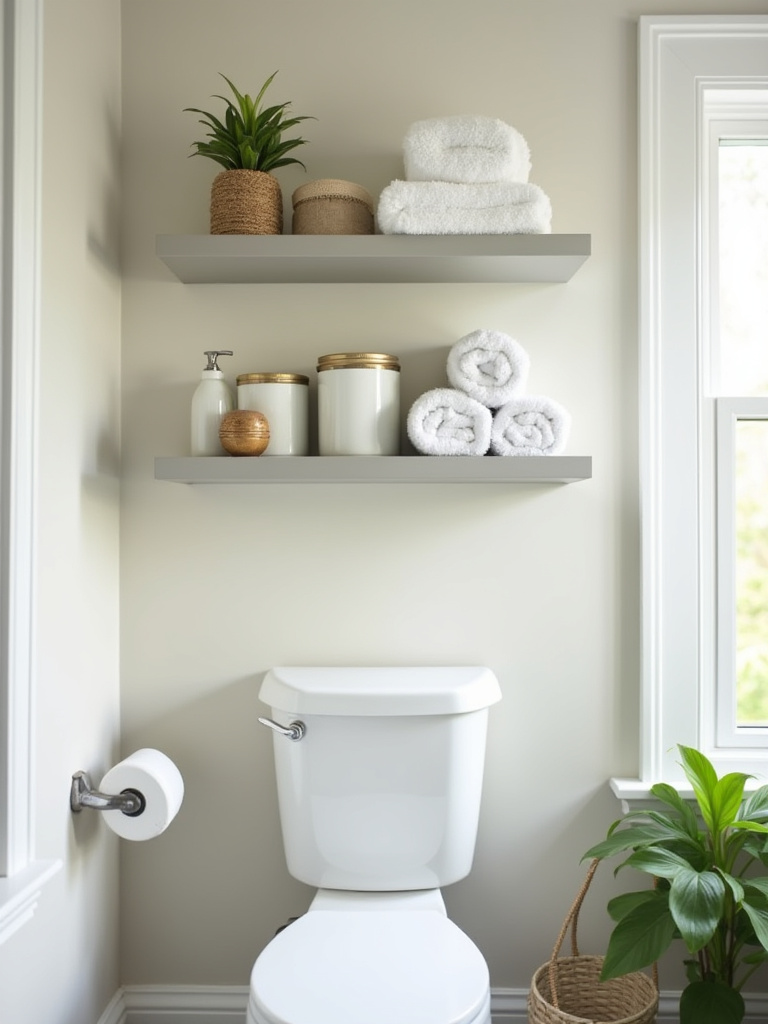
Strategic placement maximizes impact: the wall above the toilet offers prime real estate for vertical shelving, walls near the vanity keep frequently used items accessible, and corners accommodate specialized units. Even narrow gaps between fixtures can sometimes fit slim shelving. To elevate the look of budget shelves, use decorative brackets and style them thoughtfully with a mix of practical items and decorative elements.
Styling Bathroom Shelves:
- Group similar items in attractive containers
- Add a small plant for life and color
- Include one decorative object per shelf
- Vary heights and textures for visual interest
- Keep everyday essentials at eye level
- Store less attractive items in covered containers
The composition comes together when you balance open shelving with closed storage in your budget bathroom makeover, creating both display opportunities and clutter control.
12. Seat Upgrade: A Simple New Toilet Seat
Look closely and you’ll notice the subtle texture and sheen differences between old and new toilet seats—a small detail that makes a significant difference. Replacing an old, worn, stained, or scratched toilet seat is one of the quickest, easiest, and most affordable budget bathroom makeovers. This simple swap makes the entire toilet appear cleaner and newer without replacing the whole fixture.
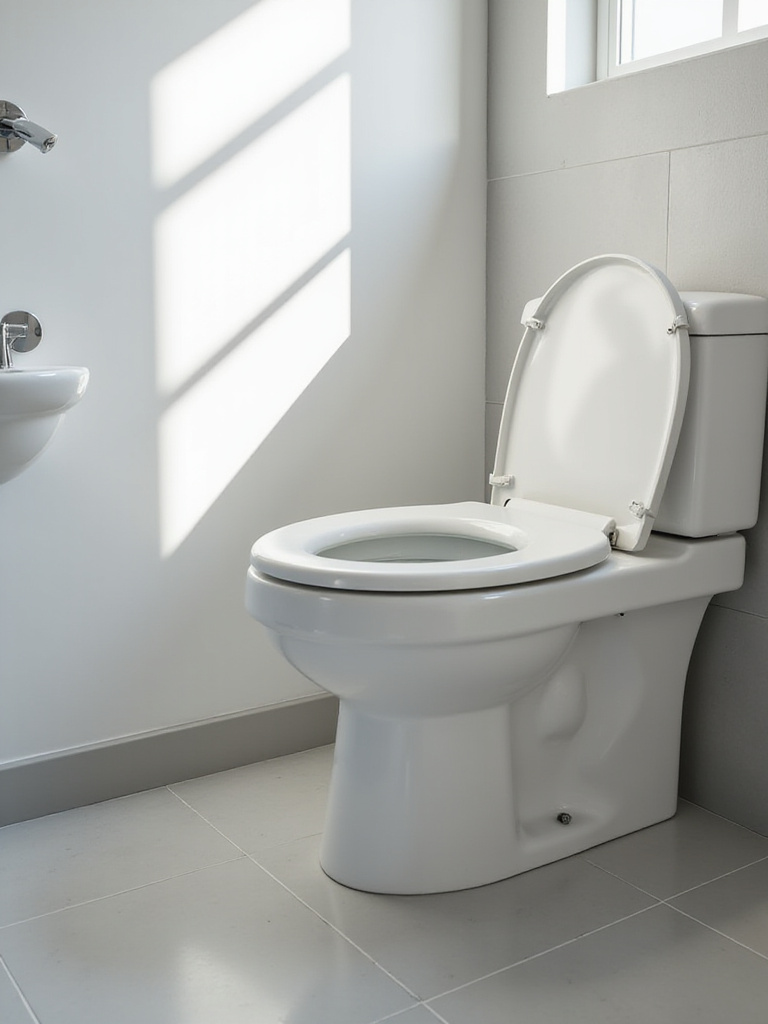
Toilet seats come in various materials and styles, with basic options starting under $20. For additional comfort and convenience, consider upgraded features like quick-release hinges for easier cleaning or soft-close mechanisms to prevent slamming. Before purchasing, measure carefully to ensure proper fit: check the distance between mounting bolt holes, the distance from bolt holes to the front of the bowl, and the bowl’s width (typically round or elongated).
The finishing touch that elevates the entire look of your budget bathroom makeover might be as simple as a fresh toilet seat with modern features.
13. The Ultimate Scrub Down: A Pro-Level Deep Clean
The traditional methods used by professional cleaners result in a level of cleanliness that transforms bathrooms without any purchases. A pro-level scrub down goes far beyond regular cleaning, tackling often-neglected areas and using specialized techniques for stubborn grime. This includes scrubbing grout lines until they gleam, polishing fixtures to remove every water spot, eliminating soap scum from shower doors, and disinfecting drains.
Areas that yield the most dramatic visual impact include grout lines (which brighten dramatically with proper cleaning), fixtures affected by hard water stains, and glass shower doors (which can appear almost invisible when truly clean). This deep cleaning approach to budget bathroom makeovers not only improves appearances but also eliminates odors and creates a healthier environment.
“The difference between a regular clean and a pro-level deep clean is like night and day. Many clients think they need to replace fixtures when what they really need is specialized cleaning techniques to restore the original beauty.” — Professional Cleaner
Beyond aesthetics, the ecological impact matters because deep cleaning extends the life of your fixtures, reducing waste and making your budget bathroom makeover more sustainable.
14. Artistic Appeal: Hang Wall Art or Decor
The cultural heritage preserved in thoughtfully selected bathroom art creates a personal connection that elevates budget bathroom makeovers. Adding wall art or decor introduces color, pattern, personality, and focal points without structural changes. It distracts from less appealing elements while making the space feel intentionally designed and complete.
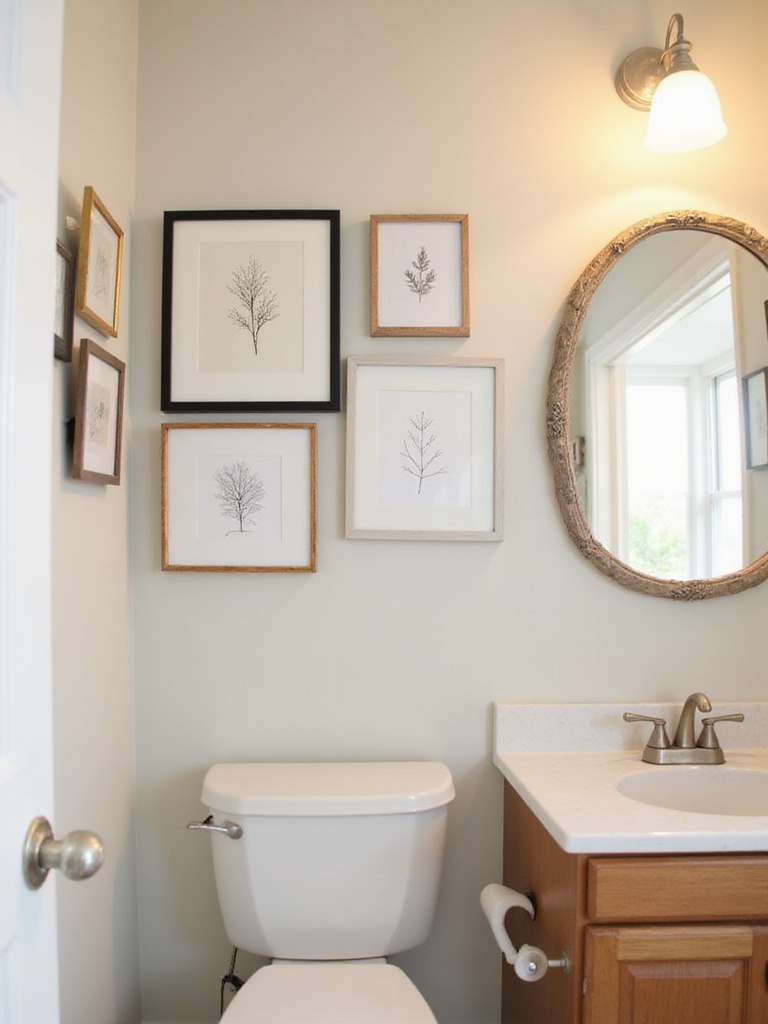
When selecting art for humid bathroom environments, durability is essential. Choose prints framed behind glass with sealed backs, metal prints, waterproof vinyl decals, or acrylic-mounted images. Avoid exposed canvas or unprotected paper. Budget-friendly sources include printable art online, thrift store frames, and discount home goods retailers. For maximum impact, create a gallery wall using thrifted frames painted a unifying color and filled with free printable art.
Bathroom Art Ideas:
- Botanical prints in waterproof frames
- Black and white photography for timeless appeal
- Vintage patent drawings of bathroom fixtures
- Abstract watercolors in complementary colors
- Framed textile pieces sealed against moisture
If you’ve struggled with similar rooms before, adding art to your budget bathroom makeover creates an immediate focal point that draws attention away from less desirable features.
15. Countertop Camouflage: Apply Contact Paper or Film
The materials are sourced from innovative manufacturers who have transformed traditional contact paper into sophisticated surface coverings. If your bathroom countertop is scratched, stained, or dated, applying adhesive vinyl film offers a budget-friendly solution to refresh the surface without replacing the entire vanity top. High-quality films designed specifically for countertops provide water resistance and durability beyond standard decorative contact paper.
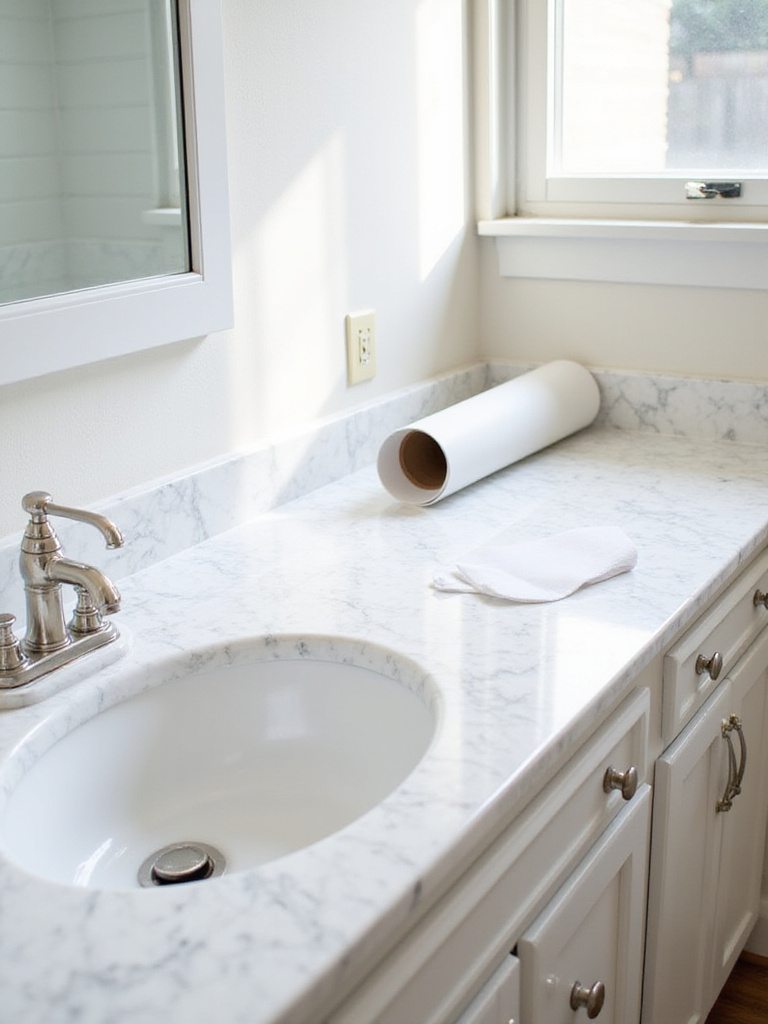
While not permanent, these films withstand daily use and splashes when properly installed and sealed around edges. They come in countless patterns mimicking luxury materials like marble, granite, concrete, and wood at a fraction of the cost. This approach to budget bathroom makeovers delivers dramatic visual change with minimal investment and no construction skills required.
The interplay between the colors creates a sophisticated look that belies the simplicity of this budget bathroom makeover technique.
16. Switch Up Your Style: Update Outlet Covers & Plates
The evolution of this trend reflects broader cultural shifts toward recognizing how small details impact overall design. Yellowed, cracked, or mismatched electrical outlet covers and switch plates subtly date a bathroom and detract from an otherwise refreshed space. Updating these small elements typically costs just a few dollars per plate yet provides a noticeable upgrade that contributes to a more polished, cohesive appearance.
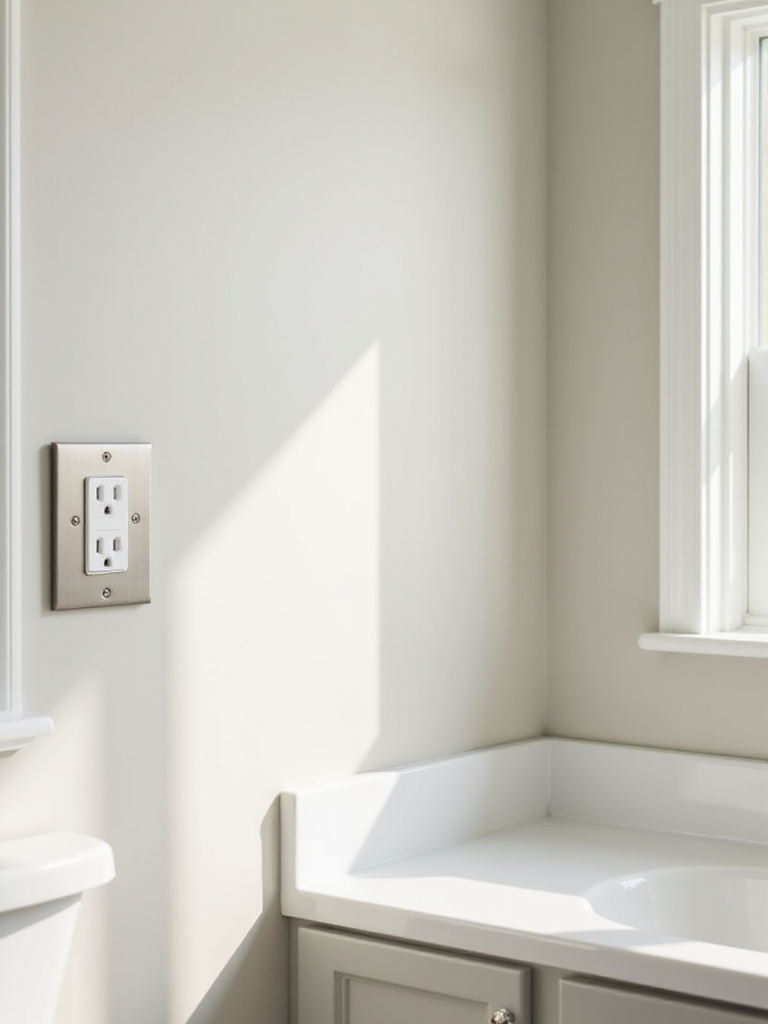
Choose from various materials like plastic or metal (stainless steel, brushed nickel, etc.) and styles, including sleek screwless designs. For bathrooms, select durable, easy-to-clean options that match your other hardware finishes. Remember that GFCI outlets (common in bathrooms for safety) require specific plates with larger openings for test and reset buttons.
“It’s often the smallest details that separate amateur from professional-looking renovations. Matching outlet covers to your hardware finish creates a cohesive look that suggests intentional design rather than piecemeal updates.” — Interior Designer
When clients ask us about balancing style with comfort in budget bathroom makeovers, we often point to these small but impactful hardware updates.
17. Scent Sensation: Add a Welcoming Fragrance
Imagine coming home to the gentle glow of a clean bathroom enhanced by a subtle, inviting scent. Adding pleasant fragrance is a crucial but often overlooked element in budget bathroom makeovers. Bathrooms face inherent odor challenges due to moisture and plumbing. A welcoming scent instantly elevates the perception of cleanliness while transforming the space from purely functional to spa-like.
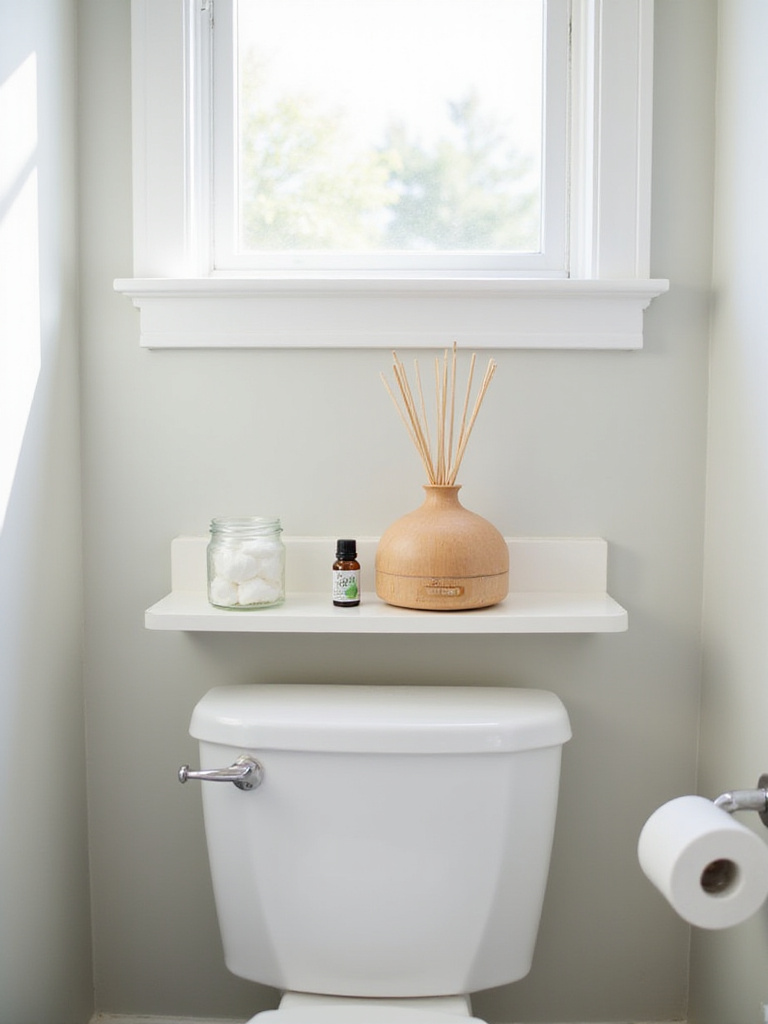
Consider these affordable scenting options: reed diffusers for continuous passive fragrance, carefully placed scented candles, essential oil diffusers, or even fresh eucalyptus branches hung from the shower head. For a DIY approach, create a simple room spray using distilled water, a splash of rubbing alcohol, and essential oils like tea tree (antibacterial) and citrus (fresh, clean scent).
Quick Scent Tips:
- Place reed diffusers on stable surfaces away from water
- Use bathroom-friendly scents like eucalyptus, citrus, or lavender
- Refresh potpourri with a few drops of essential oil when scent fades
- Hang dried lavender or eucalyptus bundles for natural fragrance
- Consider plug-in air fresheners specifically designed for bathrooms
The mood shifts dramatically when you add appropriate scents to your budget bathroom makeover, engaging multiple senses for a complete experience.
18. Under-Sink Sanctuary: Organize Your Cabinet Space
For those worried about maintenance and organization after completing budget bathroom makeovers, don’t overlook the cabinet under your sink. This space often becomes a chaotic catchall, challenging to organize due to plumbing obstacles. Transforming it into an organized sanctuary is a low-cost improvement that enhances functionality and reduces visible clutter throughout the bathroom.

Start by emptying everything, cleaning thoroughly, and discarding expired or unused items. Group remaining products by category, then measure the space carefully, noting pipe locations. Utilize clear stackable bins and drawers specifically designed for under-sink spaces (with cutouts for pipes) to create vertical storage. Label containers for easy identification and maintain organization long-term.
As morning light filters through your newly organized bathroom, the texture and order created by this budget bathroom makeover brings satisfaction beyond mere aesthetics.
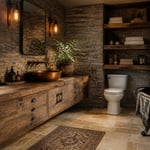
19. Furniture Flair: Introduce a Small Stool or Cabinet
The discovery of this technique happened when designers realized how a single furniture piece could transform a bathroom’s character. Adding a small stool or cabinet instantly introduces functionality and style without major construction. These pieces provide storage for towels and toiletries, offer a convenient perch, and introduce texture, color, and personality to your budget bathroom makeover.
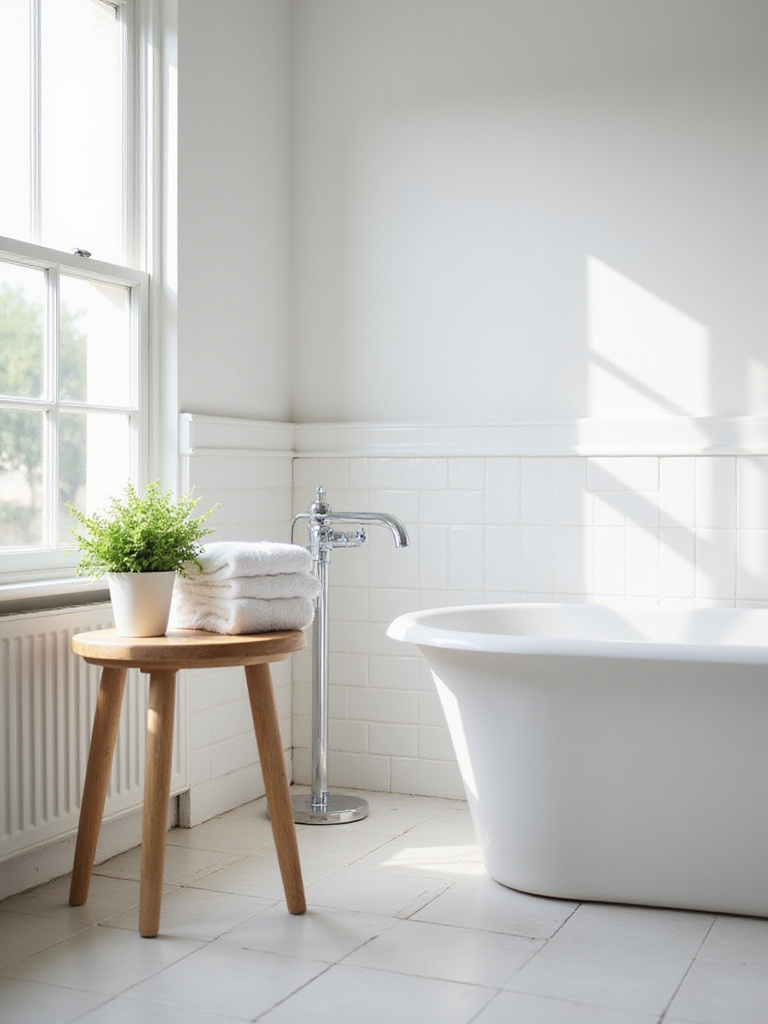
Find affordable options at thrift stores, flea markets, online marketplaces, or budget retailers. A small stool functions as a temporary seat, a surface for bath essentials, or a decorative plant stand. A cabinet primarily offers storage but also provides display space. When selecting pieces, consider humidity resistance and appropriate sizing for your space—measure carefully before purchasing.
“Bathrooms often feel clinical and utilitarian. Adding just one piece of actual furniture—whether a small cabinet, stool, or even a chair—immediately makes the space feel more like a designed room rather than just a functional necessity.” — Design Expert
While trendy, this element has staying power because it combines practicality with personalization in your budget bathroom makeover.
Conclusion
The journey through these 19 budget bathroom makeovers demonstrates that transforming your space doesn’t require demolition or designer price tags. By focusing on strategic updates—from the power of paint and hardware swaps to textile refreshes and thoughtful organization—you can create a bathroom that feels completely renewed without emptying your wallet.
What makes these approaches so effective is their accessibility. Whether you have a single weekend or want to spread projects over several months, each idea stands on its own while complementing the others. The result? A bathroom that reflects your style and meets your needs without the stress of major renovation.
Take inspiration from these budget bathroom makeovers and start with just one project. You might be surprised how quickly small changes add up to a transformation that feels anything but budget.