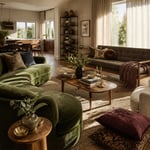
There’s a counterintuitive truth about small bathroom decor that takes most homeowners a while to accept: constraint is an advantage. A compact space forces considered material choices in a way that a larger room simply doesn’t. You can’t rely on volume, so every surface has to work harder and pair well with everything beside it.
That’s the kind of thinking that material science and surface design asks of us. In a small bathroom, the tile, the paint, the hardware, and the floor are not separate decisions — they’re a single material conversation. The quality of that conversation determines whether the space feels thoughtfully designed or just assembled. The difference usually comes down to specifics: the finish on a tap, the width of a grout line, the direction a board runs.
The 15 small bathroom decor ideas here are all material-led. None require structural changes. Most can be approached in stages. And each of them creates the kind of depth and considered character that makes a tight bathroom feel like a destination rather than an afterthought. Some are budget-friendly; a few are splurges. Together, they cover the full range of what a small bathroom can become when the material choices are genuinely thought through.
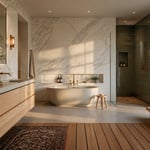
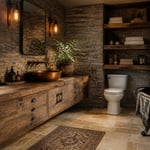
1. Warm Travertine Tile as a Statement Feature Wall
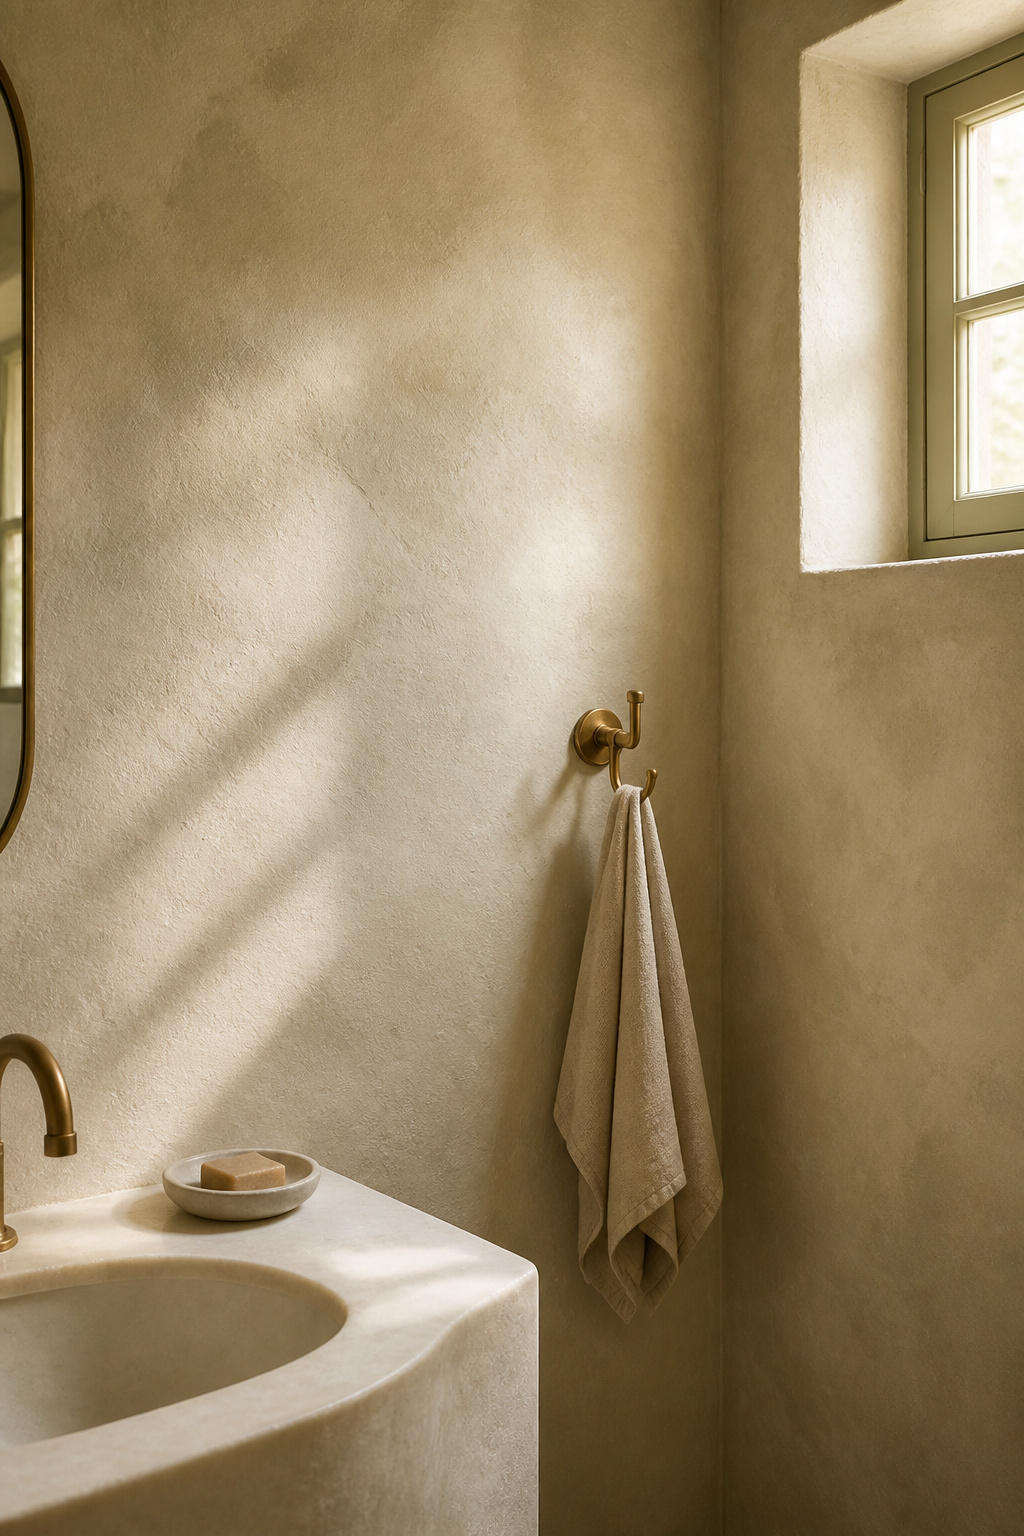
Natural travertine has been used in buildings for over two thousand years — the Colosseum contains approximately 100,000 cubic metres of it — and the reason it persists is simple: no manufactured surface replicates the depth of its veining. Each tile carries a different story, a different mineral history, and that variation is precisely what makes it effective on a small feature wall. You’re not looking at a uniform surface; you’re looking at something that accumulated over millennia.
For a small bathroom, filled travertine — where the natural voids are grouted before polishing — is the better choice on walls. The surface is smoother, easier to clean, and less likely to trap moisture in an environment that sees daily condensation. Unfilled travertine has a raw artisan quality, but the pits collect soap scum. Honed finish over polished for floors as well — polished travertine becomes genuinely slippery when wet.
Among the more sophisticated bathroom tile ideas for luxury spaces, travertine is one of the most forgiving starting points. A typical small feature wall at 25 square feet runs $425–$1,250 installed, including the penetrating sealer that’s non-negotiable in a wet room. That sealer needs reapplying every 1–3 years — plan for it. For fixtures, reach for aged brass or unlacquered bronze rather than chrome. The warm metal tones extend travertine’s palette rather than competing with it.
2. Matte Black Hardware for Strong Visual Anchoring
Hardware is the punctuation of a bathroom. The tap, the waste, the towel bar, the toilet roll holder — these are the fixed points the eye uses to navigate a small space, and their finish shapes the room’s visual register more than most homeowners realise until they change it.
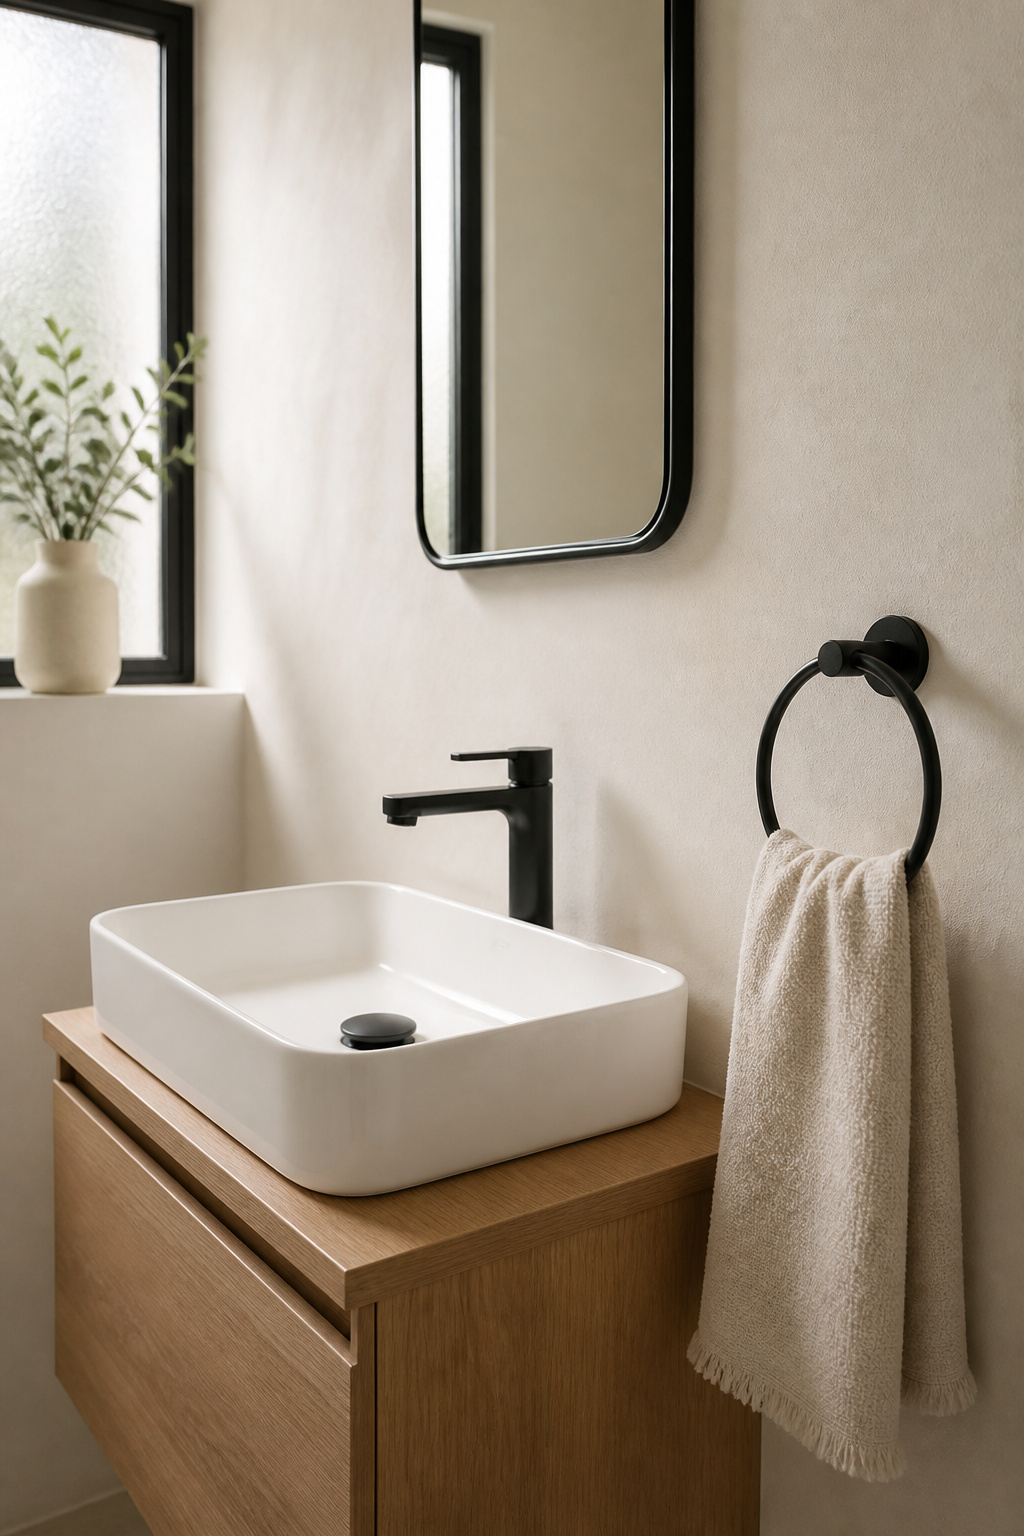
Matte black absorbs light rather than reflecting it, which creates definition without glare. In a compact bathroom, chrome can feel restless; matte black sits quietly and gives the eye somewhere definitive to land. Interior designers call this anchoring — clear visual reference points that make a small space feel organised rather than crowded.
The critical specification is PVD coating (Physical Vapour Deposition), not powder coat. PVD bonds the finish at a molecular level: harder, more corrosion-resistant, and resistant to fading even in steam-heavy bathrooms. Powder-coated matte black hardware can develop a chalky grey appearance after 5–10 years in high humidity. Look for “PVD” or “physical vapour deposition” in the product specification. Yes, it costs 20–40% more. The finish still looks right in a decade, which makes it worth it.
The smartest pairing for matte black is warm timber — white oak, walnut, or oiled teak on the vanity. The wood prevents the hardware from reading as stark. One rule worth keeping: commit to a single finish. Mixing matte black PVD pieces with powder-coated ones produces a mismatch that compounds as they age at different rates.
3. Limewash Paint: An Effortless Small Bathroom Decor Upgrade
Standard bathroom paints solve a problem — they cover a wall and resist moisture — but they don’t create visual depth. Limewash paint does both. Rather than sitting on the surface as a film, it absorbs into the plaster, becoming part of the wall. The result is an organic, layered texture with genuine depth that reads as real material rather than applied decoration.
Bauwerk and Portola have made limewash accessible for non-professionals. Portola’s Lime Wash uses a stain brush — smaller brushes produce more variation and movement, larger brushes give a smoother, more subtle effect. Both brands’ formulas are non-film-forming, which means they won’t blister or peel in steam-heavy environments the way a vinyl emulsion can.
For bathroom-specific questions, the boundaries are clear: limewash works on all wall and ceiling areas of a bathroom except the shower interior and the immediate zone adjacent to the bath. Those areas need a conventional splashback — tile or glass. Everywhere else is suitable. Bauwerk also notes that limewash is naturally anti-bacterial and mould-resistant, which is genuinely useful in a small bathroom with limited ventilation.
For colour, soft whites and pale stone tones reflect the most light while carrying the texture. Dusty sage and pale terracotta also work well in limewash because the application variation prevents any tone from feeling flat. Avoid saturated colours in a small space — the depth of the texture amplifies darkness in a way that can feel cave-like in a compact room. This is one of the highest-value small bathroom decor upgrades for impact per dollar: a full room costs $150–$400 in materials and a weekend to complete.
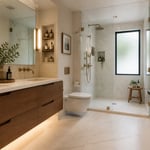
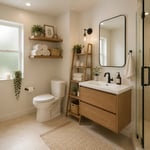
4. Floating White Oak Vanity for a Streamlined, Open Feel
The floor is the single largest plane in a small bathroom. Anything that interrupts it — cabinet bases, pedestal legs, vanity feet — breaks the horizontal continuity that makes a compact space feel spacious. A wall-mounted floating vanity eliminates that interruption entirely. The eye sees the floor running continuously, and that unbroken plane registers as more square footage than actually exists.
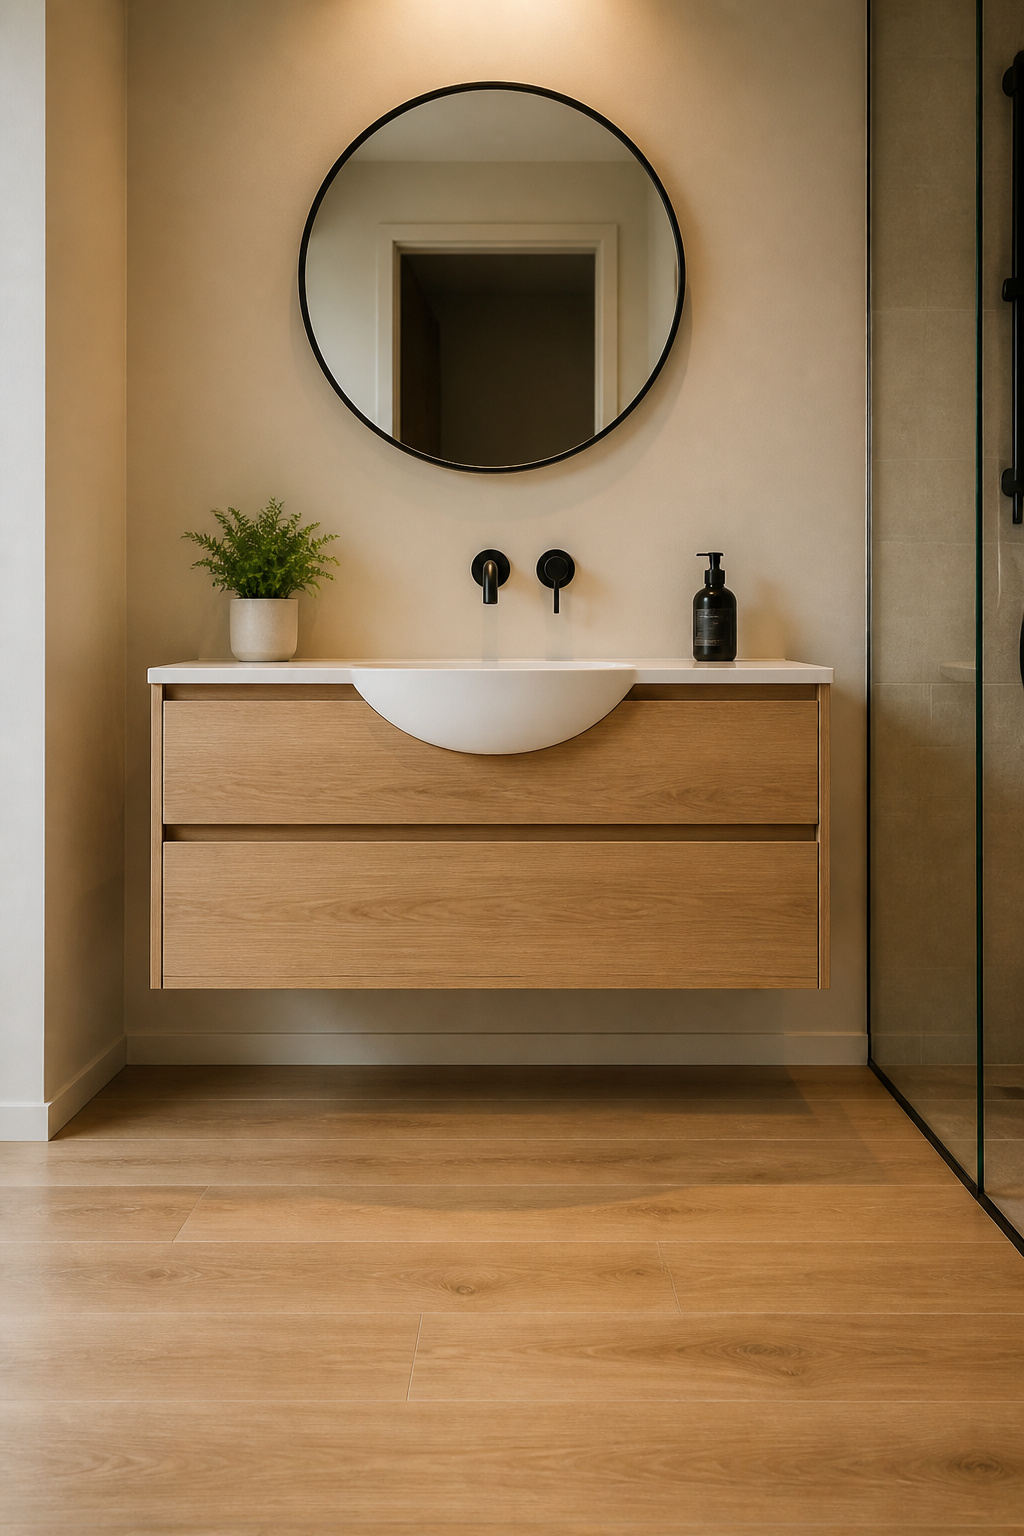
White oak is the best wood choice for this application. It contains tyloses — microscopic structures that block the wood’s pores — making it significantly more resistant to moisture than red oak or most imported tropical alternatives. With proper sealing and adequate ventilation, a white oak vanity resists swelling and warping in bathroom humidity for decades. Bamboo is often marketed as a sustainable competitor but delaminates more readily in wet conditions.
The standard floating vanity for a small bathroom sits 32–36 inches high (81–91cm) to the counter surface, with 400–450mm of floor clearance below. That reveal is what creates the visual openness — too little and the effect is lost. Widths of 18–24 inches are the practical range for single-basin use in a compact room. Wall fixings must hit solid timber framing or a steel support rail rated for the weight; this is not a simple DIY installation.
Pair the unit with an undermount or semi-recessed basin to keep the counter line clean. An above-counter vessel sink adds visual height a small room usually doesn’t need.
5. Terrazzo Flooring That Makes Small Bathrooms Feel Curated
Terrazzo works in compact rooms for a specific material science reason: its aggregate pattern operates at a fine scale. Unlike large-format geometric tiles, terrazzo’s chip pattern is small enough that the eye reads it as texture rather than as a repeating motif — and texture doesn’t advance toward the viewer the way a dominant pattern does. The space doesn’t contract; it becomes more interesting.
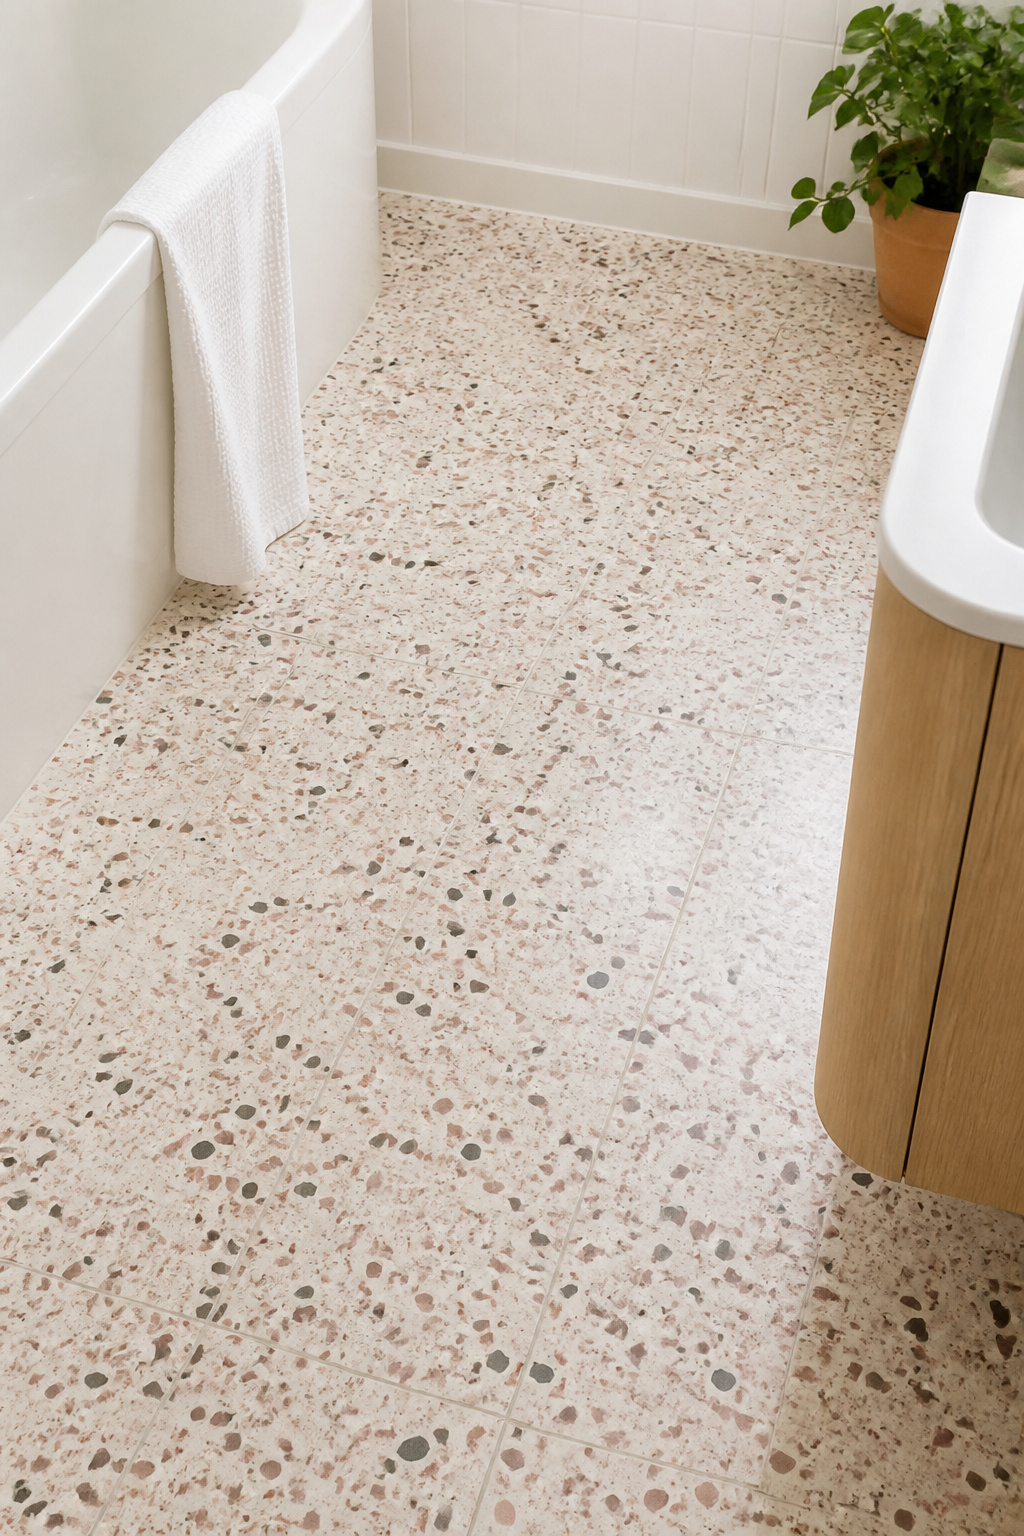
For small bathroom inspiration ideas that actually work, terrazzo is one of the most reliable floor choices precisely because it adds complexity without adding visual weight. The 12×12 or 16×16 inch tile format is optimal — large enough to reduce grout lines, proportionate enough that the tile scale doesn’t feel oversized. Chip size matters too: smaller chips under 6mm read as a finer, almost textile-like texture; larger chips (12–25mm) create a bolder statement. For most small bathrooms, smaller chips are more forgiving.
The material hierarchy runs from poured terrazzo (ground and polished in-situ, seamless, spectacular) down through genuine terrazzo tiles, terrazzo-look porcelain, and terrazzo-look luxury vinyl at the entry point. Genuine terrazzo tiles are often the sweet spot for a small bathroom floor — real material, real depth, DIY-installable, and at a cost the square footage makes manageable. A light background with warm-toned chips (cream base with pink and grey aggregate) reflects more light than a dark background. One critical note: a polished terrazzo floor requires a wet-area DCOF rating of at least 0.42 (ANSI A326.3). Many polished finishes fall below this when wet — check the specification sheet before ordering.
6. Rattan and Woven Accents for Tactile Warmth
Ceramic, stone, and glass are cold materials — visually and literally. They have low thermal emissivity compared to organic fibres, which means they reflect rather than absorb warmth. In a bathroom dominated by tile, rattan and woven accents provide the opposite quality: something that reads as warm to the eye, feels warmer to the touch, and introduces natural irregularity that tile cannot replicate.
The placement question is where the material science becomes practical. Natural rattan belongs in dry zones only: an upper shelf, a linen niche, a wall away from the bath or shower. In direct steam or splash zones, natural rattan absorbs moisture, provides ideal conditions for mould, and loses structural integrity within a season. For anything near water, use synthetic rattan (polypropylene, often labelled PP rattan) — it’s moisture-resistant, requires no sealing, and keeps its structure indefinitely.
Items that can safely use natural rattan in a well-ventilated bathroom include mirror frames and pendant light shades — both sit away from direct water contact. A round rattan mirror over the vanity is currently one of the most effective single-accent choices for adding warmth to a tile-heavy small bathroom: visually lightweight, no floor space consumed, and the organic counterpoint that makes stone and metal elements look more considered. One statement woven piece is usually enough. Two work if they’re from the same material family and at different heights.
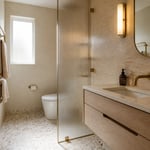
7. Fluted Glass Shower Panels for a Light-Filled Small Bathroom
The shower enclosure occupies a significant portion of a small bathroom’s floor plan, and its panel material determines whether that zone feels like a light-passing element or a visual barrier. Clear glass is the most open option but puts everything inside the shower on display. Frosted glass provides privacy but blocks more light than people realise and adds no visual interest.
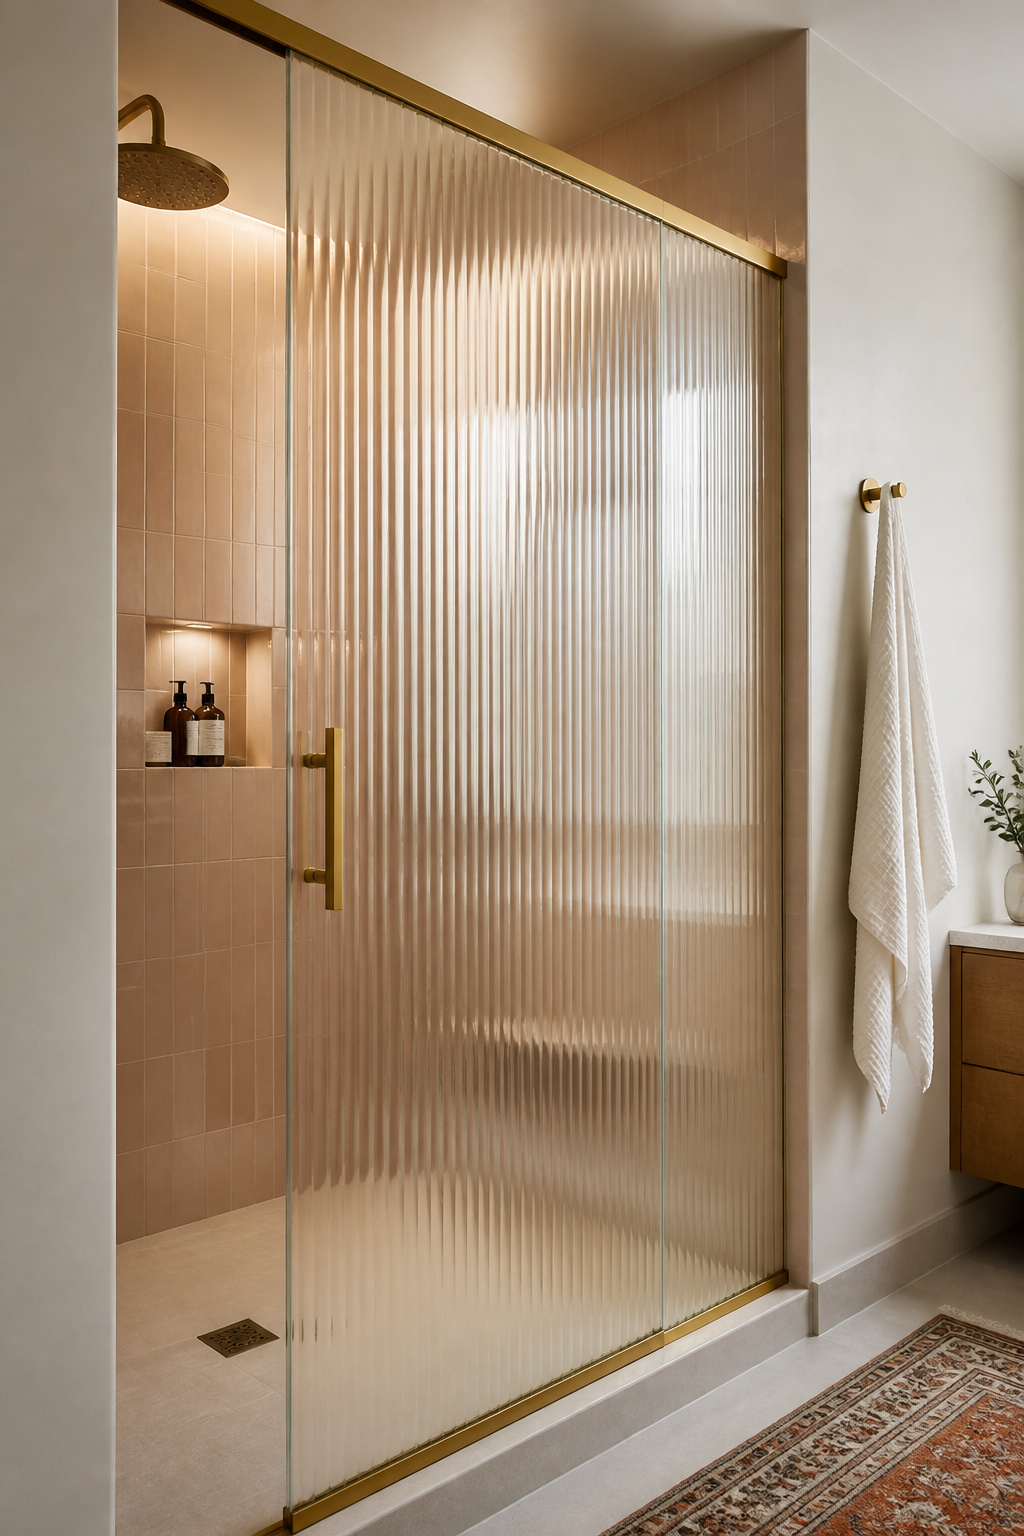
Fluted glass — also called reeded or ribbed glass — sits between the two and is often better than either for a small bathroom. The vertical channels pressed into toughened safety glass scatter incoming light, creating warm diffusion rather than flat opacity. Privacy is meaningful (outlines visible in strong backlight but details well obscured) while light continues to travel through and across the room. The vertical ribbing also aligns with vertical design elements like shiplap or tall mirrors, creating visual coherence.
For tight wet rooms, the frame profile decision matters. Frameless fluted glass requires 10mm minimum thickness to remain structurally stable — it costs more but gives the cleanest result. Semi-frameless (a slim channel at top and bottom, sides open) offers a solid compromise: less visual weight, lower cost. Frame finish matters too: black-framed fluted glass reads as graphic and deliberate; brass or gold frames create a boutique-hotel quality that pairs well with aged brass fixtures. All shower glass must meet safety glazing standards — ANSI Z97.1 in the US, BS 6206 in the UK. Specify “toughened” or “laminated” explicitly in any order.
8. Contrasting Grout as an Intentional Design Detail
Grout is the most overlooked small bathroom decor decision, and the one with the most disproportionate impact relative to its cost. Standard white or grey grout on white tile creates a background — the eye reads it as neutral and moves past. A contrasting dark or coloured grout on the same tile creates a grid that becomes the room’s visual structure. The same tile, transformed into an entirely different surface.
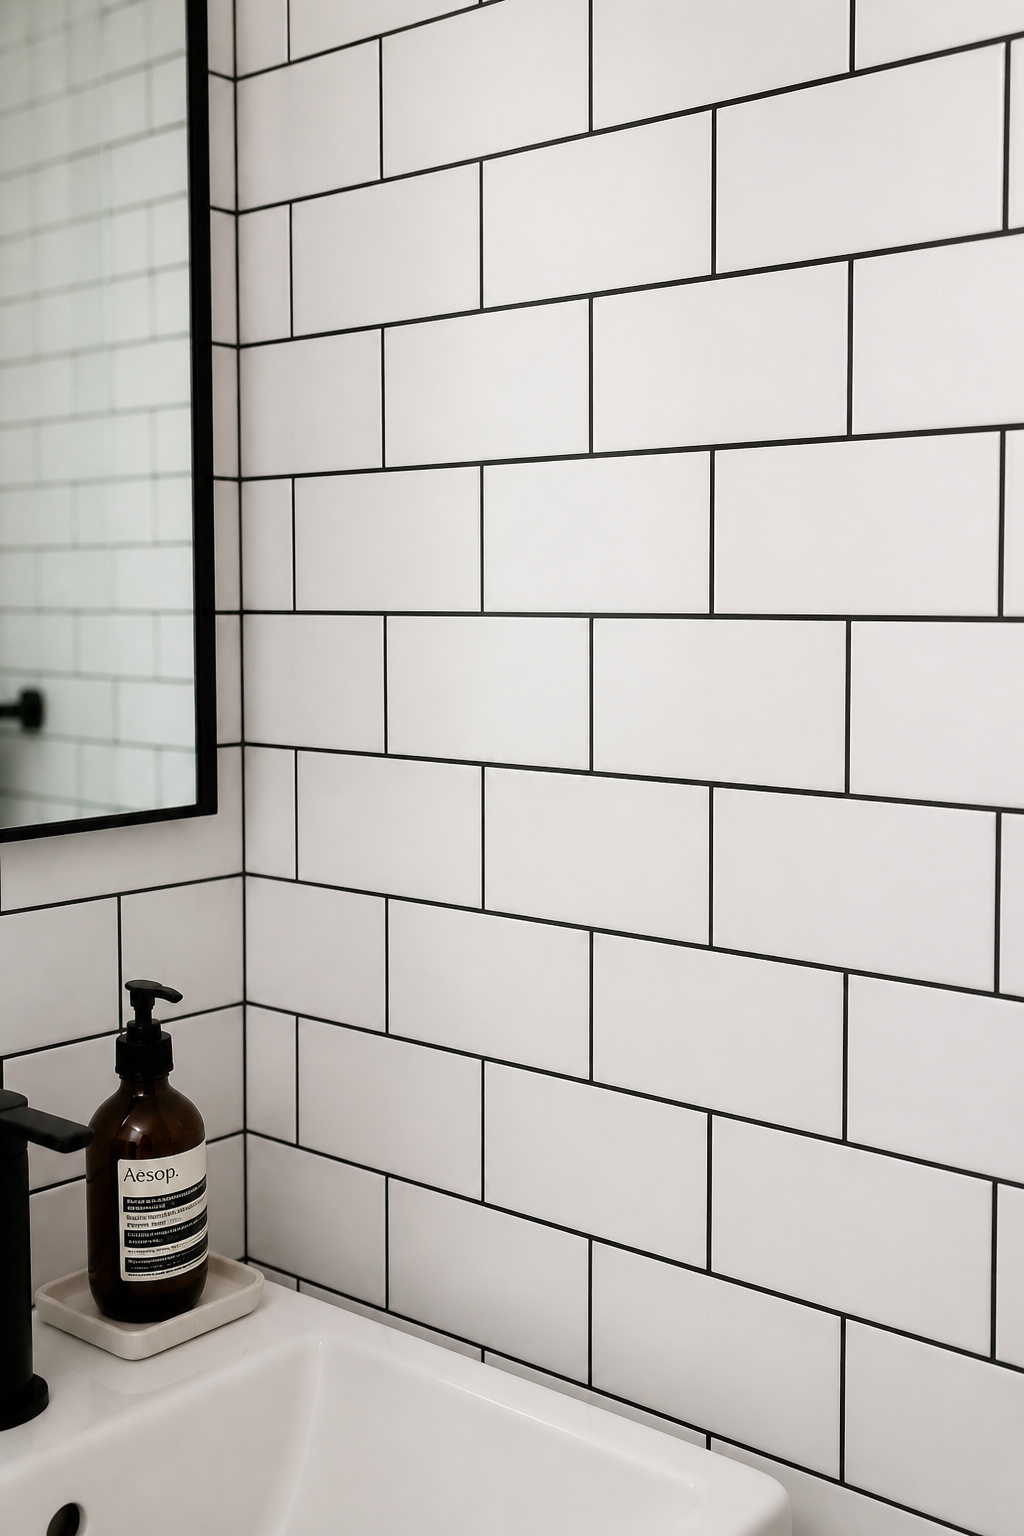
The options working particularly well right now: charcoal on white subway tile (a graphic, almost Victorian grid), terracotta on cream field tile (warm and unexpected), and forest green on white hex (botanical and deliberate). None of these require premium tile — ordinary white subway at $2–$4 per square foot reads as considered when grouted with a well-chosen epoxy colour.
For bathroom tile designs that function as the room’s defining feature, grout colour is the lever most people forget to pull. Epoxy grout — Mapei Kerapoxy and Laticrete Spectralock are the two most trusted brands — is the only grout worth specifying for a coloured design intention. At $3.00–$10.00 per square foot versus $0.50–$2.00 for cement, the premium is real. But cement grout is porous: without constant sealing, a coloured cement grout stains, fades, and discolours within a year in a bathroom environment. Epoxy grout is non-porous, holds colour for decades, and makes the premium genuinely worthwhile. One technical note: epoxy has a short working time and requires clean, quick technique. Most homeowners who tile themselves hire a tiler specifically for the grouting phase.
9. Zellige Tile Splashback for Artisan, Handmade Character
Authentic zellige is produced in Morocco from hand-pressed terracotta clay that is kiln-fired and hand-glazed — a process unchanged in its fundamentals for centuries. The result is tile with intentional surface variation: each piece sits at a fractionally different plane, carries glaze pooling unique to how it was fired, and has slightly irregular edges. When installed, the glazed surface catches and reflects light at multiple angles simultaneously, creating a shimmer and depth that no machine-made tile can come close to replicating.
Installation Is Specialist Work
In a small bathroom, a zellige splashback behind the vanity or above the bath introduces light play that makes the space feel genuinely artisan — like it was made by someone who made a considered choice, not assembled from a catalogue. The tiles are typically 10cm × 10cm, a small scale that suits compact rooms.
Zellige is not a DIY installation. The irregular edges, slight lippage, and need for skilled hand-fitting require a tiler experienced with the material — always ask for examples of previous zellige projects before hiring. Traditional installation uses very tight grout joints (1–2mm) with a liquid, flowing grout applied diagonally and wiped quickly before it sets. Order 20–25% more tile than the square footage calculation requires: irregular edge cuts, breakage during cutting, and colour-selection during installation add to the count quickly.
Authentic zellige runs $20–$50+ per square foot from US importers like Zia Tile, Clay Imports, and Riad Tile. For a small vanity splashback of 10–15 square feet, the total material cost is manageable. And it is the single most visually distinctive material upgrade available to a small bathroom.
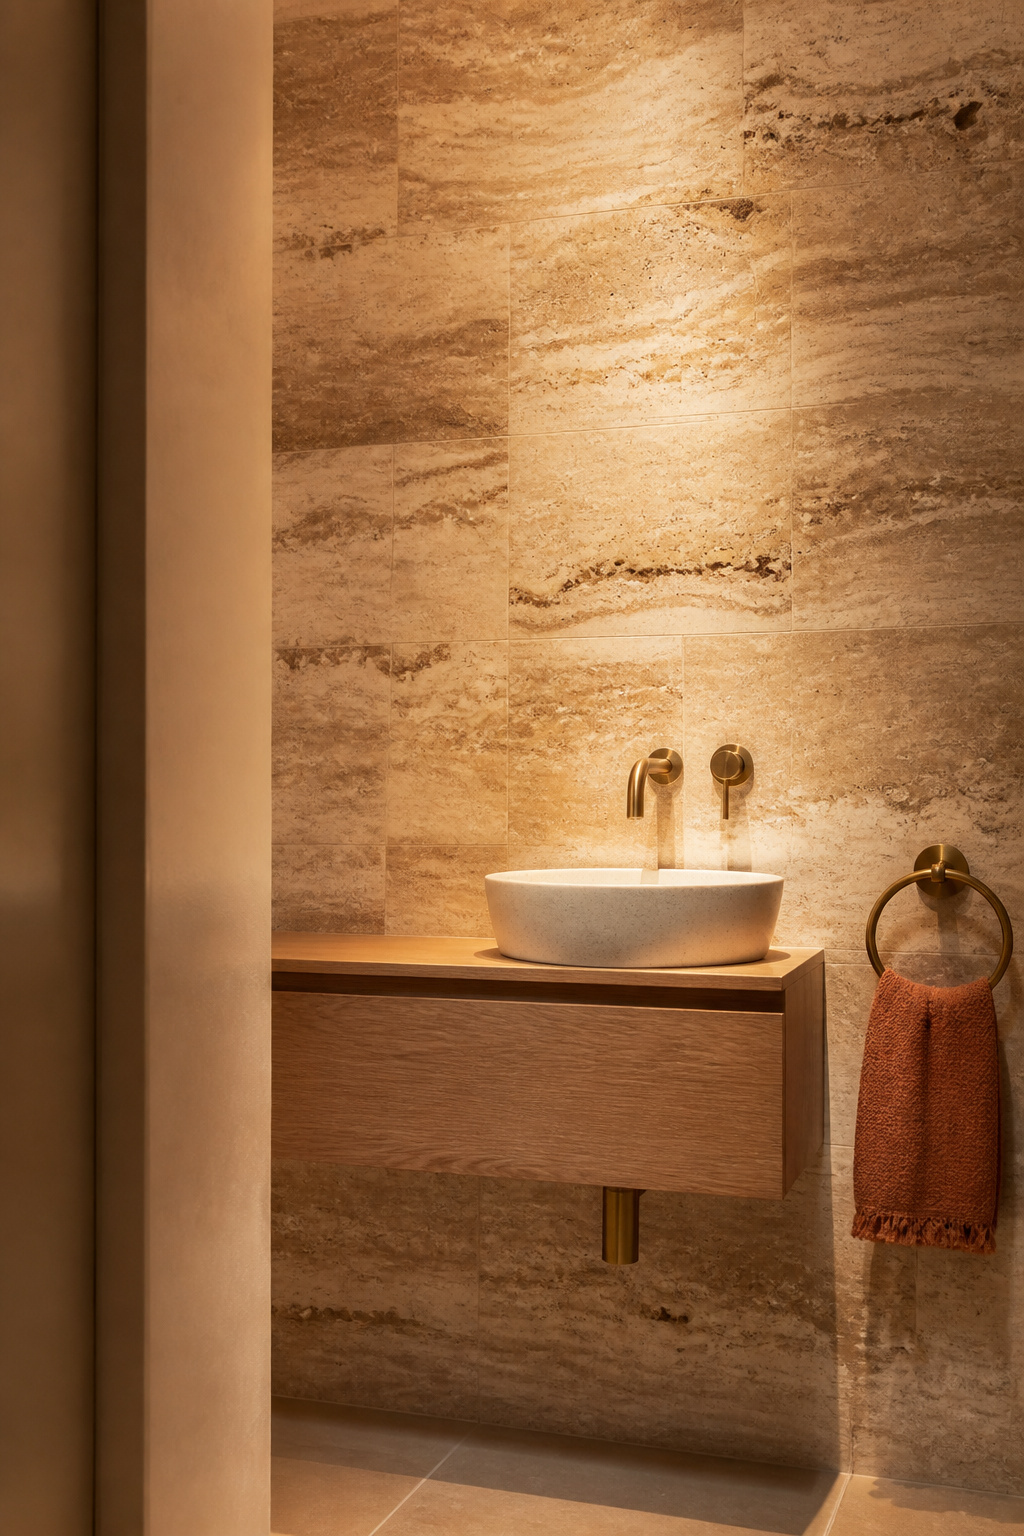
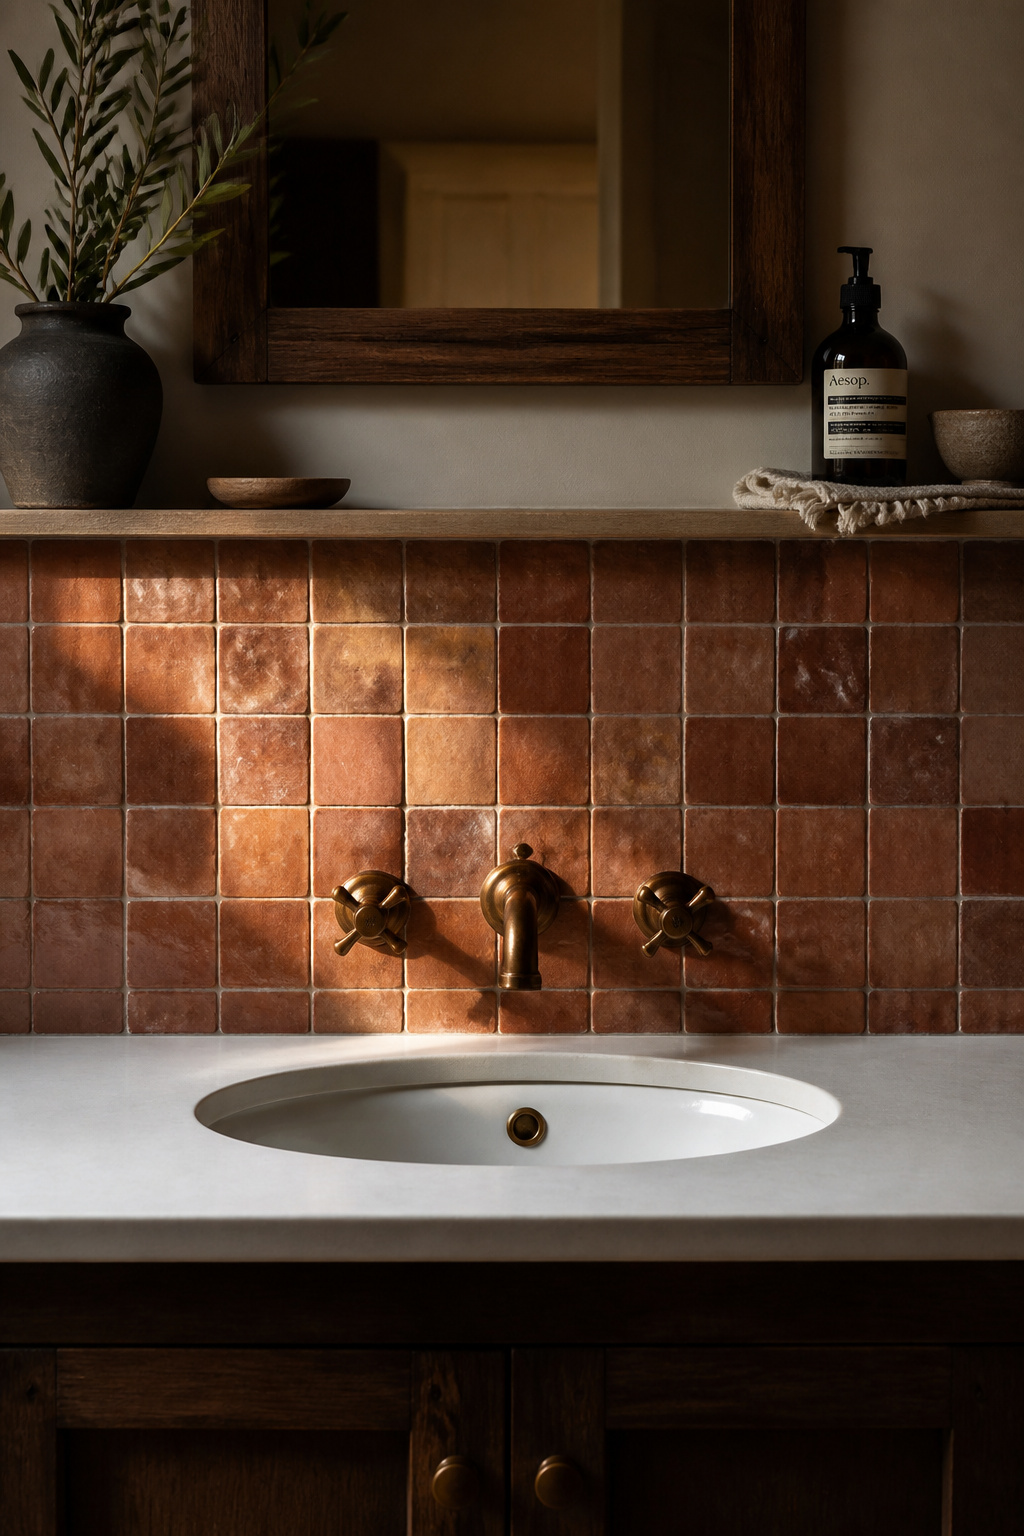
10. Aged Brass Fixtures That Develop Character Over Time
There is a category of metal finish called a “living finish” — a surface that changes with use rather than fighting it. Unlacquered aged brass is the most compelling version for a bathroom. The areas touched most frequently (tap handles, drawer pulls) darken first from skin oils and minerals in the water; less-contacted areas age more slowly. Over 12–18 months, the fixture develops a patina — a record of use that is impossible to simulate and produces a depth that polished or lacquered finishes never achieve.
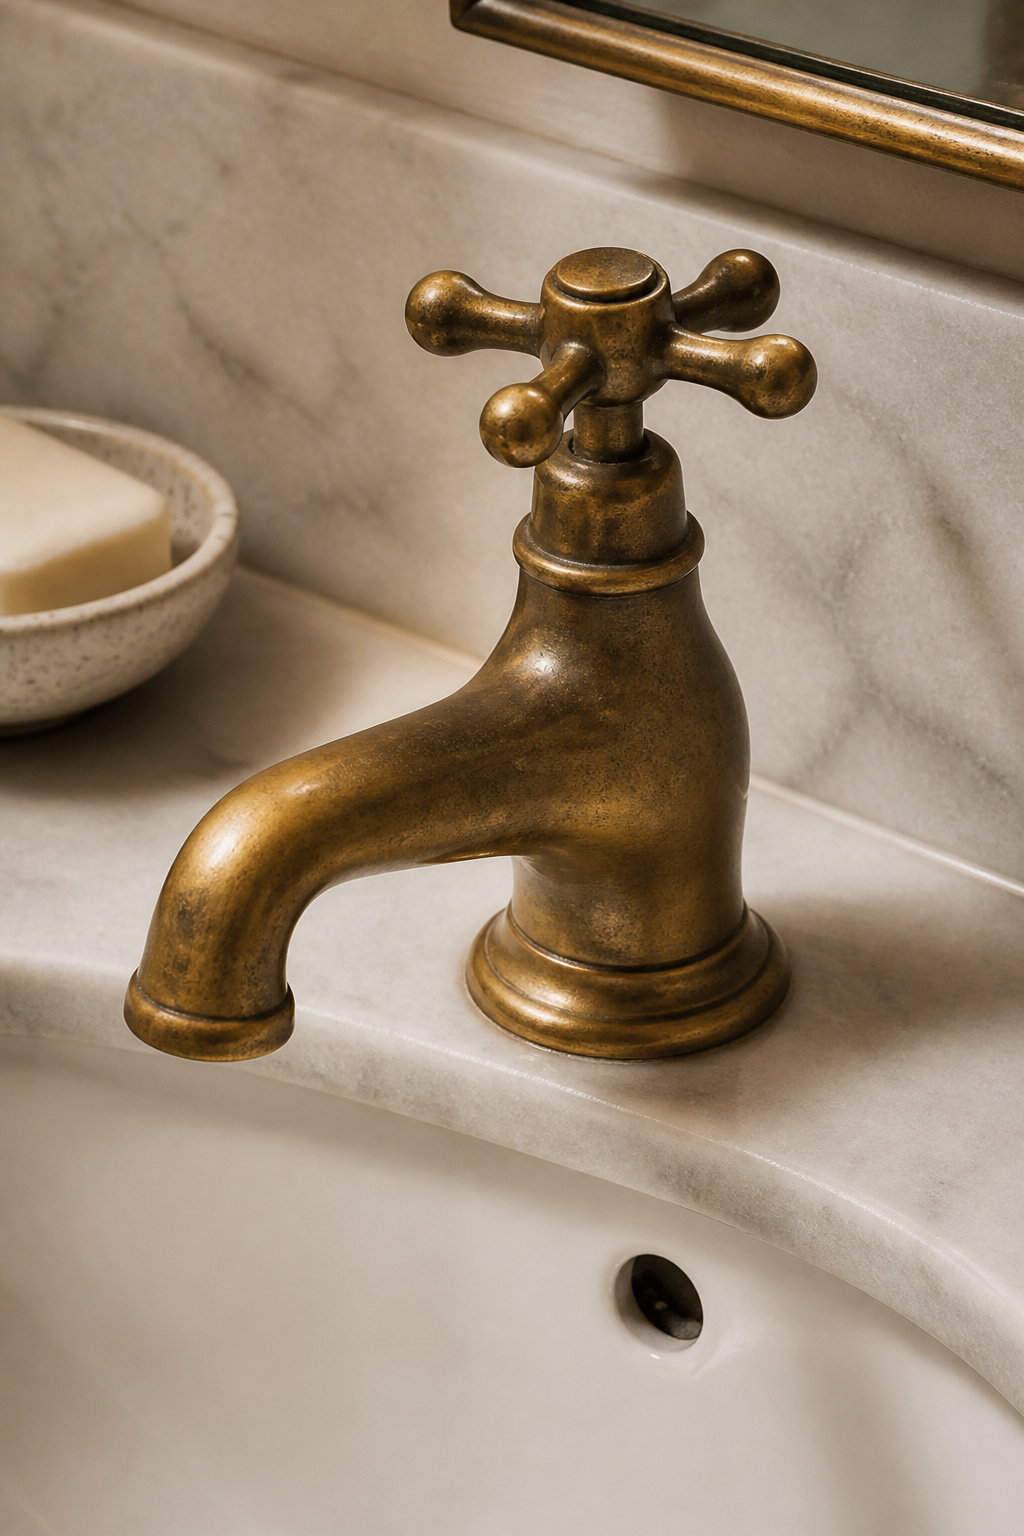
The patina is not tarnish. It is a stable surface oxide layer that actually protects the underlying metal from further corrosion, and its colour range is wide: deep golden in the first months, gradually darkening to brownish or reddish tones, occasionally producing blue-green in high-mineral-water environments. The process stabilises and slows after the first year.
The distinction to understand before buying: lacquered aged brass is sealed with a clear coat and changes very slowly; unlacquered brass has no coating and changes immediately. Clean unlacquered brass with a soft cloth and mild soap only — no acid-based cleaners, no abrasives, nothing containing bleach or vinegar. Many owners apply a small amount of mineral oil occasionally to even out patina development in specific areas.
At the material level, aged brass pairs best with surfaces that share its warmth: cool white marble creates tension that reads as sophisticated; travertine or zellige creates harmony. Either works in a small bathroom. Pairing unlacquered brass with chrome elsewhere in the room, though, always looks accidental rather than eclectic.
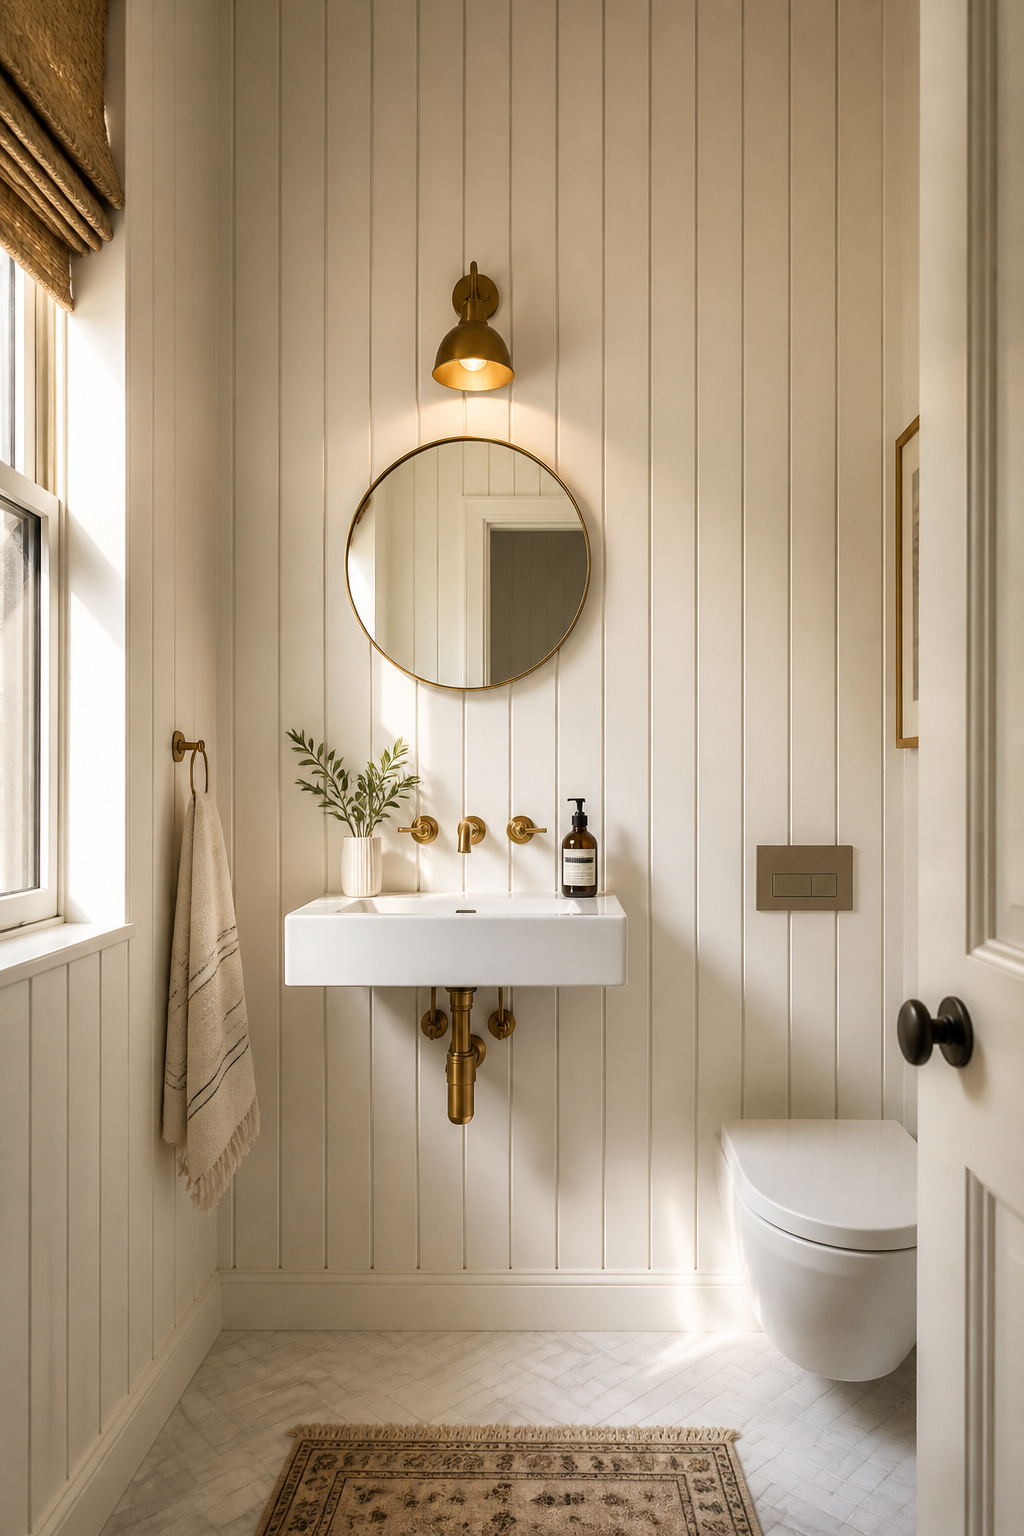
11. Vertical Shiplap Cladding for Height and Visual Warmth
Shiplap — boards with a rabbet cut on each edge creating a shadow line between planks — is structural timber detailing repurposed as interior wall architecture. In a small bathroom, the direction it runs is a practical decision about how you want the room to read. Vertical boards draw the eye upward along the line of each plank. In a room with a standard 8-foot ceiling, this can add the perception of 12–18 additional inches of height — meaningful in a tight space.
The material choice is where bathroom-specific knowledge matters. Standard MDF is not appropriate for bathroom walls — it absorbs moisture and swells. For genuine bathroom suitability, PVC shiplap (from brands like Royal Building Products and Versatex) is the most reliable option: fully waterproof, no swelling, no mould risk, and convincingly wood-like when painted. It costs $3–$5 per square foot. Real timber pine is more beautiful and works well in a ventilated bathroom, but it requires a moisture-resistant primer and at least two coats of a bathroom-grade semi-gloss in a mould-resistant formula.
Install shiplap with a 1–2mm expansion gap at floor and ceiling, sealed with flexible waterproof silicone. Light-coloured shiplap amplifies the height effect by reflecting more light toward the ceiling. Also, keep it away from shower zones and bath surrounds unless you’re using PVC — the shadow gap between planks traps moisture and creates ideal conditions for mould to establish behind the surface where you can’t see it.
12. Linen-Textured Luxury Vinyl: Small Bathroom Decor on a Budget
The gap between what luxury vinyl tile looks like and what it costs has closed significantly over the last decade. Contemporary LVT manufacturing uses photographic printing layers combined with EIR — embossed in register — where the texture pressed into the surface is mechanically aligned with the printed pattern below. The result genuinely mimics the tactile quality of natural stone or woven fabric in a way that earlier generations of vinyl flooring simply didn’t.
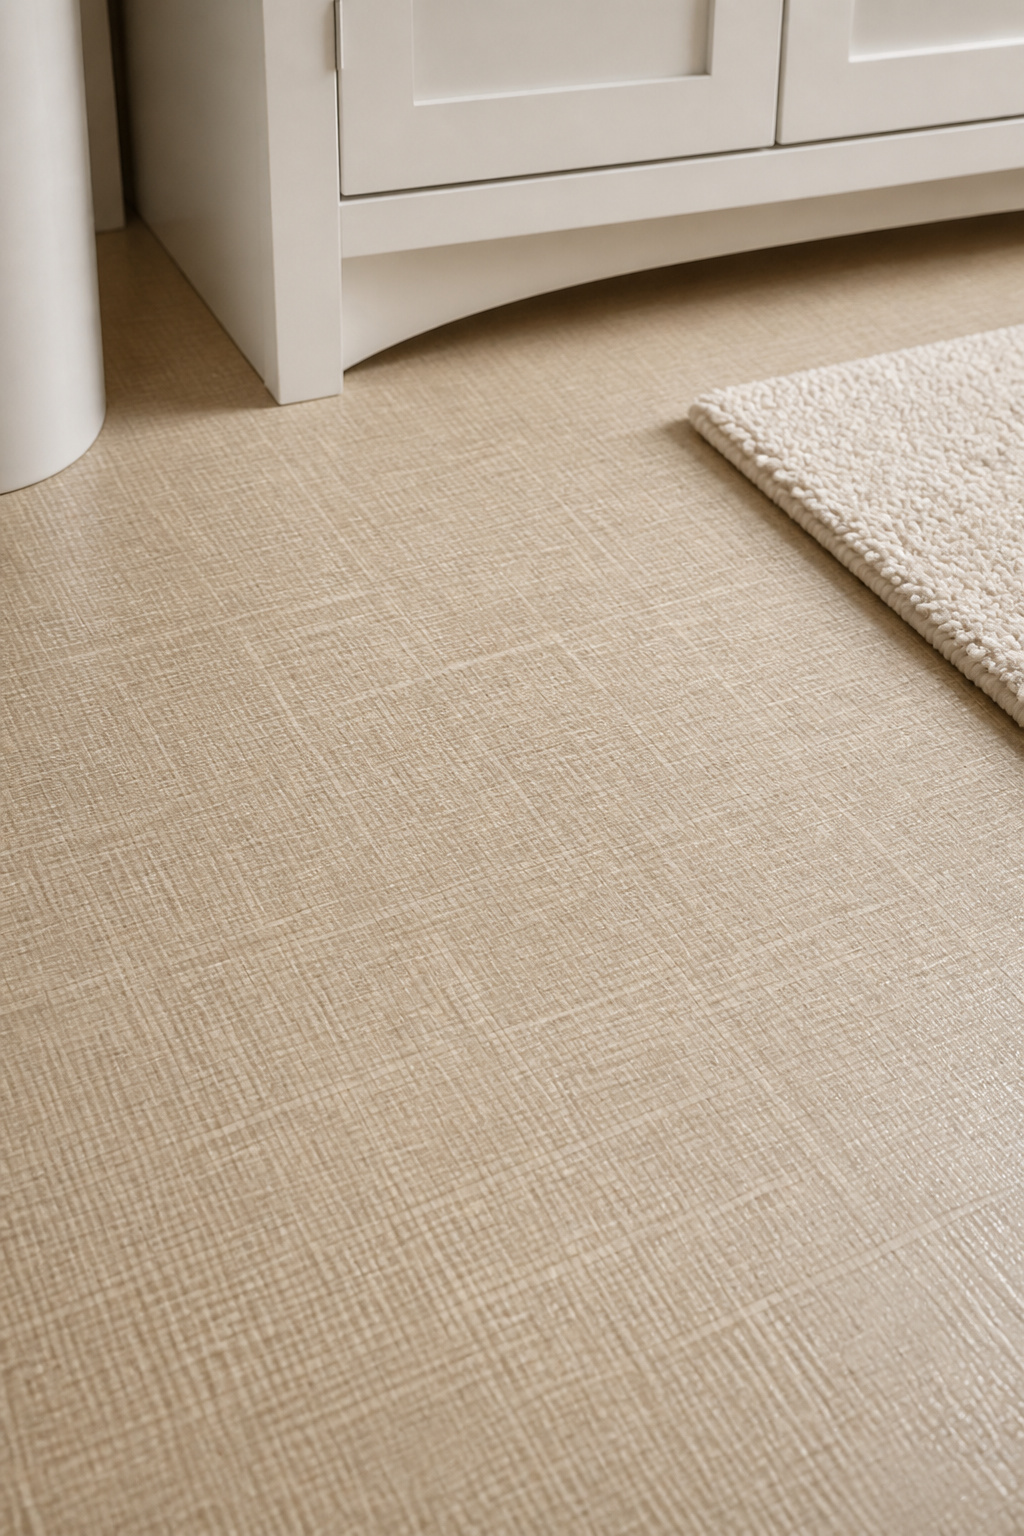
For small bathroom decor at a realistic budget, linen-textured LVT introduces a warm, soft-looking floor surface in a room that tile has made feel hard and cold. Barefoot, it feels warmer than ceramic. Visually, the textile-like texture scatters light differently than polished tile — a softer glow that reads as comfortable rather than clinical. Karndean’s Tile Collection and Amtico’s Signature range both include options in this territory.
The specification question is wear layer thickness. A 12mil wear layer is adequate for a quiet single-person bathroom; for a family bathroom with children and pets, 20mil is the better long-term choice. Both Karndean and Amtico’s professional ranges use a 0.55mm (approximately 22mil) wear layer — the same specification as their commercial-grade products. Waterproofing comes from the SPC or WPC core, not the wear layer; all quality LVT from major brands is 100% waterproof. Whichever installation method you choose, seal the expansion gaps at the wall with waterproof caulk — this is where moisture enters most often, and it’s a five-minute job that prevents a much larger problem later.
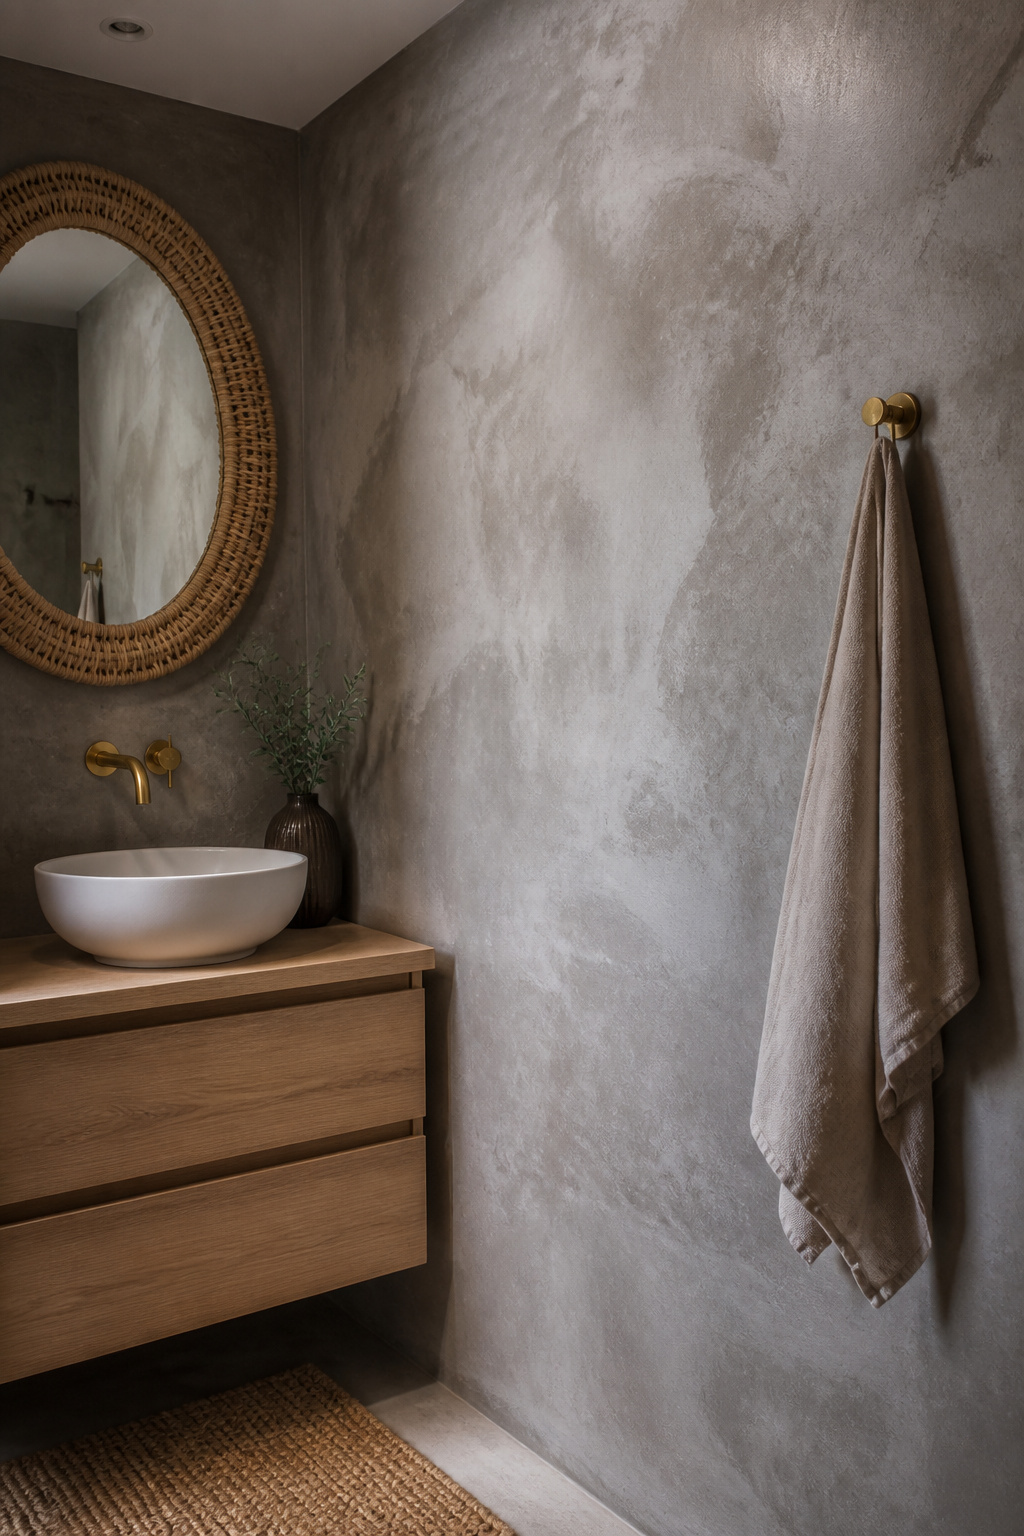
13. Concrete-Look Wall Panels for an Industrial-Soft Finish
Microcement is a hand-applied, thin-coat cementitious overlay — 2–3mm thick — that goes directly over existing tiles, plaster, or concrete without demolition. In a small bathroom, that’s a significant advantage: no disruption, no reskimming, no rebuilding. The surface is seamless and joint-free once sealed, which means no grout lines to clean and no interruptions to the wall’s visual plane. The hand-applied nature gives each installation its own trowel-mark character that looks crafted rather than manufactured.
Microcement vs. Concrete-Look Panels
Professional microcement typically costs $30–$75+ per square foot installed, with a complete small bathroom (walls and floor) running $3,000–$6,000. A full installation takes 4–6 days including surface preparation, primer coats, microcement layers, sanding, and sealing. The skill level required is high — always ask for a sample board sealed with the exact topcoat they’ll use before committing.
The practical alternative is concrete-look PVC cladding panels — typically 1 metre wide by 2.4 metres tall, fully waterproof, clicking together and trimming at edges. Material costs run $5–$25 per square foot, and a small bathroom can be transformed in a day. The visual result is less convincing up close than genuine microcement but transformative at normal viewing distance.
Either route produces an aesthetic that needs careful softening. If you want to understand the full range of industrial bathroom ideas and how to make the look work in a residential context, a white oak floating vanity, aged brass taps, and a rattan mirror frame are the three most effective counterpoints. Concrete reads cold without warm organic elements; the contrast between the two is what makes the design work.
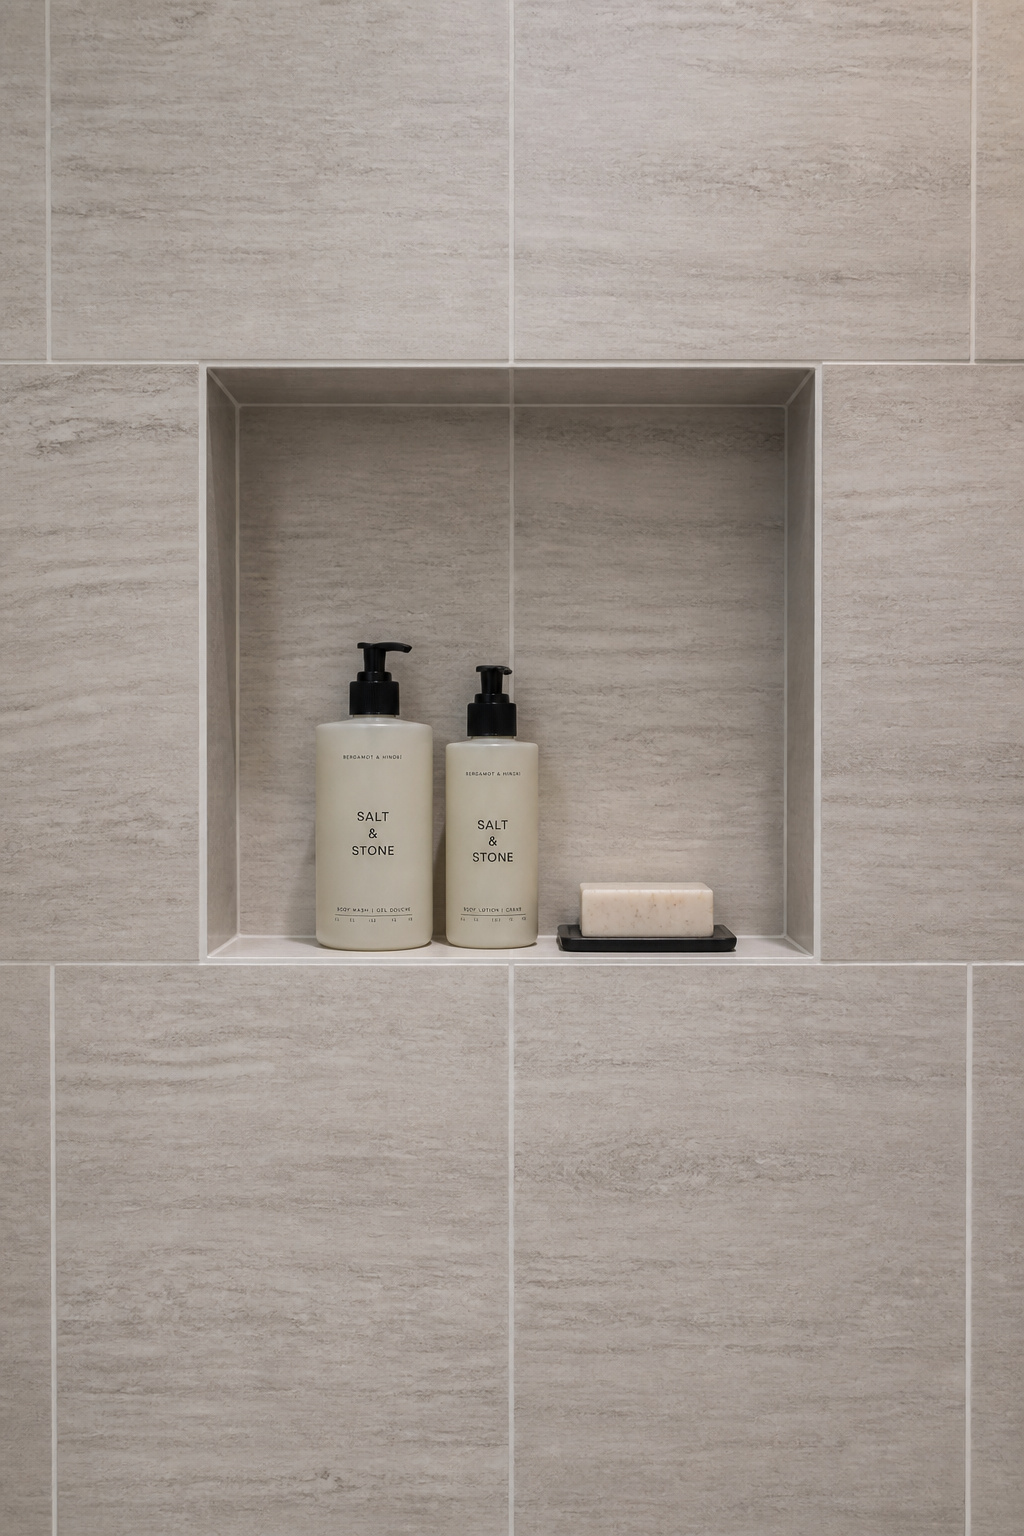
14. Integrated Tile Shelf Niches for a Seamless Material Look
A recessed tile niche built into the shower wall and tiled to match the surrounding surface does something almost architectural: it disappears. There is no shelf bracket, no frame, no visible interruption — just wall, and then a useful pocket within the wall. The visual result is that the bathroom looks cleaner and less cluttered than any external storage solution achieves, because the storage element is literally part of the structure.
Construction and Placement
The most reliable waterproofing system is Schluter’s KERDI-BOARD-SN — a prefabricated foam niche with an integrated KERDI-BAND flange that seals the connection between niche and surrounding wall. It comes in sizes from 12×6 to 12×28 inches and fastens directly to stud framing. Apply the KERDI membrane to the niche box with unmodified thin-set mortar before tiling — this step is not optional. A tile niche without proper waterproofing fails behind the wall where you can’t see it, eventually producing damp, mould, and structural damage.
The most comfortable height is 48–60 inches from the shower floor. A 12×12 inch niche is the minimum practical size; 12×28 accommodates two people’s worth of products without appearing outsized. Align the niche opening to the tile grid — plan the entire layout from the pan upward before cutting the niche opening. One critical rule: never put a niche on an exterior wall, where the cavity contains insulation that can harbour condensation in cold climates. Interior partition walls only.
A recessed niche handles shower storage while the vanity cabinet handles everything else — together they can eliminate the freestanding shelving units that eat into a small bathroom’s limited floor plan.
15. Bold Wallpaper in a Wet Room: Going All-In on Pattern
The instinct in a small bathroom is to minimise — white walls, no pattern, open and airy. The instinct is understandable and often wrong. Bold wallpaper in a small bathroom works when it commits. A strong enough pattern makes the room an experience rather than a space — the eye is too engaged by what it’s seeing to measure what it’s standing in. The question of size becomes irrelevant.

Large-scale pattern is counterintuitively more successful in small rooms than small-scale pattern. When a motif is too small for the space, it reads as fussy and restless. A pattern that fills a wall with confidence reads as intentional — and intention is what separates small bathroom decor that feels designed from small bathroom decor that feels merely decorated. The best approach is full commitment: paper the whole room rather than one feature wall with three plain walls, which in a compact space tends to look indecisive.
For bathroom wallpaper trends that stay current without dating quickly, botanicals (large-format leaves and florals in a limited palette) and geometric abstracts with plenty of white ground are the most forgiving choices. The white ground between motifs allows the eye to rest — crucial in a small room — while the pattern provides the drama.
Moisture-resistant wallpaper is non-negotiable. Solid vinyl wallpaper — vinyl face bonded to a paper or fabric backing — is the most durable option; vinyl-coated paper is slightly less robust but still suitable for a well-ventilated bathroom. Graham & Brown’s vinyl collection includes options rated specifically for bathroom humidity, with paste-the-wall technology that simplifies hanging. Use the “booking” technique before hanging each drop: fold the pasted strip paste-to-paste, let it rest for 5–10 minutes, then hang. Standard paper wallpaper in a bathroom lasts 6–12 months before the backing separates from the wall. The product specification matters more than the design in this case.
Finding Your Material Mix for a Small Bathroom You’ll Love
The 15 ideas here span a wide range of investment and complexity, and the temptation — especially after reading them back-to-back — is to want all of them at once. A small bathroom can’t carry that weight. The rooms that feel genuinely considered usually get there through restraint: one statement surface, one material upgrade, one soft accent. Three layers, each from a different category, each doing a different job.
A reliable rule from material design practice: limit the colour palette to two or three tones across all surfaces, then let the material variation create the interest. Travertine, aged brass, and limewash paint can occupy the same small bathroom beautifully because they share a warm, earthy palette — even though they’re profoundly different in texture, weight, and light behaviour. That’s the skill. In a compact space, restraint is not a limitation; it’s the method.
If you’re starting from nothing and want the highest impact per dollar, hardware is the answer. A complete hardware replacement — taps, towel bar, toilet roll holder, and robe hook — runs $300–$800 and transforms the room’s visual language without a single construction step. Second: limewash paint. A full small bathroom costs $150–$400 in materials and a weekend to complete, producing texture comparable to far more expensive wall treatments. Third: coloured epoxy grout, if a retile is already planned. The premium over standard white cement grout is $200–$400 more, but the visual result — that considered, graphic grid — elevates the entire tile installation into something that reads as a deliberate choice rather than a default.
Small bathrooms don’t need more space. They need better materials and more specific thinking. Confusing the two is why so many renovations end up feeling incomplete.