Is your kitchen feeling tired and outdated? Do you dream of a fresh, new look without the hefty price tag of a full renovation? The heart of your home deserves to be a space you love, and often, the most impactful change you can make is a kitchen cabinet makeover.
Forget demolition and weeks of disruption – transforming your cabinets is your secret weapon for achieving a stunning transformation, often in just a weekend! From simple paint updates to clever organizational hacks, these 21 ideas will inspire you to unleash your inner designer and breathe new life into your culinary haven.
1. Fresh Paint, Fresh Start: The Easiest Cabinet Transformation
Want a dramatic kitchen change with minimal effort and maximum impact? Painting your kitchen cabinets is the answer. It’s an incredibly cost-effective way to refresh your entire kitchen aesthetic without breaking the bank on a full remodel. Compared to replacing cabinets, painting is a budget-friendly alternative that can be completed in a weekend, or two for larger kitchens. The beauty of paint lies in its customizability – you have a limitless palette of colors to perfectly match your personal style.
For kitchen cabinets, it’s best to opt for paints specifically formulated for cabinets or trim. Alkyd or oil-based paints create a hard, resilient finish that stands up to kitchen rigors, while latex acrylic paints offer easier cleanup and lower VOCs. For optimal results, select a semi-gloss or gloss finish that’s easy to clean and provides enhanced moisture resistance.
Here’s the inside story – a two-tone color scheme with lighter upper cabinets creates a sense of height and spaciousness. Before painting, label each door and its corresponding cabinet frame to ensure proper reinstallation. This changes everything, doesn’t it?
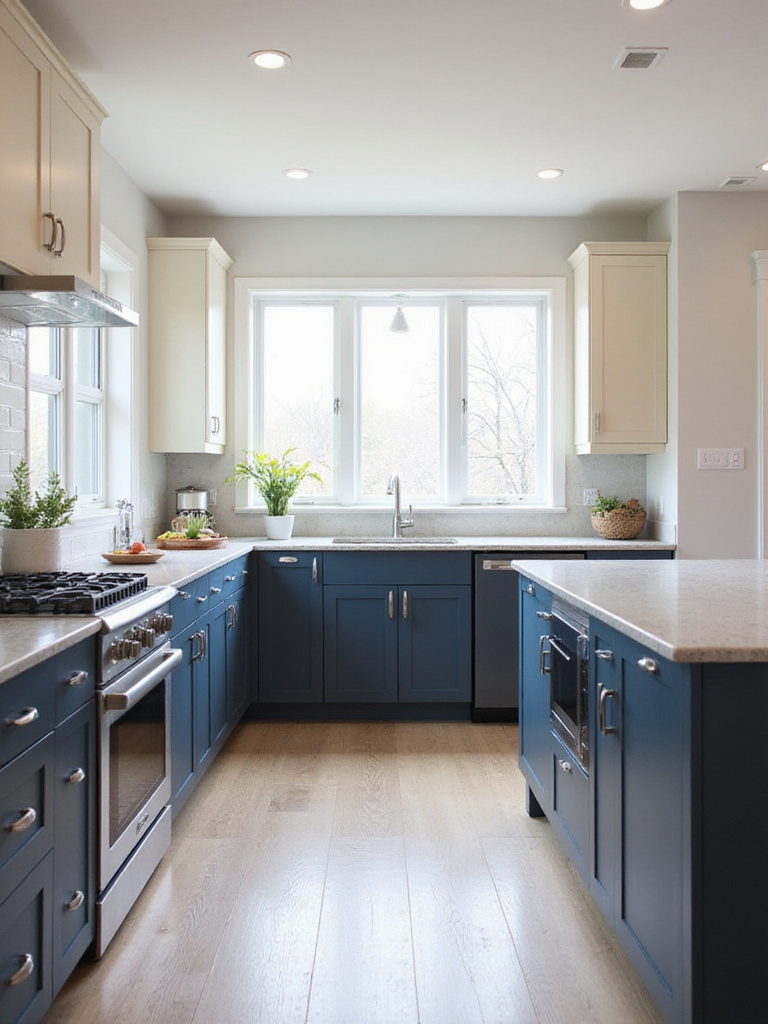
2. Dare to Dream in Color: Embrace a Bold Kitchen Cabinet Palette
Step away from the ordinary and inject your kitchen with personality by embracing bold cabinet colors! A vibrant hue can instantly elevate your kitchen from ordinary to extraordinary, transforming it into a space that truly reflects your unique style. Bold colors act as a focal point, drawing the eye and creating an inviting atmosphere that makes a statement without saying a word.
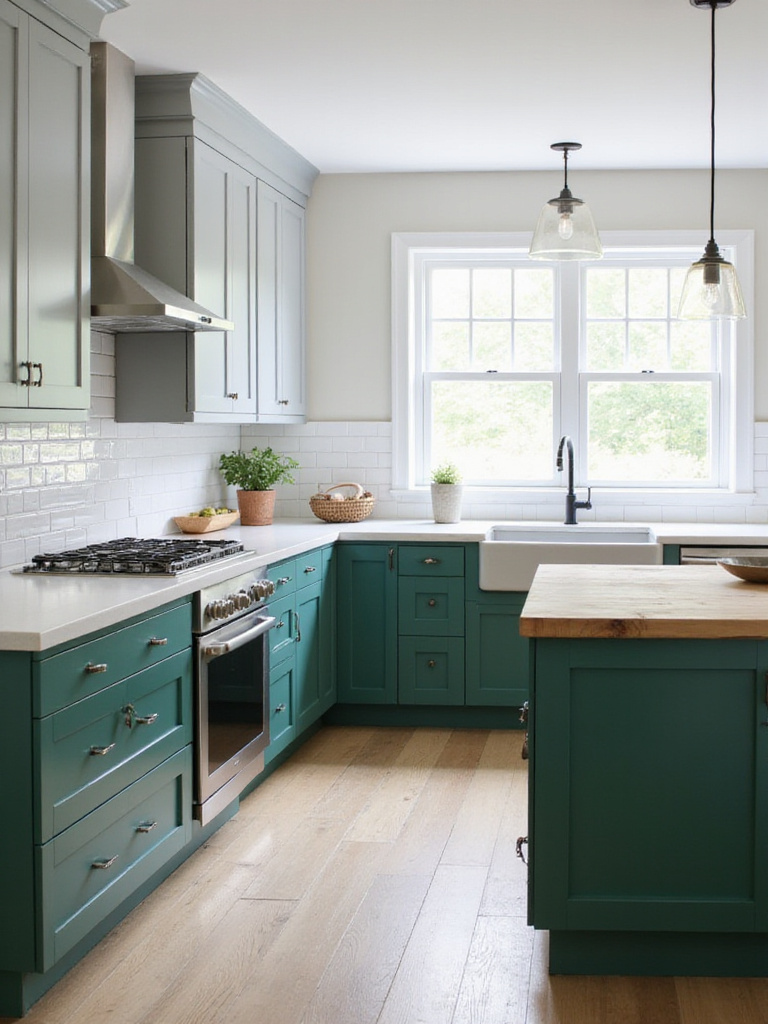
Popular and effective choices include deep blues like navy or teal that evoke sophistication and tranquility, emerald greens that bring nature indoors, rich reds that add warmth and energy, or sunny yellows that infuse cheerfulness. For a more unexpected statement, explore charcoal gray or even black. The ideal bold color depends on your personal taste, existing design elements, and the amount of natural light your kitchen receives.
The tricky part is finding balance – try painting lower cabinets a bold color and upper cabinets a neutral shade for a harmonious look. Before committing, paint a sample on cardboard and observe it in different lighting conditions throughout the day. The potential here is enormous!
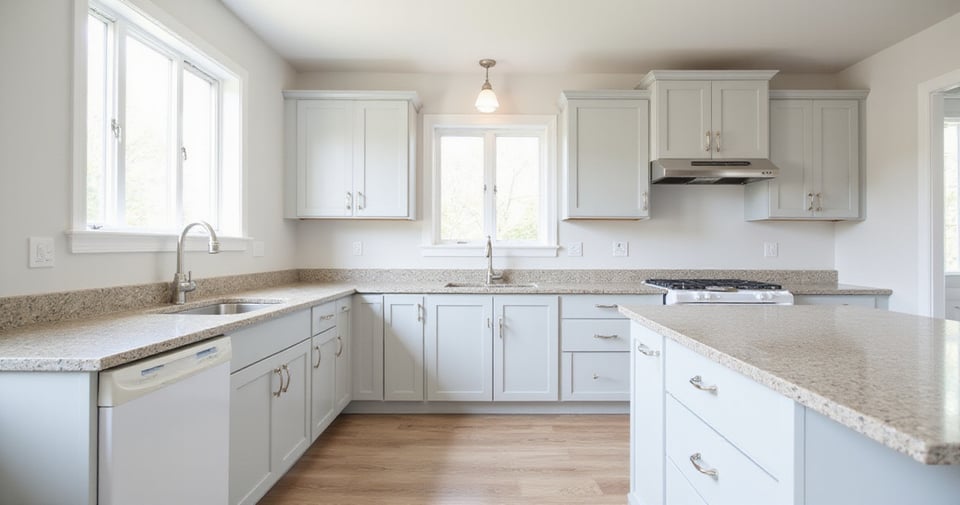
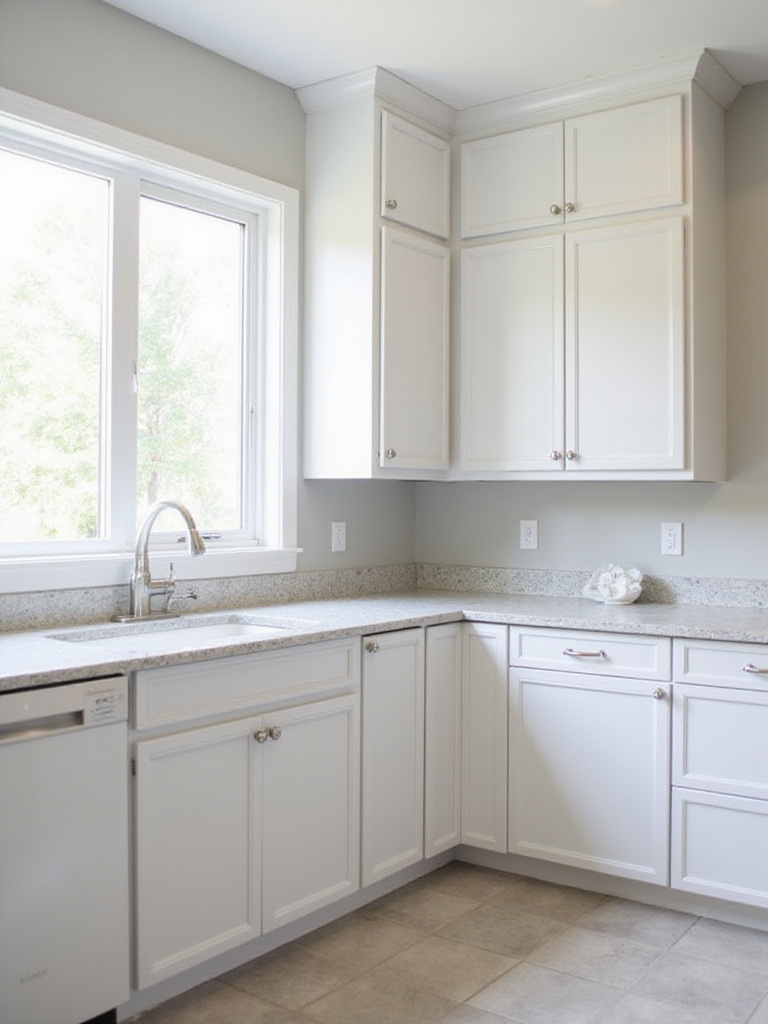
3. Timeless Elegance: Why Neutral Cabinets Always Win
For a kitchen that exudes timeless style and enduring appeal, neutral cabinet colors are an unbeatable choice. Whites, creams, grays, and light wood tones create a sense of spaciousness and brightness, especially crucial in smaller kitchens. Their versatility is unmatched, seamlessly harmonizing with a vast array of countertop materials, backsplash designs, flooring options, and appliance finishes.
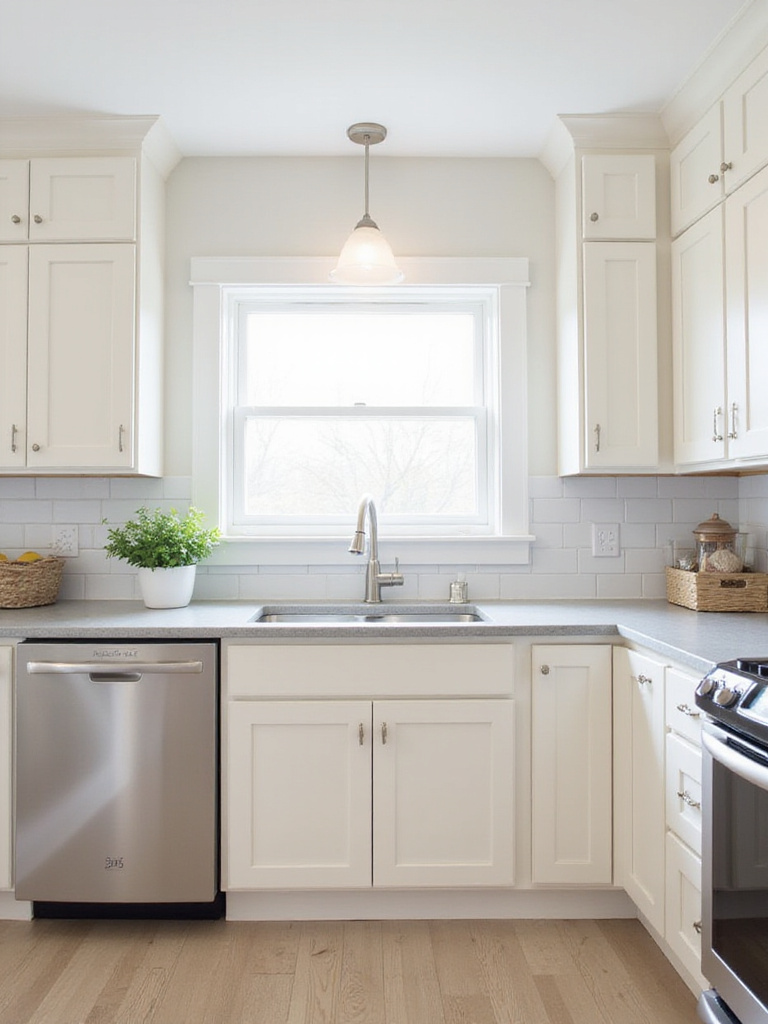
Perhaps their most significant advantage is their timelessness. Neutral cabinets effortlessly resist fleeting trends, guaranteeing your kitchen remains stylish for years to come. They’re also a smart investment that significantly boosts resale value. Kitchens are a major selling point in any home, and neutral palettes are highly favored by potential buyers because they can envision their own personal style within the space.
Picture it this way – neutral doesn’t have to mean boring. Incorporate textured cabinet fronts like shiplap or beadboard to add visual interest to an otherwise simple design. White kitchens have consistently ranked among the most popular designs for decades, demonstrating their enduring appeal. Let me show you another perspective on adding visual interest…
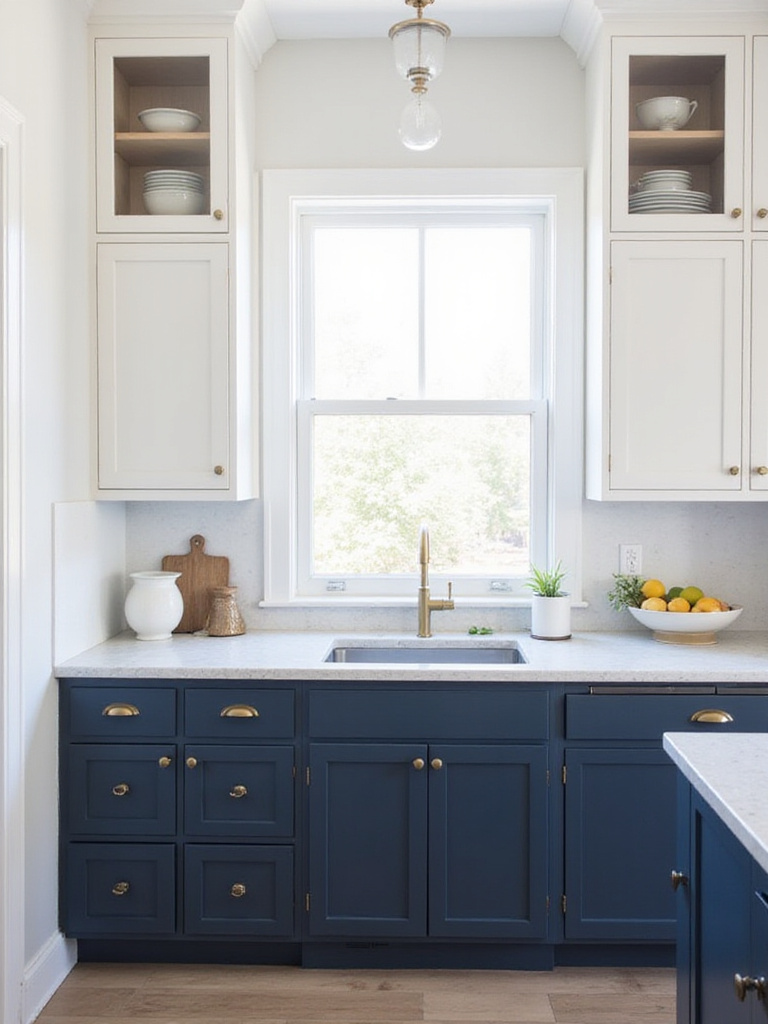
4. Double the Style: The Magic of Two-Tone Kitchen Cabinets
Inject dynamic visual interest and personalized flair into your kitchen with the magic of two-tone cabinets. This design approach creates visual depth and dimension, preventing your kitchen from feeling flat or monotonous. Two-tone cabinetry effectively defines different zones within your kitchen, strategically highlighting areas like the island or creating a focal point with upper cabinets.
Popular combinations include classic neutrals like white upper cabinets paired with darker grays or navies on lower cabinets. The warmth of wood can be beautifully integrated with white or off-white uppers for an inviting feel. For a bolder statement, pair a vibrant color like teal or emerald green on lower cabinets with a neutral upper cabinet color. Monochromatic schemes using different shades of the same color family offer subtle sophistication.
What many people overlook is how painting upper cabinets a light, airy color and lower cabinets a bolder, darker hue grounds the space while creating visual balance. The two-tone cabinet trend has gained popularity due to its versatility and ability to personalize kitchen design. From modern to vintage, here’s where it gets interesting…
5. Rustic Revival: Achieve Vintage Charm with Distressed Finishes
Embrace the allure of aged beauty and infuse your kitchen with vintage charm through distressed cabinet finishes. This technique adds character and warmth, creating a relaxed and inviting atmosphere with a touch of history. Distressing cabinets is a fantastic way to achieve a unique, lived-in look, perfect for farmhouse, cottage, or shabby chic kitchen styles.
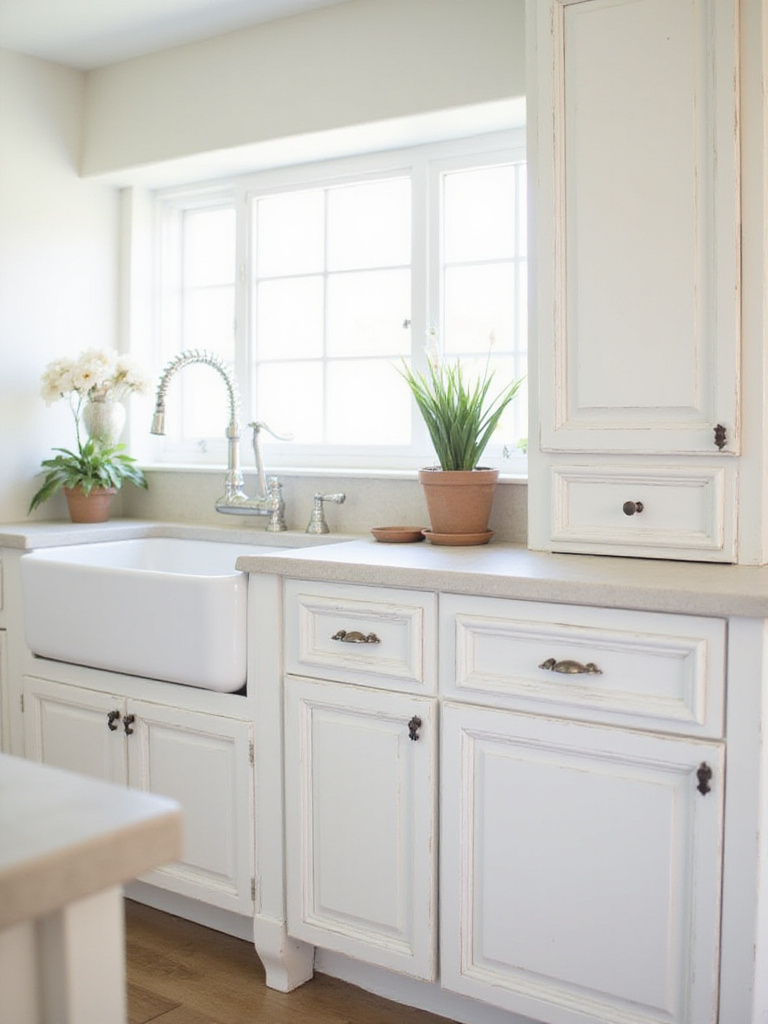
Several distressing techniques can create that coveted aged appearance. Sanding edges and corners to reveal underlying wood creates natural-looking wear. Dry brushing, applying a lighter or darker color sparingly over the base coat, adds subtle texture. Crackle medium creates an authentic cracked paint effect, while glazes highlight details and add depth. For a more pronounced rustic feel, you can even lightly hammer or dent the wood surface before painting.
The surprising part is how distressing only the edges and corners of cabinet doors creates a subtle, aged look that feels authentic rather than contrived. Distressing originated as a way to mimic antiques without the high price tag. Want to add a touch of sophistication? Glass inserts might be the answer.
6. Let the Light In: Install Glass Inserts for Elegant Cabinetry
Elevate the elegance of your kitchen and create a brighter, more open feel by incorporating glass inserts into your cabinetry. Glass-front cabinets introduce visual interest and break up the solid expanse of traditional cabinet doors. They bring a sense of lightness and airiness to the kitchen, making the space feel larger and more inviting while allowing you to showcase beautiful dishware.
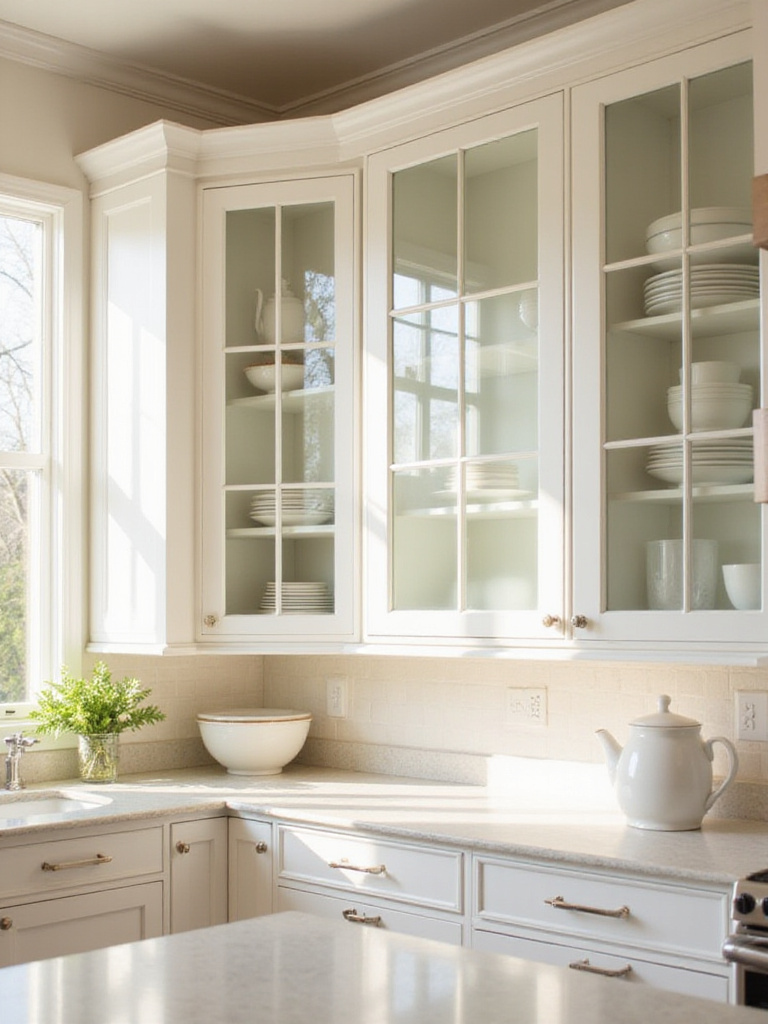
Choosing the right type of glass is crucial. Clear glass offers maximum visibility, ideal for displaying organized contents, but requires meticulous cabinet organization. Frosted glass provides a softer, diffused look with some privacy. Seeded glass adds texture and vintage-inspired charm. Leaded glass, often featuring intricate designs, exudes sophisticated elegance, while stained glass injects color and artistry.
“Glass-fronted cabinets create depth and dimension in the kitchen while allowing light to play through the space in ways solid cabinets simply can’t achieve.” – Emery Adams
The breakthrough came when designers started using different types of glass in different cabinets to create visual interest – clear glass for fine china display and frosted glass for everyday dishes. For an even more open and modern feel, let’s unpack how to transform cabinets into open shelving.
7. Showcase Your Style: Transform Cabinets into Chic Open Shelving
Embrace a modern, airy aesthetic and put your personal style on full display by transforming some of your kitchen cabinets into chic open shelving. Open shelving instantly visually expands the kitchen space, creating a more open and inviting atmosphere. The beauty lies in its ability to showcase favorite dishes, glassware, cookbooks, and decorative items, turning everyday essentials into design elements.

Upper cabinets are generally the most suitable candidates for conversion. Their position naturally lends itself to displaying decorative items and frequently used dishes. Cabinets constructed from solid wood are typically easier to work with, providing a stable base for removing doors and installing shelving. Before starting, carefully assess the structural integrity of your cabinet boxes – older or poorly constructed cabinets may require reinforcement.
The game-changer happened as homeowners realized installing floating shelves instead of traditional cabinet boxes creates a minimalist and modern look. The trend of open shelving has been influenced by restaurant kitchens, where easy access to ingredients and tools is crucial. Small changes can make a big impact – here’s the catch with hardware updates…
8. Hardware Harmony: Instantly Update Cabinets with New Knobs and Pulls
One of the quickest, easiest, and most impactful ways to refresh your kitchen cabinet makeover is by simply swapping out the hardware. Changing cabinet knobs and pulls is like adding jewelry to an outfit – a seemingly small detail that dramatically elevates the overall look. This simple DIY project is surprisingly inexpensive and can completely transform outdated cabinets without a full-scale renovation.
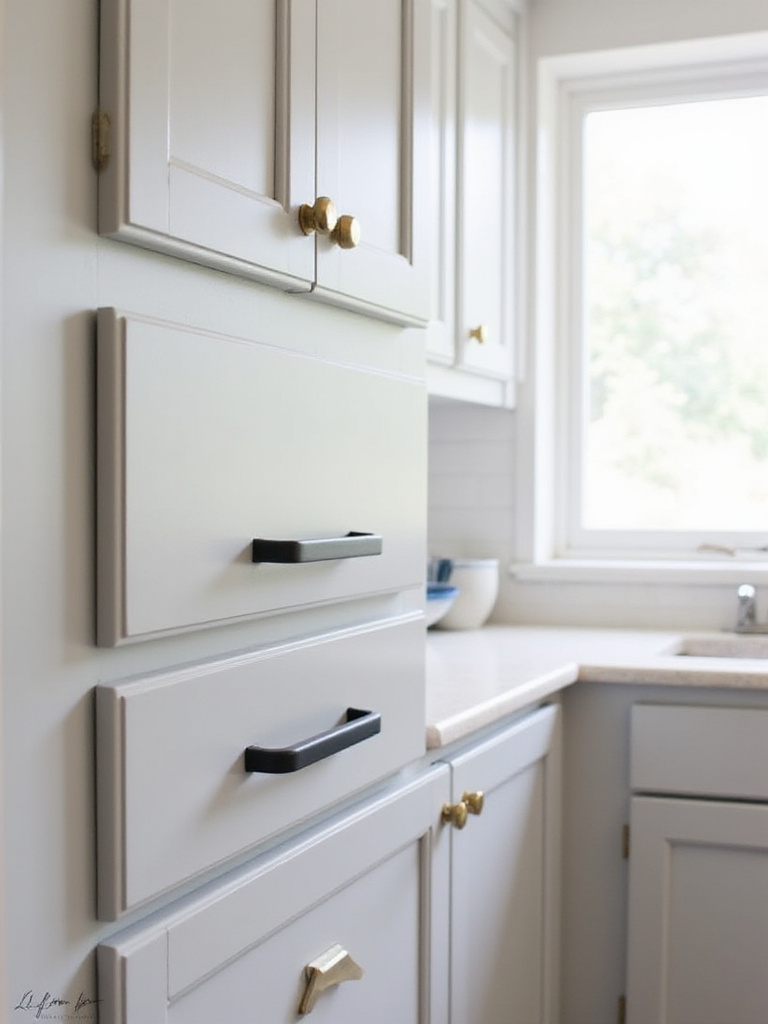
When choosing new cabinet hardware, consider several factors. Ensure the style complements your existing kitchen aesthetic, whether modern, farmhouse, or traditional. Select a finish that harmonizes with appliances, faucets, and lighting fixtures. Popular choices include brushed nickel, matte black, oil-rubbed bronze, and polished brass. Pay attention to size and shape, ensuring it’s appropriately scaled for your cabinets and comfortable to grip.
It’s kinda like mixing and matching different accessories – try knobs on upper cabinets and pulls on lower cabinets for an eclectic and personalized look. Cabinet hardware trends constantly evolve, with matte black and brass finishes currently very popular. For a truly seamless look, concealed hinges are the way to go.
9. Sleek and Seamless: Upgrade to Concealed Cabinet Hinges
Elevate your kitchen’s aesthetic to a new level of sophistication by upgrading to concealed cabinet hinges. Unlike traditional hinges visible on the cabinet face, concealed hinges (also known as European hinges) are completely hidden when the cabinet door is closed. This creates a cleaner, more streamlined appearance, allowing the beauty of your cabinet doors to take center stage.

Beyond aesthetics, concealed hinges offer practical benefits with their three-way adjustability, allowing for precise door alignment even after installation. This ensures perfect door closure and a polished, professional finish. While installing concealed hinges requires more precision than traditional face-frame hinges, it’s a manageable DIY project with basic woodworking skills and the right tools.
The heart of the matter is choosing soft-close concealed hinges for a luxurious feel and to prevent cabinet doors from slamming shut. These hinges are called ‘European hinges’ because they were first widely adopted in European cabinetmaking. Lighting is key in a kitchen – here’s what happened when I added under-cabinet lighting to my own kitchen makeover…
10. Brighten Your Workspace: Install Under-Cabinet Lighting for a Functional Glow
Illuminate your countertops and transform your kitchen’s functionality and ambiance with under-cabinet lighting. This often-overlooked upgrade significantly enhances both practicality and aesthetic appeal. Under-cabinet lighting provides focused task lighting directly where you need it most – on your countertops – making food preparation safer, easier, and more enjoyable by banishing shadows.
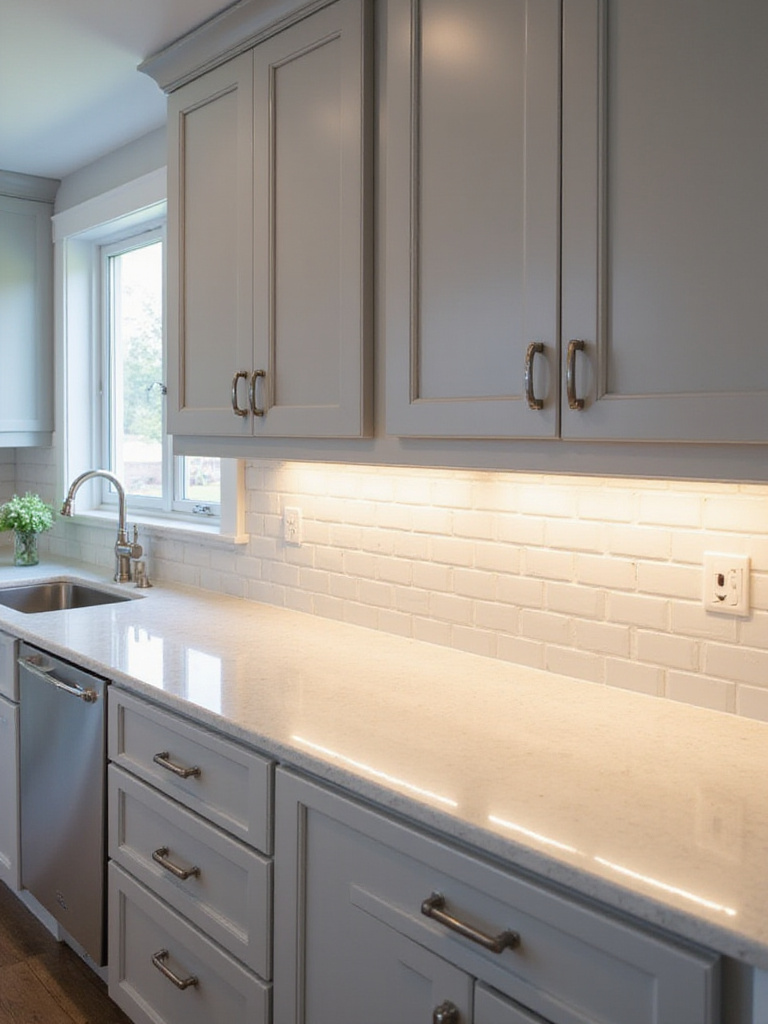
Several types cater to different needs and preferences. LED strip lights are popular due to their energy efficiency, flexibility, and even light distribution. Puck lights offer a more concentrated beam, ideal for highlighting specific areas. Linear lights provide a continuous line across larger areas. Xenon lights offer a bright, warm light similar to halogen but are less energy-efficient than LEDs.
The missing piece in many kitchen cabinet makeover projects is dimmable under-cabinet lighting that adjusts brightness according to time of day and needs. This feature was initially popular in commercial kitchens before making its way into homes. Organization is essential in any kitchen – you might be wondering how to maximize cabinet space…
11. Conquer Clutter: Maximize Cabinet Space with Pull-Out Drawers
Say goodbye to rummaging in the back of deep cabinets and hello to effortless organization with pull-out drawers. These ingenious cabinet inserts revolutionize kitchen storage, converting frustratingly inaccessible spaces into highly functional zones. Pull-out drawers address the common problem of wasted space in base cabinets, particularly deep ones, where items often get buried and forgotten.
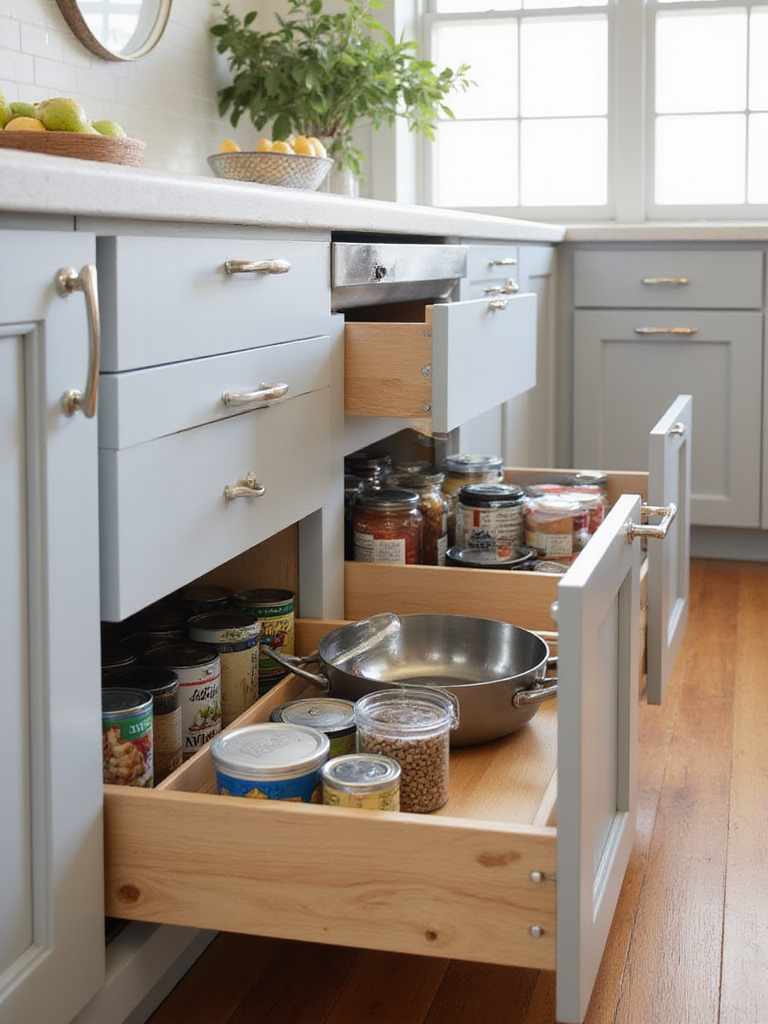
Pull-out drawers are incredibly versatile and adaptable. They’re perfect for storing pots and pans (especially heavy cast iron), baking sheets standing vertically, small appliances, dry goods, and even cleaning supplies or recycling bins. When selecting pull-out drawers, carefully consider the depth and width of your existing cabinets to optimize storage for specific items.
Do you see how huge that is? Pull-out drawers can increase usable cabinet space by up to 50% compared to traditional shelves. For spice storage, install specially designed pull-out drawers with tiered shelves for easy visibility. Corner cabinets can be tricky – my experience went like this when I tackled those awkward spaces…
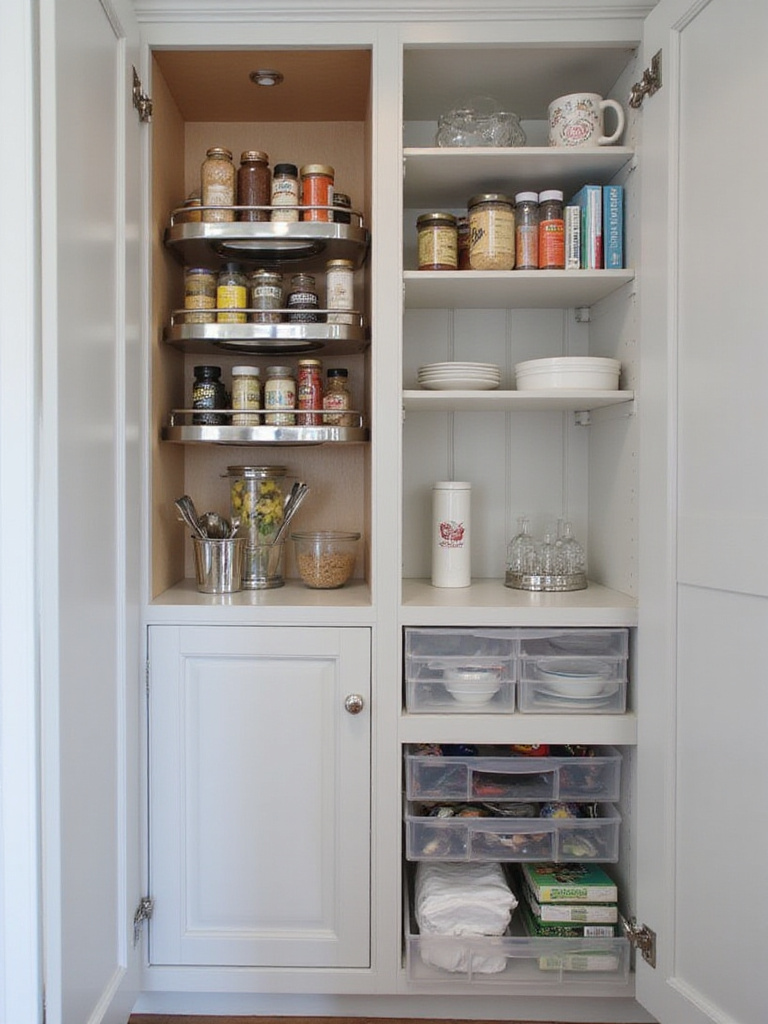
12. Corner Cabinet Cure: Tame Awkward Spaces with Lazy Susans
Corner cabinets, often relegated to the realm of kitchen frustrations, can be transformed from organizational black holes into functional storage powerhouses with Lazy Susans. These notoriously difficult-to-organize spaces become easily accessible with the rotating magic that allows you to effortlessly bring items from the back to the front with a simple spin.
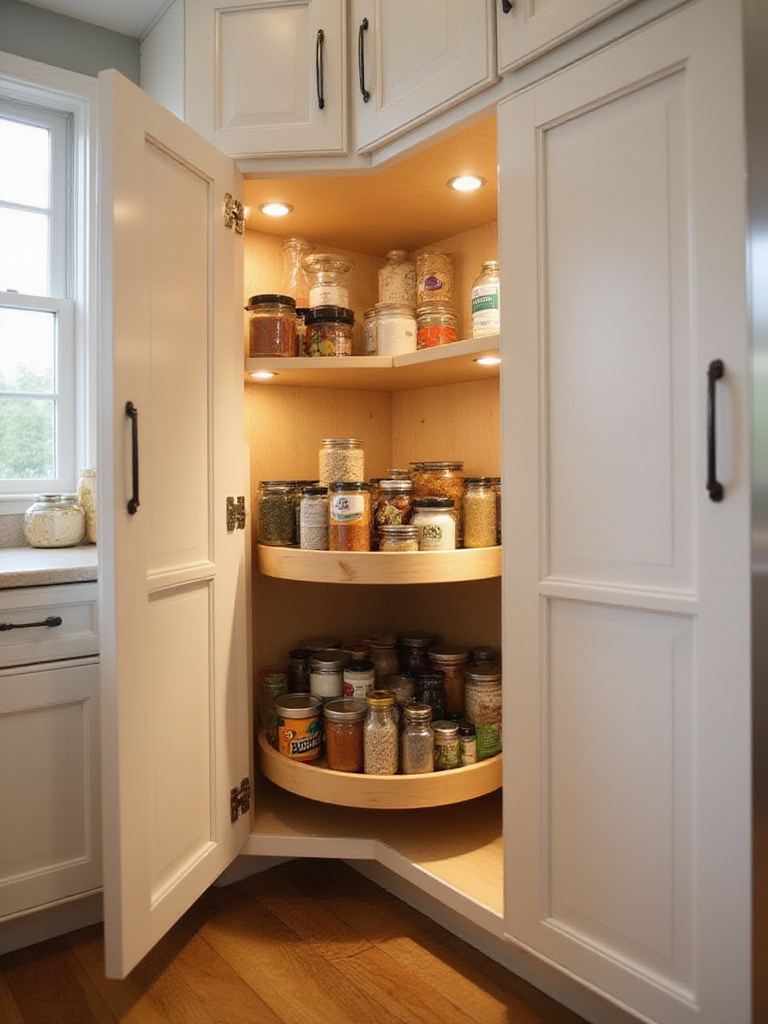
Lazy Susans maximize storage space within corner cabinets, eliminating blind rummaging and ensuring every item is easily visible and accessible. By making the most of previously underutilized space, they contribute to better kitchen organization, reduce food waste by preventing items from being forgotten, and streamline your kitchen workflow, making cooking and meal preparation more efficient.
My breakthrough came when I installed a multi-tiered Lazy Susan for maximum vertical storage, especially for spices and canned goods. The term ‘Lazy Susan’ originated in the early 20th century, though its exact origins are debated. Don’t throw out those old cabinet doors during your kitchen cabinet makeover! Let me paint you a picture of how to repurpose them…
13. Beyond the Kitchen: Creative Ways to Repurpose Old Cabinet Doors
Before tossing out old cabinet doors during your kitchen makeover, consider their hidden potential! Repurposing old cabinet doors is not only sustainable and eco-conscious but also a fantastic way to add unique, personalized touches to your home décor. Transforming discarded doors into functional and decorative items creates one-of-a-kind pieces with character that can’t be found in mass-produced items.
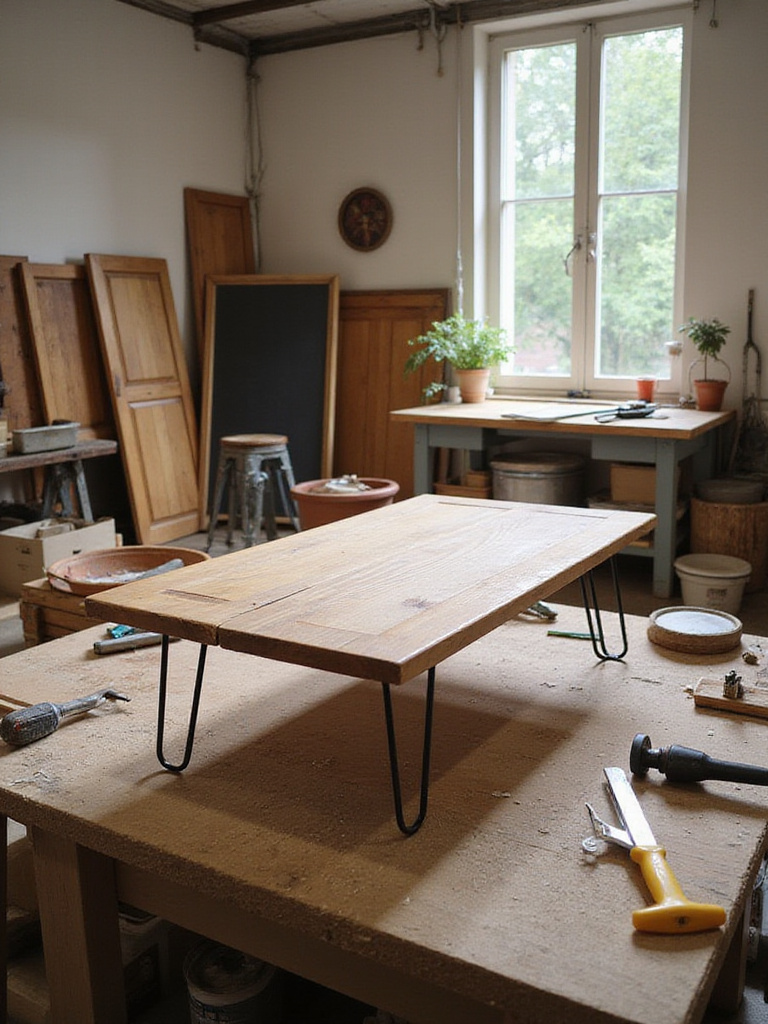
Before starting a repurposing project, assess the doors’ condition. Minor imperfections often add rustic charm, but major structural issues may limit suitability. Consider the style, material, size, and weight of the doors – larger, heavier doors might be ideal for tabletops or headboards, while smaller, lighter doors could be perfect for trays or wall décor. Honestly evaluate your DIY skill level and available tools to ensure the project is manageable.
Things took an interesting turn when I transformed an old cabinet door into a chalkboard by painting the center panel with chalkboard paint. This created a functional and decorative piece that became a family favorite. To really elevate the look of your kitchen cabinet makeover, the crucial element is adding architectural details…
14. Elevate Your Look: Add Crown Molding for Custom Cabinet Appeal
For an instant upgrade that exudes sophistication and custom craftsmanship, adding crown molding to your kitchen cabinets is a game-changer. This architectural detail elevates the entire look of your cabinetry, transforming them from standard to stunning. Crown molding effectively bridges the gap between cabinet tops and the ceiling, creating a seamless, finished look while making your kitchen feel larger and more spacious.
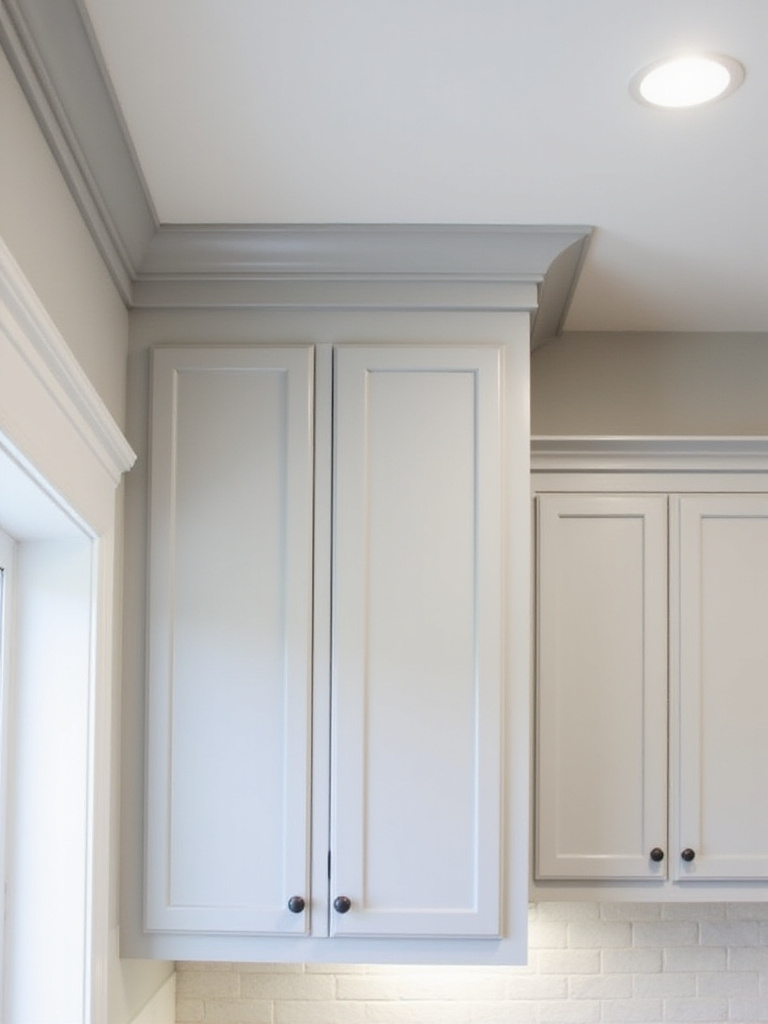
When selecting crown molding, several materials are available. Wood offers a classic look but is susceptible to moisture damage. MDF is more cost-effective but also vulnerable to moisture. PVC and polyurethane crown moldings are moisture-resistant and durable options, making them particularly well-suited for kitchens where splashes and humidity are common.
The ripple effects are enormous – using paintable caulk to seamlessly blend the crown molding with the cabinets creates a truly integrated look. Crown molding dates back to ancient Greece and Rome, where it was used to adorn important structures. For a surprise element that makes opening cabinets a delight, you may have noticed how designers are lining cabinet interiors…
15. Surprise Inside: Line Cabinet Interiors with Wallpaper or Fabric for a Pop
Add an unexpected element of delight and personality to your kitchen cabinet makeover by lining cabinet interiors with wallpaper or fabric. This often-overlooked detail transforms functional cabinet interiors into visually appealing spaces. It adds a delightful surprise element every time you open a door or drawer, turning a utilitarian space into something more charming and personalized.
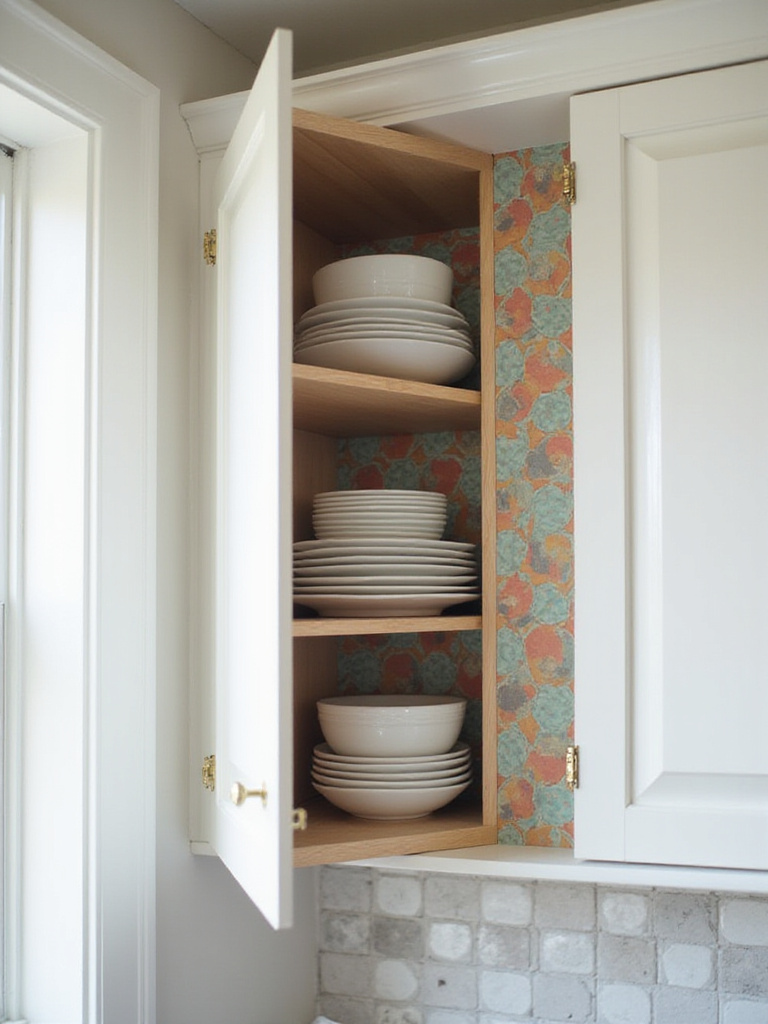
When choosing wallpaper or fabric, consider both aesthetics and practicality. For wallpaper, peel-and-stick options are recommended for ease of application and removal. Vinyl wallpaper is durable and moisture-resistant. For fabric lining, cotton is versatile and affordable – consider using fabric with a water-resistant coating or treating it with a fabric protector spray before installation. Select patterns and colors that complement your overall kitchen style.
What really matters here is using a bold, geometric wallpaper inside glass-front cabinets to create a striking visual contrast. Wallpaper was originally used as a cheaper alternative to tapestries in the 16th century. For a fun and functional update to your kitchen cabinet makeover, let me break down how to create a chalkboard cabinet door…
16. Chalk it Up: Create a Fun and Functional Chalkboard Cabinet Door
Infuse your kitchen with playful charm and practical functionality by transforming a cabinet door into a chalkboard. Chalkboard cabinet doors offer a unique blend of aesthetic appeal and everyday usefulness, providing a readily accessible surface for grocery lists, meal plans, family messages, or inspiring quotes. For households with children, they become a dedicated creative zone while you cook.
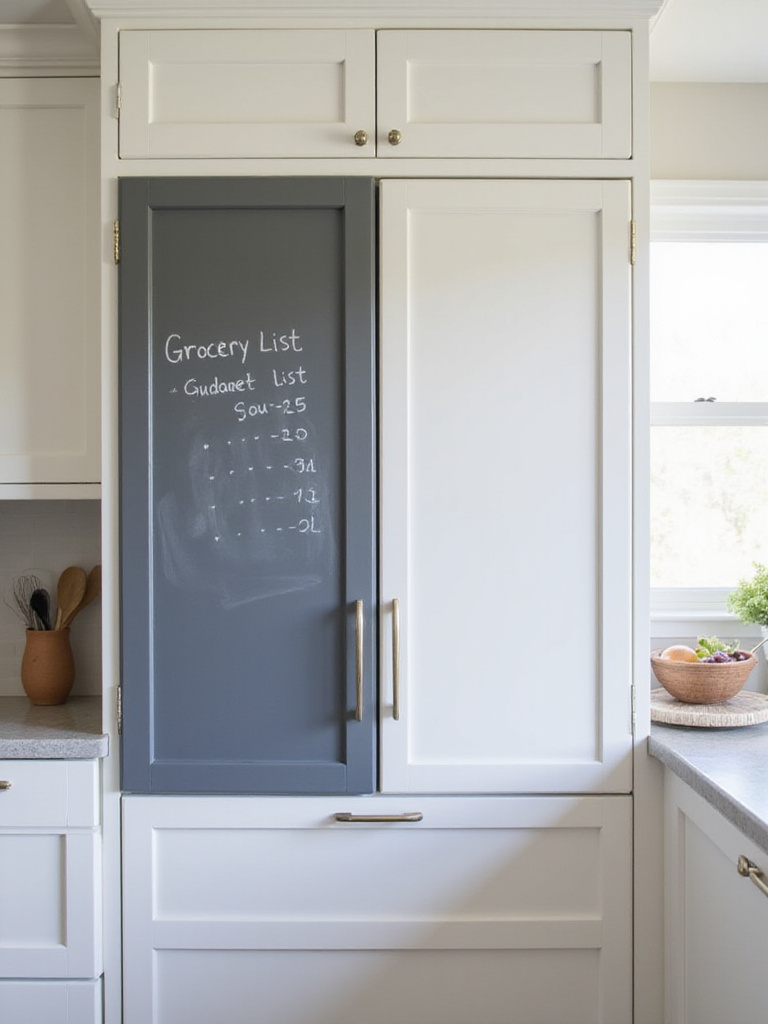
Cabinet doors with flat, smooth surfaces are ideal candidates for a chalkboard makeover, providing an even base for chalkboard paint application. Raised panel doors can also be transformed, but require more careful preparation and painting of the recessed panel area. Consider your kitchen’s overall style when deciding which cabinets to transform – a single chalkboard door can serve as a fun accent piece.
I can sense your skepticism about using black in your kitchen, but chalkboard paint isn’t just black! It comes in various colors, allowing you to customize your chalkboard cabinet to match your kitchen’s color scheme. For a super quick and easy update to your kitchen cabinet makeover, here’s the unexpected twist with peel-and-stick veneer…
17. Instant Facelift: Update Cabinets Quickly with Peel-and-Stick Veneer
For an incredibly fast and remarkably easy kitchen cabinet makeover, look no further than peel-and-stick veneer. This innovative product offers an “instant facelift” for tired cabinets in a fraction of the time compared to traditional methods. Peel-and-stick veneer is a thin, decorative layer with pre-applied adhesive backing designed for direct application to existing cabinets, bypassing sanding, priming, or painting.

Using peel-and-stick veneer offers compelling advantages. The speed and ease of installation are unparalleled, making it ideal even for beginners. It’s significantly more cost-effective than replacing cabinets or hiring professionals. Available in various styles, colors, and wood grains, it suits diverse kitchen aesthetics with a mess-free application process. However, proper surface preparation is crucial for adhesion and longevity – uneven, dirty, or textured surfaces will hinder adhesion and can lead to peeling.
The stumbling block is ensuring surfaces are perfectly prepared – thoroughly clean and degrease cabinet surfaces before applying veneer. Try using different colors or wood grains for upper and lower cabinets to create a two-toned effect. For a more dramatic transformation, this could revolutionize everything about your kitchen cabinet makeover…
18. Dramatic Redo: Refacing Kitchen Cabinets for a Whole New Look
When you desire a dramatic kitchen transformation that goes beyond paint but falls short of a full-scale cabinet replacement, refacing your kitchen cabinets is the ideal solution. This comprehensive makeover process replaces the visible elements – doors and drawer fronts – while preserving the existing cabinet boxes. Refacing includes applying matching veneer to all exposed surfaces of the cabinet boxes, ensuring a seamless and cohesive look.

Refacing offers compelling benefits compared to complete cabinet replacement. Cost savings are major, typically 30-50% less than new cabinets. The process is significantly faster and less disruptive to daily life, avoiding messy demolition and extended construction timelines. Refacing is also more environmentally responsible, reusing existing cabinet boxes and reducing construction waste.
This might raise some questions about style options – consider a two-tone cabinet refacing, using different colors for upper and lower cabinets to add visual interest and depth. Refacing is popular for homeowners happy with their kitchen layout but wanting updated style. If the cabinet boxes are still in good shape, perhaps you’ve already guessed that simply replacing cabinet doors can make a huge difference…
19. Door-to-Door Transformation: The Impact of Replacing Cabinet Doors
Often, cabinet boxes are structurally sound and functional, but the doors are dated, damaged, or simply don’t match your desired kitchen style. In these situations, replacing only the cabinet doors offers an effective and budget-friendly way to achieve a significant kitchen cabinet makeover. This “door-to-door” approach focuses solely on updating the most visible part of your cabinets, leaving existing frames untouched.
The primary benefit is substantial cost savings compared to full cabinet replacement. Door replacement is significantly more affordable, freeing budget for other kitchen upgrades. It’s a smart way to update your kitchen’s look without the expense and upheaval of removing and installing entire cabinet boxes. Replacing doors is also more environmentally conscious, reducing waste by reusing existing cabinet frames.
The implications are staggering when you opt for contrasting cabinet door colors to create visual interest, like pairing dark lower cabinets with lighter upper cabinets. Replacing cabinet doors is often considered a ‘gateway’ project to larger kitchen renovations. Before starting any makeover, let that sink in for a moment – a sparkling clean start is essential.
20. Sparkling Clean Start: The Power of a Deep Cabinet Clean
Before embarking on any kitchen cabinet makeover project, the absolute first step is a thorough and deep cabinet clean. This foundational step is crucial for success and longevity. A deep clean removes years of accumulated grease, grime, dust, food particles, and cooking residues that can significantly interfere with paint adhesion, stain penetration, or proper hardware installation. A clean, grease-free surface ensures any new finish will adhere properly, last longer, and look its absolute best.
To effectively deep clean kitchen cabinets, gather essential supplies: a degreasing cleaner (dish soap and warm water for general grime, dedicated degreaser for heavy grease), non-abrasive sponges or microfiber cloths, an old toothbrush for tight corners, warm water for rinsing, clean towels for drying, baking soda paste for stubborn stains, and a white vinegar solution for disinfecting and removing odors.
What complicates this seemingly simple task is how easily we underestimate built-up grime. For greasy cabinets, create a paste of baking soda and water, apply it to affected areas, let it sit for a few minutes, then scrub gently and wipe clean. Finally, accessorize like a pro with functional organizers to complete your kitchen cabinet makeover.
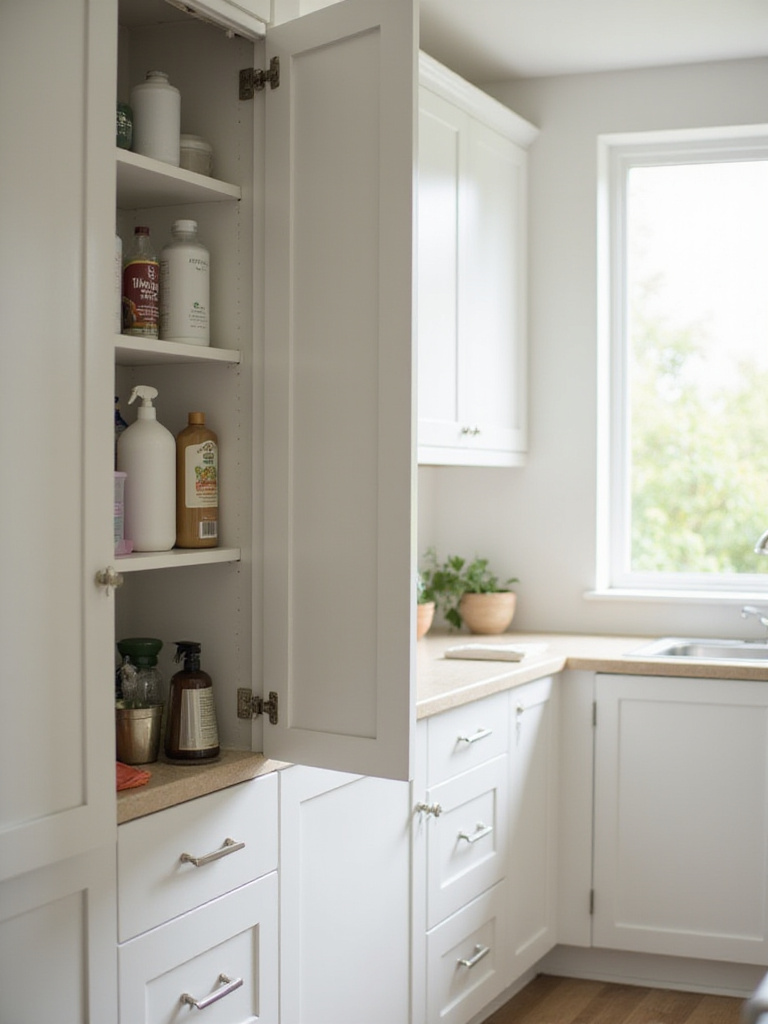
21. Accessorize Like a Pro: Style Your Cabinets with Functional Organizers
Once your kitchen cabinet makeover is complete, the final step to truly elevate both form and function is to accessorize with functional organizers. These often-underestimated additions play a crucial role in enhancing the overall look and feel of your kitchen. Functional organizers go beyond maximizing storage space – they contribute significantly to creating a cleaner, more organized, and aesthetically pleasing kitchen environment by eliminating clutter and showcasing items in an orderly fashion.
When selecting Cabinet Organizers, consider various types to address different storage needs:
- Pull-out shelves and drawers for base cabinets, transforming deep spaces into easily accessible storage
- Lazy Susans for corner cabinets, utilizing every inch of space with simple rotation
- Drawer dividers for maintaining order, keeping utensils and gadgets neatly separated
- Spice racks in in-cabinet and door-mounted designs for visible, accessible spice storage
- Under-sink organizers to maximize space beneath the sink for cleaning supplies
My discovery began when I installed pull-out spice racks next to the stove for easy access while cooking. The average kitchen cabinet is only about 50% efficient in terms of space utilization before adding organizers. Before buying any, take precise measurements of your cabinet interiors to ensure a perfect fit.
Conclusion: Your Dream Kitchen Awaits
Revitalizing your kitchen cabinets is more than just a makeover; it’s an investment in your home and daily life. From the transformative power of fresh paint to the genius of organizational inserts, these 21 ideas offer possibilities to suit every style, budget, and DIY skill level.
Whether you choose a simple hardware update or a dramatic refacing project, remember that even small changes make a significant impact in a kitchen cabinet makeover. By implementing these genius tips, you can unlock the hidden potential of your kitchen cabinets, creating a space that’s not only beautiful but also functional, organized, and a true reflection of your personal style.
The materials you choose – from paint finishes to hardware metals to organizational systems – work together to create a cohesive, layered space that engages the senses. As a material design expert, I’ve seen how these thoughtful combinations transform not just the look but the entire feel of a kitchen.
Your revitalized kitchen awaits – which cabinet makeover idea will you try first?