Living in a small kitchen often feels like playing Tetris with your daily life – every pot, pan, and appliance competing for precious real estate while you navigate around towers of precariously stacked dishes. The morning coffee routine becomes an obstacle course, and preparing even simple meals requires the strategic maneuvering of a chess master. You’re not alone in this struggle; millions of home cooks face the daily challenge of making limited square footage work harder than it should have to.
The secret isn’t in wishing for more space – it’s in revolutionizing how you use what you already have. Smart small kitchen organization transforms cramped quarters into efficient culinary command centers where every inch serves a purpose. These aren’t just tidying tricks; they’re strategic solutions that address the real pain points of compact cooking spaces.
Ready to reclaim your countertops and restore sanity to your kitchen routine? These 24 genius organization ideas will help you maximize every available inch, creating the functional cooking space you’ve been dreaming of. Let’s turn your small kitchen challenges into organizational victories.
1. Declutter Ruthlessly: Purge Duplicates and Unused Items First
Before investing in a single organizing product, the foundation of effective small kitchen organization requires honest assessment of what actually deserves space in your compact cooking area. That collection of novelty gadgets gathering dust, the three different potato mashers, and the expired spice collection from 2019 – they’re all consuming valuable real estate that could house items you actually use daily.

Professional organizers consistently emphasize that organizing clutter simply creates organized clutter. In a small kitchen where every cubic inch matters, holding onto duplicates or rarely used items becomes the primary barrier to functionality. Start by emptying one cabinet completely, sorting contents into three clear categories: keep, donate, and discard. Be ruthlessly honest – if you haven’t reached for that avocado slicer in the past year, someone else could benefit from it more than your cramped drawers.
The transformation happens immediately when you remove excess. One apartment dweller discovered fifteen duplicate items in their “junk drawer” alone, including multiple bottle openers and three different apple corers. By keeping only the most functional version of each tool, they freed an entire drawer for frequently used utensils that had been cluttering their limited counter space.
Look closely and you’ll notice the subtle transformation that happens when every remaining item earns its place through regular use rather than wishful thinking.
2. Maximize Vertical Space: Stack Smartly with Shelf Risers
Those gaps between your dishes and the shelf above represent untapped storage potential that shelf risers can instantly double. These simple platforms create additional levels within existing cabinets, transforming wasted vertical space into functional storage zones where you can actually see and access everything you’ve stored.
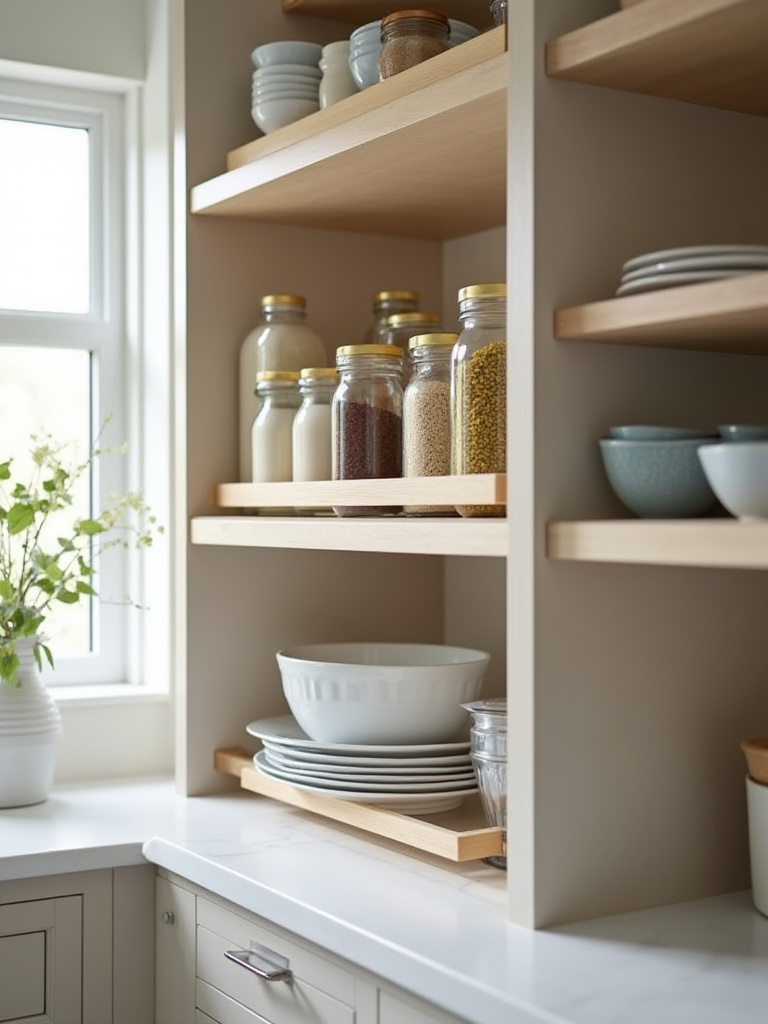
Installing shelf risers increases cabinet capacity by up to 50% while dramatically improving visibility of stored items. No more archaeological digs through stacked plates to find the bowl you need, or knocking over cans to reach something in the back. The structured approach also protects delicate items from the chips and scratches that occur when dishes stack directly on each other. Wire risers work beautifully for lightweight items like canned goods, while sturdy bamboo or metal versions handle heavier loads like dinnerware.
A renter with limited cabinet space used three stackable wire risers in a single upper cabinet, organizing 24 cans of soup and vegetables in neat, visible rows. Previously, the same space held only 10-12 cans in precarious stacks that toppled whenever she needed something from the back.
The magic of this piece lies in its ability to reveal hidden capacity you never knew existed in your existing cabinets.
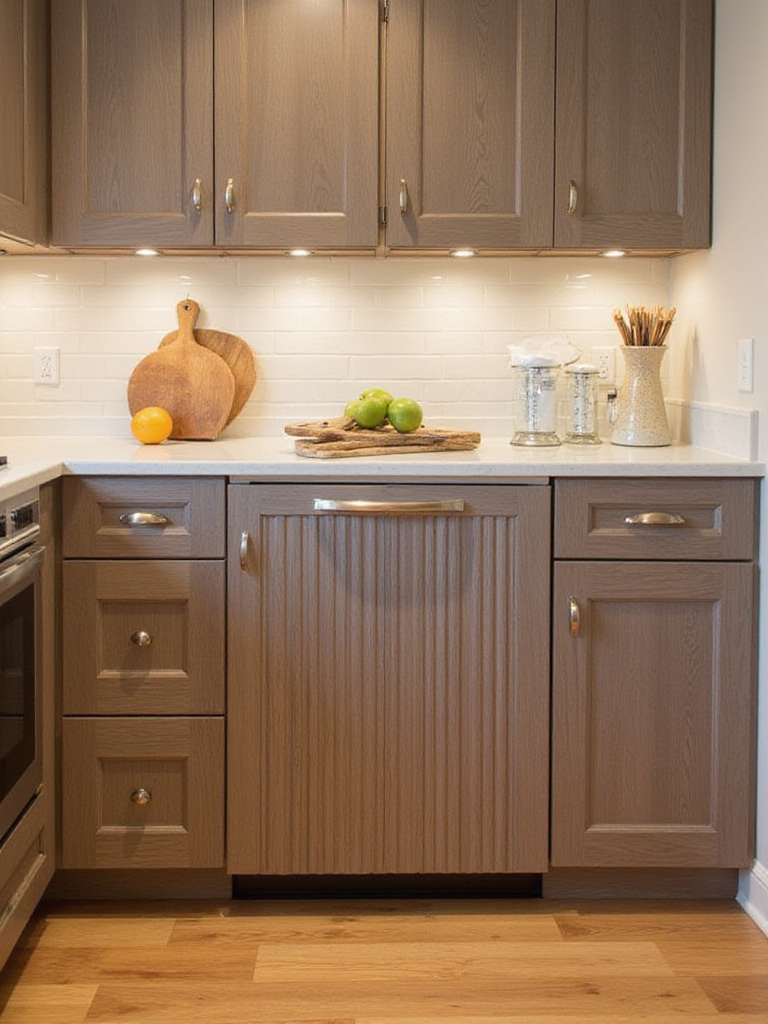
3. Clear Your Counters: Mount Essential Utensils and Knives on Walls
Counter space in a small kitchen functions like prime real estate – every square inch counts for food preparation, yet bulky utensil crocks and knife blocks consume valuable territory. Relocating frequently used tools to wall-mounted solutions instantly reclaims 1-3 square feet of workspace while keeping essentials within easy reach of your cooking zones.
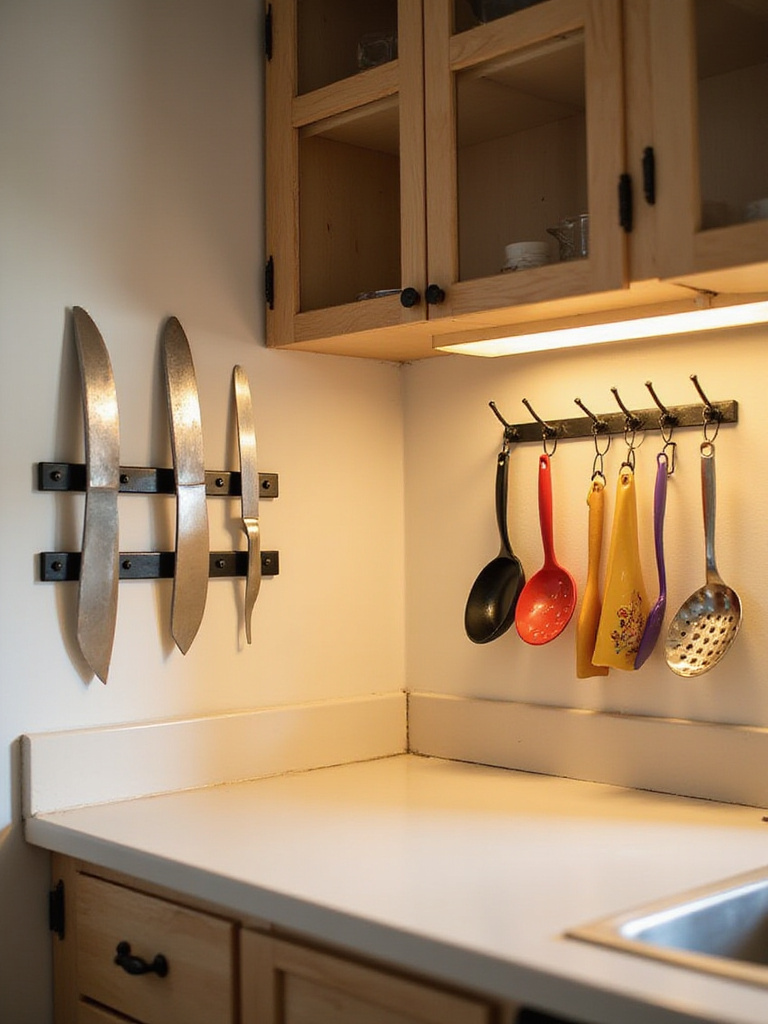
Magnetic knife strips and utensil rails with S-hooks transform unused vertical wall space into functional storage that actually improves your cooking workflow. Beyond the physical space gained, reducing visual clutter creates a calmer environment that makes the kitchen feel significantly larger. The key lies in strategic placement near your primary prep area or stove, ensuring tools remain accessible without interfering with traffic flow or creating safety hazards.
A studio apartment dweller mounted a 24-inch magnetic strip for knives and a rail system for spatulas above their limited counter space. This simple change cleared 15 inches of precious counter depth previously occupied by a knife block and utensil holder, creating enough prep area for chopping vegetables and assembling ingredients.
Running your hand across this newly cleared counter space reveals the immediate impact of thinking vertically rather than horizontally.
4. Utilize Cabinet Doors: Add Over-the-Door Racks for Spices or Wraps
The inside surface of cabinet doors represents valuable real estate that typically goes unused in small kitchen organization. Installing slim racks on these vertical surfaces creates instant storage for spice jars, aluminum foil, plastic wrap, or cutting boards, freeing up 6-12 inches of valuable shelf space per door utilized.
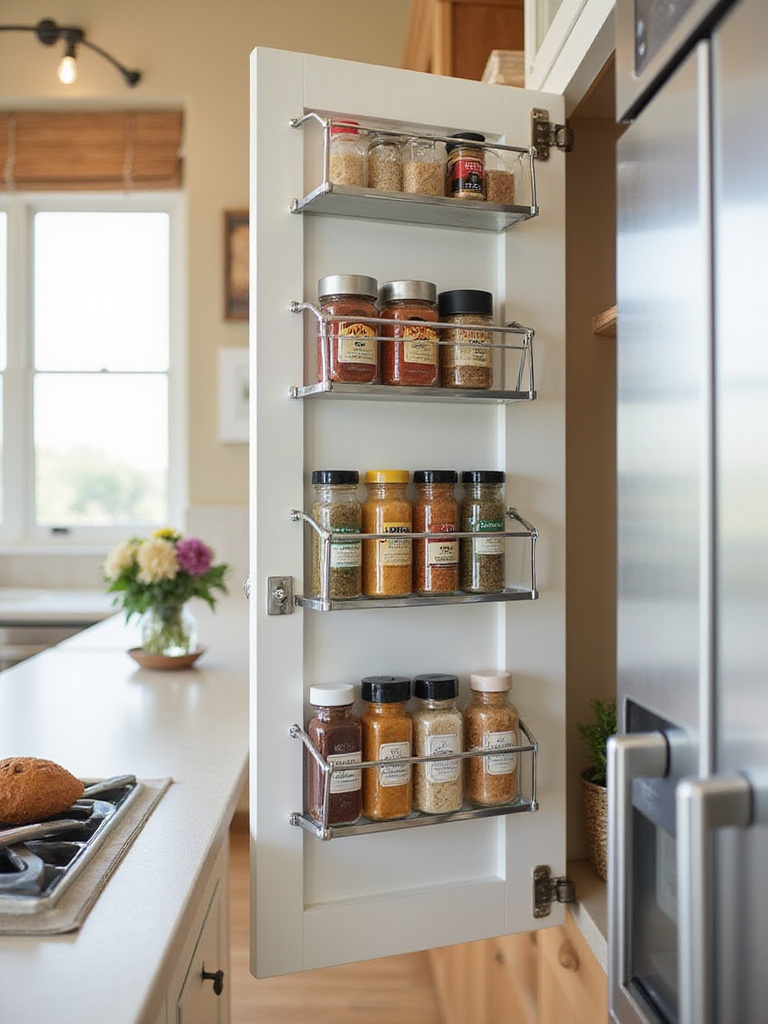
These door-mounted solutions work particularly well for spices, bringing every jar to eye level where you can see your complete collection at a glance. No more buying duplicate oregano because you couldn’t find the jar buried behind larger containers. For items like wraps and storage bags, door racks eliminate the messy drawer overflow that makes finding the right product feel like a scavenger hunt.
Choose between over-the-door hooks for renters seeking damage-free solutions, or screw-in racks for more permanent, stable mounting that handles heavier items. One homeowner installed a narrow spice rack on the cabinet door next to their stove, relocating 25 spice jars and freeing an entire 10-inch shelf for pots and pans. Their most-used seasonings now sit within arm’s reach while cooking.
The unexpected pairing that always works is combining vertical door storage with horizontal shelf organization to maximize every dimension of your cabinet space.
5. Organize Drawers Efficiently: Use Expandable Dividers for Utensils and Gadgets
Kitchen drawers without organization systems quickly devolve into frustrating jumbles where finding a specific whisk requires excavating through tangled masses of tools. Expandable drawer dividers create customizable compartments that prevent items from shifting and overlapping, maximizing usable space within often shallow or narrow drawers.
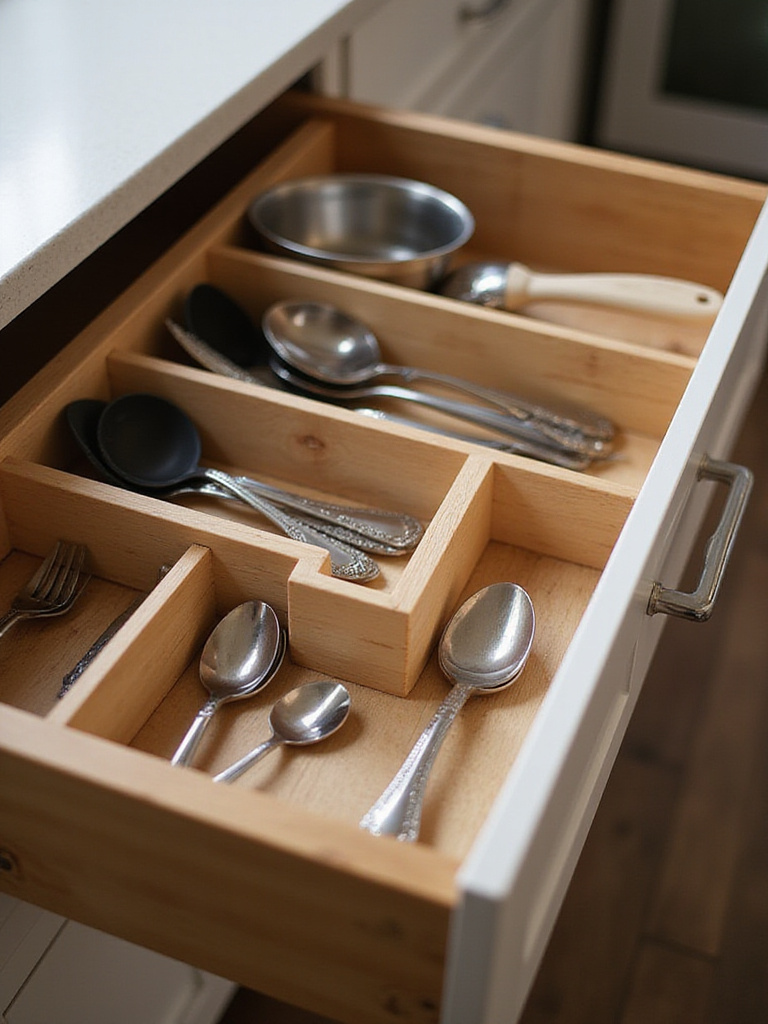
These adjustable inserts increase functional drawer space by up to 30% by eliminating the wasted area created when utensils pile on top of each other. More importantly, they reduce search time by 40-50% since items consistently live in designated zones. The flexibility of expandable dividers allows you to adjust compartment sizes as your tool collection evolves, creating a sustainable organization system that grows with your needs.
Start by completely emptying and decluttering the drawer, then measure internal dimensions carefully before purchasing dividers. Group similar items together – all spatulas, all whisks, serving spoons, small gadgets – and create a logical layout that utilizes the full length and width available. A small apartment kitchen transformed their chaotic utensil drawer using three expandable dividers, creating dedicated zones that reduced search time from minutes to seconds.
The visual weight balances perfectly when every tool has a designated home that makes sense for your cooking patterns.
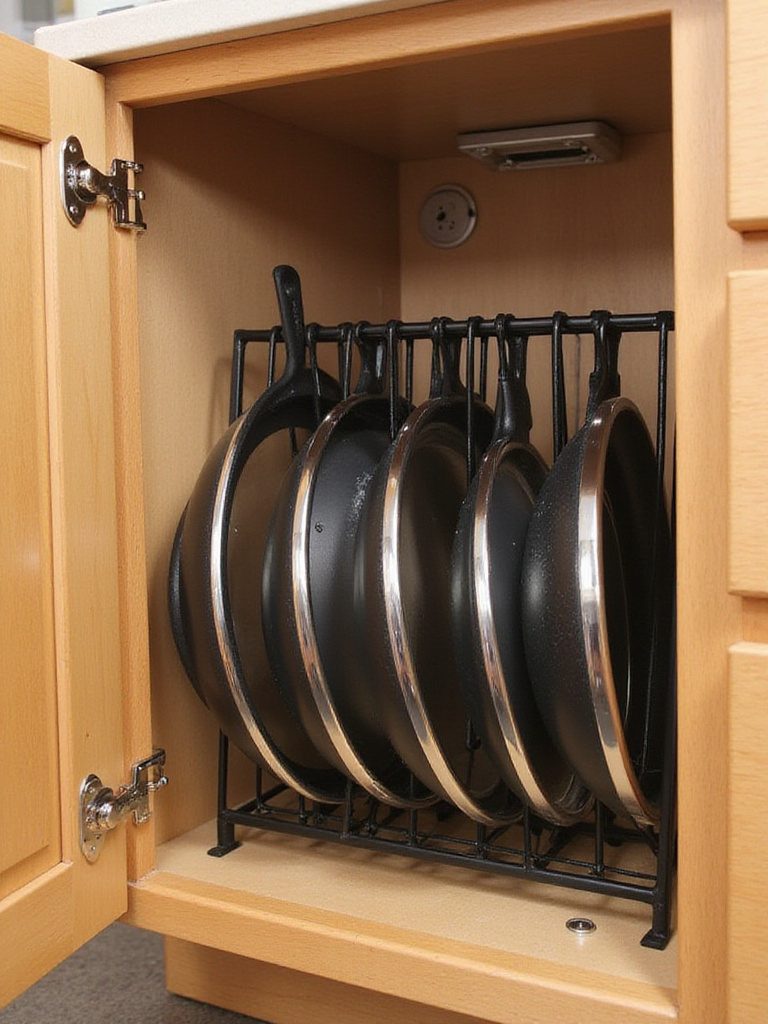
6. Store Pots and Pans Vertically: Use Pan Organizers to Prevent Stacking Chaos
The dreaded pot and pan cabinet – where finding the right-sized cookware requires lifting and shuffling heavy pieces, risking scratches to non-stick surfaces and testing your patience. Vertical pan organizers eliminate precarious stacking by allowing each piece to stand independently, utilizing cabinet height rather than relying solely on horizontal space.
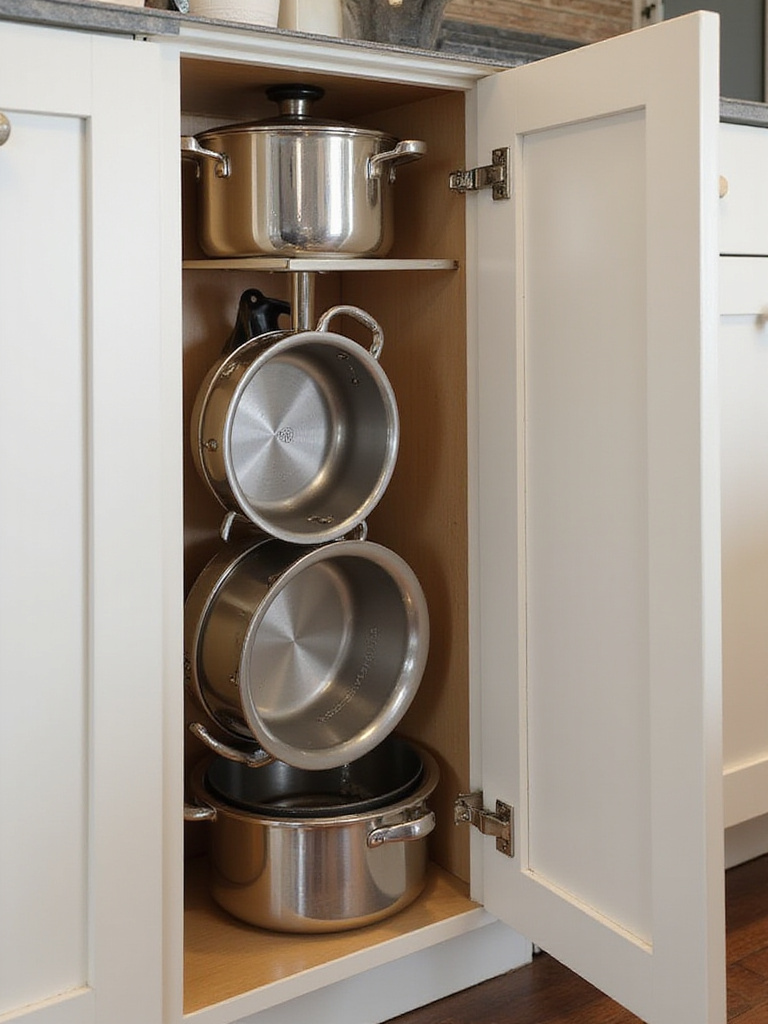
This approach increases usable cabinet space by 30-50% while protecting cookware finishes from the damage caused by stacking and dragging pieces across each other. Access becomes effortless – no more clanking excavations to reach the pot at the bottom of the pile. Wire organizers work well for most cookware, while padded versions provide extra protection for delicate finishes.
Measure your cabinet space carefully, considering both height and depth, before selecting an organizer. Place heavier or frequently used items toward the front for easier access. One homeowner installed a simple wire pan organizer in their base cabinet, storing 8 pots and pans plus 5 lids in the same space that previously held only 5 precariously stacked pieces.
The craftsmanship reveals itself in details like how smoothly you can slide any pan from its slot without disturbing its neighbors.
7. Contain Cleaning Supplies: Group Under-Sink Items in Stackable Bins
The cabinet under your kitchen sink often becomes a chaotic jumble of cleaning products navigating around plumbing obstacles. Stackable bins transform this awkward space by creating vertical storage zones that work around pipes while preventing bottles from tipping over and supplies from migrating into unreachable corners.
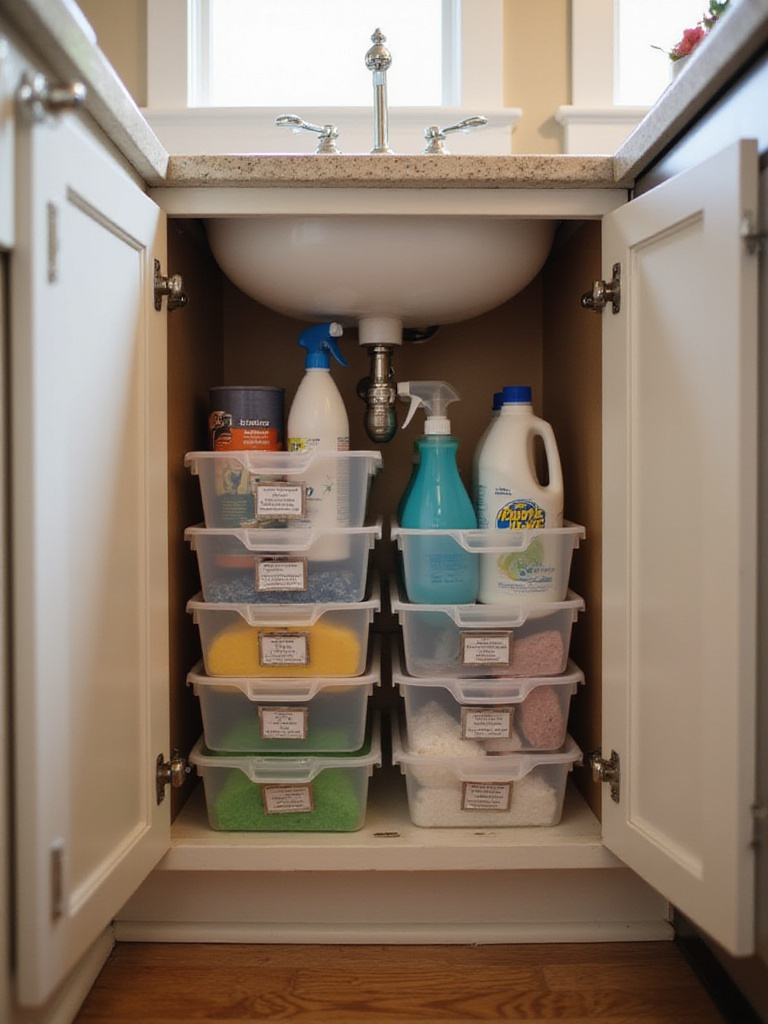
Using stackable containers increases under-sink storage capacity by up to 50% by leveraging vertical height that typically goes unused. Grouping similar items together – surface cleaners in one bin, dish soap and sponges in another – reduces search time by 30-40% and simplifies inventory management. The containment also protects your cabinet base from spills and leaks.
Measure the cabinet dimensions carefully, paying attention to pipe locations and clearances. Select bins that fit around plumbing while maximizing available space. Clear or labeled containers allow you to identify contents without pulling everything out. A small apartment owner used two sets of narrow, two-tier bins to organize spray bottles, cleaning cloths, sponges, garbage bags, and dishwasher pods, completely clearing the cabinet floor.
The sustainable journey of this material involves creating systems that maintain themselves through logical grouping and easy access.
8. Tame Tupperware Troubles: Nest Containers and Store Lids in a Dedicated Bin
Food storage containers and their corresponding lids create some of the most frustrating clutter in small kitchens. The solution lies in nesting containers by size and shape while corralling all lids in a single, dedicated organizer – a system that can reclaim up to 50% of the space previously consumed by scattered containers.

This method eliminates the daily treasure hunt for matching lids and containers, streamlining meal prep and cleanup significantly. Storing lids vertically like files in a filing cabinet makes each one immediately visible and accessible, rather than creating unstable stacks that topple when you need the bottom lid.
Begin with ruthless decluttering – discard any containers or lids that are stained, damaged, or missing their match. Group remaining containers by shape and material, then nest same-sized pieces inside each other. Use a narrow bin or specialized lid organizer to store lids vertically. One homeowner designated a single deep drawer for all food storage, using this nesting method to fit everything neatly while freeing an entire upper cabinet for pantry overflow.
The composition comes together when you realize that containing the chaos creates space for the things that truly matter in your daily cooking routine.
9. Create a Command Center: Designate One Drawer or Shelf for Mail and Keys
Small kitchen surfaces quickly become dumping grounds for keys, mail, and miscellaneous items that have nowhere else to land. Creating a designated command center – typically a single drawer or shelf near your most-used entry – prevents this clutter creep while ensuring essential items remain findable.
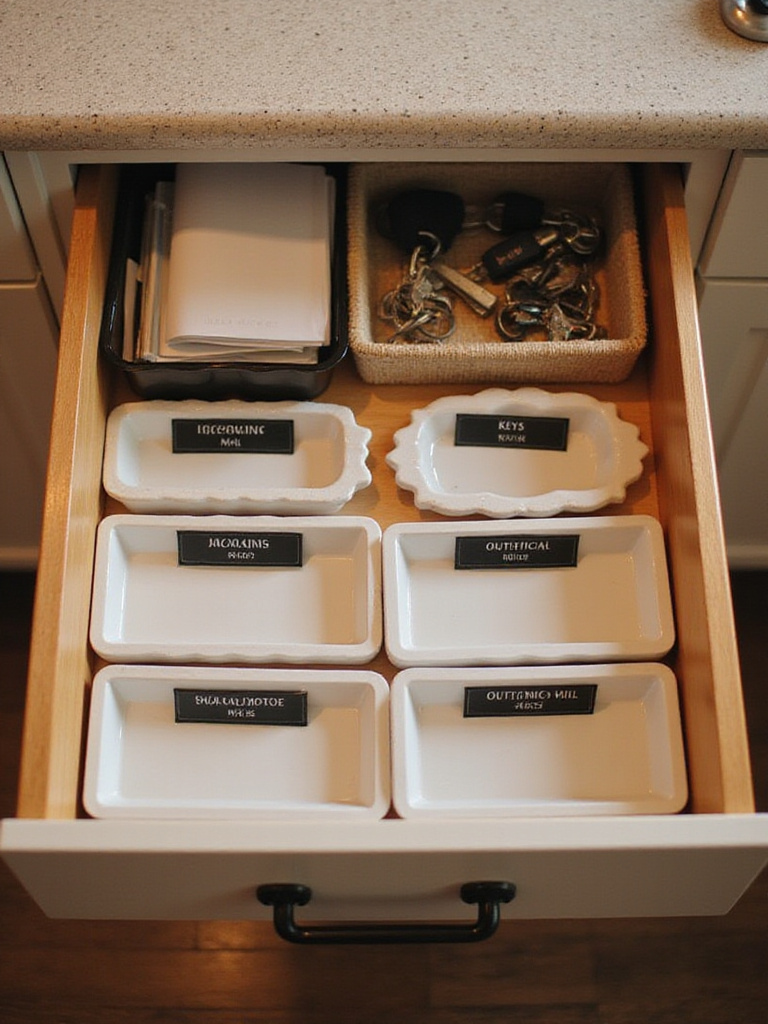
This dedicated landing zone saves 15-30 minutes weekly by eliminating time spent searching for misplaced keys or sorting scattered mail. It reduces visual clutter on kitchen surfaces by up to 80%, creating a calmer environment that feels less chaotic. Having a consistent home for these items also decreases instances of lost keys by 50-75%, preventing stress and potential lockout costs.
Select a location near your most frequently used entrance, ideally a drawer or shelf in or adjacent to the kitchen. Add simple organizers like small trays or bins to create designated spots for keys, incoming mail, and outgoing items. Keep it functional and resist letting it become a general catch-all space. A family in a small apartment designated their top kitchen drawer for this purpose, adding a small tray for keys and a narrow bin for mail, which reduced paper clutter on their kitchen table by over 70%.
The finishing touch that elevates the entire look is maintaining the discipline to process mail daily rather than letting it accumulate.
10. Hang Mugs Under Cabinets: Install Cup Hooks to Free Up Shelf Space
Mugs consume disproportionate shelf space when stored traditionally, and stacking them creates precarious towers that make accessing your favorite cup an exercise in careful extraction. Installing cup hooks or racks under upper cabinets transforms unused vertical space into functional storage while freeing 1-2 linear feet of shelf space for other items.
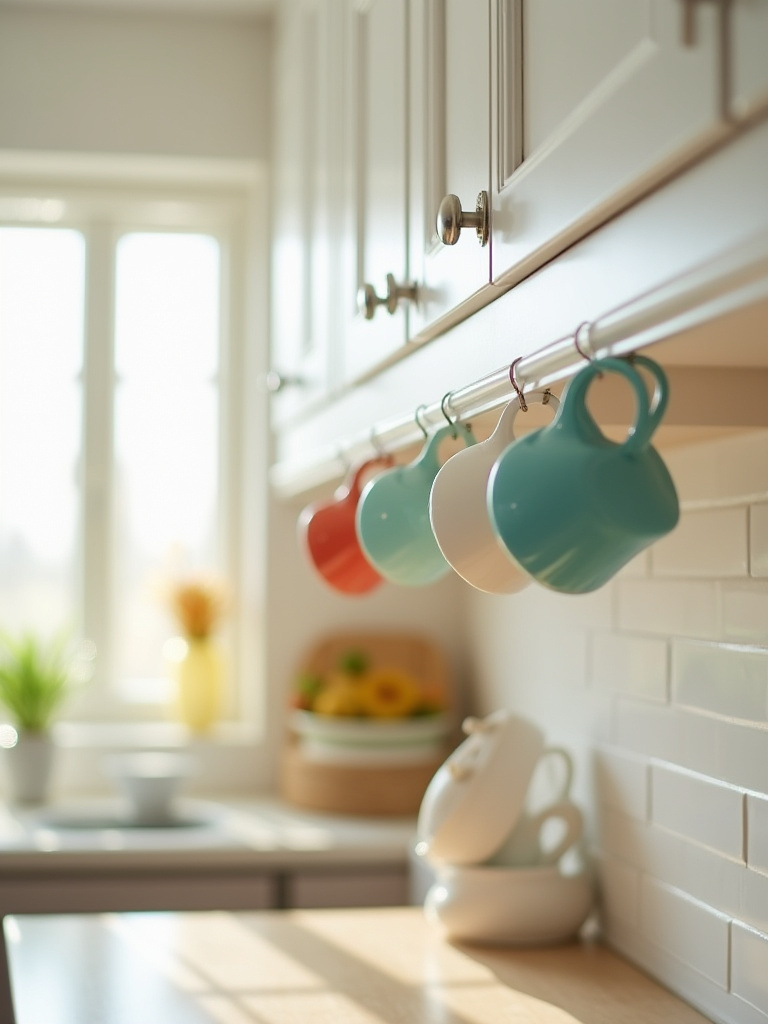
This technique increases usable vertical storage capacity by up to 30% in areas where mugs were previously stored horizontally. Hanging mugs also improves visibility and accessibility – no more unstacking to reach the mug you want. The cleared shelf space can then accommodate items that previously cluttered counters or didn’t fit in cabinets at all.
Measure and mark hook positions under cabinets, ensuring adequate clearance for mugs to hang without hitting the counter or cabinet doors. Use a template for consistent spacing and pre-drill pilot holes to prevent cabinet damage. A city apartment dweller installed two rows of hooks under a 30-inch cabinet section, hanging 14 mugs and completely clearing the shelf above for frequently accessed spices that had been cluttering the counter.
The interplay between the colors creates visual interest when your mug collection becomes part of the kitchen’s functional display.
11. Use Magnetic Strips: Store Spices or Small Metal Items on the Wall
Walls and cabinet sides offer untapped storage potential that magnetic strips can transform into sleek, accessible organization for metal items. These simple bars hold everything from knives to spice tins to small gadgets, freeing 1-3 linear feet of counter or shelf space while keeping frequently used items visible and within reach.
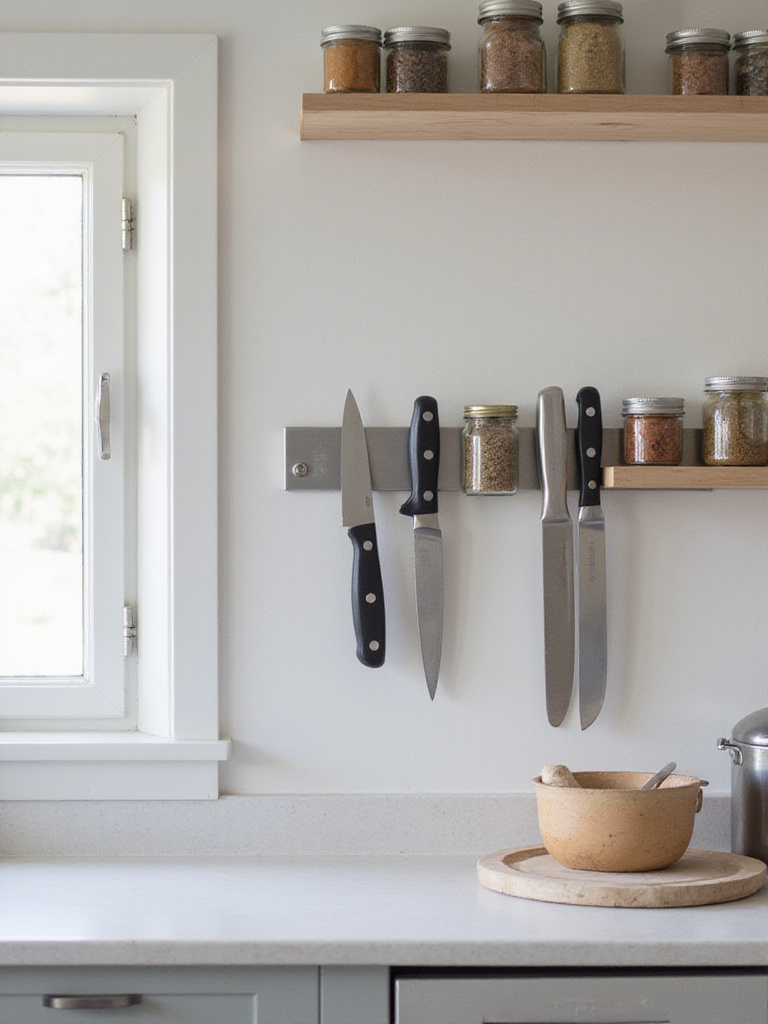
Beyond the physical space gained, magnetic storage reduces search time during meal prep by keeping items in plain sight. It declutters drawers and cabinets by relocating small metal items, making remaining contents easier to organize and access. The flexibility allows installation in various locations based on your kitchen layout – backsplash, inside cabinet doors, or refrigerator sides.
Install strips securely using screws rather than adhesive for heavier items like knives, and position them away from high-traffic areas for safety. Test magnetic strength before loading items. A renter installed a magnetic knife strip on their tiled backsplash, eliminating a bulky knife block and gaining 10 inches of usable counter area. Another homeowner used magnetic strips inside a pantry door with matching spice tins, organizing over 50 spices without using valuable shelf space.
The artisan collective that creates these pieces understands that sometimes the simplest solutions provide the most dramatic transformations.
12. Roll Out Under-Sink Storage: Add a Sliding Drawer System for Easy Access
The depth of under-sink cabinets, combined with plumbing obstructions, makes items stored in back virtually inaccessible without a full cabinet excavation. Installing roll-out drawer systems transforms this challenging space into easily accessible storage where everything slides into view with a simple pull.
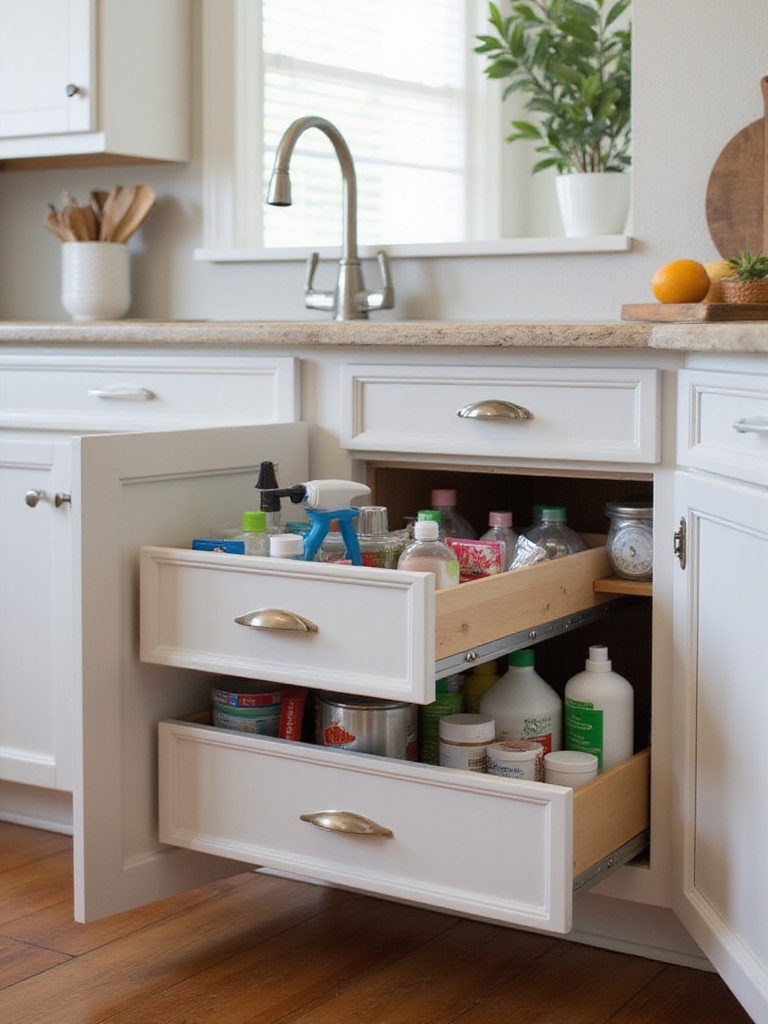
pull-out shelves increase usable under-sink space by up to 50% by utilizing vertical clearance and full depth effectively. They reduce search time by 30-40% by bringing all contents into view and within easy reach. This system prevents items from getting lost in the back corners and maintains better organization over time.
Measure cabinet dimensions carefully, noting pipe locations and clearances before selecting a system. Choose between single drawers, double tiers, or U-shaped units designed to accommodate plumbing. A homeowner installed a two-tier U-shaped system, consolidating all cleaning supplies from two different cabinets into the single under-sink space and freeing an entire upper cabinet for other uses.
The environmental story behind this piece began with recognizing that unused space is wasted space, especially in compact living situations.
13. Store Cutting Boards Vertically: Use a Simple Rack Inside a Cabinet
Cutting boards stored horizontally consume valuable linear shelf space and create unstable stacks that make retrieving a specific board unnecessarily complicated. Vertical storage using simple racks transforms these flat, bulky items into an organized system that utilizes cabinet height rather than width.
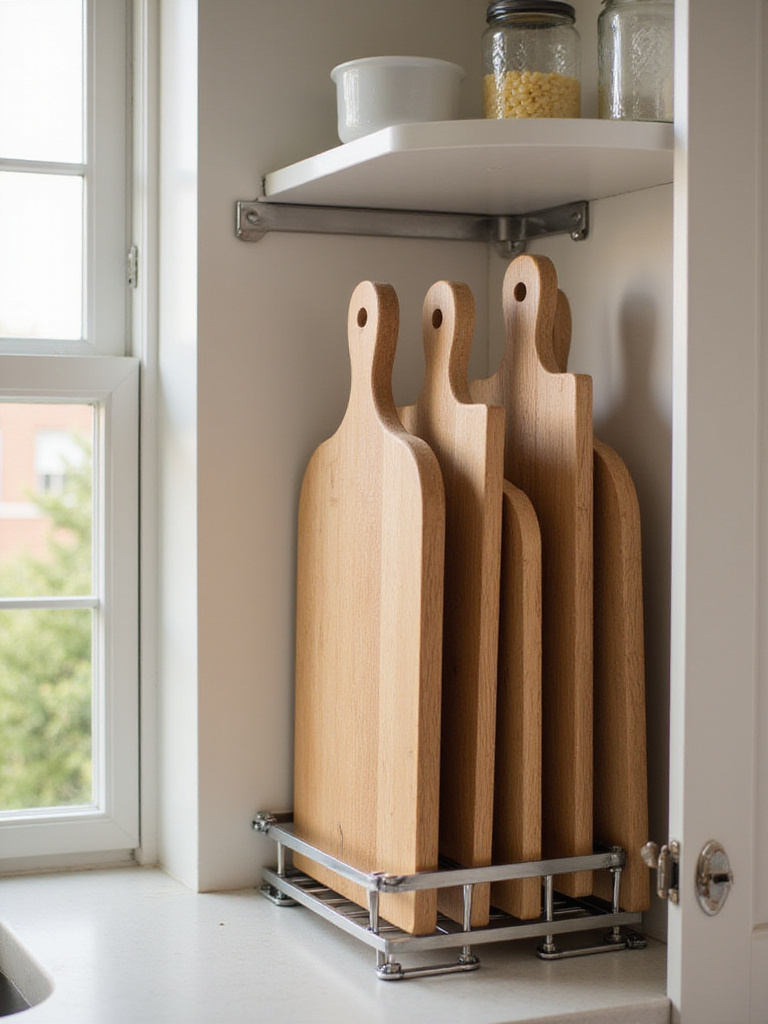
This approach frees 6-12 inches of horizontal shelf space typically occupied by stacked boards while drastically improving accessibility. Any board can be retrieved in under 5 seconds without disturbing others. The method also reduces cabinet clutter by containing boards in a designated upright section rather than allowing them to lean against other items.
Measure cabinet height, width, and depth to ensure proper rack fit, and consider your cutting boards’ thickness when selecting slots. Wire, plastic, or tension rod systems work well for different cabinet configurations. A homeowner with a galley kitchen installed a $15 vertical wire rack, storing three cutting boards in 4 inches of width instead of the 10 inches they previously occupied horizontally, instantly gaining 6 inches of shelf space.
The traditional methods used result in immediate access to any board without the domino effect of disturbed stacks.
14. Categorize and Zone: Group Similar Items in Logical Locations
Effective small kitchen organization extends beyond storage solutions to creating functional systems that support your cooking workflow. Categorizing involves grouping similar items together, while zoning assigns these categories to logical locations based on where they’re used, creating dedicated task areas that reduce search time and improve efficiency.
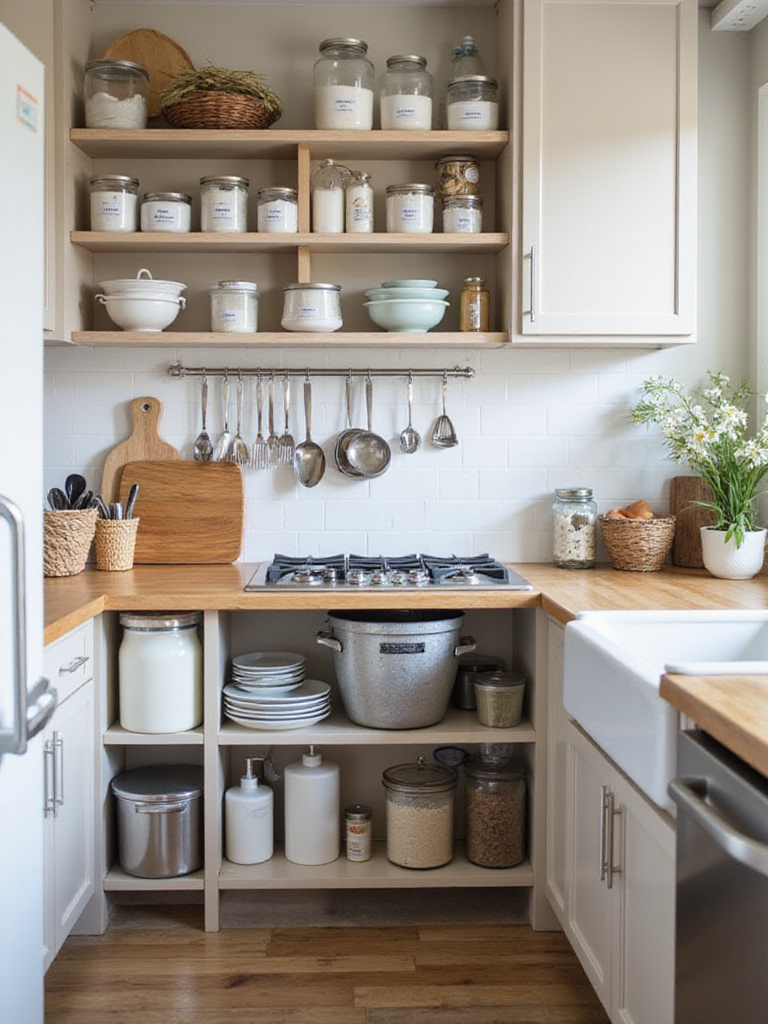
This systematic approach reduces time spent searching during meal prep by 20-30% by keeping related items near their point of first use. Spices live near the stove, mixing bowls near prep areas, and cleaning supplies under the sink. It also simplifies inventory management and can reduce duplicate purchases by 15-20% since you can easily see what you already own.
Start by emptying cabinets and sorting items into logical categories like ‘Baking Supplies,’ ‘Cooking Utensils,’ ‘Food Storage,’ and ‘Cleaning Products.’ Define zones based on your kitchen layout and assign categories to appropriate areas. A small kitchen owner created a ‘Dish & Cleanup Zone’ in the cabinet near their sink, consolidating dish soap, sponges, dishwasher pods, and cleaning supplies in one convenient location.
The discovery of this technique happened when organizing experts realized that proximity to point of use matters more than perfect aesthetics.
15. Add a Pegboard: Customize Wall Storage for Tools and Small Cookware
When cabinet and drawer space reaches capacity, walls offer unlimited potential for customizable storage. Pegboard systems provide perforated surfaces that accommodate various hooks, shelves, and bins, creating highly adaptable vertical storage that keeps frequently used tools visible and accessible while freeing valuable drawer and cabinet space.
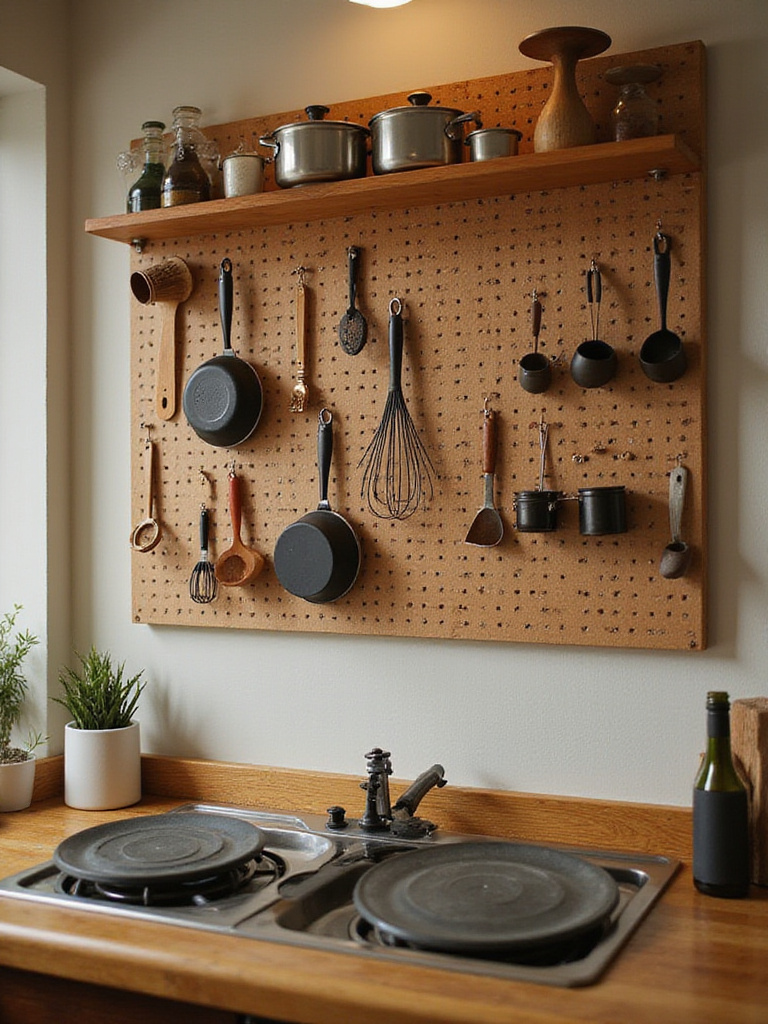
A well-designed pegboard increases usable wall space by up to 100% compared to bare surfaces while reducing search time during cooking sessions. The flexibility allows easy rearrangement as your tool collection or needs change, and the visual accessibility prevents items from being forgotten in drawer depths.
Select a wall area near your primary prep zone, ensuring it can support the weight and won’t interfere with cabinet doors or appliances. Install the board with proper spacers to allow hook insertion, and plan your layout by arranging items on the floor first. A city apartment dweller installed a 4×2-foot pegboard above their counter, hanging pots, pans, utensils, and cutting boards to completely clear limited counter space and an overcrowded drawer.
The collaboration began with a conversation about transforming unused wall space into functional storage that adapts to changing needs.
16. Invest in Slim Trash Cans: Maximize Floor Space Under the Sink or in Corners
Floor space in small kitchens requires the same strategic thinking as counter space – every square inch affects movement, safety, and workflow. Bulky round trash cans obstruct pathways and prevent cabinet doors from opening fully, while slim-profile bins fit snugly into tight spots, significantly improving traffic flow.
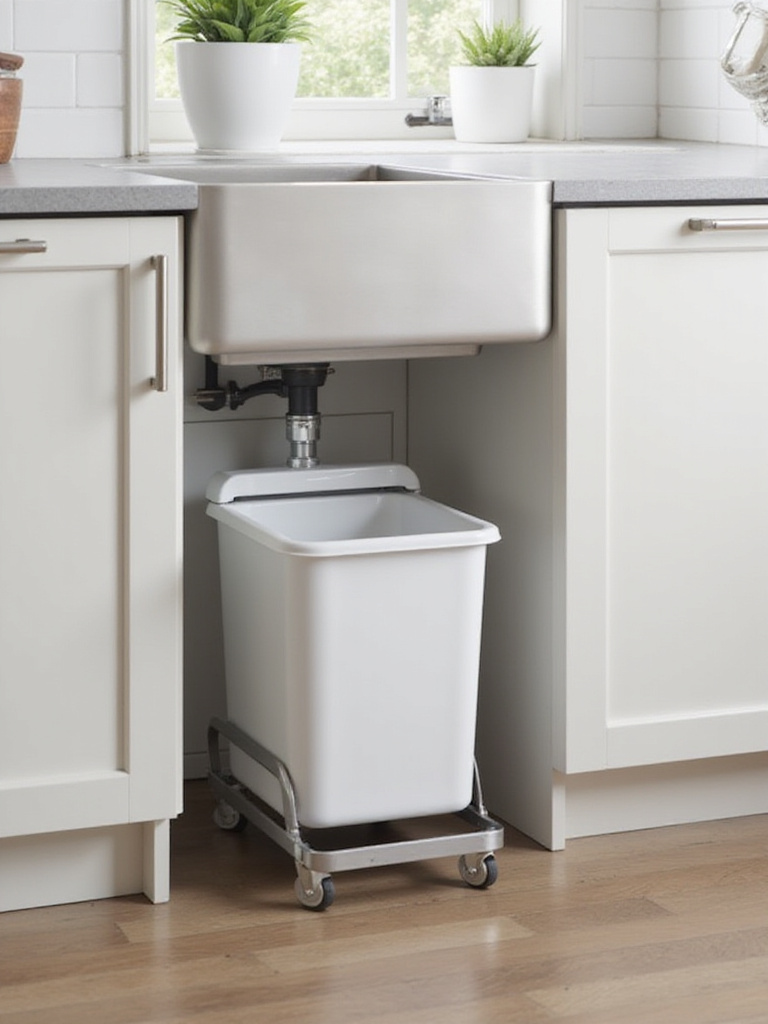
Slim trash cans free 6-12 inches of floor width compared to standard containers, allowing clearer walkways and full cabinet door operation. They enable use of previously dead zones like narrow gaps between appliances or tight corners, turning wasted areas into functional space.
Measure intended spaces precisely, accounting for door swings and pipe clearances under sinks. Select shapes that maximize capacity within your constraints – rectangular, D-shaped, or truly slimline options. Consider lid types based on surrounding clearances. A homeowner replaced a 15-inch diameter round can with an 8-inch wide rectangular version, gaining 7 inches of critical walkway clearance in their narrow galley kitchen.
The materials are sourced from a remarkable region where form follows function, creating solutions that work within real-world spatial constraints.
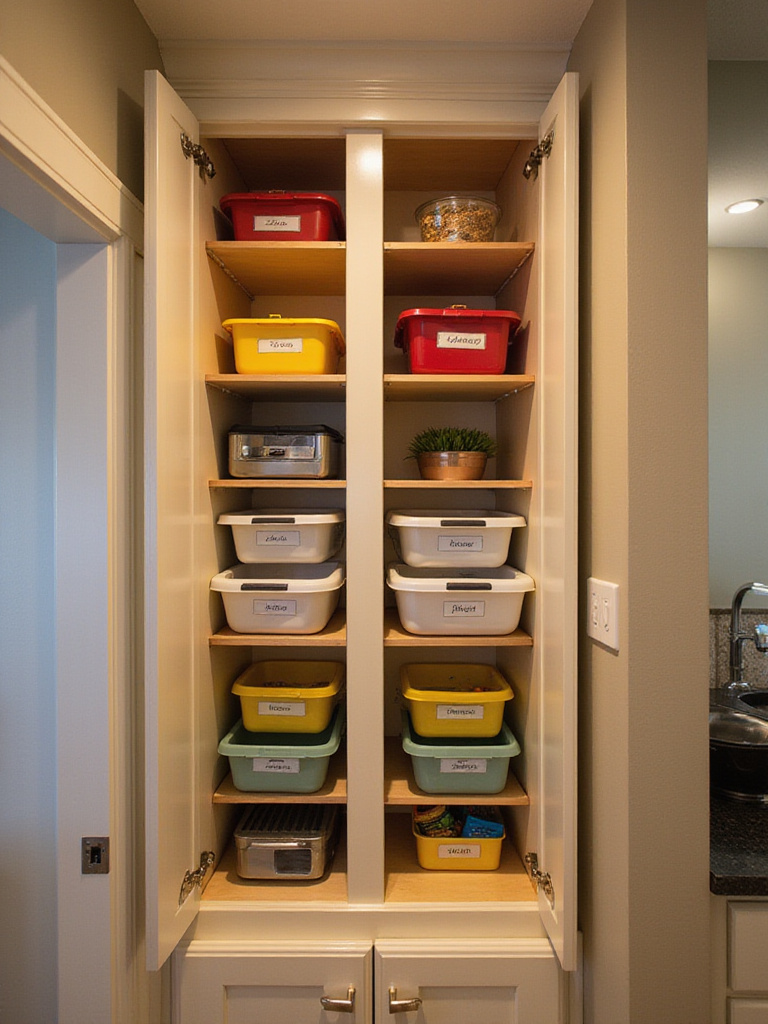
17. Decant Dry Goods: Use Uniform, Stackable Containers for Pantry Staples
Pantry staples arrive in bulky, irregularly shaped packaging that stacks poorly and creates visual chaos in small storage areas. Decanting these items into uniform, airtight containers maximizes limited vertical and horizontal space while improving visibility and extending freshness.
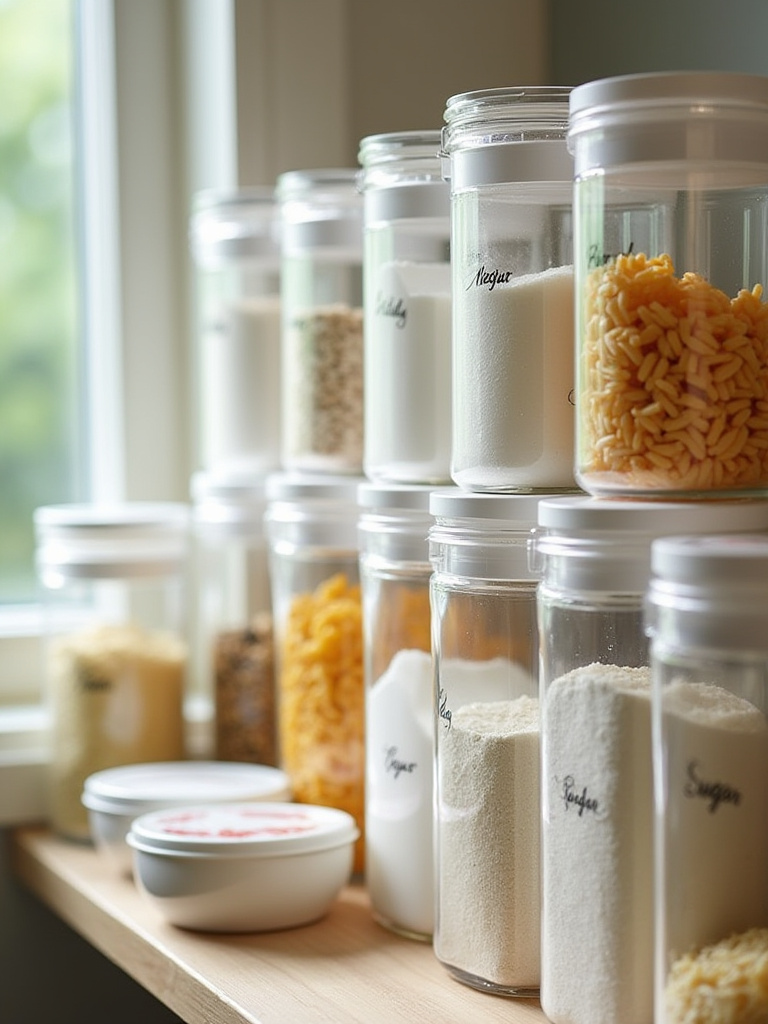
Using stackable containers allows efficient utilization of full shelf height and depth, potentially adding 25-30% more storage capacity compared to original packaging. The airtight seals significantly reduce food waste by extending shelf life and preventing pest infiltration that easily penetrates paper or plastic bags.
Assess your dry goods inventory and select uniform containers that fit your space constraints. Transfer contents from original packaging, ensuring containers are clean and dry. Label clearly with contents and expiration dates. A small apartment kitchen gained an entire shelf of space by decanting rice, pasta, and flour into 10 uniform containers, instantly improving both capacity and visibility.
The quality becomes evident after years of use when airtight storage prevents the waste and frustration of spoiled ingredients.
18. Create a Baking Station: Group Ingredients and Tools in One Cabinet
Baking in a small kitchen can become frustrating when ingredients and tools scatter across multiple locations. Creating a dedicated baking station consolidates everything needed for baking projects into a single, designated area, transforming a potentially chaotic process into a streamlined, enjoyable activity.
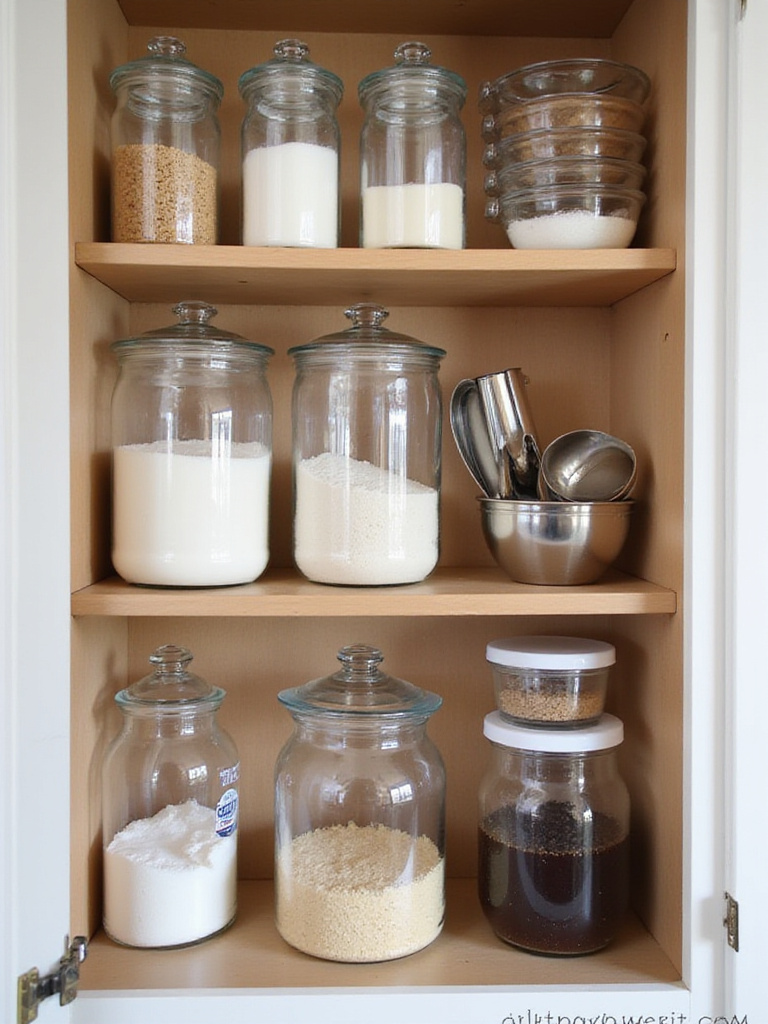
This consolidation reduces setup time by 5-10 minutes per baking session while freeing valuable space in other areas previously occupied by scattered baking supplies. It prevents duplicate purchases of ingredients or tools you already own but couldn’t locate when needed.
Gather all baking-related items from throughout your kitchen – flours, sugars, extracts, measuring tools, mixing bowls, and small appliances. Designate a specific cabinet or pantry section, preferably near workspace, and organize using containers and dividers to keep categories together. A small apartment dweller designated one upper cabinet as their complete baking station, installing tiered shelves for extracts and using clear bins for different flours and sugars.
The maker’s journey from apprentice to master influenced the understanding that dedicated spaces for specific tasks improve both efficiency and enjoyment.
19. Store Lids Smartly: Use a Lid Organizer Rack or Command Hooks on Cabinet Doors
Pot and pan lids create organizational chaos with their awkward shapes that don’t stack neatly or store efficiently with their corresponding cookware. Implementing dedicated lid storage solutions reclaims up to 30% more cabinet shelf space while making lids easily accessible and preventing damage from unstable stacking.
Vertical lid storage dramatically reduces search time by making every lid visible and accessible without unstacking or rearranging. It also prevents scratches and dents that occur when lids pile together or get jammed into overcrowded spaces.
Gather and declutter all lids, discarding any damaged or unmatched pieces. Choose between shelf-based organizer racks or door-mounted solutions using Command hooks. For door mounting, clean surfaces thoroughly and space hooks appropriately for lid handles. A small apartment owner used a 6-slot wire rack placed vertically on a shelf, allowing neater pot stacking below while gaining space for mixing bowls that previously didn’t fit.
The visual weight balances perfectly when lids stand independently rather than creating precarious towers that threaten to topple.
20. Add Pull-Out Shelves: Improve Access to Deep, Hard-to-Reach Cabinet Items
Deep kitchen cabinets offer significant storage volume but accessing items stored at the back often requires removing everything in front. Pull-out shelves transform fixed, deep shelves into accessible drawers that bring contents into full view with a simple pull, making every inch usable.
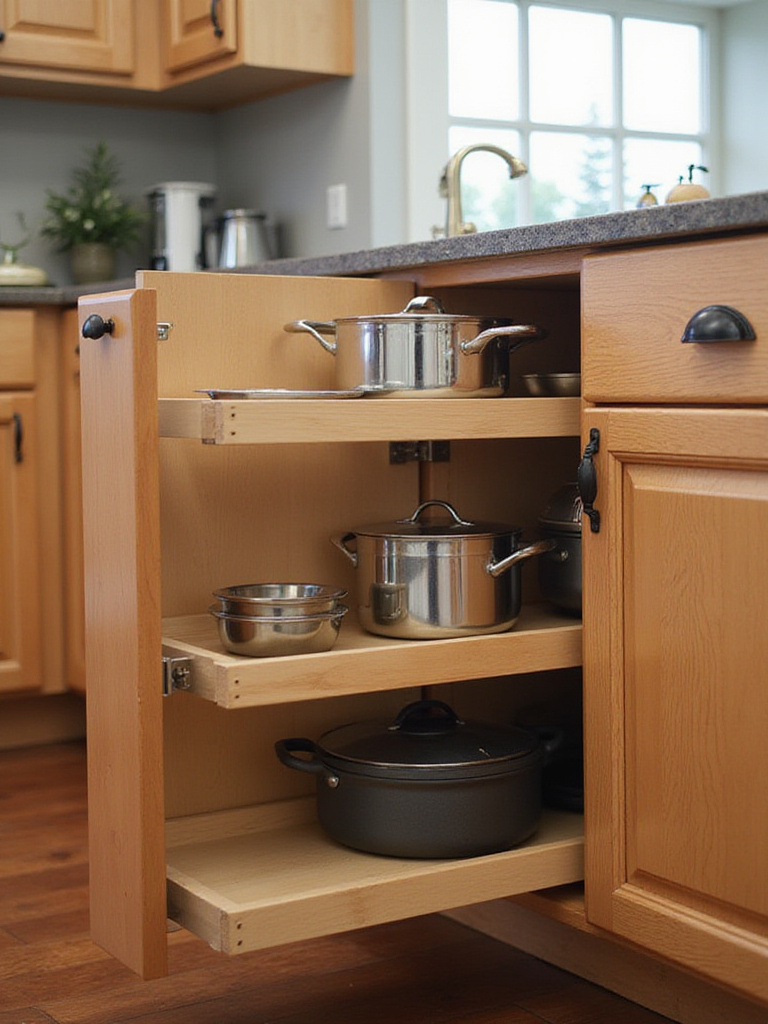
These systems increase usable cabinet depth by 75-90% while eliminating the need to unload front items to reach back contents. They improve visibility of stored items, potentially reducing food waste by making inventory easier to track, especially in deep pantry cabinets.
Measure cabinet interior dimensions carefully, including width at the narrowest point near hinges. Select appropriate glide systems and shelf configurations for your needs. Install according to manufacturer instructions, ensuring proper clearance. A homeowner installed pull-out shelves in a deep base cabinet for pots and pans, eliminating the need to remove stacks to access any piece and saving 5-10 minutes of searching weekly.
The unexpected environmental benefit comes from preventing items from being forgotten and wasted in the depths of deep cabinets.
21. Use Appliance Garages: Conceal Small Appliances and Free Up Counter Space
Small appliances like toasters, coffee makers, and blenders quickly consume precious counter space in compact kitchens. Appliance garages – dedicated enclosures that conceal these items behind doors – significantly reduce visual clutter while freeing 1-3 square feet of prime countertop real estate per garage location.
Beyond reclaiming physical space, hiding appliances and their cords improves the perceived organization and aesthetics of the kitchen by 30-50%. The enclosures also protect appliances from dust, grease, and potential damage while maintaining easy access for daily use.
Identify optimal locations near electrical outlets and measure appliances to ensure proper fit within chosen enclosures. Consider whether you’ll use appliances while housed in the garage, which requires internal electrical access. A homeowner with a 75-square-foot galley kitchen installed a corner appliance garage with tambour door, storing coffee maker, toaster, and electric kettle while freeing nearly 2.5 square feet of counter space.
The heritage technique gets a contemporary update through concealing modern appliances while maintaining their accessibility for daily use.
22. Hang Kitchen Towels: Install Hooks on the Back of Cabinet Doors or Walls
Kitchen towels often end up draped over oven handles or consuming limited counter space when they need dedicated spots for proper drying and easy access. Installing hooks on cabinet door backs or wall spaces provides designated hanging areas that free 6-12 inches of valuable counter space.
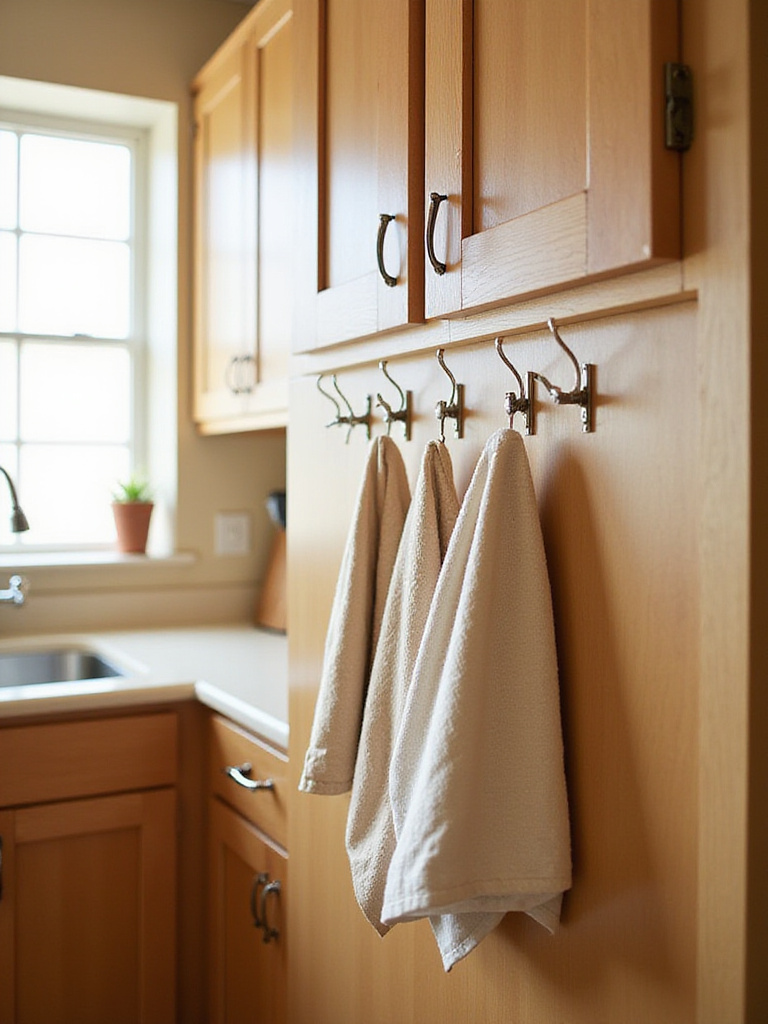
Hanging towels allows full extension for faster drying, reducing mildew risk by up to 50% compared to folded towels in drawers. It also reduces visual clutter while keeping towels accessible near their primary use areas.
Choose locations that allow doors to close fully or don’t obstruct movement. Select appropriate hook types – adhesive for damage-free installation or screw-in for permanent, sturdy mounting. Clean surfaces thoroughly before installing adhesive hooks. A renter installed adhesive hooks inside the under-sink cabinet door, freeing counter space beside the sink for easier meal prep.
The mood shifts dramatically when you add dedicated homes for everyday items that previously cluttered your workspace.
23. Organize Small Linens: Roll or Fold Dish Towels and Place in a Basket
Small kitchen linens quickly turn drawers or shelves into disorganized piles where finding a specific towel requires excavation. Rolling or uniformly folding these items and storing them in designated baskets creates tidy, accessible systems that maximize limited storage space.

This method reclaims 15-30% of storage area previously consumed by messy piles while improving visibility and access. Rolling or file-folding allows vertical storage that utilizes full container height, and the containment prevents linens from migrating and becoming disorganized.
Gather all small kitchen linens and choose consistent folding or rolling methods. Select baskets appropriate for your storage location and towel quantity. Arrange towels vertically when possible for maximum visibility and space efficiency. A homeowner used a decorative wire basket on their counter corner for rolled dish towels, freeing a drawer for utensils while keeping towels easily accessible.
The tactile experience changes the entire room’s energy when every textile has a designated home that maintains order naturally.
24. Think Upwards: Utilize the Top of Cabinets for Seldom-Used Items (in Bins)
The space above kitchen cabinets often remains unused despite offering significant storage potential for items accessed infrequently. This area provides several cubic feet of storage that can house seasonal items, specialty appliances, or bulk goods, freeing valuable drawer and cabinet space for daily essentials.
Utilizing cabinet tops reduces visual clutter throughout the kitchen by relocating seasonal or specialty items out of sight while protecting stored goods from dust and grease when properly contained in bins with lids.
Identify items truly used infrequently – holiday dishes, large stock pots, seasonal tools, or bulk paper goods. Measure the space and purchase appropriately sized bins with lids. Label bins clearly with contents visible from below. Load items securely, ensuring bins don’t overhang or create safety hazards. A homeowner stored their Thanksgiving roaster, specialty cake pans, and ice cream maker above cabinets, freeing an entire lower cabinet shelf and two drawers for everyday cookware.
The cultural heritage preserved in each piece includes maximizing every available inch while maintaining safety and accessibility for truly needed items.
Conclusion
Transforming your small kitchen from a cluttered obstacle course into an efficient culinary workspace doesn’t require a complete renovation or expensive custom solutions. These 24 small kitchen organization strategies prove that smart thinking trumps square footage every time. By focusing on vertical space, creating dedicated zones, and implementing systems that work with your cooking habits rather than against them, you can unlock storage potential you never knew existed.
The key lies in approaching organization systematically rather than randomly. Start with ruthless decluttering to eliminate items that don’t earn their space, then implement vertical solutions like shelf risers and wall-mounted storage. Create logical zones that support your workflow, and use containers and dividers to maintain the systems you establish. Remember that the goal isn’t perfection – it’s creating a kitchen that works efficiently for your daily life.
Don’t feel overwhelmed by implementing all 24 ideas simultaneously. Choose the strategies that address your biggest frustrations first, whether that’s clearing counter space with wall-mounted utensil storage or taming the chaos under your sink with stackable bins. Each small improvement builds momentum toward a kitchen that feels spacious, organized, and genuinely enjoyable to cook in. Your small kitchen has more potential than you realize – these strategies simply help you unlock it.