In the heart of every home, where meals become memories, the kitchen’s design speaks volumes. Beyond cabinets and countertops, one element stands as both protector and style-maker: the backsplash. As a lighting design specialist who’s witnessed countless kitchen transformations, I’ve seen how the right backsplash tiles can dramatically alter a space’s ambiance, functionality, and visual appeal.
The humble backsplash has evolved from a simple protective surface to a canvas for personal expression. Whether you’re planning a complete renovation or a weekend refresh, understanding these 20 essential elements will guide you toward a backsplash that balances beauty with practicality, transforming your kitchen into a space that truly reflects your lifestyle and taste.
1. Why a Kitchen Backsplash is Essential
At its core, a kitchen backsplash serves as a crucial protective barrier. The areas behind sinks and stoves face constant exposure to moisture, cooking splatters, and grease – elements that can wreak havoc on unprotected drywall. Without a proper backsplash, these substances seep into wall materials, causing stains, damage, and potentially fostering mold growth. This protective shield preserves your walls’ integrity while significantly contributing to kitchen hygiene.
Beyond protection, a backsplash stands as a powerful design statement. It provides a canvas for introducing color, texture, and personal style into your kitchen. The right backsplash ties together countertops and cabinetry, adds visual interest, and transforms the room’s overall feel. This seamless blend of function and aesthetics explains why backsplashes have become non-negotiable in modern kitchen design.
The magic of this piece lies in its dual nature – practical enough to withstand daily kitchen chaos while beautiful enough to serve as a focal point that enhances your home’s value and appeal.
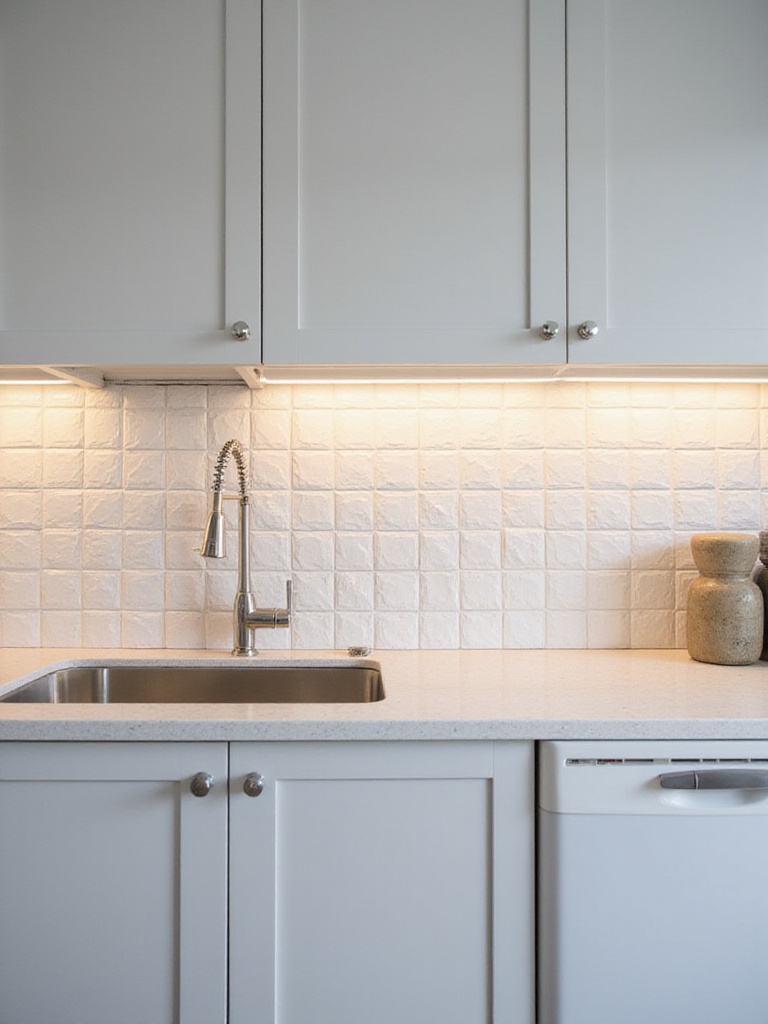
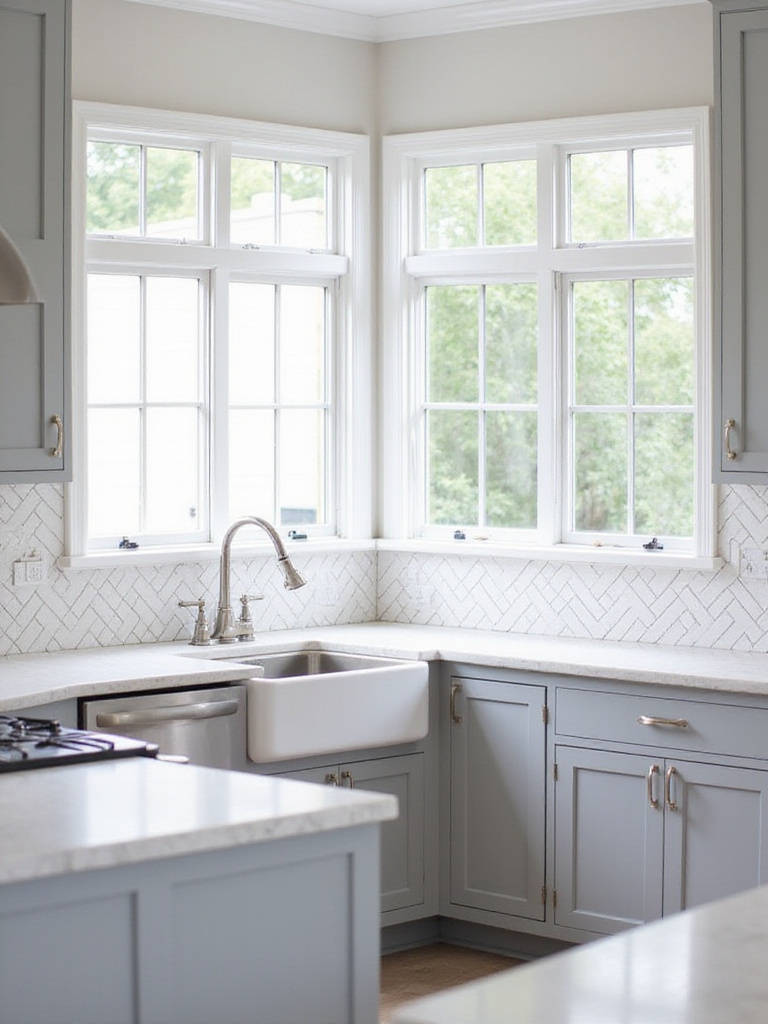
2. Classic & Timeless: Subway Tile Backsplashes
Subway tile has earned its iconic status in kitchen design for compelling reasons. Born in the early 20th century New York City transit system, these rectangular tiles (typically 3×6 inches) were chosen for their exceptional durability, cleanability, and light-reflecting properties. This perfect marriage of practicality and clean aesthetics has cemented subway tile as a timeless design element that complements everything from traditional to contemporary kitchens.

While classic white ceramic remains popular, subway tiles have evolved dramatically. Today’s options include durable porcelain, shimmering glass, luxurious natural stone, and even metal or wood-look variations. Size variations range from tiny mosaics to large-format rectangles, and finishes include everything from glossy to matte, crackle glaze, or handmade textures. The installation pattern – whether standard horizontal offset, straight stack, vertical offset, herringbone, or basketweave – dramatically alters the visual impact, offering incredible versatility within this classic form.
The designer’s secret here is that grout color transforms the entire look. White grout creates a seamless, minimalist appearance, while contrasting dark grout emphasizes the pattern for a more graphic quality. This simple choice can shift the perceived style from sleek and modern to classically vintage.
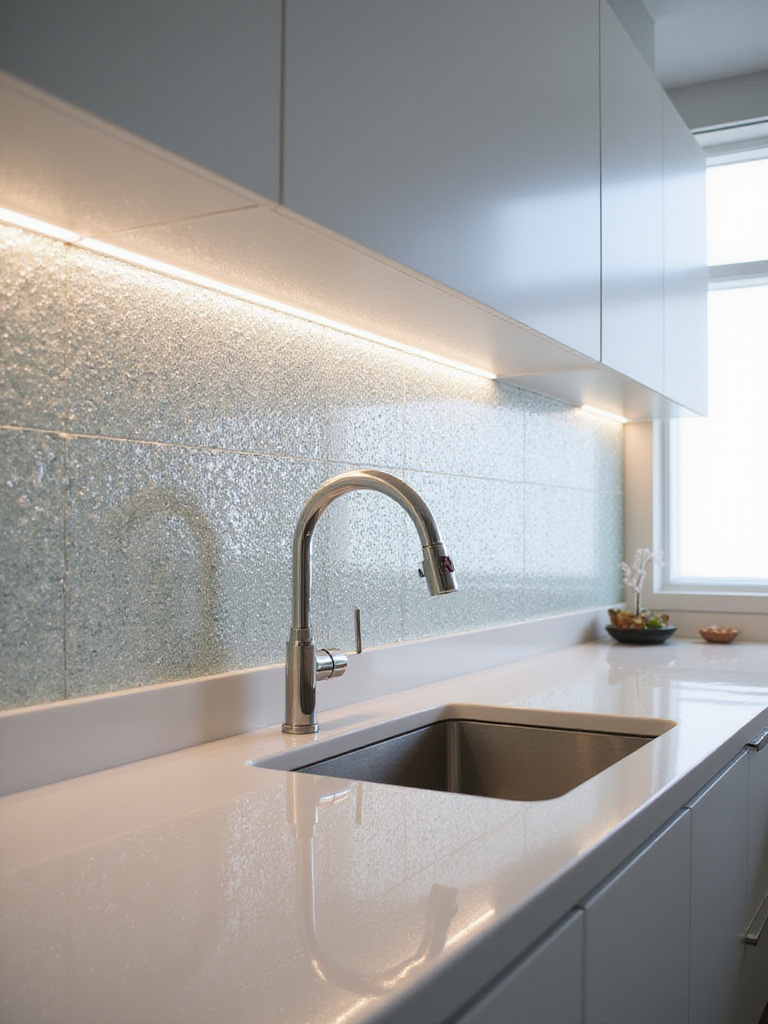
3. Adding Sparkle and Depth with Glass Tiles
Glass tiles bring an unmatched luminosity to kitchen backsplashes. Their reflective quality creates beautiful shimmer as light bounces off their smooth surfaces. The sense of depth comes from the tile’s thickness, light refraction within the glass, or special backings like metallic coatings. These elements create a visual effect of looking into the tile, giving the surface a three-dimensional quality that makes kitchens feel brighter and more expansive.
For maximum impact, certain glass tile varieties stand out. Iridescent glass tiles feature special coatings that shift colors depending on viewing angle and light source. Metallic-backed glass tiles with silver, gold, or copper finishes provide mirror-like sparkle. Even simple clear or colored glass tiles offer clean brightness through light refraction, while frosted or textured glass provides a softer, diffused glow. These variations allow for customized levels of brilliance to suit any kitchen style.
Unlike conventional options, glass backsplashes require special consideration. The installation surface must be perfectly smooth and uniform, as imperfections can show through. Strategic lighting, particularly under-cabinet fixtures, dramatically enhances glass tiles’ reflective properties, creating captivating plays of light that evolve throughout the day.
4. Intricate Designs: Exploring Mosaic Tiles
Mosaic tiles, defined by their small size (typically under 2×2 inches), create stunning, detailed backsplashes that larger tiles simply cannot achieve. Most commonly sold on mesh or paper sheets for easier installation, mosaics come in an impressive variety of materials: glass, ceramic, porcelain, natural stone, metal, and often combinations within a single sheet. This material diversity enables remarkable variation in color, texture, and visual effect.
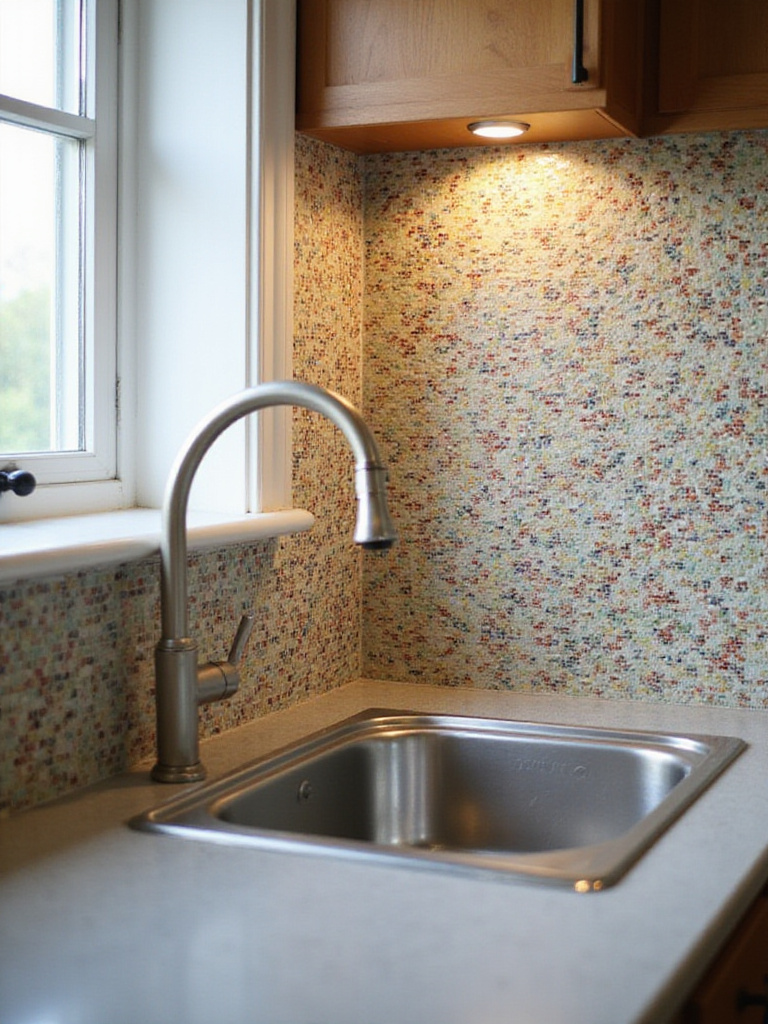
Kitchen backsplashes benefit tremendously from mosaics’ ability to introduce intricate detail and rich texture. Their small scale allows for complex patterns, borders, or striking focal points, especially behind ranges or sinks. Glass mosaics add sparkle, while stone varieties offer natural variation and texture. Beyond basic squares, mosaics come in fascinating shapes – penny rounds, mini subway tiles, arabesque or lantern forms – and pre-set patterns like herringbone, basketweave, or chevron. Mixed-material sheets combining glass and stone add another layer of design complexity.
What makes this design special is how grout choice dramatically impacts the final look. Contrasting grout emphasizes individual tile shapes and patterns, while matching grout creates a more unified surface. For kitchen durability, epoxy grout offers superior stain resistance, though it requires more installation skill than traditional cementitious options.
5. The Elegance and Durability of Porcelain Tiles
Porcelain tiles stand out for their exceptional durability in kitchen environments. Their composition – a refined clay, feldspar, and mineral mix – undergoes vitrification during high-temperature firing, resulting in an incredibly dense, hard, and virtually non-porous surface (with water absorption below 0.5%). This low porosity makes porcelain highly resistant to moisture, stains, heat, and bacteria – all common kitchen challenges. Unlike softer materials, porcelain withstands impacts without easily chipping, cracking, or scratching, ensuring a backsplash that maintains its beauty for years.

Modern technology has elevated porcelain’s design potential dramatically. Today’s porcelain tiles realistically replicate luxurious materials like marble, granite, wood, concrete, or even fabric, complete with authentic-looking veining, grain patterns, and textures. Available finishes range from highly polished to matte, textured, or subtly shimmering lappato. Size options span from small mosaics to classic subway dimensions and impressive large-format tiles that minimize grout lines for a sleek, sophisticated look. This combination of realistic aesthetics and diverse formats allows porcelain to integrate seamlessly into virtually any kitchen style.
The craftsmanship reveals itself in details like rectified edges (precisely cut for minimal grout lines), through-body coloration (making chips less noticeable), and the remarkable fidelity with which porcelain mimics premium materials without their maintenance demands – truly offering the best of both worlds.
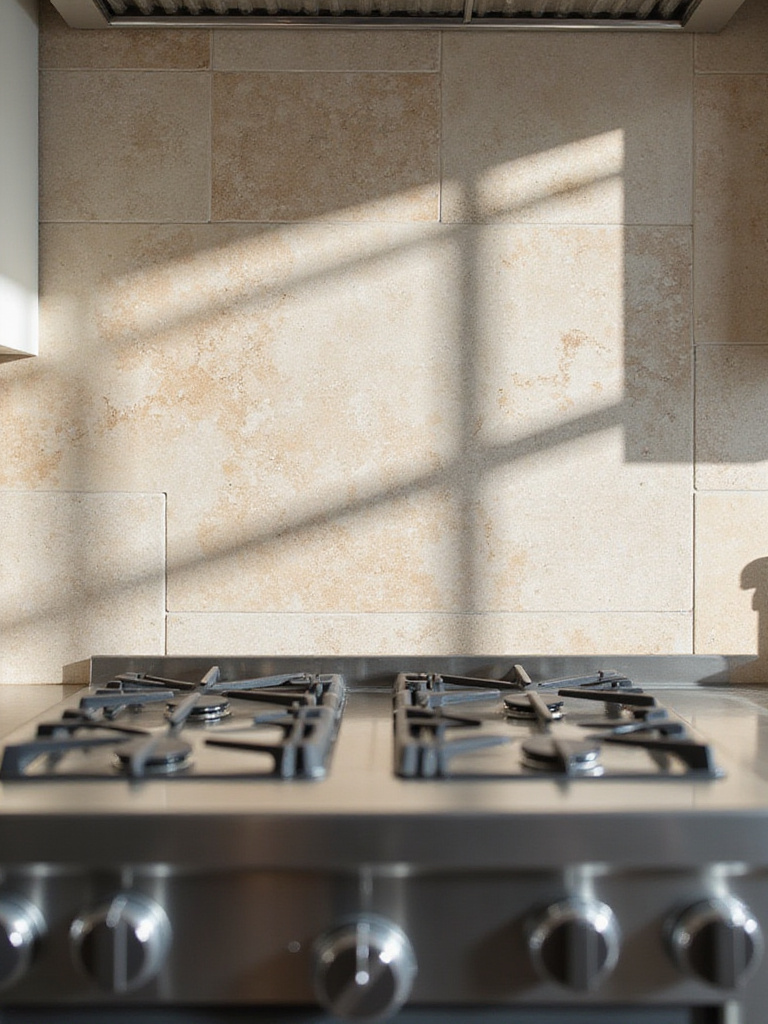
6. Bringing Nature Indoors: Natural Stone Backsplashes
Natural stone backsplashes introduce unparalleled authenticity and character to kitchens. Popular options include marble with its distinctive veining and luxurious feel; granite with exceptional durability and heat resistance; travertine offering warm, textured surfaces; and slate with its rustic, layered appearance. Each stone type brings unique patterns, colors, and textures that can’t be perfectly replicated, creating truly one-of-a-kind backsplashes that add significant character and potential home value.
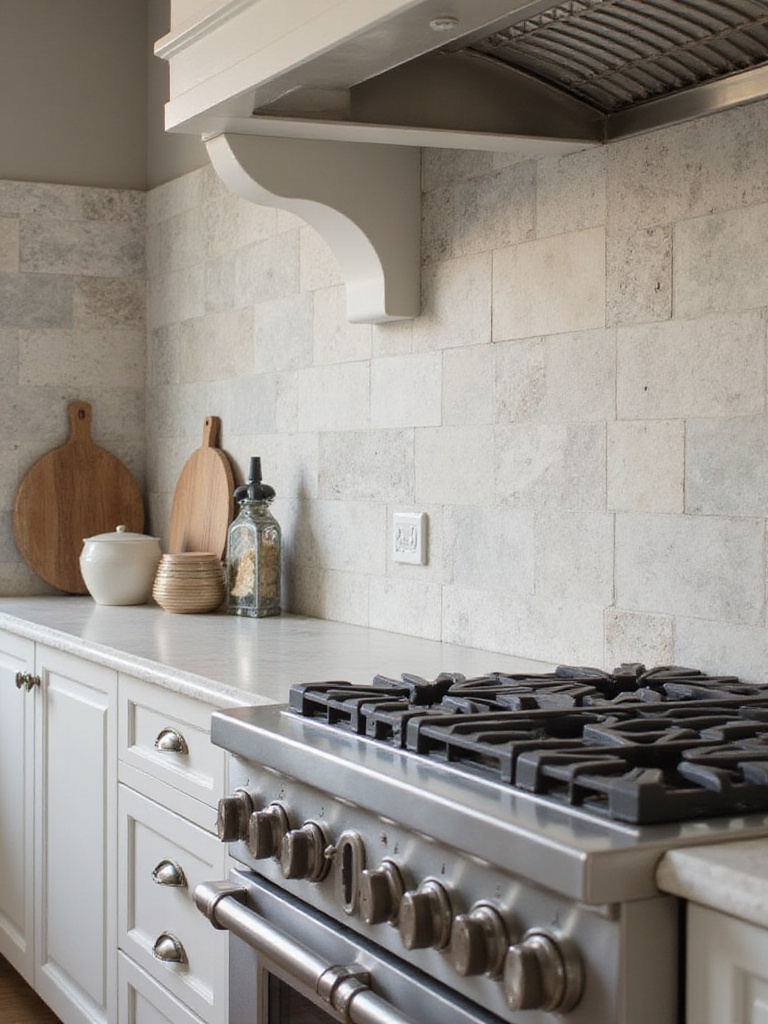
The environmental story behind natural stone begins millions of years ago. These materials formed through geological processes, making each piece a literal slice of earth history with unique markings and mineral compositions. This authenticity comes with considerations – most natural stones (especially marble and travertine) are porous and require regular sealing to prevent stains and etching from acidic substances common in kitchens. Maintenance typically involves specific pH-neutral cleaners and prompt cleanup of spills.
The unexpected environmental benefit comes from stone’s longevity and timelessness. A well-maintained stone backsplash can last decades or even centuries, reducing the need for replacement and associated resource consumption – a truly sustainable choice when viewed through the lens of lifetime use.
7. Unexpected Style: Metal Tile Backsplash Options
Metal tiles bring distinctive industrial chic or sophisticated gleam to kitchen backsplashes. Common options include stainless steel with its sleek, durable, and easy-to-clean surface; copper with its warmth and unique patina development; lightweight and versatile aluminum; subtly aged zinc; and classic brass. Each metal offers specific characteristics that influence both aesthetics and maintenance requirements, allowing for customized expressions ranging from ultra-modern to vintage-inspired.
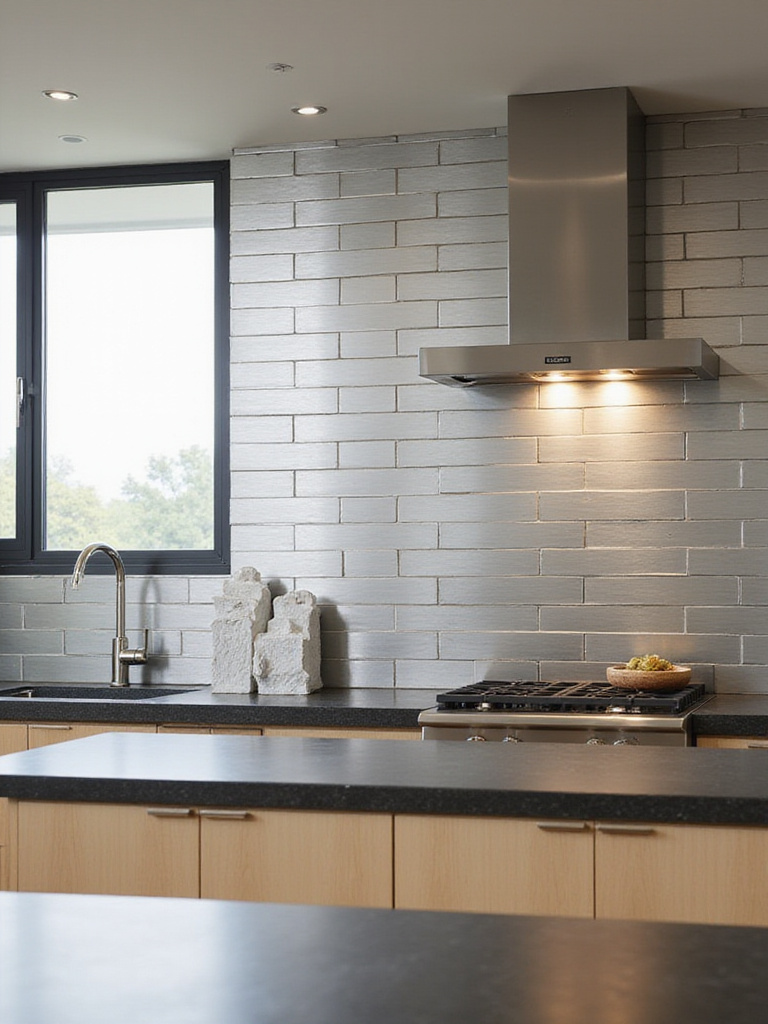
The advantages of metal backsplashes are significant: exceptional durability, heat and moisture resistance, non-porosity for easy cleaning and hygiene, and light-reflecting properties that brighten kitchens. Their reflective nature creates dynamic surfaces that change appearance as light conditions shift throughout the day. However, considerations include potentially higher costs, susceptibility to scratching (particularly with softer metals), and maintenance requirements for certain finishes. Polished surfaces show fingerprints readily, while brushed or hammered finishes better conceal minor marks and smudges.
After months of sourcing and curation, designers have developed metal tiles in various shapes and patterns – from classic squares and rectangles to intricate mosaics and geometric forms – allowing these distinctive materials to adapt to diverse kitchen styles while making a memorable statement.
8. Budget-Friendly Updates: Peel and Stick Tiles
Peel and stick backsplash tiles offer a revolutionary approach to kitchen updates, providing a quick, easy, and cost-effective alternative to traditional tiling. These panels typically feature a decorative surface layer – often durable vinyl, gel, or thin metal – embossed or printed to mimic ceramic, glass, stone, or metal tiles. The key difference lies in the adhesive backing; simply peel off the protective paper and apply directly to clean, smooth walls. This eliminates the need for mortar, grout, and specialized tools, making it an accessible DIY solution that costs significantly less than traditional installation.
The advantages are compelling: affordability (both in materials and eliminated labor costs), straightforward installation that can often be completed in hours, minimal tools required, and virtually no mess from mortar or grout. Many varieties are designed to be removable, making them perfect for renters or those who enjoy frequent design changes. Available in countless styles, colors, and patterns, they can mimic almost any traditional tile look. However, limitations include generally lower durability and heat resistance (particularly near stoves), less water resistance than properly grouted traditional tiles, and the need for perfectly clean, smooth wall surfaces for proper adhesion.
If you’ve struggled with similar rooms before, peel and stick tiles offer an approachable solution for quick transformations, temporary design changes, or budget renovations – particularly in areas with moderate splashing and heat exposure, such as behind sinks or on wall sections away from high-heat cooking surfaces.
9. Playing with Pattern: Herringbone Layouts
A herringbone pattern creates unmistakable visual interest in kitchen backsplashes. This distinctive arrangement places rectangular tiles at 45-degree angles to form continuous V-shapes that resemble a herring fish skeleton. The resulting zigzag pattern instantly adds movement, texture, and sophistication. Depending on orientation (horizontal or vertical V-shapes), the pattern can subtly make walls appear wider or taller, bringing classic elegance while feeling fresh and dynamic compared to simpler grid layouts.
True herringbone patterns require rectangular tiles – commonly subway tiles in 3×6 or 2×4 inch dimensions, though various sizes create different scale effects. While ceramic, porcelain, glass, or natural stone can all be used, the installation complexity exceeds standard layouts. Herringbone requires precise 45-degree cuts, particularly around edges, corners, and obstacles like outlets. This increased complexity means higher material waste (often 15-20% more than simpler patterns) and more installation time. Starting from a central point and working outward helps ensure balanced, symmetrical results.
The inspiration for this collection struck when designers observed how diagonal lines create energy and movement in otherwise static spaces. The interplay between the angles creates visual rhythm that draws the eye across the backsplash, making it both a protective surface and an architectural feature that adds unexpected sophistication.
10. Charming & Unique: Penny Round Tiles
Penny round tiles bring distinctive character to kitchen backsplashes with their small circular shape, typically measuring 3/4 to 1 inch in diameter. Usually sold on mesh sheets for easier installation, these tiles earned their name from their resemblance to US pennies. Their unique appeal comes from this circular form and the resulting high density of grout lines, creating a visually textured surface that feels simultaneously vintage and modern. The soft, curved lines offer a gentle yet eye-catching alternative to straight-edged tiles, adding significant charm and personality.

Available in numerous materials and finishes – including durable porcelain and ceramic, shimmering glass, luxurious natural stone, and even metal or resin – penny rounds allow diverse design expressions. Glossy finishes in bright colors evoke playful, retro diner aesthetics, while matte finishes in muted tones create understated contemporary looks. Marble penny rounds add sophistication, and glass varieties contribute brightness and spatial expansion. The material and finish dramatically impact the final aesthetic, allowing customization to various kitchen styles.
The silhouette draws inspiration from early 20th-century design, particularly Arts and Crafts and Art Deco periods, when these tiles first gained popularity. Their timeless appeal continues today, offering a perfect balance of historical reference and fresh design potential for modern kitchens.
11. The Impact of Grout Color on Your Tile
Grout color dramatically influences your kitchen backsplash’s final appearance, often more than people realize. Choosing a grout that sharply contrasts with your tile color – like dark gray with white tiles or white with dark tiles – makes each individual tile shape and pattern stand out prominently. This creates a distinct grid or geometric design across the backsplash, emphasizing the layout and adding visual definition. This approach excellently showcases interesting tile shapes or intricate installation patterns like herringbone or chevron, transforming the backsplash into a dynamic focal point with strong graphic qualities.
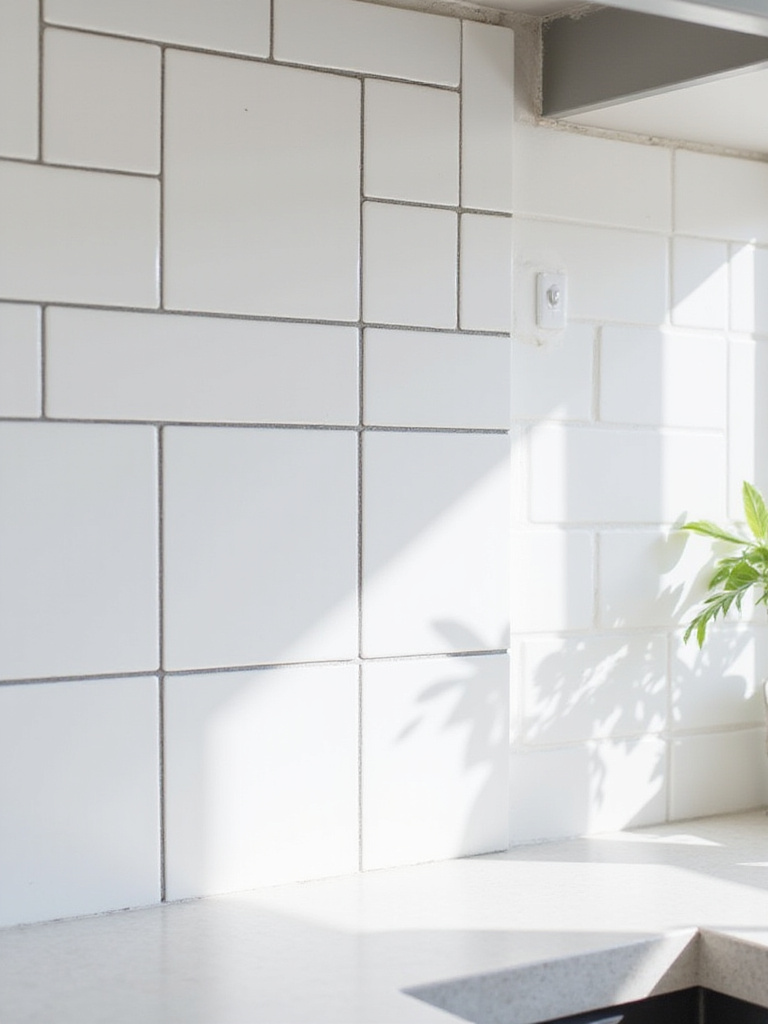
Conversely, selecting grout that closely matches your tile color results in a more unified, seamless appearance. When grout blends with tiles, the eye perceives the backsplash as a cohesive surface rather than focusing on individual pieces and lines. This minimizes the grid’s visual impact, creating a calmer, less busy look. Matching grout is ideal for highlighting texture, subtle color variations, or the inherent beauty of materials like natural stone or handmade tiles, allowing the backsplash to function as a textured backdrop rather than a graphic pattern.
While often thought of as just filler, grout provides essential structural support by bonding tiles together and preventing edge chipping. Its color can dramatically shift your backsplash’s perceived style – white subway tile with white grout looks sleek and modern, while the same tile with dark gray grout creates a classic, graphic statement.
12. DIY vs. Professional Backsplash Installation
Deciding between DIY and professional backsplash installation involves weighing several key factors. Your personal skill level and prior tiling experience are paramount considerations. Available time matters significantly, as DIY projects typically take longer than anticipated, especially for beginners. Budget constraints often drive DIY decisions, as professional labor can represent 50% or more of total project costs. The complexity of your chosen material and pattern also impacts this decision – simple ceramic subway tiles in a straight layout are far more DIY-friendly than intricate natural stone mosaics in herringbone patterns.
DIY installation can be rewarding and cost-effective but comes with potential pitfalls. Common issues include inadequate surface preparation leading to poor adhesion, incorrect mixing or application of mortar and grout, miscalculated cuts around outlets and corners, uneven spacing, and misalignment. Without proper tools like wet saws for precise cuts, DIY results may fall short of expectations. Professional installation, while more expensive, guarantees expertise, efficiency, and high-quality results, especially for complex projects or expensive materials where mistakes prove costly.
Many homeowners wonder how to balance budget considerations with quality results. Consider a hybrid approach – tackle straightforward sections yourself while hiring professionals for complex areas like intricate cuts or tricky corners. This compromise can reduce costs while ensuring critical areas receive expert attention.
13. Understanding Backsplash Tile Costs
The total cost of a kitchen backsplash project depends on several key factors. Material costs vary dramatically – basic ceramic or porcelain starts around $2-$5 per square foot, while glass tiles typically range from $15-$50, natural stone from $20-$75+, and mosaic or handmade tiles can exceed $100 per square foot. The installation area’s size directly impacts material quantity needed. Pattern complexity affects both installation time and material waste, with intricate designs like herringbone generating more waste than simple layouts. Professional installation typically adds $10-$40+ per square foot depending on location, installer experience, and job complexity.
Beyond tile and labor, several “hidden” costs deserve consideration. Setting materials (thinset mortar, grout, sealer, caulk) add approximately $1-$3 per square foot. Edge treatments like bullnose tiles or metal Schluter strips are necessary for finished edges. Removing existing backsplashes incurs demolition costs and potential wall repair expenses. Always budget for 10-15% extra tile to account for cuts and waste (more for complex patterns), plus a buffer for unexpected issues. DIY installation eliminates labor costs but requires purchasing or renting tools and materials, plus significant time investment.
The unexpected environmental benefit comes from quality materials and proper installation, which ensure longevity and reduce the need for premature replacement – an important consideration when calculating the true lifetime cost of your backsplash investment.
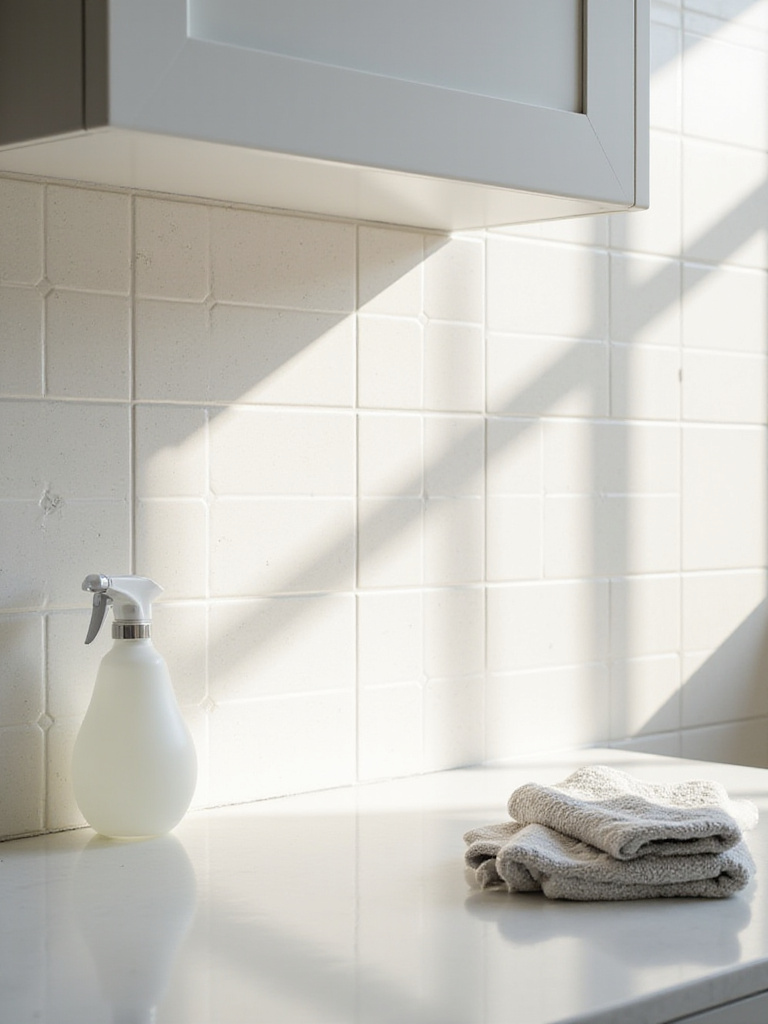
14. Keeping Your Backsplash Clean: Maintenance Tips
Maintaining a clean kitchen backsplash is essential for both hygiene and aesthetics. For most non-porous surfaces like ceramic, porcelain, glass, and sealed stone, warm water with mild dish soap works effectively for everyday cleaning. Tougher grease or food splatters may require a kitchen degreaser safe for your specific material. Avoid abrasive cleaners, steel wool, or harsh chemicals unless specifically recommended, as these can damage surfaces or grout. Cleaning frequency depends on cooking habits – wiping splash zones daily or every few days prevents buildup, with more thorough cleaning weekly, particularly behind the stove.
Different backsplash materials have specific maintenance needs. Glass tiles clean easily with glass cleaner or soapy water but require drying with microfiber cloths to prevent streaks. Stainless steel shows fingerprints and water spots; clean with warm soapy water or stainless steel cleaner, wiping with the grain and drying immediately. Natural stone requires pH-neutral cleaners specifically formulated for stone – never use acidic cleaners like vinegar or lemon products, which can etch and damage the surface. Ceramic and porcelain are generally low-maintenance, with grout lines typically needing the most attention.
“The most overlooked aspect of backsplash maintenance is preventive care. Regular sealing of porous materials and grout provides an invisible shield against stains and damage, making everyday cleaning significantly easier.” – Caleb Roberts
15. Coordinating Backsplash with Countertops & Cabinets
The fundamental principle when coordinating your backsplash with countertops and cabinets is creating visual harmony and balance. These three elements occupy significant visual space in your kitchen and need to work together rather than competing for attention. Consider their colors, textures, patterns, and visual prominence carefully. Often, one element becomes the focal point – perhaps a dramatic countertop or bold backsplash – with the others playing supporting roles to create a cohesive space.
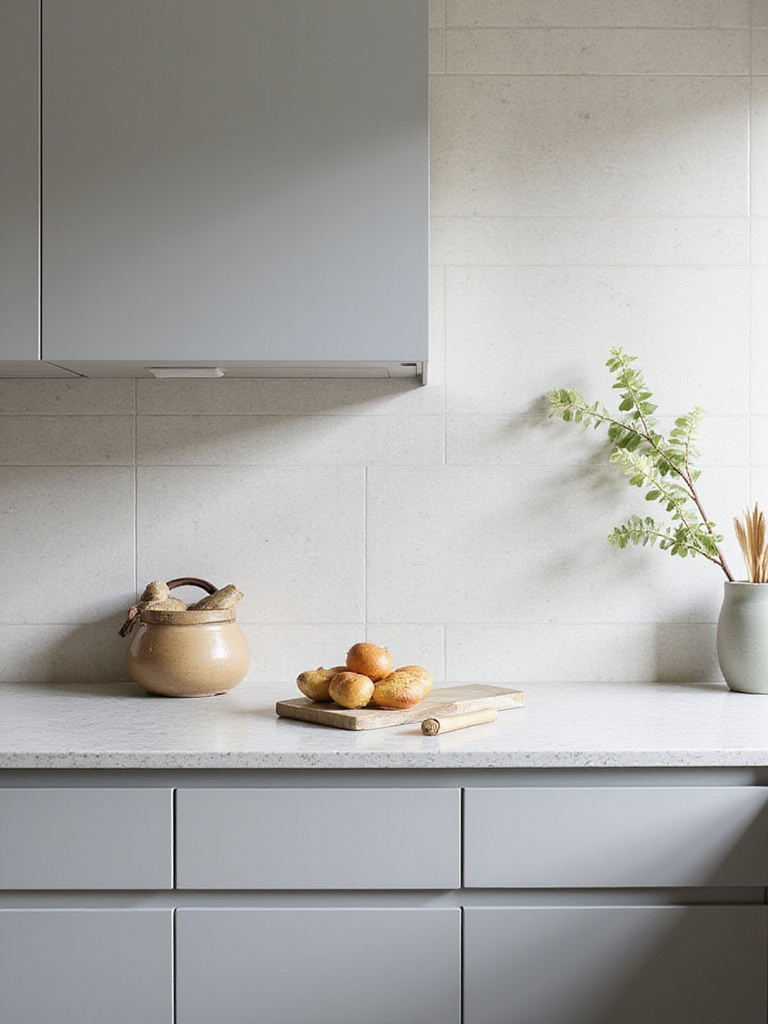
There’s no universal rule dictating whether backsplashes should match or contrast with countertops and cabinets; both approaches succeed depending on desired style. Matching creates a seamless, understated look popular in modern or minimalist designs. Contrasting allows the backsplash or countertops to stand as deliberate focal points, adding visual interest and personality. When handling busy patterns on one surface (like heavily veined granite or intricate mosaic backsplashes), keep the other surfaces relatively simple to avoid visual clutter. The 60-30-10 color rule (60% dominant color, 30% secondary, 10% accent) provides helpful guidance, though backsplashes sometimes take larger percentages as intended focal points.
For those worried about balancing these elements, create a “color bridge” where the backsplash incorporates subtle shades found in both countertops and cabinets, seamlessly connecting them while maintaining its own distinct character.
16. Making a Bold Statement with Tile
Choosing a bold kitchen backsplash tile means deliberately making this area a primary focal point. This goes beyond simple protection or subtle aesthetics to using the backsplash as artistic expression. Boldness emerges through several design elements: vibrant, saturated, or high-contrast colors; intricate or large-scale patterns; unique shapes like hexagons, arabesques, or fish scales; or materials with inherent drama like metallic finishes, highly reflective surfaces, three-dimensional tiles, or striking natural stone veining.
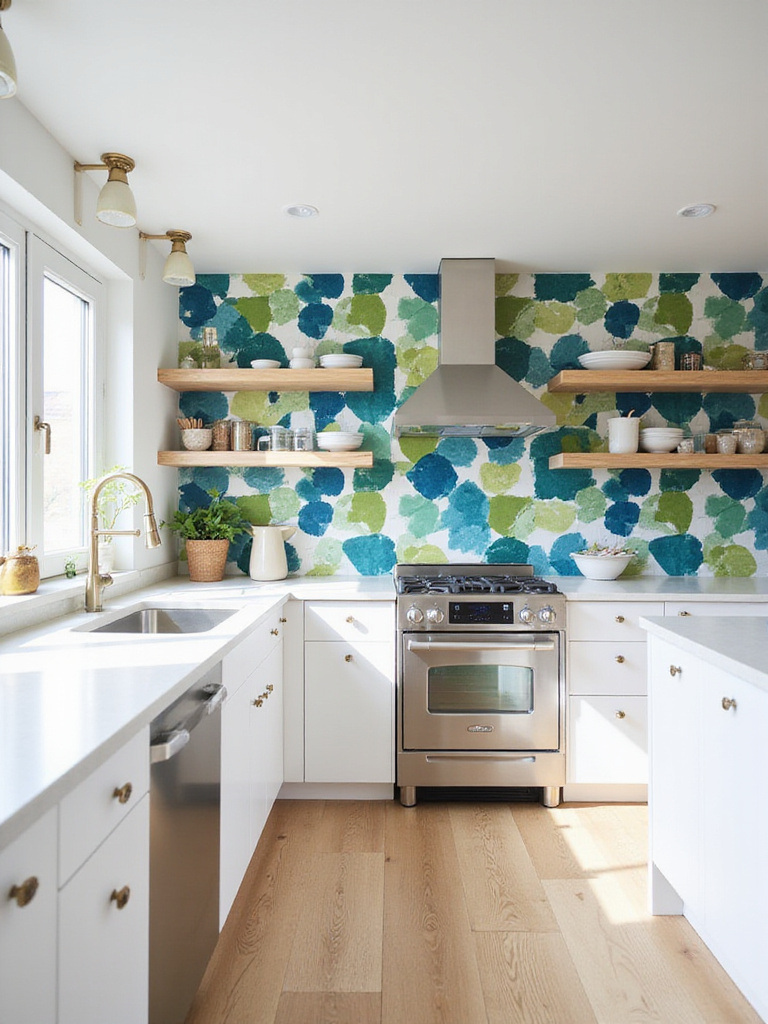
Creating a successful bold statement requires balance with other kitchen elements. If your backsplash is the star, keep countertops, cabinets, and flooring more subdued with neutral colors, simple cabinet door styles, and less busy patterns. Avoid competing focal points – if you have a stunning island or range hood, ensure the backsplash complements rather than fights with it. Color coordination remains important; ensure bold backsplash colors or patterns harmonize with your existing palette. Strategic lighting, particularly under-cabinet fixtures, is crucial for highlighting a bold backsplash’s texture, color, and pattern effectively.
The magic of this piece lies in its ability to transform an otherwise standard kitchen into a personalized space that reflects your design confidence. Bold doesn’t necessarily mean bright or loud – it can also mean sophisticated texture, unexpected material, or architectural pattern that creates visual intrigue.
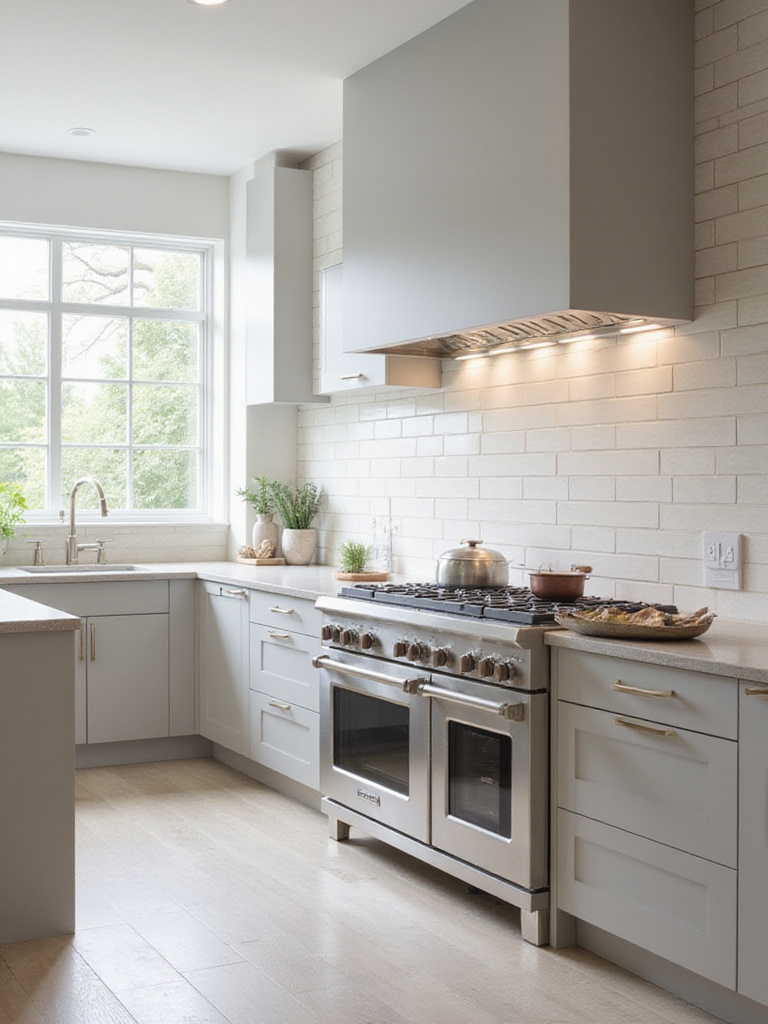
17. Extending the Backsplash for Maximum Impact
Extending kitchen backsplash tiles beyond standard counter-to-cabinet height offers compelling aesthetic and practical benefits. Aesthetically, extended tile creates a more dramatic focal point, drawing the eye upward and adding visual height, texture, and personality. This approach makes spaces feel more luxurious, custom-designed, and intentional. Practically, covering larger wall areas provides enhanced protection against splashes, grease, and stains well beyond immediate zones behind sinks and ranges. This makes cleaning easier for more surface area and protects more underlying wall material, contributing to long-term durability and lower maintenance.

Common extension approaches include tiling from countertop to ceiling (particularly behind ranges and range hoods), creating powerful vertical focal points that make ceilings feel higher and showcase tile as a major design element. Another method involves wrapping backsplash tile horizontally around inside corners onto adjacent walls, even without cabinets or counters, creating a cohesive, continuous look that adds texture and interest to otherwise blank walls. Each approach dramatically influences how the tile functions visually – ceiling extensions add vertical drama while corner wrapping creates an immersive, textured environment.
When clients ask us about balancing style with comfort, extended backsplashes often provide the perfect solution – they create dramatic visual impact while simultaneously offering enhanced practical protection in a hardworking kitchen environment.
18. Considering Tile Size and Kitchen Scale
The size of your kitchen significantly influences how different backsplash tile sizes appear and impact the space. In smaller kitchens, larger format tiles (12×24 inches or bigger) can paradoxically make rooms feel more spacious by reducing visual clutter through fewer grout lines. Conversely, tiny mosaic tiles across entire backsplashes in small kitchens might create busy visual noise, though they work beautifully as limited accents. In larger kitchens, both small tiles like classic 3×6 subway or intricate mosaics and large format options work effectively, offering greater flexibility based on desired style.
While no strict rules exist, some general recommendations can guide decisions. For small kitchens, larger format tiles or minimal patterns promote spaciousness. For medium to large kitchens, almost any tile size works depending on desired style and other design elements’ scale. A kitchen with busy countertops might benefit from simpler, larger tiles for balance, while a large kitchen with minimal cabinets could handle detailed or smaller tile patterns. Grout color also influences perceived tile size – contrasting grout highlights individual tiles and lines, making them appear smaller, while matching grout minimizes lines, making tiles appear larger and surfaces more unified.
The visual weight balances perfectly when tile size proportionally relates to kitchen scale. Always obtain physical samples of potential tiles in actual sizes you’re considering and place them on your kitchen wall in different lighting conditions to understand how they’ll feel in your specific space.
19. Adding Dimension with Textured Tiles
Textured backsplash tiles introduce relief and three-dimensional effects that flat surfaces simply cannot achieve. These textures range from subtle undulations to prominent 3D forms – geometric patterns with raised sections, wave or ripple designs, intricate relief patterns, split-face natural stone, realistic wood-grain tiles, or brick-look tiles with deep mortar lines. The texture level can vary from gentle variation to striking sculptural elements that transform ordinary walls into artistic focal points.
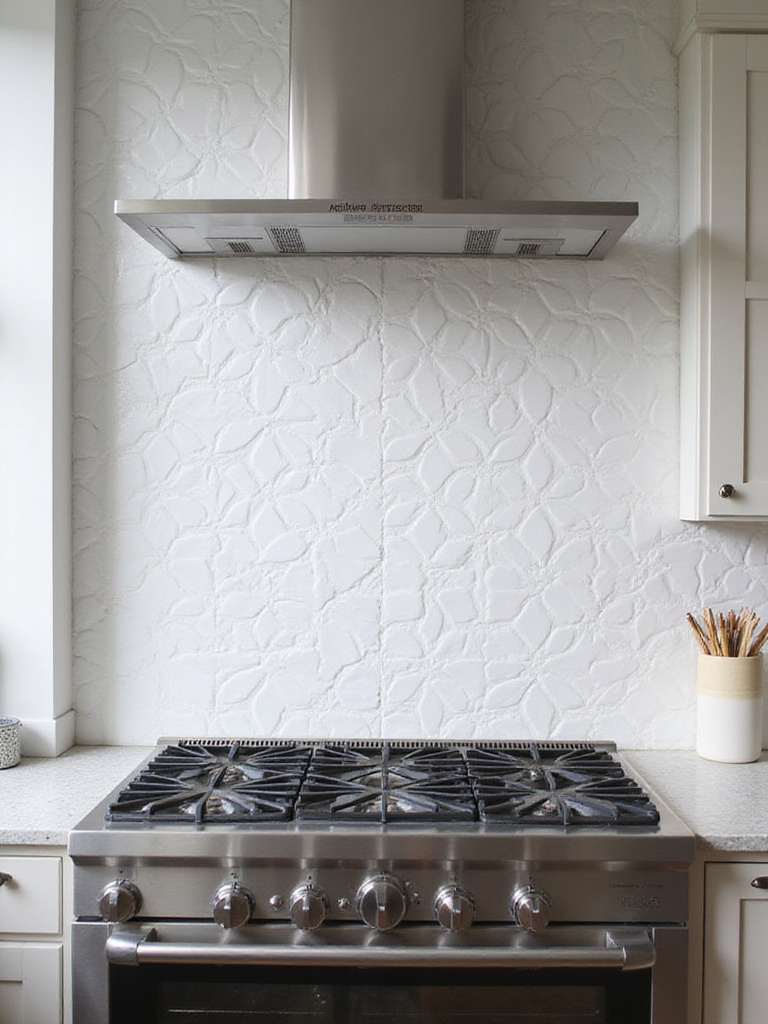
What makes textured tiles visually compelling is their dynamic interaction with light. Unlike flat surfaces, textured tiles catch light at different angles, creating highlights on raised areas and casting shadows in recessed sections. This interplay gives backsplashes remarkable depth, making walls more dynamic and interesting. The appearance changes throughout the day as lighting shifts, bringing surfaces to life with layers of sophistication that flat tiles cannot match. This added dimension makes kitchens feel more layered, complex, and intentionally designed.
The artisans behind these designs began with the understanding that humans naturally respond to tactile surfaces. Strategic placement maximizes impact while minimizing maintenance concerns – consider installing highly textured tiles behind a range or cooktop, extending up to the hood or ceiling as a feature wall, while using simpler tiles on adjacent areas for a balanced, sophisticated look.
20. The Importance of Sealing Natural Stone Backsplashes
Sealing natural stone backsplashes is absolutely crucial in kitchen environments. Natural stones like marble, granite, travertine, and slate contain varying degrees of porosity – tiny pores that readily absorb liquids. In kitchens, these surfaces face constant exposure to water, oil, sauces, acidic substances, and grease splatter. Without protective sealing, these contaminants penetrate the stone’s pores, causing permanent stains, discoloration, and etching (surface damage from acids, particularly on calcium-based stones like marble). Moisture absorption can also foster mold and mildew growth in damp areas.
Quality stone sealers create protective barriers that prevent or significantly slow absorption of damaging substances. This barrier makes stones easier to clean, providing time to wipe spills before they penetrate and cause damage. Sealing preserves the stone’s original beauty, maintains its color and finish, and extends its lifespan by protecting against daily wear and potential staining. It’s an essential preventative measure that protects your investment and minimizes long-term maintenance challenges. The simple “water test” helps determine when resealing is needed – if water droplets soak into the stone rather than beading on the surface, it’s time to reseal.
For those hesitant about bold patterns but drawn to natural materials, properly sealed stone backsplashes offer the perfect balance – distinctive natural beauty with practical protection against kitchen challenges. Remember that different stones have different porosity levels, requiring varying sealing frequencies, typically every 6-12 months depending on use and exposure.
Conclusion
The kitchen backsplash stands at a unique intersection of form and function, protecting your walls while expressing your personal style. From the timeless appeal of subway tiles to the dimensional drama of textured options, kitchen backsplash tiles offer endless possibilities for transformation. The choices you make – in material, pattern, color, and installation – create a distinctive signature in your home’s most-used space.
What elevates a backsplash from merely functional to truly exceptional is thoughtful consideration of how it integrates with your kitchen’s overall design while meeting your practical needs. Whether you prefer the subtle elegance of coordinated surfaces or the bold statement of contrasting elements, your backsplash can become the defining feature that ties your kitchen together.
As you embark on selecting the perfect kitchen backsplash tiles, remember that this relatively small surface area offers disproportionate impact on your kitchen’s overall look and feel. The right choice creates a space that not only serves your daily needs but brings genuine joy each time you enter. After all, in the heart of the home, beauty and function should always go hand in hand.