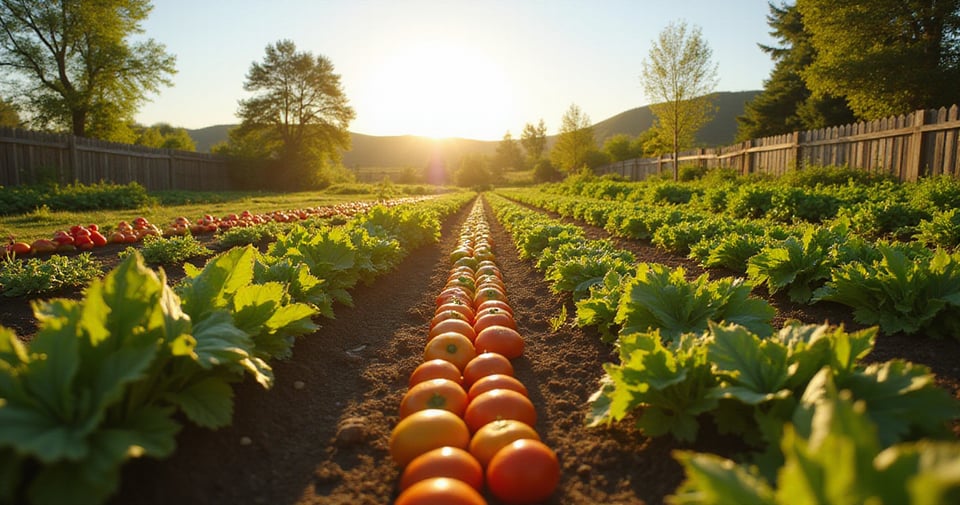
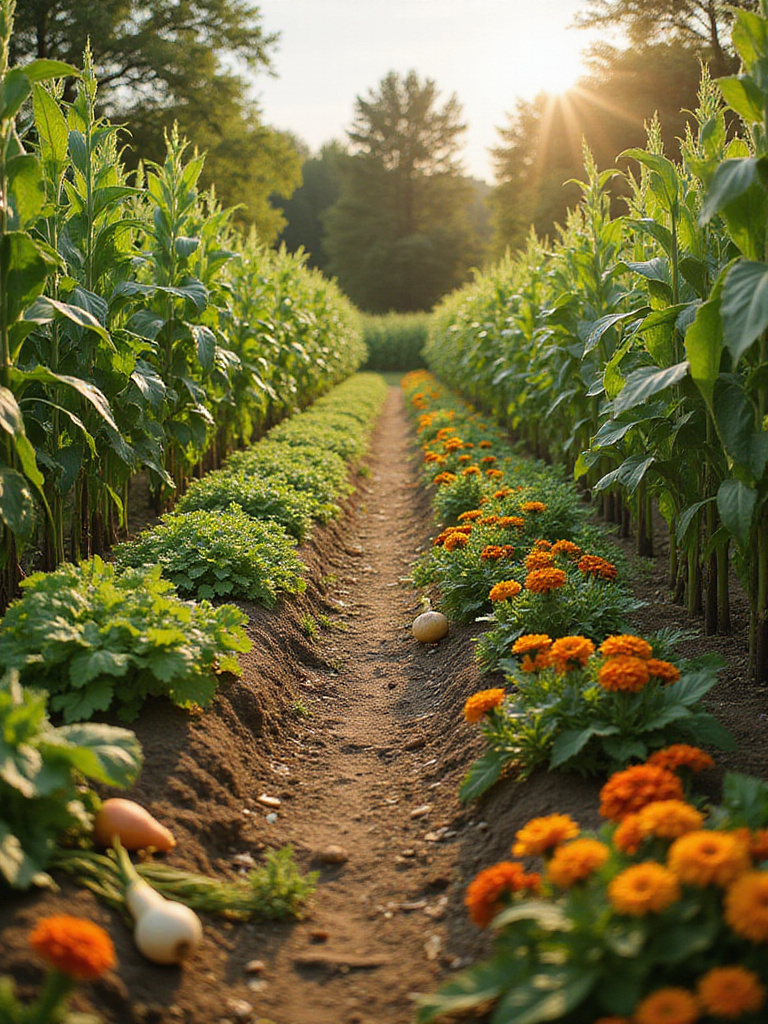
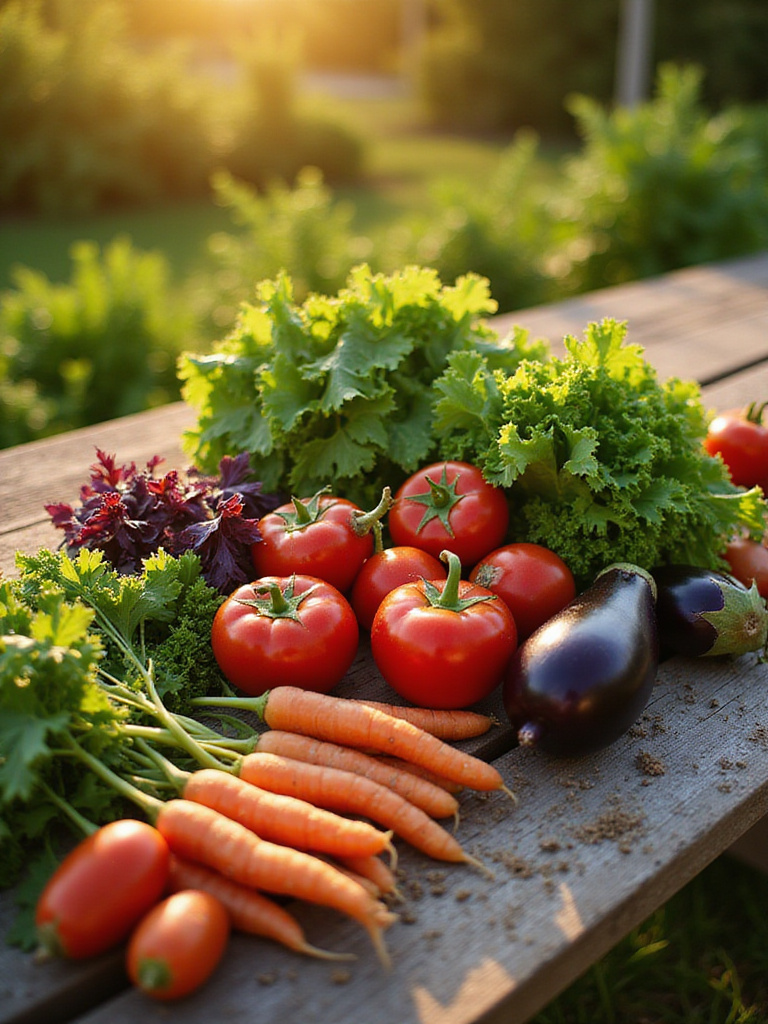
Imagine stepping into your backyard and harvesting sun-ripened tomatoes bursting with flavor, crisp lettuce that melts in your mouth, and fragrant herbs that elevate every dish. That’s the magic of vegetable gardening – a journey that connects you to nature, your food, and a more sustainable lifestyle.
I’ve spent nine years designing lighting systems, but my true passion lies in my backyard garden. Trust me when I say there’s nothing like the satisfaction of growing your own food. Whether you’re a complete novice or looking to refine your techniques, these 24 secrets will transform your garden from struggling to thriving.
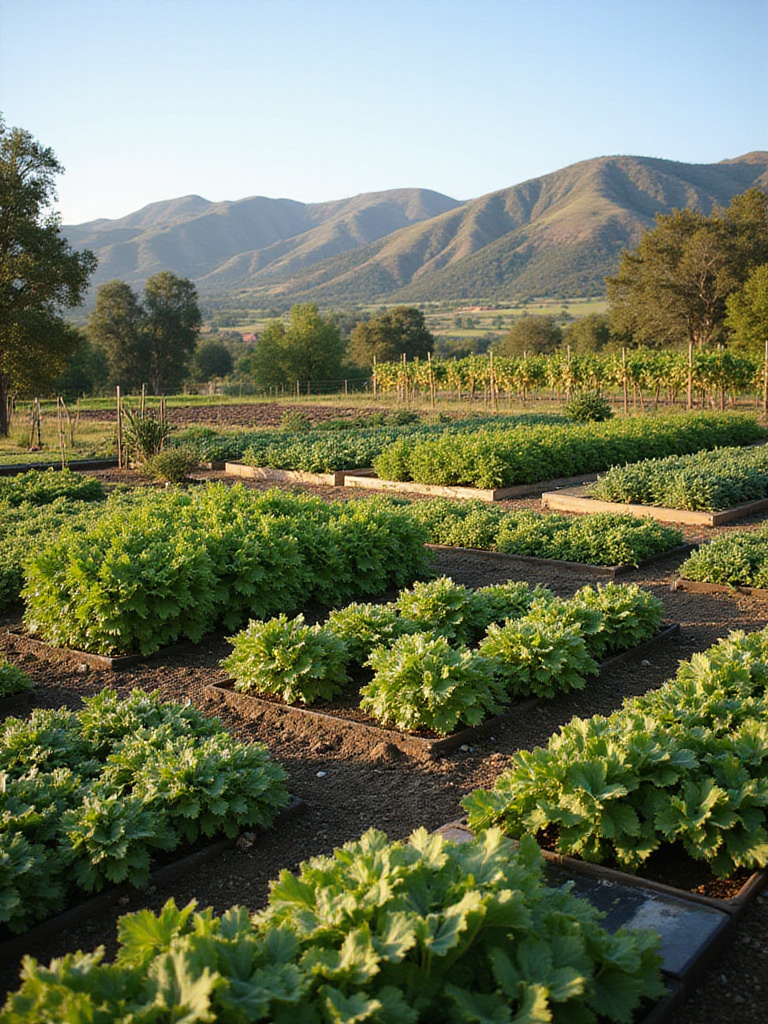
1. Sun-Kissed Success: Choose the Perfect Sunny Spot for Your Veggies
Sunlight is the lifeblood of your veggie patch. Just as we need food to fuel our bodies, plants need sunlight to power photosynthesis – the remarkable process that converts light energy into the sugars they need to grow strong and produce those delicious vegetables we crave. Without enough sunlight, your vegetable garden will struggle, leading to weak, spindly plants and a disappointing harvest.
Most vegetables need at least 6-8 hours of direct sunlight daily. While some leafy greens and root vegetables can tolerate 4-6 hours, sun-loving crops like tomatoes, peppers, and cucumbers demand that full 6-8 hour minimum for optimal fruit production. To determine how much sunlight your potential garden spot receives, observe the area throughout the day, noting when the sun hits and when shade creeps in.
“The difference between a good garden and a great garden often comes down to those extra hours of sunlight.” – My gardening mentor’s words that transformed my approach to site selection.
Here’s the unexpected twist… the quality of your soil matters just as much as sunlight. Let’s dig into what makes soil the foundation of a flourishing vegetable garden.
2. Soil Secrets Revealed: The Foundation of a Flourishing Vegetable Garden
Think of soil as the kitchen and pantry for your plants – it’s where they get all their essential nutrients, water, and air. Healthy soil allows roots to stretch deep and strong, giving plants access to everything they need to thrive. Poor soil, on the other hand, leads to nutrient deficiencies, stunted growth, and plants that are easy targets for pests and diseases.
Good garden soil is a balanced recipe of mineral particles (sand, silt, and clay), organic matter, air, and water. While the ideal ratio varies depending on what you’re growing, a loamy soil with a good balance of all these components is generally the gold standard. Wondering what kind of soil you have? Try the simple “jar test” – fill a jar with soil and water, shake it up, and let it settle for a day. The layers that form will show you the proportions of sand, silt, and clay.
- Perform a soil drainage test by digging a hole 12 inches deep and filling it with water. If it doesn’t drain within 12 hours, your soil needs amendment.
- One teaspoon of healthy garden soil contains more microorganisms than there are people on Earth!
- Create a worm composting bin to generate nutrient-rich compost for your garden.
The heart of the matter is that great soil sets the stage for everything else in your vegetable gardening journey. Now let’s look at how to plan your garden for maximum success without overwhelming yourself.
3. Start Small, Grow Big: Master the Art of Planning Your Vegetable Garden
Starting small in vegetable gardening is your secret weapon against overwhelm. A modest garden is far easier to manage, allowing you to focus on the essentials: nurturing healthy soil, mastering watering techniques, and tackling pest control effectively. This focused attention dramatically increases your chances of a bountiful harvest and builds the confidence you need to expand in future seasons.
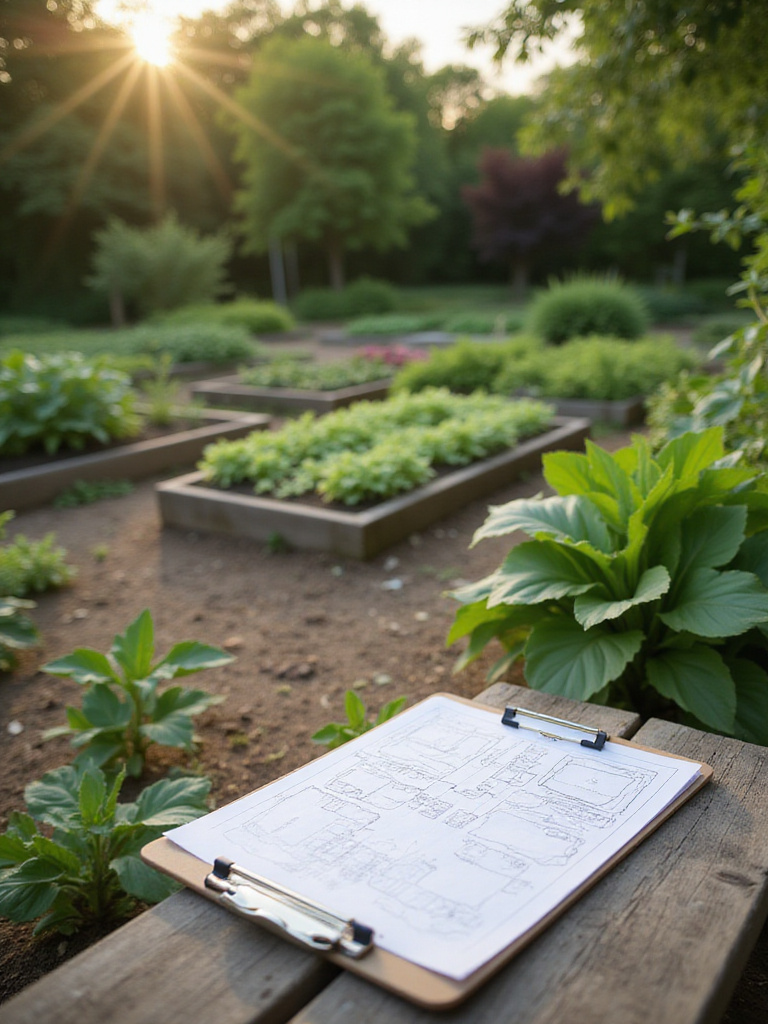
Planning your garden effectively involves several key factors. Sunlight and soil health are paramount, as we’ve discussed. Water access is non-negotiable – think about how you’ll irrigate. Space considerations matter too – choose vegetables that fit your available area. Your local climate plays a major role, so select vegetables that thrive in your region. And finally, grow what you love to eat! Nothing motivates garden care like anticipating your favorite flavors.
The game-changer happened as I mapped out my first successful garden on graph paper. By visualizing the mature size of each plant and planning for companion planting, I avoided the overcrowding mistakes that had plagued my earlier attempts.
What complicates this planning process is knowing which plants will actually thrive in your specific climate zone. Let’s explore how understanding your planting zone can set you up for vegetable gardening success.
4. Know Your Zone, Grow Like a Pro: Understanding Planting Zones for Veggies
Planting zones are essentially maps dividing regions based on their average minimum winter temperatures. These zones are your secret code to successful vegetable gardening because they tell you which plants are most likely to survive and flourish in your specific area. Trying to grow vegetables outside their recommended zone is a risky game that often leads to disappointing results.
Finding your planting zone is easy! The USDA Plant Hardiness Zone Map is the most widely used system – just hop onto their website and enter your zip code. While this map is a great starting point, remember that microclimates within your yard can create warmer or cooler pockets. And keep in mind that planting zones only tell part of the story – they indicate winter temperatures but don’t account for frost dates, growing season length, or summer heat.
- Use row covers or other protective materials to shield sensitive vegetables from frost and extend the growing season
- Create a planting calendar based on your zone and average frost dates
- Remember that south-facing gardens typically receive the most sunlight in the Northern Hemisphere
Picture it this way: your planting zone is like the foundation of a house – essential but not the complete structure. You’ll still need to add walls (proper timing) and a roof (appropriate care) to create a successful vegetable garden. Now let’s look at how starting seeds indoors can give your garden a significant head start.
5. Seed Starting Savvy: Get a Head Start with Indoor Seed Starting
Starting seeds indoors is like giving your vegetable garden a super early head start. It stretches your growing season, meaning you can harvest sooner, especially in regions with shorter summers. It also puts you in the driver’s seat, giving you much more control over the growing environment and shielding delicate seedlings from harsh weather, pests, and diseases.
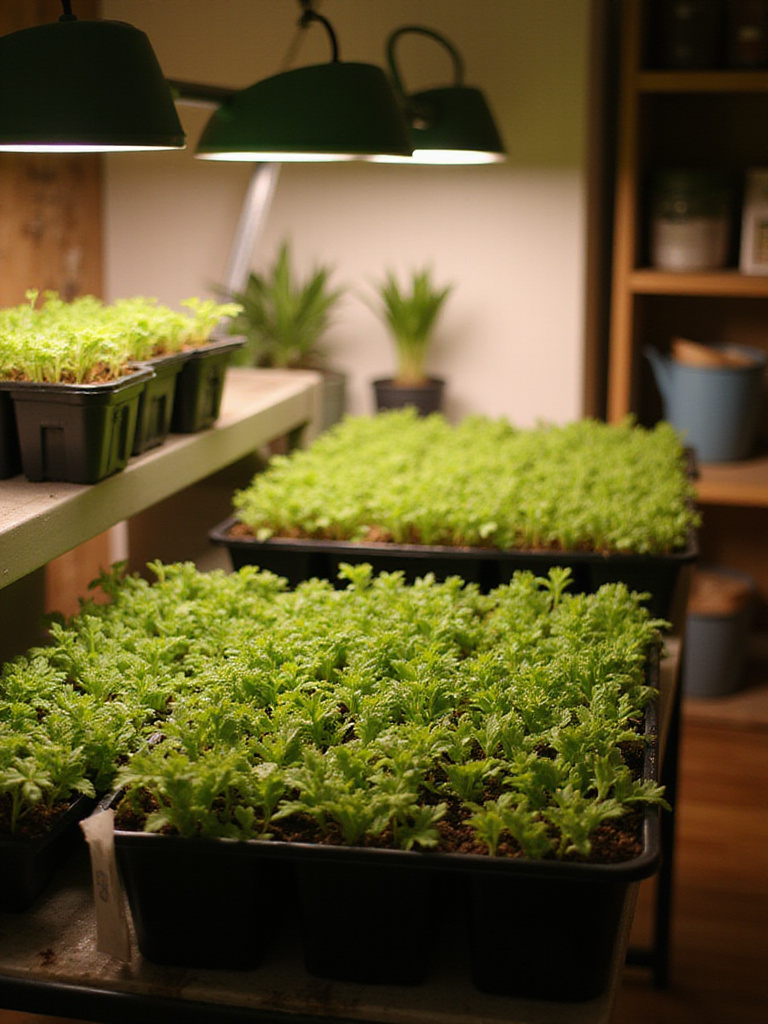
To embark on your indoor seed starting journey, you’ll need a few key supplies: seed starting trays with Drainage Holes, specialized seed starting mix (not garden soil), seeds, a humidity dome, and grow lights. A heat mat is highly recommended to provide gentle bottom heat for germination. Choose a lightweight, sterile seed starting mix that drains well, typically made of peat moss, vermiculite, and perlite. Avoid garden soil, which can compact and harbor diseases.
The breakthrough came when I realized that adequate light was the missing piece in my seed starting setup. Once I invested in proper grow lights positioned just a few inches above my seedlings, they transformed from leggy, weak plants to stocky, vigorous seedlings ready for the garden.
It works something like this: you plant seeds indoors 6-8 weeks before your last frost date, nurture them under grow lights, gradually harden them off, and then transplant them outdoors when conditions are right. But what about vegetables that prefer direct sowing? Let’s explore that technique next.
6. Direct Sowing Demystified: Simple Steps to Planting Seeds Directly Outdoors
Direct sowing is the no-fuss approach to planting – perfect for certain veggies that prefer to be sown straight into their garden home. Root vegetables like carrots, radishes, and beets don’t transplant well and are prime candidates for direct sowing. Leafy greens, beans, peas, corn, and squash also thrive when directly sown. Always consider your local climate and growing season when selecting varieties.
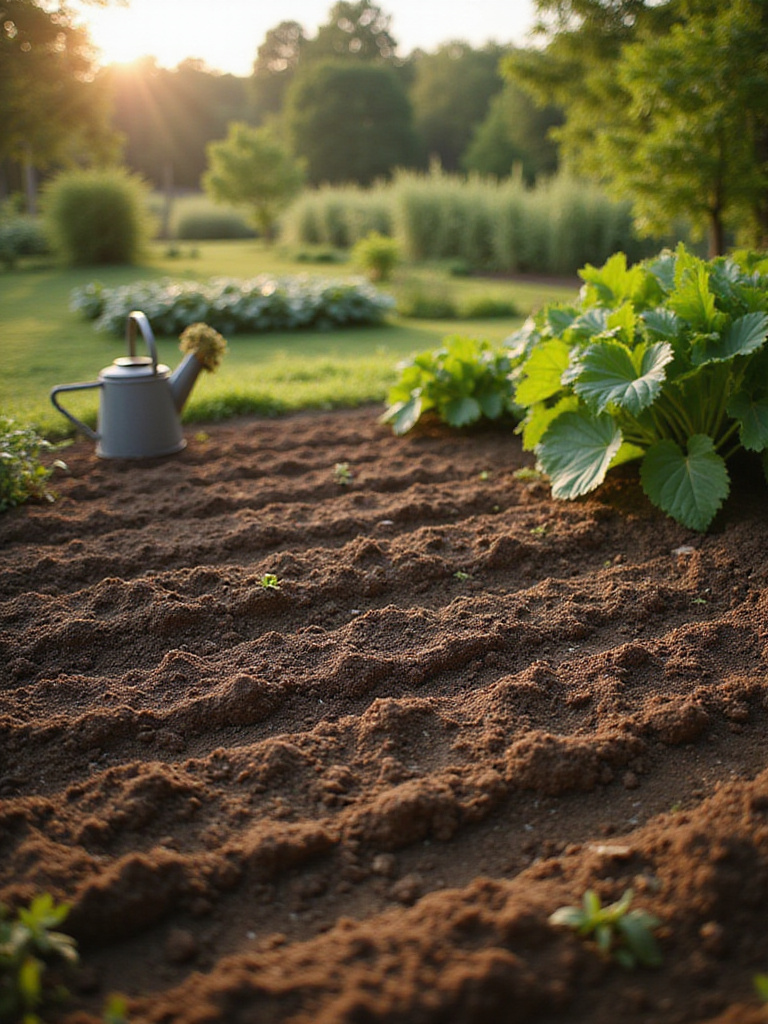
Preparing the soil for direct sowing is crucial for success. Clear the area of weeds and debris, loosen the soil to a depth of at least 6-12 inches, and incorporate compost to boost fertility. Rake the soil smooth to create a fine seedbed and water thoroughly before planting. Consult the seed packet for specific planting depth and spacing instructions – generally, plant seeds at a depth two to three times their diameter. After sowing, consider using row covers to protect seedlings from birds and insects.
- Use a dibber or pencil to create evenly spaced holes for planting seeds at the correct depth
- Some seeds require light to germinate and should only be pressed gently into the soil surface
- Create a planting calendar to track sowing dates for different vegetables
The stumbling block is that even perfectly sown seeds need proper watering to thrive. Let’s dive into the wisdom behind hydrating your vegetable garden the right way.
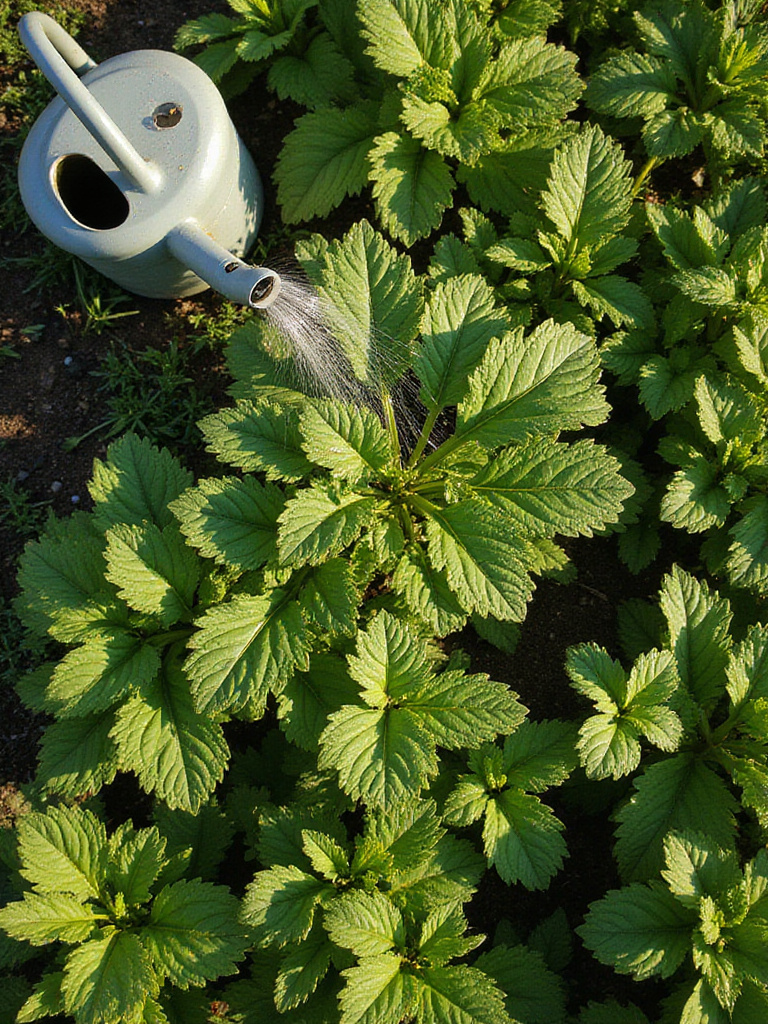
7. Watering Wisdom: The Right Way to Hydrate Your Vegetable Garden
Water needs vary dramatically based on the vegetable type, growth stage, soil, and weather. A general rule is about 1 inch of water per week from rain or irrigation for most veggies. Leafy greens are thirstier than drought-tolerant tomatoes, while seedlings need consistent moisture compared to mature plants that can handle drier spells. The best way to know if your plants need water? Stick your finger a couple of inches into the soil – if it feels dry, it’s time to water.
Early morning is the golden hour for watering your vegetable garden. This allows foliage to dry before nightfall, reducing the risk of fungal diseases. Evening watering is generally discouraged due to leaves staying wet overnight, creating a haven for pathogens. Drip irrigation is often the most efficient watering method, delivering water directly to roots and minimizing evaporation. Soaker hoses work similarly, while overhead sprinklers, though convenient, can increase disease risk.
Do you see how huge that is? Proper watering makes the difference between struggling plants and a thriving vegetable garden. Using mulch around your plants helps retain moisture in the soil and reduces evaporation – a simple step with significant impact.
You might be wondering about another common garden challenge – weeds. Let’s address how to become a weed warrior, conquering unwanted growth and protecting your precious veggies.
8. Weed Warriors Unite: Conquer Weeds and Protect Your Veggies
Weeds are more than just unsightly – they’re resource thieves, competing with your vegetable plants for sunlight, water, and precious nutrients. This competition can seriously stunt your veggies’ growth and slash your harvest. Some weeds even release chemicals that inhibit the growth of nearby plants – talk about unwelcome neighbors!
Prevention is your best defense against weeds. Start with clean soil, removing existing weeds and their roots before planting. Mulching is a powerhouse strategy – it blocks sunlight from weed seeds, stopping them from germinating. For manual weeding, hand-pulling is ideal for young weeds or those with shallow roots, while a hoe or weeding tool lets you tackle larger weeds. Always remove the entire root system to stop regrowth, and weeding after rain is easiest when the soil is moist.
“The best time to pull a weed is the first time you see it.” This simple advice from my grandfather has saved me countless hours of garden maintenance over the years.
The tricky part is that even a weed-free garden can face another challenge – pests. Let’s learn how to become pest patrol pros, using natural methods for a healthy vegetable gardening harvest.
9. Pest Patrol Power: Natural Pest Control for a Healthy Harvest
Choosing natural pest control methods protects not only your vegetables but also the delicate balance of your garden ecosystem. Natural methods avoid the harmful effects of synthetic pesticides on beneficial insects, soil health, and even human health. They encourage a thriving ecosystem, leading to a healthier and more sustainable vegetable gardening experience in the long run.
Identifying specific pests is the first step to effective control. Common culprits include aphids (which suck sap, causing distorted growth), cabbage worms (leaf devourers), squash bugs (sap suckers that cause wilting), tomato hornworms (leaf-eating machines), and slugs and snails (which munch on leaves and seedlings). Attracting beneficial insects by planting flowers like dill, fennel, yarrow, and marigolds creates a natural defense system. These flowers provide nectar and pollen for ladybugs, lacewings, and parasitic wasps that feast on common garden pests.
- Handpick visible pests like tomato hornworms
- Try insecticidal soap for soft-bodied insects (mix 1-2 tablespoons of liquid dish soap with 1 gallon of water)
- Create a “pest patrol” border using insect-repelling herbs and flowers
- Did you know? Ladybugs can consume up to 50 aphids per day!
It’s similar to creating a neighborhood watch program for your garden – beneficial insects patrol and protect your precious vegetables. Now let’s explore how to nourish your plants with proper fertilizing techniques.
10. Fertilizing Fundamentals: Nourish Your Veggies for Maximum Growth
Unlike many ornamental plants, vegetables are heavy feeders – they demand significant nutrients to produce abundant and flavorful yields. The soil in your garden, especially after repeated harvests, may not naturally contain enough essential elements. Fertilizing replenishes these nutrients, ensuring healthy growth, strong root development, and plentiful fruit production. Without adequate fertilization, your plants can become stunted and produce smaller, less flavorful crops.
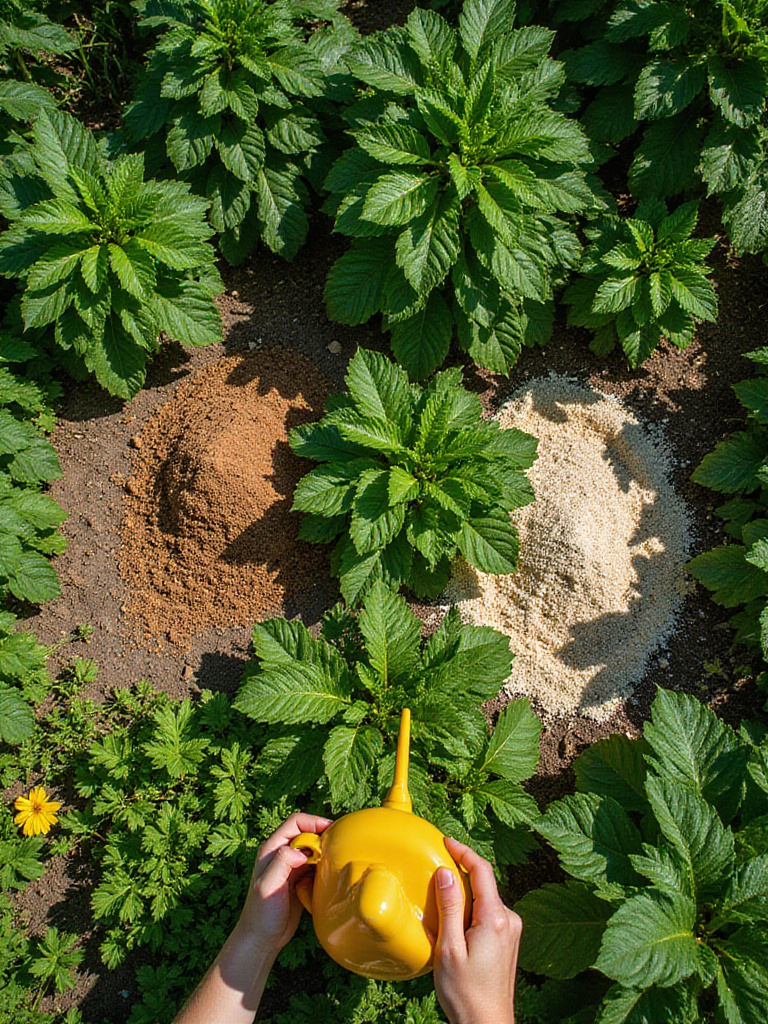
The power trio of nutrients is Nitrogen (N), Phosphorus (P), and Potassium (K), often displayed as the N-P-K ratio on fertilizer labels. Nitrogen promotes leafy green growth, phosphorus supports root development and fruit production, and potassium boosts overall plant health and disease resistance. Beyond these macronutrients, vegetables also need micronutrients like calcium, magnesium, iron, and zinc, though in smaller amounts, often found in healthy soil or supplemented by compost.
Think of it as providing a balanced diet for your plants – just as humans need various nutrients to thrive, so do your vegetables. Compost tea (made by steeping compost in water) offers a gentle, nutrient-rich boost that won’t burn plants like some chemical fertilizers might.
Let me paint you a picture of another way to maximize your vegetable gardening success – using vertical space to grow more in less area.
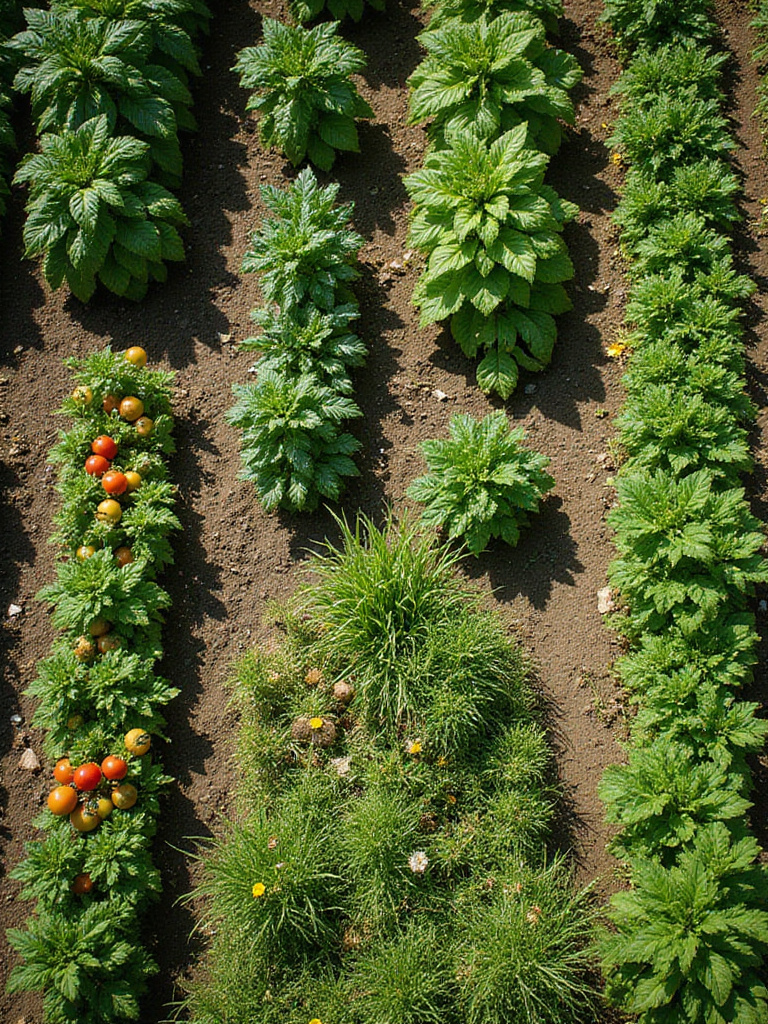
11. Trellis Tales: Vertical Growing for Space-Saving Vegetable Gardens
Vertical gardening is a game-changer, especially for smaller gardens, balconies, or patios. It’s all about maximizing space utilization, allowing you to grow more in less area. Vertical structures improve air circulation around plants, reducing the risk of fungal diseases. They also increase sunlight exposure, leading to better yields, while making harvesting easier and keeping fruits and vegetables cleaner by lifting them off the ground.
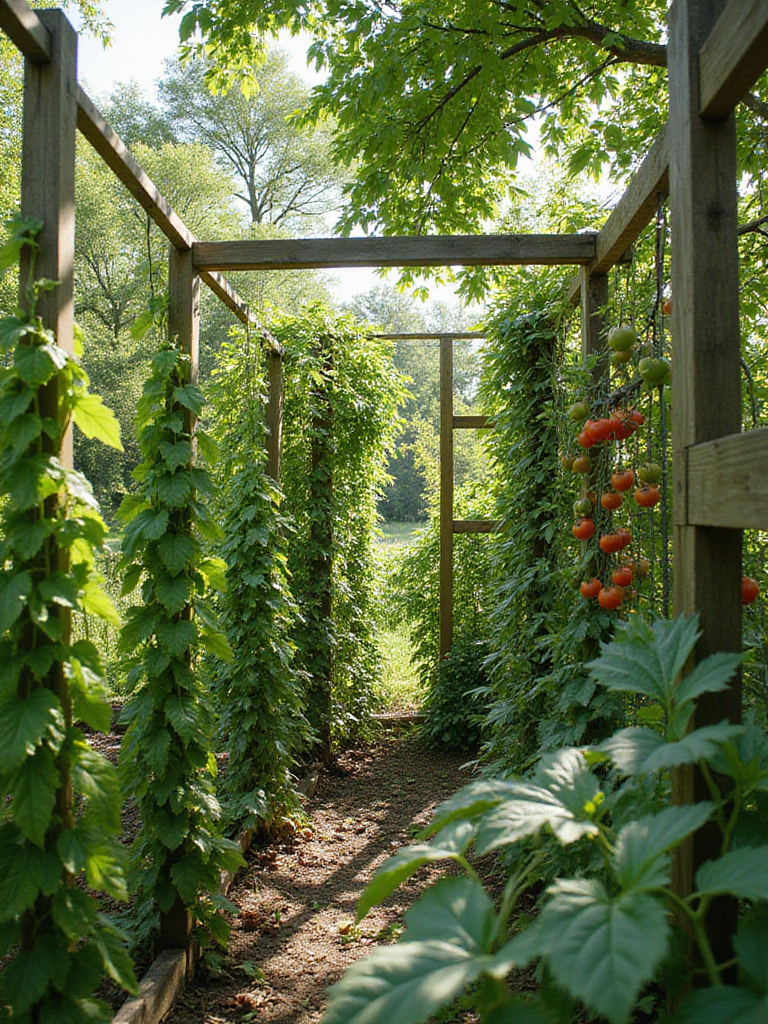
Vining vegetables are natural climbers! Tomatoes (especially indeterminate varieties), cucumbers, peas, beans, smaller squash varieties, and even some melons can thrive on trellises. Consider the plant’s weight and growth habit when choosing a trellis. A-frames and teepees are great for peas and beans, while sturdy fences or wall-mounted trellises are ideal for heavier plants like tomatoes and squash. Ensure the trellis is strong enough to support the plant, especially when laden with fruit.
- To build a simple A-frame trellis, cut two long pieces of wood and lean them against each other in an ‘A’ shape
- Vertical gardening dates back to ancient civilizations, with examples found in the Hanging Gardens of Babylon
- Try creating a living wall using a trellis covered in climbing vegetables for a beautiful and functional garden feature
The ripple effects are enormous when you start thinking three-dimensionally about your vegetable garden. But there’s another dimension to consider – the relationships between different plants. Let’s explore the magic of companion planting.
12. Companion Planting Magic: Boost Your Garden with Plant Partnerships
Companion planting is the art of strategically placing different plant species together to create mutually beneficial relationships. These benefits range from pest control and improved pollination to enhanced growth and better space utilization. Some plants naturally repel pests that plague others, some attract beneficial insects, some provide shade or support, and others improve soil conditions.
The “Three Sisters” (corn, beans, and squash) is a legendary Native American example – corn provides support for beans, beans fix nitrogen in the soil, and squash suppresses weeds and retains moisture. Tomatoes and basil are another power couple – basil repels tomato hornworms and enhances tomato flavor. Carrots and onions work well together as onions deter carrot root flies while carrots deter onion flies. However, not all plants play nicely together. Fennel inhibits the growth of most vegetables, cabbage family plants and strawberries clash, and onions and garlic can stunt beans and peas.
My discovery began when I planted marigolds around my tomato plants. Not only did they add cheerful color to my vegetable garden, but I noticed fewer pest problems and stronger tomato growth – a simple companion planting success that convinced me of its value.
This changes everything, doesn’t it? The way we arrange plants can dramatically impact their health and productivity. Now let’s explore another revolutionary practice – crop rotation – for healthy soil and happy plants year after year.
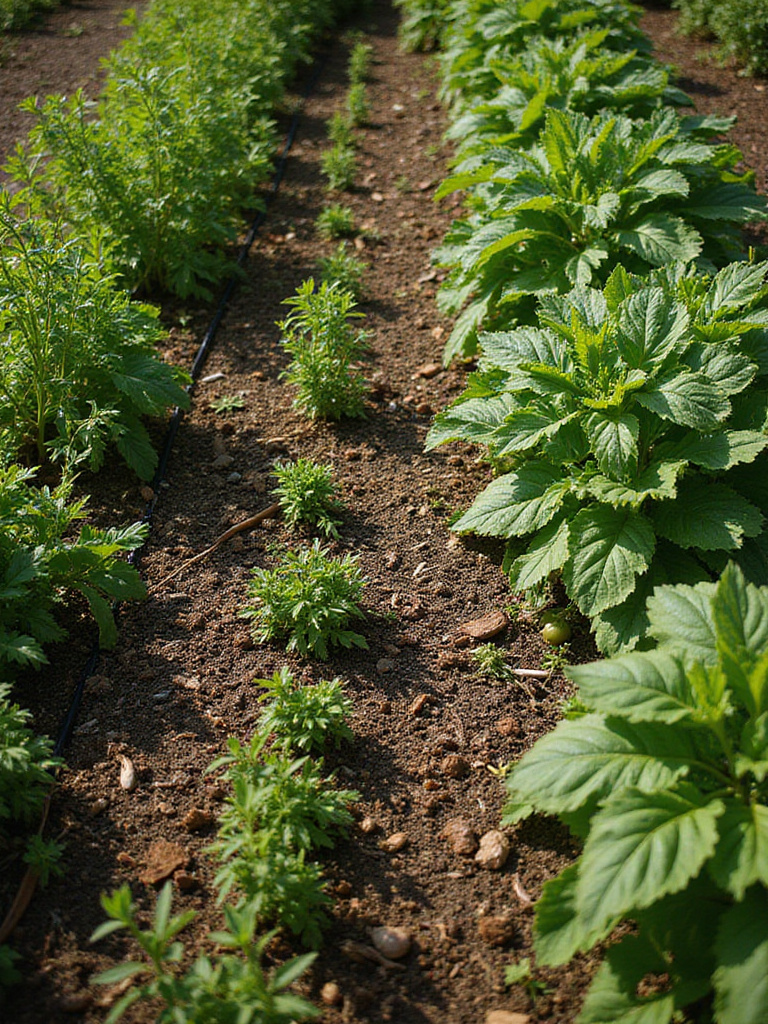
13. Crop Rotation Revolution: Healthy Soil, Happy Plants, Year After Year
Crop rotation is simply planting different families of vegetables in a specific sequence in the same garden bed each year. It’s a cornerstone of healthy vegetable gardening because it prevents soil depletion, breaks pest and disease cycles, improves soil structure, and can even boost yields. Different plants have different nutrient needs and attract different pests, so rotating them prevents the same nutrients from being constantly drained and stops pests from building up in the soil.
Planning involves understanding the nutrient needs of different vegetable families and grouping them accordingly. A common approach is to rotate between heavy feeders (like tomatoes, corn, squash), light feeders (leafy greens, root vegetables), and soil builders (legumes, which fix nitrogen). Ideally, aim for a 3-4 year rotation cycle. A simple 4-year rotation could be: Year 1: Legumes; Year 2: Heavy Feeders; Year 3: Root Vegetables; Year 4: Leafy Greens/Brassicas.
- Keep a detailed garden journal to track what you planted where
- Crop rotation has been practiced for centuries, dating back to ancient civilizations
- Create a visual crop rotation map of your garden beds to easily track your planting schedule
Here’s where it gets interesting – you can further maximize your harvest by implementing succession planting, ensuring a continuous supply of fresh vegetables throughout the season.
14. Succession Planting Secrets: Extend Your Harvest All Season Long
Succession planting is the clever strategy of staggering plantings of the same or different crops over weeks or months to ensure a continuous harvest throughout the growing season. Instead of planting everything at once and facing a glut of produce at one time, you plant in intervals. This prevents a harvest bottleneck and provides a steady stream of fresh vegetables for longer. It also maximizes garden space and can reduce pest and disease pressure by avoiding large, concentrated plantings.
Different methods of succession planting include direct sowing seeds at intervals (every 2-3 weeks), transplanting seedlings at intervals, intercropping fast-growing crops between rows of slower-growing ones, and relay cropping (planting a new crop before the previous one finishes). Vegetables with quick maturity and short harvest windows are ideal candidates: leafy greens, root vegetables, herbs, bush beans, summer squash, and sweet corn planted in blocks every 2 weeks will provide ongoing harvests.
The surprising part is how simple yet effective this technique can be. By planting just a few lettuce seeds every week rather than an entire row at once, I enjoy fresh salads for months instead of having too much at once followed by nothing.
Let me show you another perspective that can dramatically improve your vegetable gardening success – the magic of mulching for weed control and moisture retention.
15. Mulch Mania: The Must-Do for Weed Control and Moisture Retention
Mulch is a layer of material spread on the soil surface around your plants, and it’s a vegetable garden superhero. It suppresses weeds by blocking sunlight, conserves moisture by reducing evaporation, regulates soil temperature, prevents soil erosion, and organic mulches even add nutrients as they decompose. This simple practice can dramatically reduce your workload while improving plant health.
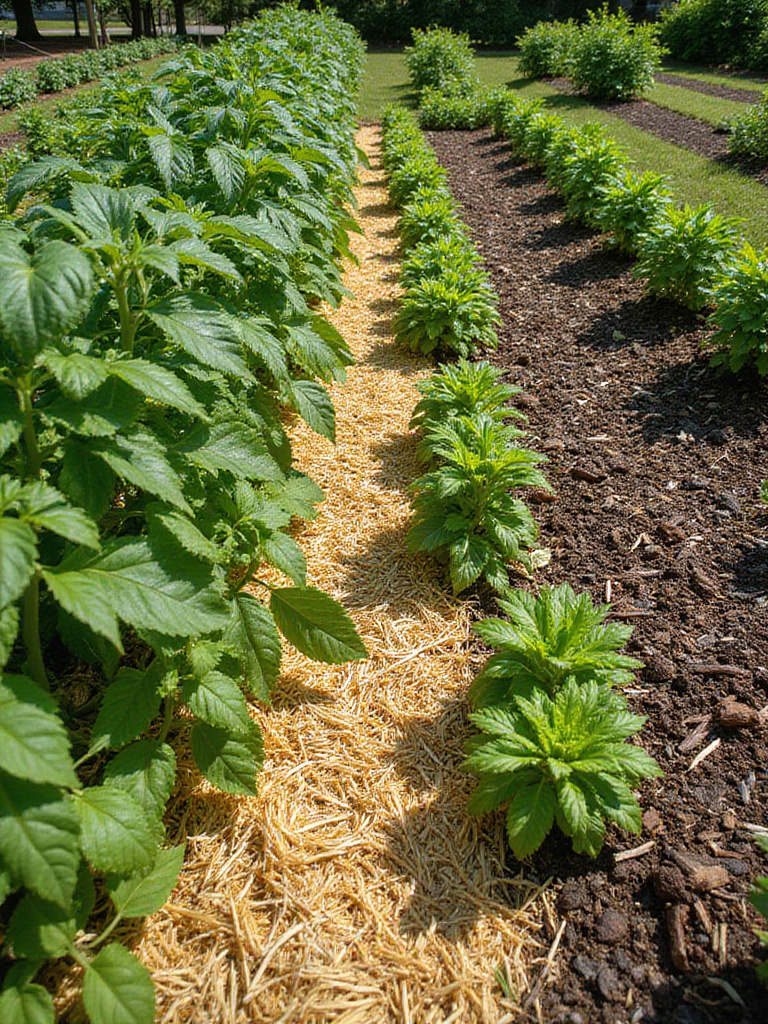
Organic mulches like straw, wood chips, shredded leaves, grass clippings, compost, and pine needles decompose over time, enriching soil and improving structure. They attract beneficial insects but need replenishing periodically. Inorganic mulches like plastic sheeting, landscape fabric, and gravel don’t decompose and last longer. They effectively control weeds and retain moisture but don’t improve soil quality. For most vegetable gardens, a 2-4 inch layer of organic mulch is ideal, applied after planting and after soil warms in spring.
“The day I started using mulch consistently was the day my vegetable gardening workload was cut in half. Less watering, fewer weeds, healthier plants – it’s as close to a miracle as you’ll find in gardening.” – My personal revelation after years of resistance.
Before you mulch, thoroughly weed your garden bed to prevent existing weeds from spreading underneath. Now let’s move on to the exciting moment every gardener anticipates – harvest time – and learn the hints for knowing exactly when to pick your ripe veggies.
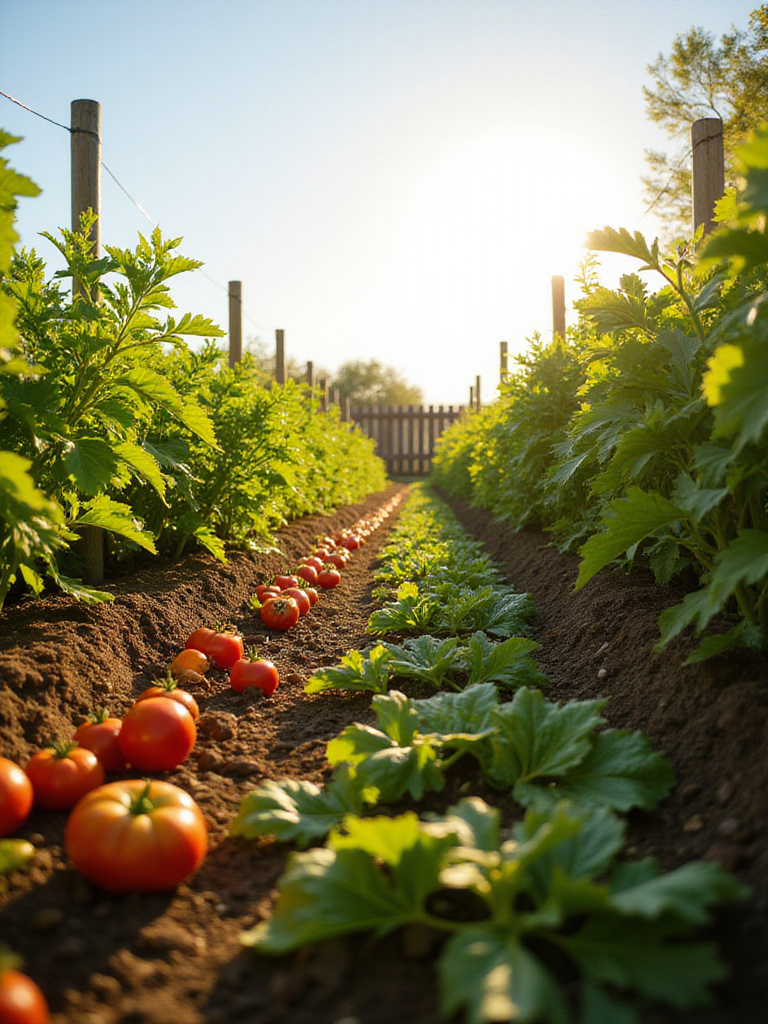
16. Harvesting Hints: Know Exactly When to Pick Your Ripe Veggies
Harvesting at peak ripeness is crucial for the best flavor, texture, and nutritional value in your vegetable gardening efforts. Picking too early results in bland, underdeveloped produce, while harvesting too late can lead to tough, overripe, or even spoiled vegetables. Correct timing also encourages continued production in many vegetables, signaling the plant to keep flowering and fruiting.
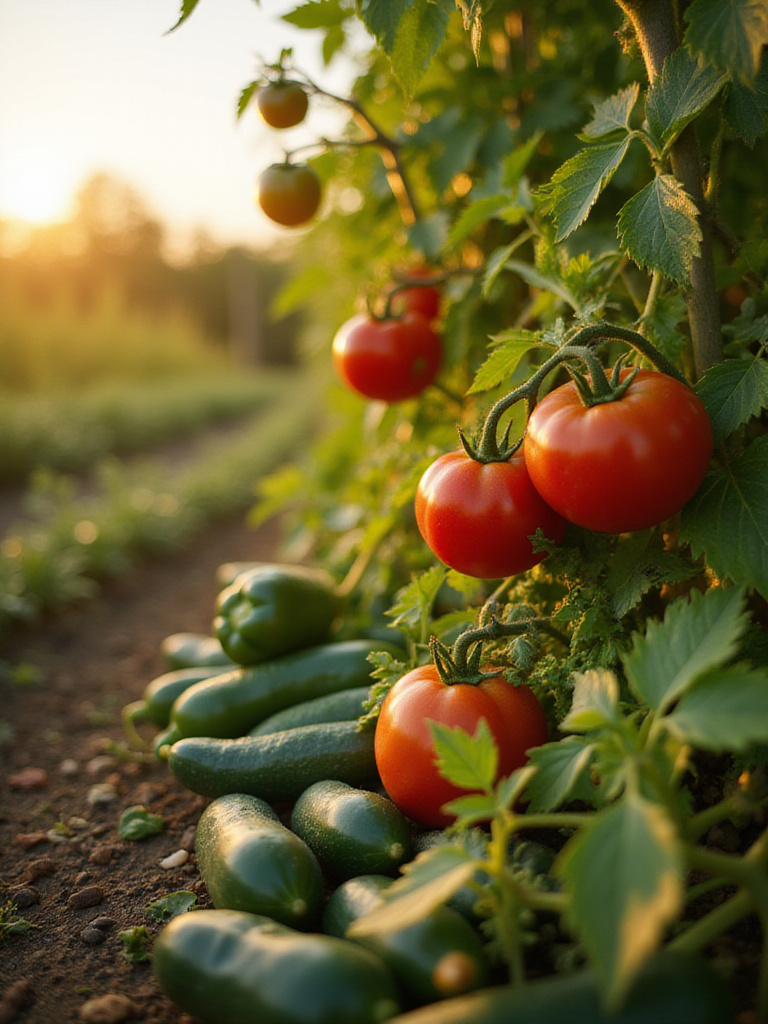
Each vegetable has its ripeness cues. Tomatoes should be deeply colored, slightly soft, and detach easily from the vine. Peppers should be fully colored, firm, and have a slight sheen. Cucumbers should be deep green (unless a different variety), firm, and the right size for the variety – overripe ones turn yellow and seedy. Zucchini should have shiny skin, be relatively small (6-8 inches), and firm. Green beans should have plump, firm pods that snap easily. Lettuce leaves should be harvested before bolting, and root vegetables are ready when they reach the desired size and color.
- For vegetables that ripen gradually (like tomatoes and peppers), harvest regularly to encourage continued production
- The color of a tomato is determined by different pigments, such as lycopene (red) and beta-carotene (orange)
- Create a “Harvest Calendar” specific to your garden, noting expected harvest times for each vegetable
Things took an interesting turn when I realized that having the right tools makes vegetable gardening significantly easier and more enjoyable. Let’s explore the essential gear that every gardener should have.
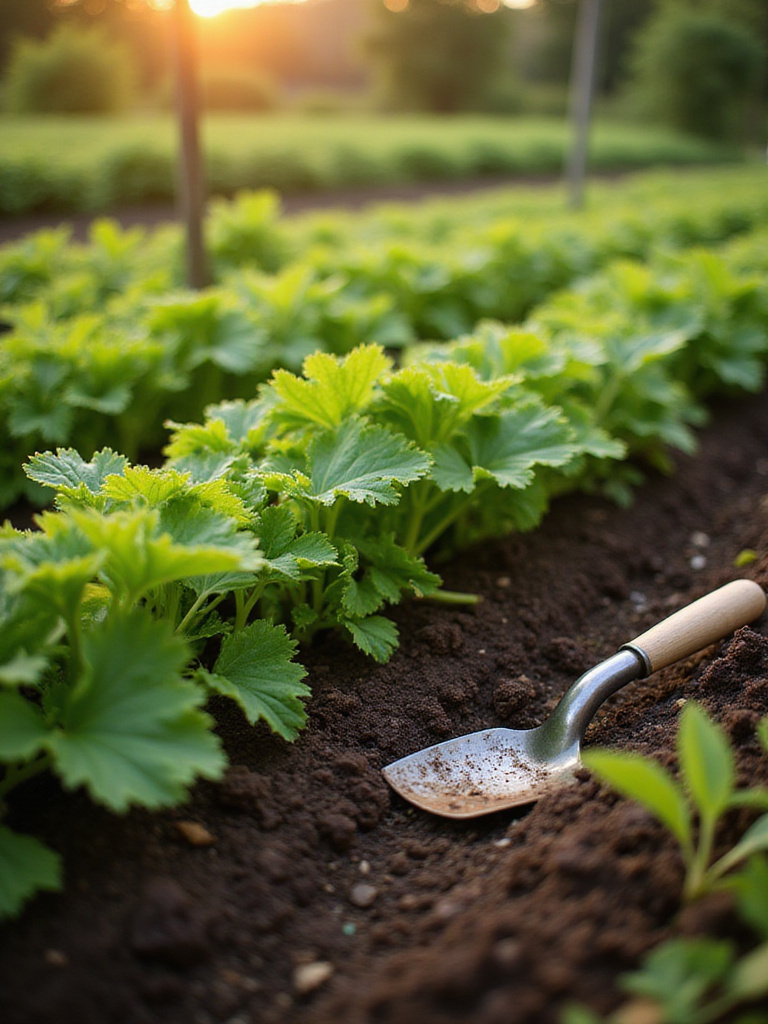
17. Tools of the Trade: Essential Gear for Every Vegetable Gardener
A solid set of essential tools is your foundation for vegetable gardening success. You’ll need a sturdy garden trowel for planting and transplanting, a hand fork for loosening soil and weeding, a gardening knife or hori hori for tasks like cutting twine and dividing plants, a watering can or hose with an adjustable nozzle, and gardening gloves to protect your hands. A wheelbarrow or garden cart is also invaluable for moving soil, compost, and plants.
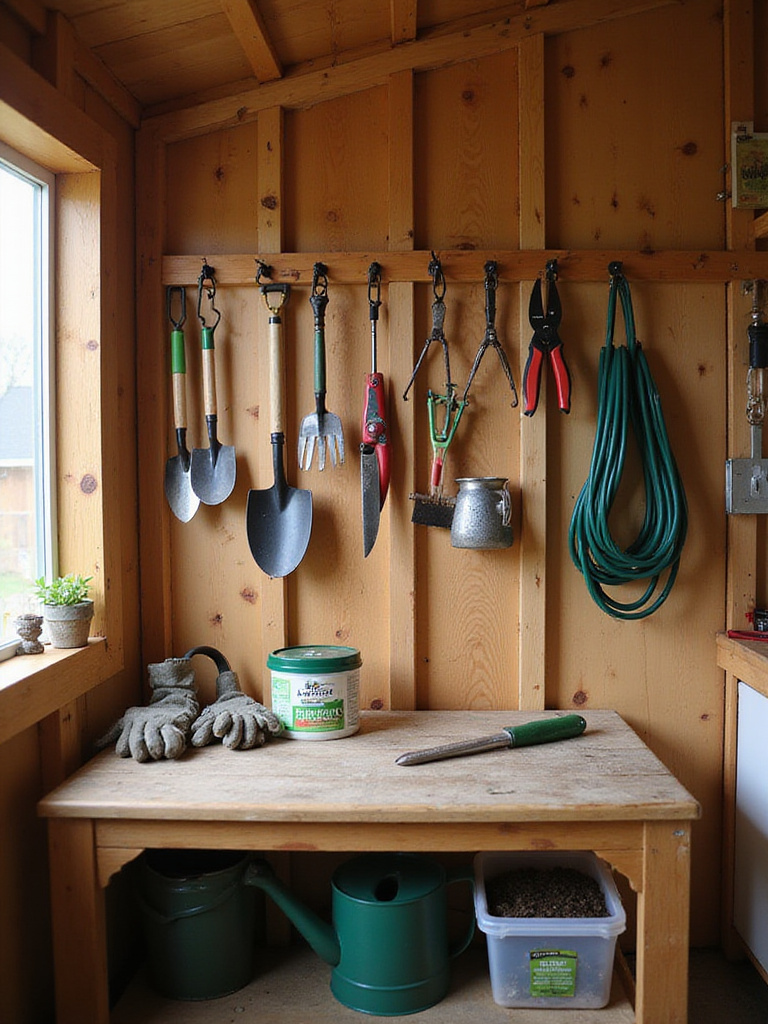
Beyond the basics, consider specialized tools for specific needs. A soil testing kit helps understand soil pH and nutrients. A garden hoe is essential for weeding large areas. A broadfork aerates compacted soil without inverting it. Trellis systems and plant supports are vital for vining vegetables. And a good pair of pruning shears is crucial for plant maintenance. Proper tool care ensures longevity – clean tools after each use, dry them thoroughly to prevent rust, sharpen cutting edges regularly, and store them in a dry location.
The implications are staggering when you consider how much time and effort quality tools can save you. Creating a designated tool storage area keeps everything organized and easily accessible, preventing the frustration of searching for tools when you need them.
But what if you don’t have much space for a traditional vegetable garden? Let’s explore how container gardening allows you to grow vegetables even in limited areas.
18. Container Gardening Craze: Grow Veggies Even in Small Spaces
Many vegetables thrive in containers! Leafy greens, herbs, determinate tomatoes, peppers, dwarf eggplant, radishes, bush beans, strawberries, and bush cucumbers are all excellent choices for container vegetable gardening. This approach is perfect for patios, balconies, or anywhere traditional garden space is limited.
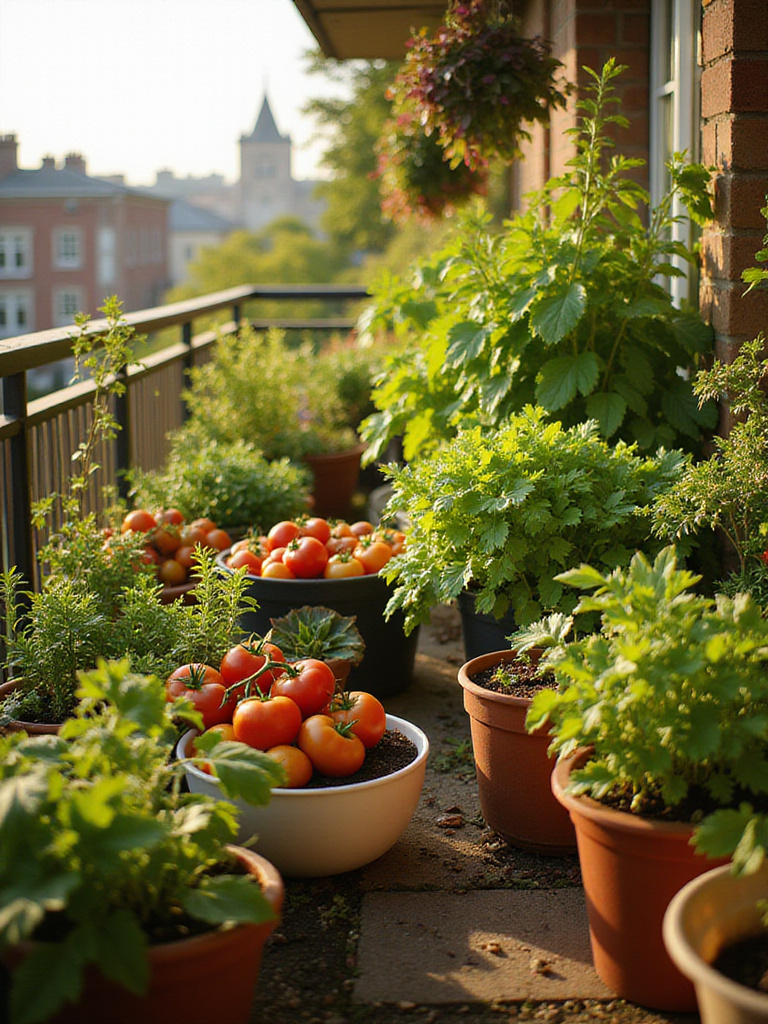
When choosing containers, size matters – they must be large enough for mature roots. Larger plants need larger containers, as insufficient space restricts growth. Drainage is essential to prevent root rot, so ensure your containers have drainage holes. Material options include plastic (lightweight, moisture-retaining), terracotta (breathable but dries quickly), wood, and fabric pots (excellent drainage and aeration). Container color also matters – dark colors absorb heat (good in cool climates, bad in warm ones), while light colors reflect heat.
- Choose a high-quality potting mix specifically formulated for containers, not garden soil
- Container gardening dates back to ancient times, with evidence found in ancient Egypt and Rome
- Try vertical container gardening using stacked planters or hanging baskets to maximize space
You could compare it to apartment living versus a house – both can be comfortable and productive, but they require different approaches. For those ready to take container gardening to the next level, let’s explore more vertical gardening ventures.
19. Vertical Gardening Ventures: Maximize Yield in Minimal Footprint
Vertical gardening maximizes yield per square foot, making it ideal for urban spaces, balconies, and small yards. Beyond space efficiency, it improves air circulation (reducing fungal diseases), elevates plants for easier harvesting and maintenance, and adds visual appeal to your vegetable garden. It’s a strategy that transforms limitations into advantages.
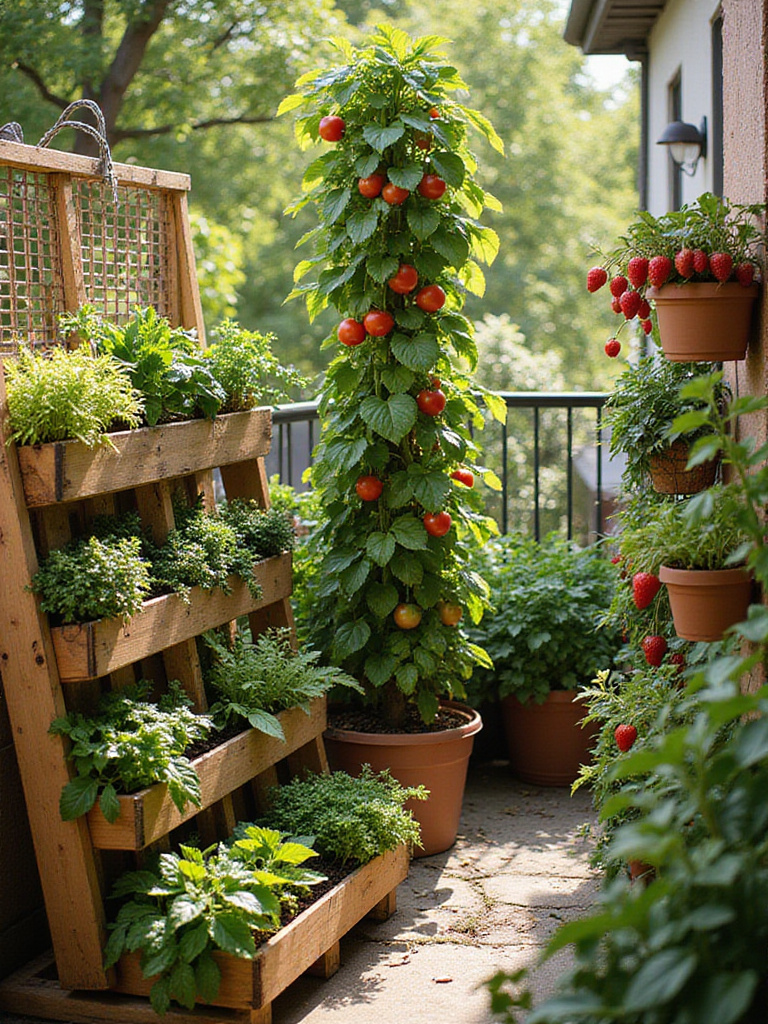
Leafy greens, herbs, determinate tomatoes, cucumbers, beans, peas, and strawberries all thrive in vertical systems. The structure you choose matters too – trellises work for climbing plants, stackable planters suit herbs and leafy greens, pallet gardens offer a rustic look, hanging baskets work for smaller plants, and living walls create stunning visual impact. Always choose a sunny location that receives at least 6 hours of direct sunlight per day for most vegetables in your vertical garden.
My breakthrough came when I transformed an old wooden ladder into a tiered planting system. By placing pots on each step and training vining plants up strings attached to the wall, I doubled my growing space in a narrow side yard – a vertical vegetable gardening solution that was both functional and attractive.
The potential here is enormous for space-challenged gardeners. But even the most well-designed garden can face challenges from plant diseases. Let’s learn to be disease detectives, spotting and preventing common vegetable garden problems.
20. Disease Detectives: Spot and Prevent Common Vegetable Garden Diseases
Common vegetable garden diseases include fungal culprits like powdery mildew (white spots), early blight (dark spots with rings on tomatoes/potatoes), late blight (irregular water-soaked spots), and downy mildew (yellow spots with downy growth). Bacterial diseases include bacterial speck (tiny black spots on tomatoes) and bacterial wilt (sudden wilting). Viral diseases cause stunted growth and distorted fruit. Regular plant inspection is key – use a magnifying glass to examine leaves closely.
Prevention is paramount in disease management. Choose disease-resistant varieties when possible. Practice crop rotation to prevent pathogen buildup. Ensure good air circulation by properly spacing plants and pruning dense foliage. Water at the base to avoid wetting leaves, which can spread fungal spores. Mulch to prevent soil splash, remove weeds and debris promptly, and sanitize tools with a bleach solution (1:9 bleach:water). When treatment is necessary, copper-based fungicides, neem oil, and baking soda sprays can help with fungal diseases, especially when applied early.
- Make a simple baking soda spray for powdery mildew: mix 1 tablespoon of baking soda and 1 teaspoon of liquid soap in 1 gallon of water
- Some plants, like marigolds, have antifungal properties that can help suppress certain soilborne diseases
- Keep a “disease detective” garden journal to document observations and treatments
The crucial element is catching problems early – most plant diseases are much easier to manage when identified at the first signs of trouble. Now let’s consider how to adapt your vegetable garden to your local weather conditions.
21. Climate Control Considerations: Adapting Your Garden to Your Weather
Understanding your local climate’s impact on vegetable gardening starts with knowing your USDA Plant Hardiness Zone, which indicates minimum winter temperatures. Consider microclimates created by sun exposure, wind patterns, soil conditions, and elevation differences in your yard. Local weather patterns like rainfall, humidity, and summer temperatures are crucial factors too. This knowledge helps you choose suitable varieties and implement appropriate climate control strategies.
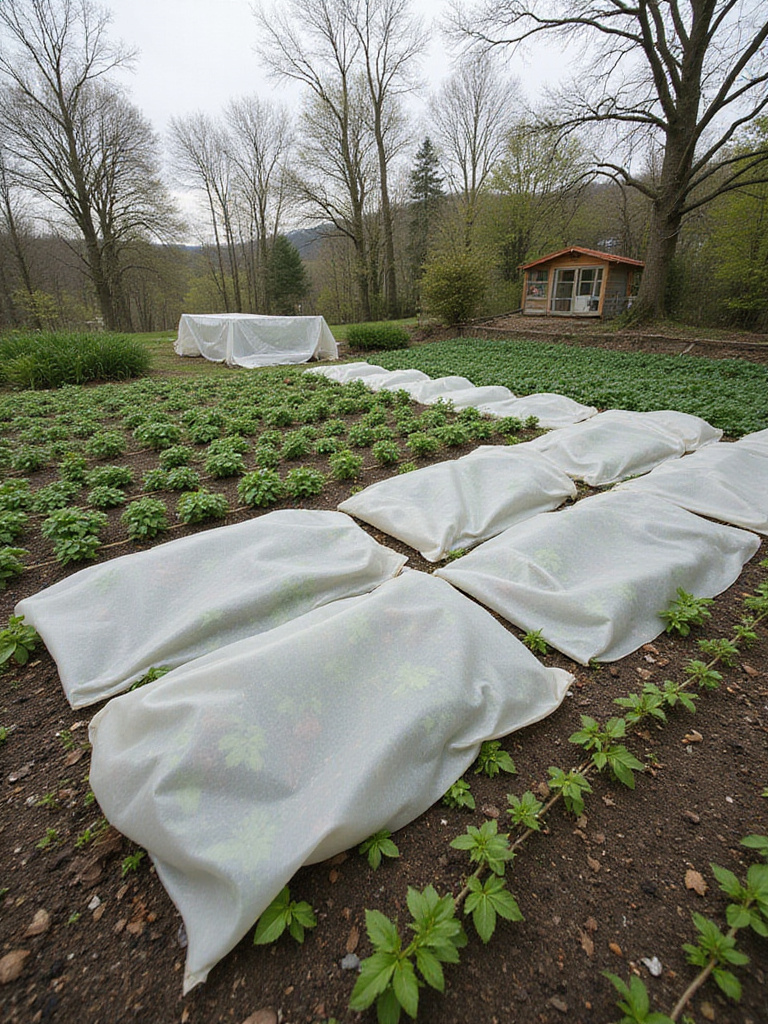
Common climate challenges can be addressed with specific techniques. For short growing seasons, use row covers, cold frames, or greenhouses, start seeds indoors, and choose fast-maturing varieties. In extreme heat, provide shade cloth, water deeply, and mulch heavily. For frost protection, use frost blankets, cloches, or deep watering before frost. In areas with excessive rain, improve drainage with compost and raised beds, and choose disease-resistant varieties. During drought, select drought-tolerant varieties, implement drip irrigation, mulch thoroughly, and collect rainwater.
The microclimate around a south-facing wall can be significantly warmer than surrounding areas, allowing you to grow plants typically suited for warmer zones. This kind of knowledge can dramatically expand your vegetable gardening options.
Let that sink in for a moment – by understanding and working with your climate rather than fighting against it, you can dramatically improve your garden’s success. Another way to adapt to your specific conditions is by saving seeds from plants that have thrived in your garden.
22. Seed Saving Strategies: Preserve Your Favorite Varieties for Next Year
Seed saving preserves your favorite vegetable varieties, adapts them to your local climate over time, reduces costs, promotes biodiversity, and fosters a deeper connection to the gardening cycle. It’s a practice that connects you to generations of gardeners who maintained food security through saving their best seeds year after year.
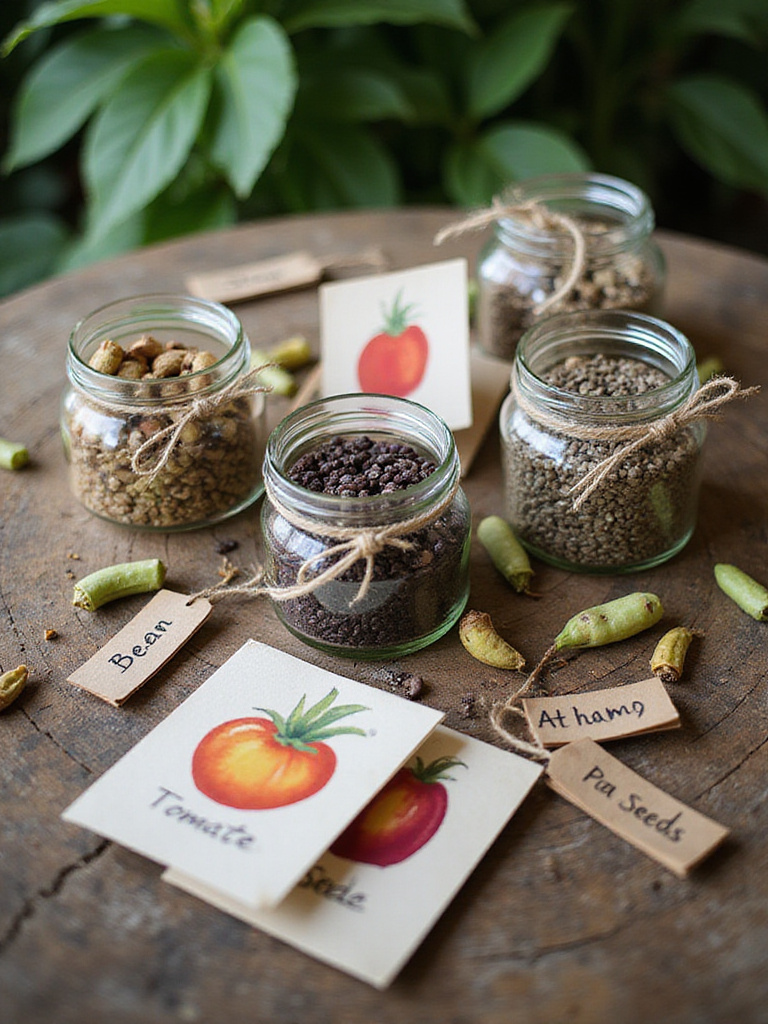
Self-pollinating plants like tomatoes, peppers, beans, and peas are easiest for beginners, as they’re less likely to cross-pollinate. For tomatoes, the process involves fermentation – squeeze seeds and pulp into a jar with water, let sit for 3-4 days while stirring daily. A mold will form, good seeds will sink, and pulp will float. Pour off the mold/pulp, rinse seeds thoroughly, and dry completely before storing. For beans and peas, allow pods to dry completely on the plant until brittle, then harvest, shell, and store in airtight containers in a cool, dark, dry place.
- Conduct a germination test before planting saved seeds by placing a sample on a damp paper towel
- Some seeds can remain viable for decades when stored properly
- Consider hosting a seed swap with other gardeners to share your saved seeds and discover new varieties
You might be wondering about another sustainable practice that can transform your vegetable gardening – composting. Let’s explore how to turn kitchen scraps into garden gold.
23. Composting Champions: Turn Kitchen Scraps into Garden Gold
Composting is the natural breakdown of organic matter into nutrient-rich soil amendment. For vegetable gardening, it improves soil structure (enhancing both water retention and drainage), provides essential nutrients (reducing the need for synthetic fertilizers), reduces landfill waste, and introduces beneficial microbes that support soil health and disease resistance.
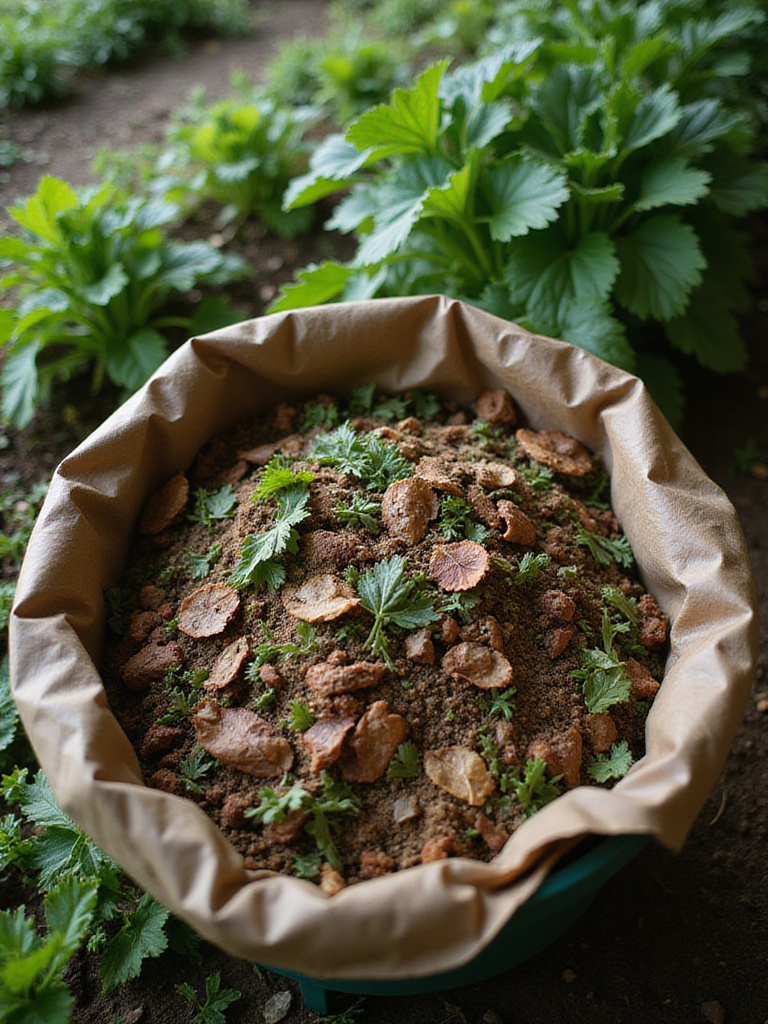
You can compost “greens” (nitrogen-rich materials) like vegetable scraps, coffee grounds, and fresh grass clippings, along with “browns” (carbon-rich materials) like dried leaves, shredded paper, and wood chips. Avoid meat, dairy, oily foods, diseased plants, and pet waste. To start a compost pile, combine greens and browns in roughly equal amounts, keep the pile as moist as a wrung-out sponge, and turn it regularly for aeration. Finished compost is dark brown, crumbly, earthy-smelling, with no recognizable original materials.
The game-changer happened when I started using compost tea in my vegetable garden. By steeping finished compost in water and using this nutrient-rich liquid to water my plants, I gave them a natural boost that improved both growth and disease resistance.
The missing piece for many gardeners is appreciating the full circle of growing, harvesting, composting, and returning those nutrients to the soil. Now let’s savor the ultimate reward of all your efforts – the joy and deliciousness of homegrown vegetables.
24. Savor the Sprout: The Joy and Deliciousness of Homegrown Vegetables
Homegrown vegetables taste dramatically better than store-bought for several reasons. Freshness is key – homegrown veggies are harvested at peak ripeness, maximizing flavor, while store-bought are typically picked unripe for shipping. Your backyard harvest hasn’t endured long transport, which degrades quality. Plus, you control growing conditions, ensuring optimal soil and nutrients for superior flavor development.
The psychological benefits of eating from your vegetable garden are equally significant. There’s a profound sense of accomplishment, a deeper connection to nature, reduced stress, and increased appreciation for food. Knowing exactly where your food came from and how it was grown alleviates concerns about food safety and quality. To best showcase these flavors, prepare vegetables simply and soon after harvest – lightly steam, roast, or grill with minimal seasonings to let their natural flavors shine.
“The first time I served a salad made entirely from my garden, I understood why I had become so passionate about vegetable gardening. The flavors were alive in a way I’d never experienced from store-bought produce.” – My personal revelation that keeps me gardening year after year.
Conclusion
Vegetable gardening connects us to something primal and essential – the ability to grow our own food. From understanding sunlight needs to savoring the harvest, these 24 green thumb secrets provide a roadmap to success. Remember that every garden is an experiment, every season brings new lessons, and every harvest is a celebration of your efforts.
The journey from seed to table is filled with challenges and rewards, frustrations and joys. But there’s nothing quite like the satisfaction of serving a meal featuring vegetables you’ve grown yourself. So grab your trowel, get your hands dirty, and discover the transformative power of vegetable gardening. Your future self – with dirt under your fingernails and the taste of sun-warmed tomatoes fresh in your memory – will thank you.