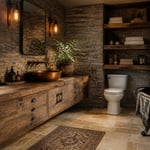
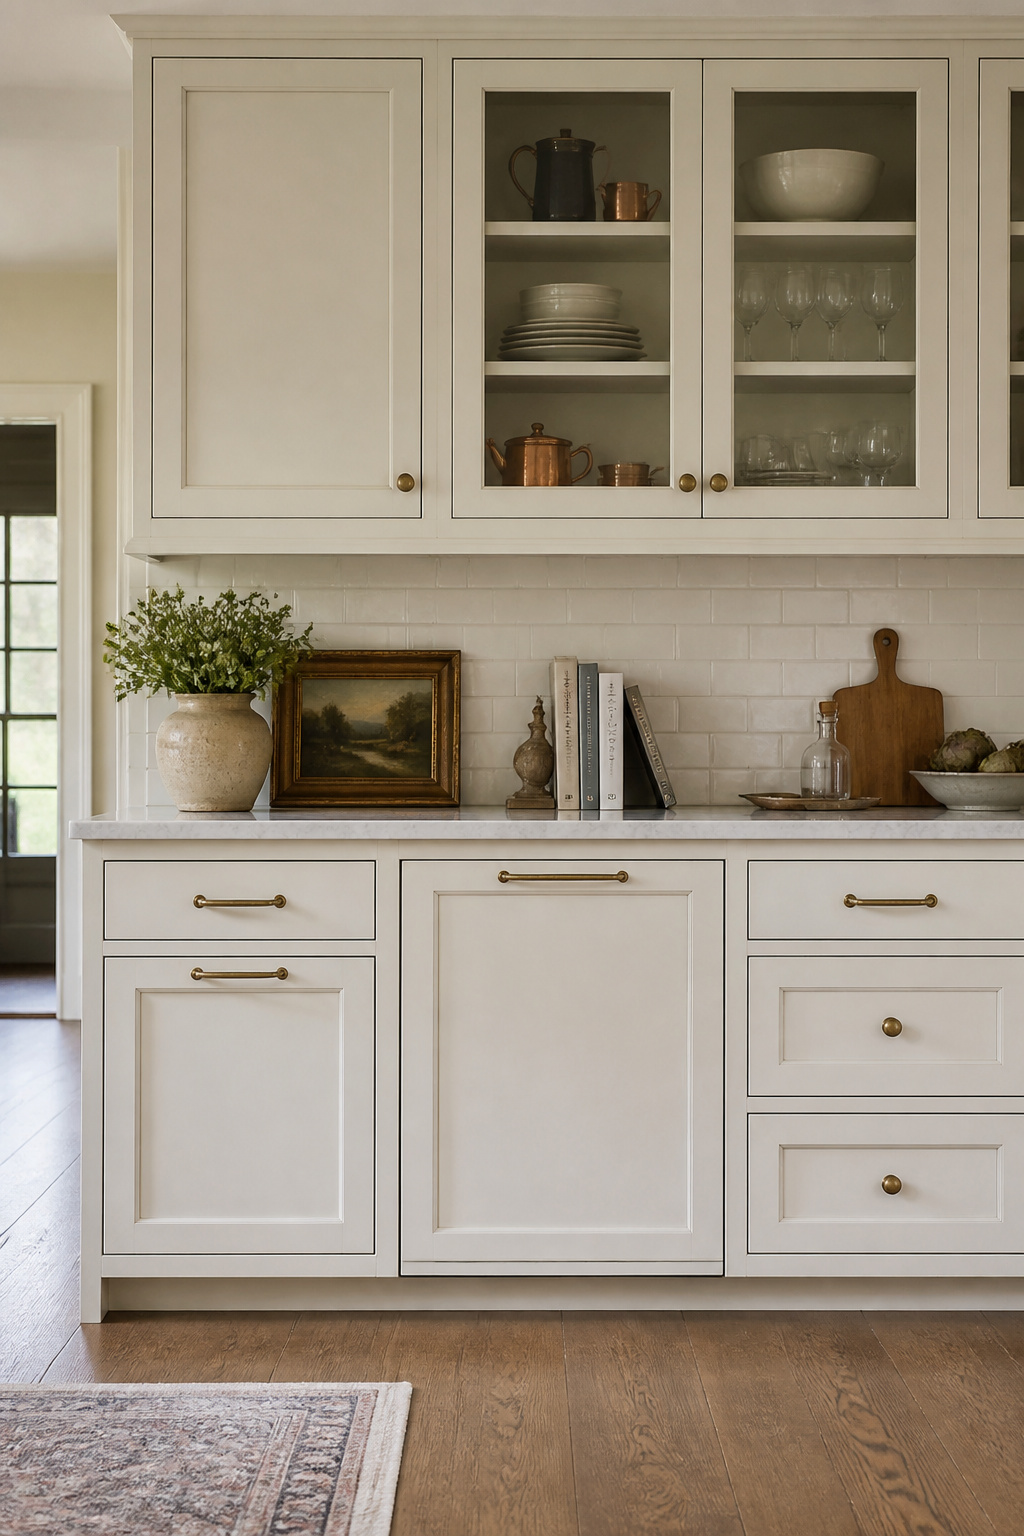
There’s a kind of kitchen that doesn’t care what year it is. The cabinetry is painted in a warm cream that’s lived in the room so long it seems to belong there. The countertops are honed marble — cool, slightly worn at the edges, better than the day they were installed. A deep fireclay sink sits under a window framed in proper moulding, and aged brass hardware catches the morning light. This is traditional kitchen design at its best: rooms built around material quality and craft rather than the cycle of trends.
What makes traditional kitchen design worth studying is that it’s not nostalgia. It’s a set of principles — materials that age well, details that communicate craft, compositions that feel resolved — developed over several centuries rather than the last five years. Every element in these 15 traditional kitchen design ideas is here because it has earned its place through longevity, not because it appeared on a mood board this season.
1. Raised-Panel Shaker Cabinetry in Classic White or Warm Cream
Raised-panel Shaker cabinetry occupies a specific position in the kitchen design hierarchy: more visually substantial than flat-panel Shaker, less ornate than fully decorated Victorian styles. The raised center panel creates depth and shadow that reads as considered and crafted, while the Shaker frame keeps the overall composition from tipping into fussiness. It’s a pairing that has worked continuously for three centuries, and the proportions are simply good.
For painted raised-panel cabinets, the material question matters more than most people expect. The industry standard is solid maple or alder frames with MDF center panels — not because MDF is inferior, but because it’s superior for this specific job. MDF panels are dimensionally stable across humidity changes, paint dead flat (no raised grain), and don’t produce the hairline cracks at paint joints that solid wood panels can as they expand and contract seasonally. If you’ve seen painted kitchen cabinets with fine cracks running along the frame-to-panel joint, that’s seasonal wood movement doing its work.
Getting the Paint Right
Finish colour determines the whole room’s temperature. Pure whites — Benjamin Moore White Dove OC-17, Sherwin-Williams Pure White SW-7005 — work beautifully against cool-toned marble and polished stone, but can read as slightly harsh under warm incandescent light. Warm cream finishes — Antique White, Ivory White — sit more naturally alongside aged brass hardware, wide-plank floors, and the warm veining of Carrara marble. The key is deciding which material temperature dominates the kitchen and letting the cabinet colour support it. Quality factory-applied catalyzed lacquer outperforms field-applied paint by a factor of 2-3x in durability — worth asking your cabinet maker about their finish system before committing.
2. Honed Marble Countertops That Define Traditional Kitchen Design
Polished marble looks extraordinary in a showroom. Honed marble looks extraordinary in a kitchen — and keeps looking extraordinary after five years of use. The distinction matters because marble etches: citrus juice, vinegar, and wine trigger a chemical reaction with the calcite in the stone, producing dull patches on the surface. On a polished countertop, those patches are visible against the high-gloss background. On a honed surface, the same etch is nearly invisible — the matte finish reads uniformly, and the kitchen doesn’t demand the anxious daily wiping-up that polished marble requires.
Architecturally, honed marble carries a different quality than polished. It’s softer, more antique-feeling, closer to the stone floors of old Italian villas and English manor kitchens than to a contemporary renovation. That’s exactly why it suits traditional kitchen design as well as it does.
The marble selection depends on the kitchen’s colour register. Carrara — light gray base, soft feathery veining — is the most practical choice: affordable ($40-100/sq ft installed), and the gray tones camouflage wear and minor etching better than white backgrounds. Calacatta’s bright white and bold veining is more dramatic but more demanding; etching shows more clearly against the white. Statuario splits the difference — white background, bold veining, and the densest, least porous structure of the three. For a full look at kitchen countertop ideas worth considering, the calcite-based stones offer something that engineered quartz simply doesn’t: the way they read differently in morning and afternoon light, and the character they develop over decades.
Living Honestly With Honed Marble
Seal every 6-12 months with a professional impregnating sealer. It won’t prevent etching (that’s chemistry, not absorption), but it will prevent staining from oils and liquids. Etching is not a flaw — it’s how marble behaves. On a honed surface, the resulting patina is part of the kitchen’s character: evidence of a well-used room, not evidence of neglect.
3. Ornate Crown Molding That Frames the Cabinets Like Fine Joinery
Crown molding is the architectural lid on kitchen cabinetry. Without it, cabinets that stop below the ceiling leave an awkward gap that collects dust and undermines any sense of completion. With it, the cabinetry reads as designed rather than simply installed. In traditional kitchen design, this detail is never optional — it’s the element that carries the room’s craft signal most clearly from across the space.
The traditional profiles are worth understanding before selecting one. The ogee — an S-curve with one concave and one convex surface — is the most versatile, appearing in kitchen cabinetry continuously since the Georgian era. Dentil molding adds evenly spaced rectangular blocks that trace their origins to Persian and Greek architecture from 500 BC; in a kitchen, they add formality that suits Colonial Revival, Federal, or Georgian-influenced spaces. Stacked crown assemblies — multiple moulding pieces layered to create depth and shadow — are the right solution when cabinets stop short of the ceiling and the gap needs architectural weight rather than dead space.
Proportion against ceiling height is the most commonly misunderstood element. For an 8-foot ceiling, a crown profile that drops 3-5 inches is appropriate; for a 9-foot ceiling, 5-10 inches; for 10-12 foot ceilings, 10-20 inches. The rule: for every foot of ceiling height, the crown’s diagonal width should be roughly 1/2 to 1 inch. A 2-inch ogee in a 10-foot kitchen looks like an afterthought. A 6-inch stacked crown in an 8-foot kitchen overwhelms the cabinetry it’s meant to complete.
4. Classic Subway Tile Backsplash in a Timeless Brick-Lay Pattern
The 3×6-inch rectangular ceramic tile was designed in 1904 by architects Heins and La Farge for the original New York City subway stations. It is now 122 years old and still the first choice for traditional kitchen backsplashes — not through inertia but because the 1:2 proportion is mathematically fundamental to how human perception processes repetition and rhythm. The same proportion appears in Roman brickwork, traditional masonry, and clinker brick. It has been working for longer than anyone can claim to fully understand.
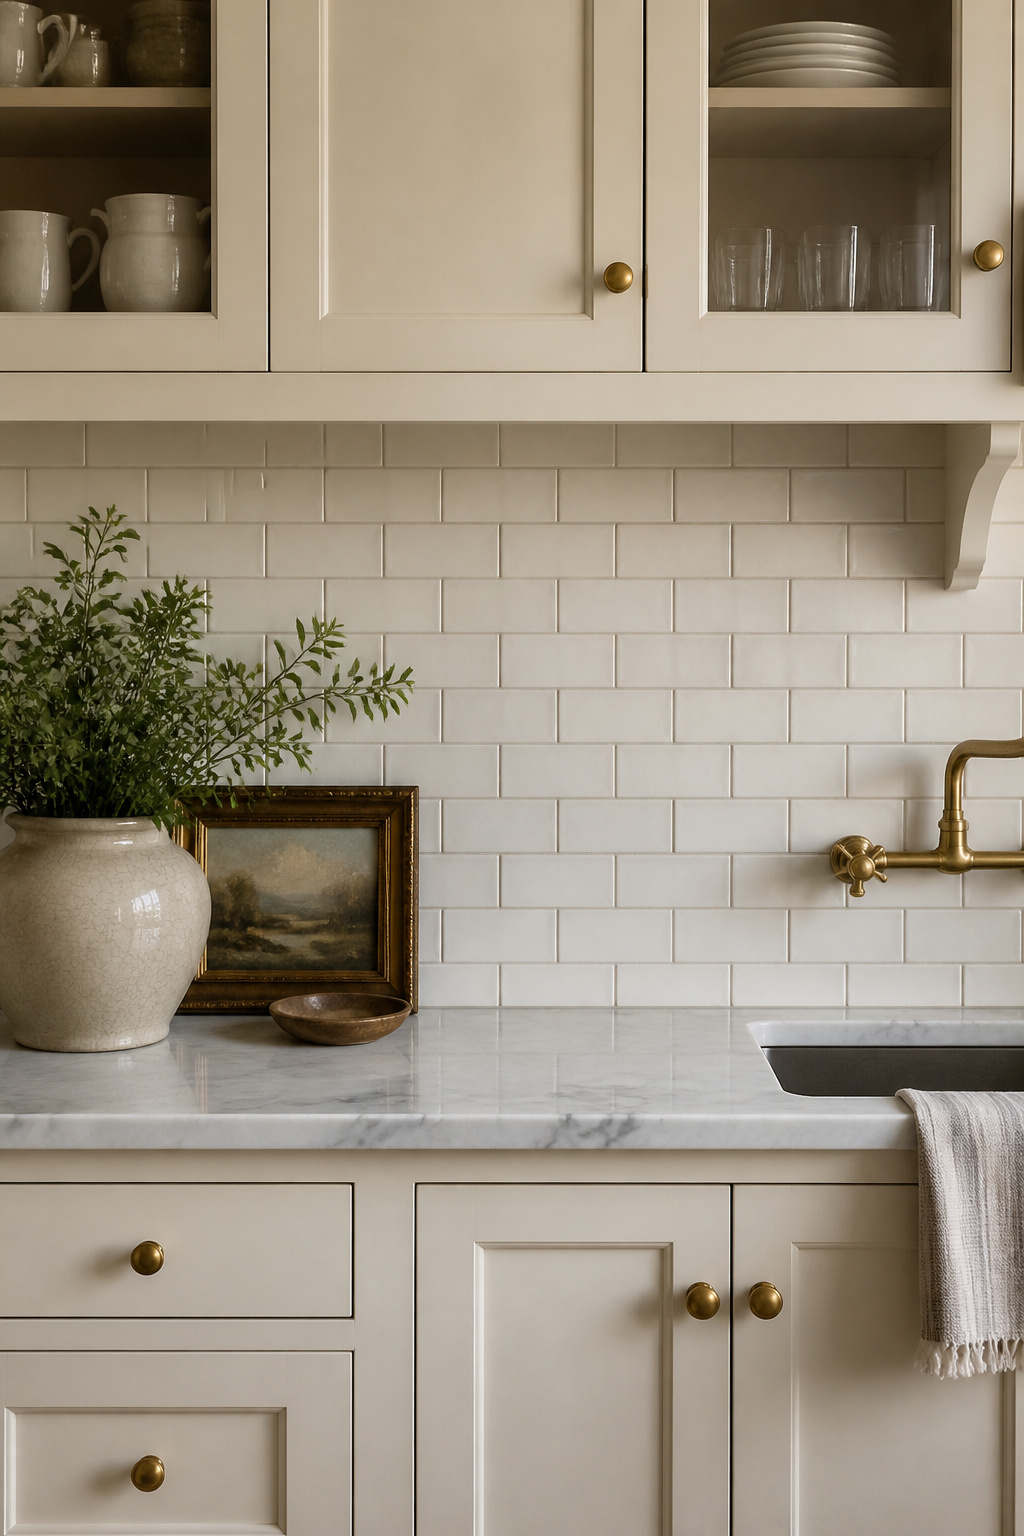
The variables that determine how a subway tile backsplash reads are grout color and tile surface. Machine-made 3×6 ceramic ($0.50-3/sq ft) lays flat with tight 1/16″ grout joints and a consistent glaze. Handmade artisan ceramic tiles (up to $15/sq ft) have slight thickness variations, require wider grout joints (1/8-3/16″), and produce a surface with more organic character — better suited to country and farmhouse traditional styles than to formal ones.
For grout color: white grout creates a seamless, monolithic plane that shows staining quickly. Medium gray or warm putty grout adds definition to the grid pattern and hides wear far more effectively. In traditional kitchen contexts, warm putty — Mapei Antique White, Custom Building Products Pearl Gray — bridges cream cabinetry and white tile without the graphic hardness of charcoal. For backsplash ideas that go beyond subway tile — handmade ceramic, unlacquered zellige, or stone options — there are strong alternatives that suit the traditional kitchen equally well.
5. Aged Brass Hardware: The Detail That Elevates Traditional Kitchen Design
No single element transforms the read of painted kitchen cabinetry more efficiently than hardware. Satin nickel pulls on a cream Shaker kitchen look like a standard renovation. Aged brass cup pulls on the same kitchen look like it was assembled over time by someone who cared about every detail. The difference is approximately $200-800 in hardware cost for a standard kitchen, and it’s among the highest-return investments available in a traditional kitchen design project.
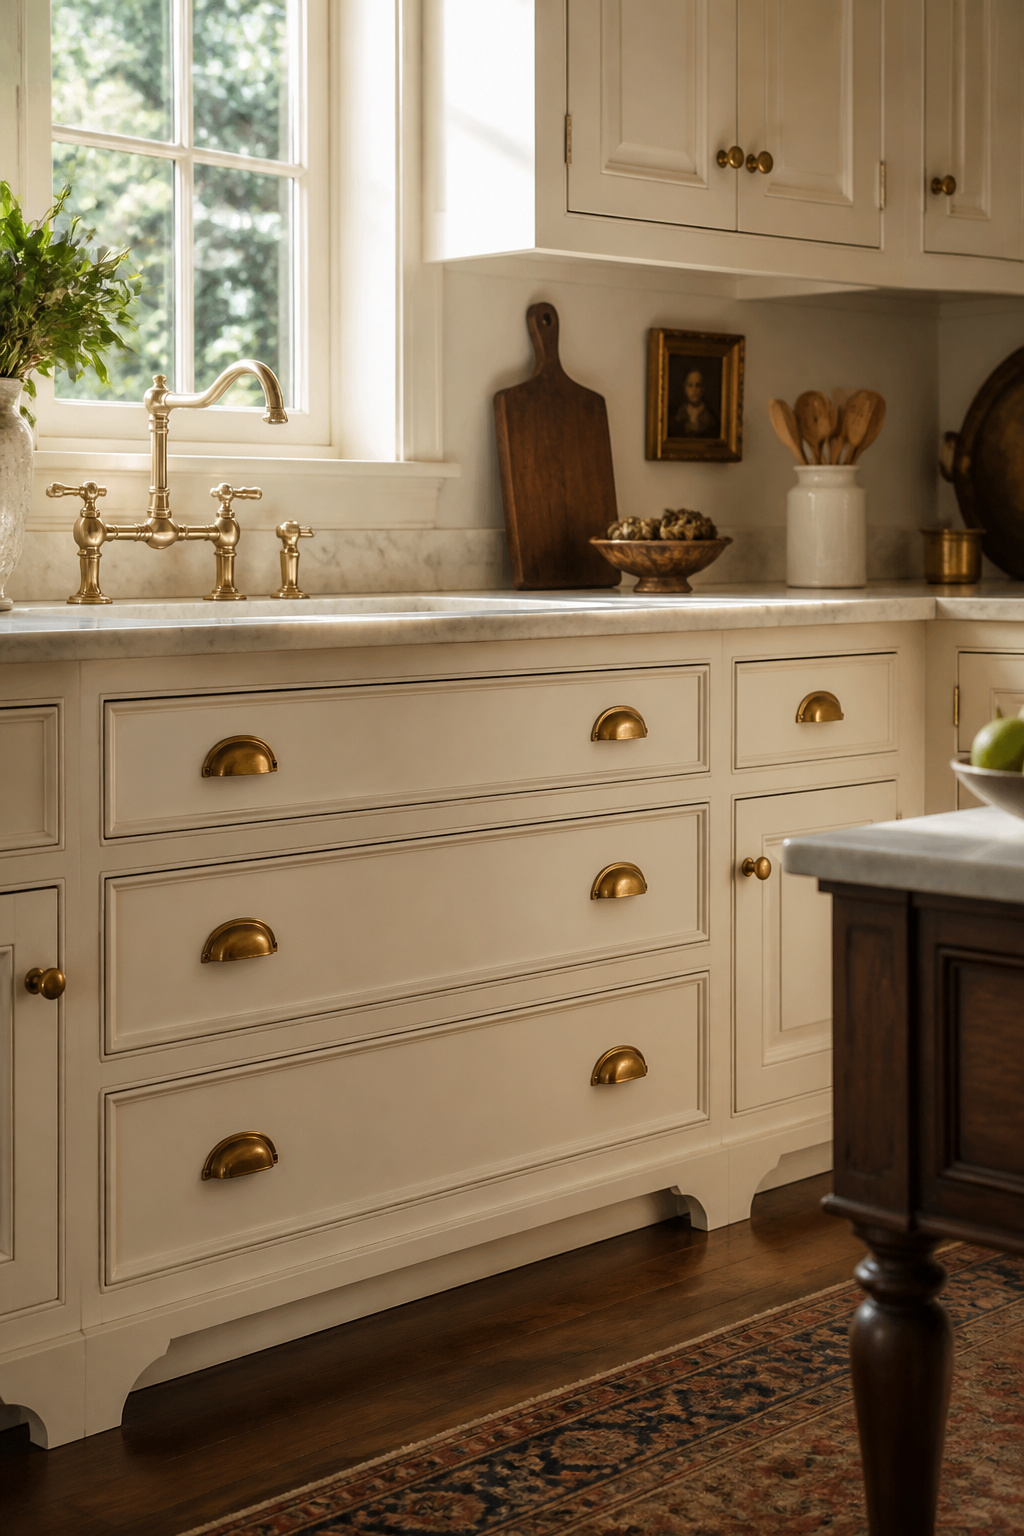
Unlacquered brass — brass without a protective lacquer coating — develops a natural patina from skin oils, air, and daily contact over 2-5 years, shifting from bright gold toward deeper amber-brown with occasional greenish undertones at edges. This is not wear; it’s a living finish, and it’s what the material was always meant to do. The resulting patina is unique to your space and use patterns — one of the few kitchen surfaces that genuinely individualizes with time.
Pull shape matters more than most people expect. Cup pulls (concave semicircles mounting beneath drawer fronts) are strongly Colonial American and the most historically specific choice for traditional drawers. Bin pulls (wire bail pendants on two posts) reference early 20th-century kitchen furniture with a slightly more rustic character. Bar pulls in aged brass offer a cleaner line that bridges traditional to transitional, working across both drawer fronts and larger cabinet doors. For a full look at cabinet knobs and pulls worth considering — every configuration across finishes and profiles — the options are substantial.
The Patina Question in Traditional Kitchen Design
One thing to avoid: choosing lacquered “antique brass” and then polishing it clean. Lacquered antique brass has been pre-aged at the factory; polishing removes the effect and leaves shiny brass that reads as neither modern nor traditional. Unlacquered brass, left entirely alone, does the work for you — and over five years it becomes impossible to replicate by any other means.
6. Wide-Plank Hardwood Floors in White Oak or American Walnut
Flooring is the element the eye returns to constantly. In traditional kitchen design, what it finds there either supports or undermines the room’s other design decisions. Standard 2 1/4-inch strip flooring reads as dated alongside substantial raised-panel cabinetry, honed marble countertops, and aged brass hardware — proportionally, the narrow strips feel inconsistent with the scale of everything above them.
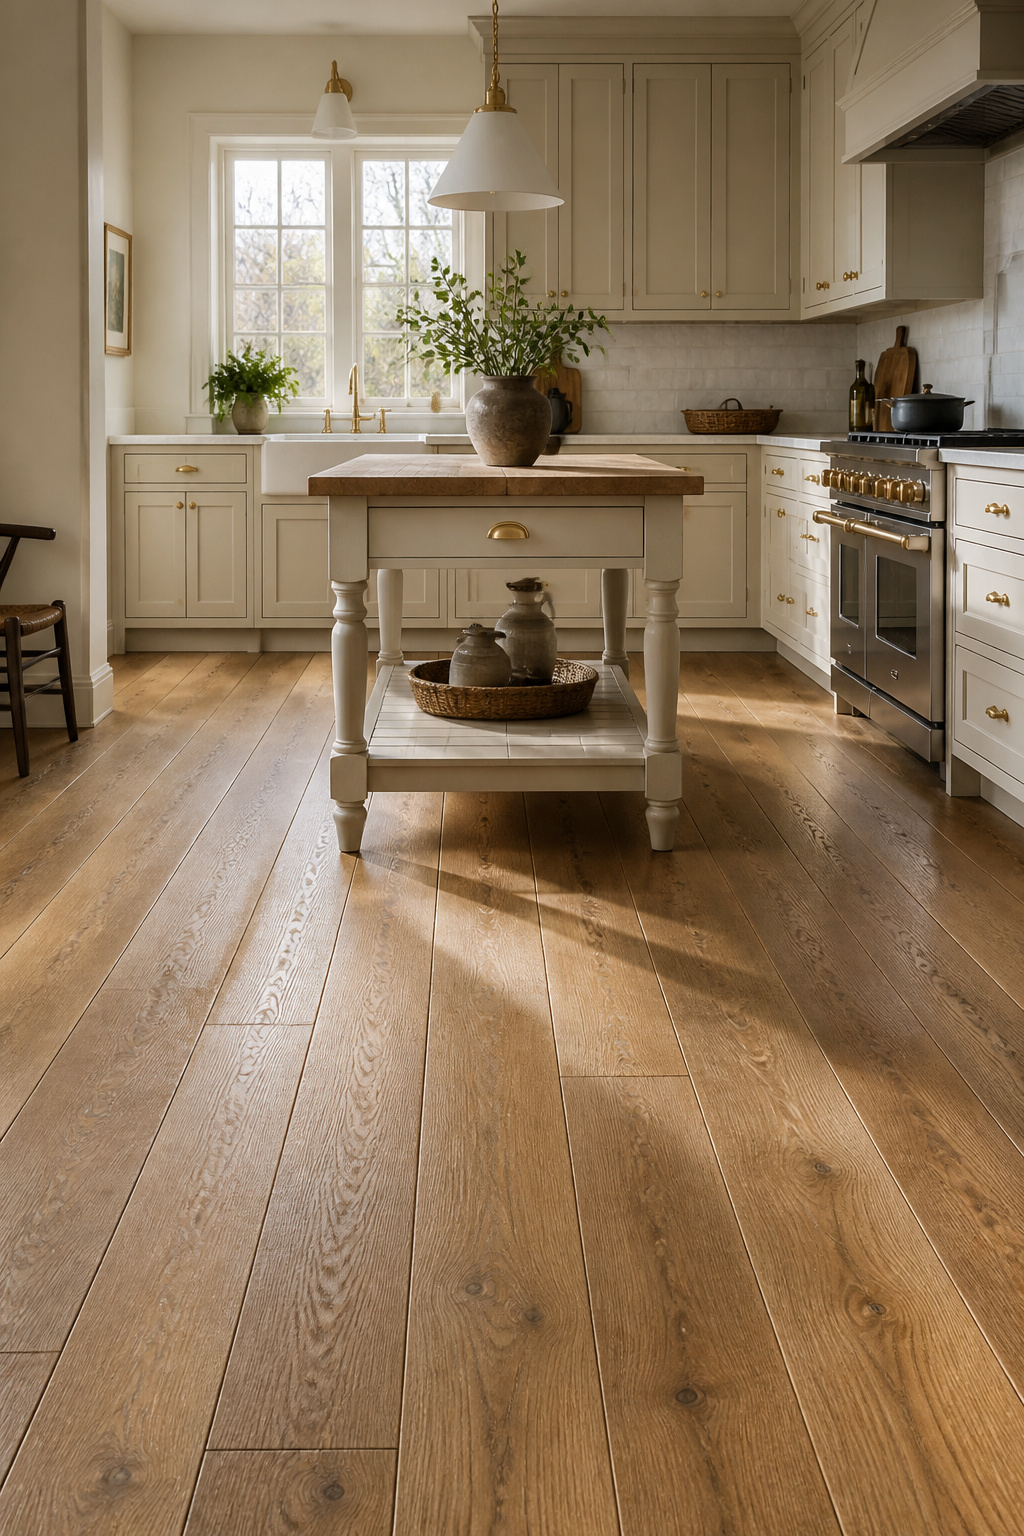
Wide planks (5 inches minimum; luxury at 7 and above) reduce the number of seams, allowing the wood’s grain to read as a continuous, calm field. The fewer the joints, the more the material becomes the story rather than the pattern of its installation. White oak is the current first choice specifically for kitchen floors: Janka hardness of 1360 lbf, tight closed grain that provides natural moisture resistance, and nutty brown tones that pair with cream cabinetry without competing for warmth. American walnut — rich dark mocha heartwood, Janka 1010 lbf — is more visually dramatic but softer, showing scratches and dents more readily in a high-traffic kitchen environment. Walnut suits dining rooms and sitting spaces better than working kitchens.
Wire-Brushing for Traditional Kitchen Design Longevity
Wire-brushed finishes address the practical reality of a kitchen floor: the brushing process removes soft grain mechanically, leaving hard grain raised and giving the floor a pre-distressed texture. When real scratches happen, they blend into the existing texture rather than standing out against a smooth surface. Oil finishing with a penetrating product like Rubio Monocoat works at the fiber level, allowing spot repairs without refinishing the whole floor — a meaningful advantage in a room that accumulates wear unevenly near the sink, range, and island.
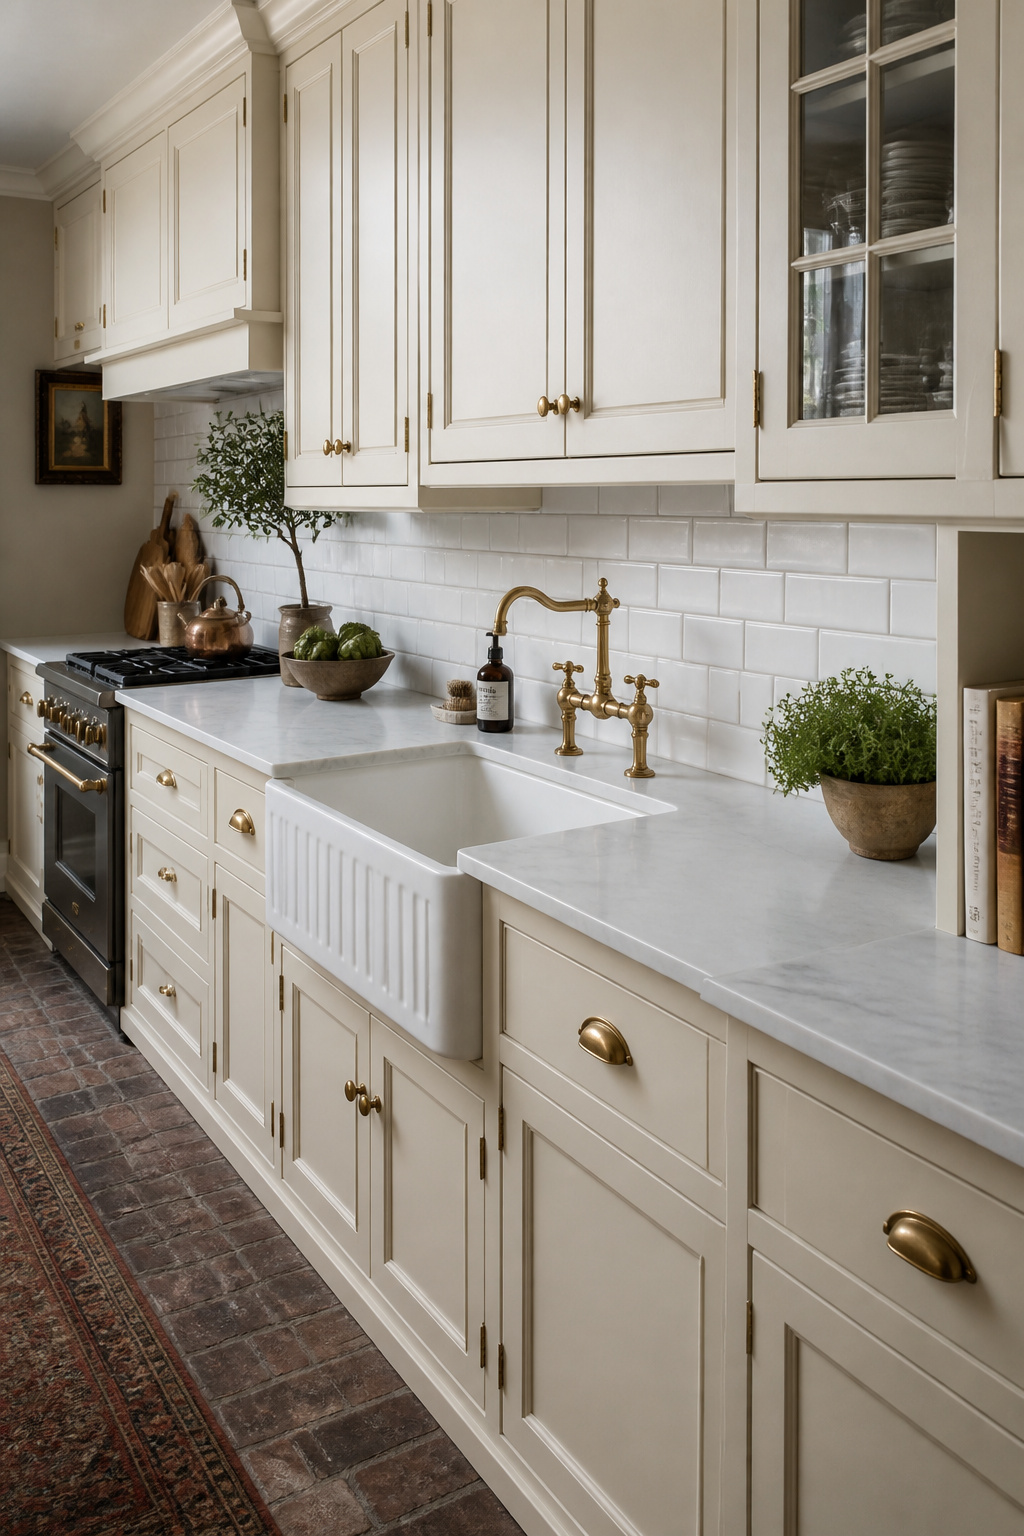
7. Deep Farmhouse Sink in Fireclay or Cast Iron
A fireclay apron-front sink changes the character of a traditional kitchen design more clearly than almost any other single element. It’s specific: it signals a commitment to the working kitchen aesthetic, to depth and capacity over sleek minimalism, to surfaces meant to take hard daily use without showing it.
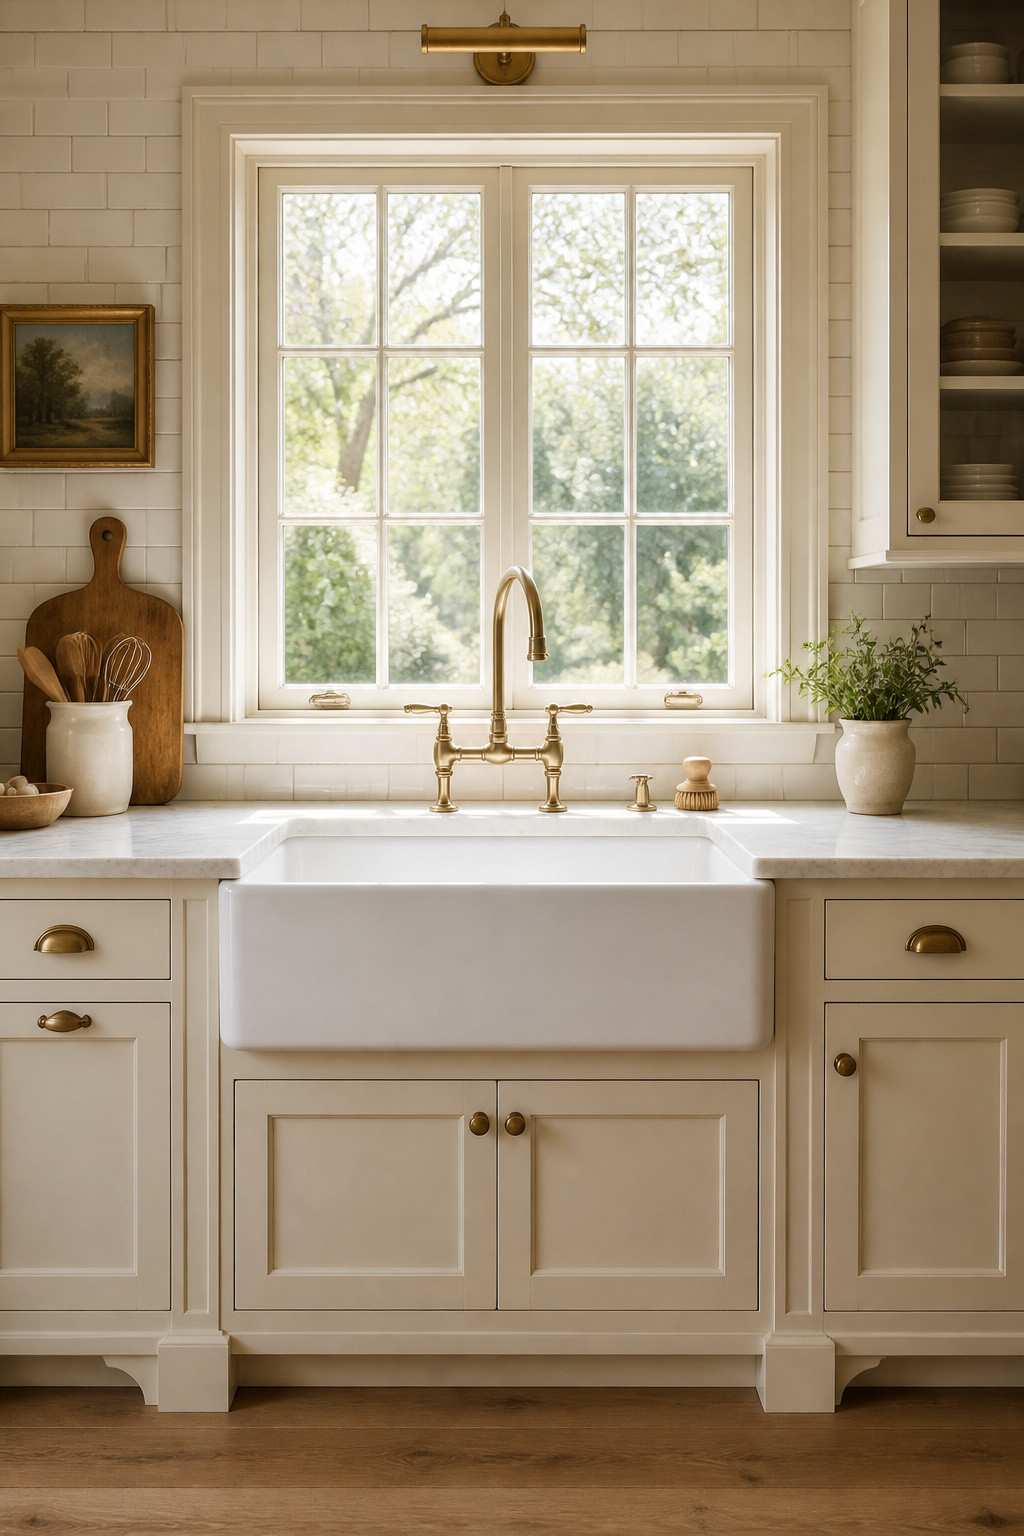
The single-basin configuration reads as most traditionally correct. Farmhouse kitchens used deep single sinks for washing pots, canning equipment, and produce — the undivided interior was a functional necessity, and that necessity produced an aesthetic that still reads as authentic. A divided basin is more efficient for daily dishwashing; a single basin handles large sheet pans, stock pots, and produce without compromise.
Fireclay vs Cast Iron: The Honest Answer
Between fireclay and cast iron, fireclay has largely displaced cast iron for new installations. Fireclay — ceramic fired at high temperature with a glassy glaze fused to the clay during firing — weighs 80-120 lbs, costs $400-1000, and offers a chip-resistant surface that stays bright white without yellowing. Cast iron (a heavy iron core coated in enamel) can exceed 200 lbs, demands structural reinforcement, and costs $500-2000 or more. Any chip that exposes the iron beneath needs immediate treatment to prevent rusting. The installation requirement for either: the front rail of the base cabinet must be removed and a support cradle added inside the box to transfer the sink’s weight. For retrofit installations, manufacturer-specific retrofit designs can fit standard 24-30-inch base cabinets without a full rebuild.
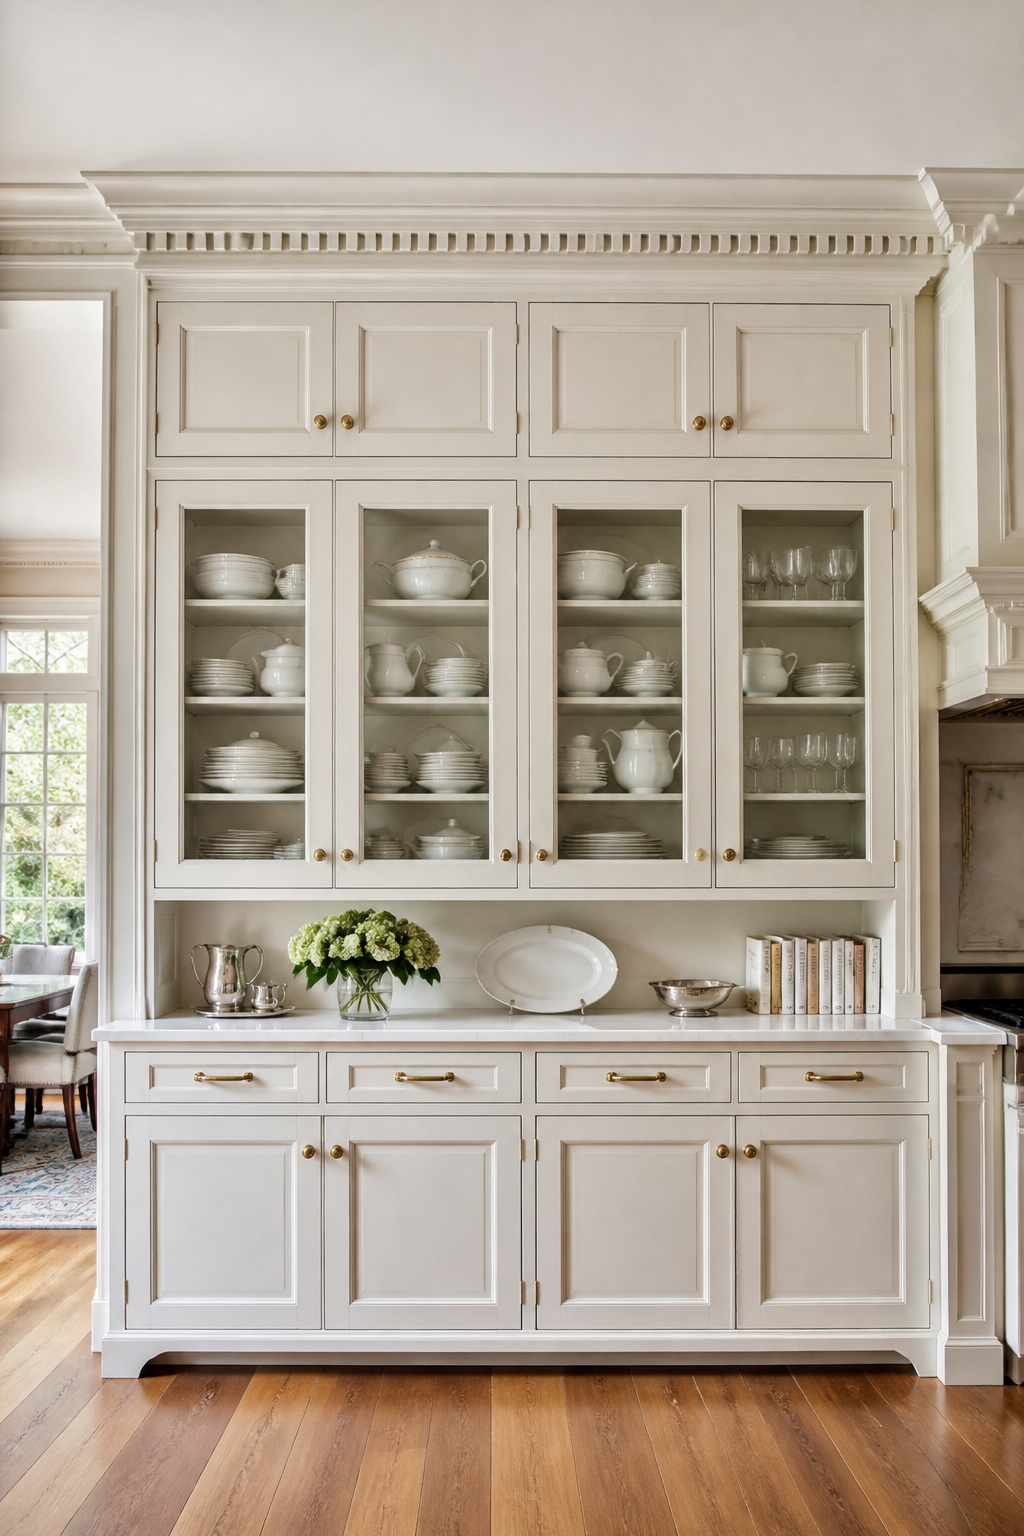
8. Open Plate Rack Shelving: A Classic Kitchen Design Feature Worth Reviving
Before enclosed upper cabinetry became standard, plate racks were the kitchen’s primary system for storing and air-drying dishware. The vertical slot design allowed air circulation — a practical necessity that also produced one of the most characterful storage solutions in domestic design history. In a traditional kitchen, bringing plate racks back isn’t nostalgia; it’s reclaiming a functional object that was always better than what replaced it.
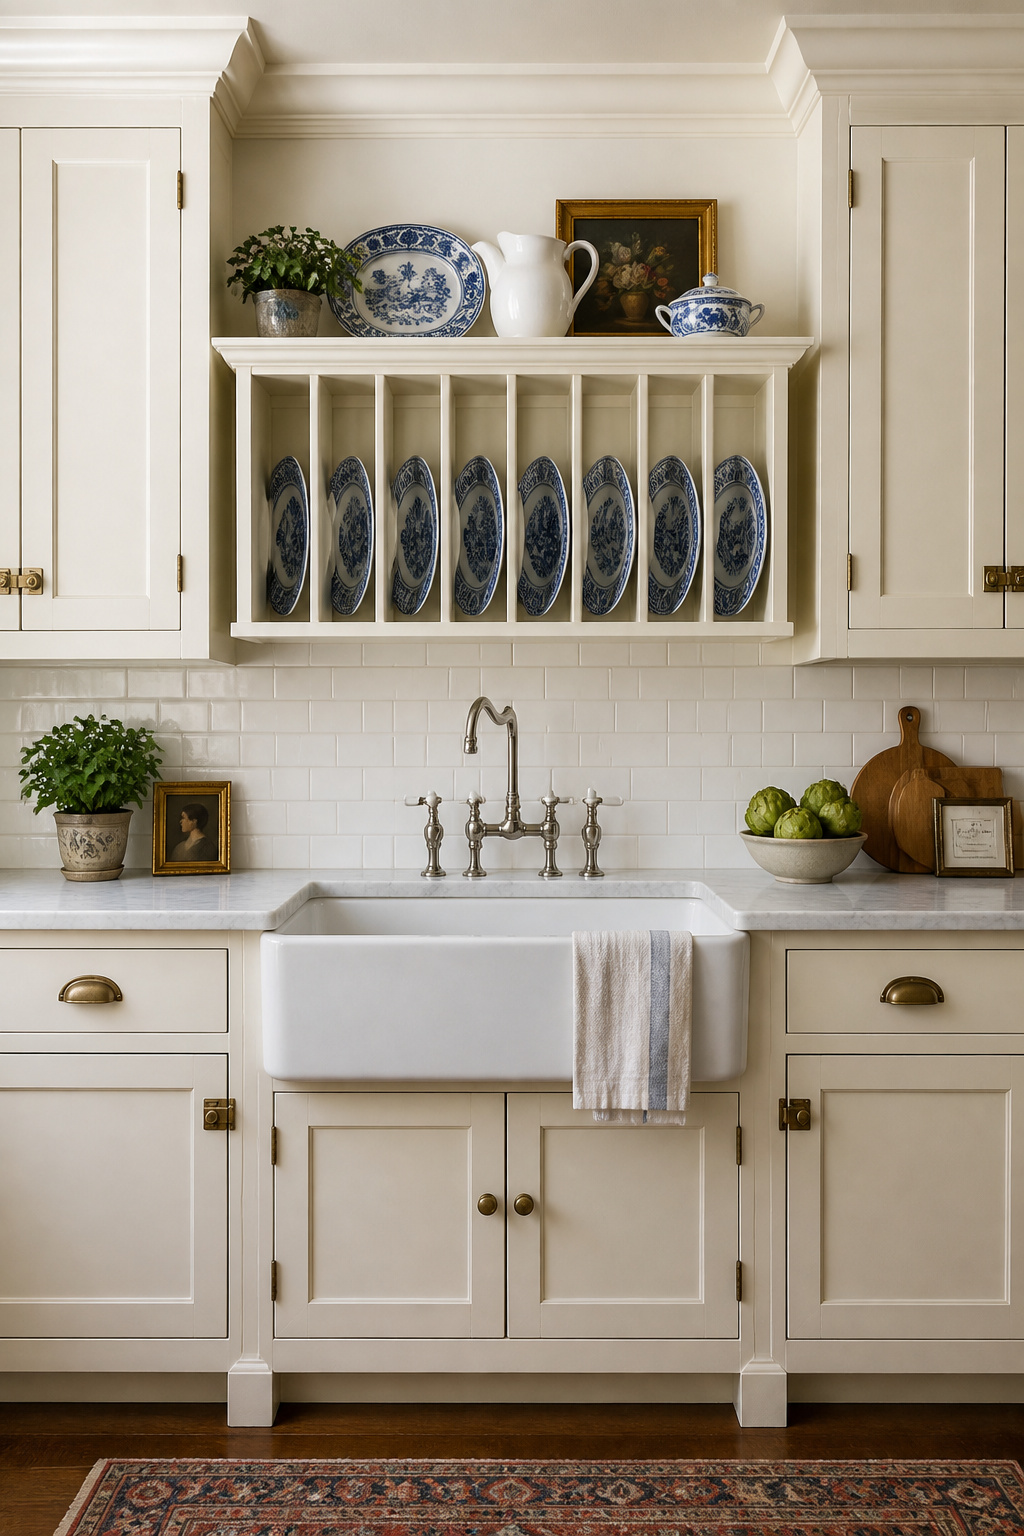
Plate racks work hardest positioned over the sink — using wall space that would otherwise sit dead between the top of the sink window and the ceiling — or flanking a window as a symmetrical pair. Either placement adds storage without blocking natural light. The display dimension is genuinely valuable: traditional blue-and-white transferware, ironstone, or creamware transforms functional storage into visual warmth that no enclosed cabinet delivers. The debate between open shelving versus upper cabinets is, in the traditional kitchen context, partially resolved by the plate rack — it’s open display applied specifically to dishware, where the display itself adds aesthetic value.
Sizing and Material for Plate Racks
Standard dinner plates run 10-11 inches in diameter; salad plates 7-9 inches. Slot spacing should allow 3-4 inches of clearance above the plate diameter for easy removal. A 36-inch wide wall-mounted rack holds 8-10 dinner plates comfortably. For material: painted wood matching the cabinetry is the most cohesive option. Natural oak creates a warm contrast against painted frames. Wrought iron suits kitchens with dark cabinetry and hammered metal accents throughout.
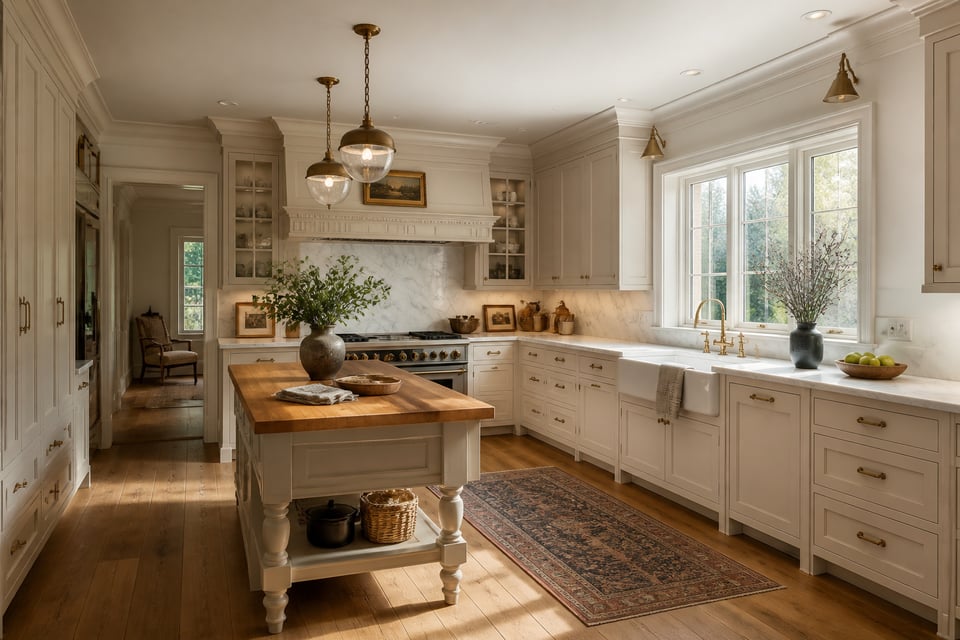
9. Turned-Leg Kitchen Island With Butcher Block or Honed Stone Top
Traditional kitchen design treats the island as a piece of furniture placed in the room, not as a continuation of built-in cabinetry. This distinction is fundamental — and a furniture-style island with turned legs makes it visible. The legs communicate craft: the symmetrical turned profiles reference centuries of American and English furniture-making, the kind of woodworking that made deliberate decisions about proportion and form. Solid cabinet islands are practical; furniture-style islands are intentional.
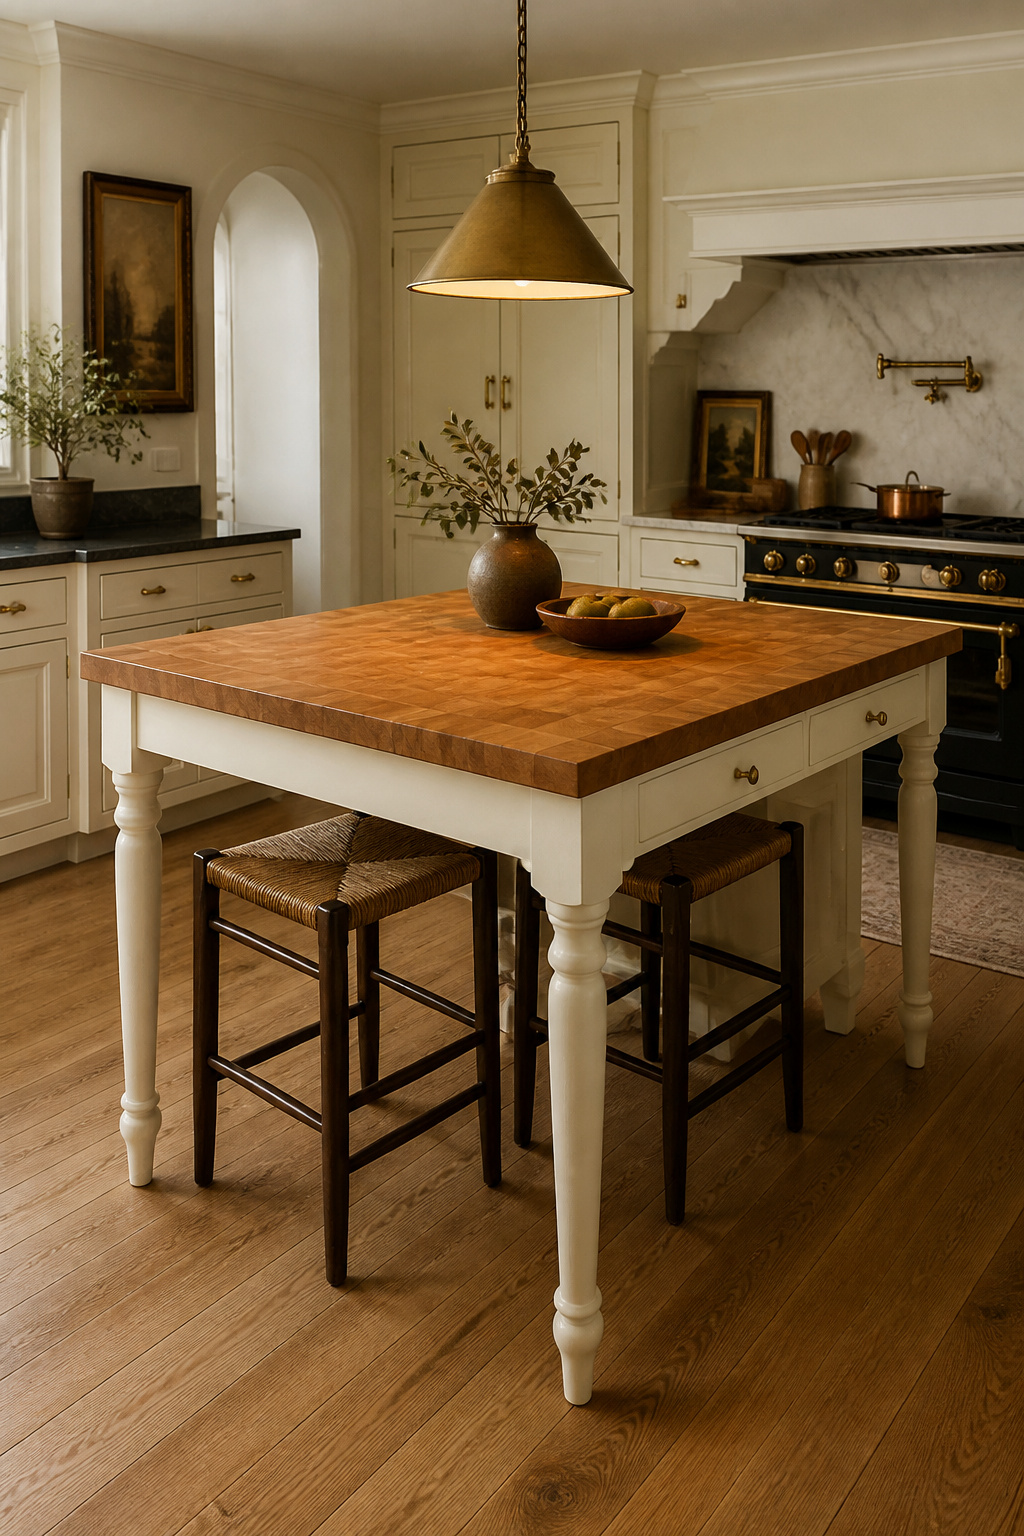
The visual breathing room under a turned-leg island lightens the composition. Solid base cabinet islands anchor a room, but they can make a kitchen feel heavy depending on its dimensions. Turned legs allow the floor plane to read continuously beneath the island, keeping the room from feeling over-furnished. For more context on the range of approaches and what separates them, the elements of traditional kitchen design that resonate most strongly tend to be the ones that treat the kitchen as a room furnished over time — not a renovation completed in one pass.
Leg profile depends on the kitchen’s overall character. Federal and Colonial-influenced kitchens suit simple tapered turned legs — slender, elegant, minimal ornamentation. Country and farmhouse traditional kitchens carry chunkier square-to-round tapered legs with more rustic weight. For the island top: butcher block (maple or walnut) is the most sympathetic choice — it reinforces the piece-of-furniture reading, shows use, develops character, and costs $30-60/sq ft installed. Honed marble introduces a cool, luxurious counterpoint to warm wood legs. Soapstone in dark charcoal provides the strongest material contrast against light-painted legs.
10. Inset Cabinet Doors for a Built-In, Furniture-Grade Appearance
There’s a construction difference between overlay and inset cabinets that most homeowners never see but every designer notices immediately. Overlay doors sit on the front of the cabinet face frame, covering it — the frame is hidden, installation tolerances are forgiving, and the result is standard across almost every price point of kitchen installation. Inset doors sit inside the frame opening, flush with the face, with a consistent reveal (typically 1/16 to 3/32 of an inch) running around all four sides. That reveal is part of the design. The visible face frame is part of the design. Nothing is hidden.

Inset cabinetry reads more like fine furniture and less like a renovation product. The kitchen cabinet door styles to consider span a wide range, but inset construction is the method that most clearly distinguishes a kitchen intended to last three decades from one designed to look good in listing photos. It’s the same approach used in high-end English and American traditional kitchen design for the past 200 years.
The Cost Is Real; So Is the Argument
The cost premium is real — typically 15-25% above equivalent overlay cabinets — and it exists because inset demands precision that overlay doesn’t. Each door must be individually fitted to its specific opening; wood movement with humidity changes means seasonal clearance adjustments may be needed; mistakes are visible in an irregular reveal that the eye catches immediately. The hinge becomes a design detail rather than something concealed. Exposed butt hinges — available in aged brass or oil-rubbed bronze with ball-tip or acorn-tip finials — are the most period-appropriate option. Also, the hinge finish should coordinate exactly with the cabinet pulls; mixing finishes between hinges and pulls is a common oversight that fragments the material language.
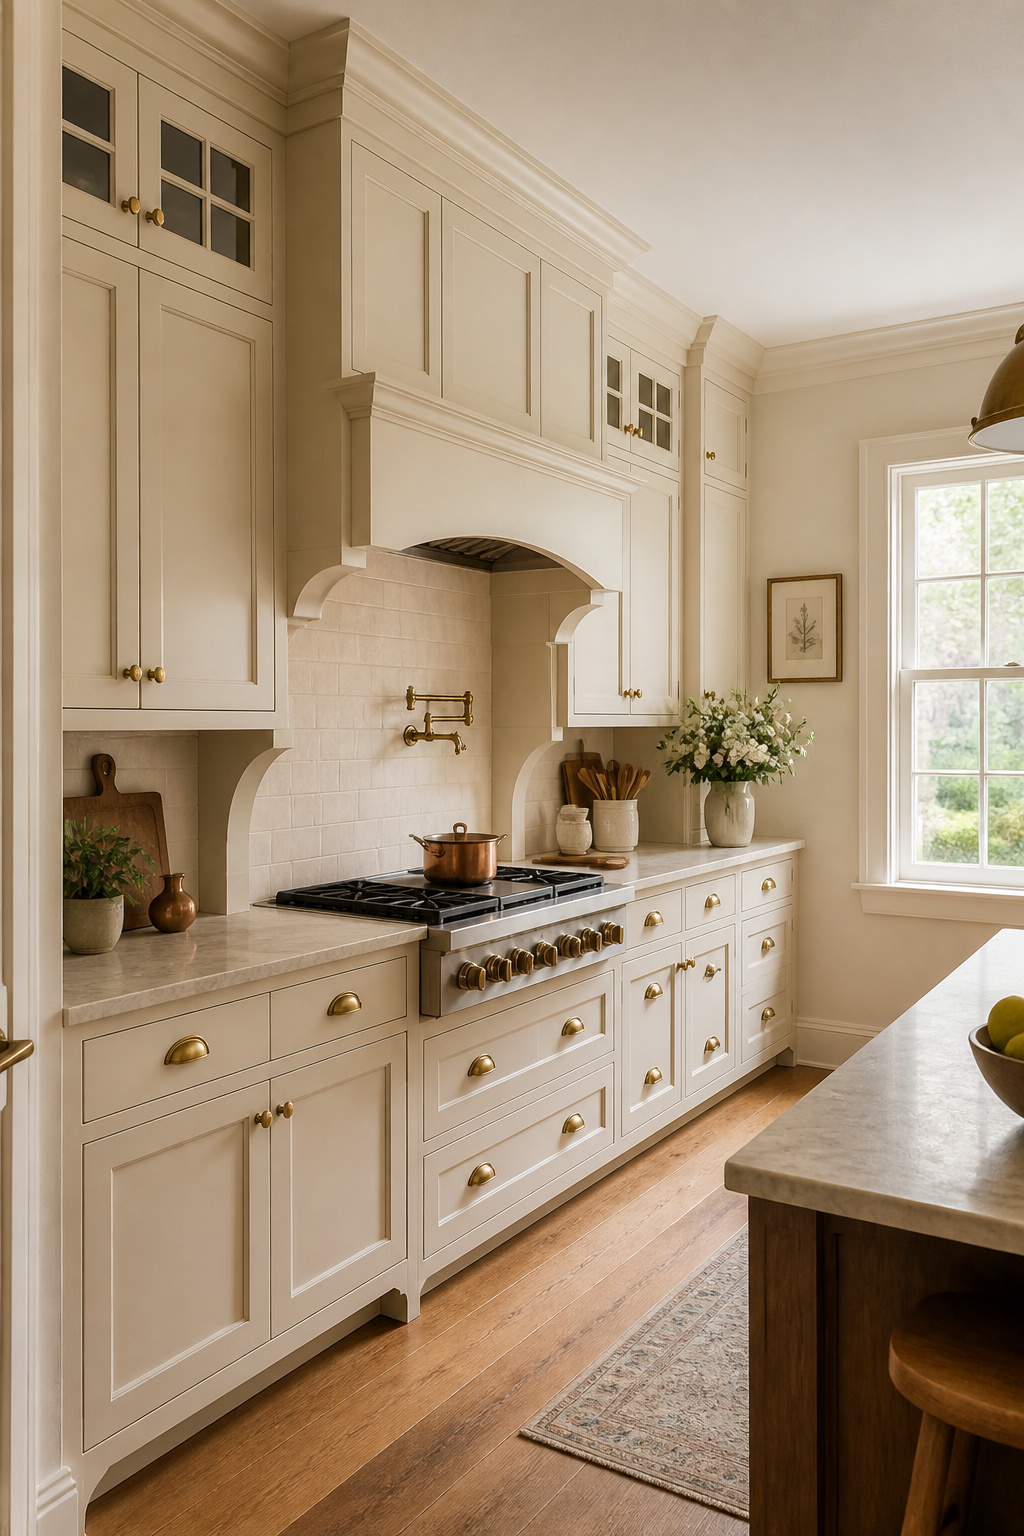
11. Statement Range Hood as the Traditional Kitchen’s Focal Point
Everything in a traditional kitchen above counter height draws the eye upward, and the range hood is where that visual journey ends. If it’s worthy of that position, the room works. If it’s an afterthought — underpowered in size, undecided in material, too small for the ceiling — the kitchen feels unresolved no matter how good everything else is. The hood should command the same authority that a fireplace does in a living room: the room’s focal point, the element that organizes the space around it.
Width first: the hood should be at least as wide as the range or cooktop, ideally 3 inches wider on each side. A 30-inch range gets a 36-inch hood minimum; a 36-inch or 48-inch professional cooktop requires a proportionally larger hood. Anything narrower looks inadequate and fails at its actual job of capturing steam and vapor.
Material and Scale Decisions
Painted wood with applied moulding — built to match or coordinate with the cabinetry — is the most cohesive choice for Shaker and raised-panel traditional kitchens. Plaster allows curved, arched, and custom profiles that wood can’t easily achieve and suits kitchens where an unusual ceiling height calls for a distinctive solution. Hammered copper is the most dramatic option — particularly suited to Old World, Mediterranean, French Country, and Tuscan-influenced kitchens; custom fabrication runs $1,000-5,000 or more, and it becomes the room’s signature piece. Mount height: 28-36 inches above the cooktop surface, with 33 inches as the standard recommendation. Standard chimney sections extend to 96 inches; for ceilings above 8 feet, additional chimney sections fill the vertical space between the hood canopy and the ceiling — leaving a gap here looks exactly like the oversight it is.
12. Navy or Forest Green Accent Cabinetry on the Island or Lower Run
All-white or all-cream traditional kitchens are coherent, but they can read as flat. Two-tone cabinetry — a richer color on the island or lower cabinets, lighter color on the uppers — adds visual weight that grounds the room, makes the island read as a distinct piece of furniture, and introduces the color depth that traditional kitchens historically had. This approach has genuine historical precedent: traditional English kitchens frequently paired a painted dresser in a heritage color against fitted cabinetry in a different finish. It’s not a trend; it’s a traditional approach that was abandoned and is now being correctly restored.
Navy and forest green are the two colors with the strongest traditional heritage coding. Navy — particularly Farrow & Ball Hague Blue (No.30) or Benjamin Moore Hale Navy HC-154 — carries the depth of Naval and Georgian color schemes and pairs naturally with cream upper cabinetry and aged brass hardware. Forest green — Farrow & Ball Calke Green (No.80), Sherwin-Williams Hunt Club SW-6468 — references the painted kitchen furniture of English country houses. Both colors benefit from depth and complexity: navy that leans slightly green reads as more sophisticated than straightforward blue; forest green that leans slightly gray reads as more traditional than bright bottle green.
Hardware Across Traditional Kitchen Designs
The most important coordination rule: one hardware finish across all cabinets regardless of paint color. Aged brass works against both navy and green better than any other finish — the warm gold against dark blues and greens has centuries of precedent in ceramics, textiles, and decorative objects. Oil-rubbed bronze is the second choice: its warm brown-black tone reads more quietly against dark cabinetry. Avoid polished chrome or satin nickel, which reads as too contemporary against heritage cabinet colors. For a full look at how color decisions interact with the broader kitchen palette, kitchen cabinet colors that transform the space provides useful reference across the full spectrum.
13. Picture-Frame Windows Over the Sink With Period-Correct Moulding
Drywall returns — finishing the window reveal with plaster or drywall alone, no casing — are a modern approach. In a traditional kitchen, they read like an oversight: the window is present but not acknowledged as an architectural element. Substantial window casing transforms a functional opening into a designed feature, and the window above the sink has particular status — it’s the primary source of working light, the framed view from the kitchen’s most-used position, and typically the most-looked-at wall surface in the room during daily use.
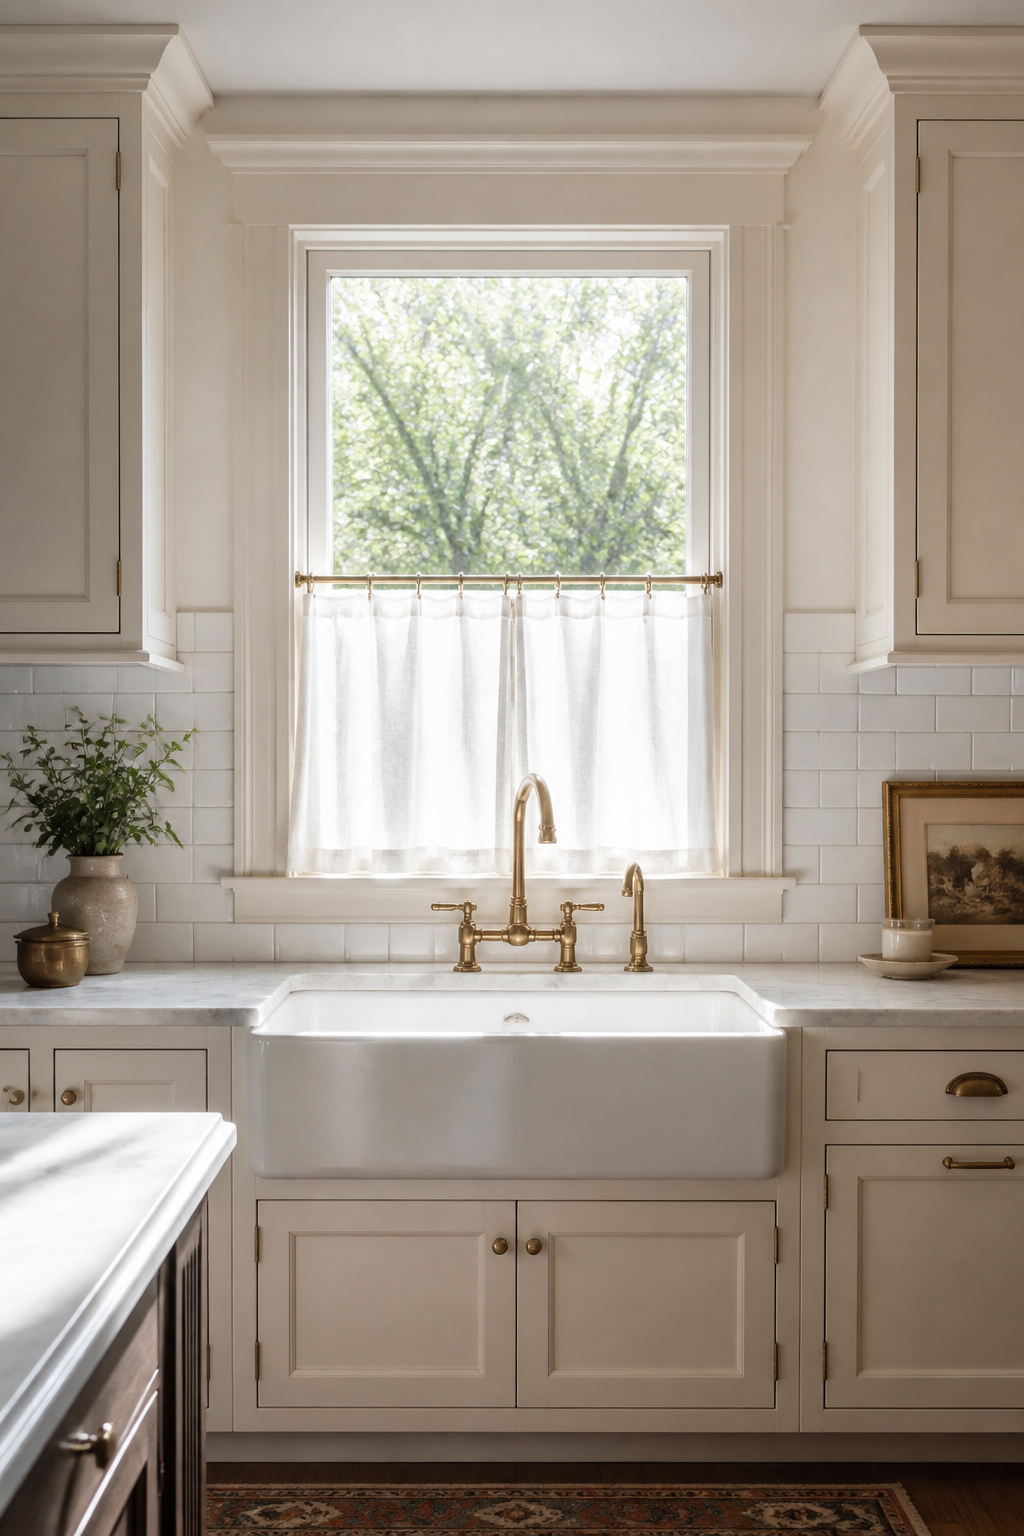
The simplest traditional approach is flat stock with a backband: a plain board surrounding the window opening, with a smaller backband moulding running along its outer edge to add a shadow line. A built-up moulding assembly layers multiple pieces — a base board, a casing with an ogee or ovolo inner profile, a cap moulding at the head — to create depth and complexity that reads as more formal. For Federal, Georgian, or Colonial Revival kitchens, a crosshead or small pediment detail at the window head adds historical specificity.
Window Treatments That Suit the Traditional Kitchen
Simple cafe curtains on a brass rod across the lower half of the window are the most honest choice: unlined cotton or linen in a white or cream stripe allows light to come in above while providing privacy at eye level. Interior shutters (solid or louvred) are the most architectural option and suit rooms with deep enough sills to accommodate the panel thickness when open. The key detail to avoid: stopping the backsplash tile directly at the window without introducing a transition moulding. That junction needs a proper finish — a simple piece of flat stock works — and adding traditional details to your kitchen at this level of resolution is exactly what separates a renovation from a room. For more on these finishing moves, adding traditional details to your kitchen covers the specific junctions that matter most.
14. Integrated Appliance Panels for a Seamless Traditional Kitchen Design
Traditional kitchen design predates built-in appliances by centuries. The historically coherent approach to refrigerators and dishwashers in a traditional kitchen has always been to conceal them behind period-appropriate cabinetry — treating modern equipment as functional machinery to be housed in the kitchen rather than displayed by it. This has been standard practice in high-end English, German, and Scandinavian kitchen design for decades; it’s a long-established method for maintaining aesthetic continuity.
Panel-ready appliances accept custom cabinetry panels that match the surrounding doors in material, paint color, and finish. The dishwasher disappears into the base cabinet run; the refrigerator becomes a pair of tall cabinet towers; the kitchen reads as an uninterrupted cabinetry composition from wall to wall. The result is visual quiet — the eye reads furniture, not appliances-between-furniture-sections. This is the defining visual quality of a seamless traditional kitchen design.
Which Appliances to Panel
Dishwashers from virtually every high-end brand (Bosch, Miele, Gaggenau, Thermador) offer panel-ready options accepting a standard 24-inch wide panel. Counter-depth panel-ready refrigerators align with standard 24-inch deep cabinetry; columnar refrigerator/freezer pairs are the most architecturally elegant solution for larger kitchens. Ranges and cooktops are typically left exposed — a colored enamel range (cream, navy, or black) or a professional-style range with brass trim works as a deliberate design element rather than something to hide. The critical detail: the panel must match adjacent cabinetry exactly — same substrate, same paint color matched to the actual finished cabinet on site, same sheen level. Always match panels to physical samples. Dishwasher panel clearance is typically 1/8 inch all around; refrigerator clearance follows the manufacturer’s specification, which varies by model.
15. Warm Pendant Lighting in Bronze or Brass Clustered Over the Island
Pendant lighting over the kitchen island is among the last decisions made and one of the most visible — the fixtures hang at eye level, define the island’s character from across the room, and determine the quality of light for the kitchen’s primary work surface. In a traditional kitchen, the material vocabulary for pendant lighting is clear: bronze or aged brass, with glass shades that diffuse light rather than project it.
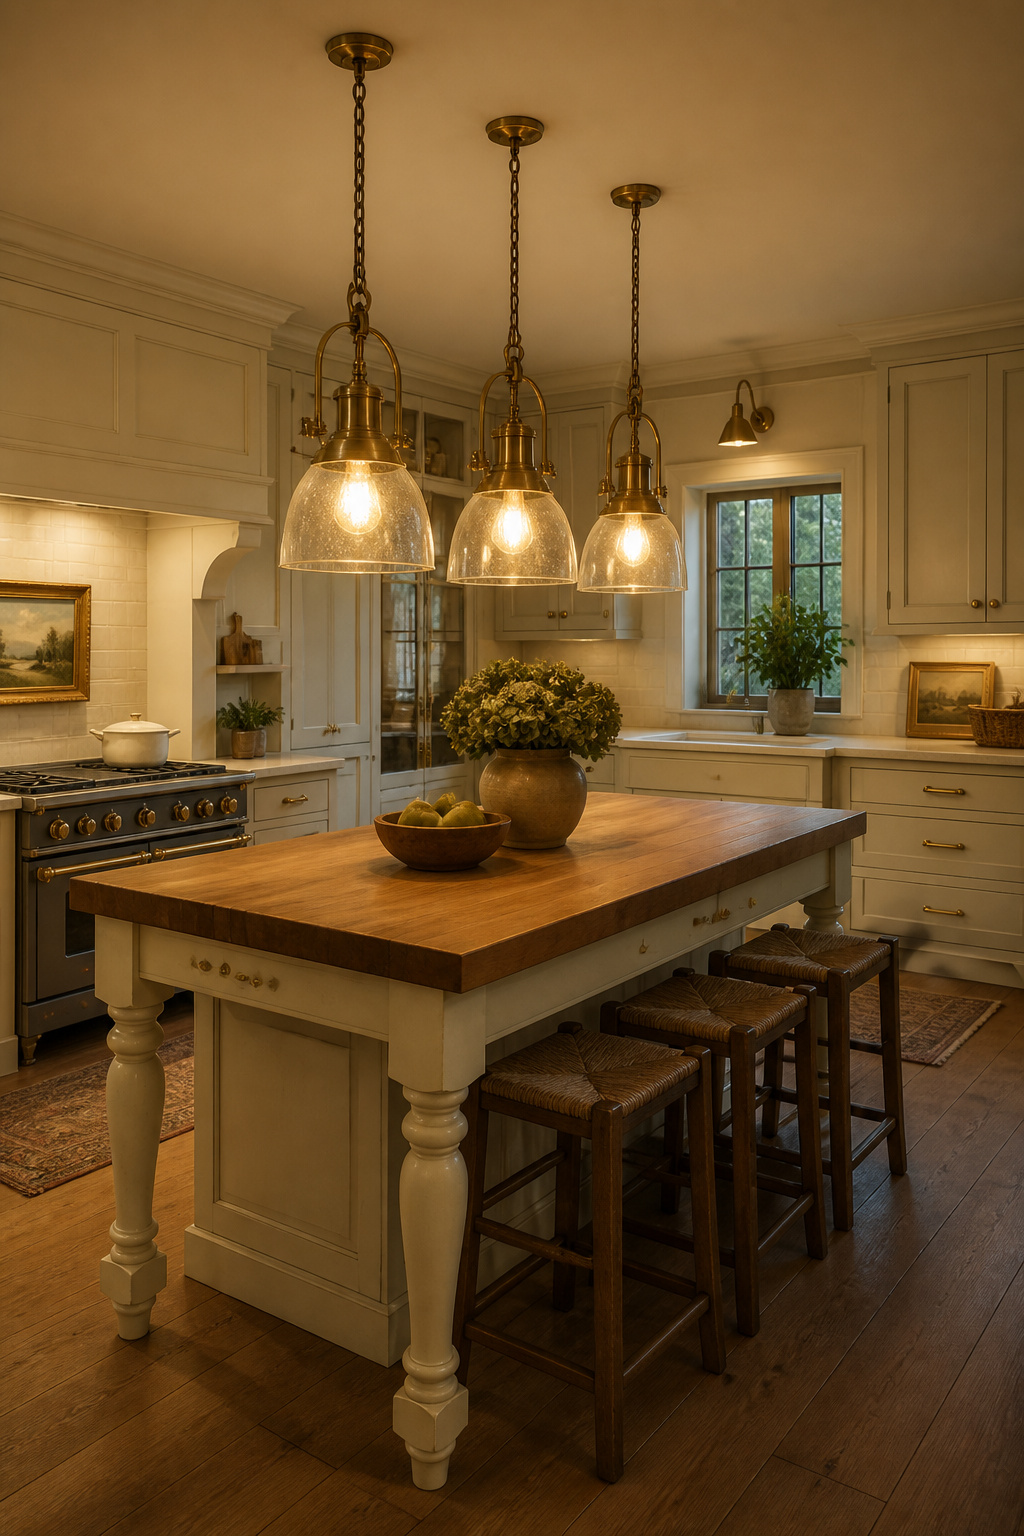
Scale and spacing are the technical decisions that determine success. For a 36-48-inch island: two pendants spaced approximately 30 inches apart provides balanced coverage. For a 60-inch or longer island: three pendants, or two larger pendants in the 18-20-inch diameter range. Hang the fixture bottoms 30-36 inches above the island surface — lower for visual drama in rooms with high ceilings. For a deeper look at the options and configurations, the kitchen lighting over the island considerations include spacing formulas for different island lengths and ceiling heights.
Finish and Glass: Bronze, Brass, or Blackened Steel
Oil-rubbed bronze is the most versatile finish for traditional kitchen pendants: its warm brown-black tone works against cream, white, navy, and green cabinetry without competing. Aged brass is the right choice when brass hardware pulls are already part of the kitchen’s material language — the pendant becomes part of a cohesive brass story rather than introducing a second competing metal. Blackened steel reads more contemporary-traditional and suits darker kitchen palettes (navy or green island cabinetry) better than white and cream. For glass shades: seeded glass (textured with small air bubbles) diffuses light softly, eliminates the harshness of visible bulbs, and is available in clear and amber. Amber seeded glass in aged brass fixtures produces the warmest, most atmospheric light in a traditional kitchen — the kind of light that makes the room feel like it’s been there for years. Ribbed glass offers more visual graphic interest while remaining within the traditional vocabulary.
How to Build Your Own Traditional Kitchen Design From the Ground Up
The most useful thing to know about traditional kitchen design is that sequence matters more than budget. A kitchen with inset cabinetry, honed marble, and bare-bulb pendant lighting is less resolved than one with overlay cabinetry, quartz countertops, and beautiful seeded-glass bronze pendants. Material choices and their relationship to each other determine success — not the absolute price of any individual element.
Start with the fixed elements: cabinet style and finish, countertop material. These are the most expensive and least reversible decisions in the room, and everything else layers over them. Once cabinetry colour is confirmed on site (not from a paint chip — on site, in the actual room’s light), select hardware against the finished cabinet. Then choose backsplash tile once the countertop is confirmed, because tile needs to work with both materials simultaneously. Flooring is selected against both cabinetry and countertop samples at the same time.
The Traditional Kitchen Design Budget Priority
For those not doing a full renovation: the highest-impact single change is hardware. Replacing builder-grade satin nickel pulls with aged brass cup pulls or bin pulls transforms painted cabinetry from anonymous to characterful for $200-800 depending on kitchen size. The second most impactful change is a statement range hood — it provides the focal point the room was missing and shifts the aesthetic register of the whole kitchen. Third is the farmhouse sink, which requires cabinetry modification but gives the traditional kitchen design a specific identity that no other single change delivers as clearly.
A well-considered traditional kitchen design doesn’t need to arrive complete. The best ones accumulate over time — a fireclay sink now, turned-leg island later, plate rack in the space above the sink when the right one appears. What makes traditional kitchen design durable isn’t the budget that built it. It’s the commitment to materials and details that age honestly, and the patience to add them deliberately.