Staring at your outdated bathroom and dreading the renovation estimates that seem to climb higher each year? You’re not alone in feeling overwhelmed by the prospect of transforming your space without draining your savings account. The good news is that a stunning bathroom makeover doesn’t require a second mortgage or months of living in construction chaos.
Smart homeowners are discovering that strategic, high-impact changes can deliver the fresh, modern look they crave while keeping costs refreshingly low. From clever DIY techniques to savvy shopping strategies, the path to your dream bathroom is more affordable than you might imagine. These proven approaches focus on maximizing visual impact while minimizing financial strain, proving that style and budget consciousness can beautifully coexist.
Ready to discover how small investments can yield dramatic transformations? These 19 brilliant bathroom remodeling on a budget ideas will show you exactly how to achieve that magazine-worthy look without the magazine-worthy price tag, saving you thousands while creating a space you’ll love for years to come.
1. Establish a Strict Budget First to Guide All Decisions
Before selecting a single tile or fixture, creating a detailed budget serves as your renovation roadmap, preventing costly detours and ensuring every dollar works strategically toward your vision. This financial framework eliminates the temptation to overspend on impulse purchases while forcing you to prioritize essential improvements over luxury additions. Research shows that homeowners with predetermined budgets reduce cost overruns by 15-20% compared to those who plan as they go, making this step crucial for successful bathroom remodeling on a budget.
A well-defined budget also accelerates decision-making by immediately filtering options within your price range, reducing the overwhelming nature of endless choices. When you know exactly how much you can allocate to flooring, fixtures, and labor, selecting materials becomes efficient rather than stressful. Professional contractors consistently emphasize that “the biggest renovation mistakes happen when homeowners start shopping before budgeting – it’s like grocery shopping when hungry, everything looks necessary and affordable until you reach the checkout.”
Essential Budget Categories:
- Materials (tiles, fixtures, hardware): 40-50% of total budget
- Labor costs (plumbing, electrical, installation): 30-40% of total budget
- Contingency fund for unexpected issues: 10-20% of total budget
- Tools and supplies: 5-10% of total budget
The magic of this collection struck when we realized how proper financial planning transforms renovation stress into renovation success.
2. Prioritize Must-Have Upgrades Over Nice-to-Haves
Once your budget framework is established, distinguishing between essential improvements and luxury additions becomes your next strategic move for effective bathroom remodeling on a budget. Focus 70-80% of your resources on functional necessities like fixing leaks, improving ventilation, and updating safety hazards before considering aesthetic enhancements. This approach ensures your bathroom operates efficiently while preventing costly problems that could derail your entire project timeline and budget.
Smart prioritization also maximizes your return on investment by addressing issues that impact daily functionality and home value. A properly functioning toilet, adequate lighting, and reliable plumbing provide immediate benefits and long-term peace of mind, while decorative elements can often be added gradually over time. Interior designers frequently advise clients that “a beautiful bathroom that doesn’t function properly will quickly become a source of frustration rather than joy – always build your foundation with essentials first.”
Must-Have Priority List:
- Safety and code compliance issues (GFCI outlets, proper ventilation)
- Plumbing repairs and water damage prevention
- Functional lighting for daily tasks
- Efficient fixtures that reduce utility costs
Nice-to-Have Additions:
- Luxury finishes and decorative hardware
- High-end tile patterns and custom features
- Spa-like amenities and comfort upgrades
After months of sourcing and curation, we’ve learned that successful renovations always start with solid functional foundations.
3. Assess Your DIY Skills to Save on Labor Costs
Understanding your personal capabilities honestly determines where you can slash labor expenses while avoiding costly mistakes that require professional fixes. Labor typically represents 30-50% of renovation costs, making DIY contributions one of the most effective ways to stretch your bathroom remodeling on a budget dollars. Simple tasks like painting, installing pre-fabricated vanities, or replacing basic fixtures offer substantial savings opportunities for moderately handy homeowners willing to invest time and effort.
However, recognizing your limits prevents expensive disasters that could exceed the cost of hiring professionals initially. Complex plumbing modifications, electrical work requiring permits, and structural changes demand licensed expertise to ensure safety and code compliance. Experienced contractors warn that “the most expensive DIY projects are often those that started as cost-saving measures but required professional intervention to fix improper installation – always weigh potential savings against risk of costly corrections.”
Beginner-Friendly DIY Tasks:
- Painting walls and trim
- Installing new hardware and accessories
- Replacing faucets and showerheads
- Basic tile work and grouting
Professional-Only Territory:
- Major plumbing relocations
- Electrical circuit additions or modifications
- Structural wall changes
- Complex tile installations requiring waterproofing
The craftsmanship in this approach reveals itself in details like knowing when to tackle projects yourself and when professional expertise provides better value.
4. Transform Walls Instantly with a Fresh Coat of Paint
Paint delivers the most dramatic visual transformation per dollar spent, making it the cornerstone of any successful bathroom remodeling on a budget strategy. Quality bathroom paint costs $100-300 for materials while professional application might add $200-500, yet the impact rivals renovations costing thousands more. Moisture-resistant formulations specifically designed for bathrooms prevent mold growth while providing lasting beauty that withstands daily humidity and temperature fluctuations.
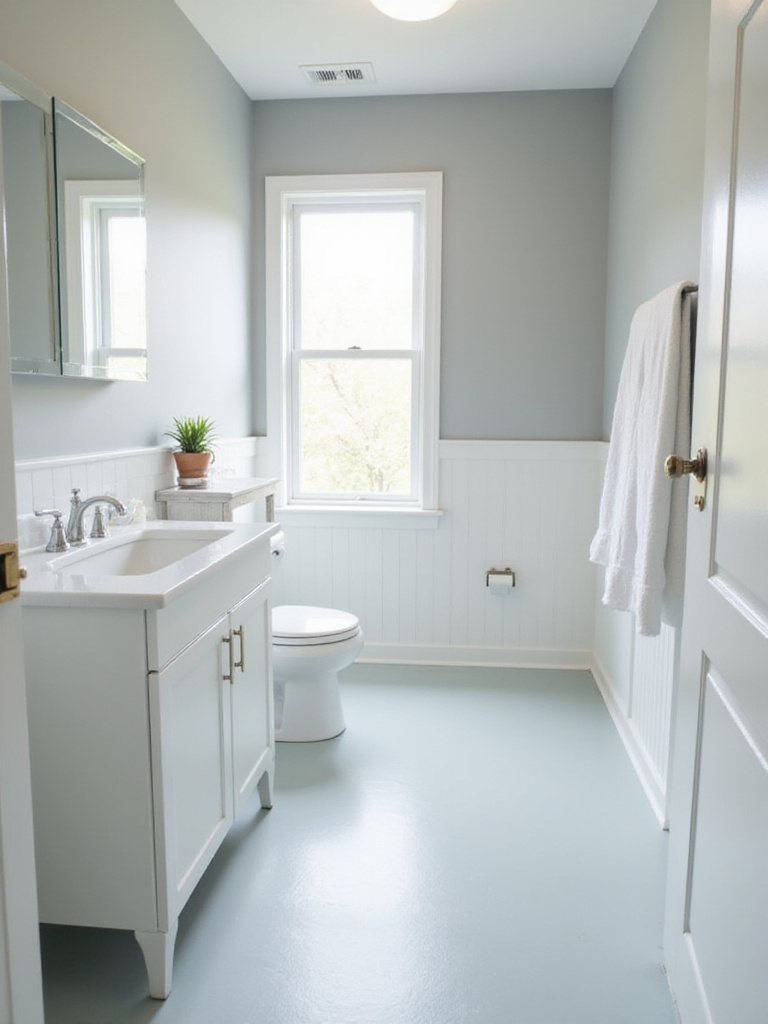
Strategic color selection can visually expand small spaces, brighten dim areas, and create cohesive design themes that tie other elements together seamlessly. Light, neutral tones reflect available light and create an airy feeling, while bold accent walls can add personality without overwhelming compact spaces. Professional painters consistently note that “proper surface preparation and quality paint make the difference between a weekend refresh and a lasting transformation – investing in premium bathroom-specific formulations pays dividends in durability and appearance.”
Paint Selection Guidelines:
- Semi-gloss or satin finishes for moisture resistance
- Mildew-resistant formulations for high-humidity areas
- Light colors to maximize natural light reflection
- Quality primers for lasting adhesion and coverage
The unexpected pairing that always works is combining thorough prep work with premium paint products for professional-looking results.
5. Update Cabinet and Vanity Hardware for a New Look
Swapping outdated knobs and pulls instantly modernizes your vanity while requiring minimal investment and time, making this one of the highest-impact strategies for bathroom remodeling on a budget. New hardware typically costs $50-200 depending on quality and quantity, yet transforms the entire vanity’s appearance as dramatically as replacing the entire unit. This simple upgrade allows you to experiment with different styles, finishes, and trends without committing to major renovations or expenses.
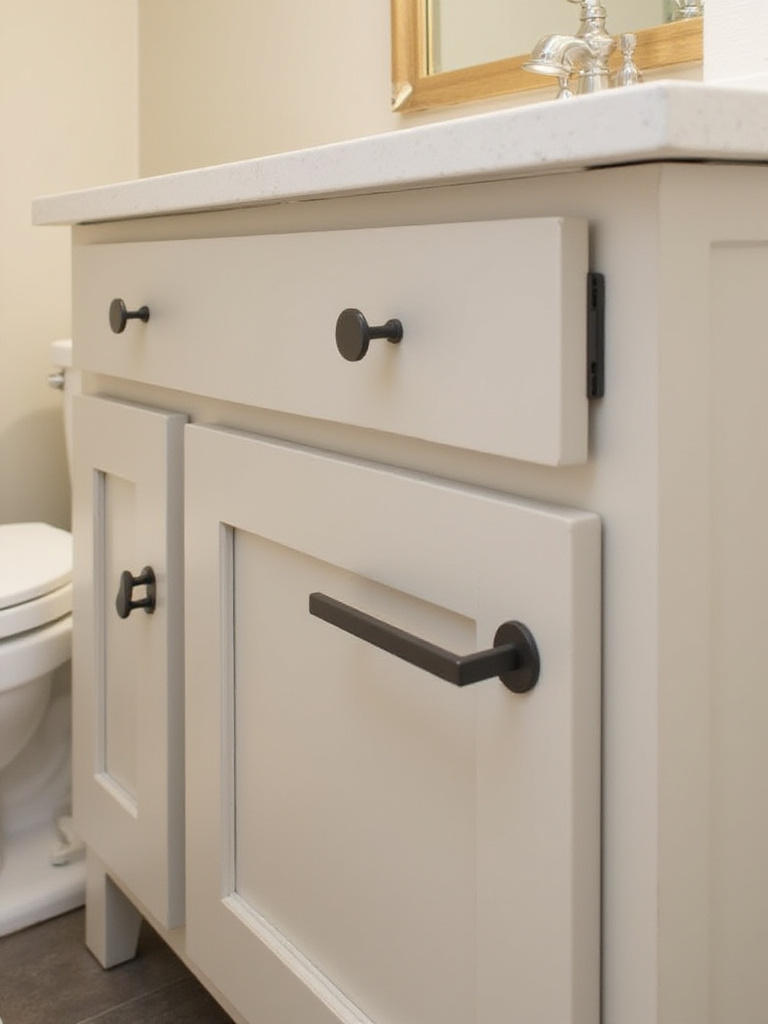
Quality hardware also improves daily functionality through smoother operation and enhanced durability compared to worn original pieces. Modern finishes like matte black, brushed gold, or oil-rubbed bronze can bridge design gaps between existing fixtures and new additions, creating cohesive aesthetics throughout your space. Interior designers often describe hardware as “jewelry for your cabinetry – small details that make significant style statements and show attention to design quality.”
“Hardware updates are the fastest way to give dated cabinetry a contemporary feel without the expense of replacement. It’s like changing accessories on an outfit – suddenly everything looks fresh and intentional.” – Professional Interior Designer
The designer’s secret here is to measure existing hole spacing precisely to avoid drilling new holes, ensuring quick installation and professional results.
6. Swap Out Old Light Fixtures for Modern Illumination
Updating outdated light fixtures immediately enhances both functionality and aesthetics while reducing energy consumption through modern LED technology. Quality LED fixtures cost $75-300 each but provide 75-80% energy savings compared to incandescent alternatives, making this upgrade financially beneficial for bathroom remodeling on a budget both initially and long-term. Proper bathroom lighting improves daily tasks like grooming while creating ambiance that makes the space feel larger and more welcoming.
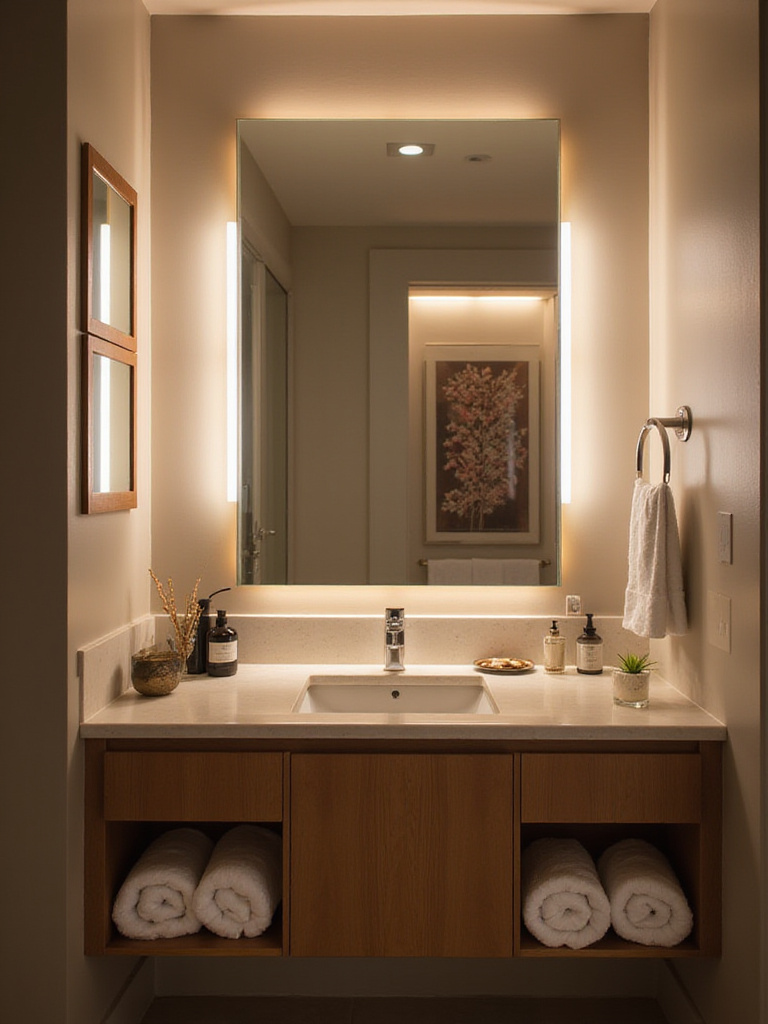
Strategic lighting placement can eliminate shadows, highlight attractive features, and create the illusion of expanded space through careful positioning and fixture selection. Modern fixtures also offer improved safety through better illumination of potentially hazardous wet areas while adding contemporary style that complements other upgrades. Lighting designers emphasize that “bathroom lighting serves multiple purposes – task, ambient, and accent – so choosing fixtures that address these needs transforms both function and atmosphere significantly.”
Lighting Upgrade Priorities:
- Vanity lighting for grooming tasks
- Overhead ambient lighting for general illumination
- Accent lighting to highlight architectural features
- Dimmer controls for versatility and mood adjustment
What makes this design special is the way modern LED fixtures provide superior light quality while reducing operating costs substantially.
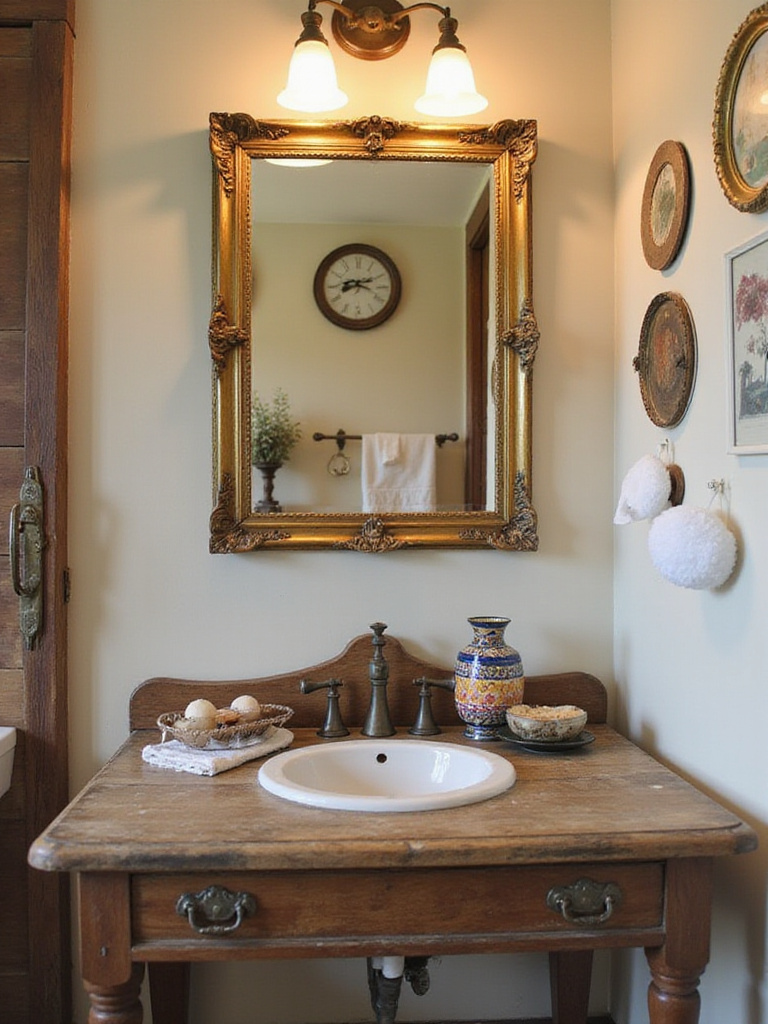
7. Upgrade Your Mirror to Elevate the Entire Room
A strategically chosen mirror serves as both functional necessity and powerful design element, capable of doubling perceived space while reflecting light throughout your bathroom. Quality mirrors range from $100-500 but deliver visual impact equivalent to much more expensive renovations, making them essential components of bathroom remodeling on a budget projects. Large or uniquely shaped mirrors can become focal points that draw attention away from areas you haven’t yet updated while adding sophistication and style.
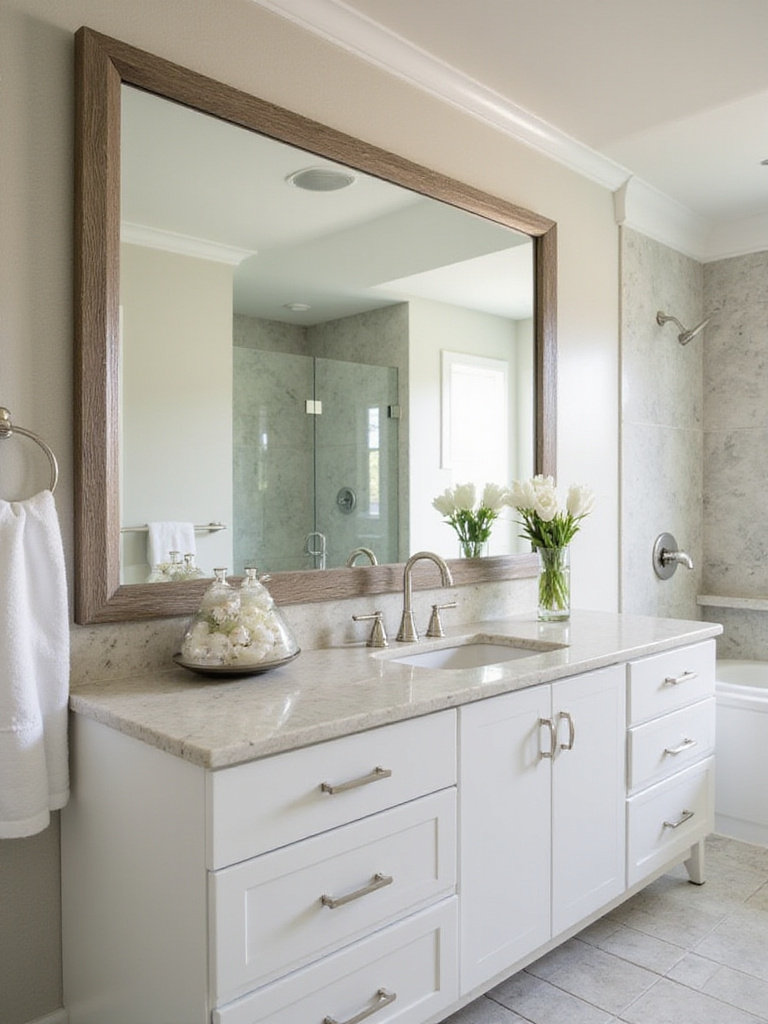
Mirrors also amplify natural and artificial light, brightening spaces that might otherwise feel cramped or dim without expensive lighting additions. The right mirror can tie together various design elements while providing practical benefits for daily routines. Professional designers consistently recommend that “mirrors are often overlooked as design opportunities – they’re not just functional items but architectural elements that can completely change how a space feels and functions.”
Mirror Selection Criteria:
- Size proportional to vanity (70-80% of vanity width)
- Shape that complements overall design theme
- Frame style that coordinates with other fixtures
- Quality construction for long-term durability
The interplay between the mirror and existing lighting creates dramatic improvements in both brightness and perceived spaciousness.
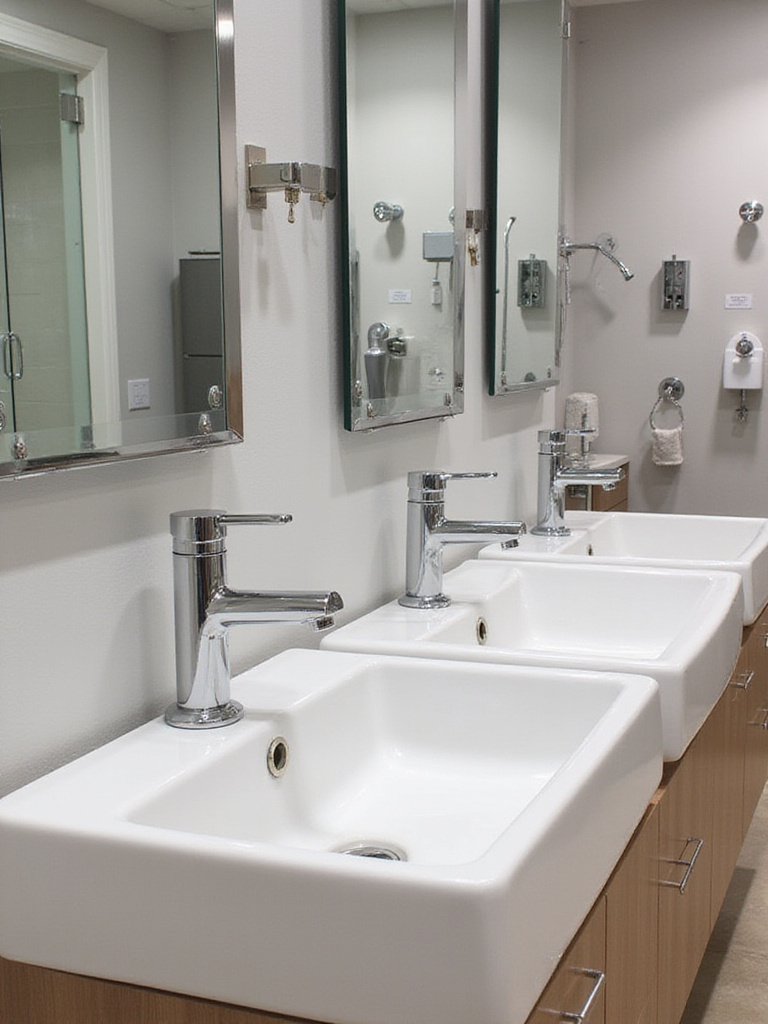
8. Replace Faucets for an Instant Style Refresh
New faucets provide immediate visual updates while often improving water efficiency and daily functionality, making them smart investments for bathroom remodeling on a budget projects. Quality faucets cost $75-300 but can reduce water consumption by 20-30% through improved aerators and flow control technology. This upgrade typically requires only basic tools and 1-2 hours for installation, delivering professional results without professional labor costs.
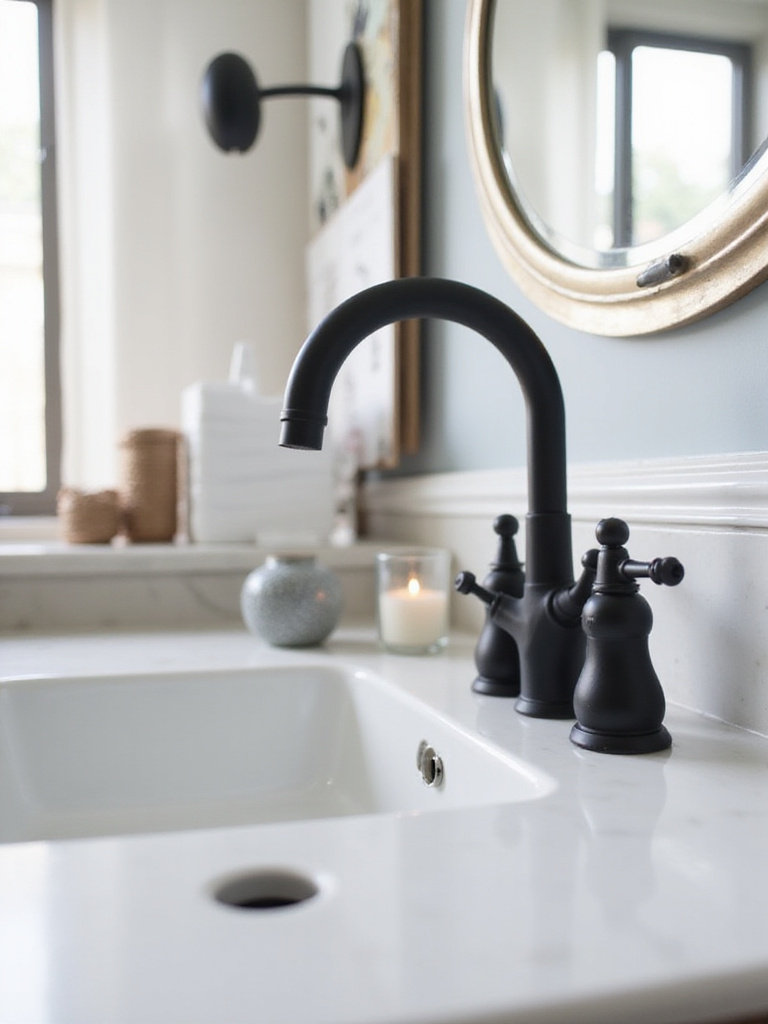
Modern faucet designs also offer enhanced durability through improved materials and engineering compared to older models that may leak or operate poorly. Coordinating faucet finishes with other bathroom hardware creates cohesive design themes that appear professionally planned rather than randomly assembled. Plumbing professionals note that “faucet replacement is one of the most satisfying DIY projects because the improvement is immediately visible and functional – it’s like getting a new car but for a fraction of the cost.”
“The right faucet can make a builder-grade vanity look custom and expensive. It’s amazing how this single change can elevate the entire vanity area and make everything else look more intentional.” – Master Plumber
Beyond the obvious aesthetic improvement, consider how modern faucets offer better water pressure and temperature control for enhanced daily comfort.
9. Install a New Showerhead for Improved Experience
Upgrading your showerhead transforms daily routines while potentially reducing water consumption through efficient modern designs perfect for bathroom remodeling on a budget goals. Quality showerheads cost $50-250 and typically install in 30 minutes or less, yet provide immediate improvements in water pressure, spray patterns, and overall shower satisfaction. WaterSense certified models can reduce water usage by 20-30% without sacrificing performance, lowering utility bills while enhancing comfort.
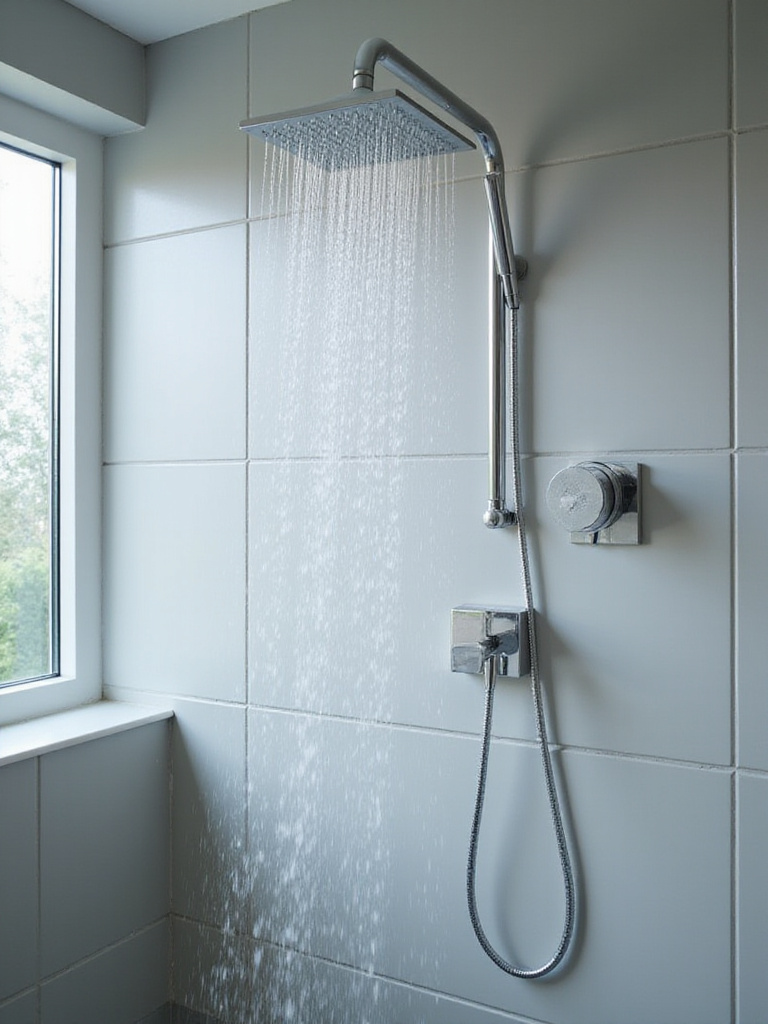
Modern showerheads offer multiple spray settings, improved pressure optimization, and better temperature consistency compared to older models that may provide inadequate or uneven coverage. This upgrade also allows you to coordinate finishes with other fixtures, creating design continuity throughout your bathroom space. Professional plumbers consistently observe that “showerhead replacement is the easiest way to dramatically improve shower quality – many homeowners are amazed at how much better their daily routine becomes with proper water flow and pressure.”
Showerhead Features to Consider:
- Multiple spray patterns for versatility
- Water-saving certification for efficiency
- Adjustable height or handheld options
- Finish coordination with existing fixtures
The sustainable journey of this upgrade involves both immediate comfort improvements and long-term utility savings that benefit your budget continuously.
10. Resurface Tubs and Tiles Instead of Replacing Them
Professional resurfacing transforms worn bathtubs and tile surfaces for 70-80% less than full replacement costs, making this technique invaluable for bathroom remodeling on a budget projects. Quality resurfacing typically costs $400-800 compared to $2,000-5,000+ for new installation, while providing surfaces that look and feel completely renewed. This process also eliminates demolition mess and timeline disruptions associated with full replacement projects.
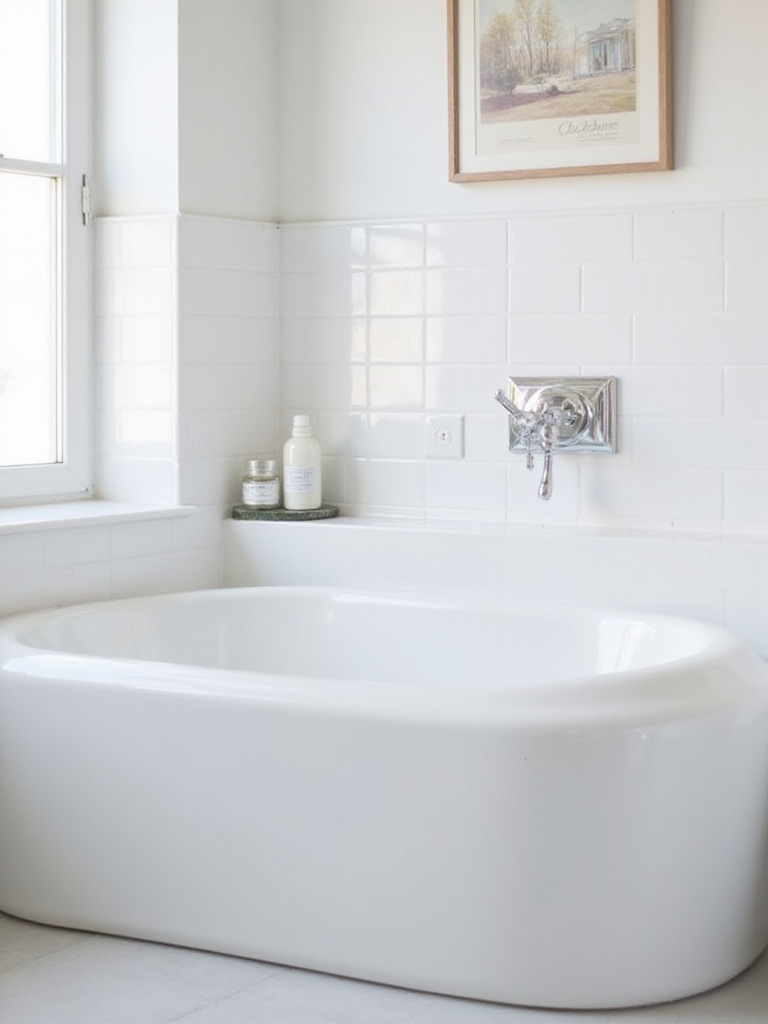
Properly executed resurfacing can last 10-15 years with appropriate care, providing excellent return on investment while allowing you to allocate budget toward other improvements. Modern resurfacing materials offer improved durability and appearance compared to older techniques, with options that resist chipping, staining, and wear effectively. Resurfacing professionals emphasize that “today’s refinishing materials and techniques produce results that are virtually indistinguishable from new installations when properly applied – it’s an excellent option for budget-conscious homeowners.”
Resurfacing Benefits:
- Significant cost savings over replacement
- Quick completion (1-3 days vs. weeks)
- No demolition or disposal requirements
- Customizable colors and finishes
The environmental story behind this technique involves extending product lifecycles while reducing landfill waste substantially.
11. Apply Peel-and-Stick Tiles for Affordable Floor Updates
Peel-and-stick tiles offer remarkable versatility for bathroom remodeling on a budget, providing realistic wood, stone, or ceramic appearances at fraction of traditional installation costs. Quality adhesive tiles cost $1-7 per square foot compared to $5-15+ for ceramic alternatives, while installation requires only basic tools and can be completed in single day. Modern formulations provide improved durability and water resistance suitable for bathroom environments when properly installed over prepared surfaces.
This flooring option also allows for easy future updates or repairs since individual tiles can be replaced without affecting surrounding areas. The immediate walkability eliminates cure times associated with traditional tile installations, minimizing bathroom downtime during renovations. Flooring specialists note that “the key to successful peel-and-stick installation is meticulous surface preparation – any debris or unevenness will show through and compromise adhesion, but proper prep work yields professional-looking results.”
Installation Success Factors:
- Thoroughly clean and level subfloor
- Allow tiles to acclimate before installation
- Use proper tools for cutting and fitting
- Apply consistent pressure for optimal adhesion
Unlike conventional options, this approach allows renters to update spaces without permanent modifications while homeowners enjoy affordable style flexibility.
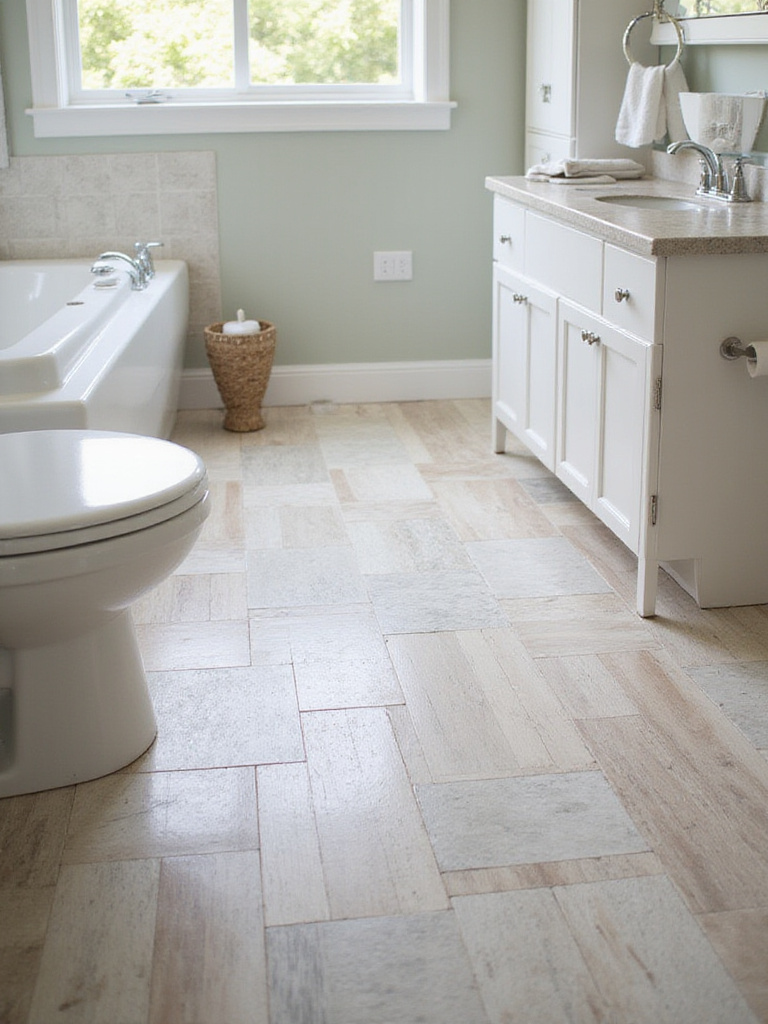
12. Choose Luxury Vinyl Plank for Durable, Budget-Friendly Floors
Luxury Vinyl Plank (LVP) delivers authentic wood and stone appearances with superior water resistance essential for bathroom environments, making it ideal for bathroom remodeling on a budget projects. Quality LVP costs $2-7 per square foot installed, significantly less than hardwood ($8-20+) or natural stone ($10-25+), while providing 100% waterproof performance that prevents moisture damage and mold growth. Modern manufacturing techniques create incredibly realistic textures and patterns that rival natural materials visually.
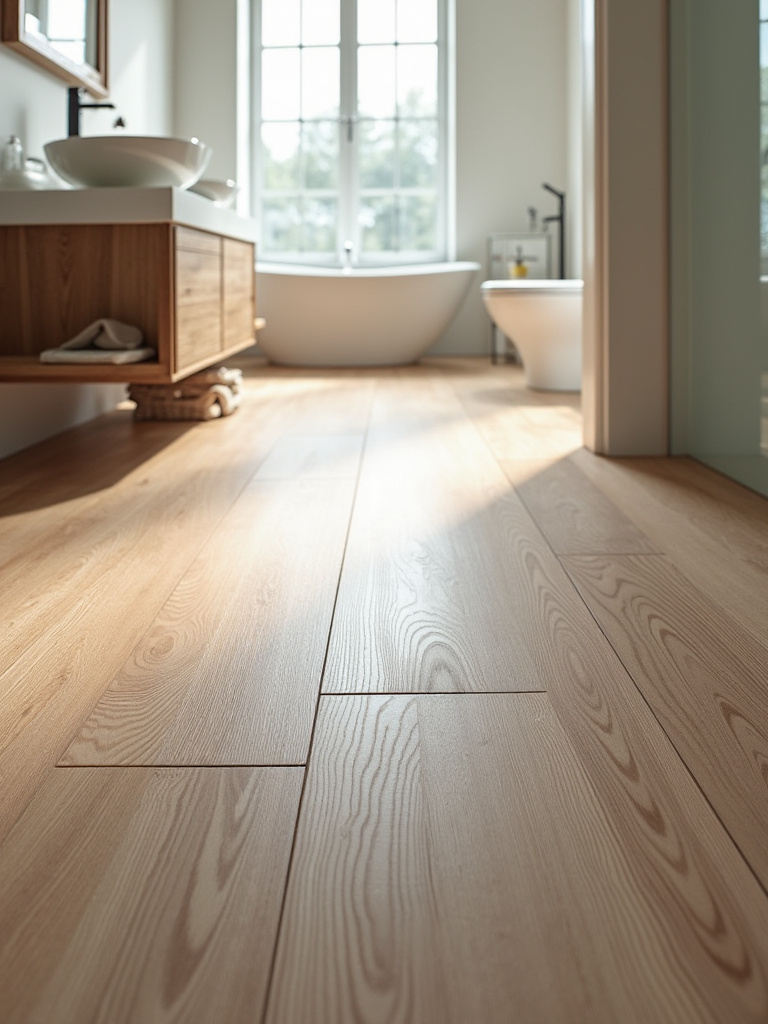
LVP also offers enhanced durability through thick wear layers that resist scratches, dents, and daily wear while requiring minimal maintenance beyond regular cleaning. The click-and-lock installation system allows for DIY installation over most existing surfaces, further reducing project costs and timeline. Flooring experts consistently recommend that “for bathrooms, LVP’s waterproof nature eliminates the moisture concerns associated with hardwood or laminate, while the comfort underfoot and realistic appearance make it an excellent choice for any design style.”
“LVP technology has advanced dramatically in recent years. Today’s products are virtually indistinguishable from natural materials but offer superior performance in wet environments like bathrooms.” – Certified Flooring Installer
The visual weight balances perfectly when you choose planks with realistic grain patterns and appropriate scale for your bathroom size.
13. Paint or Cover Countertops for a Modern Finish
Countertop refinishing kits and adhesive films transform dated surfaces for under $200, delivering 85-95% savings compared to replacement costs while achieving contemporary appearances. Quality countertop paint systems can successfully mimic granite, marble, or concrete textures when properly applied, providing durable surfaces suitable for bathroom use. This technique works particularly well for bathroom remodeling on a budget since bathroom counters typically receive less intensive use than kitchen surfaces.
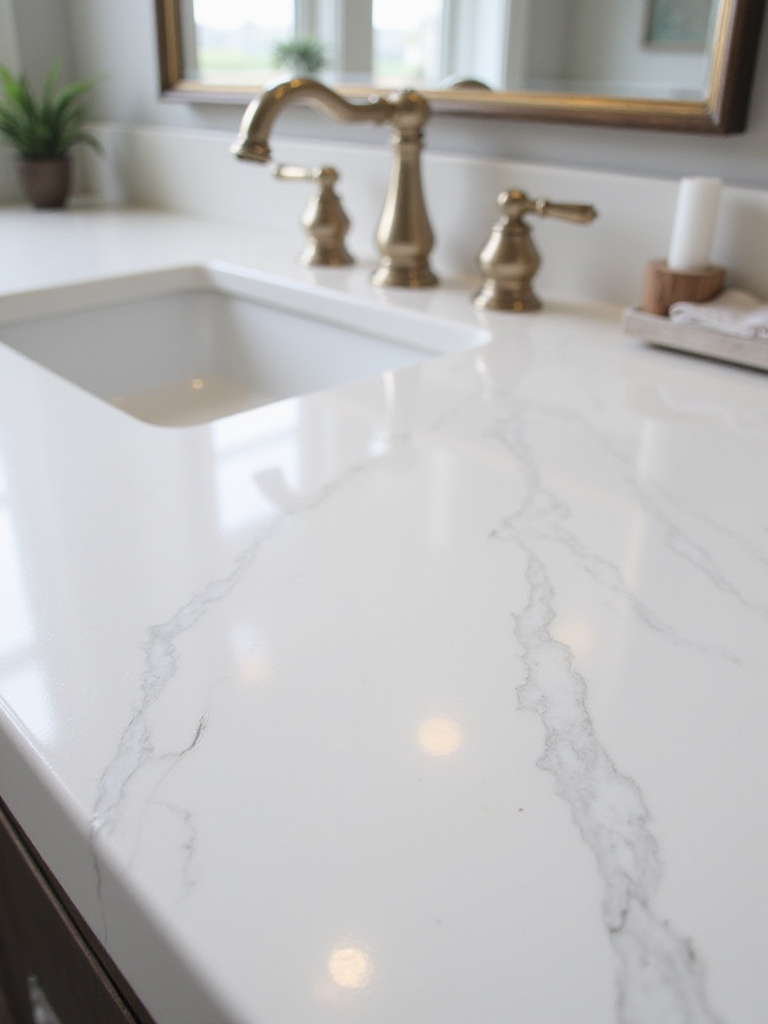
Professional-grade refinishing products offer improved durability and appearance compared to basic paint options, with specialized formulations designed to withstand moisture and daily use. The process typically completes in 2-3 days including cure time, allowing quick transformation without extended bathroom closures. Refinishing specialists advise that “surface preparation is absolutely critical for lasting results – thorough cleaning, light sanding, and proper priming ensure the new finish adheres properly and looks professional.”
Refinishing Process Steps:
- Deep clean and degrease existing surface
- Sand lightly for improved adhesion
- Apply specialized primer designed for countertops
- Build color and texture layers according to kit instructions
- Seal with durable topcoat for protection
The finishing touch that elevates the entire look involves careful attention to edges and corners where wear typically shows first.
14. Install a Water-Saving Toilet to Reduce Utility Bills
Modern high-efficiency toilets reduce water consumption by 20-60% compared to older models while providing superior flushing performance, making them excellent investments for bathroom remodeling on a budget projects. WaterSense certified toilets use 1.28 gallons per flush or less compared to older models using 3.5-7 gallons, potentially saving $140+ annually on water bills for average households. These savings continue throughout the toilet’s 15-20 year lifespan, providing substantial long-term value.
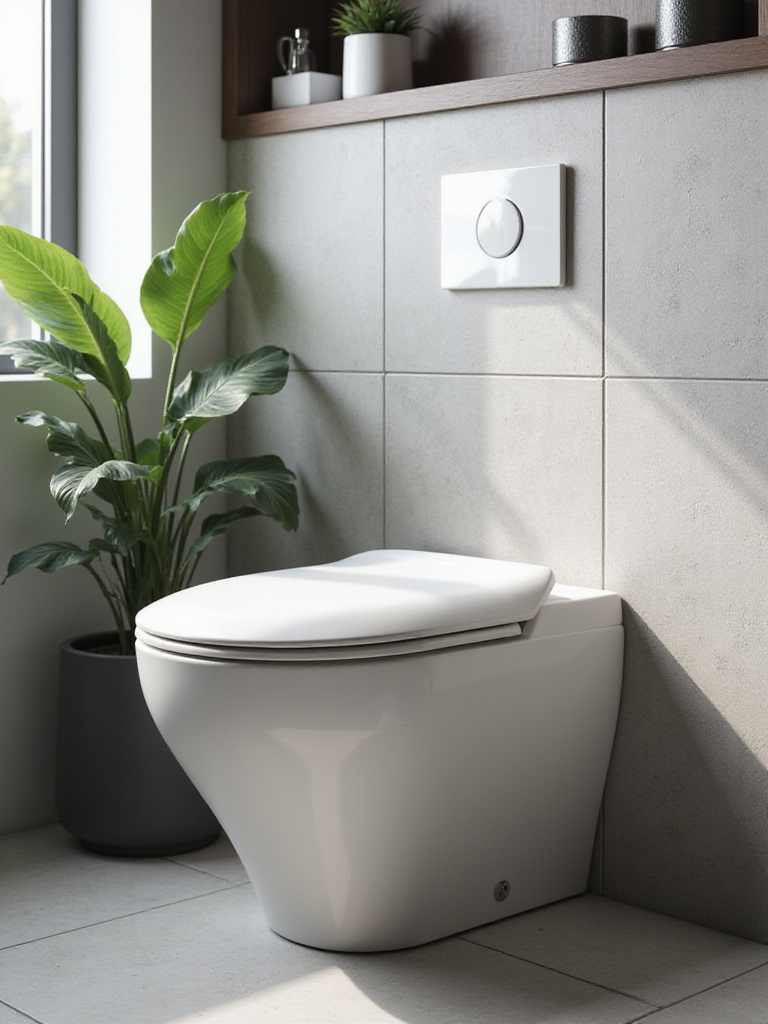
Contemporary efficient toilets also offer improved comfort through better bowl designs and enhanced flushing systems that prevent clogs and reduce maintenance requirements. Many utilities offer rebates for water-efficient fixtures, further reducing upfront costs while supporting environmental conservation goals. Plumbing professionals emphasize that “modern high-efficiency toilets have overcome the performance issues of early low-flow models – today’s designs provide powerful, reliable flushing while using significantly less water.”
Water-Saving Toilet Benefits:
- Substantial utility bill reductions
- Improved flushing performance and reliability
- Potential utility rebates and incentives
- Enhanced comfort and contemporary styling
The investment value comes from the exceptional combination of immediate comfort improvements and ongoing operational savings.
15. Add Open Shelving for Stylish and Practical Storage
Open shelving maximizes storage capacity while creating visual spaciousness essential for successful bathroom remodeling on a budget in smaller spaces. Quality floating shelves cost $25-100 each installed, providing accessible storage for towels, toiletries, and decorative items without the expense of custom cabinetry. This approach also allows for easy reconfiguration as needs change while showcasing attractive items that enhance overall design aesthetics.
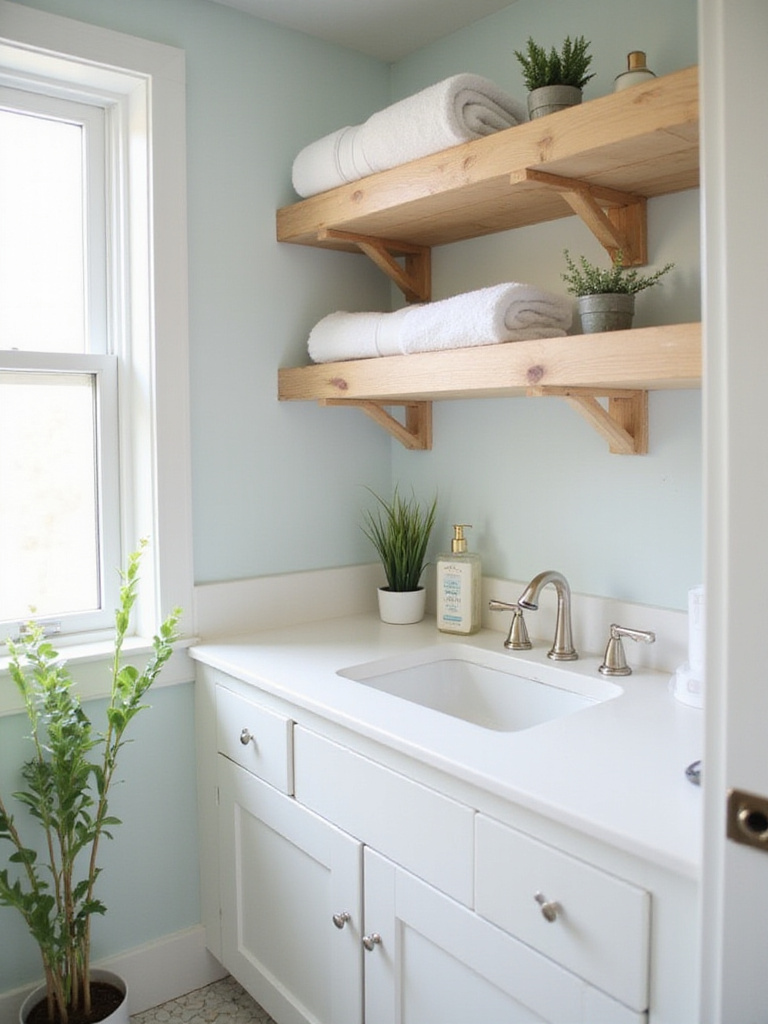
Strategic shelf placement can draw attention to attractive architectural features while providing functional storage that reduces countertop clutter effectively. Open storage also encourages organization and cleanliness since contents remain visible, promoting tidier habits naturally. Interior designers frequently recommend that “open shelving forces intentional curation – you’ll naturally keep only attractive, useful items visible, which creates a cleaner, more organized appearance overall.”
Shelving Placement Guidelines:
- Above toilet areas for maximum space utilization
- Beside vanities for frequently used items
- In shower niches for convenient access
- Near entry points for towel storage
The mood shifts dramatically when you add well-organized open storage that combines functionality with visual appeal.
16. Scour Thrift Stores for Unique Decor and Accessories
Secondhand shopping provides access to unique decorative elements at 50-90% below retail prices while supporting sustainable consumption practices perfect for bathroom remodeling on a budget goals. Vintage mirrors, artwork, storage baskets, and decorative accessories found at thrift stores often possess character and quality unavailable in mass-produced alternatives. This approach also allows for experimentation with different styles and periods without significant financial commitment.
Thrifted items can be easily customized through painting, reupholstering, or minor modifications to perfectly match your design vision while maintaining budget consciousness. The hunt for perfect pieces also becomes an enjoyable part of the renovation process rather than a stressful shopping obligation. Experienced thrift shoppers note that “patience and regular visits are key to finding exceptional pieces – the best items often appear unexpectedly, so maintaining a wish list helps focus searches effectively.”
“Some of my most treasured bathroom accessories came from estate sales and thrift stores. These pieces have stories and character that you simply can’t buy new, and they often become conversation starters.” – Vintage Design Enthusiast
The cultural heritage preserved in each piece includes craftsmanship and materials that modern mass production rarely matches.
17. Shop End-of-Season Sales for Deep Discounts on Fixtures
Strategic timing of major purchases can reduce fixture costs by 30-70% through end-of-season clearances and inventory reduction sales, maximizing bathroom remodeling on a budget effectiveness. Major retailers typically clear inventory during specific periods: late summer for spring lines, late winter for fall collections, and year-end for annual overstock. Planning purchases around these cycles allows access to premium fixtures at budget-friendly prices.
Clearance shopping also provides opportunities to upgrade to higher-quality brands or finishes that would otherwise exceed budget limitations while maintaining the same overall expenditure. However, successful sale shopping requires advance planning and flexibility since specific models or colors may have limited availability. Retail professionals advise that “the best clearance deals often appear with little notice, so having measurements, specifications, and backup choices ready allows quick decision-making when opportunities arise.”
Sale Shopping Strategy:
- Subscribe to retailer newsletters for advance notice
- Create detailed specification lists before shopping
- Check return policies for clearance items
- Consider open-box and floor model discounts
What surprises clients most is how strategic timing can make luxury fixtures affordable within modest budgets.
18. Re-Grout Existing Tiles to Brighten Your Bathroom
Fresh grout transforms existing tile installations for under 10% of full replacement costs while dramatically improving cleanliness and visual appeal essential for bathroom remodeling on a budget success. Professional re-grouting typically costs $200-500 for average bathrooms compared to $2,000-8,000+ for complete tile replacement, while providing remarkably similar aesthetic improvements. Clean, properly sealed grout also prevents moisture infiltration that can cause expensive damage behind walls.
Quality grout removal and replacement requires patience and proper tools but remains within reach of motivated DIY homeowners willing to invest time for significant savings. Light-colored grout can brighten spaces considerably while making tiles appear larger and more prominent within the overall design. Tile professionals consistently emphasize that “grout condition dramatically affects tile appearance – even expensive tiles look cheap with dirty, cracked grout, while fresh grout makes modest tiles look professionally installed.”
Re-Grouting Process:
- Remove old grout completely using proper tools
- Clean all surfaces thoroughly before application
- Mix and apply new grout according to manufacturer specifications
- Seal properly for long-term moisture protection
The composition comes together when you realize that grout acts as the frame for your tile artwork.
19. Refresh Old Caulk for a Clean, Professional Finish
New caulk provides the final detail that distinguishes professional-quality bathroom remodeling on a budget results from amateur attempts while preventing costly water damage. Quality bathroom caulk costs under $20 per tube but transforms the appearance of tubs, showers, and vanities while providing essential moisture protection. This simple maintenance task can make other upgrades appear more expensive and professionally executed through clean, precise lines.

Proper caulk application also prevents water infiltration that can cause mold growth, wood rot, and structural damage requiring expensive professional remediation. The contrast between old, discolored caulk and fresh, clean lines immediately improves perceived cleanliness and maintenance quality throughout the space. Professional contractors universally agree that “caulk quality and condition often determine whether a bathroom looks professionally maintained or neglected – it’s a small detail with disproportionate visual impact.”
Caulking Success Tips:
- Remove all old caulk completely before applying new
- Clean surfaces with alcohol for optimal adhesion
- Use painter’s tape for perfectly straight lines
- Tool immediately after application for smooth finish
The emotional response this evokes begins with the satisfaction of crisp, clean lines that make everything else look intentionally designed and professionally maintained.
Conclusion
These 19 strategic approaches prove that stunning bathroom transformations don’t require enormous budgets or extensive construction timelines. By focusing on high-impact, cost-effective improvements – from fresh paint and updated hardware to smart fixture swaps and clever storage solutions – you can achieve the modern, functional bathroom you’ve envisioned while keeping thousands in your bank account. The key lies in understanding which upgrades deliver maximum visual and functional return on investment, allowing you to prioritize spending where it matters most.
Remember that successful bathroom remodeling on a budget isn’t about cutting corners or accepting inferior results – it’s about making informed choices that maximize impact while minimizing expense. Each strategy we’ve explored offers proven pathways to professional-quality results through careful planning, strategic shopping, and selective DIY efforts that build both skills and savings simultaneously.
Your dream bathroom is absolutely achievable within your current budget constraints. Start with one or two high-impact changes that excite you most, then build momentum as you see the dramatic improvements unfold. With patience, creativity, and these proven strategies, you’ll soon enjoy a beautiful, functional space that reflects your style while proving that smart planning trumps unlimited spending every time.


