The most successful professional organizers spend only about 20% of their time actually putting things in bins. After designing custom storage solutions for hundreds of homes, I discovered the hidden framework that makes organization last. It’s not about buying the trendiest containers—it’s about engineering a system that honors the unique, often awkward, geometry of a space.
That cabinet under your kitchen sink? It’s a masterclass in challenges: bulky pipes, a garbage disposal, constant moisture, and a deep, dark layout. Just throwing a few stacking bins in there is a temporary fix for a fundamental design problem. These 20 strategic steps will teach you to think like a custom cabinet designer, transforming that chaotic cavern into a model of lasting efficiency.
The Foundational Work: Setting the Stage for Order
Before you buy a single organizer, we have to lay the groundwork. This is the part most people skip, and it’s why their efforts fail within a month. Think of this as site prep. We’re assessing the terrain, clearing the debris, and installing the infrastructure that will support a truly functional system.
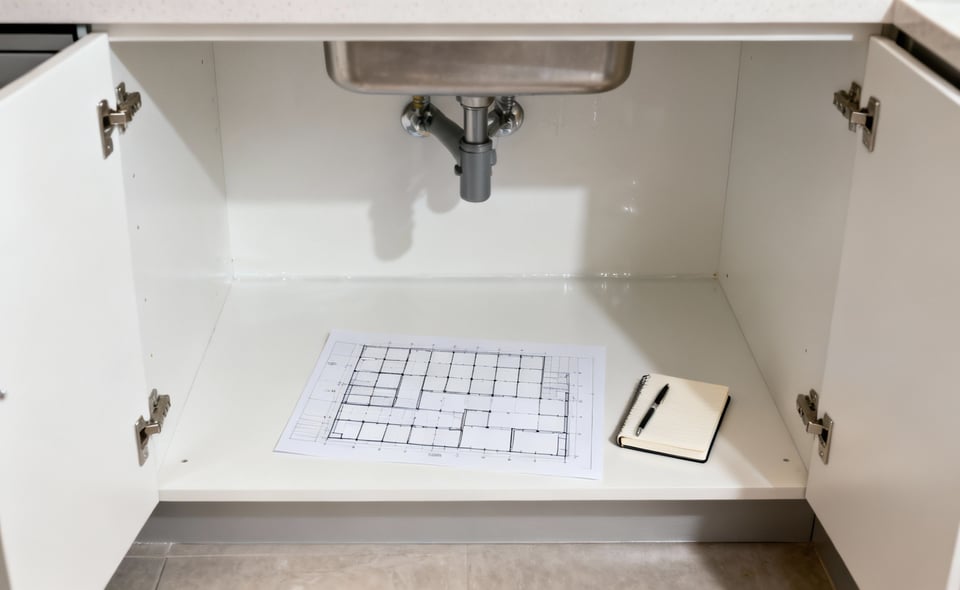
1. First, Pull Everything Out and Get Real
You can’t organize clutter. The first, non-negotiable step is to completely empty the cabinet. Take every single bottle, sponge, and stray twist-tie out. Once it’s empty, give the cabinet a thorough cleaning. Now, be ruthless. Sort everything into categories: daily dish care, heavy-duty cleaners, trash bags, etc. Toss anything expired, broken, or that you honestly haven’t used in a year. You’ll be amazed at how much space you reclaim.
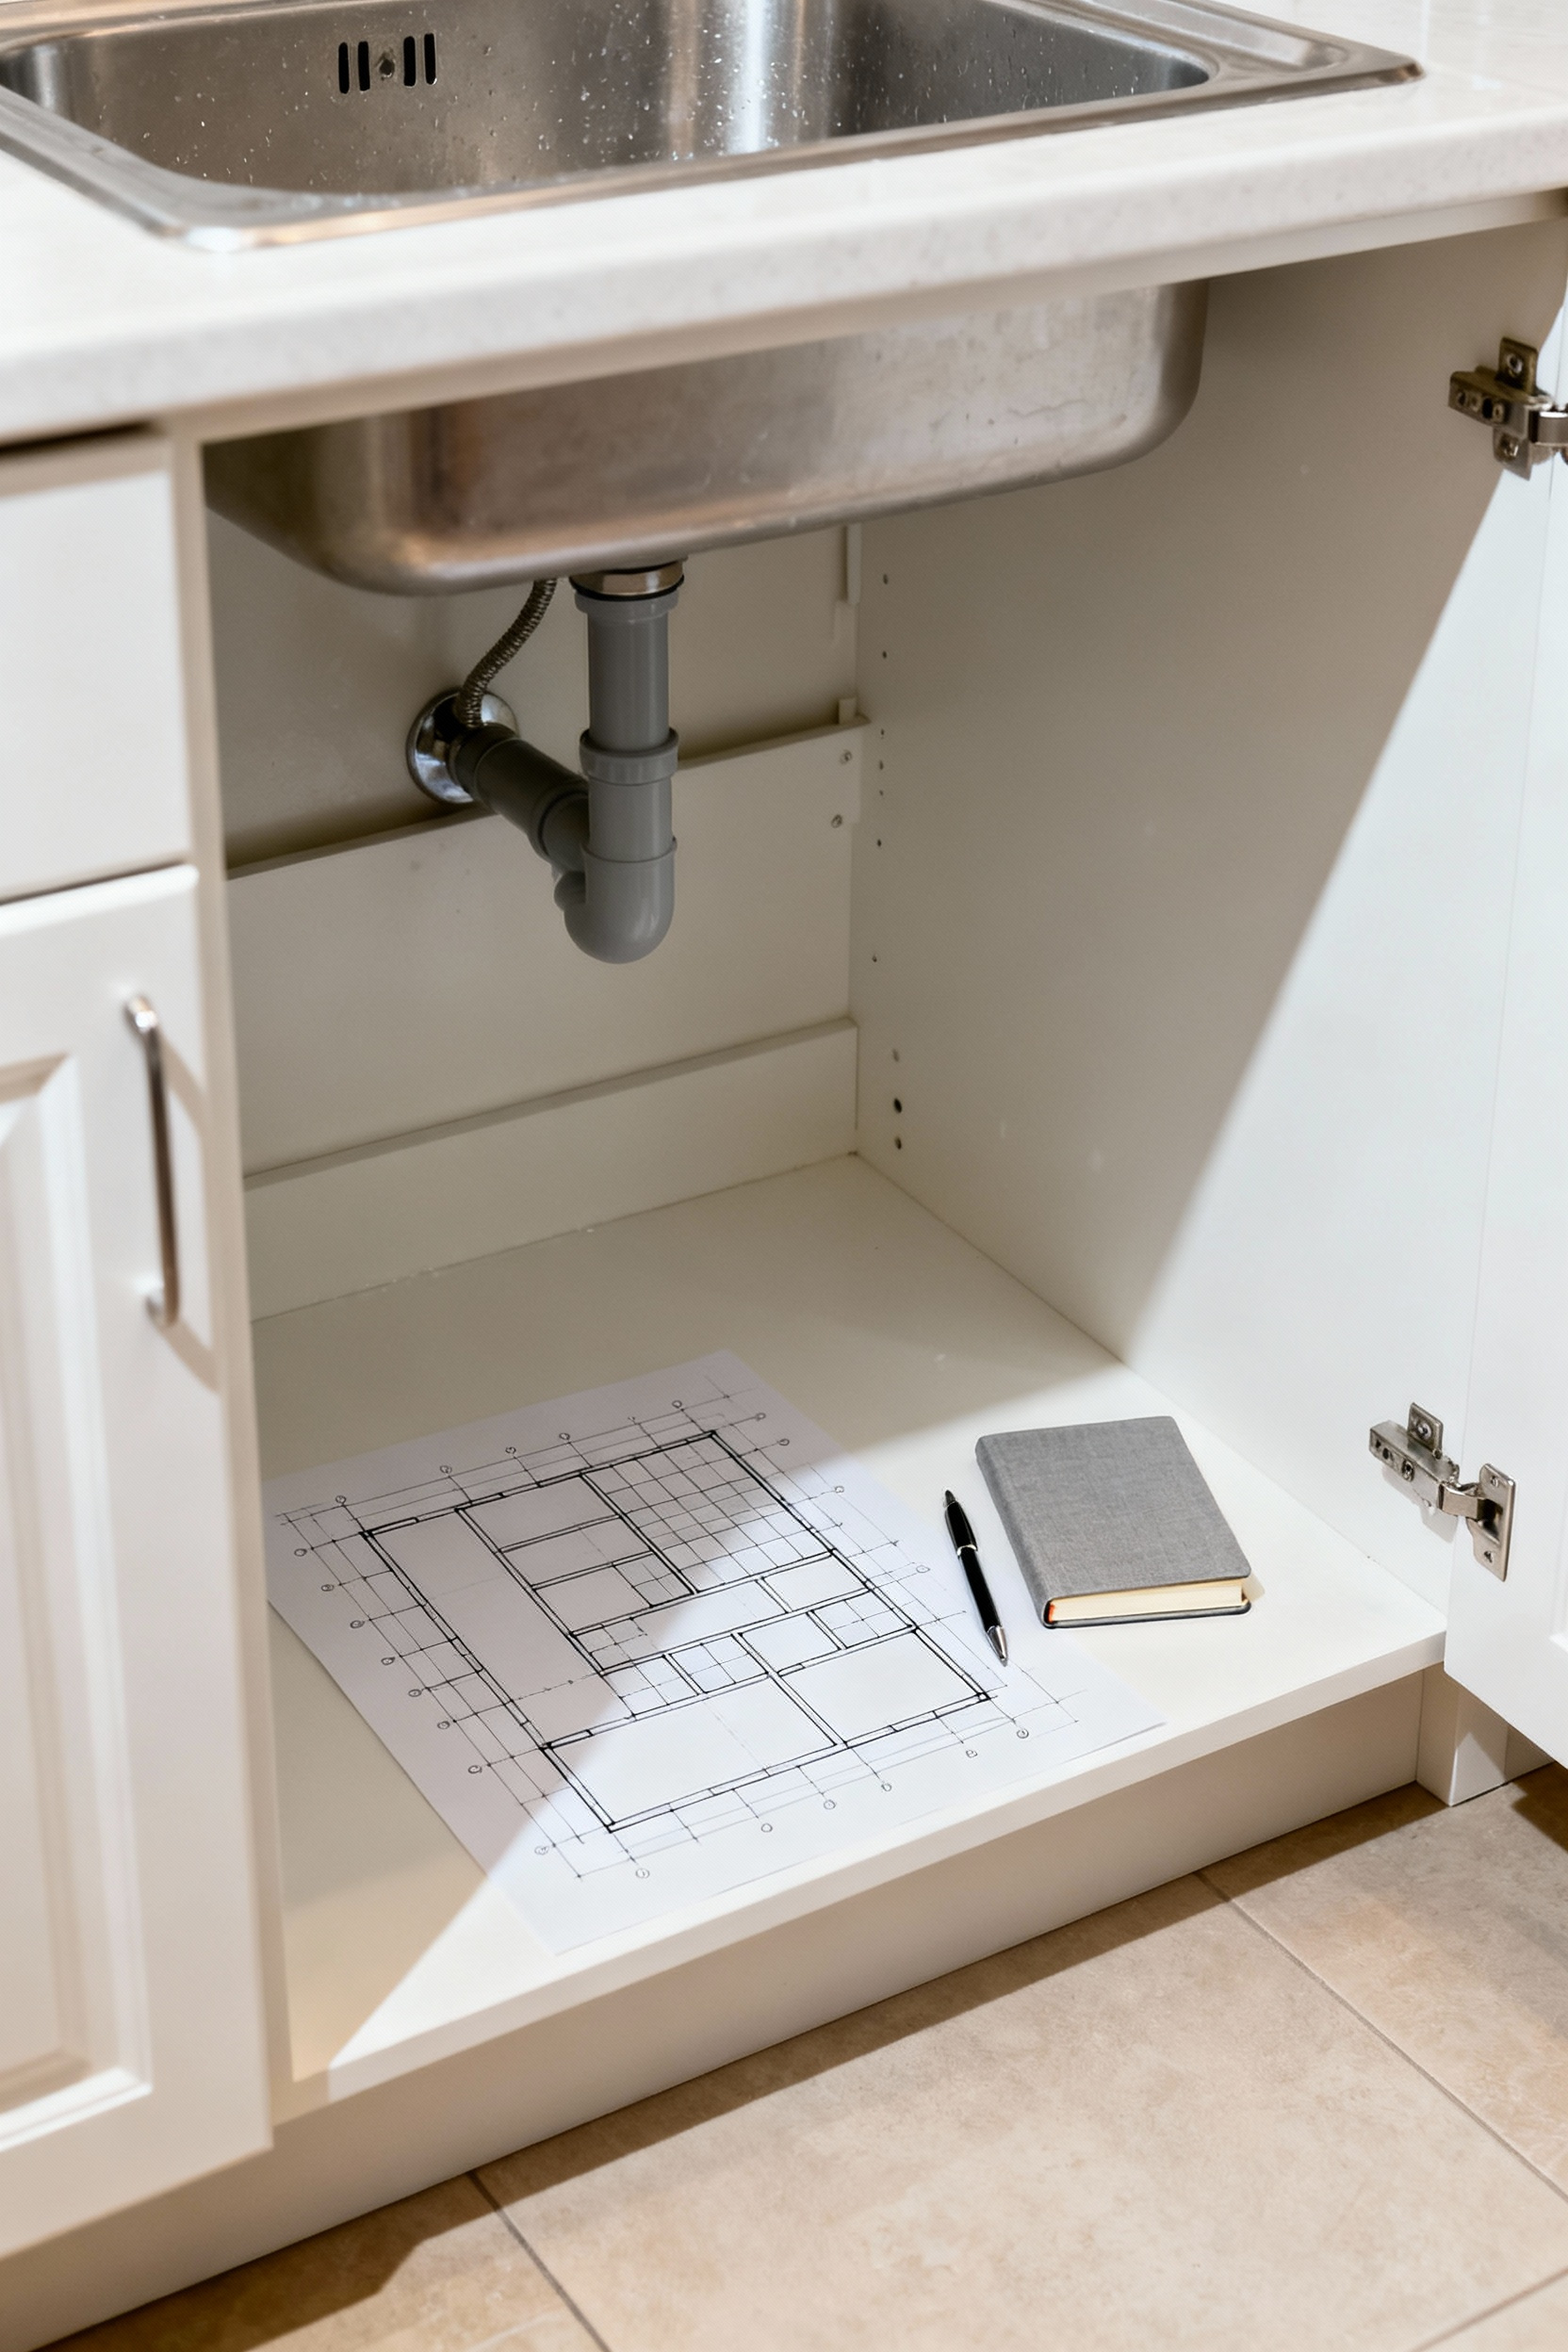
This is also the moment to grab a tape measure. Before you buy anything, you need a map. Measure the cabinet’s width, depth, and height, but more importantly, measure around the pipes and disposal. Note the exact clearances. What I tell my clients is that good organization is just math. We’re solving a geometry problem, and you can’t do that without the exact dimensions. This single step prevents the frustration of buying organizers that almost—but don’t—fit.
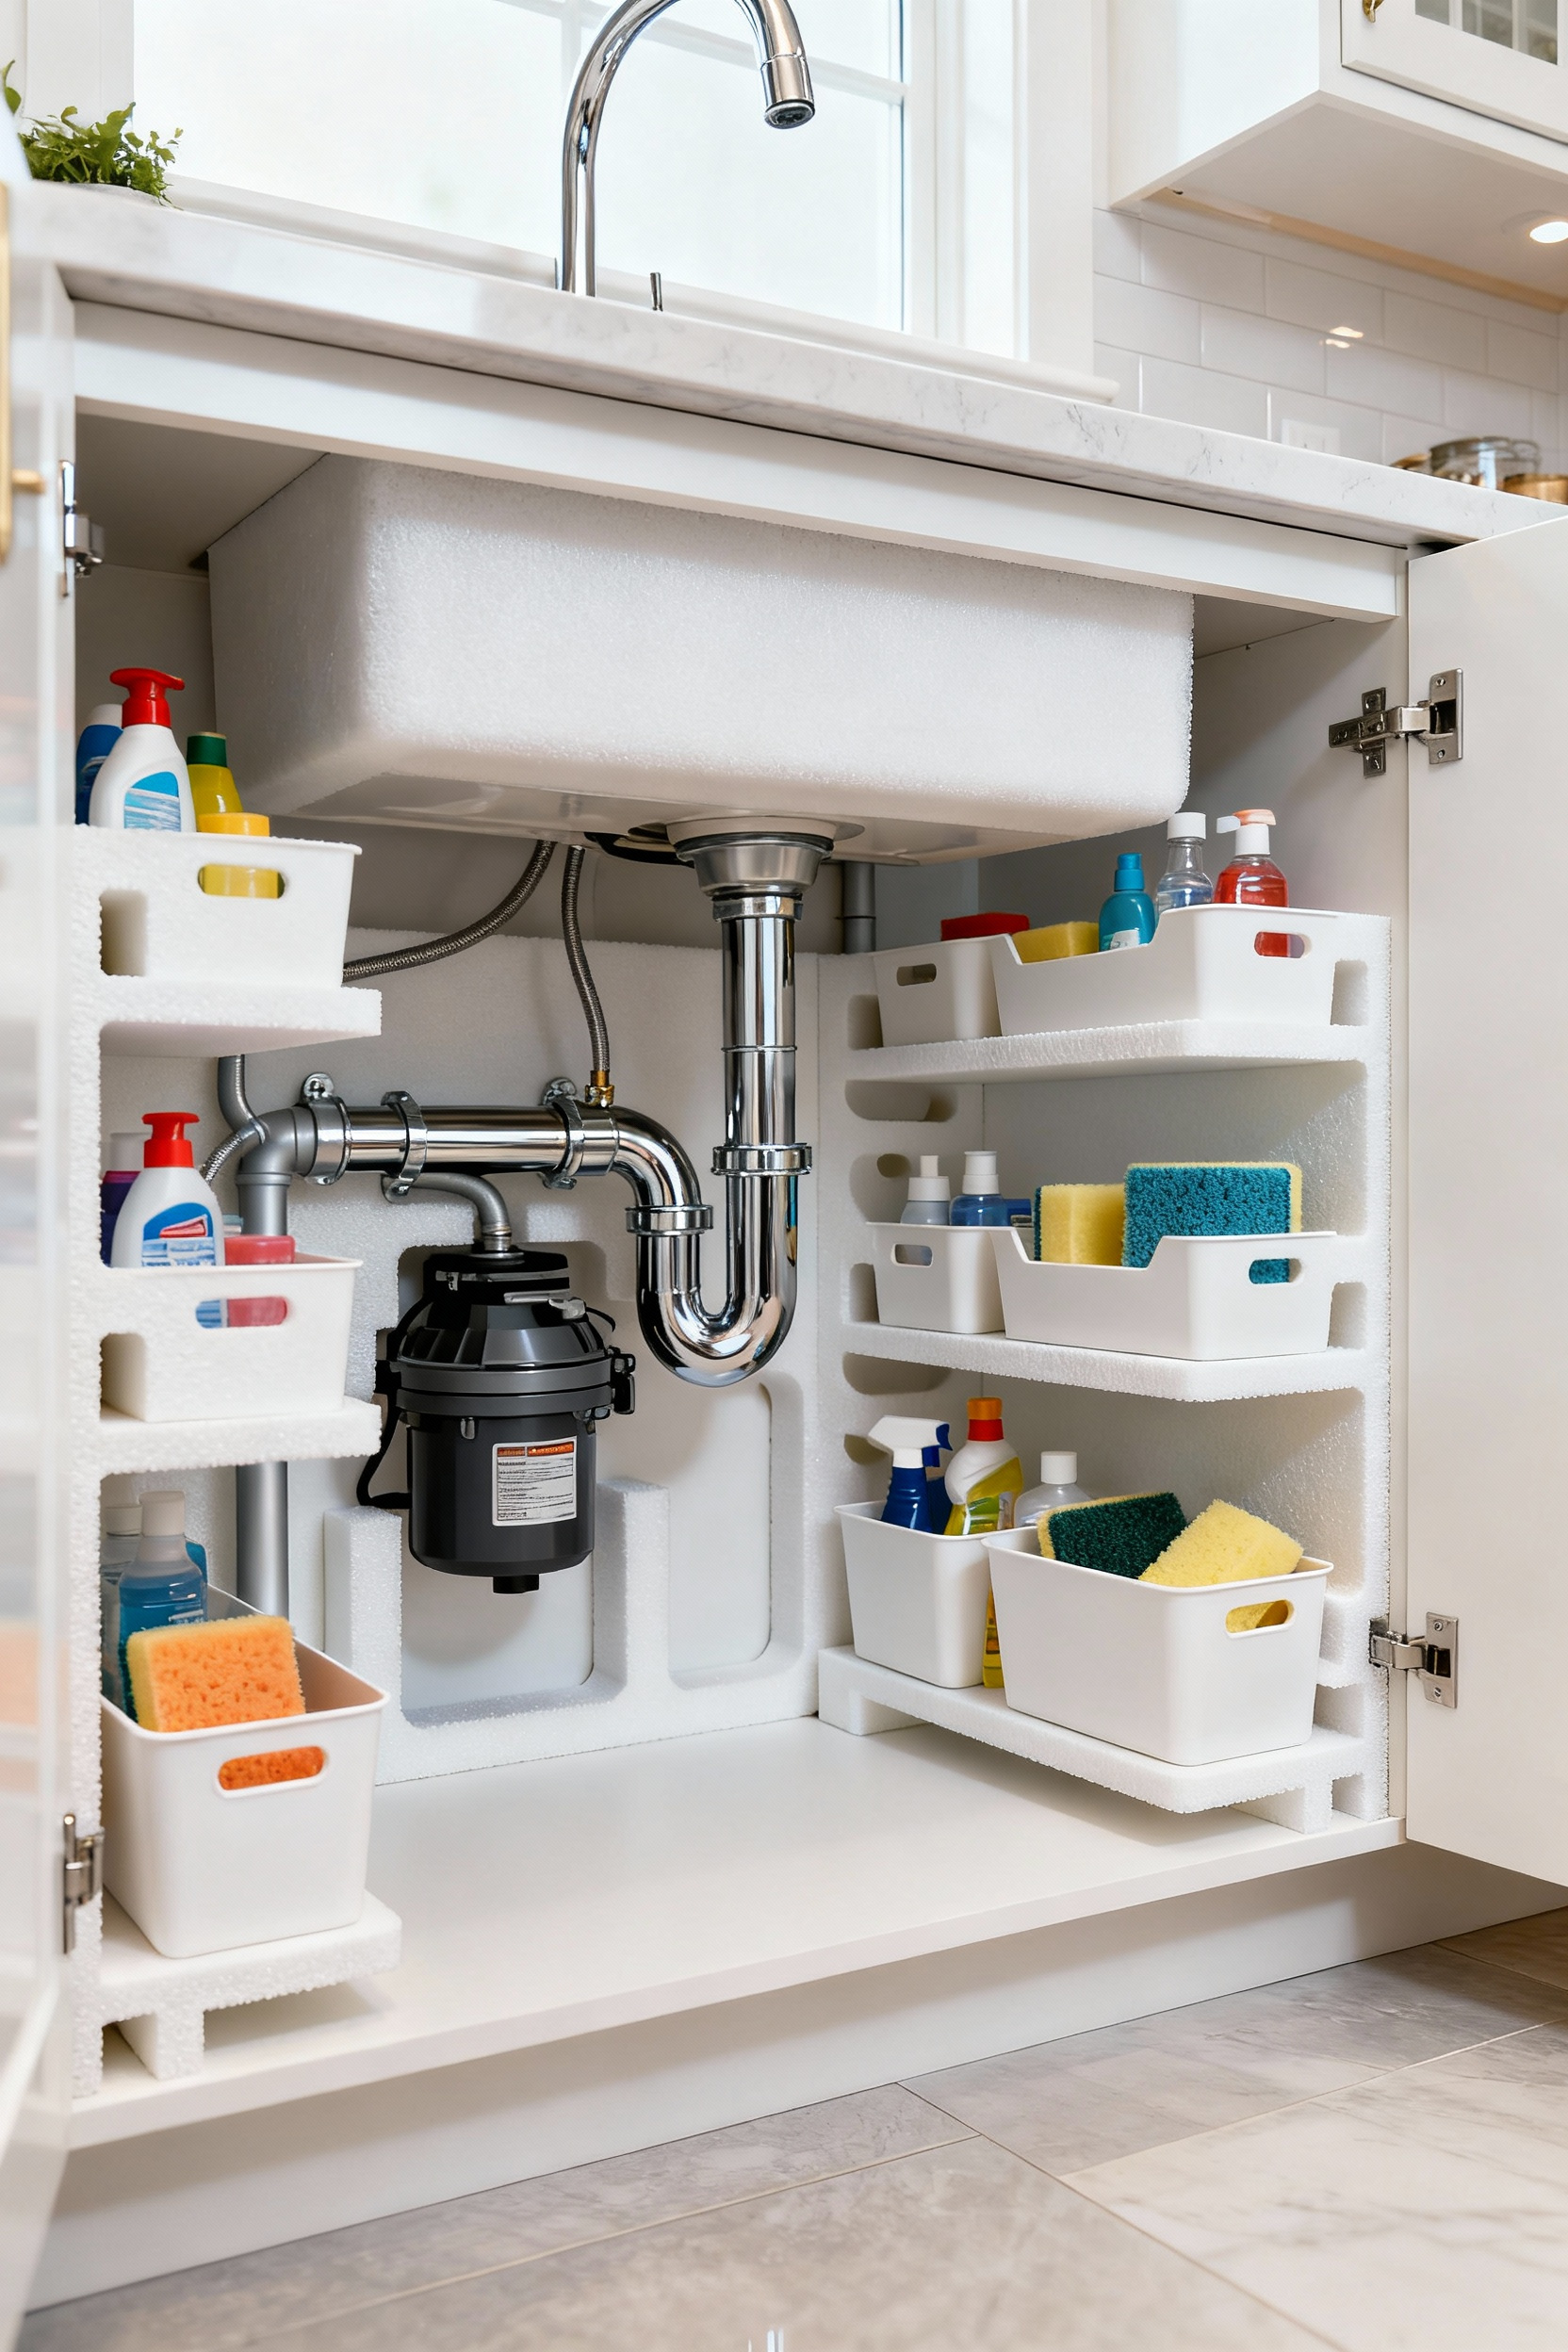
2. Create Logical Zones for Your Primary Supplies
Now that you know what you’re keeping, group those items by task. This is what we call “zoning.” Instead of a random collection of bottles, you’ll create designated “stations.” For example, create a “Dishwashing Zone” with your dish soap, sponges, and dishwasher pods. A “Surface Cleaning Zone” might have your all-purpose spray and microfiber cloths.
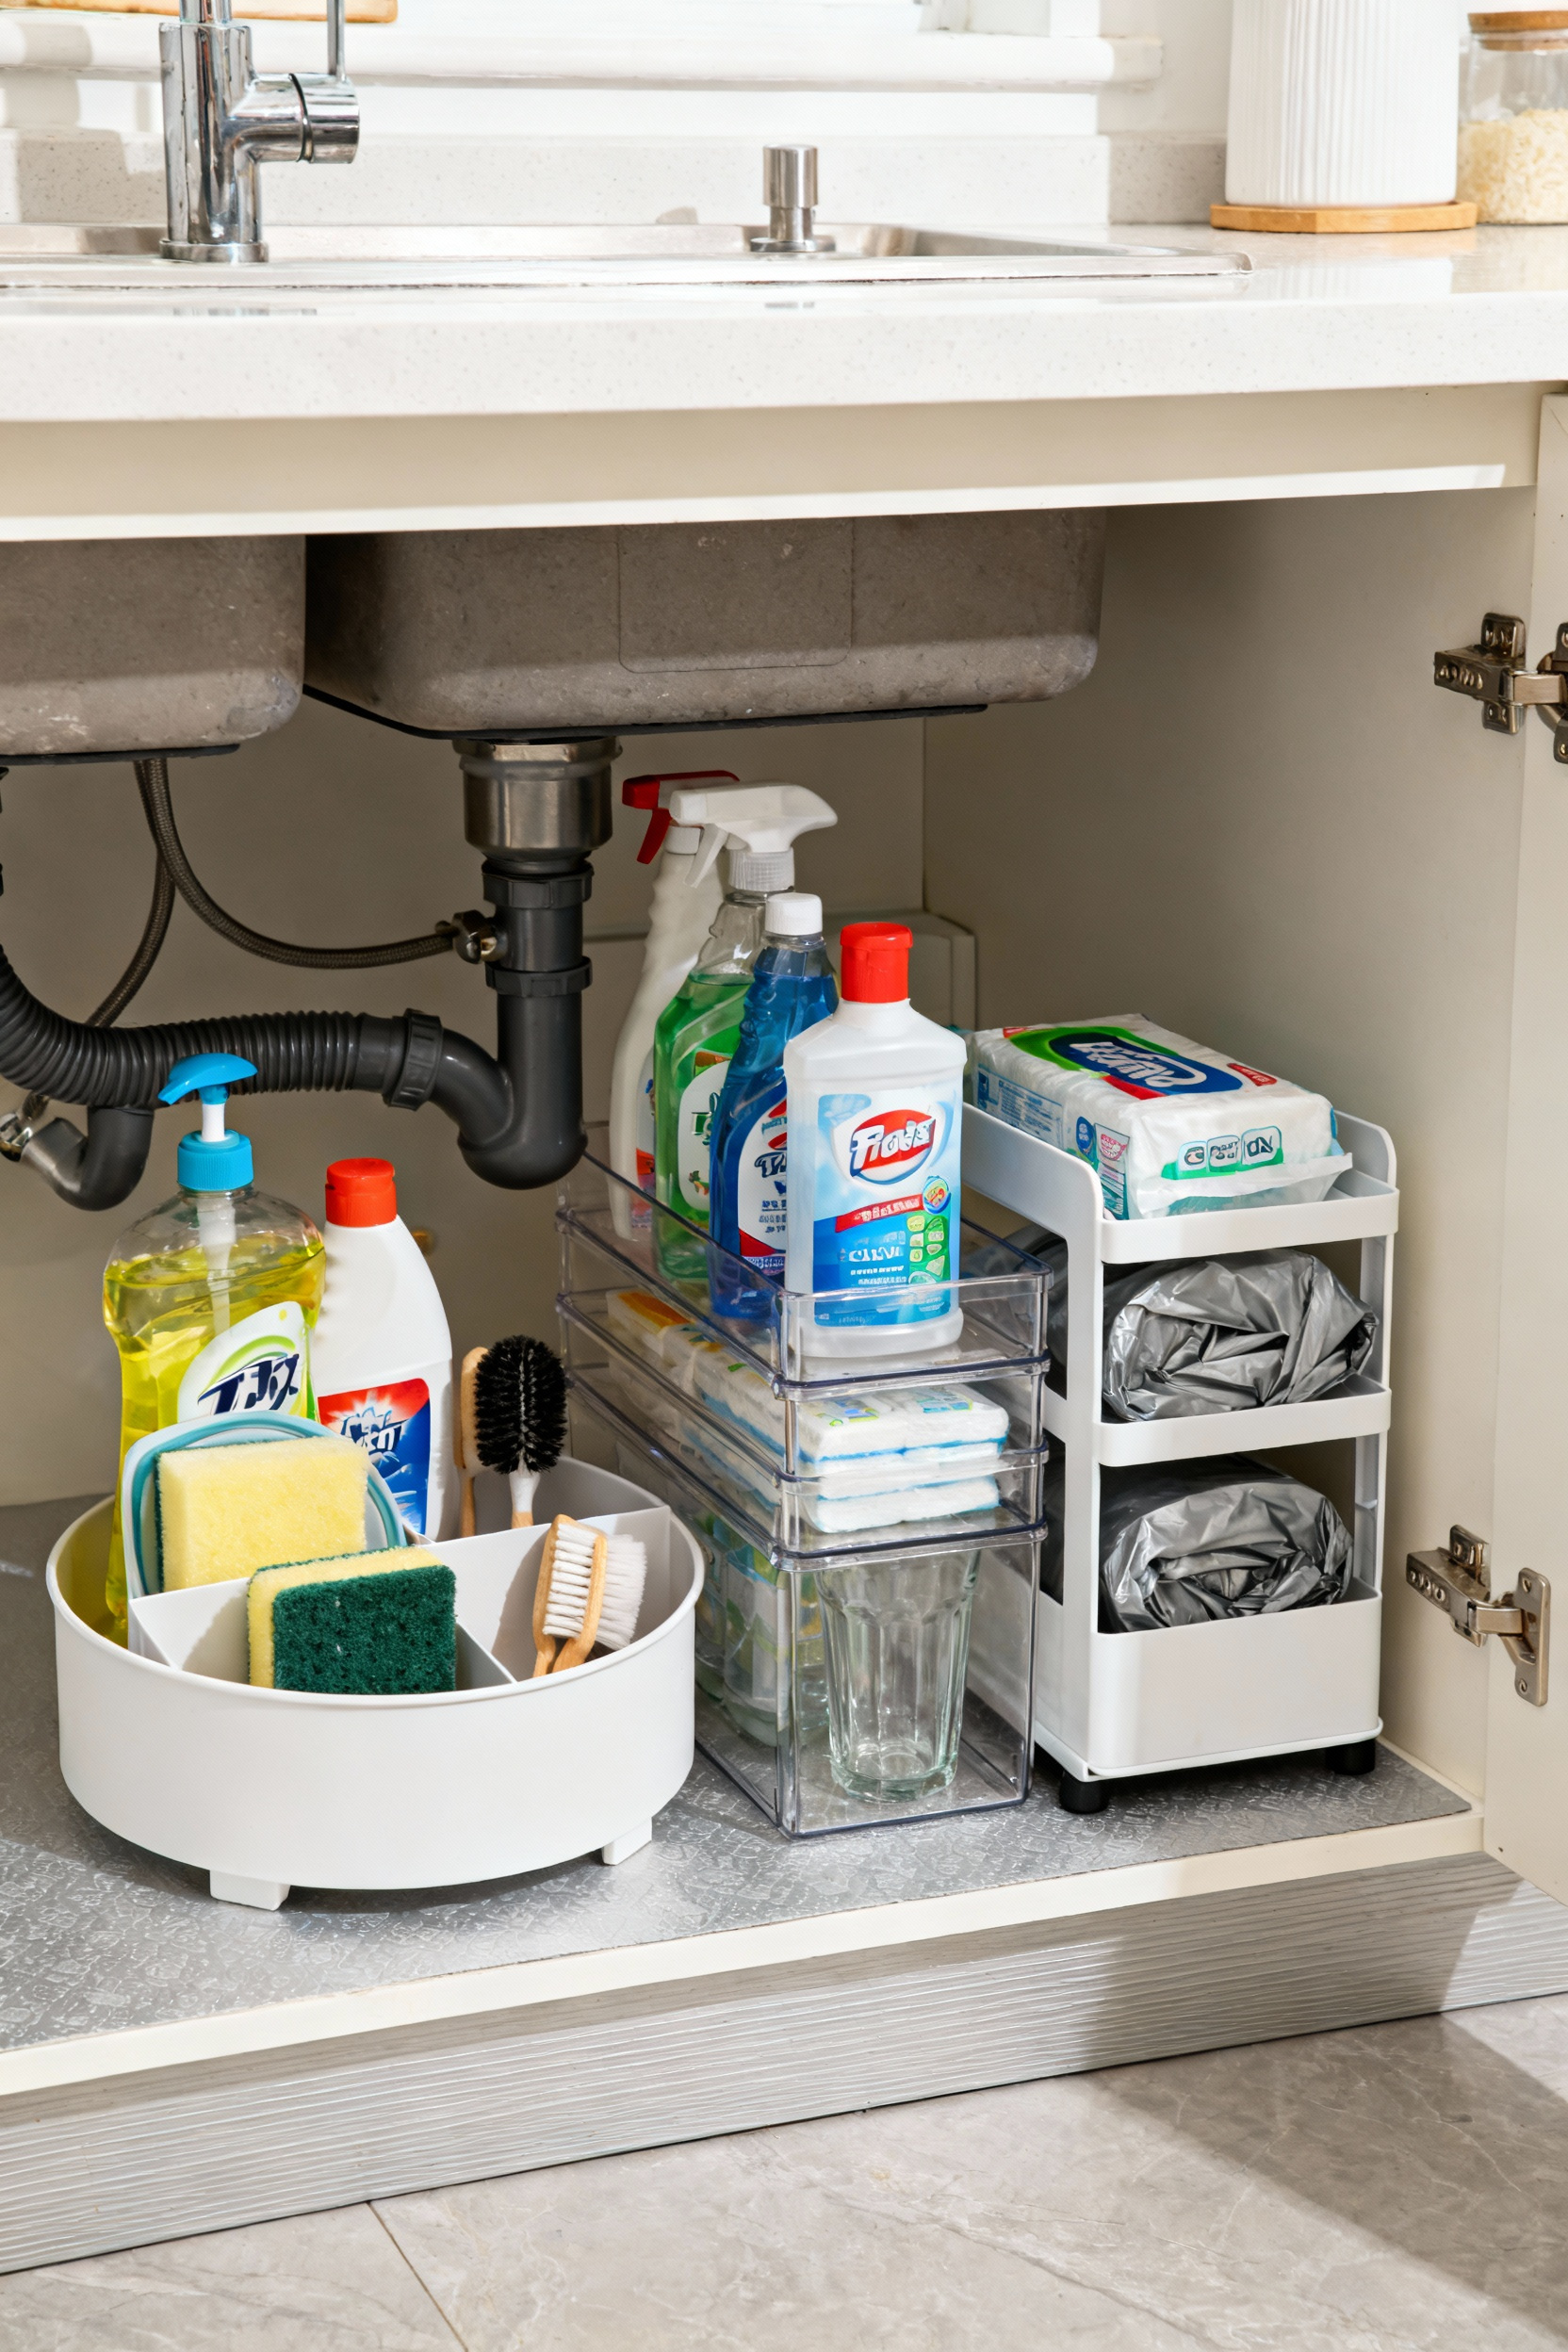
By thinking in zones, you make your daily routines incredibly efficient. Need to wipe down the counters? You grab one caddy or pull out one bin, not hunt for three separate items. Keep the most frequently used zones—like dishwashing—right at the front for easy access. Less-used items, like silver polish or drain cleaner, can go toward the back or on a higher tier.
3. Protect Your Investment with a Waterproof Liner
This isn’t just about looking neat; it’s about protecting the cabinet itself. From my work in custom cabinetry, I can tell you that the number one killer of under-sink cabinets is the slow, silent leak you don’t notice for months. A high-quality, waterproof, lipped liner is the cheapest insurance you’ll ever buy for your kitchen.
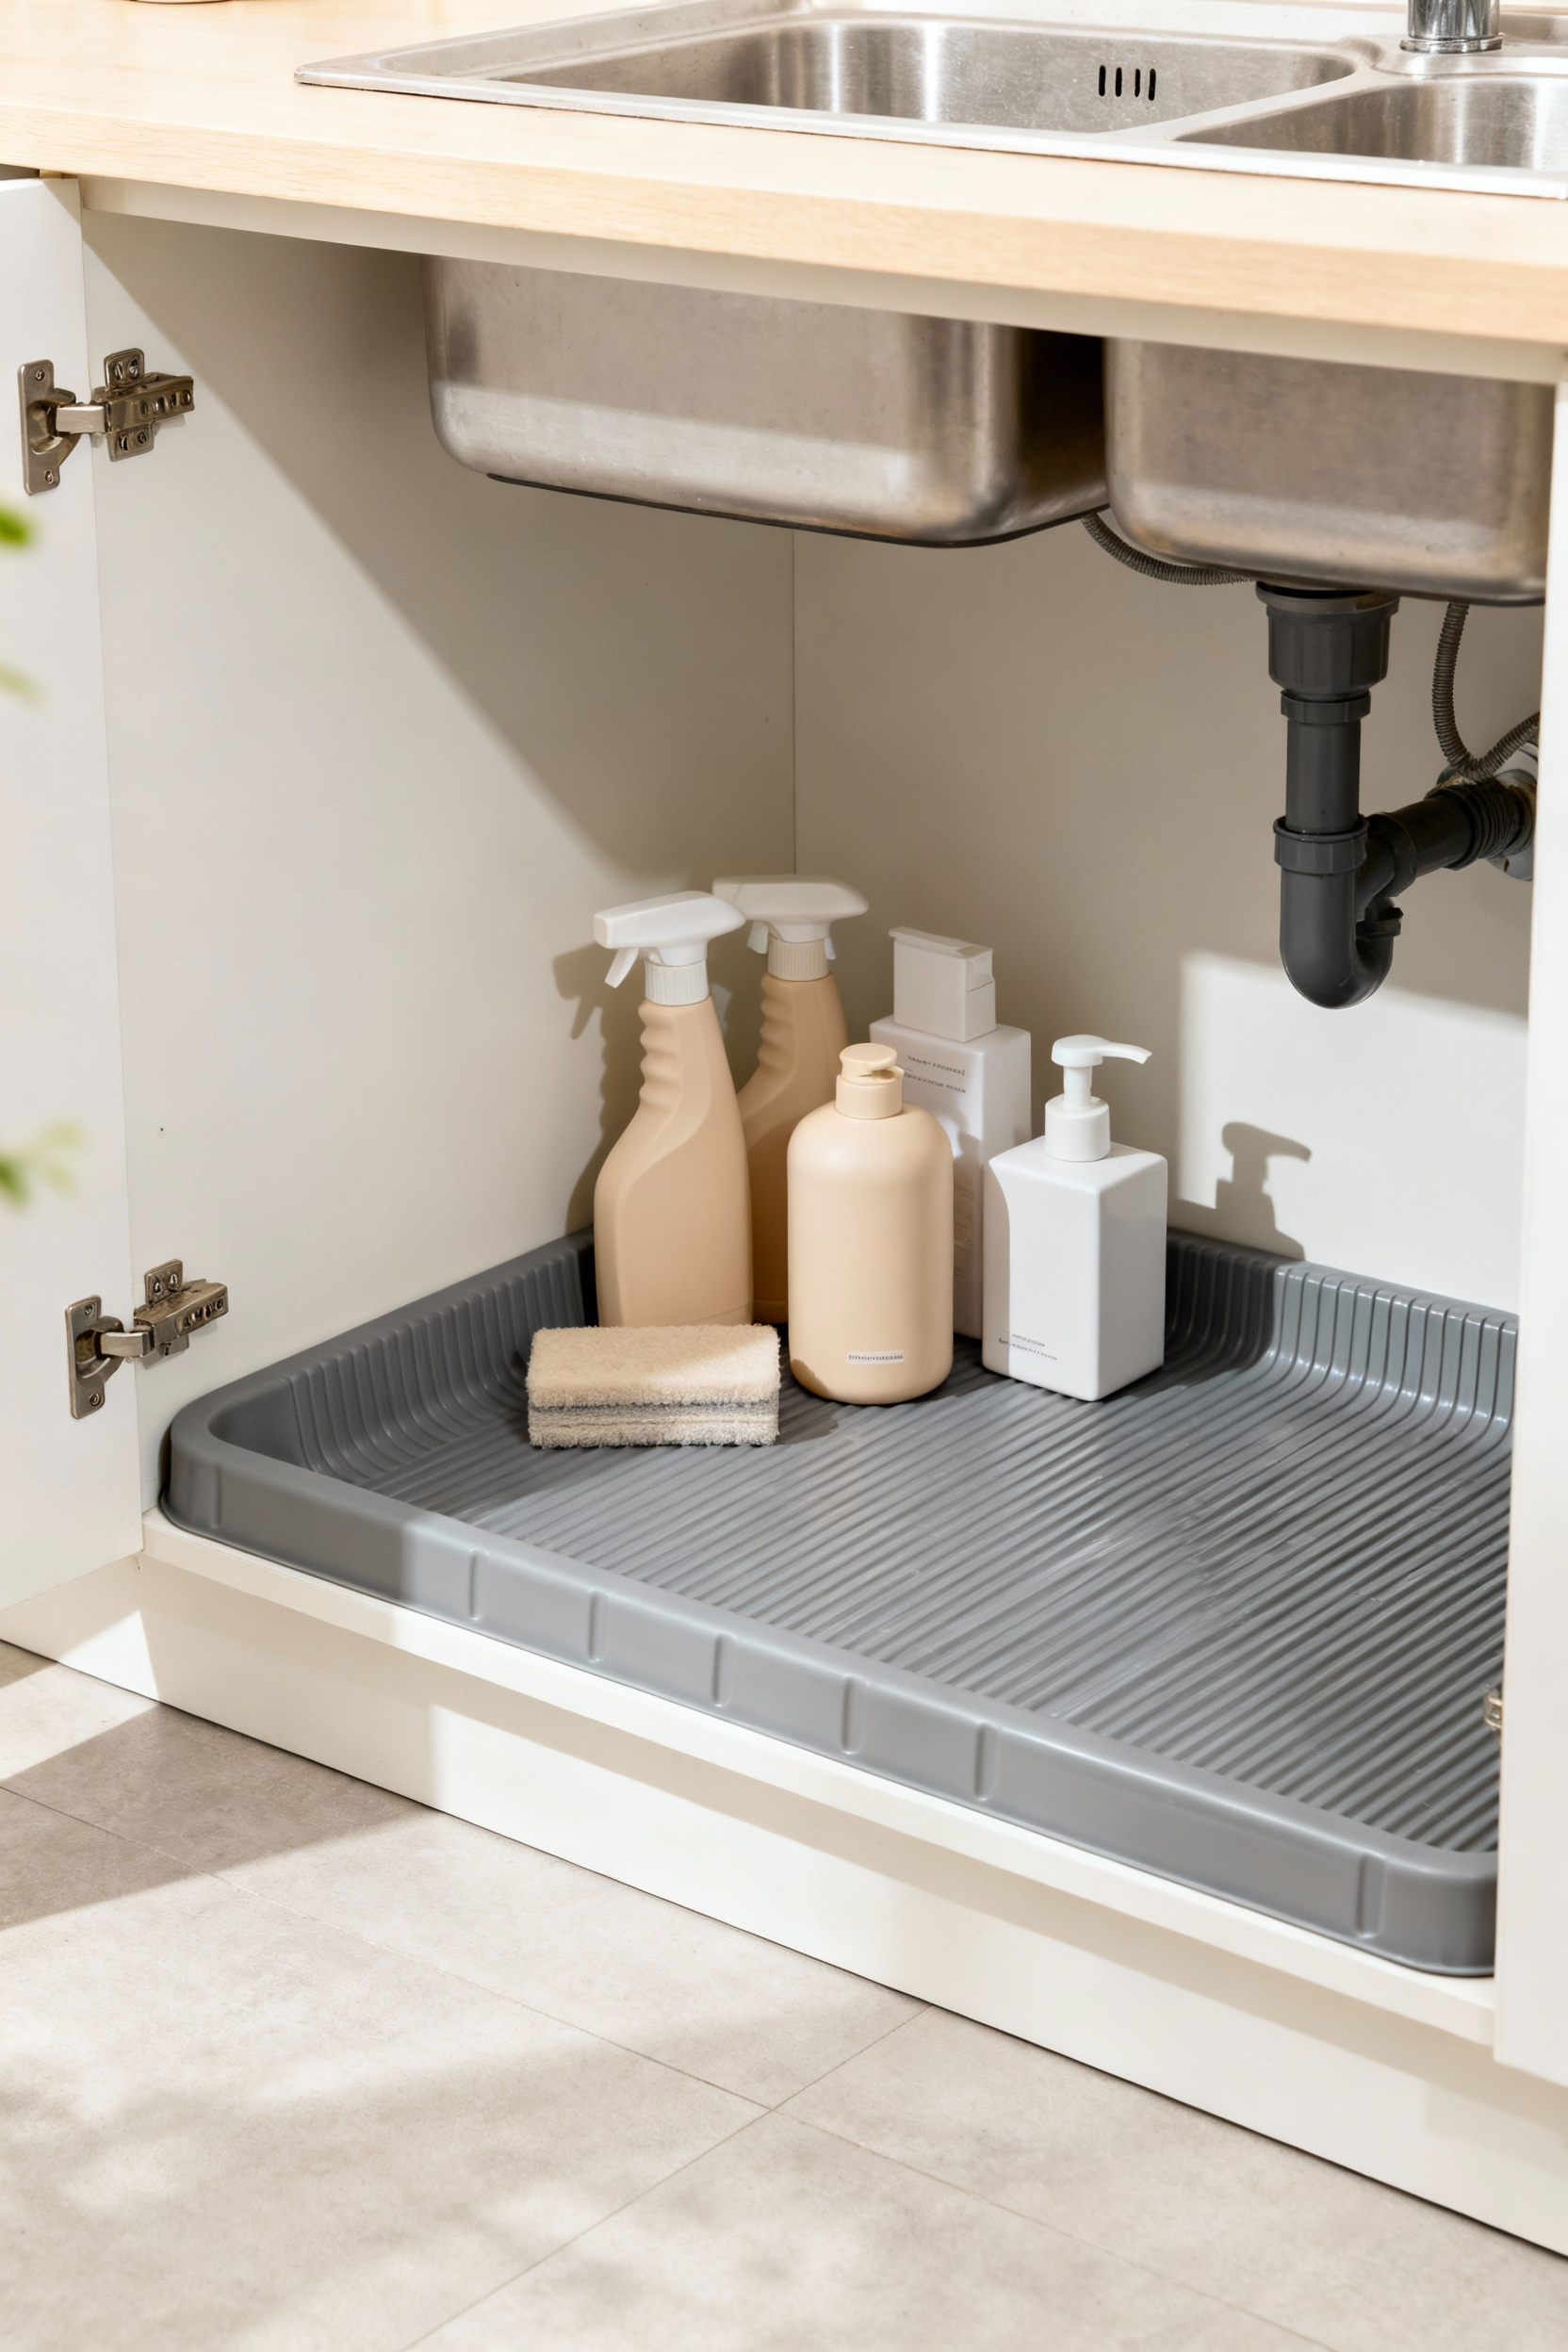
Look for a silicone or heavy-duty plastic mat with a raised edge. This “containment lip” will hold a surprising amount of water from a small leak or a dripping bottle, saving your cabinet box from swelling, warping, and growing mold. I’ve seen homeowners face thousands in repairs that a single $30 liner could have completely prevented. Cut it to fit snugly around your pipes, and if you want to be extra careful, use a bit of silicone caulk to seal the gaps.
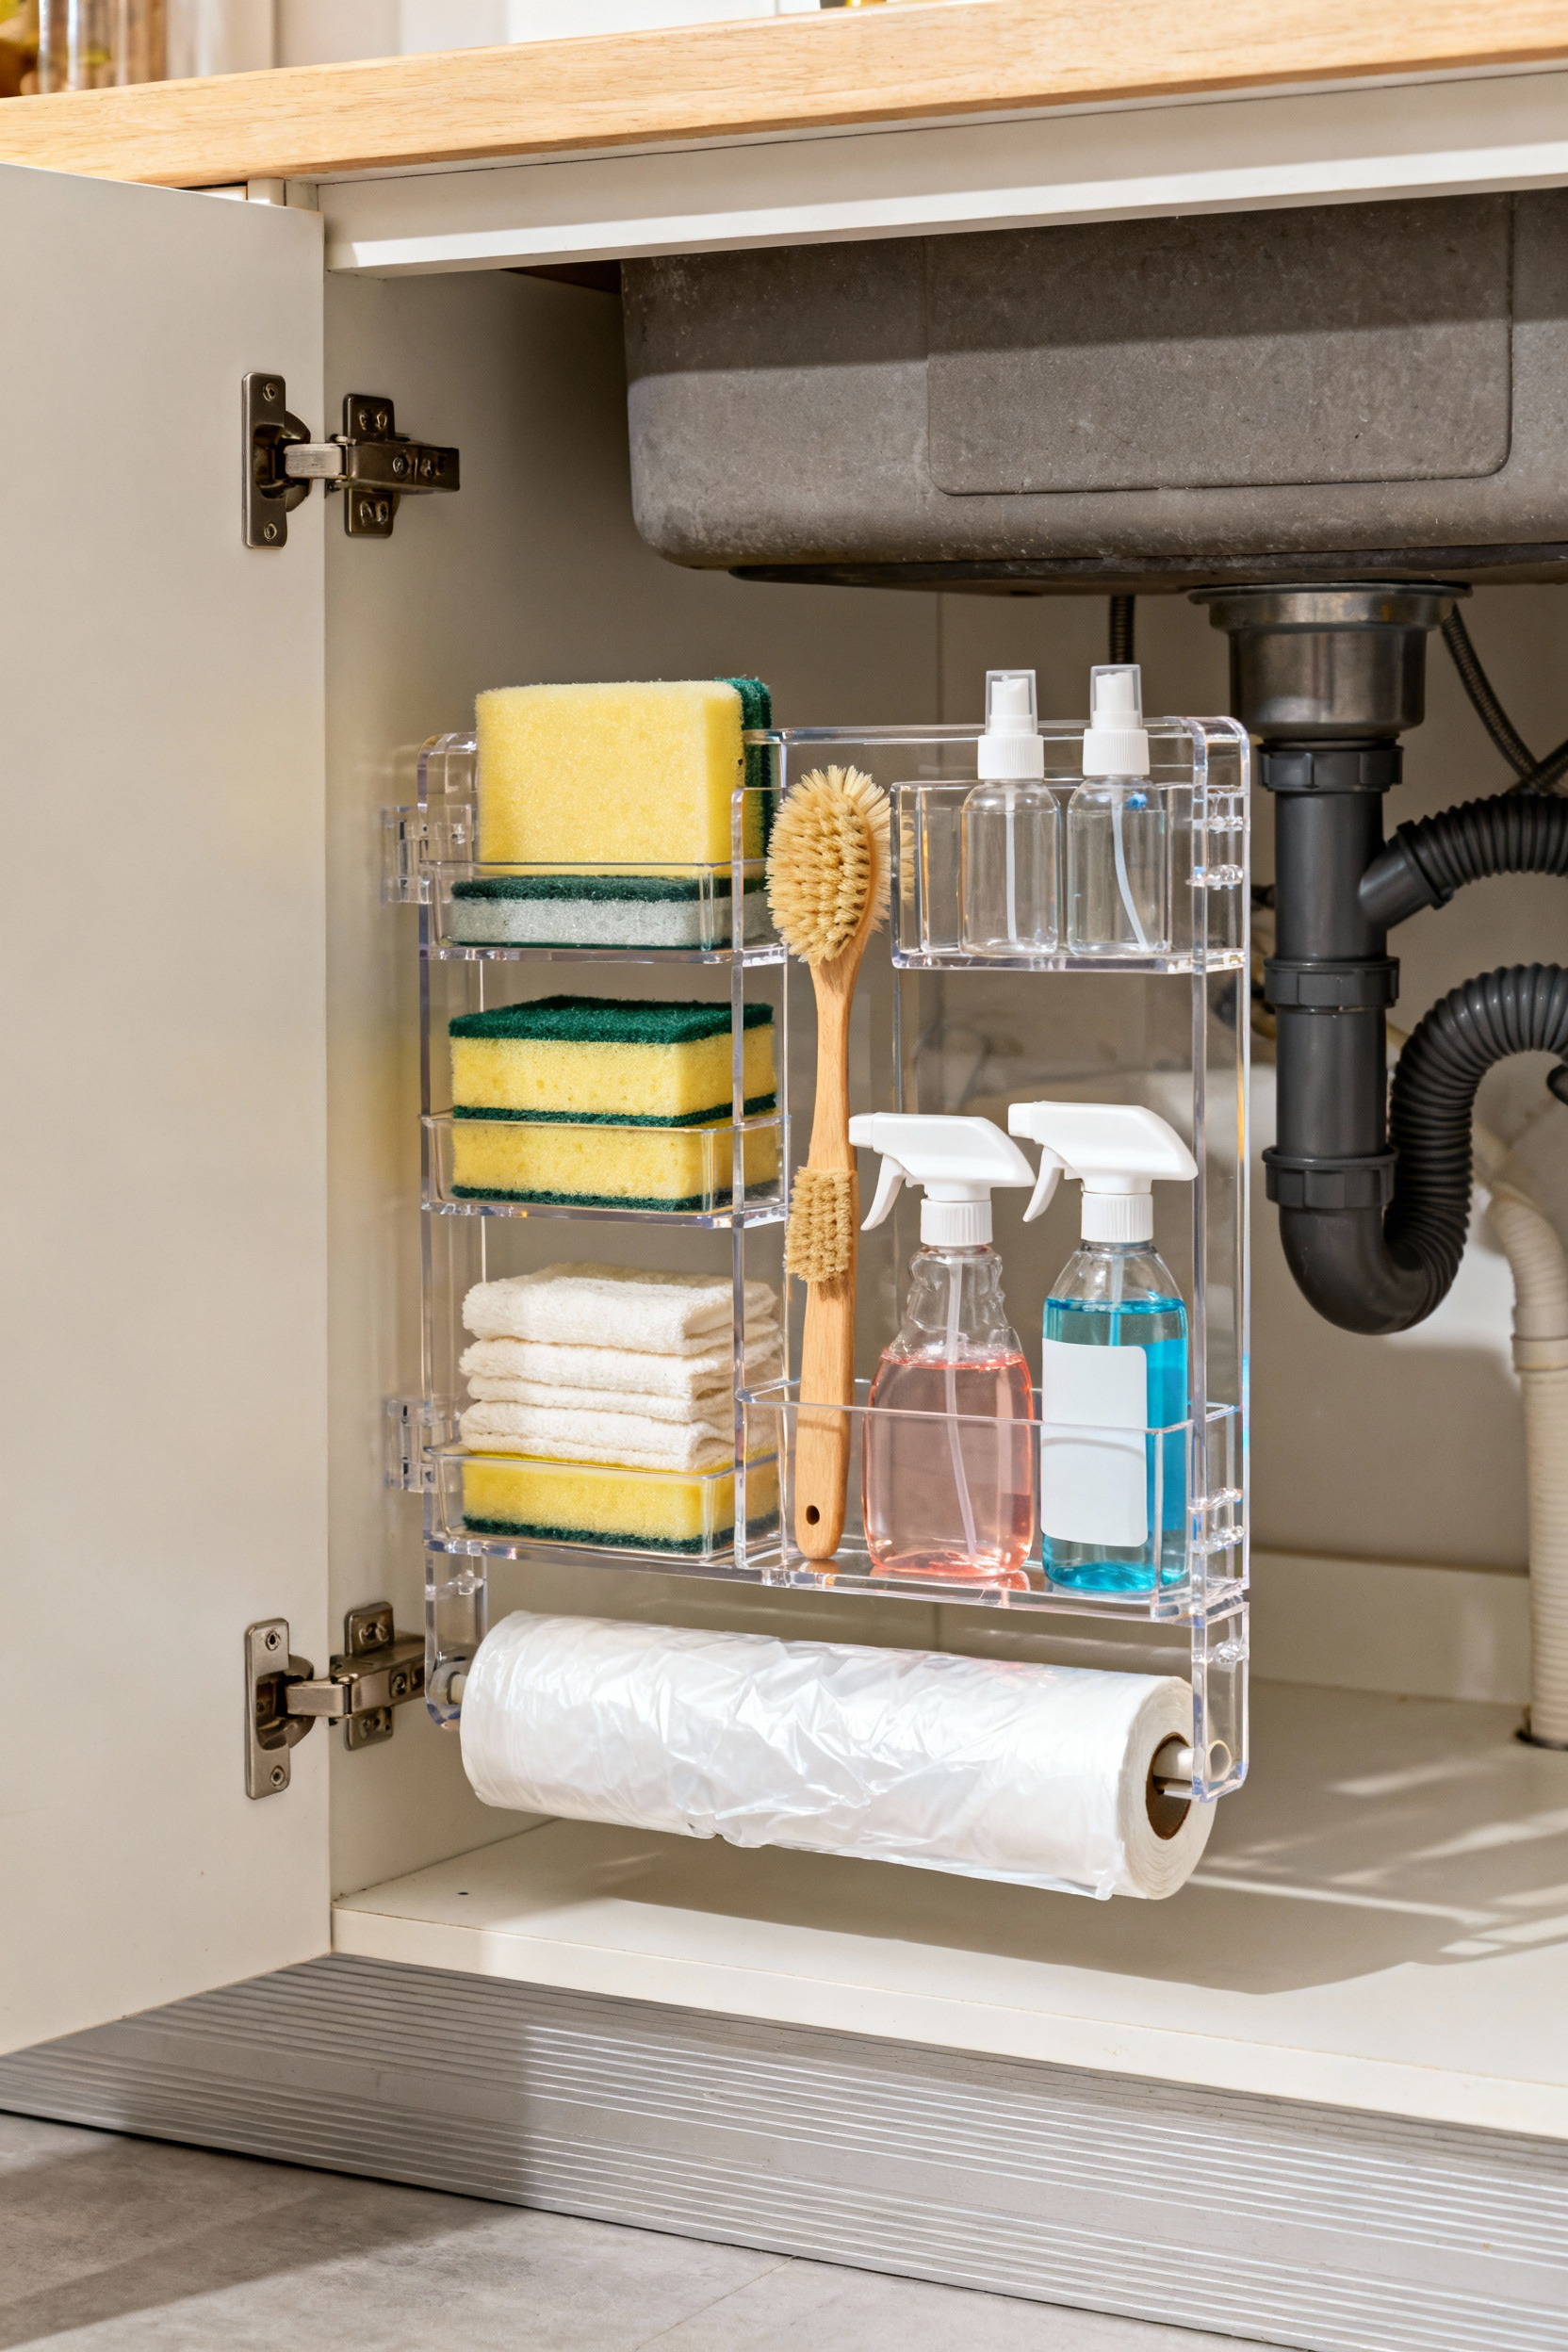
4. Go Vertical with Tiered Expandable Shelving
The biggest mistake people make under the sink is only using the floor of the cabinet. All that vertical space—the “airspace” around the P-trap and disposal—is wasted real estate. This is where tiered, expandable shelves are brilliant. They essentially create a second story of storage.
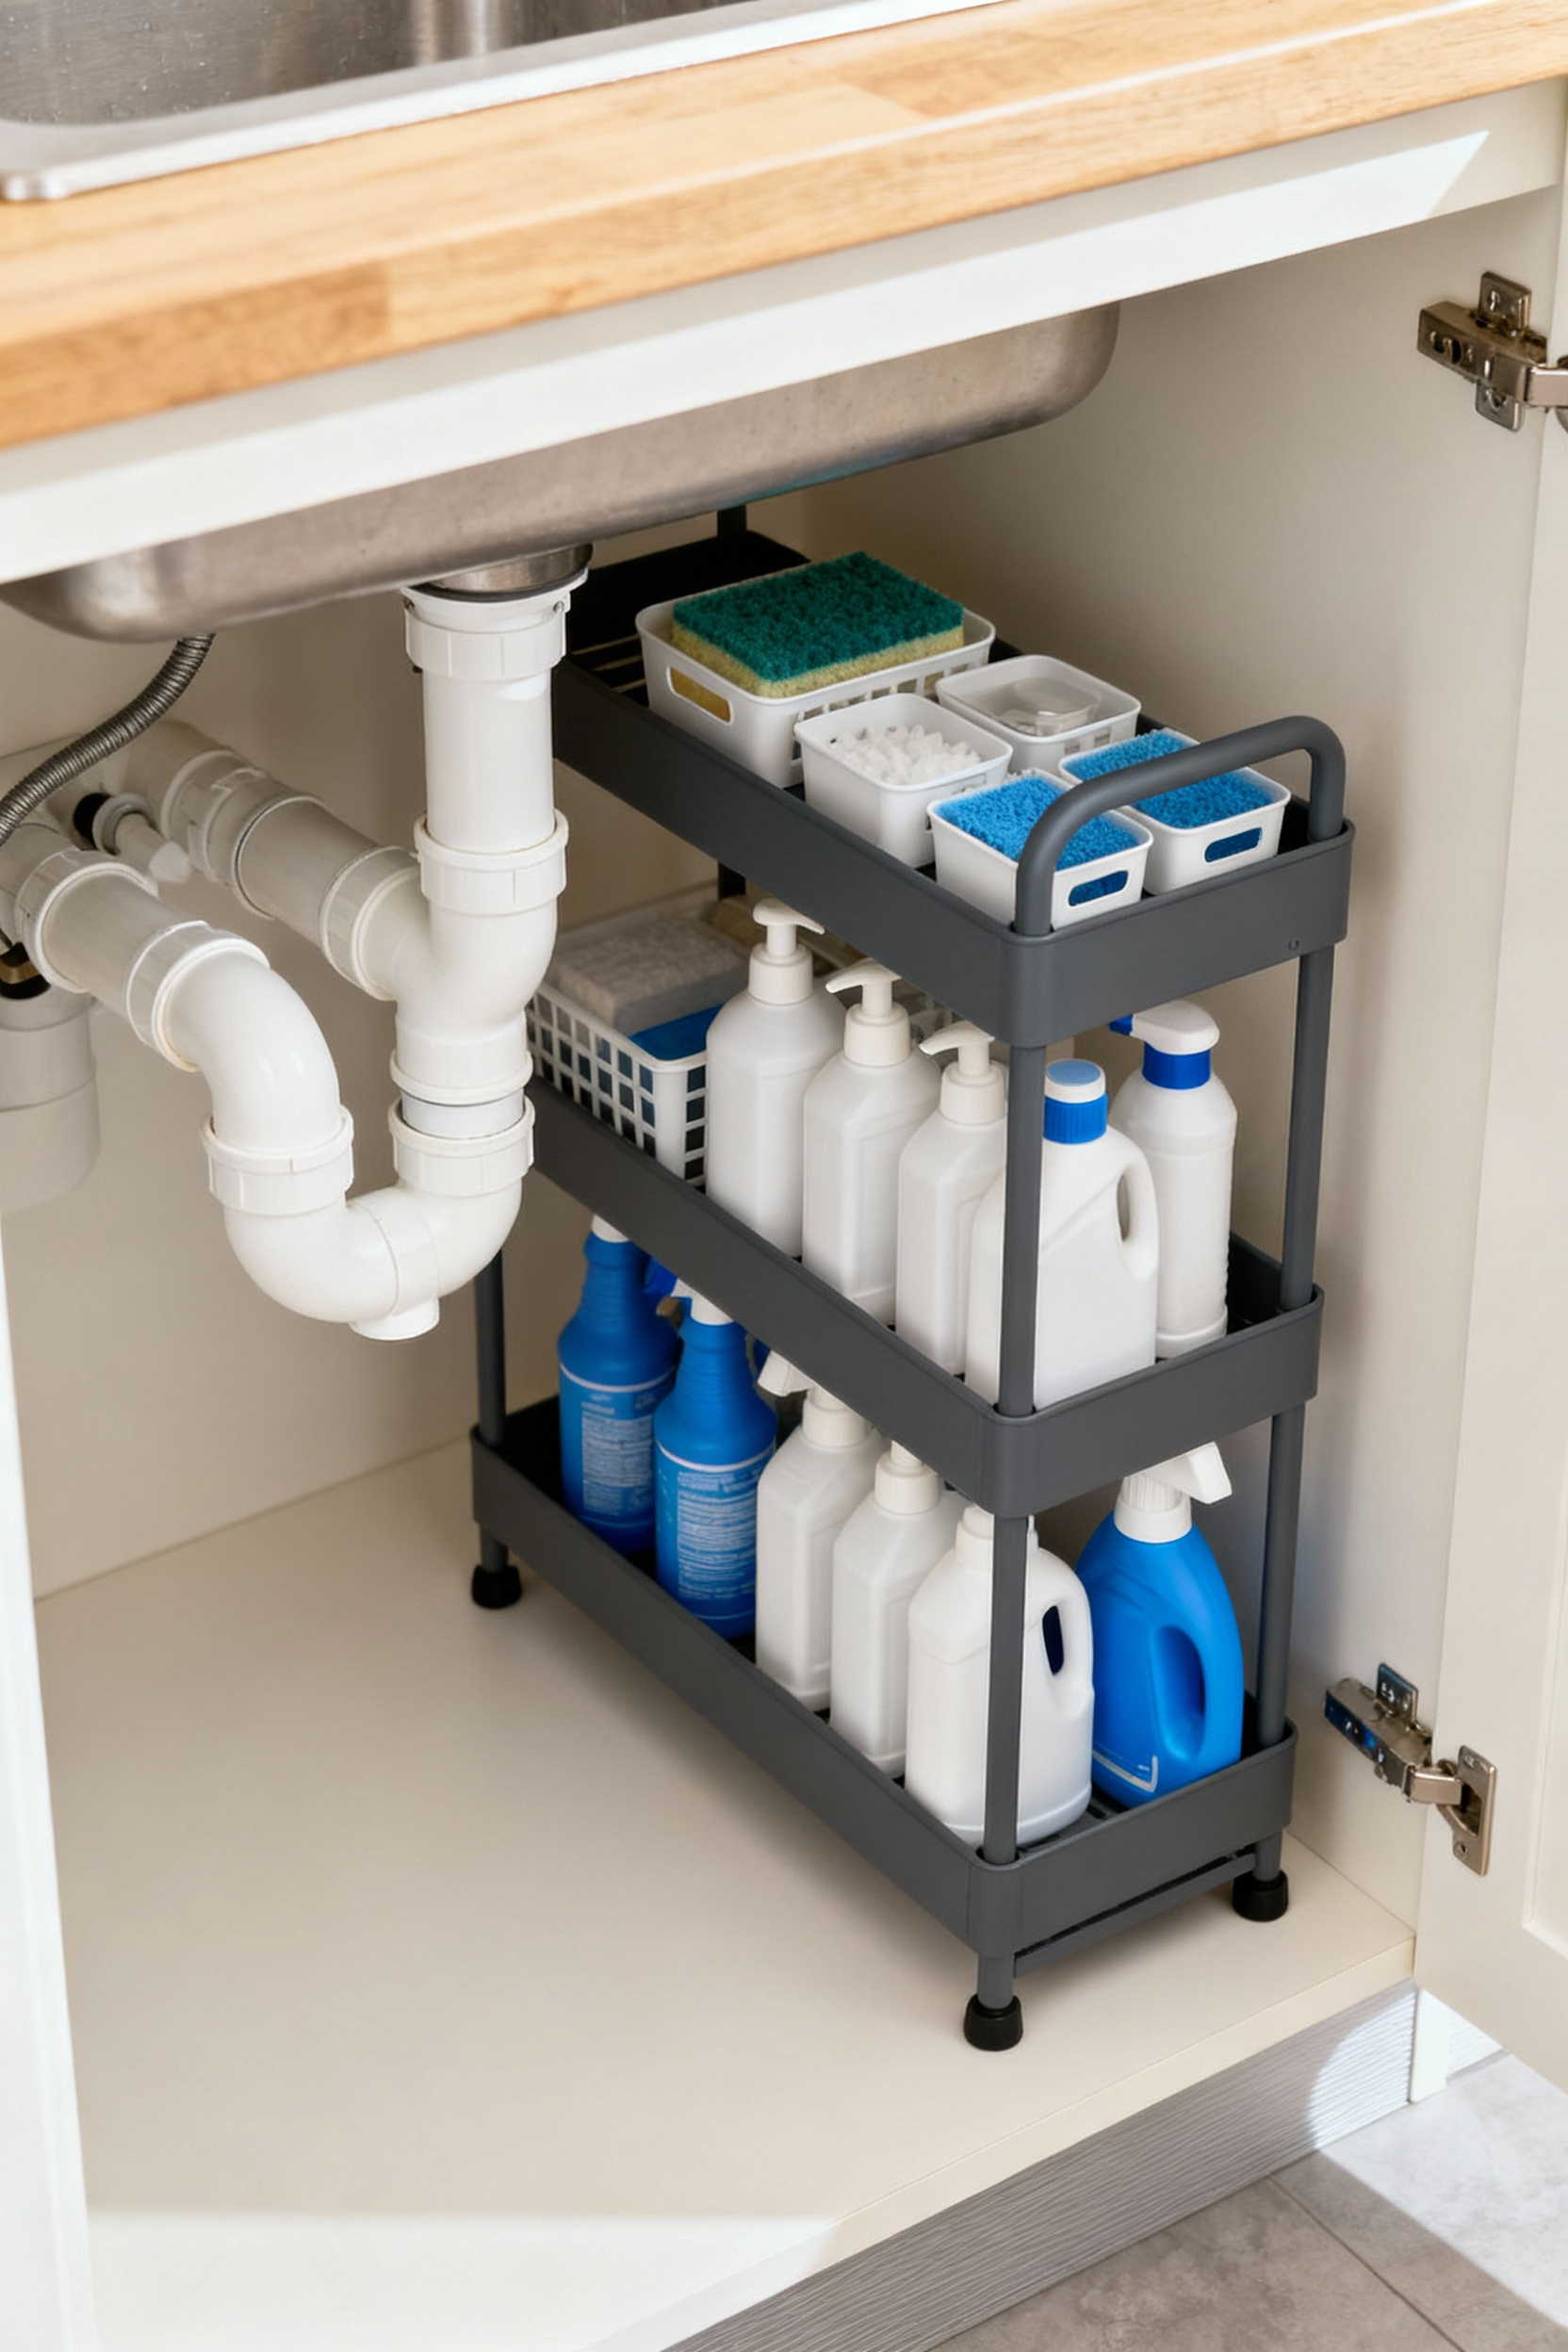
These shelves are designed to be adjustable, with slats you can remove so the unit fits perfectly around your plumbing. Suddenly, you’ve doubled your usable surface area. You can place taller bottles on the bottom and smaller items like extra sponges, gloves, or scouring pads on the top shelf. It gets everything up and visible, so you’re no longer dealing with a jumble of bottles hiding in the back.
Elevating Your System: Smarter Tools and Access
With a clean, protected, and zoned foundation, we can start adding the hardware that transforms this space from simply “tidy” to truly “functional.” This phase is about easy access, visual calm, and making your daily routines feel effortless.
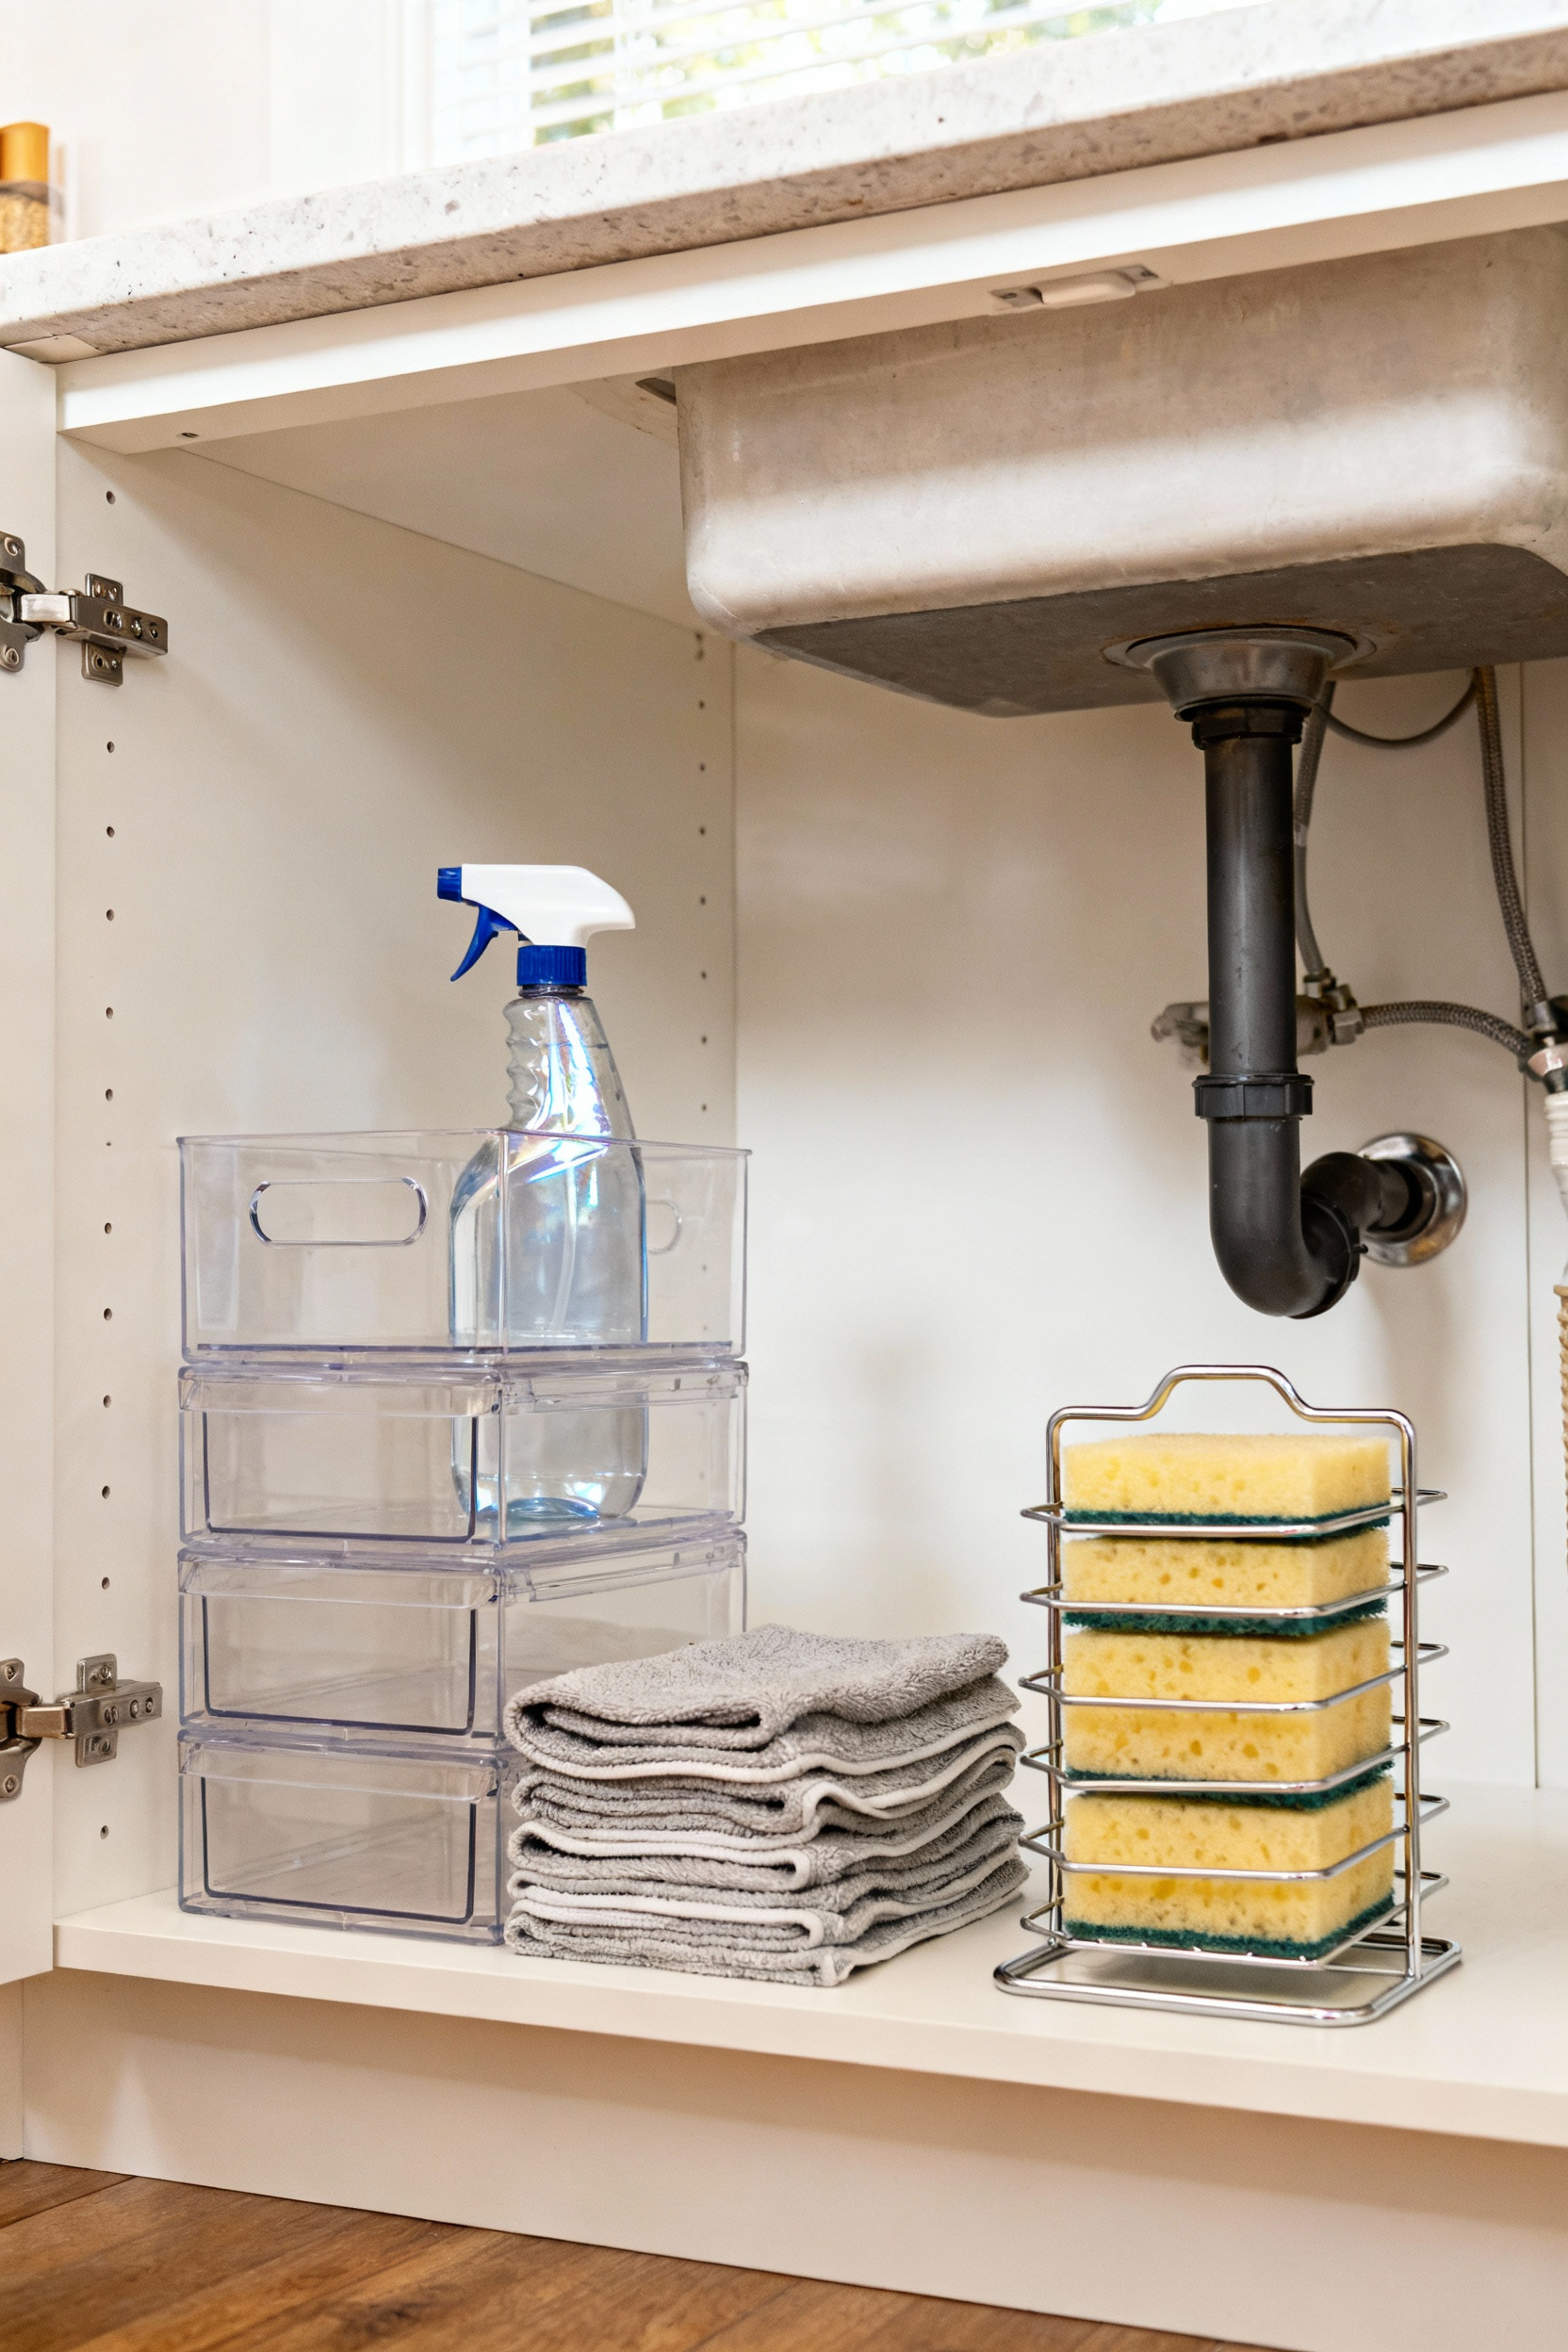
5. Install Modular Drawers to Tame the Chaos
For the ultimate in accessible storage, nothing beats modular drawers. These units, whether single-tier or stacked, allow you to bring the contents of the cabinet out to you. No more getting on your knees and reaching into the dark back corner. Look for clear acrylic or mesh steel drawers so you can see the contents at a glance.
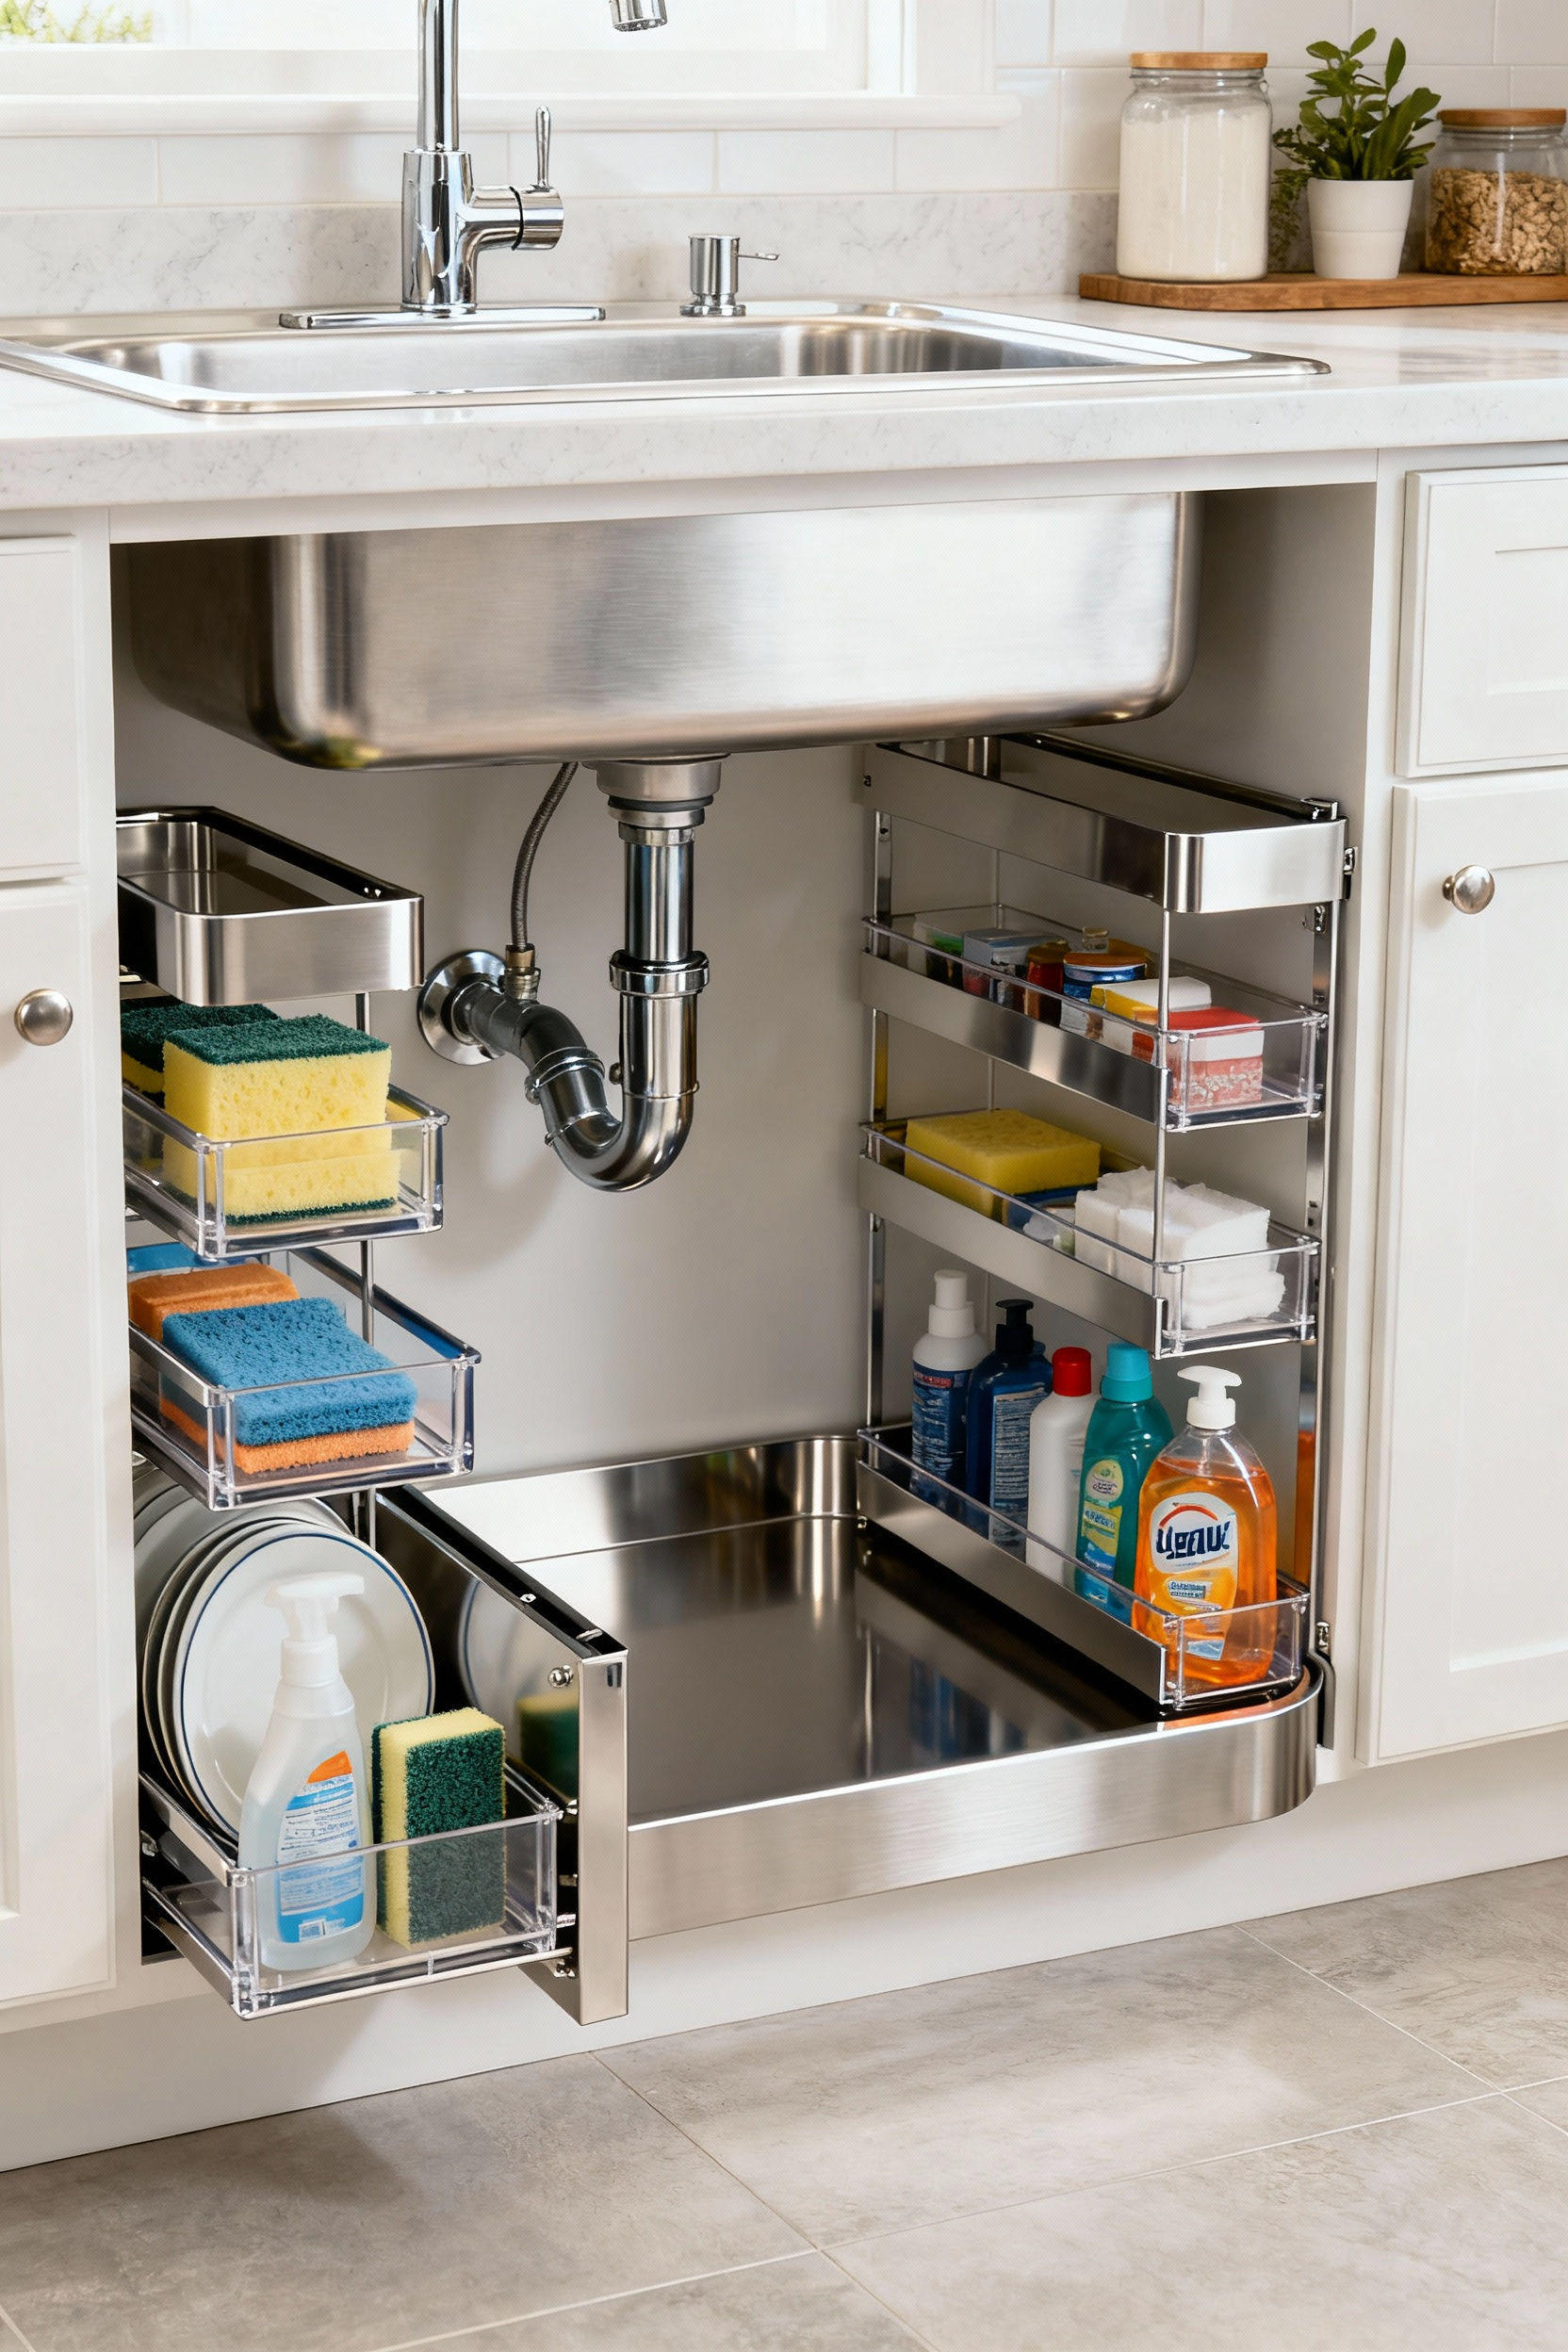
They’re perfect for corralling smaller items that tend to get lost, like dishwasher pods, cleaning erasers, or rolls of trash bags. You can place a two-tiered unit on one side of the cabinet, leaving room for taller spray bottles on the other. It creates a clean, built-in feel and enforces your zones perfectly.
6. Use Pull-Out Caddies for Grab-and-Go Access
A pull-out caddy combines the accessibility of a drawer with the portability of a cleaning bucket. These are typically narrow, deep bins on a sliding track that you install on the cabinet floor. They’re my go-to solution for holding all your primary spray bottles and cleaning solutions.
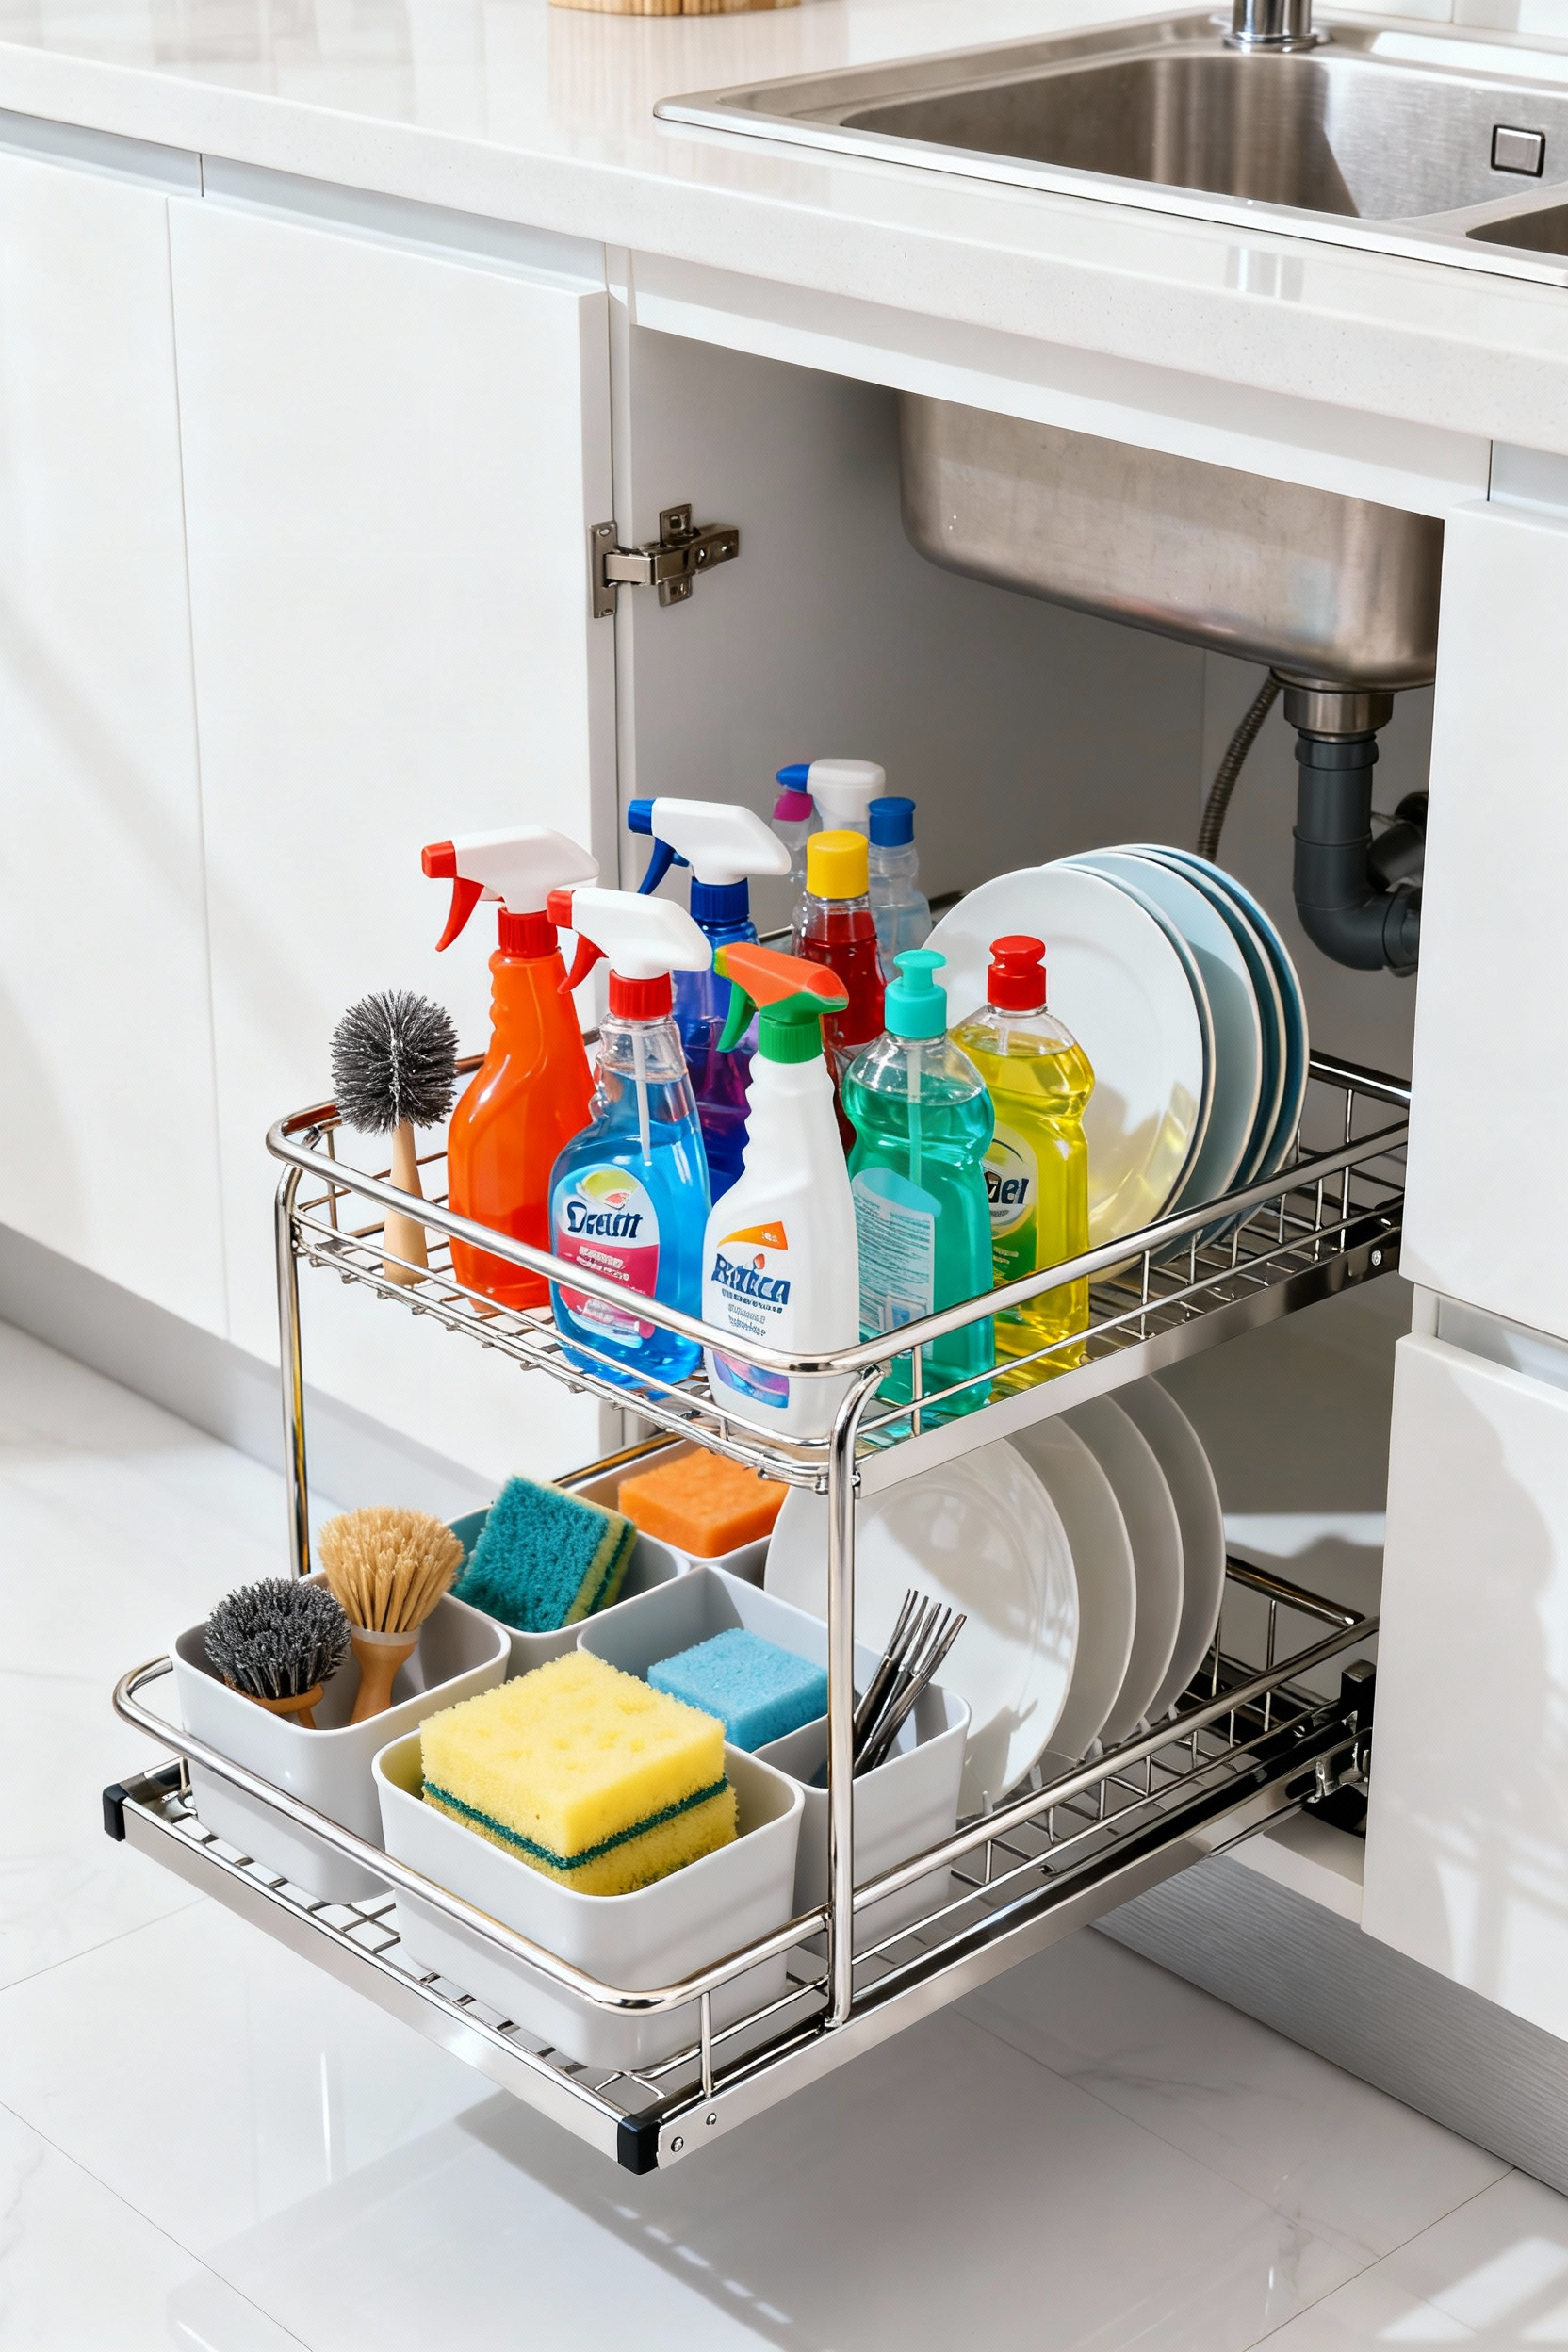
When you need to clean the bathrooms, you don’t grab five individual bottles; you slide the caddy out, lift the whole thing by its handle, and go. It keeps everything upright, preventing leaks and drips. And because it slides out smoothly, you’ll never again knock over three bottles just to get to the one you need in the back.
7. Decant Your Supplies into Uniform Bottles
This might sound purely aesthetic, but it has a massive functional payoff. Transferring your various cleaning supplies—dish soap, all-purpose cleaner, glass cleaner—into uniform, labeled spray bottles and dispensers creates a profound sense of visual calm. Instead of a chaotic jumble of clashing brand labels, you have a serene, cohesive collection.
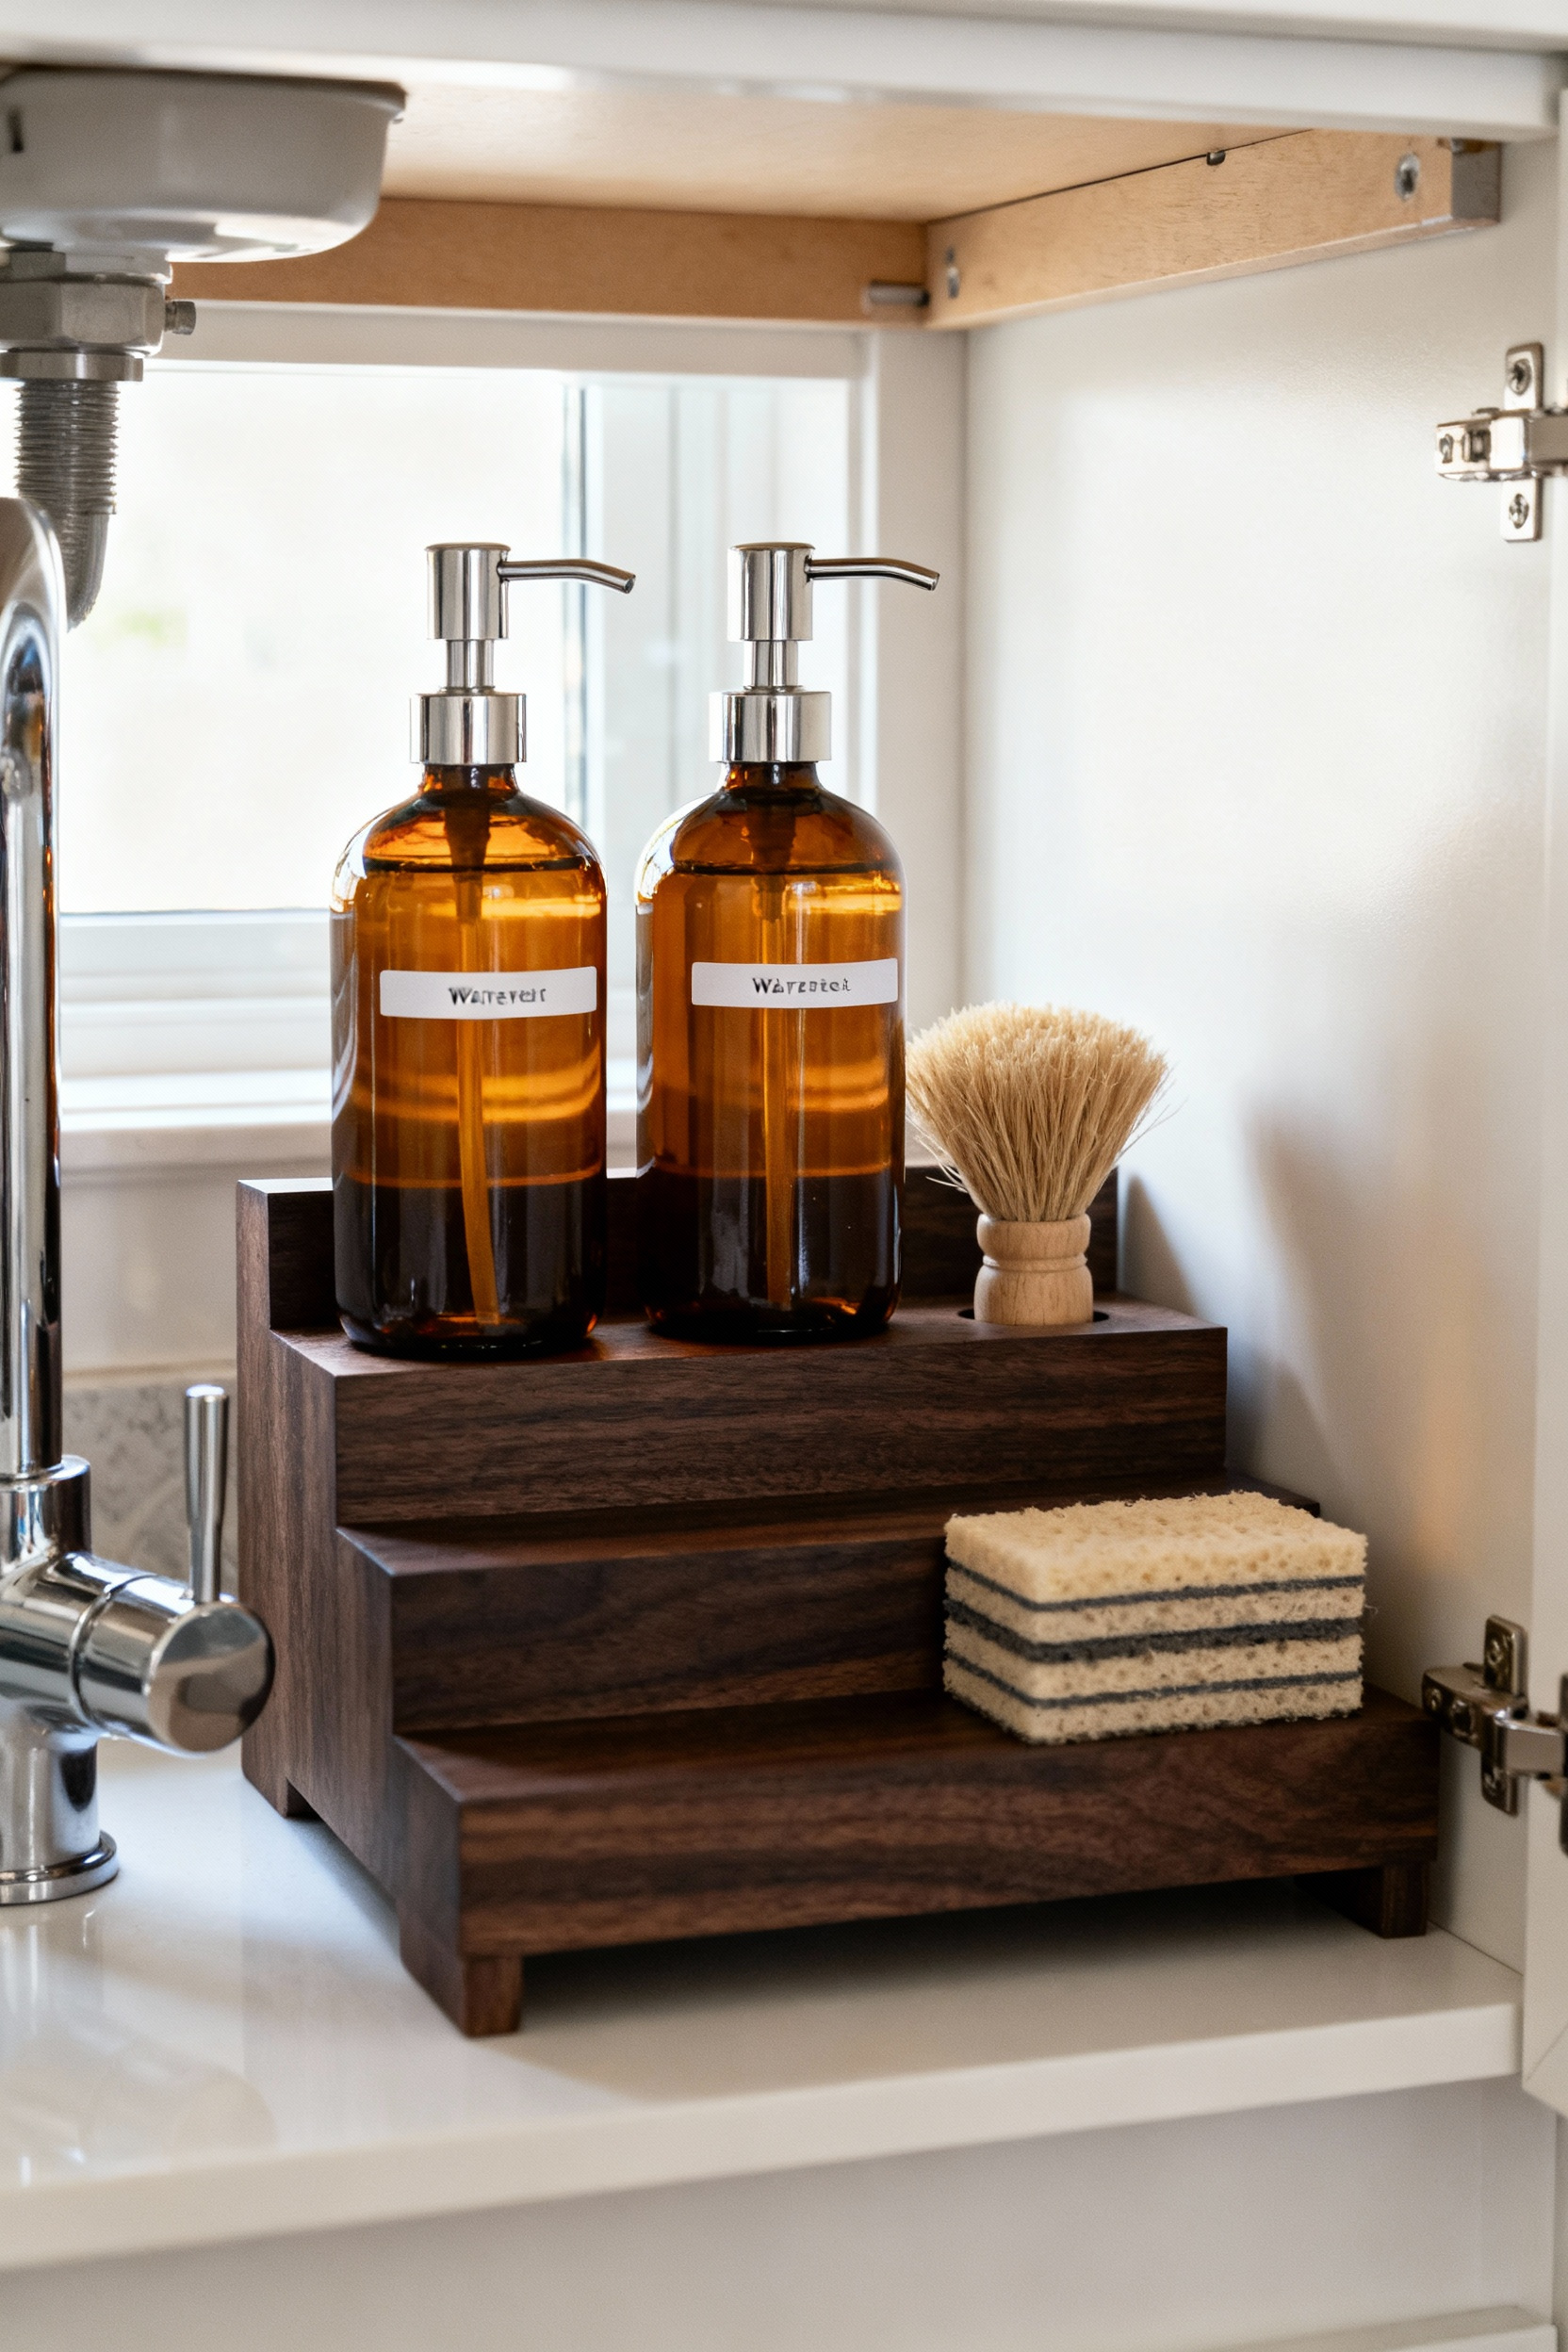
Functionally, this allows you to buy refills in bulk, which saves money and reduces plastic waste. Plus, you control the quality of the nozzle. Many store-bought cleaners come with flimsy spray heads; you can upgrade to durable, ergonomic ones. Just be sure to use high-quality, waterproof labels. You absolutely must know which bottle contains glass cleaner and which contains a harsher chemical.
8. Reclaim Your cabinet doors
The inside of your cabinet doors is some of the most valuable, and most overlooked, real estate in your kitchen. Adding a slim, over-the-door or screw-mounted organizer is a game-changer. It’s the perfect spot for the small, frequently used items that clutter up the main cabinet.
Think sponges, scrub brushes, a roll of trash bags, or even your collection of rubber gloves. Getting these items off the cabinet floor and into a dedicated spot on the door makes them instantly accessible and allows them to dry properly, which prevents mildew. Just be sure to measure first, ensuring the organizer won’t hit your pipes or garbage disposal when the door is closed.
9. Add Motion-Sensor LEDs—You Can’t Organize What You Can’t See
That under-sink cabinet is a black hole. How can you maintain an organization system if you can’t even see it? A simple, battery-operated motion-sensor LED light is one of the best investments you can make. They cost very little and take seconds to install with an adhesive strip.

The moment you open the cabinet door, the space is flooded with bright, clear light. You can immediately see everything, read labels, and spot any potential leaks early. It’s a small detail that feels surprisingly luxurious and makes maintaining your system a whole lot easier. You’ll wonder how you ever lived without it.
10. Systematize Your Waste with Divided Bins
If you keep your trash and recycling under the sink, it deserves a proper system, not just a loose can that gets in the way. A pull-out system with divided bins for trash and recyclables is the gold standard. These units mount to the cabinet floor and slide out smoothly, often with an option to attach to the door for one-pull opening.
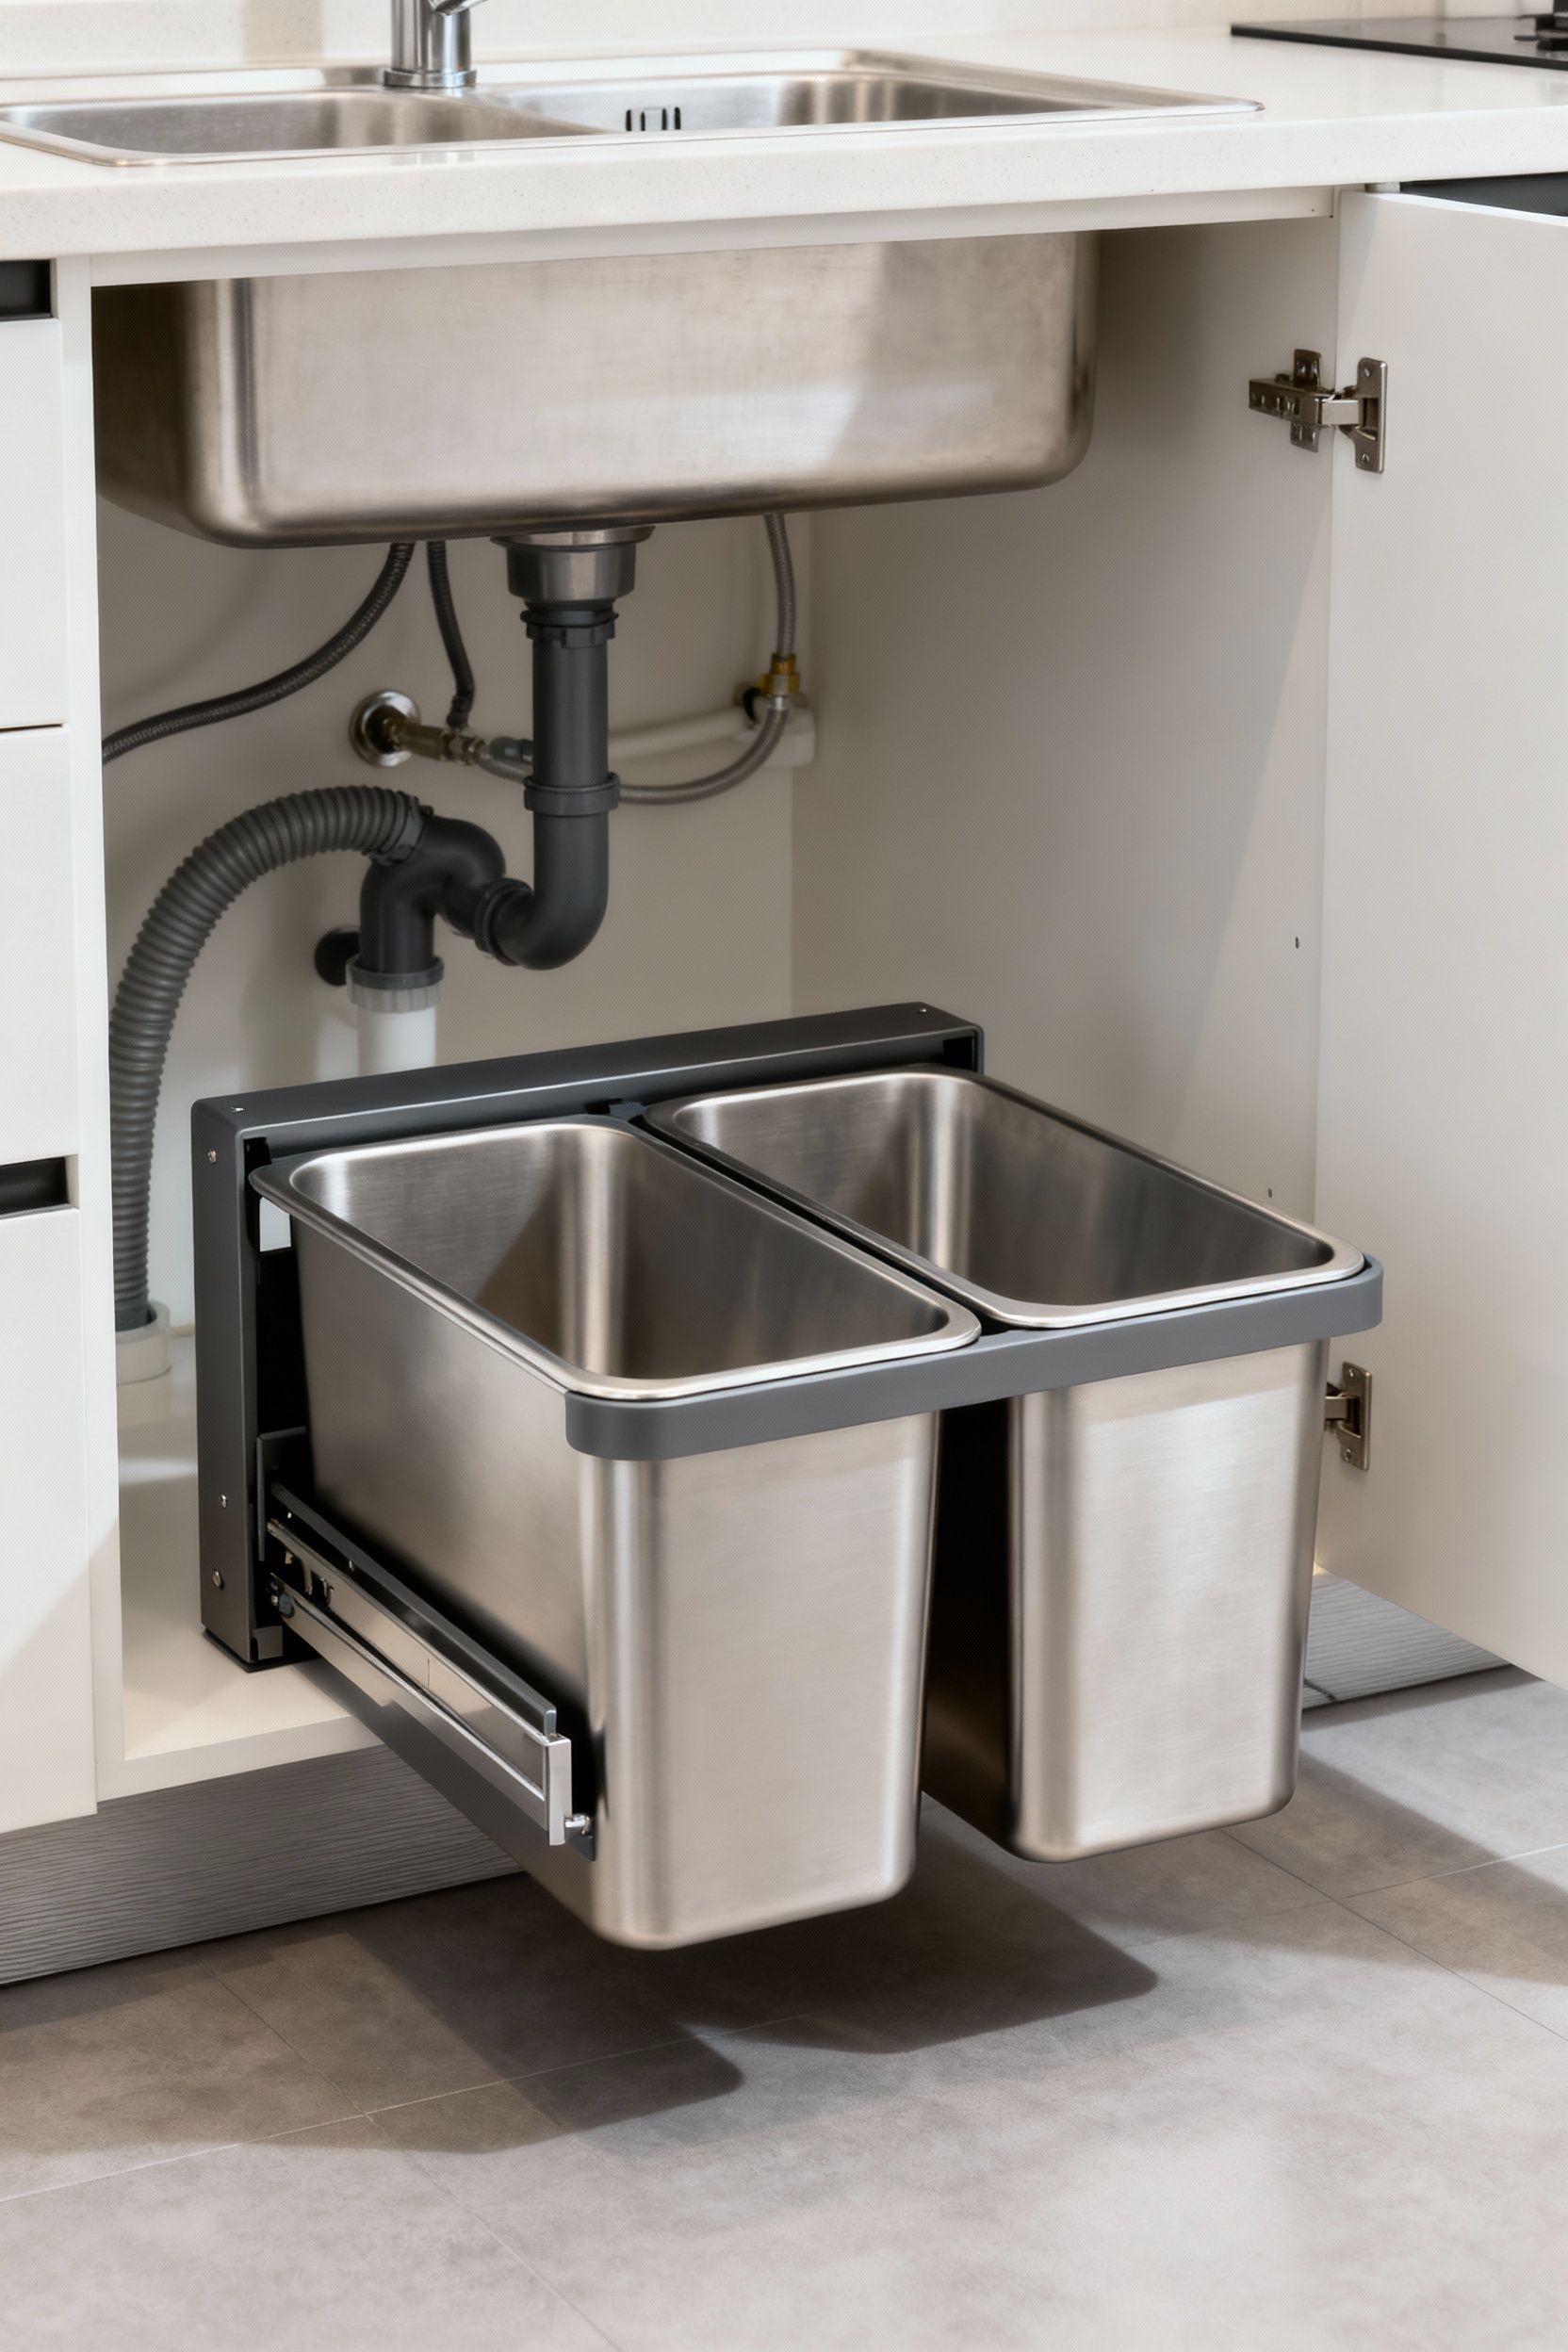
This keeps waste and odors contained, makes sorting effortless, and frees up floor space in your kitchen. It also reinforces the idea that every single function in this cabinet should be streamlined and efficient. Measure carefully to ensure you get a unit that clears your plumbing and disposal with ease.
Advanced Strategies for a Flawless System
Once your systems are in place, the final step is to adopt the habits and advanced solutions that make your organization truly permanent. This is where we move from one-time projects to long-term management, ensuring the cabinet stays as pristine as the day you organized it.
11. Adopt a Strict “One-In, One-Out” Rule
Now that your space is perfected, you need to protect it from future clutter. The “one-in, one-out” policy is your gatekeeper. It’s simple: before a new cleaning product comes into the cabinet, an old one must be finished and removed. No exceptions.
This prevents the slow accumulation of “backup” supplies that eventually overflows your system. It forces you to be mindful of what you’re buying and to actually use up what you have. In my storage solutions practice, this single habit is the biggest differentiator between clients who stay organized and those who relapse into clutter. It transforms organization from a project into a permanent way of operating.
12. For a Perfect Fit, Engineer Custom Solutions
If you have a particularly tricky plumbing setup or simply want the most efficient solution possible, sometimes an off-the-shelf product won’t cut it. This is where you can apply the principles of custom design. You can build a simple U-shaped shelf or riser from moisture-resistant plywood or PVC board that fits perfectly around your pipes.
This allows you to create a platform in the middle of the cabinet, reclaiming that awkward space right behind the P-trap for storing extra sponges or paper towels. It doesn’t have to be complicated. A simple, well-measured custom piece can solve a unique spatial problem in a way no store-bought item can, giving you a truly bespoke and maximally efficient storage space.
Conclusion
Transforming that chaotic cabinet under your kitchen sink isn’t about finding one magic container. It’s about applying a systematic, designer’s approach to a challenging space. We’ve moved from the crucial groundwork of purging and protecting to the smart implementation of tools like pull-out caddies and vertical shelving, and finally, to the advanced strategies that ensure your hard work lasts.
By thinking about the geometry, accessibility, and function of the space, you’ve done more than just tidy up—you’ve engineered a custom system that makes your daily life easier and brings a sense of calm to one of your kitchen’s most hardworking zones. That feeling of opening a cabinet and seeing everything in its place, effortlessly within reach, is the true reward.
Ready to take control? Don’t feel you have to do it all at once. Start this weekend with step one: empty the cabinet and install a liner. That single action will build the momentum you need to create a space that is not just organized, but brilliantly designed.


