Can we talk about why everyone seems to get bathroom cabinets wrong? It drives me nuts. People spend a fortune on tile and a fancy tub, then they just… stick a box under the sink and wonder why their bathroom is a cluttered disaster zone a month later. They treat it like furniture. A pretty box to hide junk in.
But a great bathroom cabinet isn’t a piece of furniture. It’s a system. It’s the engine that runs your morning routine smoothly and your evening wind-down peacefully. Get it right, and your whole day starts and ends better. Get it wrong, and you’re fighting for countertop space and digging through a drawer-of-doom for your toothpaste forever. I’ve spent my career designing and organizing these spaces, and I can tell you, what actually matters isn’t what you see on Instagram. It’s the hidden logic behind it all. So, let’s break it down, step-by-step, and build you a system that works.
Planning and Assessment for Your Ideal Bathroom Cabinets (Part 1)
This is the phase everyone wants to rush through. It’s the “boring” part before you get to pick pretty colors. Don’t do it. Getting this groundwork right is the difference between a cabinet that fits your life and a cabinet you have to contort your life to fit.
1. Conduct a Thorough Space Audit and Precise Measurements
Okay, first things first. Before you even open Pinterest, you need to become best friends with your tape measure. People either skip this or do it half-heartedly, and it’s why you see expensive vanities that prevent the bathroom door from opening all the way. It’s not just about wall-to-wall measurements; it’s about understanding the space in 3D, including how you move through it.
I once had a client who bought a stunning, deep vanity online without double-checking the distance to their toilet. By the time it was installed, they realized they had to practically straddle the toilet to open the main drawer. It was a disaster. The “fix” was a massive plumbing job that cost them nearly as much as the vanity itself. So please, measure everything: the swing of the door, the height of the window sill, where the pipes pop out of the wall. Measure it all. Twice.
With your numbers in hand, it’s time to figure out what, exactly, you need to store.
2. Define Your Comprehensive Storage Needs Beyond the Obvious
Your mission here is to conduct a full-scale inventory of your bathroom life. Don’t just think “towels and toothbrushes.” Empty out every drawer, cabinet, and corner. Dump it all on the floor. You’ll be horrified, and that’s good. Now, group everything: daily stuff, weekly stuff, guest stuff, backup supplies, cleaning products, the zillion little hair things. This isn’t just about counting items; it’s about understanding their shape, size, and how you use them.
The BS everyone tells themselves is, “I just need more space.” No, you don’t. You need smarter space. I learned this the hard way in my own tiny apartment bathroom. I thought a big vanity would solve my problems, but all I did was create a deeper junk drawer. The real solution came when I zoned my storage—a shallow drawer for daily makeup, a vertical pull-out for tall hairspray bottles, and a designated bin for travel-sized extras. That’s what actually makes a difference.
This inventory will directly inform the style of cabinet that will serve you best.
3. Align Cabinet Style with Your Bathroom’s Overall Aesthetic
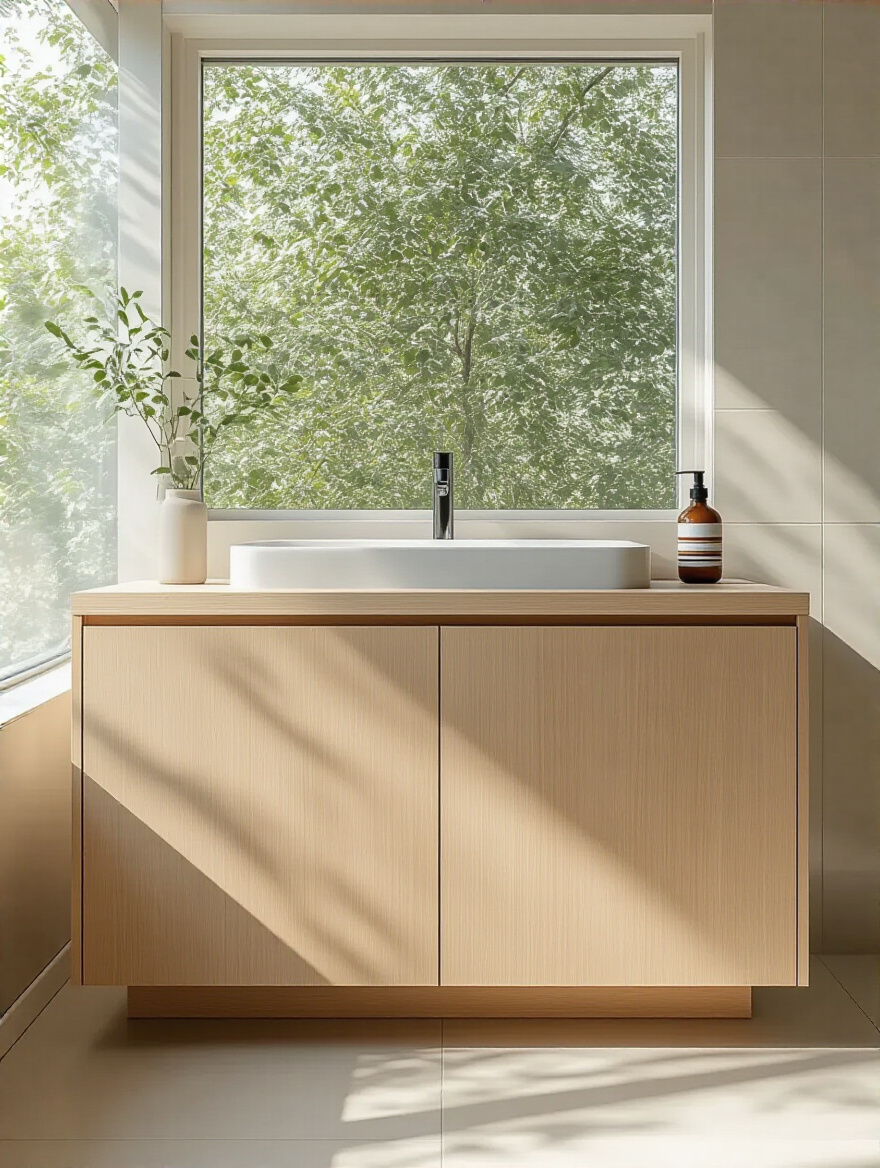
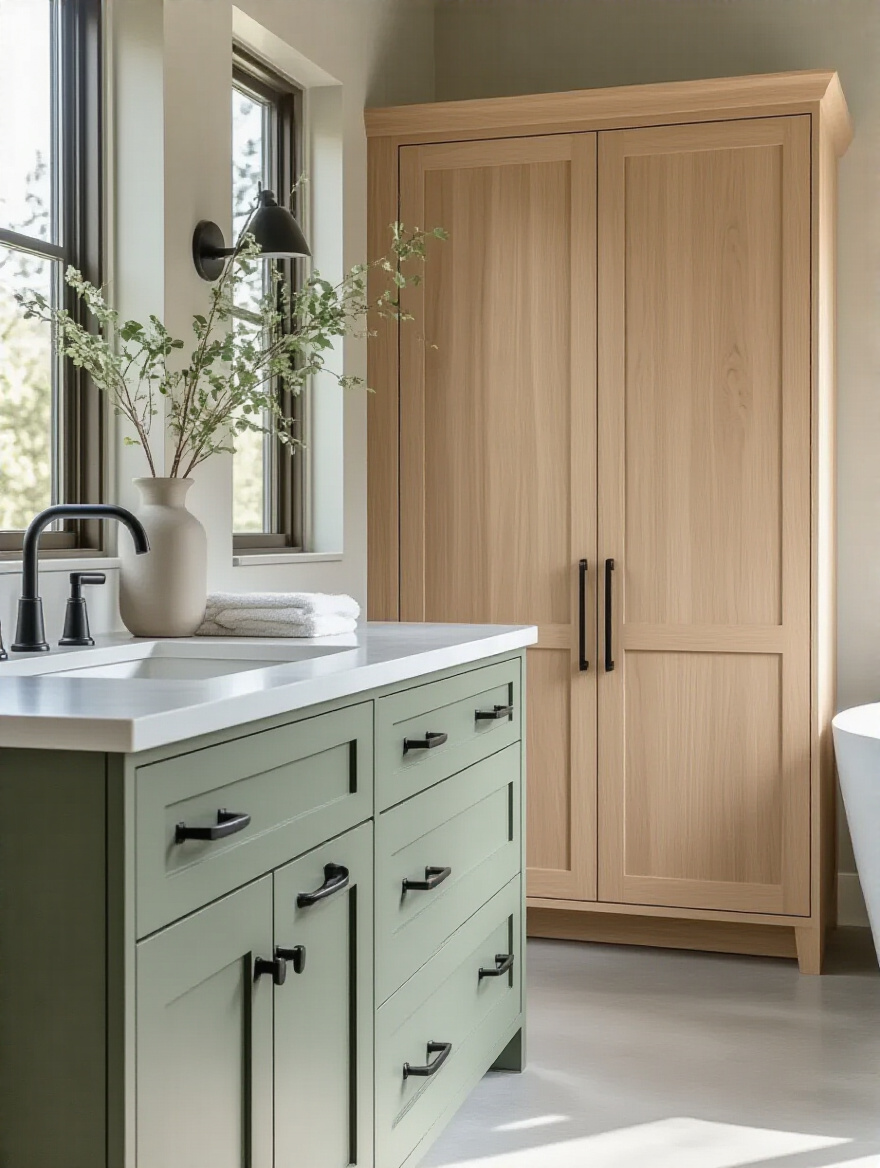
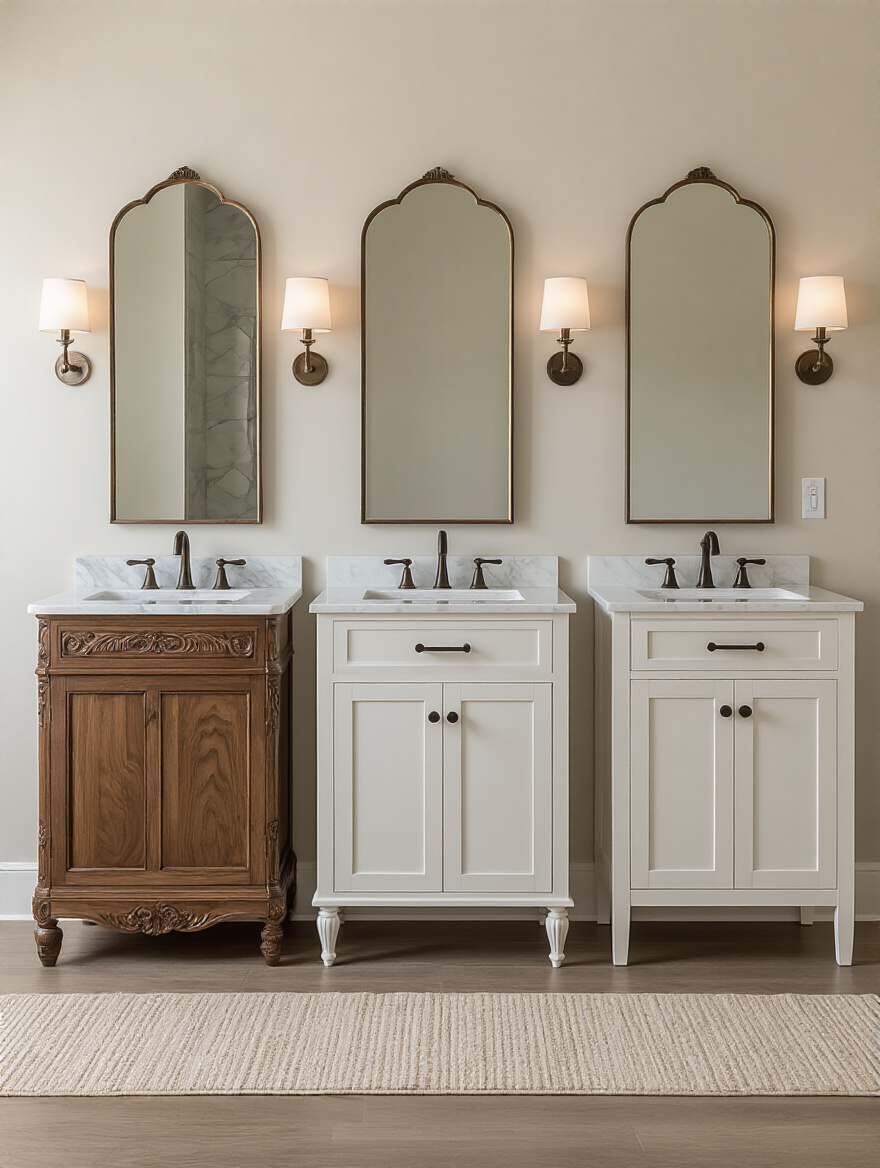
Now for the fun part. The style of your cabinet door is like the cover of a book—it sets the entire tone. A flat, slab-style door screams modern and minimalist, while a traditional raised-panel door feels classic and formal. Shaker doors? They’re the jeans and a nice t-shirt of the cabinet world—they go with almost everything, from farmhouse to transitional. Don’t just pick what’s trendy; pick what feels cohesive with the rest of your bathroom and your home.
The mistake people make is falling in love with a cabinet style in a showroom and ignoring the context of their own space. That ornate, traditional vanity looks incredible in a grand, high-ceilinged showroom, but in your cozy 5×8 bathroom, it might just look bulky and out of place. My shortcut? Create a mood board. Pin a photo of your floor tile, your faucet, your light fixture, and then drop in different cabinet styles. You’ll see right away what works and what fights everything else.
Of course, your dream style has to align with your real-world budget.
4. Establish a Realistic Budget for Cabinetry and Installation
Let’s get real about money. Cabinets are almost always more expensive than people think, especially when you factor in installation. Corporate websites will give you a price for the box, but they conveniently leave out the cost of demo, delivery, installation, plumbing adjustments, and the all-important “oops” fund. My rule of thumb is to add a 15-20% contingency to your total budget. Always.
A friend of mine was renovating and budgeted down to the penny for her cabinets. The day of the install, the crew discovered some minor dry rot in the wall behind the old vanity. It was a few hundred bucks to fix—not a huge deal, but because she had zero wiggle room in her budget, it became a massive source of stress and delayed the whole project. That contingency fund isn’t for fun extras; it’s for the things that inevitably go wrong in any renovation. Get at least three itemized quotes, and make sure they include everything.
Planning and Assessment for Your Ideal Bathroom Cabinets (Part 2)
We’ve covered the “what” and “how much.” Now let’s dig into the “where” and “how”—the details that make your cabinets a joy to use every single day.
5. Strategize Cabinet Layout for Optimal Workflow and Accessibility
Think about your morning routine. Where do you stand when you brush your teeth? Where do you do your hair? Your cabinet layout should support that natural flow, not fight against it. Store the things you use most often in the “prime real estate”—the top drawer right under the counter, or the medicine cabinet at eye level. Less-used items like backup toilet paper or cleaning supplies can go in lower cabinets or higher shelves.
This is about creating zones. Your “dental zone” should have toothpaste, floss, and brushes all together. Your “showering zone” has towels and bath products nearby. A great layout means you’re not trekking across the bathroom with wet hands to grab a towel. I had a family with two teenagers sharing a bathroom, and the chaos was epic. We designed a central tall cabinet with separate, designated pull-out shelves for each kid. The morning arguments dropped by about 80%. It’s not just organization; it’s peace-keeping.
As you plan that layout, you also have to consider the environment your cabinets will be living in.
6. Assess Environmental Factors Like Lighting and Ventilation Impact
Your bathroom is a war zone of moisture and steam. You can buy the most expensive solid wood cabinets in the world, but if your ventilation is terrible, they will warp, swell, and fail. A good exhaust fan isn’t a luxury; it’s a critical part of protecting your investment. Make sure it’s sized correctly for your bathroom (look up the CFM rating) and run it for a good 15-20 minutes after every shower.
Lighting is the other piece of the puzzle. Dark-stained cabinets might look moody and dramatic online, but in a small bathroom with one dim overhead light, they’ll just create a black hole that you can’t see into. Consider how your cabinet choice will affect the light. If you’re set on a dark color, plan for integrated lighting under the cabinet or on either side of the mirror to brighten the countertop workspace. Good lighting makes a space feel bigger, cleaner, and more functional.
Selecting and Integrating the Perfect Cabinetry (Part 1)
This is where your vision starts to become a physical reality. The materials, doors, and hardware you choose will define the look, feel, and lifespan of your entire bathroom.
7. Choose Durable Materials Resistant to Bathroom Humidity and Wear
The biggest lie in the cabinet industry is that solid wood is always the “best.” For a bathroom? Not necessarily. Wood naturally expands and contracts with humidity, which can lead to cracked paint and warped doors over time. For a bathroom, I often recommend high-quality MDF (Medium Density Fiberboard) with a durable, factory-applied finish or marine-grade plywood. These materials are engineered for stability in moist environments.
What really matters is the finish. A cheap finish will peel and delaminate in a year, no matter what’s underneath. Look for cabinets with multi-layer baked-on finishes or high-quality thermofoil. I tell clients to take a sample door and really abuse it. Drip some water on it and leave it overnight. See what happens. The material that can stand up to that test is the one you want in your bathroom.
Once you’ve settled on the guts of the cabinet, you can focus on the face.
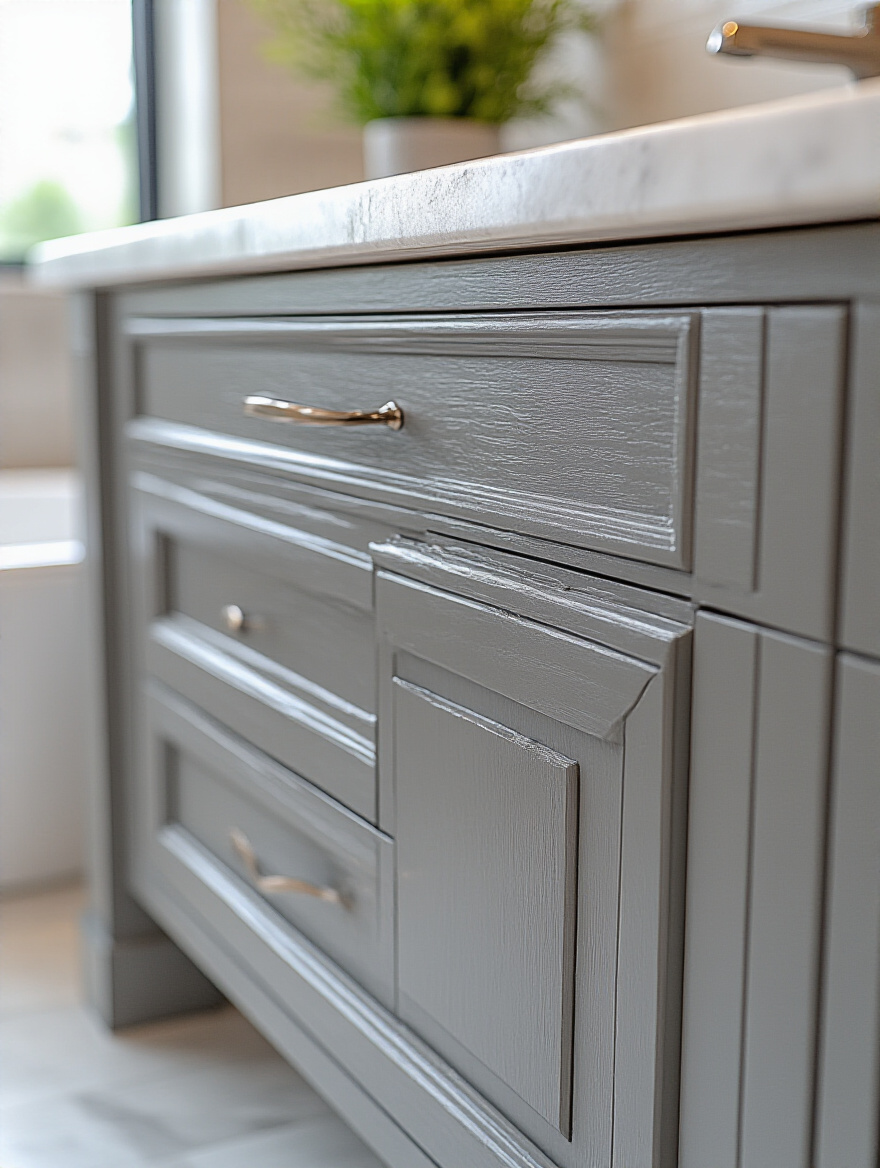
8. Explore Various Door Styles to Complement Your Design Theme
This choice sets the personality of your bathroom. The noise out there is about fleeting trends, but what you really want is a style that fits the architecture of your home and your personal taste. Don’t let a designer talk you into an ultra-modern slab door if you live in a classic colonial house—it will never feel right.
A quick shortcut to help you decide:
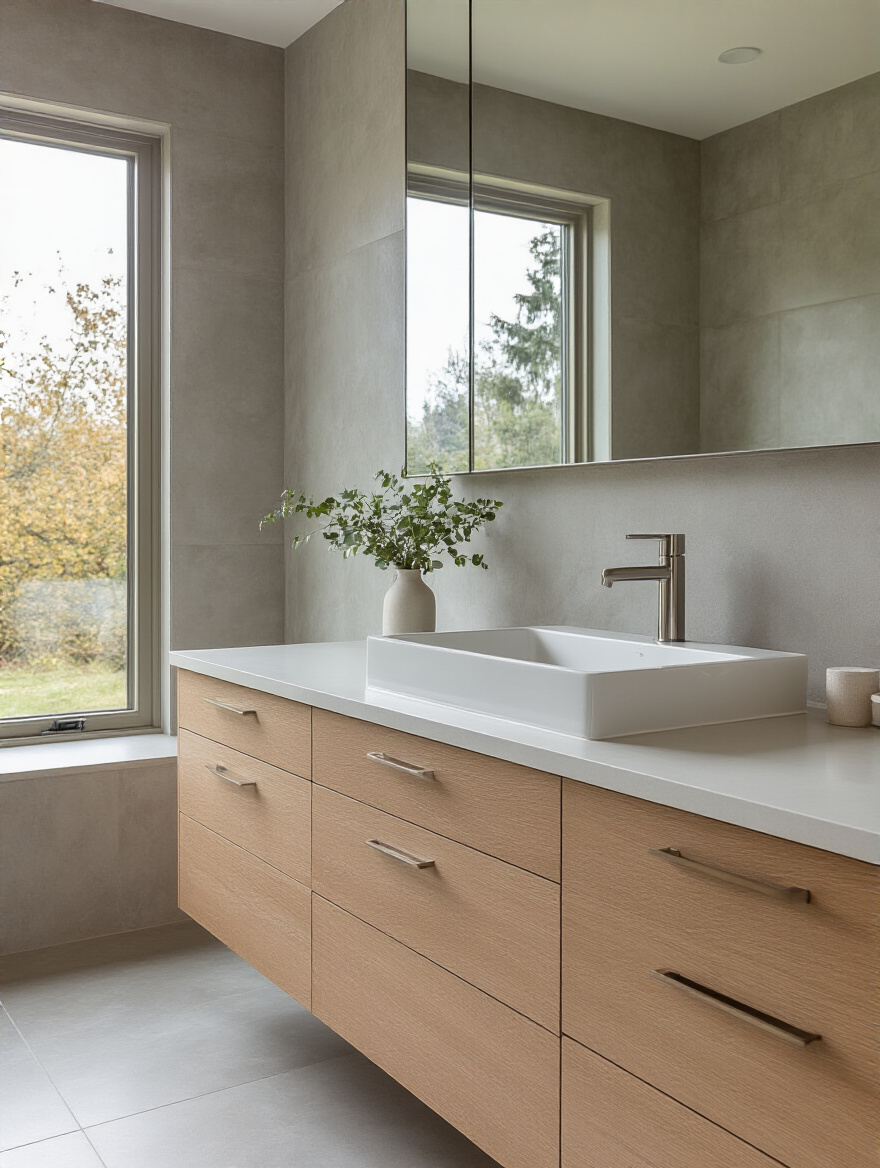
- Modern/Minimalist: Flat-panel (slab) doors.
- Transitional/Farmhouse: Shaker-style doors.
- Traditional/Formal: Raised-panel or applied-molding doors.
Remember that simpler styles are easier to clean. All those intricate details on a traditional door are just little ledges for dust and grime to collect on. In a small space, a simple Shaker or slab door can also make the room feel less busy and more spacious.
Think of the hardware as the jewelry that completes the outfit.
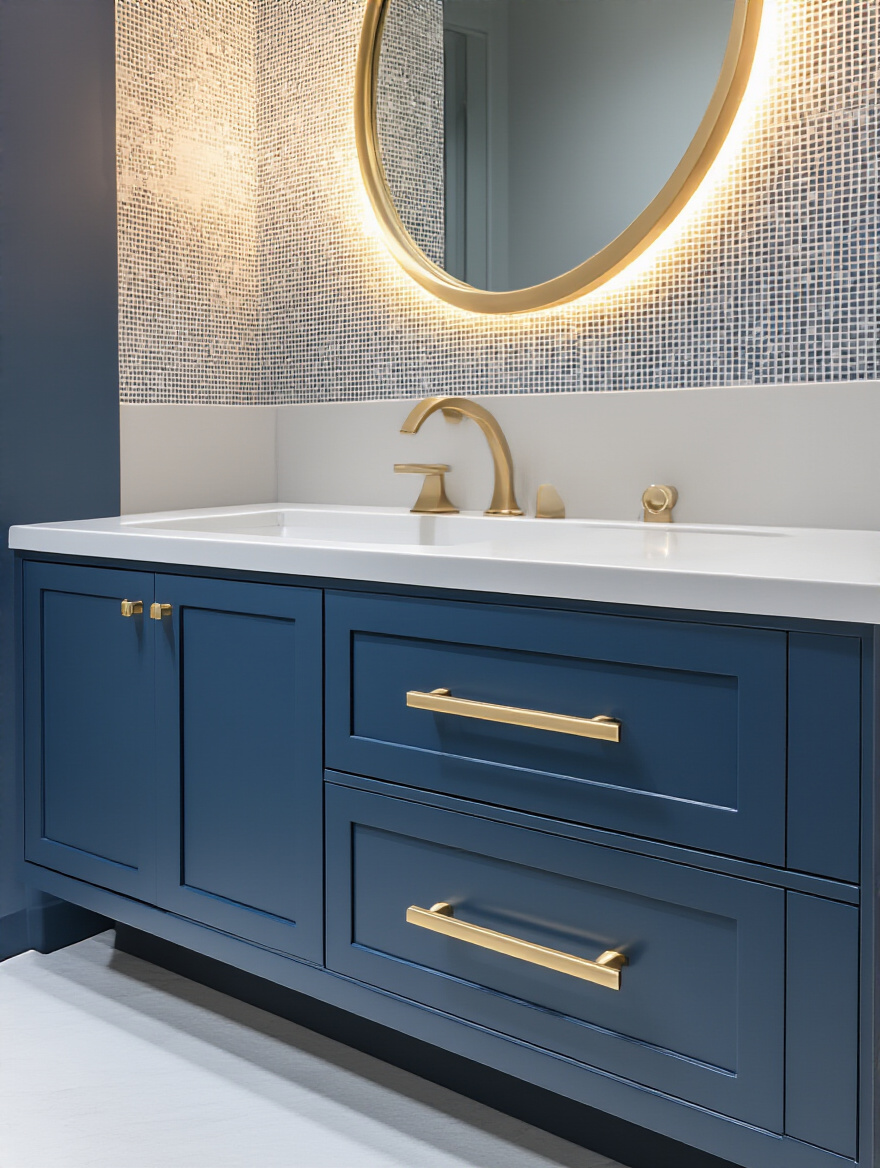
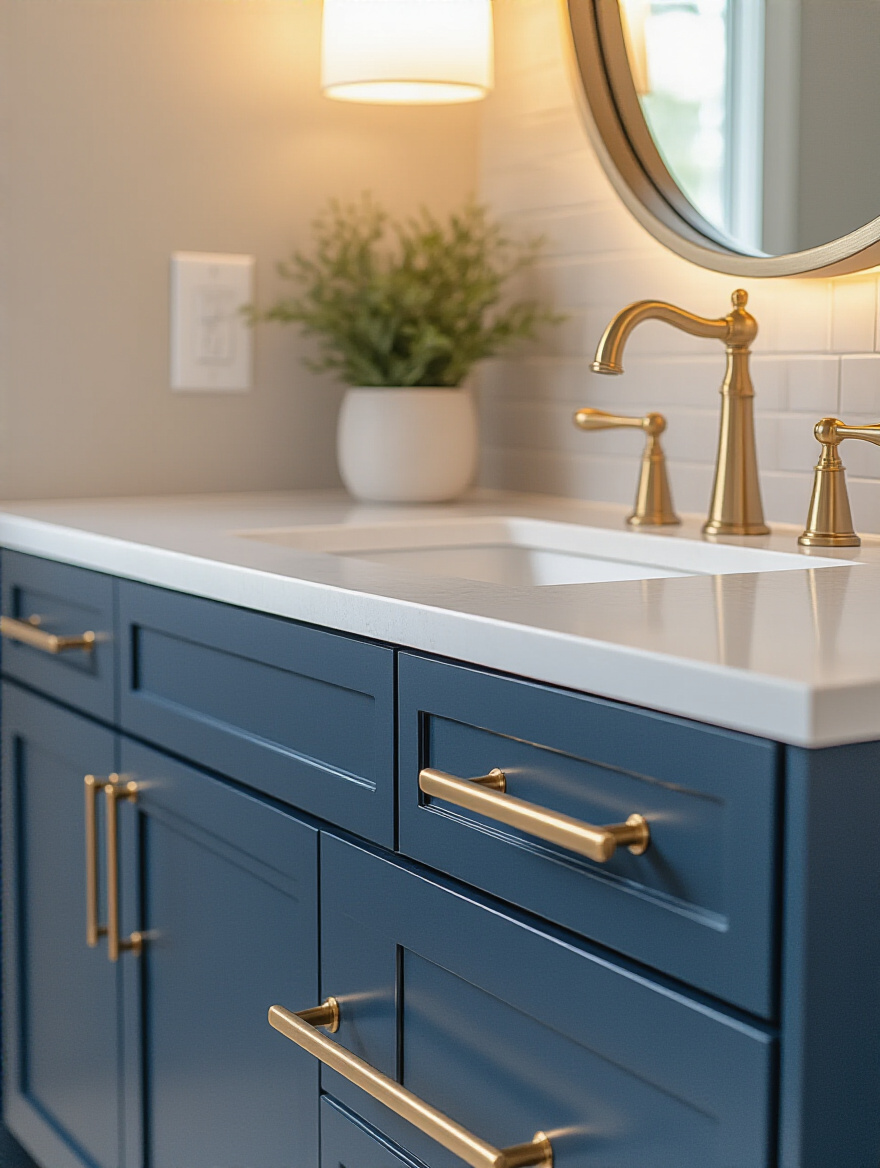
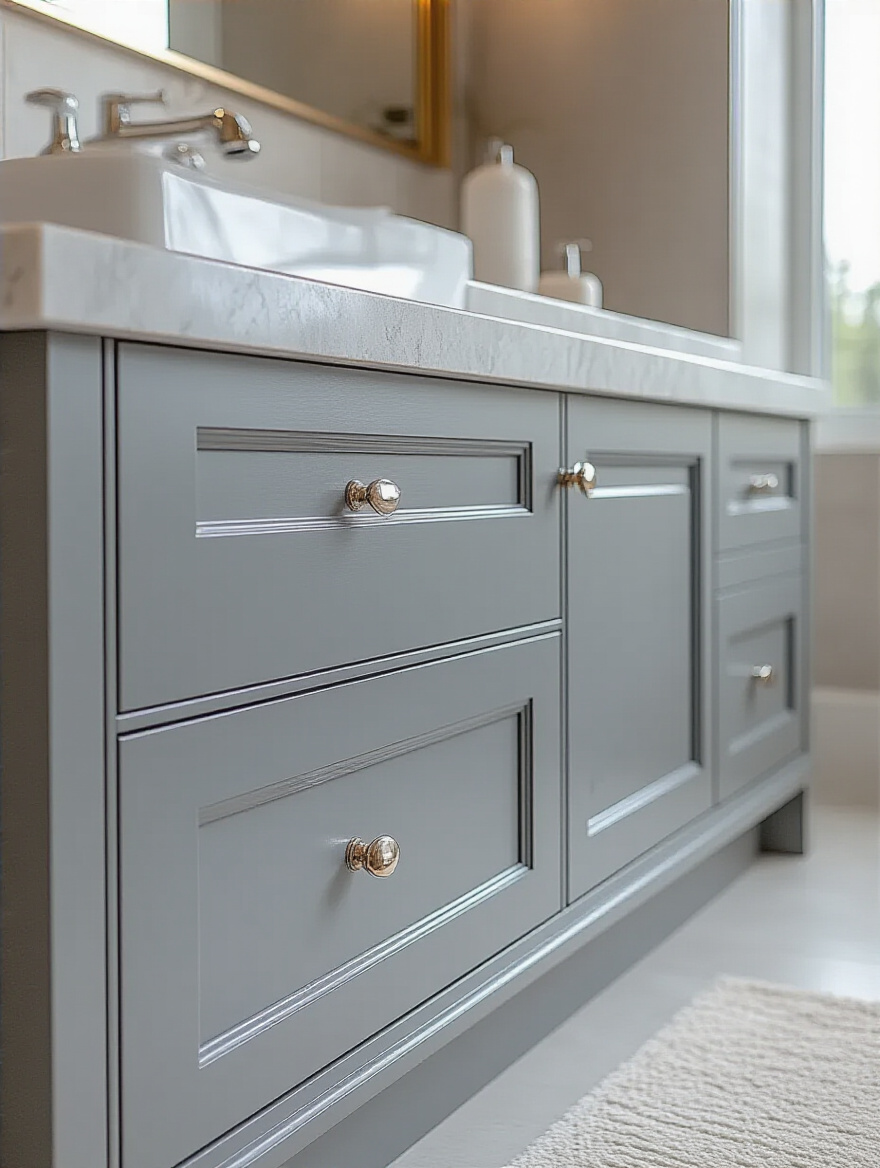
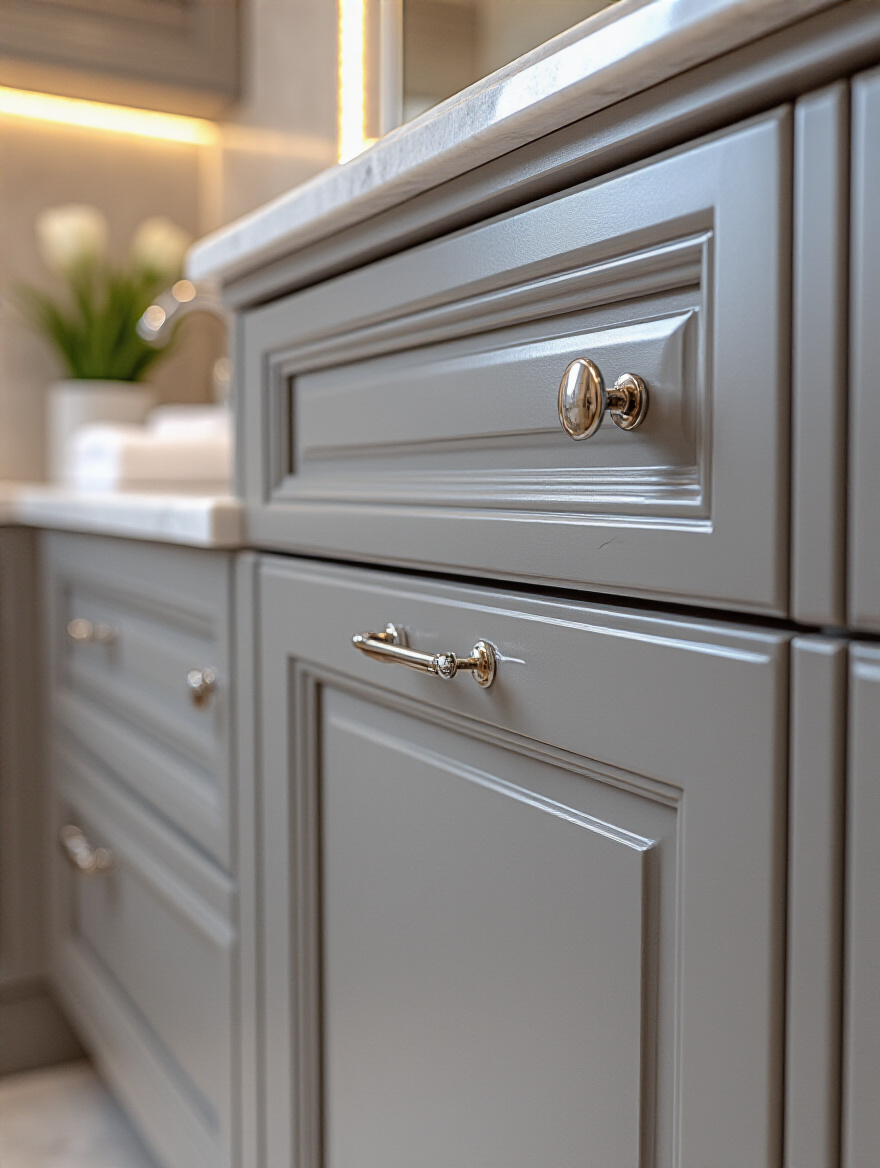
9. Select Hardware That Enhances Both Functionality and Visual Appeal
Hardware is not an afterthought. The right knobs or pulls can make builder-grade cabinets look custom, while the wrong choice can cheapen an expensive vanity. Functionality comes first here. Think about opening a drawer with wet or soapy hands. A small, slick knob is a terrible idea. A bar pull that you can hook a finger through is much more practical.
And don’t forget the hinges. The single best upgrade you can make to any cabinet is adding soft-close hinges and drawer glides. The first time you experience a drawer that glides shut silently instead of slamming, you’ll wonder how you ever lived without it. It’s a small detail that adds a huge amount of daily luxury and prevents wear and tear on your cabinet frames.
But the real magic happens inside the cabinet.
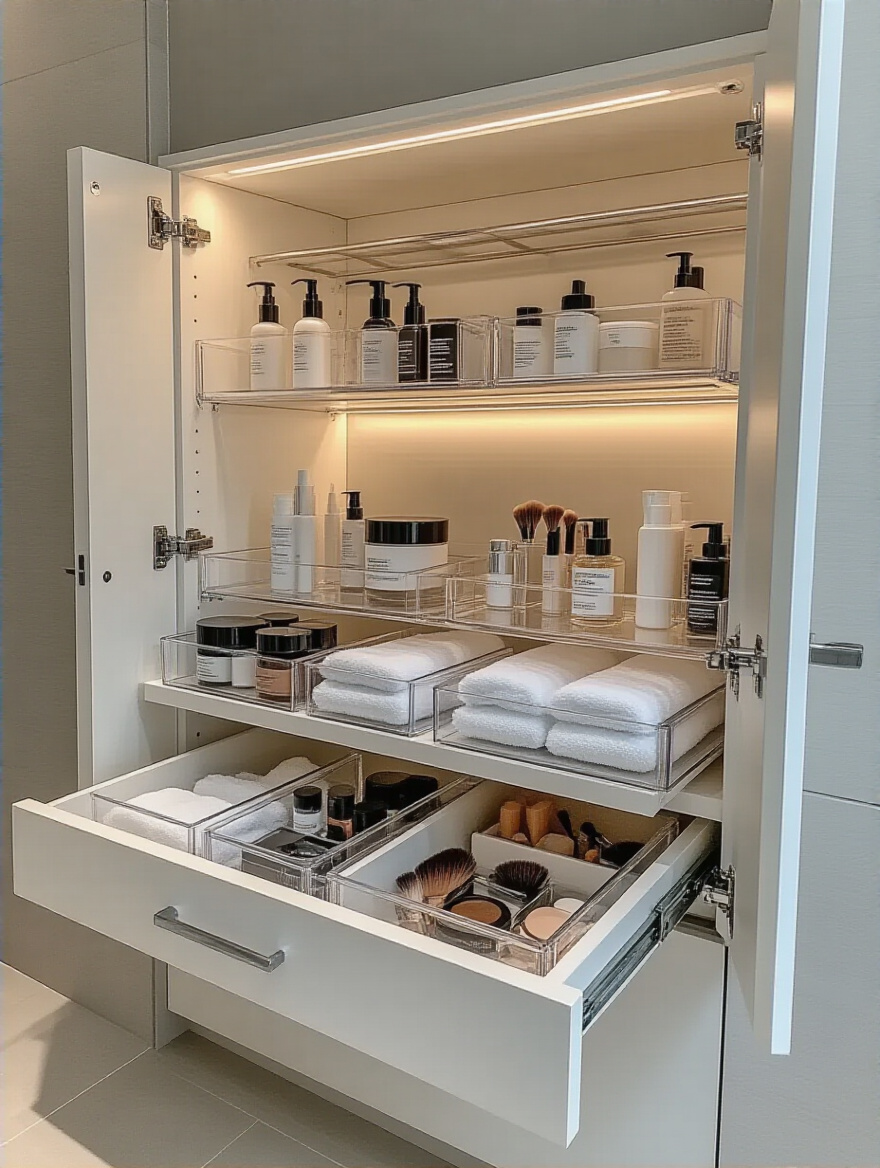
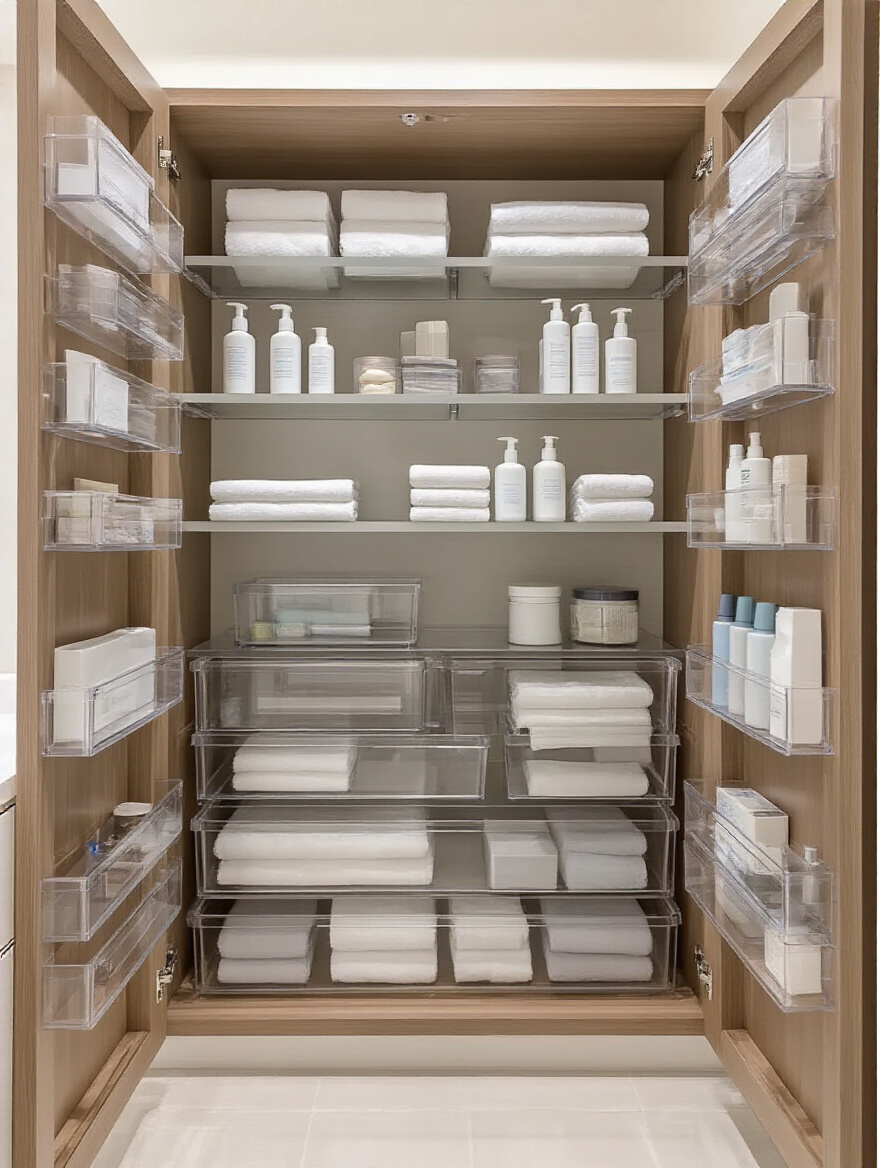
10. Integrate Smart Internal Storage Solutions for Peak Organization
This is my absolute favorite part. A cabinet is just a box until you outfit the inside. This is what separates a pretty bathroom from a truly functional one. Forget cavernous, empty cabinets where everything gets lost in the back. The goal is to make every single item visible and accessible.
Here’s the noise: buy a bunch of cute plastic bins. Here’s what actually works: integrated, purpose-built solutions.
- Under the Sink: Get U-shaped pull-out drawers that fit around the plumbing. You’ll reclaim all that wasted space.
- Deep Drawers: Use customizable dividers to create specific spots for every little thing. No more junk drawers.
- Tall Cabinets: Install pull-out shelves (roll-out trays) so you can access items at the back without taking everything else out first.
- On the Door: Use door-mounted racks for small, frequently used items.
I once worked with a client whose vanity was a complete disaster zone. We installed a single two-tiered pull-out organizer under her sink, and she swore it changed her life. It wasn’t more space; it was organized, accessible space.
Selecting and Integrating the Perfect Cabinetry (Part 2)
We’re diving deeper now, moving from the foundational choices to the integrated features that truly elevate a design from standard to exceptional.
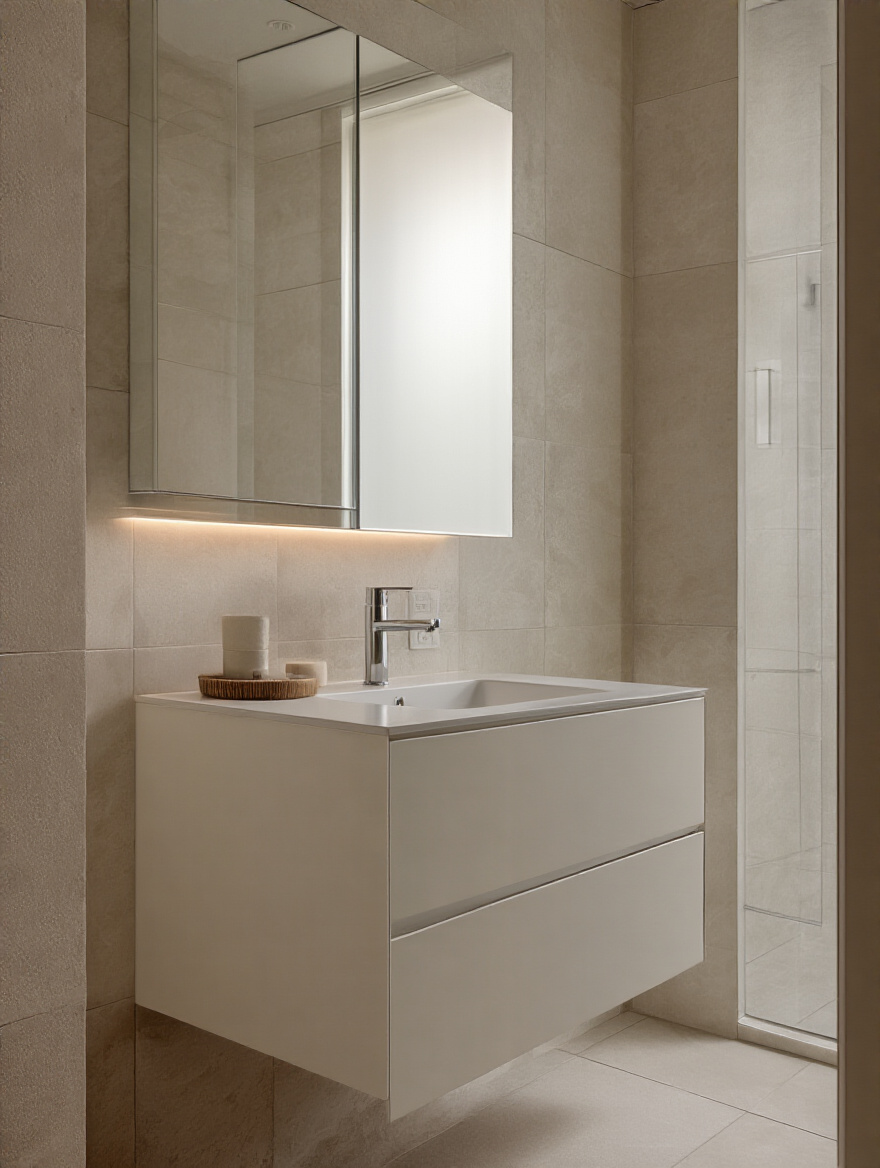
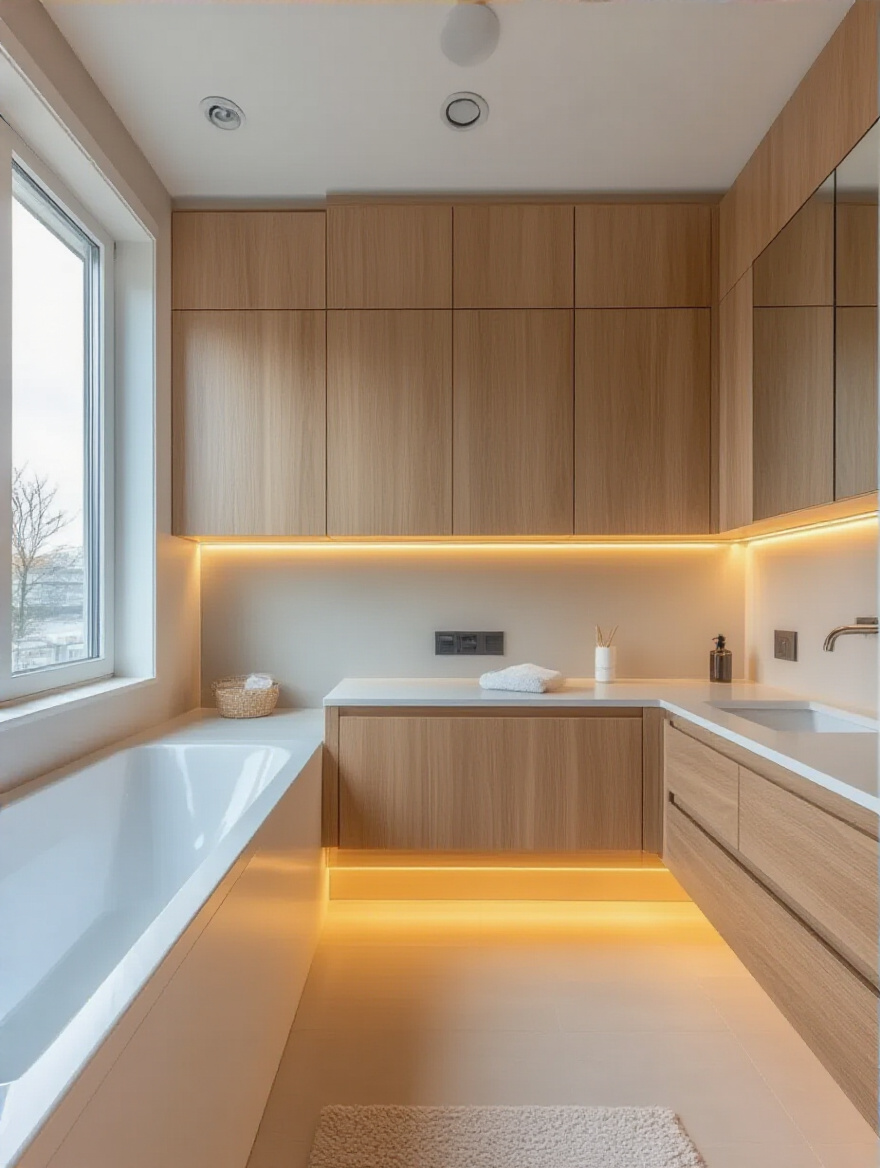
11. Incorporate Integrated Lighting for Enhanced Task and Accent Illumination
If you really want to level up your bathroom, build lighting into your cabinets. Sconces and overhead lights are fine for general illumination, but they cast shadows right where you need to see—on your face and on the countertop. Putting a slim LED strip under your upper cabinet or medicine cabinet gives you perfect, shadow-free task lighting.
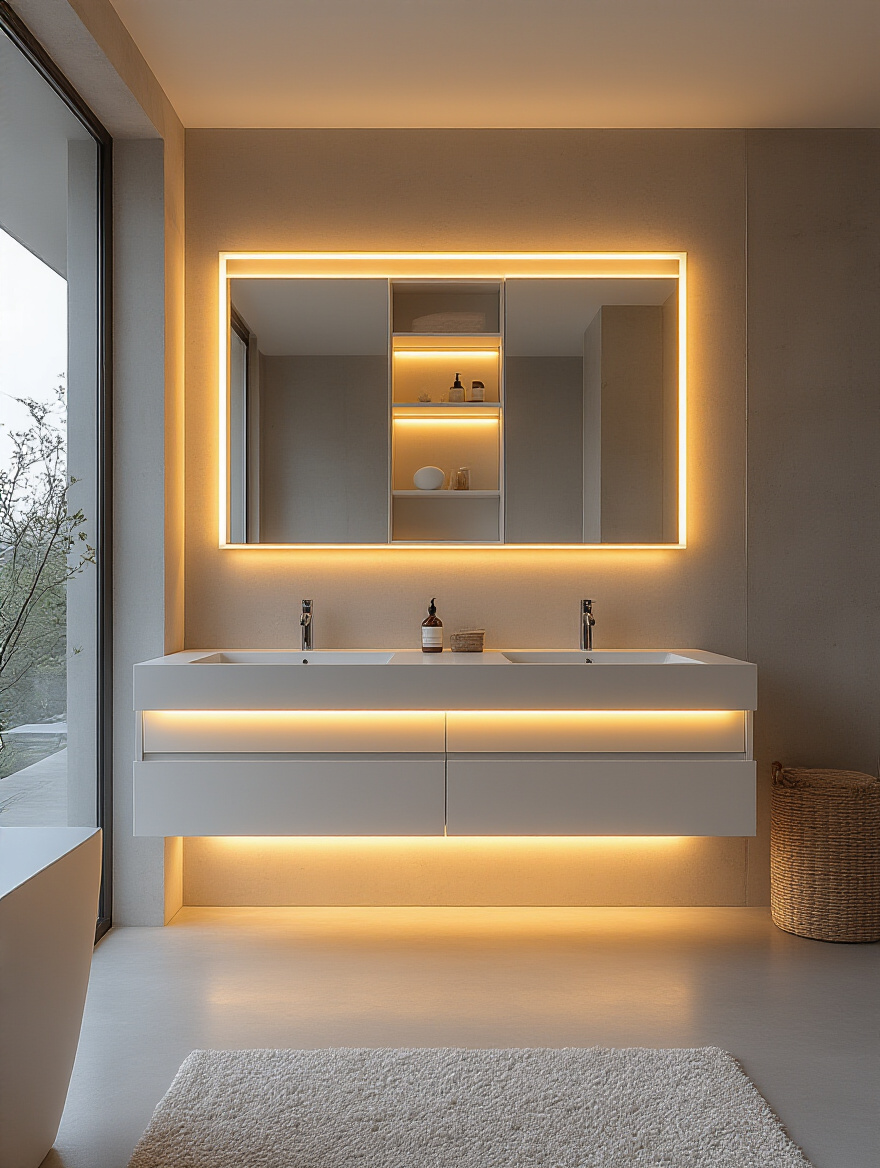
This isn’t just about function; it’s about mood. A soft glow from a toe-kick light under a floating vanity is the perfect built-in nightlight—enough to see by without blinding you at 2 a.m. You can even put motion-activated lights inside drawers and cabinets so they illuminate when you open them. It feels incredibly high-end and makes finding things in the back of a dark cabinet a breeze.
This level of customization often leads to a major decision point in any project.
12. Decide Between Custom, Semi-Custom, or Stock Cabinetry Options
This can feel overwhelming, but it’s pretty simple when you break it down by your priorities: time, budget, and flexibility.
- Stock: This is your off-the-shelf option from a big box store. Pro: It’s the cheapest and fastest. You can often take it home the same day. Con: You’re limited to standard sizes and finishes. You’ll often end up with wasted space from filler strips because they don’t perfectly fit your walls.
- Semi-Custom: This is the middle ground. You start with standard cabinet sizes but have more options for door styles, finishes, and organizational features. Pro: A good balance of cost and personalization. Con: Lead times are typically 4-8 weeks.
- Custom: This is built from scratch specifically for your space by a cabinet maker like me. Pro: Every inch is maximized. The quality and design possibilities are limitless. Con: It’s the most expensive option and has the longest lead time (8-16+ weeks).
The common misconception is that “custom” always means “better.” If your bathroom is a standard size and a stock Shaker vanity fits perfectly, that might be the smartest choice. Custom shines when you have an awkward space, a specific storage need, or want a level of quality and detail you can’t find off the shelf.
Styling and Optimizing Cabinet Functionality (Part 1)
The cabinets are in. Now it’s time to integrate them perfectly into the rest of the room and make sure every inch is working as hard as possible.
13. Harmonize Cabinet Colors and Finishes with Your Bathroom Palette
The biggest mistake I see is people choosing their cabinet color in isolation. You have to consider it alongside your floor tile, wall color, and countertop. Take samples of everything and look at them together in your bathroom. The fluorescent lights of a showroom can make a gray cabinet look cool, but in the warm morning light of your own bathroom, it might suddenly look purple.
My go-to shortcut is the 60-30-10 rule. Let 60% of the room be a dominant color (like your walls), 30% a secondary color (your cabinets), and 10% an accent color (towels, art, hardware). This simple formula helps create a balanced, cohesive look instead of a chaotic mess. If you’re scared of color, a classic white or wood-tone cabinet is timeless and allows you to easily change your accent colors over the years without a major renovation.
Next up is the surface that sits on top of your beautiful new cabinets.
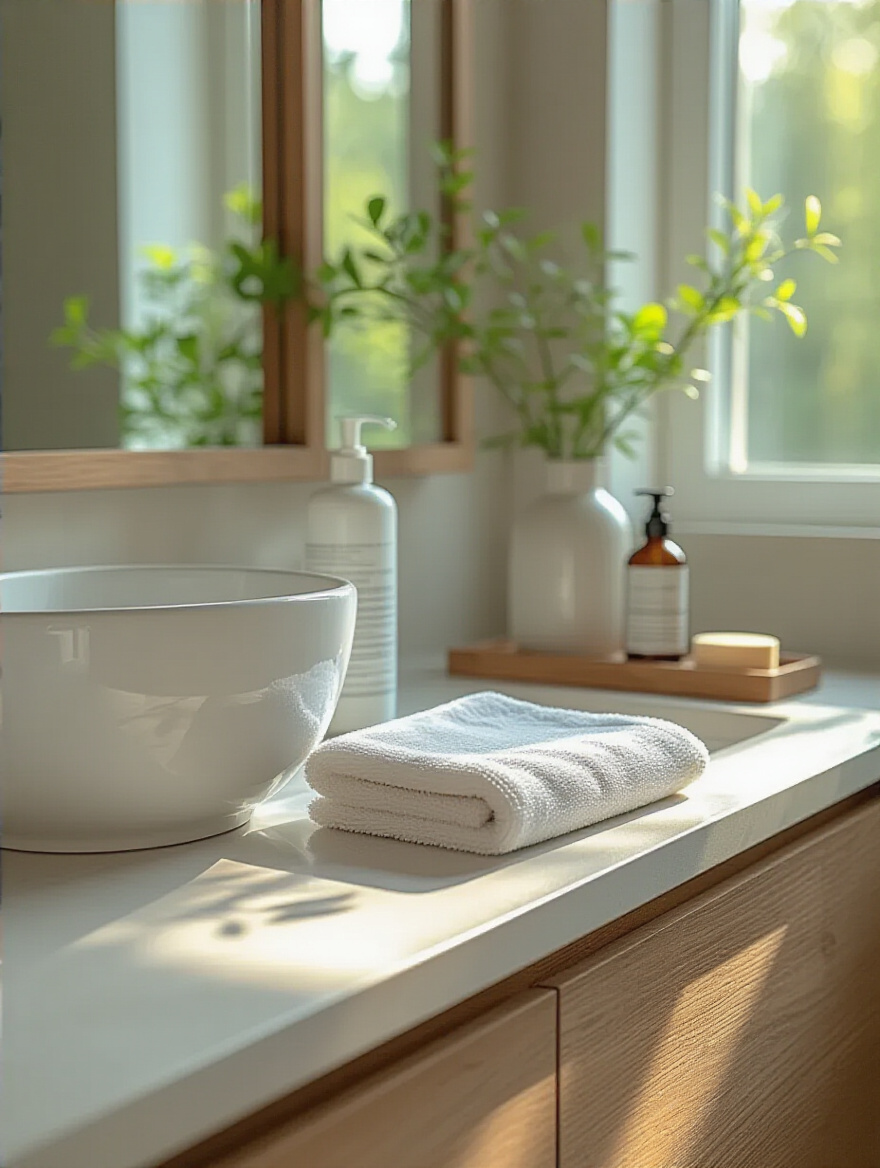
14. Select Countertop Materials That Enhance Cabinet Durability and Look
Your countertop is your cabinet’s first line of defense against water. Don’t skimp here. While gorgeous, porous stones like marble are super popular on social media, they are a high-maintenance nightmare in a bathroom. They stain easily from makeup and lotions and require regular sealing to prevent water from seeping through to the cabinet below.
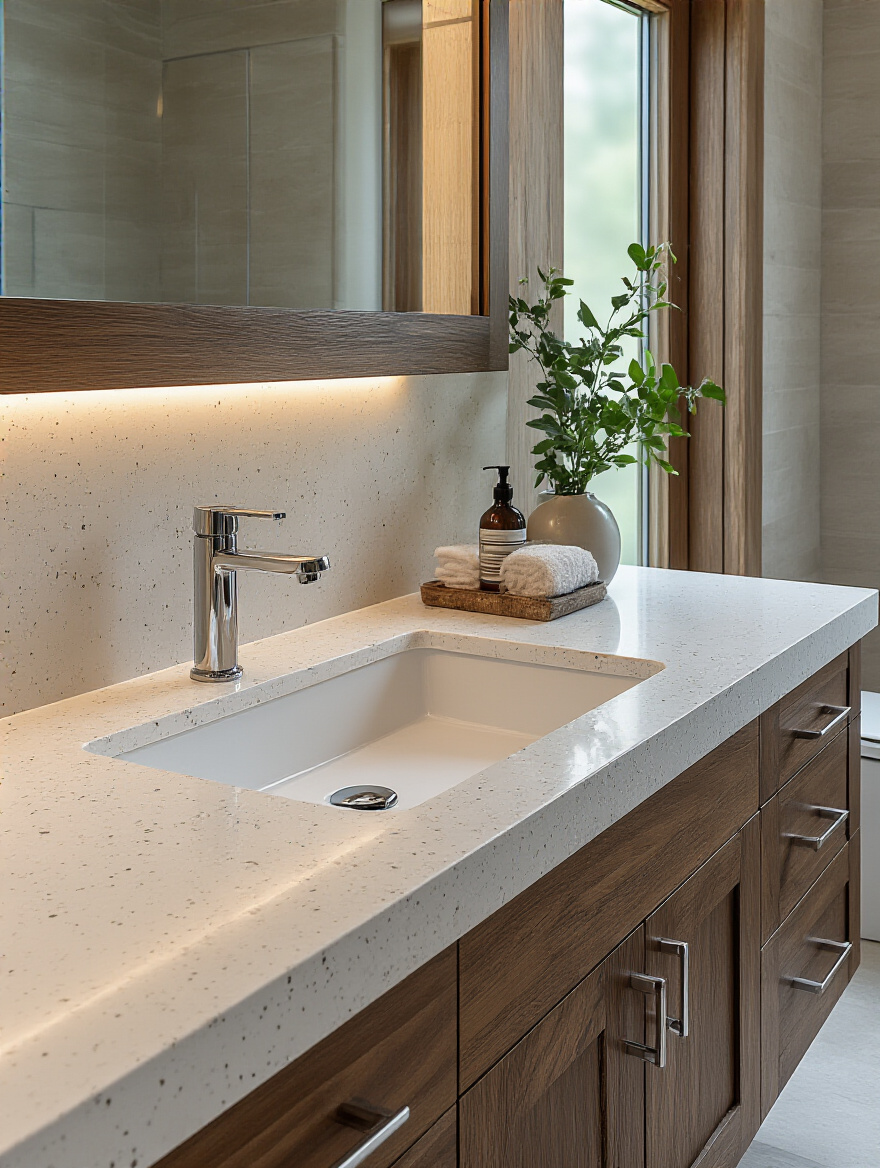
For 99% of people, engineered quartz is the best choice for a bathroom. It’s non-porous (so it won’t stain or harbor bacteria), incredibly durable, and comes in a million different looks, from solid white to designs that perfectly mimic marble. It gives you the high-end aesthetic without the high-end headache. That’s a win-win.
Now let’s get back to what’s happening inside.
15. Implement Clever Inserts for Maximizing Vertical Space Utilization
Most bathroom cabinets have one or two shelves, leaving a huge amount of wasted vertical air space where things get piled on top of each other. This is a crime against organization. You need to break up that vertical space into smaller, more manageable zones.
The answer is tiered shelves and stackable drawers. A simple tiered shelf meant for spices in a kitchen is brilliant for organizing smaller bottles in a medicine cabinet. Under the sink, a two-tier pull-out organizer can literally double your accessible storage space. The key is to think in layers. By utilizing the full height of the cabinet, you can store twice as much in a way that keeps everything visible and easy to grab.
And it’s not just about what you can reach, but how you reach it.
16. Ensure Ergonomic Design for Seamless Everyday Accessibility
Ergonomics sounds like a fancy corporate term, but it’s simple: design for your body. The ideal countertop height should be comfortable for you, not just a builder’s standard. Heavy, frequently used items should be stored between your shoulder and waist height to avoid straining your back or reaching precariously.
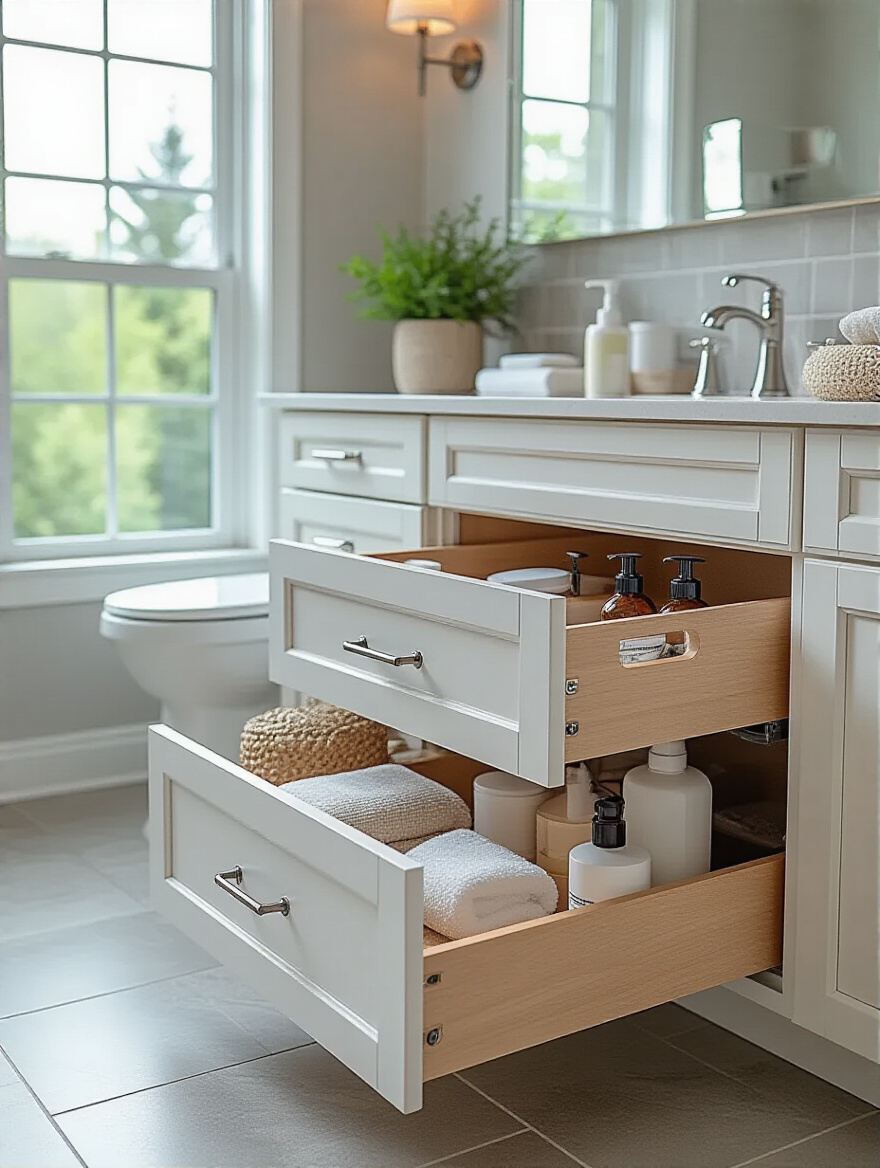
This is why drawers are almost always superior to base cabinets with doors. With a drawer, you pull it out and look down—everything is visible and accessible. With a doored cabinet, you have to get on your hands and knees and dig into a dark cave to find what you need. Full-extension drawer glides are non-negotiable. They allow the drawer to pull all the way out, so you can easily reach things in the very back. It’s a small detail that makes a massive difference in daily use.
Styling and Optimizing Cabinet Functionality (Part 2)
Let’s talk about a few final touches that can take your bathroom from good to great—blending display space with storage and taming modern-day electronic clutter.
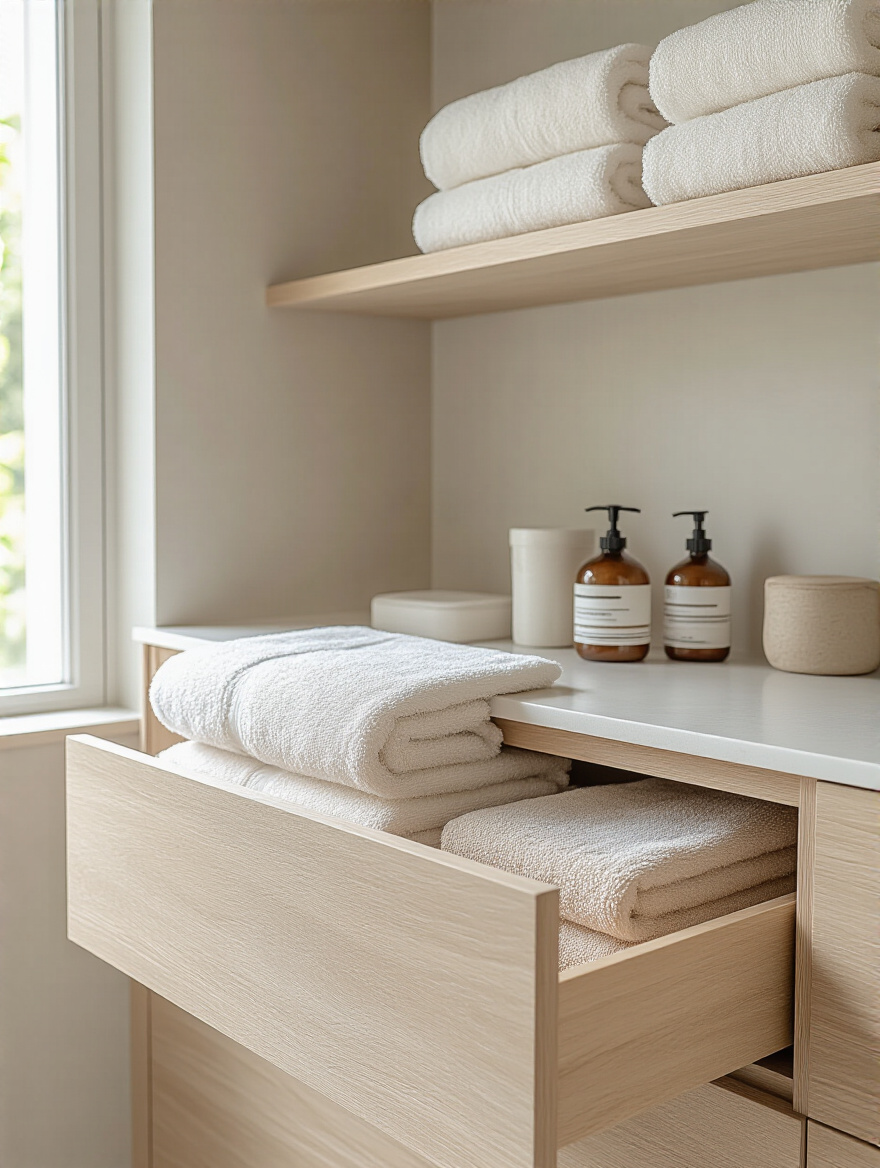
17. Integrate Open Shelving or Nooks for Decorative and Functional Display
Wall-to-wall solid cabinet doors can feel heavy and overwhelming, especially in a small bathroom. Breaking it up with some open shelving or a built-in nook creates visual breathing room and makes the space feel larger and more personal. This is your chance to display pretty towels, a nice plant, or curated decorative objects.
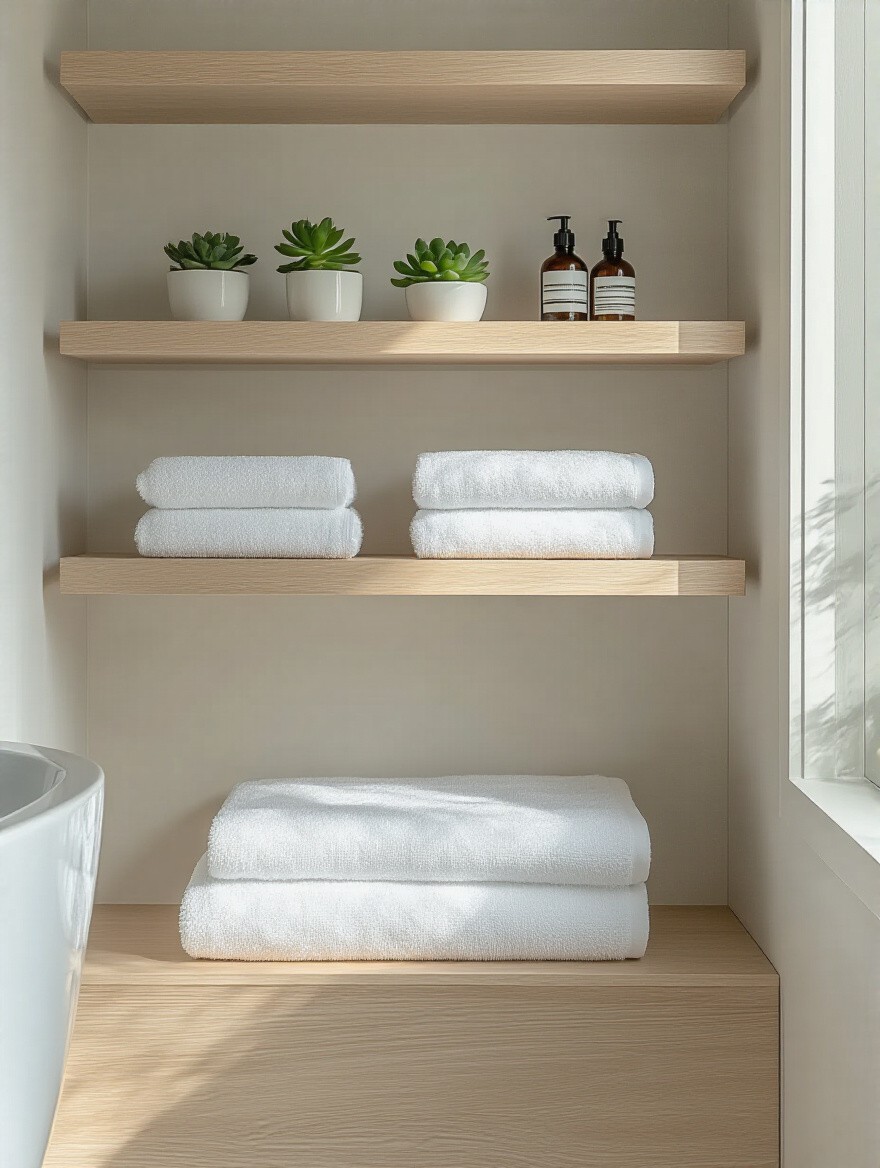
The catch? Open shelves demand curation. They are not a dumping ground. The rule is simple: if it’s not beautiful or something you use every single day, it doesn’t belong on an open shelf. Use attractive baskets or containers to corral smaller items so the look stays clean and intentional, not cluttered. One beautifully organized open shelf is better than three messy ones.
Now, let’s address the elephant in the bathroom: all those cords.
18. Install Built-in Charging Stations for Cord-Free Device Organization
Your electric toothbrush, your water flosser, your razor, your hair dryer—they all come with ugly cords that create a tangled mess on your countertop. The most elegant solution is to move the outlet inside the cabinet or drawer.
Installing a GFI-protected outlet in your medicine cabinet or vanity drawer is a game-changer. Your toothbrush can live on its charger, out of sight. You can store your hair dryer plugged in and ready to go. This one little feature does more to declutter your countertop than almost anything else. It’s the kind of thoughtful detail that separates a truly custom-feeling space from a standard build. Just make sure it’s installed by a licensed electrician to be safe and up to code.
Longevity, Maintenance, and Future-Proofing Your Cabinets (Part 1)
You’ve made a big investment in your beautiful new bathroom. Here’s how to protect it and keep it looking and working great for years, not just months.
19. Protect Cabinetry from Water Damage with Proper Sealing and Venting
We’ve talked about ventilation, but sealing is the other half of the moisture-protection equation. The most vulnerable spots on any cabinet are the seams and edges, especially around the sink cutout. Even the best factory finish can have microscopic weak points.

This is a cheap and easy insurance policy: get a tube of clear, waterproof silicone caulk and run a thin, clean bead along the seam where the countertop meets the cabinet base and around the sink. Inside, I recommend using peel-and-stick waterproof cabinet liners, especially under the sink. If you ever have a small drip from the P-trap, the liner will contain the water and save your cabinet from swelling and damage.
Once protected, you need a plan to keep them clean.
20. Develop a Regular Cleaning and Preventative Maintenance Schedule
The number one thing that ruins cabinet finishes? Hair spray. It leaves a sticky film that attracts dust and is a nightmare to clean if it builds up. The secret is regular, gentle maintenance. Keep a microfiber cloth under the sink and just give the cabinet fronts a quick wipe-down every few days to remove splatters and residue.
For a deeper clean, use a gentle, pH-neutral cleaner. Avoid harsh, abrasive chemicals like bleach or ammonia at all costs—they will strip the protective top coat right off your finish. And whatever you do, always dry the cabinets thoroughly after cleaning. It’s the lingering moisture that causes the most damage over time.
Of course, the best way to keep cabinets clean is to keep them uncluttered.
21. Optimize Decluttering Strategies for Lasting Organization and Function
A perfectly organized cabinet system is useless if it’s full of stuff you don’t need. The real secret to staying organized is ruthless and regular editing. Once every six months, pull everything out of your medicine cabinet and vanity drawers. Be honest about what you actually use.
My shortcut is the “one in, one out” rule. If you buy a new moisturizer, the old half-used one has to go. This stops the endless accumulation of products. And please, check expiration dates! Cosmetics and medications have a shelf life. Using expired products is not just a waste of space; it can be bad for your health. A well-organized space is a well-edited space.
Maintenance isn’t just about cleaning; it’s also about proactive repairs.
22. Perform Minor Repairs Promptly to Prevent Further Deterioration
Don’t ignore a loose hinge, a wobbly drawer pull, or a small chip in the paint. These are not just cosmetic flaws; they are entry points for moisture and the start of bigger problems. That wobbly hinge is putting extra stress on the cabinet frame every time you open the door, which can eventually cause the screw holes to strip out.
Keep a small repair kit with a multi-bit screwdriver, some touch-up paint that matches your cabinet finish, and some waterproof wood glue. When you see a problem, fix it immediately. Tightening a screw takes 30 seconds. Ignoring it could lead to a door falling off its hinges, which is a much bigger and more expensive repair. Proactive maintenance is always cheaper than reactive disaster recovery.
Longevity, Maintenance, and Future-Proofing Your Cabinets (Part 2)
The final piece of the puzzle is designing for the future. Your needs will change over time, and a truly smart design can change with you.
23. Plan for Adaptable Storage Solutions as Your Needs Evolve
Your life isn’t static, so why should your storage be? The things you need to store when you have a baby are completely different from what you’ll need when they’re a teenager, which is different again from what you’ll need as an empty nester. The smartest designs are flexible.
This is why I love systems with adjustable shelves and removable drawer dividers. They allow you to reconfigure the space as your needs change without having to replace the entire cabinet. If you have the space, consider including a freestanding piece like a small shelving unit or a rolling cart. It can be a changing station now, a spot for teen beauty products later, and a place for extra towels when you have guests. Planning for adaptability is the ultimate way to future-proof your bathroom.
Conclusion
So, there you have it. The secret is to stop thinking about a bathroom cabinet as a thing you buy, and start thinking of it as a system you design. It’s a series of small, intentional choices—from the first measurement to the last adjustable shelf—that add up to a space that makes your daily life easier, calmer, and more beautiful. You’re not just organizing your stuff; you’re organizing your routine.
You now have the framework to make smart decisions that will serve you well for years. Don’t settle for a generic box that creates more problems than it solves. Take these ideas, plan thoughtfully, and create a bathroom that feels custom-made for you. Because a well-designed space isn’t an indulgence—it’s a tool for a better life.