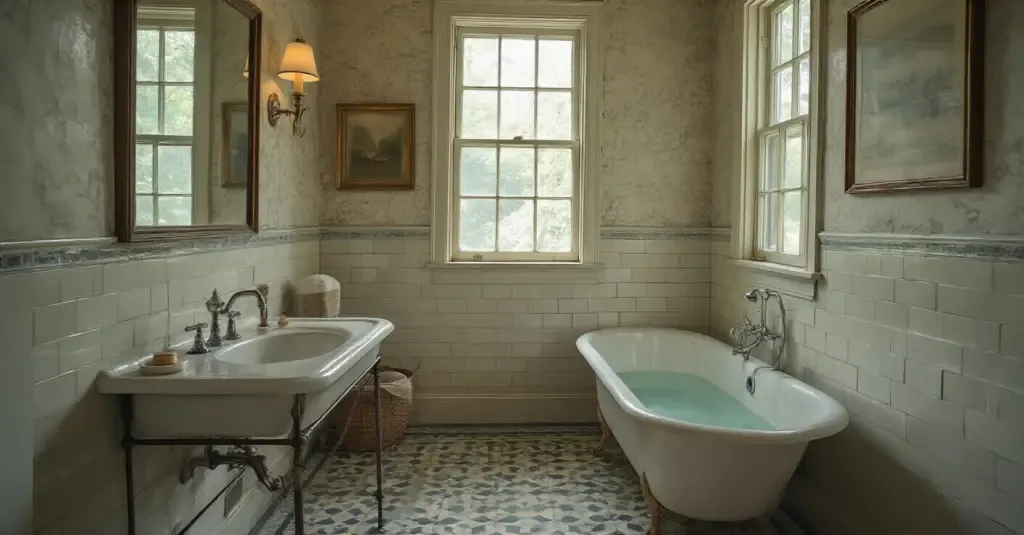
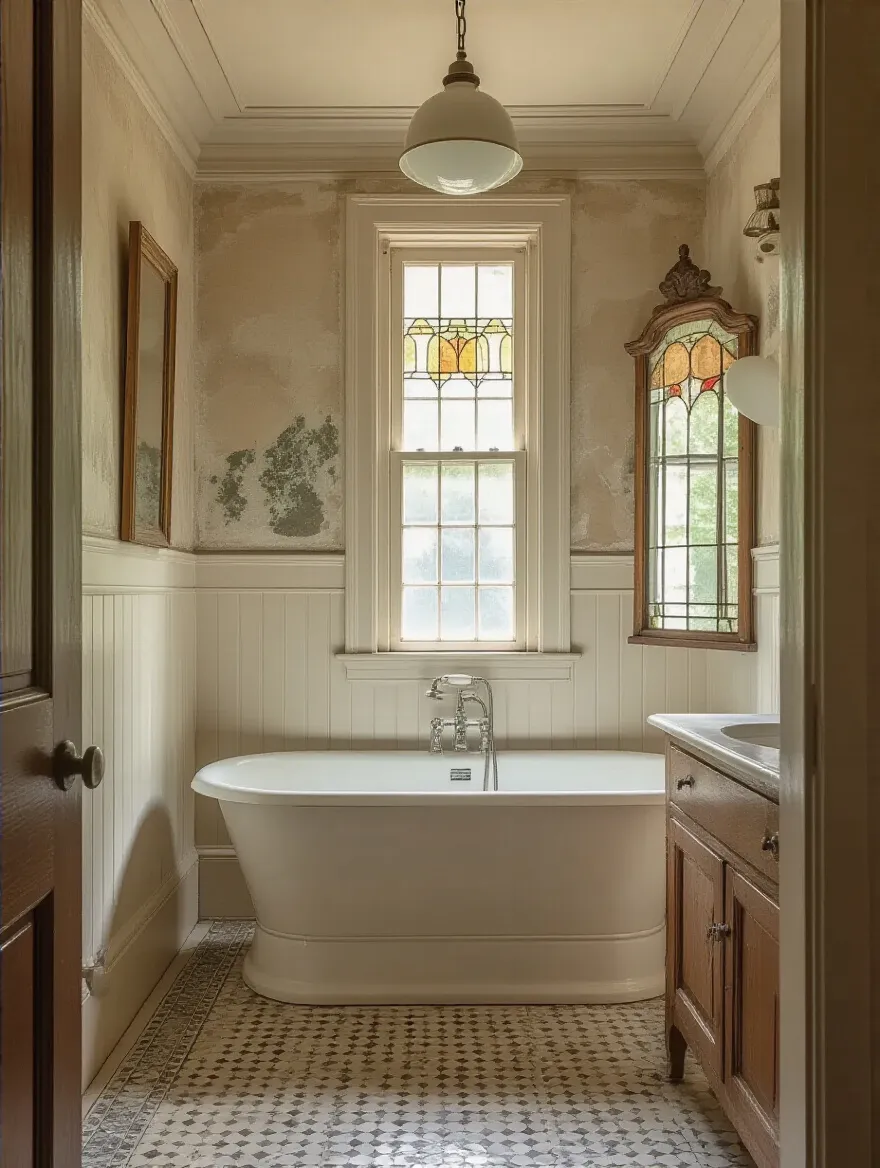
Picture this: You’re standing in a bathroom. Maybe it’s yours. It has a peel-and-stick floor from a decade ago, a clunky builder-grade vanity, and zero personality. It’s a room you use, not one you enjoy. Now, imagine stepping into a bathroom with a gorgeous clawfoot tub, classic black-and-white tile that feels solid under your feet, and a pedestal sink that makes the whole room feel bigger. It has character. It has a story.
People always ask me how to get that second bathroom. The secret isn’t just about buying old-looking stuff. That’s the biggest mistake people make—they end up with a chaotic, cluttered mess. A truly great vintage bathroom is all about having a system. It’s about making a series of smart, deliberate choices that all work together. It’s not just about looking good; it’s about creating a space that functions beautifully and makes your daily routine feel a little more special.
So, forget the vague inspiration and the pricey mistakes. Here’s the system I use. Let’s build your dream vintage bathroom, one methodical step at a time.
Foundations & Planning for Authentic Vintage Aesthetics
This is the boring-but-critical part. I know, I know. You want to get to the pretty tile and shiny faucets. But trust me, skipping the planning is like building a custom cabinet without measuring first. It leads to disaster. Getting this right is what separates a truly stunning, functional space from an expensive failure.
1. Understand Period Styles (Victorian, Art Deco, Mid-Century) for Authenticity.
First thing’s first: you have to pick a lane. You can’t just throw a Victorian tub, an Art Deco mirror, and a Mid-Century light fixture into a room and call it “vintage.” That’s not a style; it’s a yard sale. Each era has its own distinct look—the materials, the shapes, the colors. Victorian is ornate, with lots of detail. Art Deco is all about sharp geometric patterns and chrome. Mid-Century is simpler, with clean lines and maybe a pop of color.
Doing a little homework here saves you a world of headache later. It’s your guiding light for every other decision. Think of it like a recipe. You wouldn’t throw every spice in your kitchen into one pot. You choose a flavor profile and stick to it. This initial decision is your flavor profile.
Once you’ve got that down, you need to commit.
2. Define Your Vintage Era to Ensure Cohesive Design and Details.
Okay, you’ve done the research. Now, make a decision and write it down. Are you Team Victorian or Team Art Deco? This decision becomes your rulebook. Taping it to the wall isn’t a bad idea. Every time you’re tempted to buy a faucet or a tile that doesn’t fit, you look at your rule. It stops you from making impulse buys that will derail the entire project.
A clearly defined era makes everything else easier. It drastically cuts down your options, which sounds limiting but is actually freeing. Instead of looking at 500 bathroom sinks, you’re only looking at the 20 that fit your specific period. A friend and historical designer once told me, “True authenticity comes from disciplined dedication to a singular historical narrative.” It sounds a bit dramatic, but she’s right. Sticking to your chosen era is what creates that immersive, time-travel feeling.
With your era defined, it’s time to look at the bones of the room.
3. Research Original Floor Plans to Optimize Layout and Functionality.
Before you even think about moving a single pipe, see if you can find the original floor plans for your house. Check with the city archives or previous owners. Why? Because the most expensive part of any bathroom remodel is moving the plumbing. The toilet, the sink, the tub—they are all connected to pipes that are expensive and messy to relocate.
Working with your home’s original layout is almost always smarter and cheaper. Often, the original builders knew what they were doing. The layout might be compact, but it’s probably efficient. Understanding the original flow helps you place modern fixtures without it feeling awkward or costing a fortune. I had a client save nearly $6,000 by keeping their toilet and sink in the original spots and spending that money on incredible, period-perfect tile instead.
Now that you know your layout constraints, you can start the fun part of planning.
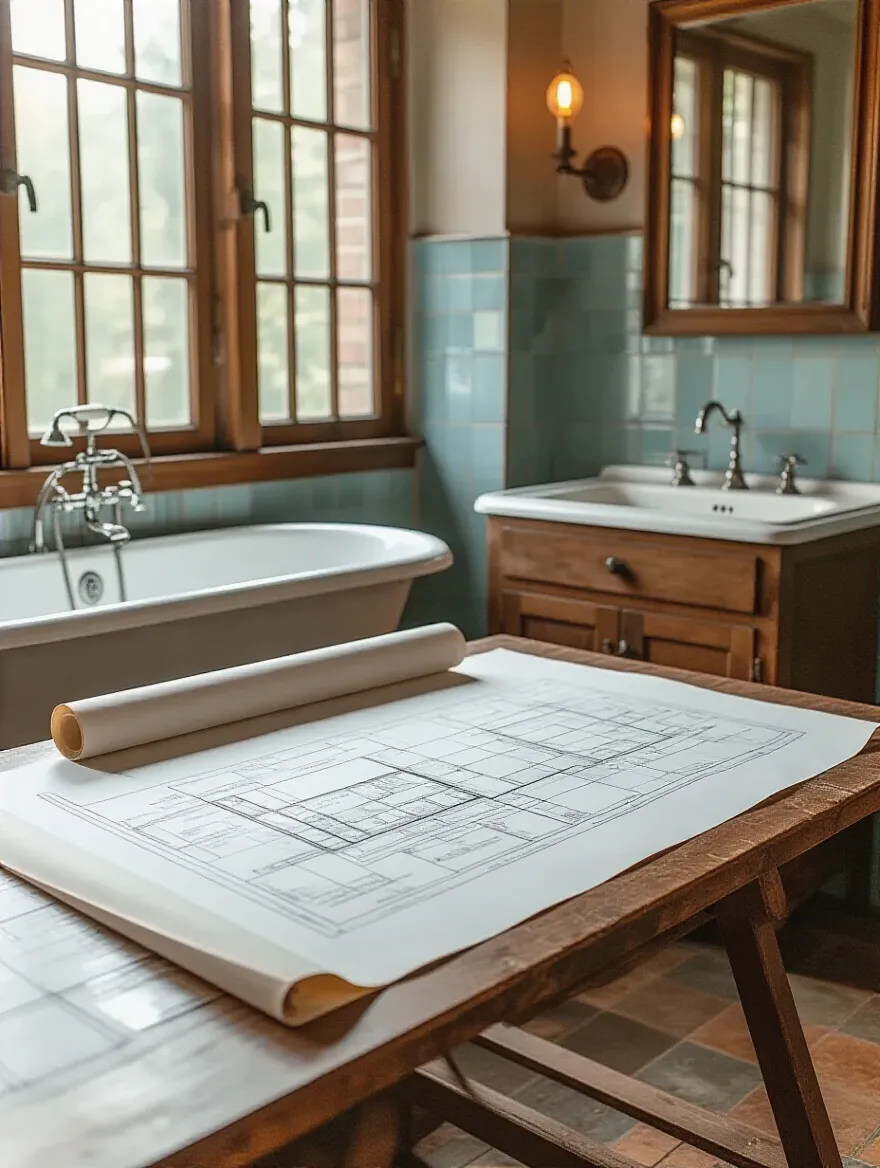
4. Create a Visual Mood Board to Guide Your Timeless Bathroom Design.
A mood board is your project’s blueprint. It’s non-negotiable. This is where your vision comes to life before you spend a single dime. You can use Pinterest, or you can go old-school with a corkboard, paint chips, and fabric swatches. This isn’t just about collecting pretty pictures; it’s about curating a very specific vibe. Include images of fixtures, tile patterns, lighting, paint colors, and even the texture of the towels you want.
Your mood board is your reference point for every single decision. When your contractor asks what kind of grout you want, you point to the board. When you’re choosing a light fixture, you hold it up against the board. This tool is what keeps you from getting distracted and ensures every element works together harmoniously. It’s the difference between a cohesive, magazine-worthy room and a jumbled mess.
With the visuals sorted, we have to talk about what’s behind the walls.
5. Prioritize Plumbing and Electrical Updates for Safety First.
Listen to me on this one. This is the single most important step. It’s also the one everyone wants to skip because it’s expensive and invisible. Do not skip this. Old houses have old wiring (like knob-and-tube) and old pipes (like galvanized steel or lead). These aren’t just inefficient; they are dangerous. A fire hazard or a slow leak behind a wall can destroy your beautiful new bathroom and cost you ten times more than the initial upgrade.
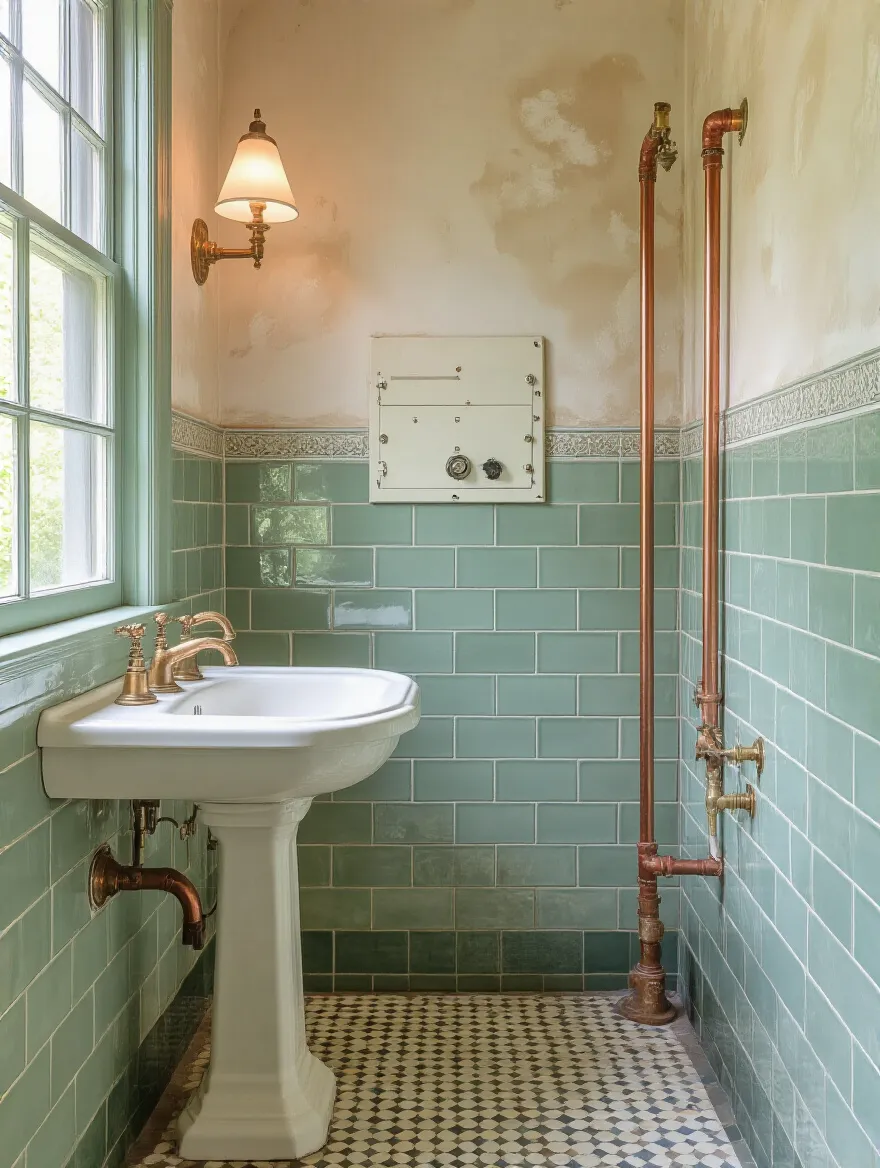
Hire a licensed plumber and a licensed electrician to do a full inspection before you start demolition. They’ll tell you what needs to be brought up to code. This isn’t optional; it’s a matter of safety for your family and protecting your investment. Think of it this way: the beautiful fixtures are the “show,” but the plumbing and electrical are the “stage.” If the stage collapses, the show is over.
Okay, safety lecture over. Let’s talk money.
6. Budget Smartly for Vintage Renovation Success and Unexpected Costs.
Every single old house has secrets. When you open up a wall, you will find something you weren’t expecting. It could be water damage, termite damage, or weird structural issues. That’s why you absolutely must have a contingency fund. For an old home, I recommend setting aside at least 15-20% of your total budget for these surprises. If you don’t need it, great! But you probably will.
Break down your budget into line items: demolition, plumbing, electrical, tile, fixtures, labor, etc. Then, prioritize where you want to spend your money. Is the show-stopping clawfoot tub your number one priority? Allocate more money there and maybe save on the light fixture. Being strategic allows you to get the high-impact vintage look you want without going into debt when an unexpected problem pops up.
With a solid plan and budget, you can finally start shopping for the fun stuff.
Selecting Core Fixtures & Essential Materials
This is where the room’s personality really starts to take shape. These are the big-ticket items that define the space. They are the bones of your design, and choosing them correctly is what makes the vintage look feel authentic and grounded.
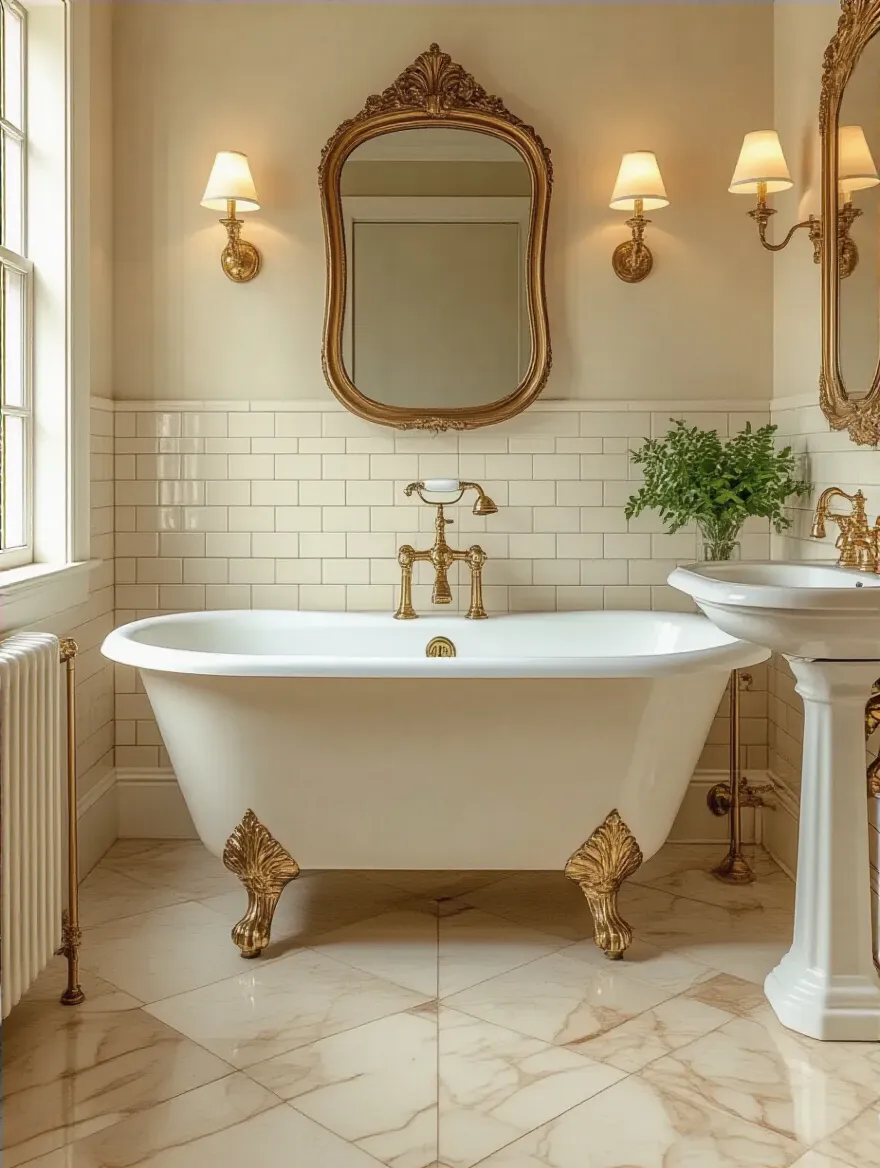
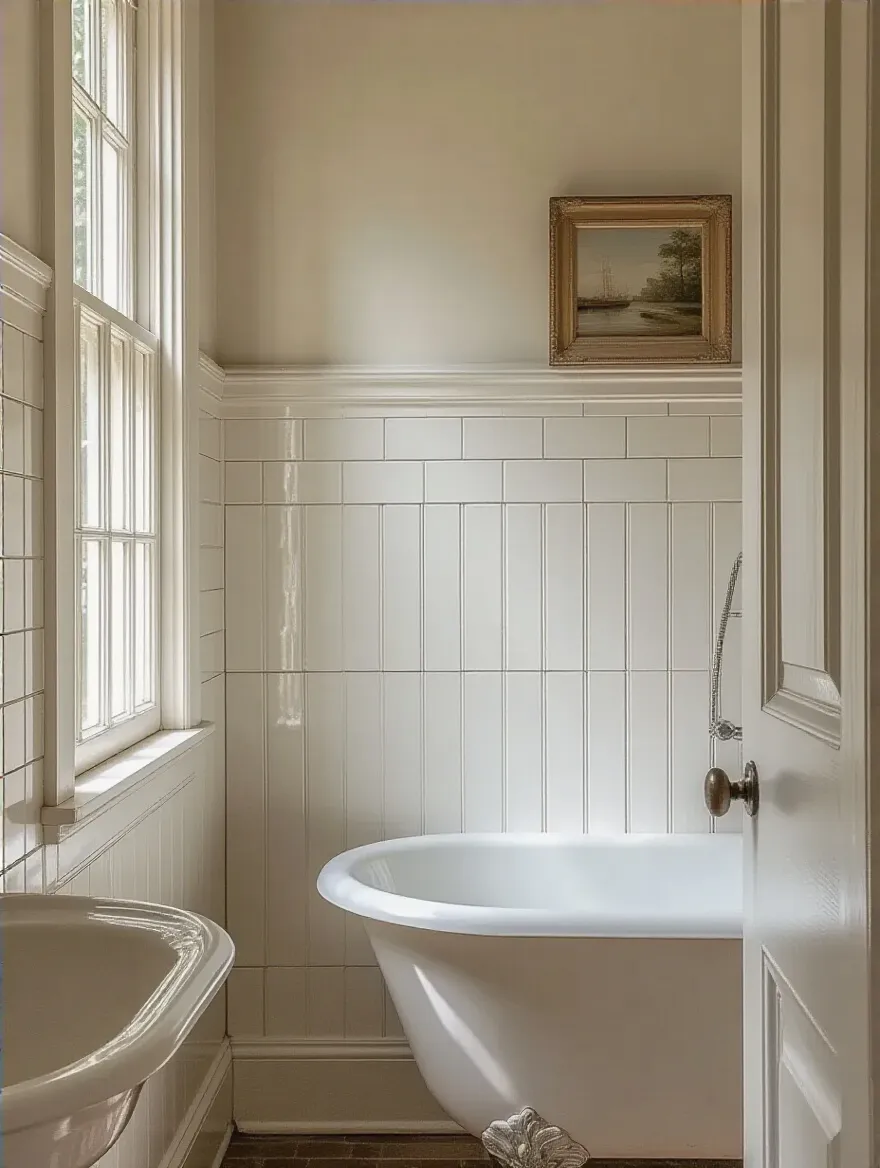
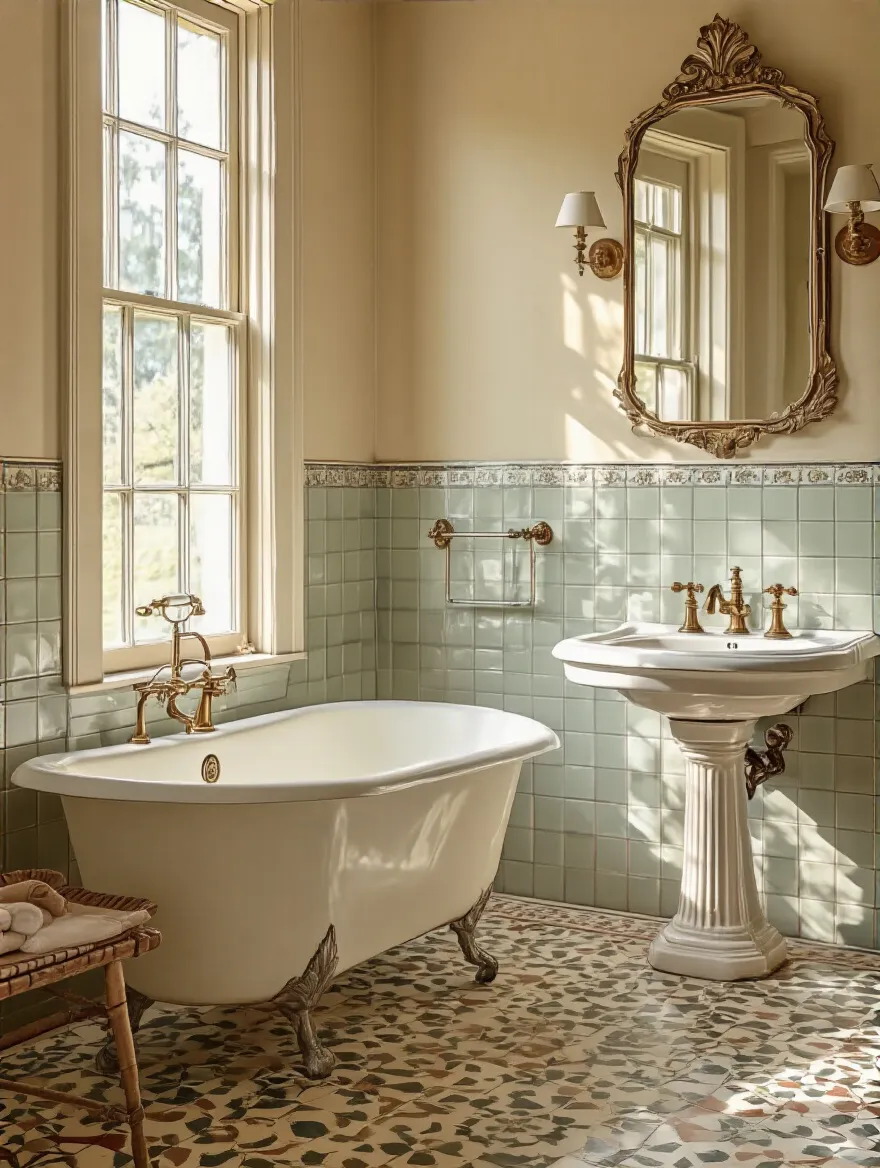
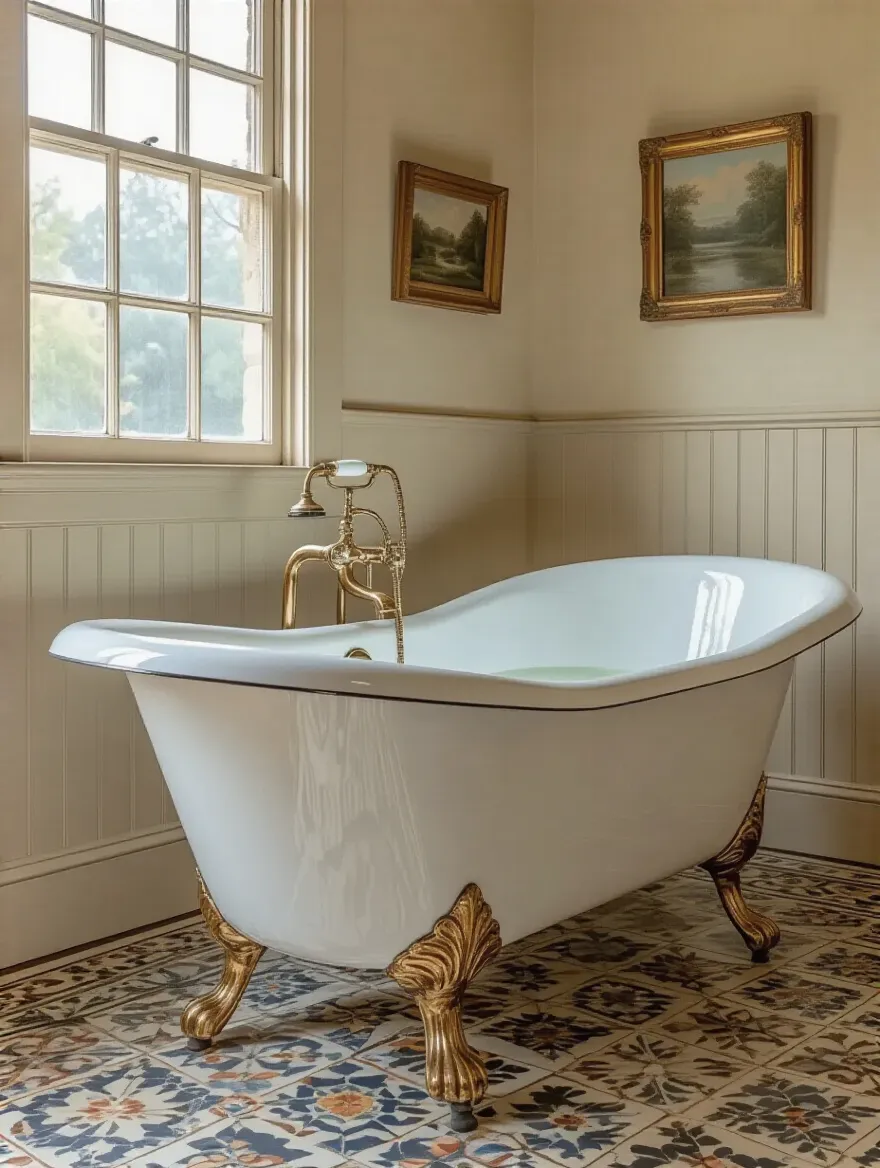
7. Choose the Right Vintage Bathtub Style (Clawfoot, Pedestal) for Impact.
The bathtub is the star of the show. It’s the anchor of the entire room. A beautiful clawfoot or pedestal tub immediately signals “vintage” and sets a luxurious, relaxing tone. Before you fall in love, measure your space carefully. A massive tub in a tiny bathroom will feel cramped and ridiculous. The scale has to be right.
Also, think about material. A genuine cast iron tub is incredibly heavy—you may need to reinforce the floor joists to support it—but it holds heat like nothing else. Modern acrylic versions are much lighter and come in more styles, but they might not have the same authentic heft. This is one of those “spend” items. A great tub elevates the entire space.
From the star of the show to its essential supporting actor…
8. Select Period-Appropriate Toilets for Historical Accuracy and Function.
Nobody loves talking about toilets, but a modern, low-slung toilet in an otherwise perfect Victorian bathroom will stick out like a sore thumb. You have options here! For a truly authentic look, you can get high-tank toilets with the classic pull chain. For something a little more subtle, look for toilets with more traditional lines and a separate tank and bowl.
The good news is that you don’t have to sacrifice modern function. Many companies make high-quality reproductions that have the vintage look but feature modern, water-saving flush technology inside. It’s the best of both worlds: you get the historical accuracy without the historical plumbing problems. Don’t overlook this detail; it makes a huge difference.
Next up, the piece that combines function with sculptural beauty.
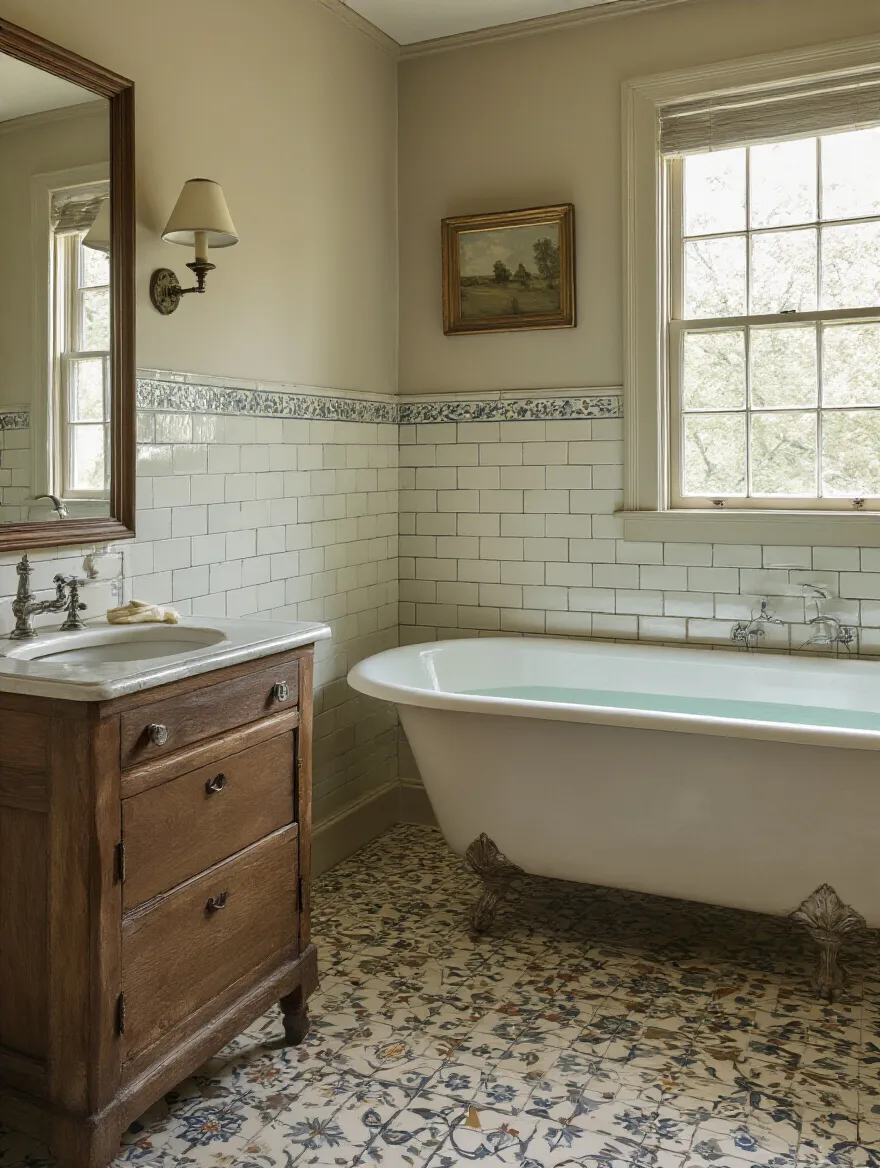
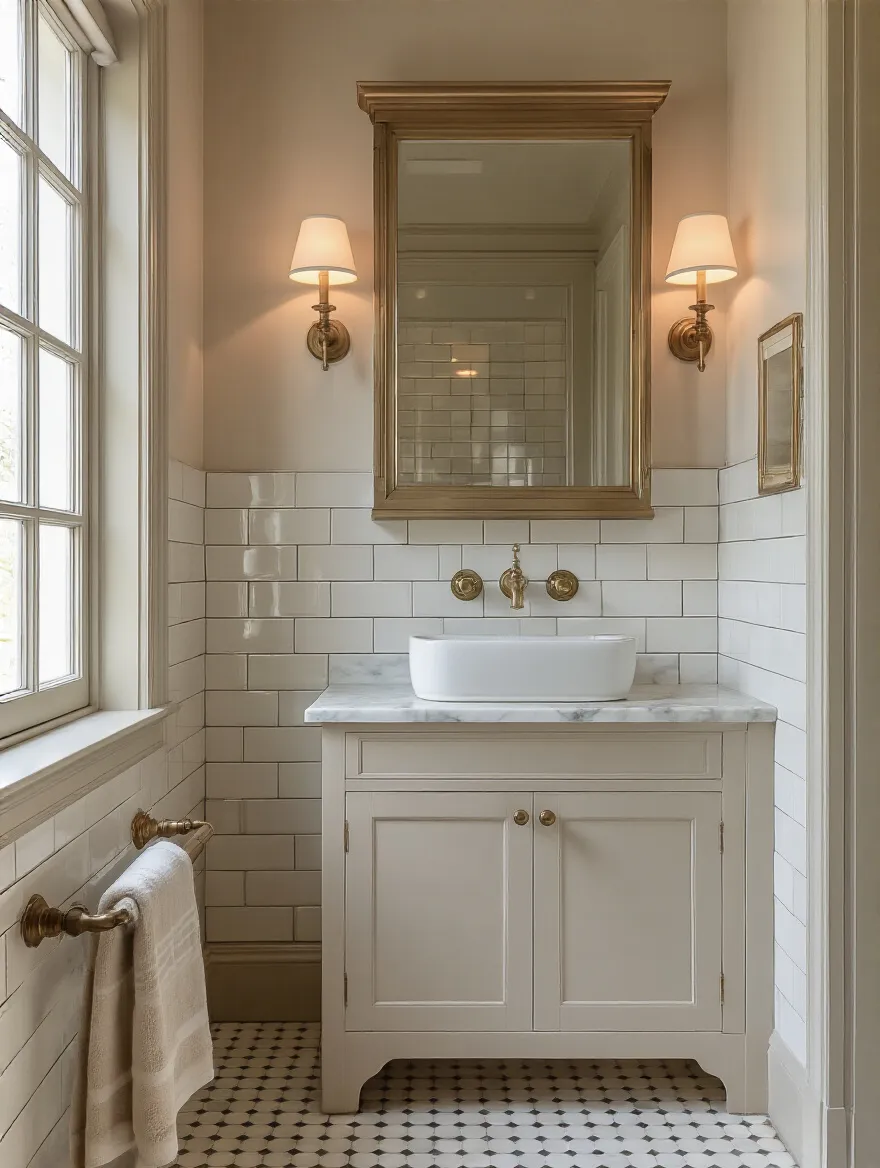
9. Explore Pedestal Sinks or Console Vanities for Authentic Charm.
Modern bathrooms are all about bulky vanities with tons of hidden storage. Vintage bathrooms? They were all about lightness and air. A pedestal sink is a classic choice that makes any bathroom feel bigger because you can see the floor underneath. A console sink, which is basically a sink top on two or four legs, gives you a little more counter space and often a lower shelf for a basket or folded towels.
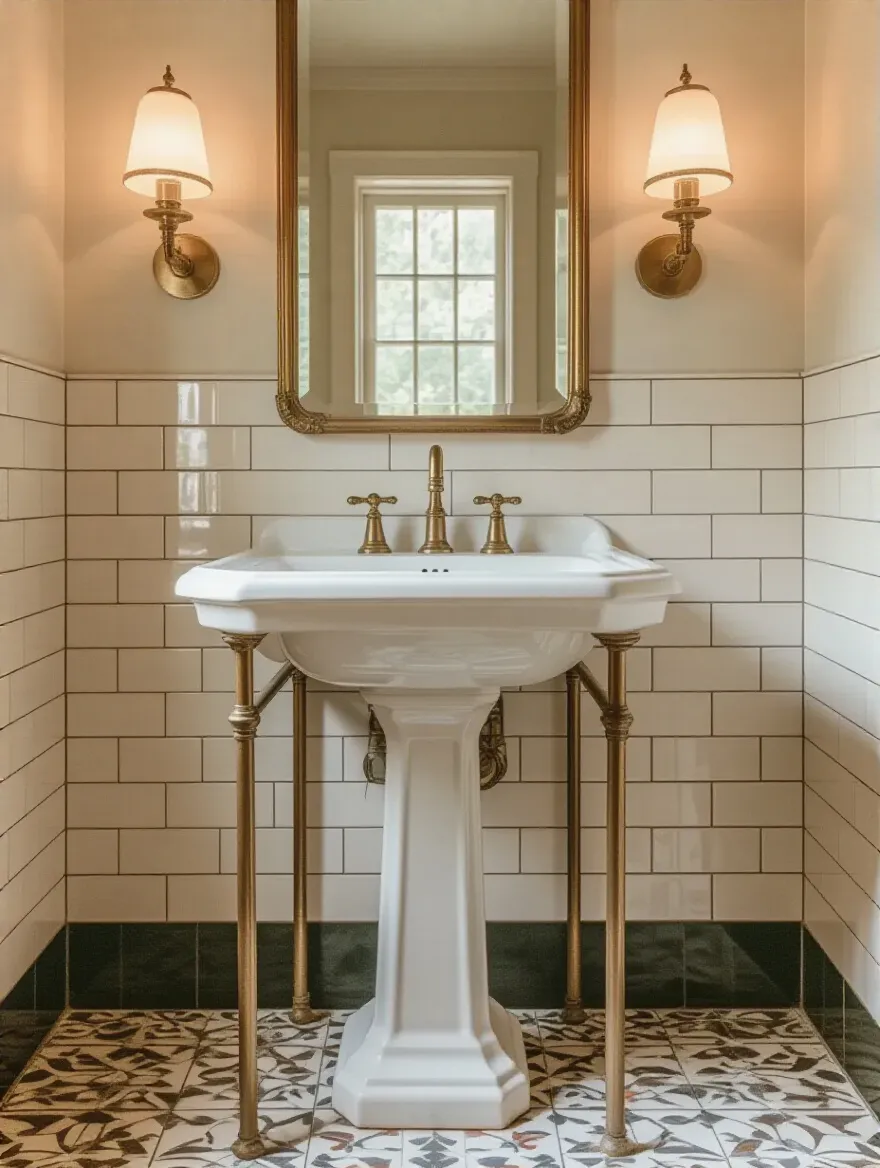
Of course, this means you lose under-sink storage. And that’s where the system comes in. You have to plan for that. A beautiful recessed medicine cabinet, some elegant glass wall shelves, or a small freestanding antique cabinet can handle your storage needs without compromising that open, airy vintage feel. It’s a trade-off, but for authentic charm, it’s one worth making.
Now let’s look down at your feet.
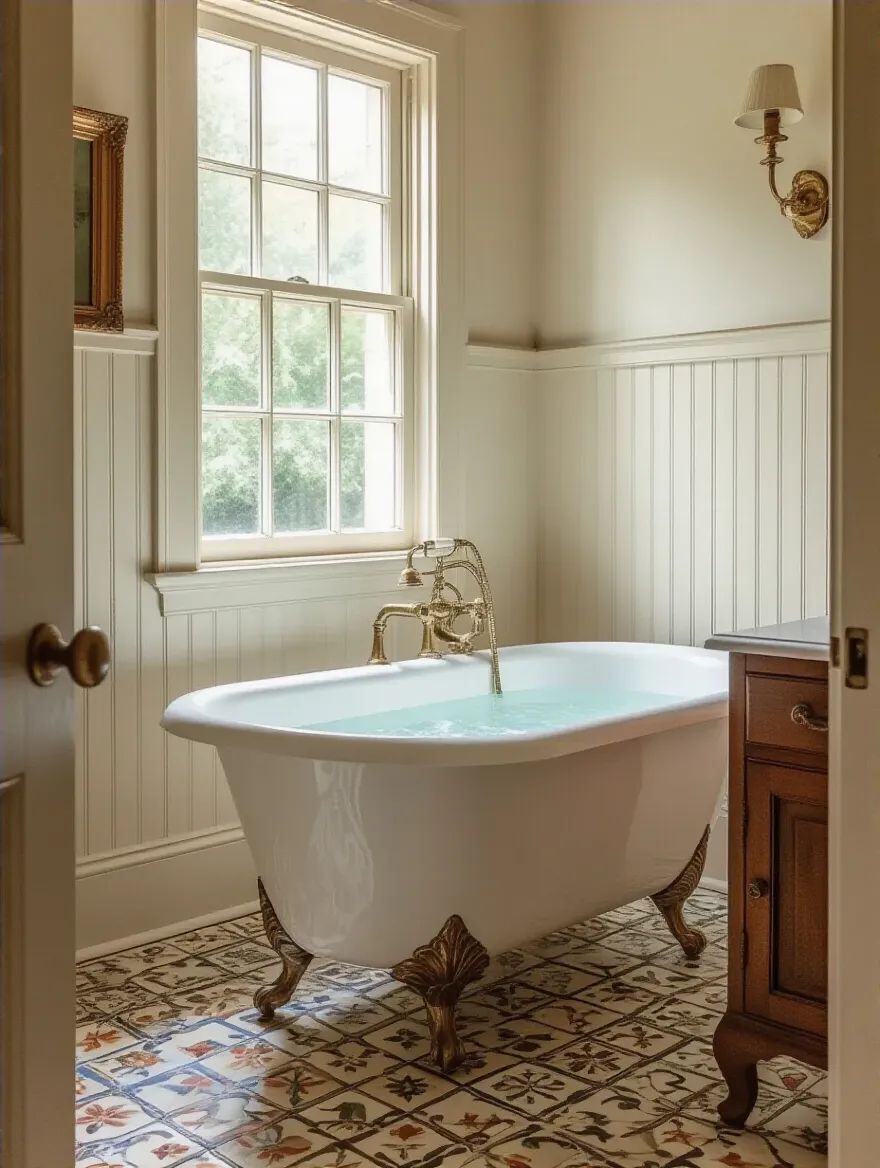
10. Install Hexagon or Penny Tile Floors for Classic Period Appeal.
There is nothing that says “classic bathroom” more than small hexagon or penny tiles. This was the go-to flooring for decades for a reason: it’s incredibly durable, timeless, and the multitude of grout lines makes it naturally slip-resistant. Whether you go with classic white, black and white patterns, or add a custom border, this type of tile is a guaranteed win.

A word of warning: installing these small tiles is a job for a pro. The subfloor has to be perfectly level, and laying the sheets so the pattern looks seamless takes real skill. This is not the place to try and save money with a DIY job unless you’re extremely confident. Also, consider grout color. A contrasting grout (like dark grey or black with white tile) is very period-accurate and helps hide dirt.
From the floor, we move up to the walls.
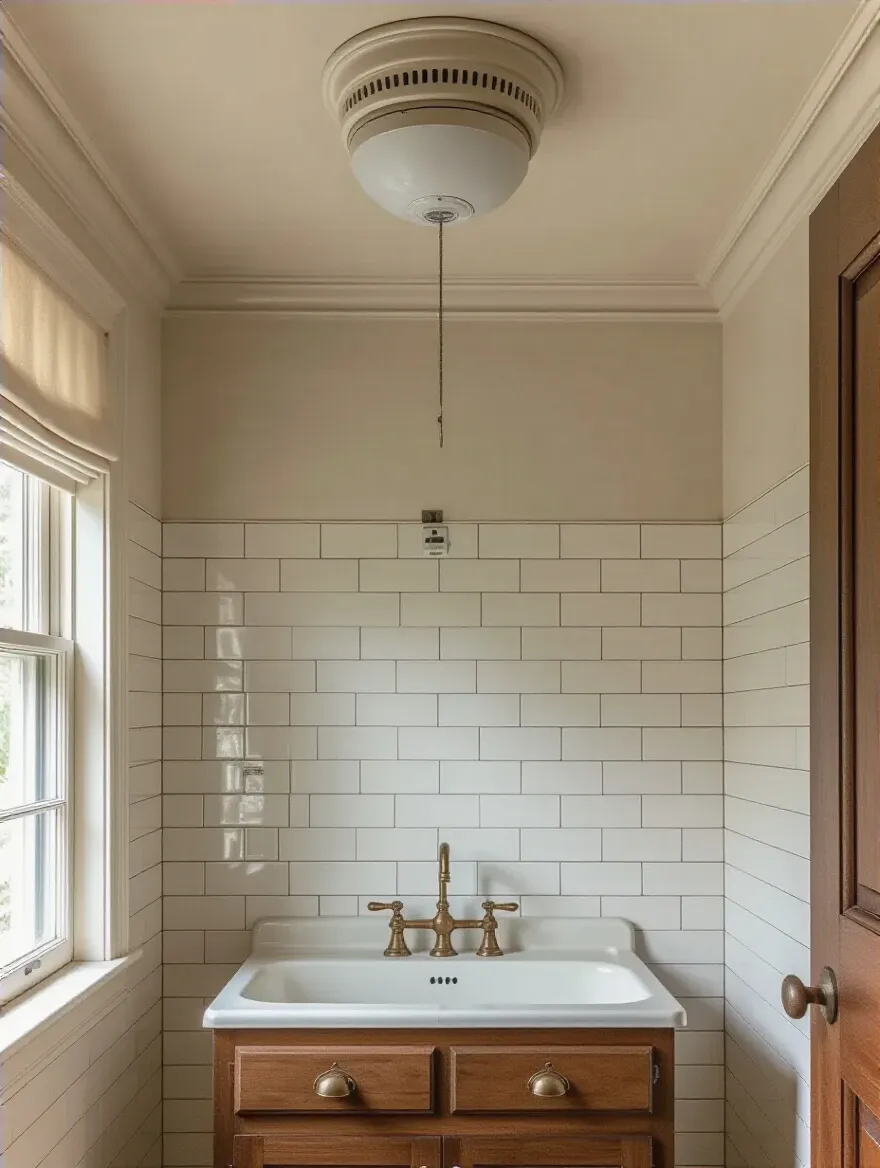
11. Integrate Beadboard or Subway Tile Walls for Era-Specific Texture.
Plain drywall walls can feel a little flat in a vintage space. Adding wainscoting with either beadboard or subway tile is a fantastic way to introduce texture, durability, and historical character. Beadboard gives a charming, cottage-y feel, while subway tile offers a clean, classic look that works for almost any era from Victorian to Art Deco.
Typically, wainscoting runs about a third of the way up the wall, capped with a decorative chair rail. This protects the lower part of the wall from splashes and scuffs, and it also creates a perfect opportunity to add a beautiful paint color or wallpaper above it. As a cabinet maker, I love beadboard—it adds a layer of craftsmanship that feels so satisfying. Just be sure to use moisture-resistant MDF or properly seal wood in a bathroom environment.
Now, a final thought on the foundation of the room.
12. Select Floor Material (Wood vs. Tile) for Durability and Style.
While penny and hex tiles are classic, you do have other options. For a farmhouse or more rustic look, you might be tempted by wood floors. Real solid hardwood is a beautiful but risky choice for a full bathroom due to moisture. However, high-quality porcelain tiles that look like wood can give you that warm aesthetic without the worry of warping and water damage.

Whatever you choose, durability is key. This is a high-traffic, high-moisture area. You need a material that can stand up to it. Porcelain tile is king here because its water absorption rate is practically zero. It’s a workhorse that comes in endless styles, allowing you to get the perfect vintage look without sacrificing practicality.
Adding Authentic Details & Finishing Touches
Okay, the bones are in place. The room is starting to look right. Now comes the part that elevates it from “nice” to “wow.” These are the finishing touches, the jewelry of the room. This is where you layer in the personality and really seal the deal on your chosen era.
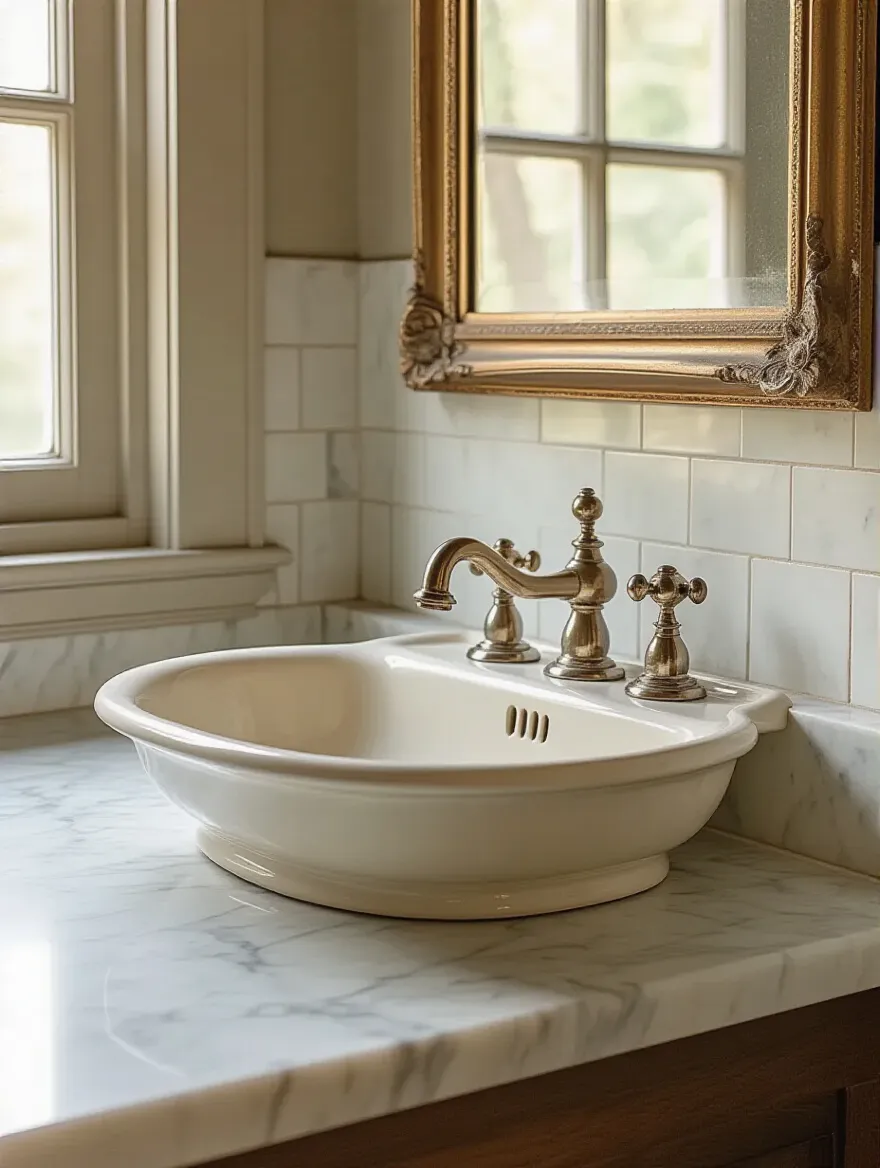
13. Select Vintage-Inspired Faucets to Elevate Sink and Tub Appeal.
Faucets are the jewelry of the bathroom. A beautiful, period-appropriate faucet is a small detail that makes a massive impact. Look for styles like bridge faucets (where the hot and cold handles are separate from the spout) or gooseneck spouts. Pay close attention to the finish. Polished nickel has a warmer, more traditional feel than chrome. Unlacquered brass will develop a beautiful, natural patina over time.
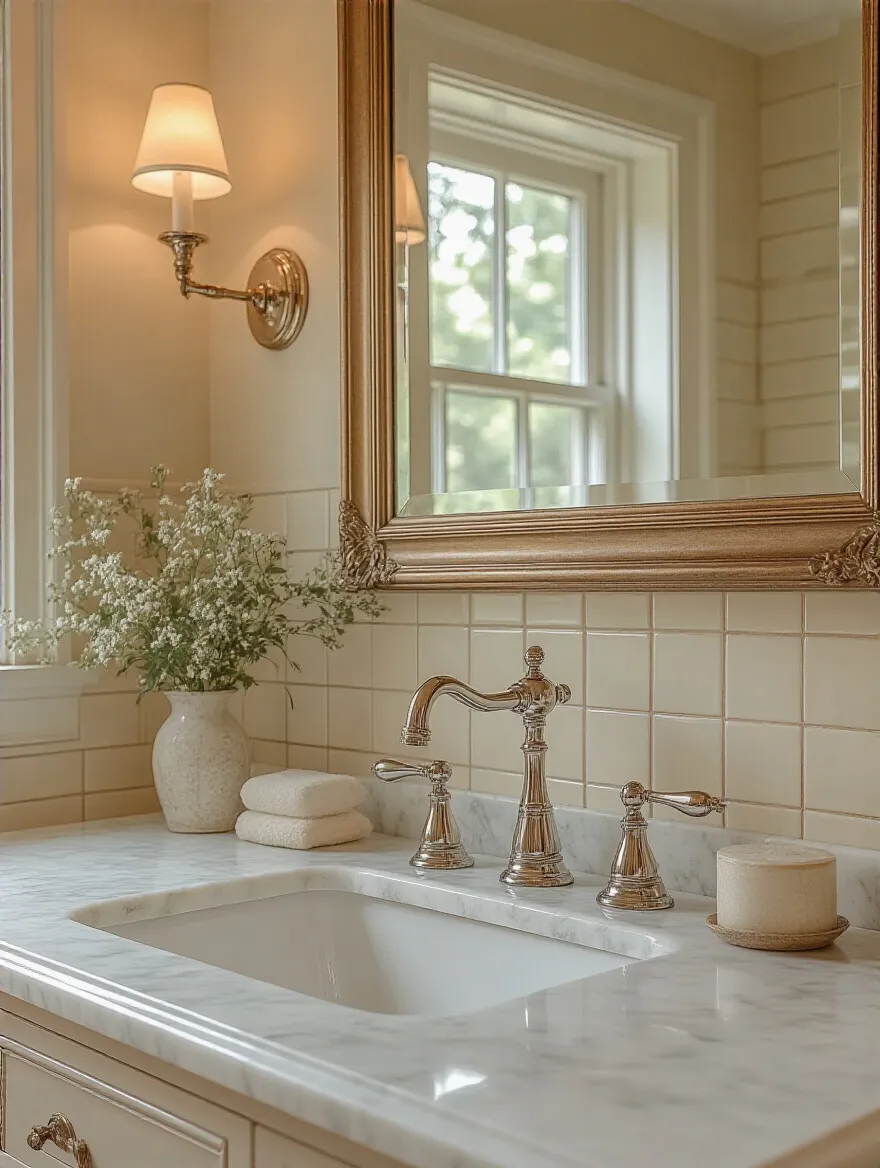
This is an area where you want to feel the quality. A good faucet is heavy. It feels solid in your hand. Look for brands that use solid brass construction and ceramic disc valves—this ensures they won’t drip and will last for years. A cheap, lightweight faucet will cheapen the feel of the whole room.
From the shine of the faucets, we move to the glow of the lights.
14. Incorporate Period lighting fixtures for Authentic Atmospheric Illumination.
Bad lighting can ruin even the most beautiful room. For a vintage bathroom, you want to layer your light. That means you need task lighting at the vanity (sconces on either side of the mirror are best) and ambient lighting for the whole room (a beautiful flush-mount or a small chandelier). Make sure any light you choose is UL-rated for damp locations.
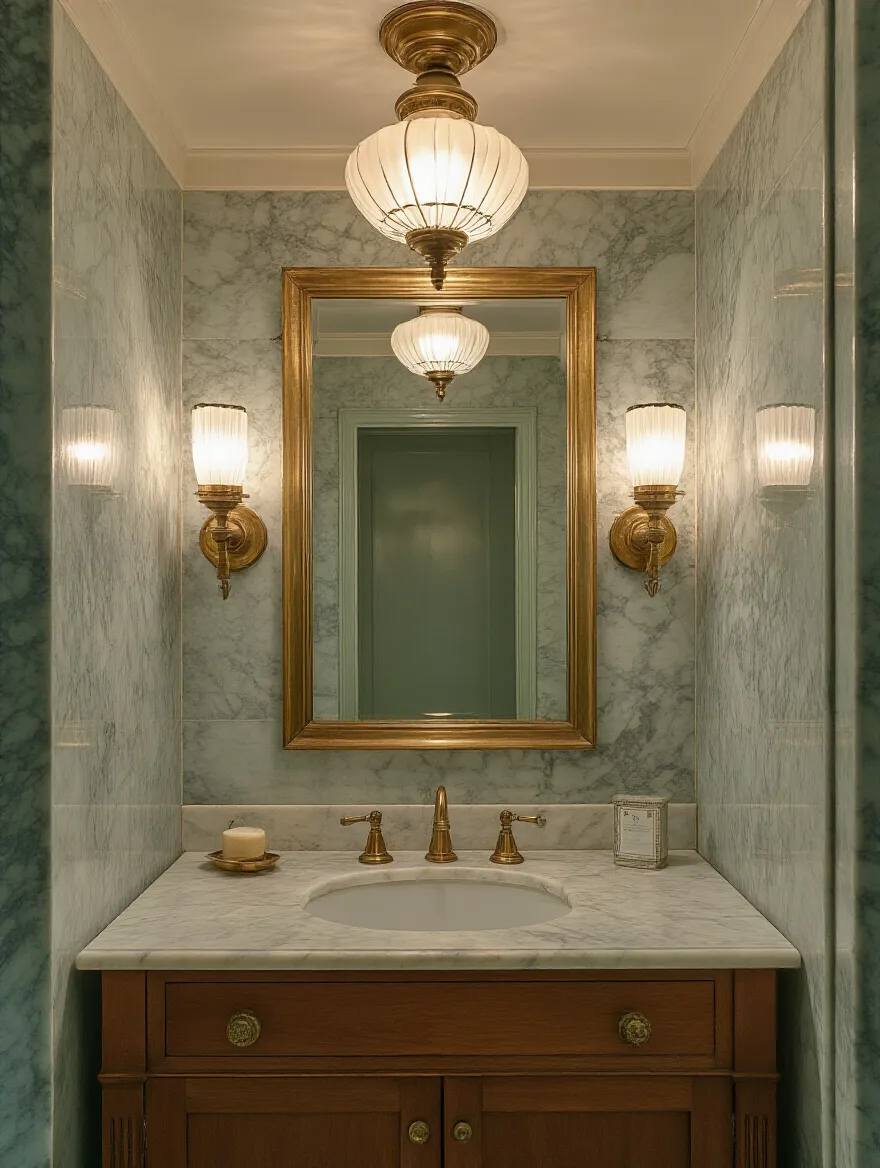
Sconces with milk glass shades, fixtures with exposed Edison bulbs, or Art Deco-style chrome and glass pieces can all add incredible character. A great shortcut: put everything on a dimmer switch. This allows you to have bright light when you’re getting ready in the morning and soft, atmospheric light when you’re taking a relaxing bath at night.
Now for the reflection of all your hard work.
15. Choose a Decorative Vintage Mirror as a Timeless Focal Point.
Forget the boring, frameless sheet of glass glued to the wall. A beautiful, decorative mirror can be a piece of art. Hunt for a real vintage one at an antique shop or flea market, or find a great reproduction with an ornate wood frame, a beveled edge, or an interesting shape that fits your era.
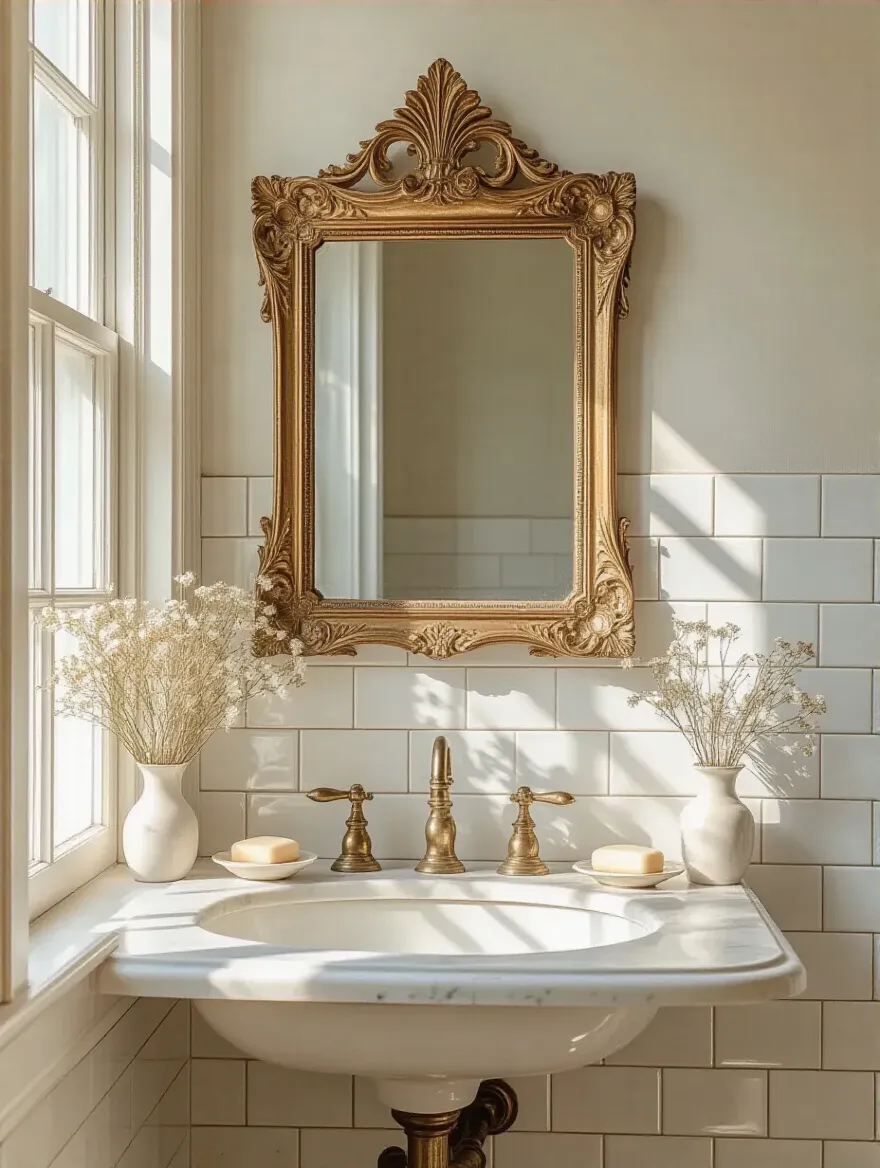
The mirror should feel like a deliberate choice, a focal point that ties the room together. In terms of size, a good rule of thumb is to have the mirror be slightly narrower than your sink or vanity. It creates a more balanced, pleasing look. This one piece can inject so much personality into the space.
Behind the mirror and all around it, color is key.
16. Paint Walls in Classic Vintage Color Palettes for Period Warmth.
Modern paint colors are often crisp and clean. Historic color palettes are different. They tend to be a little more muted, softer, and more complex. Think of dusty blues, soft sage greens, buttery creams, and warm greys. These colors have a depth that creates an instant feeling of warmth and history.
My biggest tip here: always, always test paint samples on the actual walls of your bathroom. Paint a big swatch on at least two different walls and look at it at different times of day. The light in a bathroom can be tricky, and a color you loved on a tiny chip can look completely different on a full wall. Also, consider the finish. An eggshell or even a matte finish is more historically accurate and has a beautiful, soft look.
Next, let’s talk about my favorite subject: storage.
17. Source Antique or Repurposed Cabinetry for Unique Storage Solutions.
This is my secret weapon for creating a truly one-of-a-kind vintage bathroom. Instead of a standard vanity, why not convert an antique dresser, a small buffet, or a washstand? This is where I tell my hard-won story. I had a client who fell in love with a stunning 1920s oak dresser. She bought it, hauled it home, and only then did we discover the drawers didn’t line up with where the plumbing needed to go. It became a nightmare of custom-cutting and reinforcing. The lesson? Measure everything first.
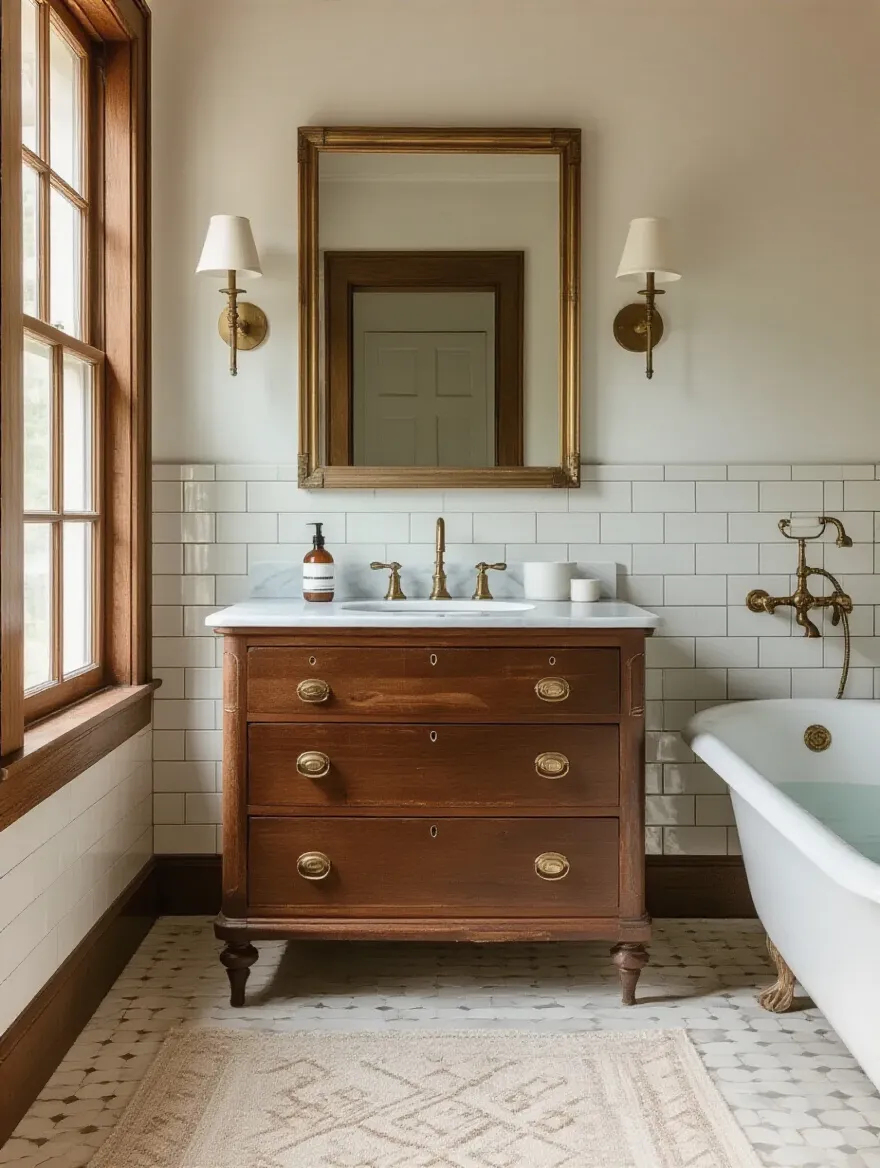
If you find a piece you love, take detailed measurements of your space and the plumbing rough-ins. Then, map out on the furniture itself where the sink basin and pipes will go. It takes a skilled carpenter or plumber to do the conversion correctly—sealing the wood top against water, cutting holes precisely, and securing it to the wall—but the result is a piece of storage that is completely unique and full of character.
Finally, the smallest details can have the biggest impact.
18. Add Authentic Vintage Accessories like Soap Dishes and Tumblers.
You’ve done all this work to create an authentic space. Don’t ruin it with a plastic soap dispenser from a big-box store! This is the final layer of your system. Scour flea markets, antique shops, and Etsy for the little things: a milk glass soap dish, a porcelain tumbler for toothbrushes, an old-fashioned towel bar, or antique glass jars for cotton balls.
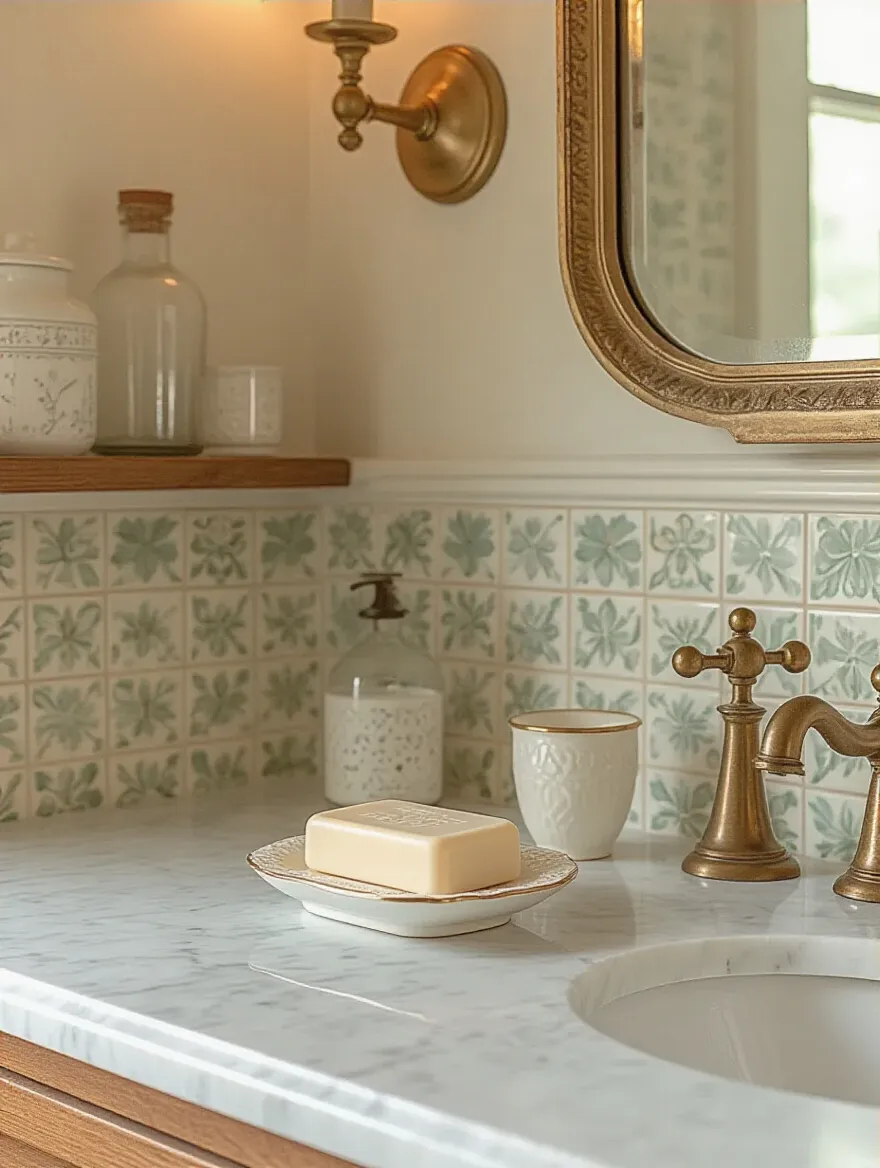
These small, authentic touches are what make the space feel truly finished and lived-in. It’s the difference between a movie set and a real, functional room. The hunt for these pieces is part of the fun, and each one adds another layer to your bathroom’s story.
Advanced Considerations & Preserving Your Vintage Space
You’ve built your dream bathroom. Congratulations! Now, how do you keep it looking amazing for years to come? This final part of the system is all about smart sourcing, long-term preservation, and maintenance.
19. Master Sourcing Authentic Vintage Pieces to Enhance Your Design.
Finding real vintage pieces is a treasure hunt. Architectural salvage yards are your best friend. They are full of old doors, sinks, tubs, light fixtures, and hardware that have been rescued from demolished buildings. Get to know the staff, tell them what you’re looking for, and they’ll often keep an eye out for you.
When you find something, inspect it carefully. Bring a tape measure and a flashlight. Look for hairline cracks in porcelain, check the integrity of wood, and see if hardware is complete. Remember that an “authentic” piece that is broken or can’t be adapted for modern plumbing is just an “expensive problem.” Be a smart hunter.
But what if you can’t find the perfect antique?
20. Understand Restoration vs. Replica Decisions for Key Elements.
This is a big one. You find an original 1910 cast iron tub, but the enamel is chipped all over. Do you pay to have it restored, or do you buy a brand-new replica? There’s no single right answer, but here’s a good system for deciding:
Adopt a hybrid approach. Restore the irreplaceable focal points—like a uniquely shaped sink or original tilework. Use high-quality replicas for things where modern function is key, like faucets and toilets.
Restoring an antique can be expensive, sometimes more than buying a replica. Get quotes for both. A replica gives you a warranty and modern performance. A restored original gives you an unbeatable story and character. Weigh the pros and cons for each key element based on its condition, its importance to the design, and your budget.
Next, how to blend the old with the new.
21. Integrate Modern Conveniences Seamlessly Without Sacrificing Style.
A vintage bathroom doesn’t mean you have to live in the past. You can have heated floors, a great sound system, and outlets for your electric toothbrush. The trick is to hide them. Radiant heat goes invisibly under the tile. A recessed medicine cabinet can hide outlets inside. A fan/light combination can have a Bluetooth speaker built-in.
The goal is to make the technology serve you without screaming “I’m from this century!” Choose outlet covers that match your wall color, or find ones in a metal finish that complements your fixtures. It’s all about integrating modern comfort so discreetly that it doesn’t break the vintage illusion.
One modern convenience you absolutely cannot hide—or skip—is this one.
22. Implement Effective Ventilation to Protect Vintage Materials Long-Term.
Moisture is the number one enemy of any bathroom, especially one with vintage materials like wood, plaster, and certain metals. A wimpy, noisy fan that doesn’t actually vent to the outside is worse than useless. You need a powerful, quiet exhaust fan that is ducted properly all the way to the exterior of your house.
This is non-negotiable. It prevents mold and mildew, stops paint from peeling, keeps wood from warping, and protects metal finishes from deteriorating. I recommend getting a fan with a timer or humidity sensor so it runs automatically for 20-30 minutes after you shower, ensuring all that damp air gets pulled out of the room. This single investment will protect all your other investments.
Now for keeping those investments looking their best.
23. Develop a Simple Cleaning Routine for Maintaining Historic Fixtures.
Step away from the harsh, abrasive cleaners! Vintage surfaces are more delicate than modern ones. Harsh chemicals can strip the finish off nickel-plated faucets, scratch the glaze on an old porcelain sink, and ruin the patina on unlacquered brass.
Your cleaning kit should be simple: pH-neutral soap (like a gentle dish soap), water, and soft microfiber cloths. For unlacquered brass, a coat of museum-grade wax every few months can protect the finish and slow down tarnishing. The key is gentle, regular cleaning. A quick wipe-down after each use to prevent water spots goes a long way.
Finally, the most important rule of all.
24. Preserve Original Architectural Details for Unmatched Character and Value.
If you are lucky enough to have original tile, an old built-in cabinet, or beautiful window casings in your bathroom, do everything in your power to preserve them. These elements are the soul of the room. They are what give it a sense of history and place that you can never get from new materials.
Even if they’re a little damaged, consult with a restoration expert before you rip them out. Often, old tile can be repaired, a wood cabinet can be refinished, and plaster can be patched. Preserving these details not only adds immense character, it also adds real financial value to your home. Buyers looking for character homes will pay a premium for that kind of authenticity. It’s a treasure—treat it like one.
Conclusion
See? It’s a system. When you break it down into manageable steps—planning, sourcing, building, and preserving—creating a stunning vintage bathroom feels achievable, not overwhelming. It’s about being methodical, making smart choices, and focusing on a cohesive vision from start to finish.
This isn’t just about making a bathroom look old. It’s about crafting a space with soul, a room that tells a story and makes your everyday life feel a little more beautiful. The result is a timeless sanctuary that functions perfectly for modern life while honoring the craftsmanship of the past. It’s a space that provides a deep sense of satisfaction every single time you walk into it—the pure joy of creating beautiful, functional order out of chaos. Now go build your masterpiece.