
The smell hits you first — woodsmoke and charred metal and whatever is sizzling on the grate. Then the warmth from the grill, even on a cool evening. Then the realization that you haven’t gone inside for two hours, because everything you need is out here. That’s the promise of a well-designed outdoor kitchen patio, and it’s a real one when the materials and layout are right.
But an outdoor kitchen patio isn’t a kitchen that happens to be outside — it’s an entirely different material problem. The tile that looks perfect at the showroom can crack its second winter. Getting these spaces right means making different decisions than you’d make indoors, often counterintuitive ones.
These 15 ideas come from a material science background, not an Instagram feed. All of them are aimed at outdoor kitchen patios that still work well in year five, not just year one.
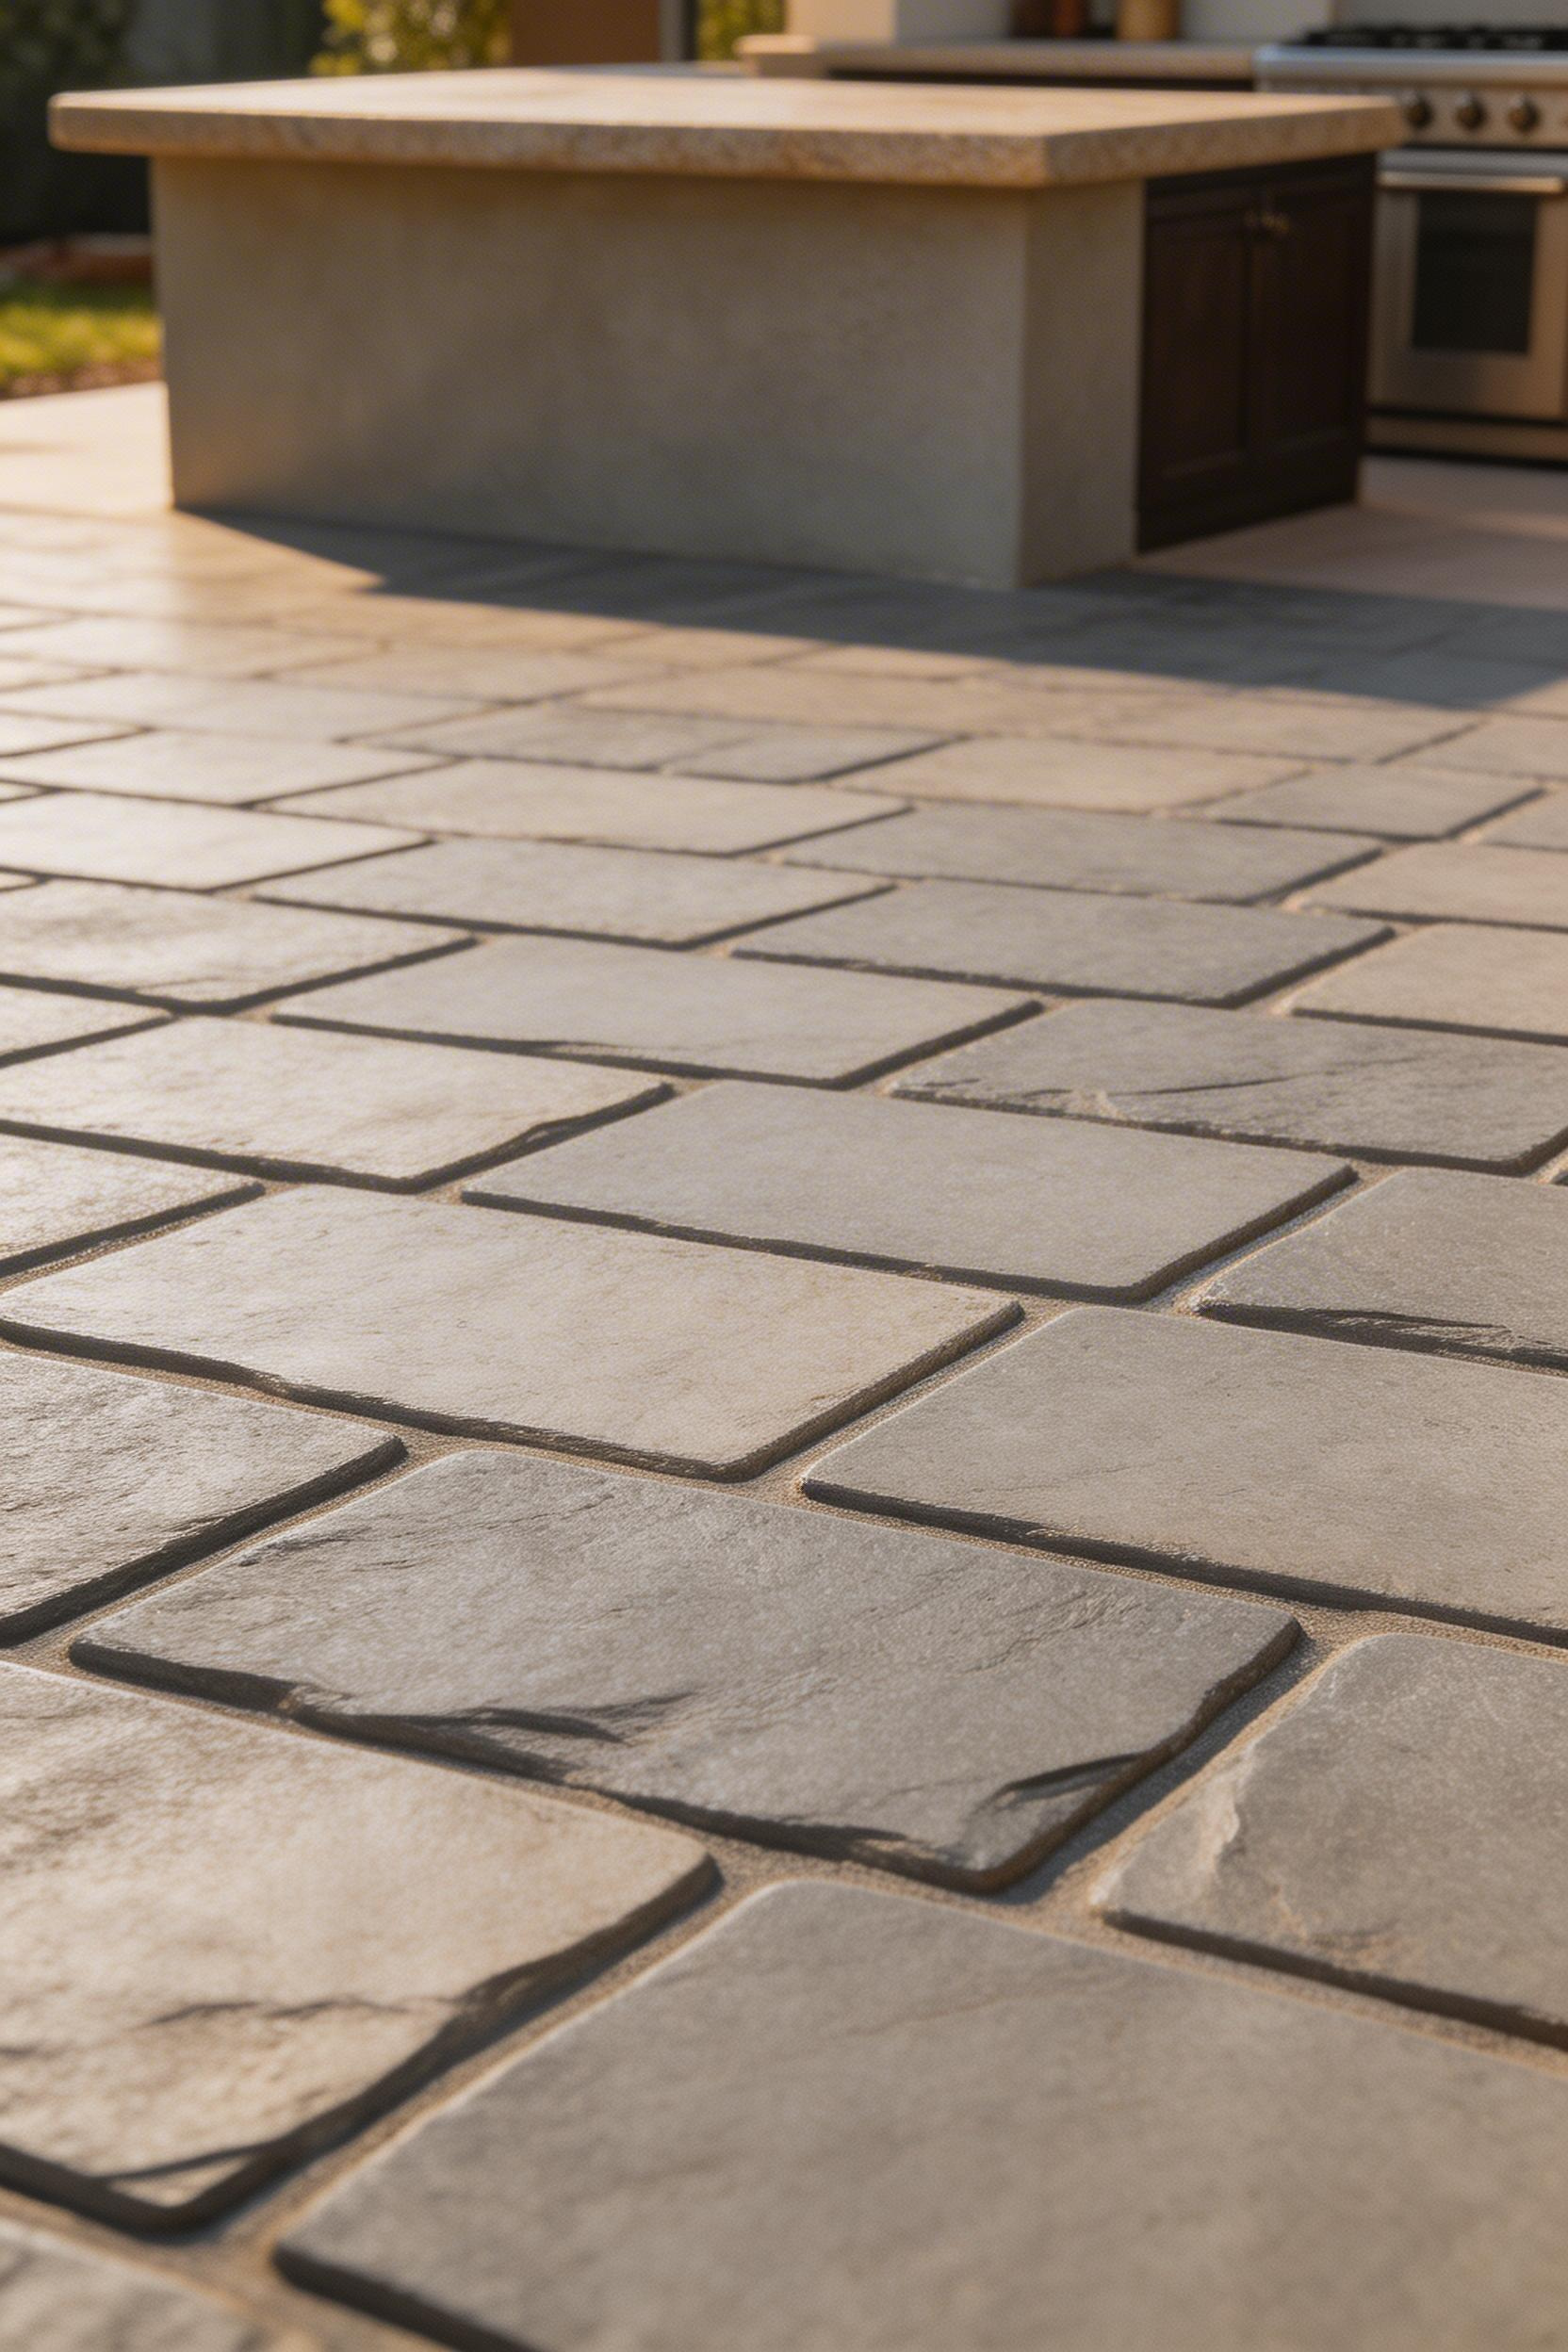
1. Porcelain Tile Flooring That Handles Freeze-Thaw Cycles
If you live in a climate that drops below 32°F. Even occasionally — the single most important outdoor kitchen patio flooring decision you’ll make is the water absorption rate of your tile.
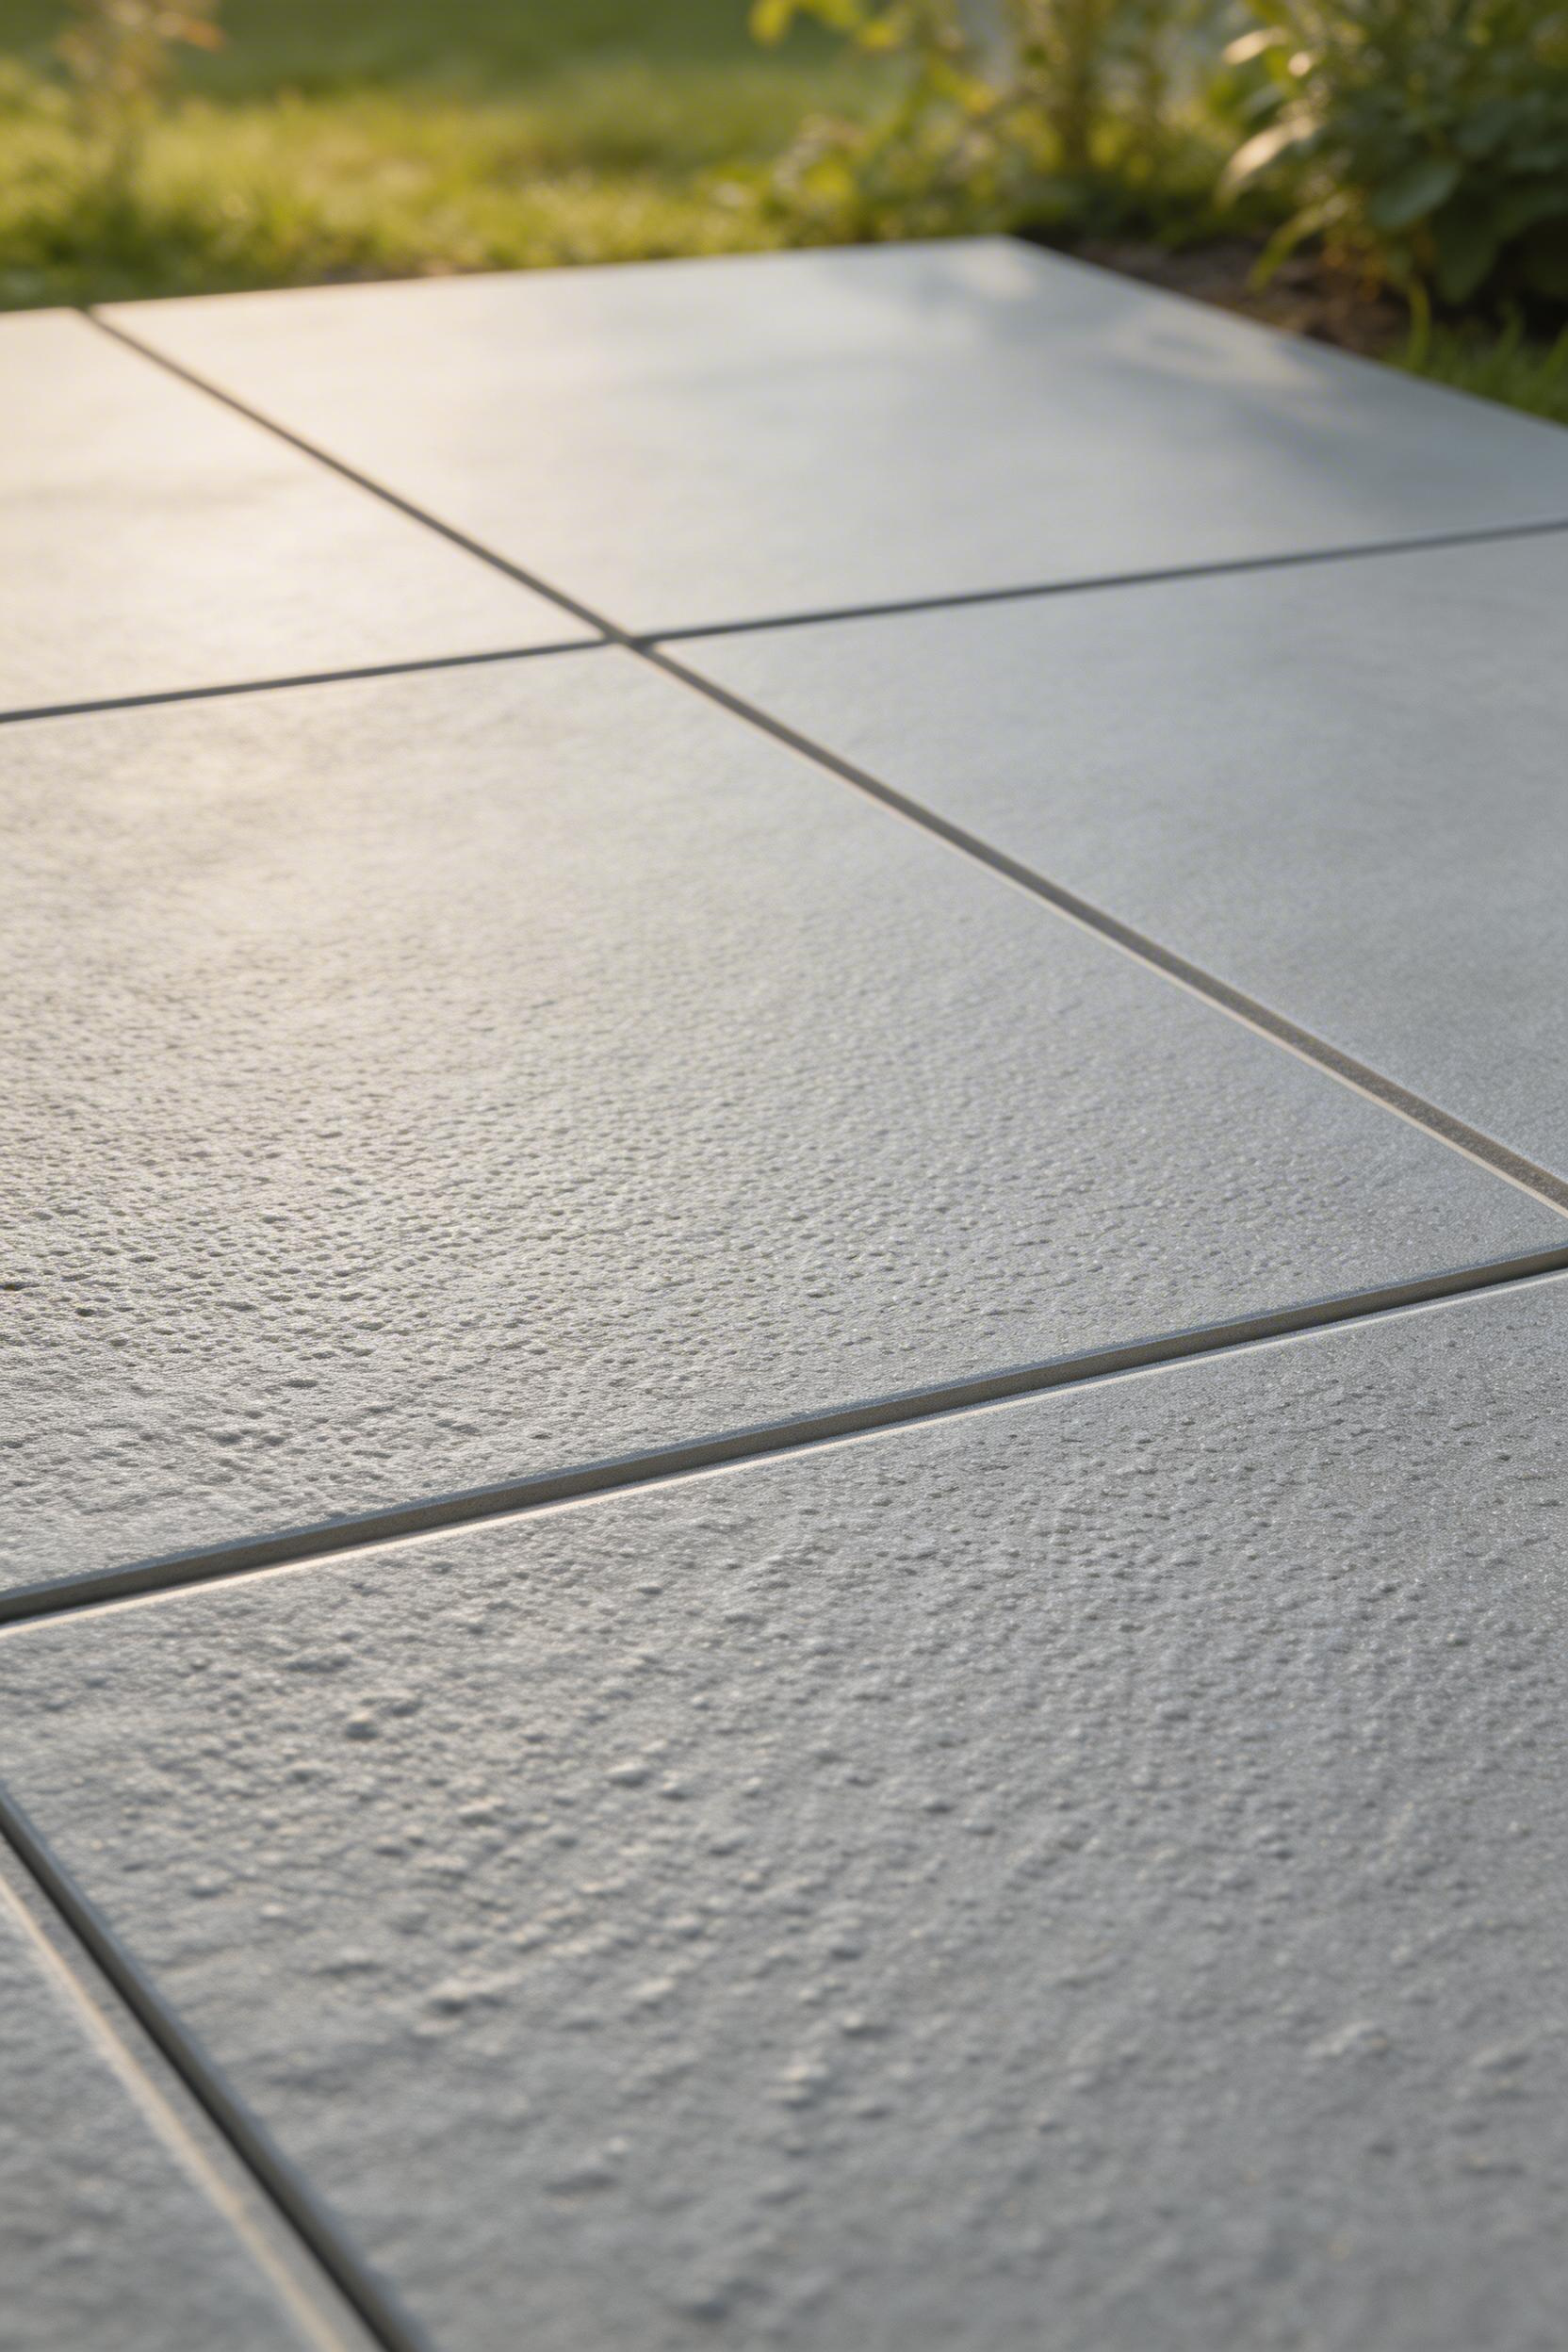
Standard ceramic tile absorbs 7 to 20 percent water. When that water freezes, it expands by nine percent and cracks the tile from within — one hard freeze can destroy an improperly specified floor. Frost-proof porcelain has a water absorption rate below 0.5 percent per ANSI A137.1 standards and won’t crack from freeze-thaw cycling.
What to Look For in Outdoor Porcelain
Beyond frost rating, you need adequate slip resistance. Look for a DCOF AcuTest rating of 0.60 or higher, or a German ramp test rating of R10 or R11. The tile also needs to be large format. 20×20 inches minimum, 24×24 preferred — to reduce grout lines that can collect water and crack. Dark tiles absorb significantly more heat, so matte light-colored tiles are the better choice for barefoot-friendly surfaces in direct sun.
Daltile Delegate Colorbody Porcelain (20×20 inches) at $2.89 per square foot hits all these specs. MSI Dimensions Bullnose at $3.49 per square foot is a larger-format option with R11 slip resistance.
Installation matters as much as product selection. Use a large-format tile mortar like LATICRETE 254 Platinum, ensure full mortar coverage on the back of each tile, set a slope of at least 1/8-inch per linear foot toward drainage. Plan expansion joints every 8 to 10 feet. The Tile Council of North America notes that improper installation accounts for over 80 percent of outdoor tile failures.
Order 15 percent extra over your square footage estimate. Rectified tiles with tight 1/16-inch grout lines look cleaner and reduce water infiltration compared to traditional grout widths.
2. Stainless Steel Cabinet Frames with Polymer Door Fronts
The outdoor kitchen cabinetry market is full of beautiful teak and cedar options that photograph well and perform poorly. Wood, even treated wood, shrinks and expands with seasonal humidity changes. That movement causes hardware misalignment, door gaps, and eventually structural failure — sometimes within three to five years. Solid stainless steel cabinets solve the wood problem but create a new one: they’re expensive, heavy. Prone to galvanic corrosion where they contact other metals.
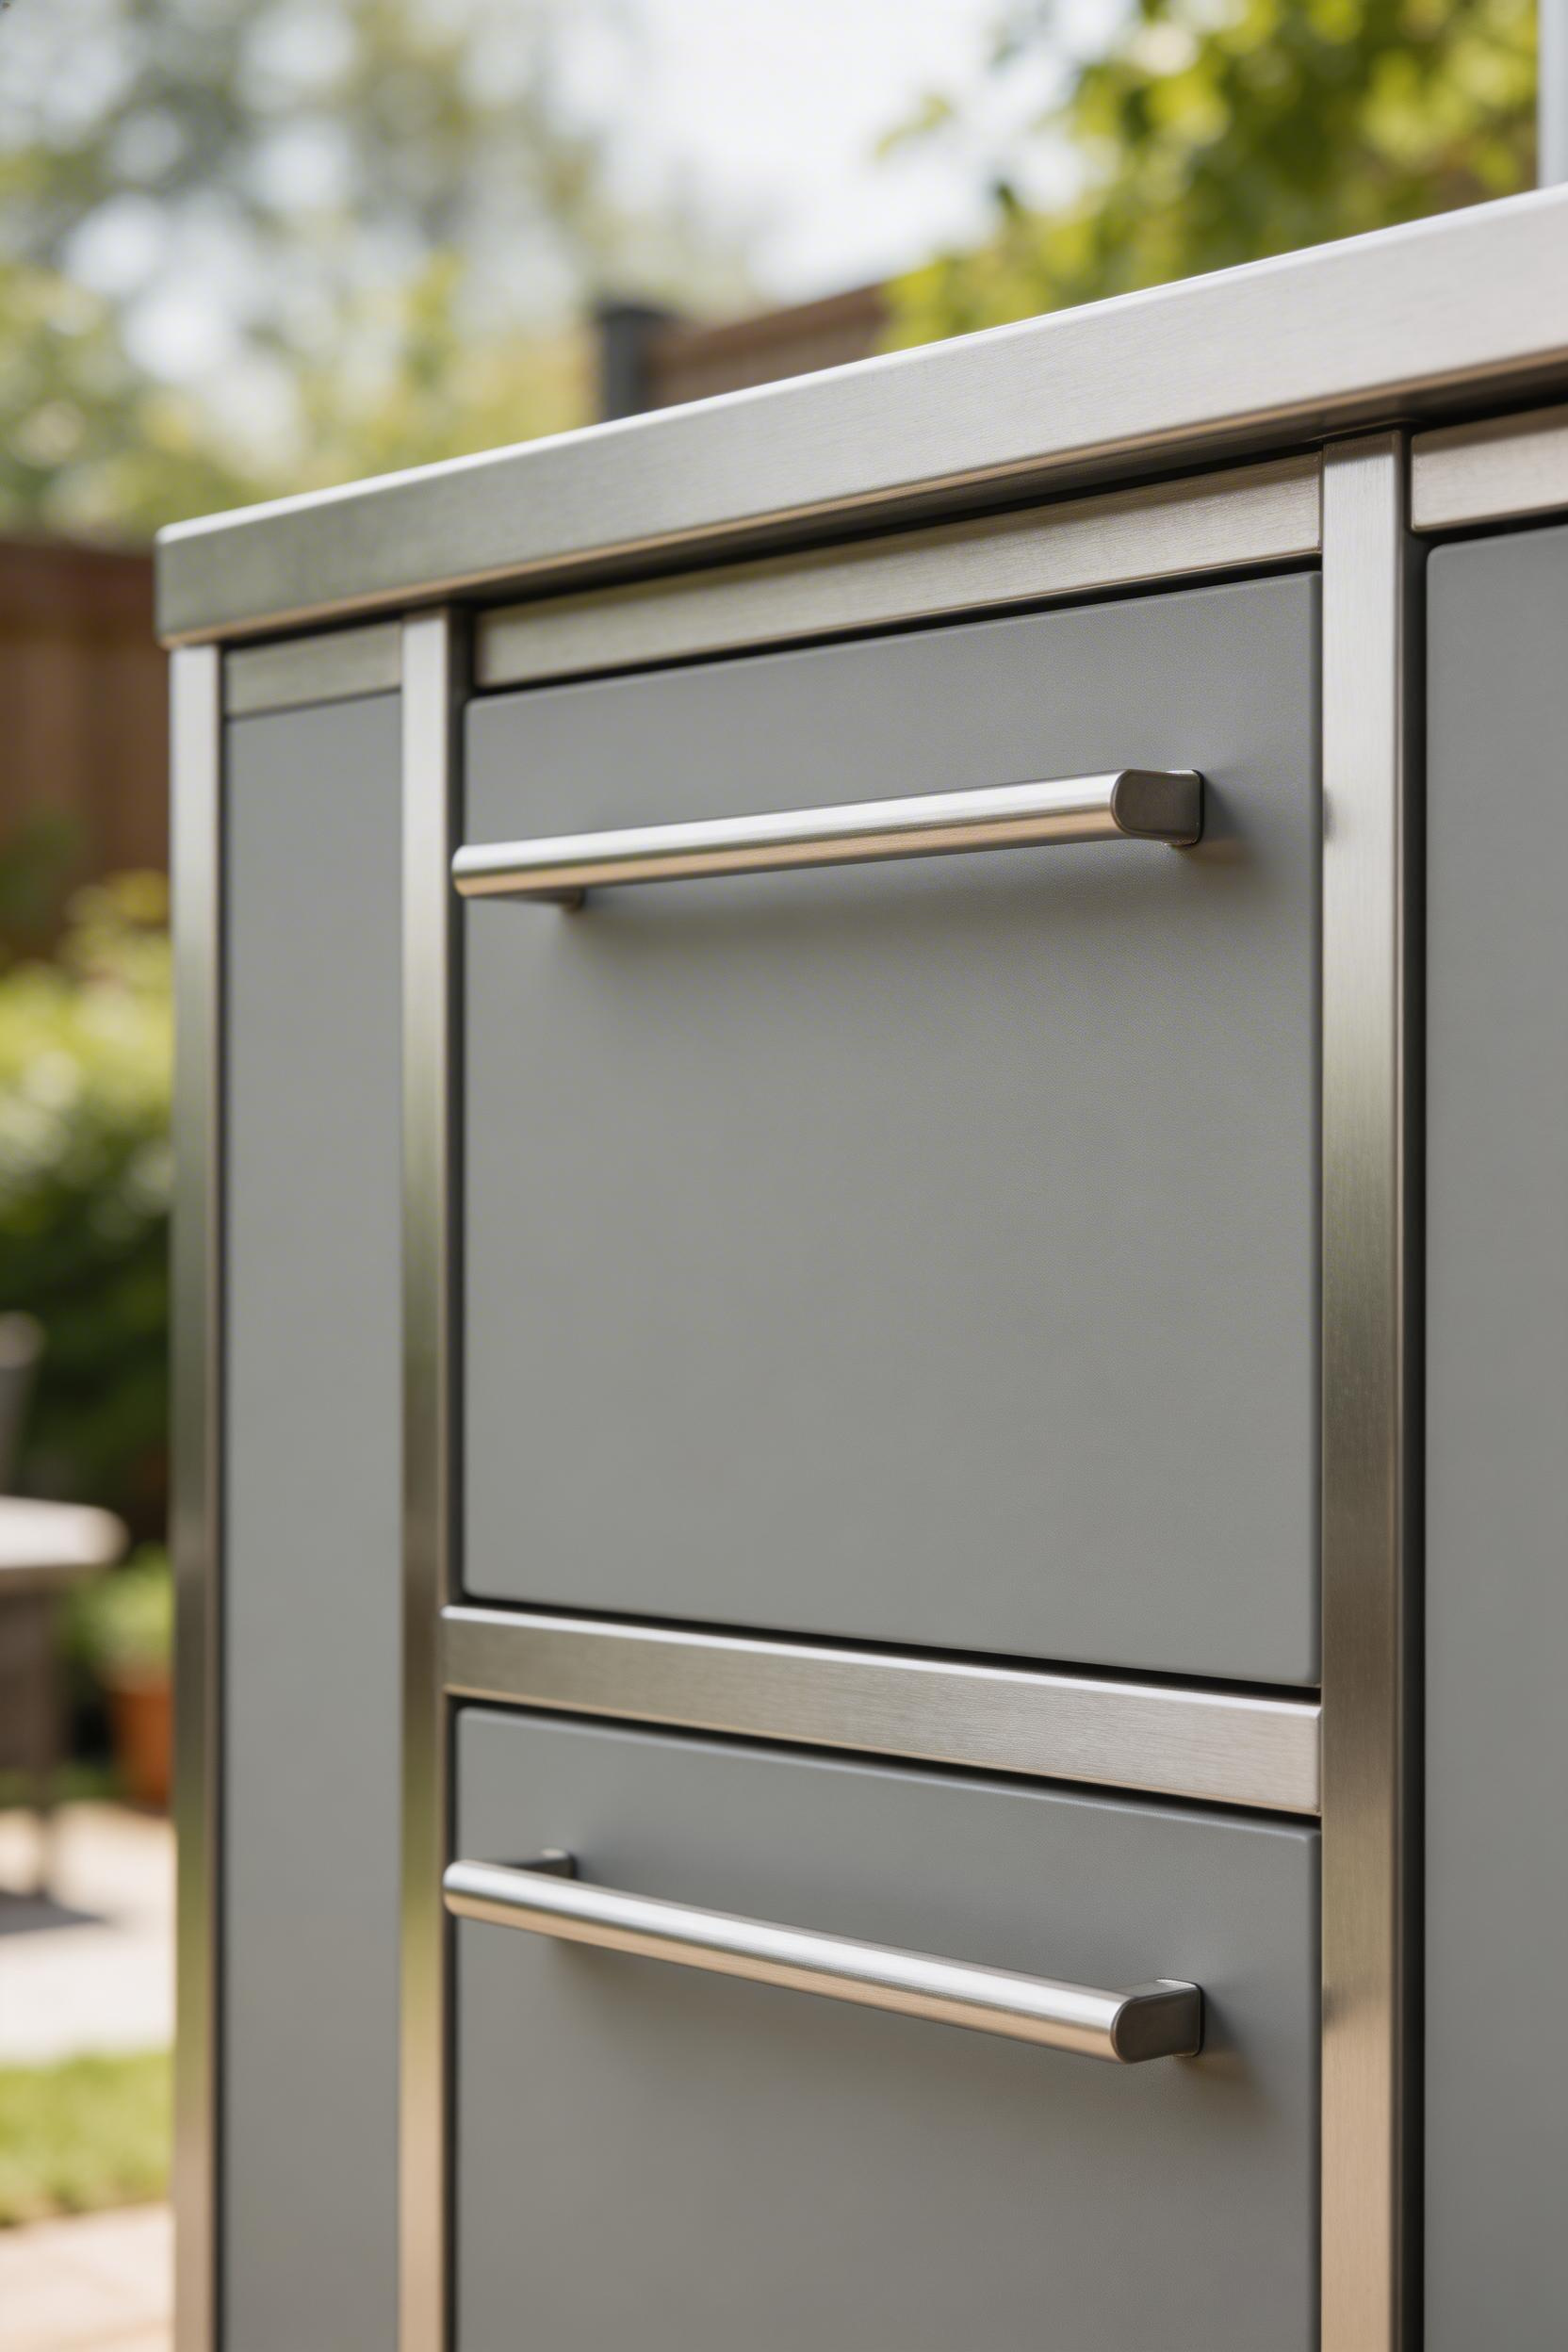
The pairing that actually performs outdoors is 18-gauge 304 stainless steel framing with HDPE door fronts. Stainless handles the structural load. HDPE doesn’t rot, doesn’t absorb water, won’t support mold, and is UV-stable for 15 to 20 years. Powder-coated aluminum doors are a functional alternative.
Avoiding Galvanic Corrosion
Galvanic corrosion happens when dissimilar metals contact each other with moisture as the electrolyte. Use nylon bushings or silicone isolation between stainless frames and any aluminum components. Specify stainless steel or nylon-insert locknuts on all frame connections.
Within two miles of saltwater, upgrade from 304 stainless to 316 marine-grade stainless. The 25 to 30 percent cost premium is worth it in a corrosive coastal environment.
Summerset’s stainless steel outdoor cabinet sets run $649 to $849 per unit with HDPE doors and 75-lb-rated drawer slides included. The drawer slides are the detail I’d focus on. A 2022 survey of outdoor kitchen contractors found that 68 percent of warranty callbacks involved cabinetry hardware failures, not the cabinets themselves. Full-extension, soft-close slides in 316 stainless or marine-grade nylon are the specification to insist on.
3. Concrete Countertops Sealed for Outdoor Use
Concrete countertops have been an indoor design staple for 20 years, but outdoor concrete is a meaningfully different material challenge. The same mix that works in a protected kitchen will crack within two to three years outdoors. It faces UV exposure, temperature swings, rain, and grease simultaneously — a very different set of stresses.
The mix design has to be stronger than indoor work. 4,000 PSI compressive strength minimum versus the 3,000 PSI standard used for slabs. Reinforce with 1/2-inch rebar at 12-inch centers or fiberglass mesh — thermal expansion cracks unbraced outdoor concrete regardless of mix quality. Cheng Outdoor Pro-Formula and Trinic AllCure are both pre-blended mixes with pozzolanic additives that increase density and reduce absorption. Worth using rather than mixing from scratch.
The Sealer Decision Matters
The sealer type is where most outdoor concrete counters fail. Topcoat epoxy sealers — popular for indoor work because they’re shiny and easy to clean — peel, blister, and trap moisture outdoors. Instead, use a penetrating silane-siloxane sealer that soaks into the concrete matrix. Surecrete XS-327 Outdoor is a solid choice at $65 per gallon — UV stable, penetrating, not prone to peeling.
Even with the right sealer, plan to re-seal every one to two years outdoors. Unsealed concrete near a grill becomes permanently stained from grease penetration — no sealer reverses that after the fact.
Professional pour-in-place outdoor concrete runs $85 to $140 per square foot installed; precast runs $65 to $95 per square foot. DIY material cost is $15 to $25 per square foot. The honest caveat here is that form-building skill is what separates a clean result from a wavy one. Rent a concrete vibrator rather than hand-tamping, and let the slab cure a full 28 days before sealing.
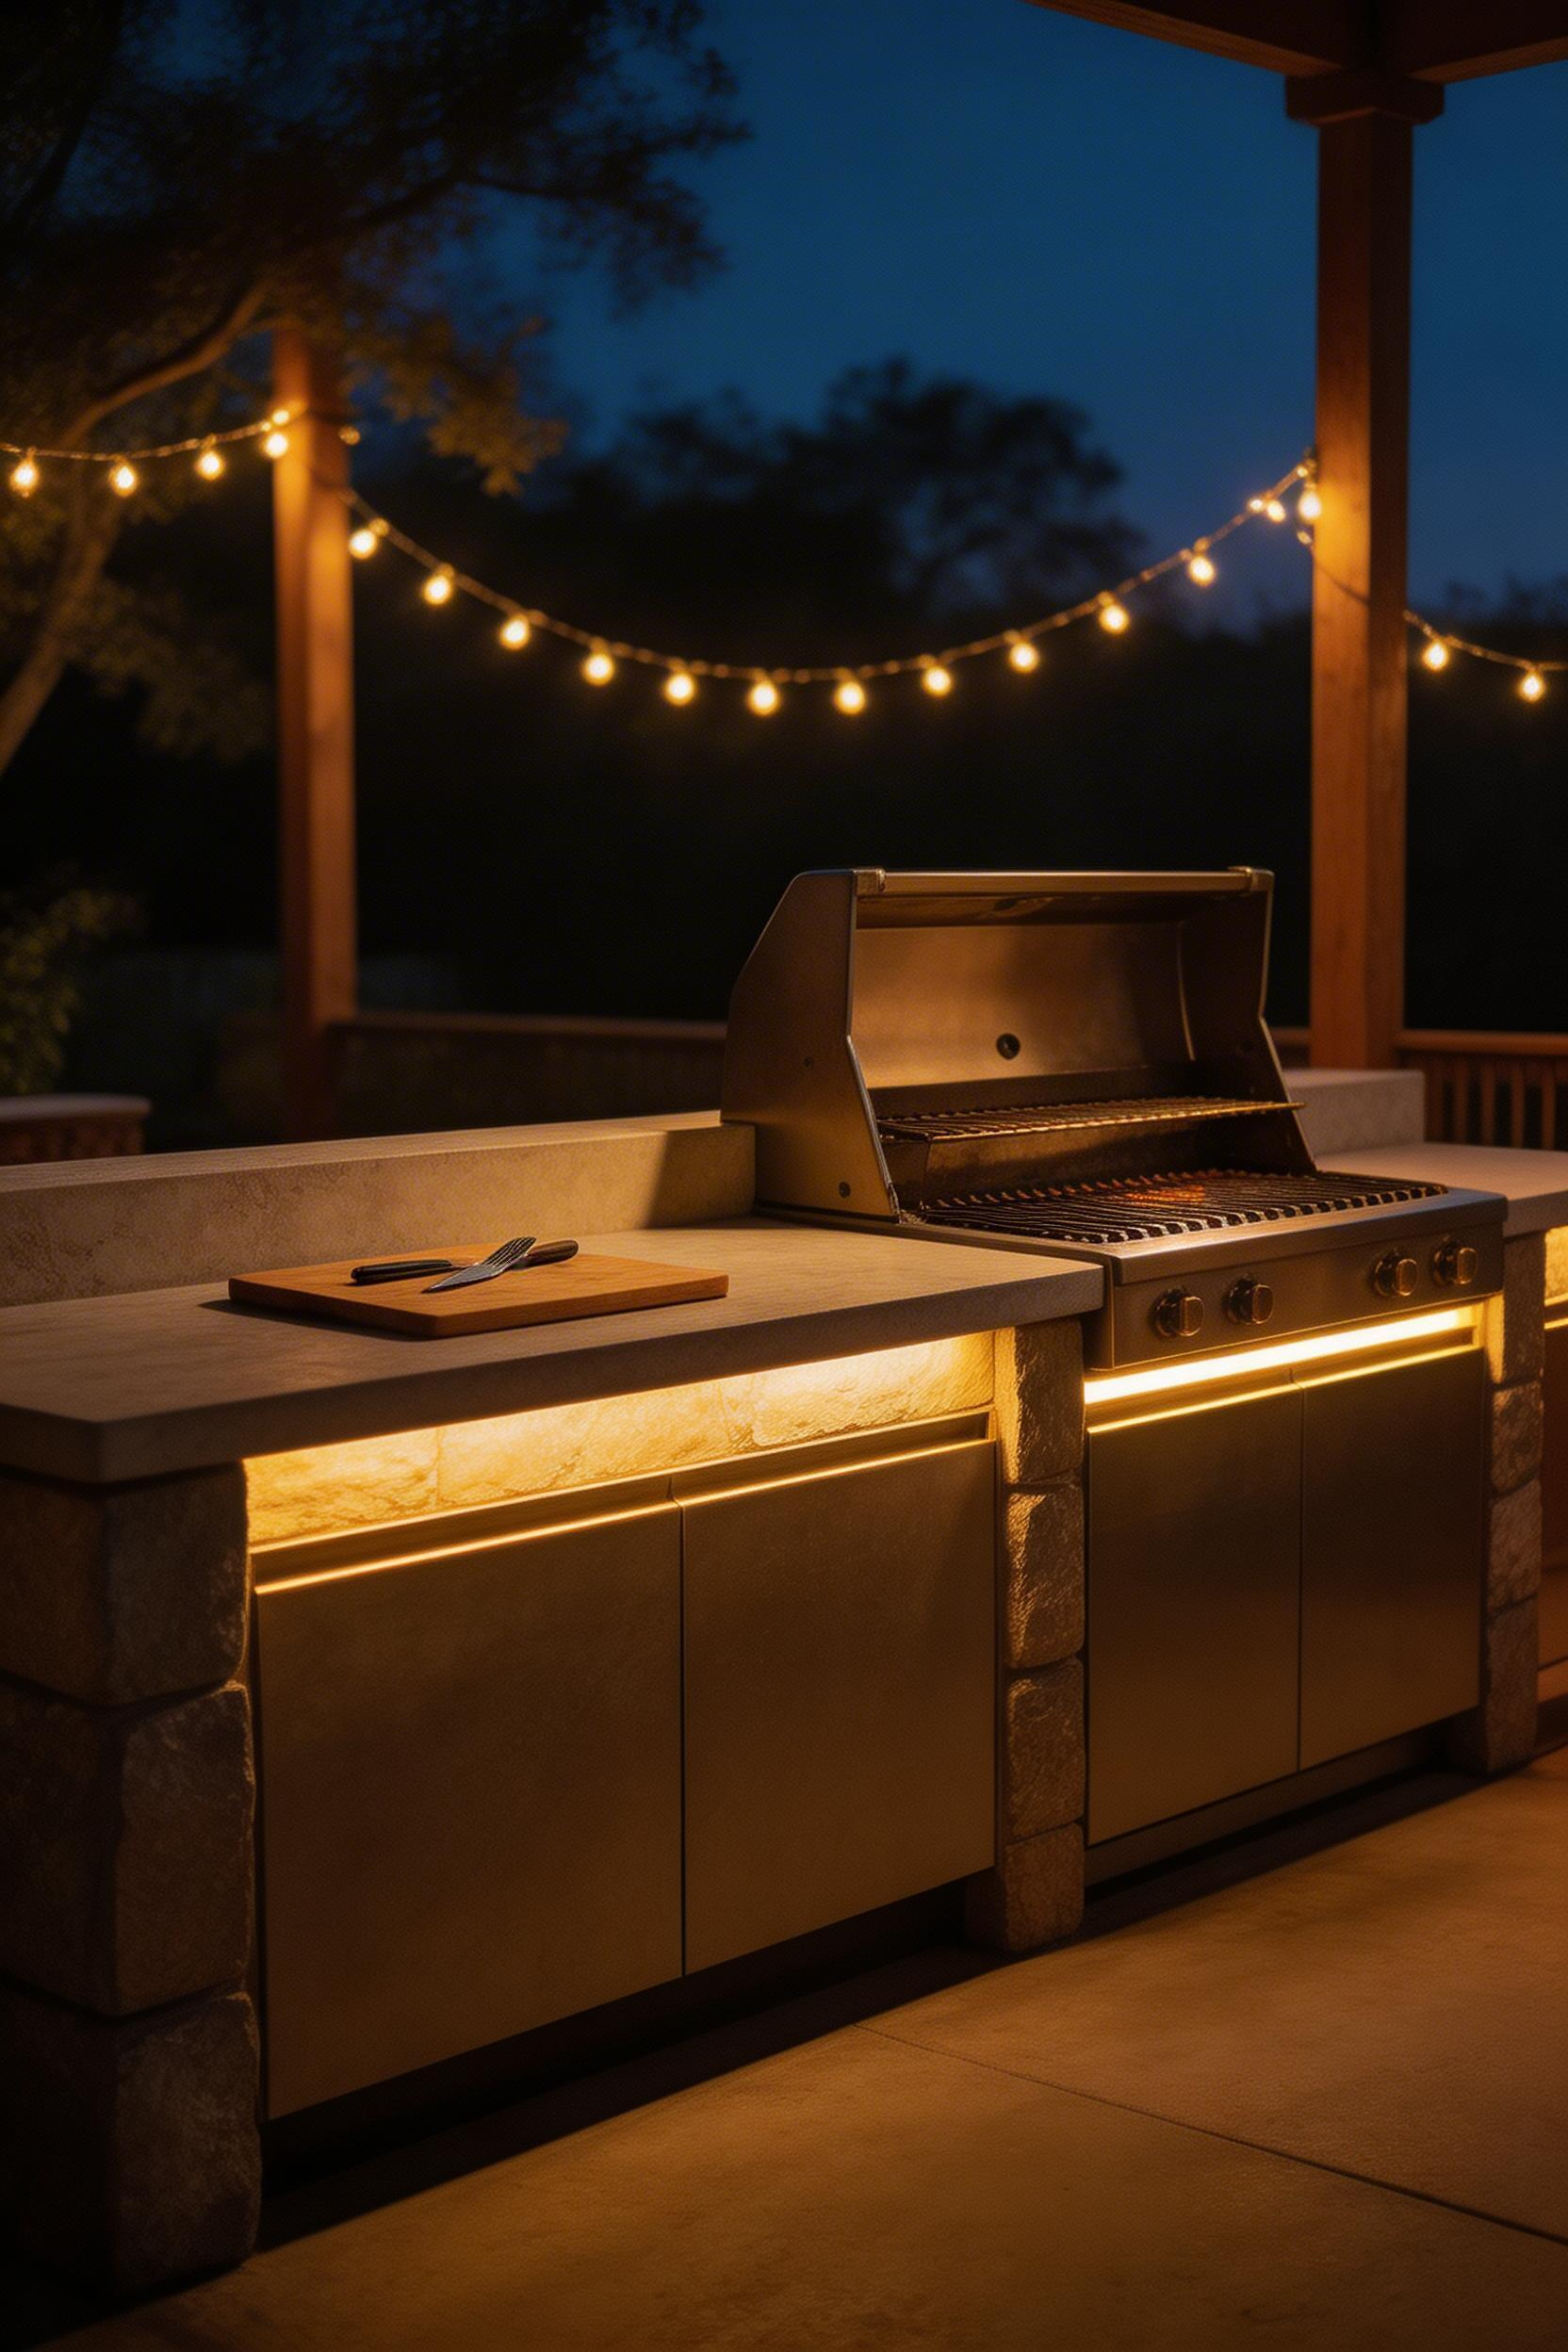
4. Pergola Covers That Extend the Cooking Season
Research from the American Institute of Architects consistently finds that covered outdoor kitchens see roughly three times more annual use than uncovered setups. The functional season extends by three to four months in most US climate zones. The cover type matters significantly — some protect from rain while blocking all natural light, others let light through but provide limited weather protection.
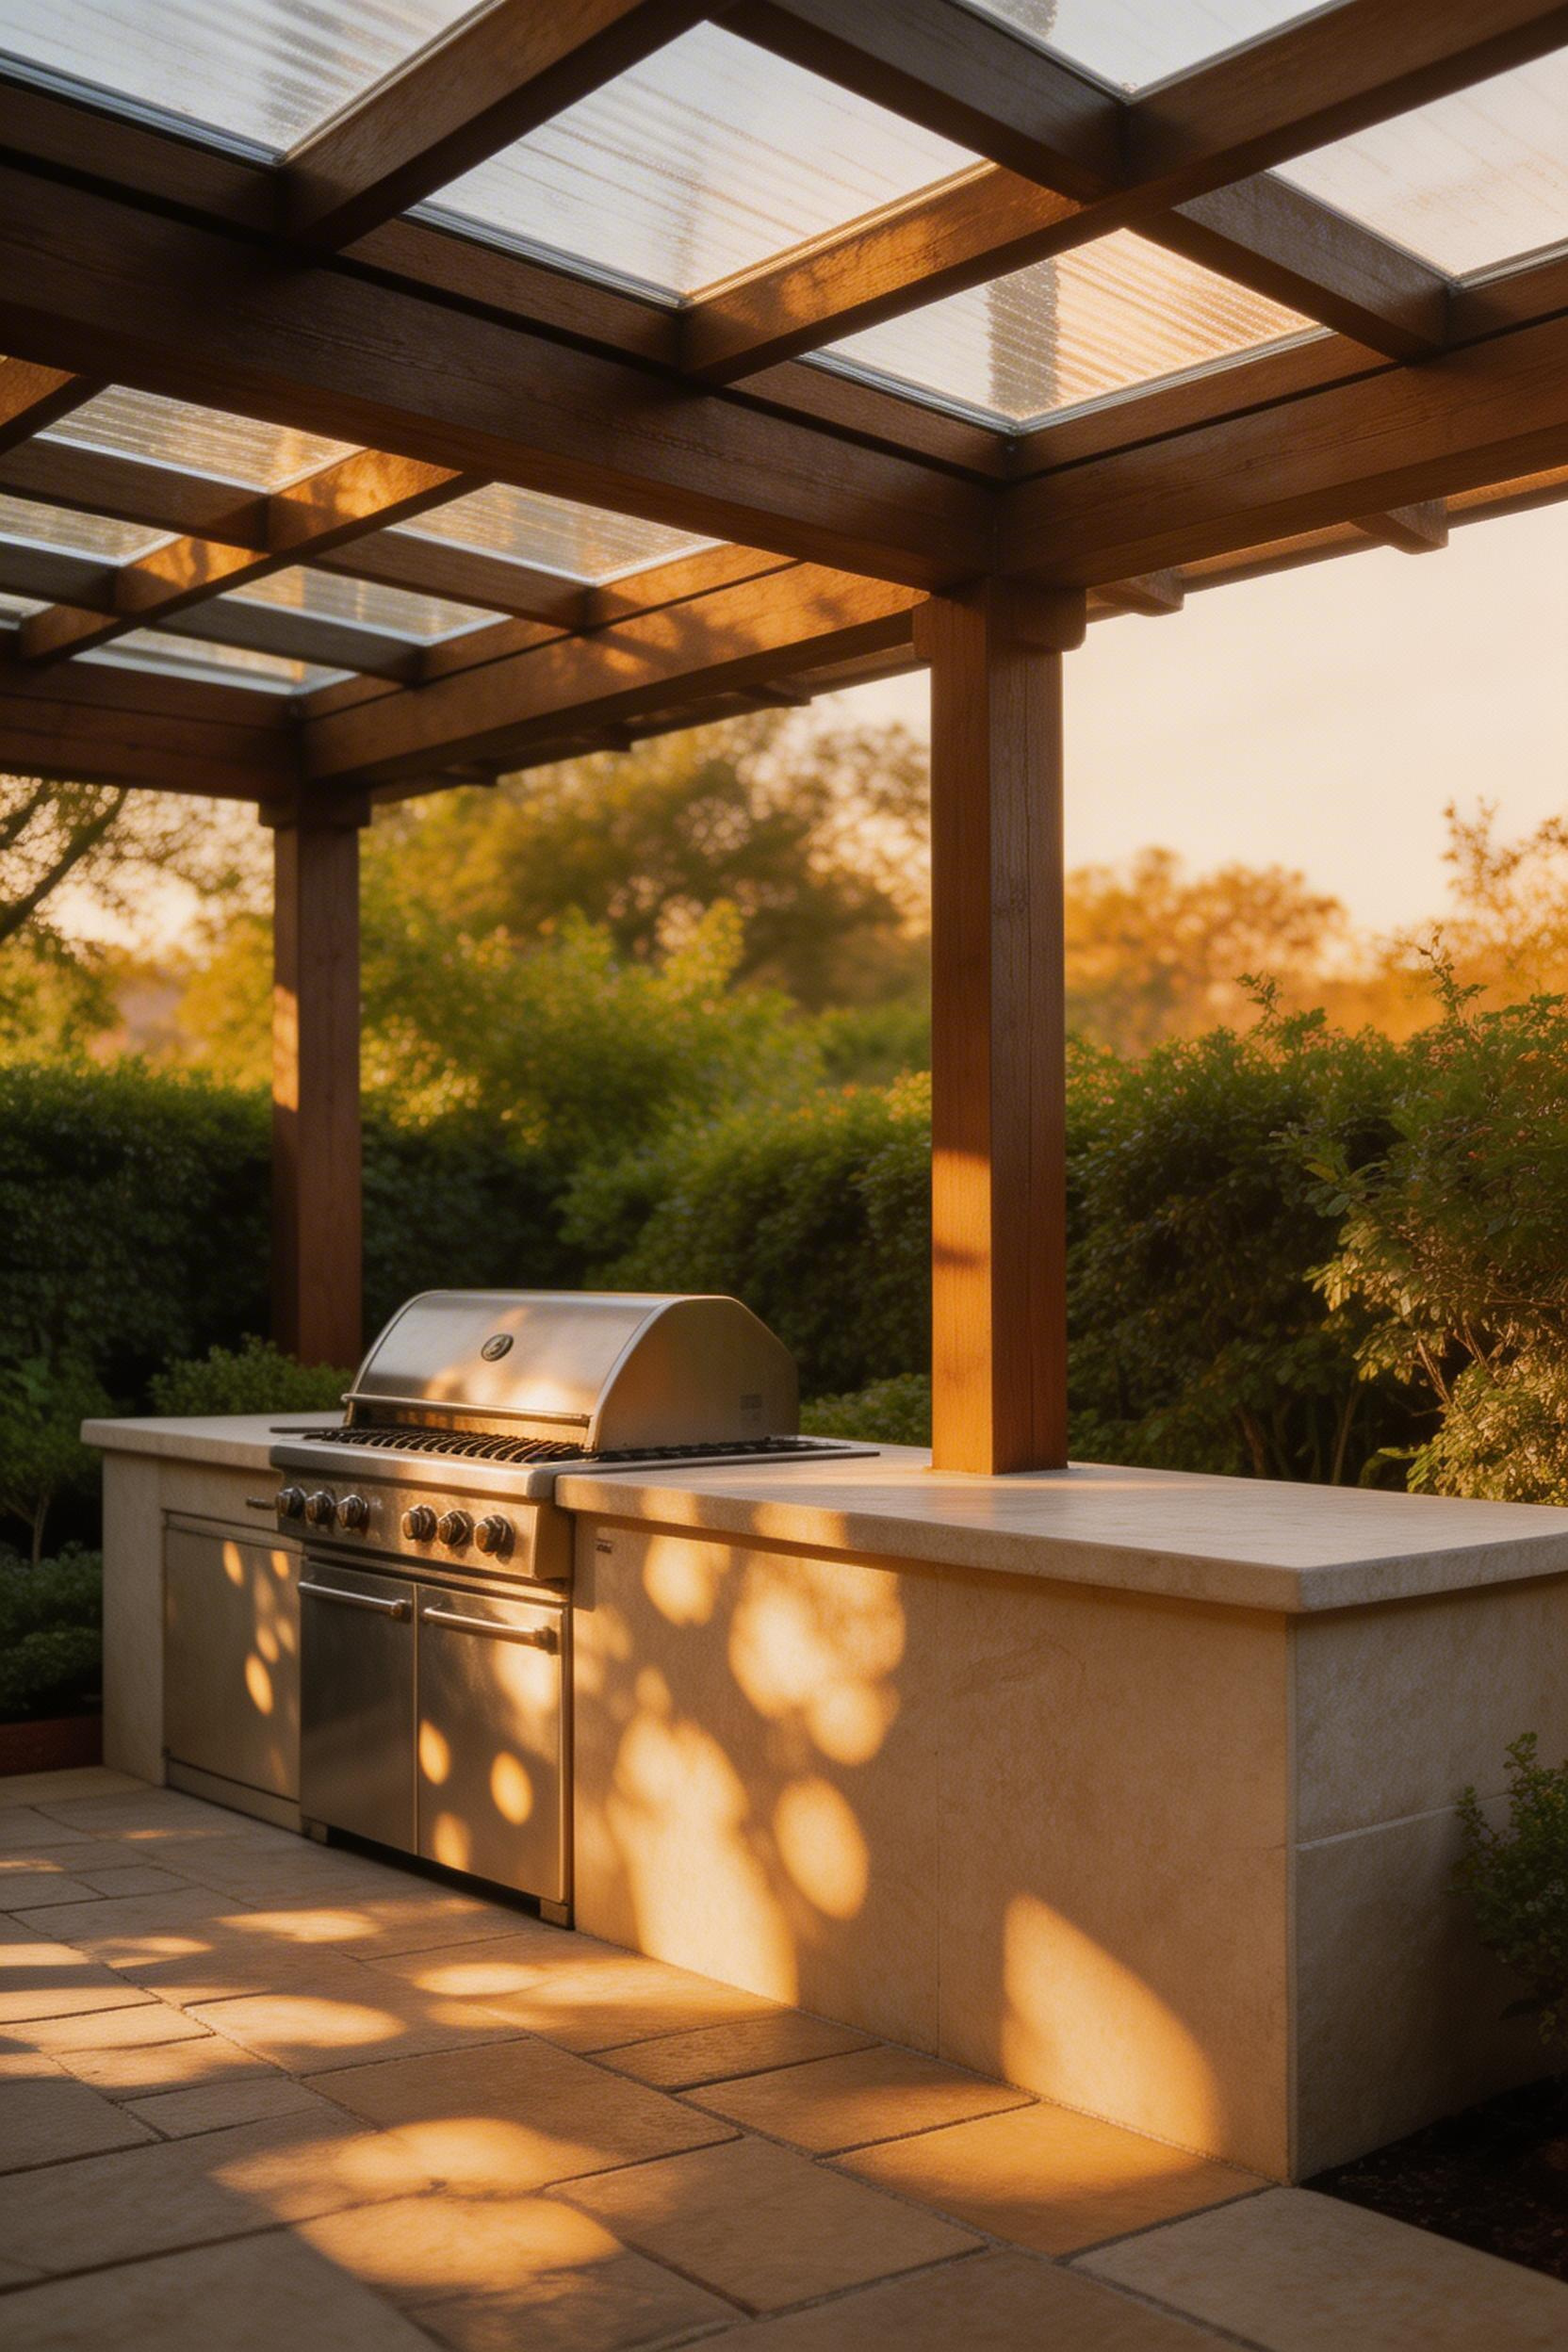
Polycarbonate twin-wall or multiwall panels are the best balance of light transmission and weather protection for most patios. They transmit 80 to 90 percent of visible light while blocking 99 percent of UV. 8mm twin-wall is the right thickness — thinner single-wall panels flex and rattle in wind.
Comparing the Main Cover Types
HDPE shade cloth (70 to 90 percent block rating) is the cheapest option at $0.50 to $1.50 per square foot, but it provides no rain protection. Fine for sun shading, not for a kitchen area where you’re cooking through a light drizzle. Tongue-and-groove cedar roof panels look best of all the options and last 15 to 25 years treated. They block all natural light and require a minimum 1:12 pitch for drainage. Motorized aluminum louver systems (like Palram’s Arcadia series or higher-end systems from Struxure) are the premium choice at $8,000 to $25,000 installed, but they’re genuinely transformative. Adjustable sun angle, automatic rain close, and full year-round functionality.
The Palram-Canopia Arcadia 10×12 kit at $3,299 ships as a complete aluminum-and-polycarbonate system and assembles in one to two days.
The most underrated upgrade for any covered outdoor kitchen patio is a ceiling fan. Even a light fan rotation keeps smoke away from the cooking area and makes hot-weather cooking genuinely comfortable. Specify a UL Damp rated fan at minimum; UL Wet is better for partially covered spaces.
5. Built-in Pizza Ovens on a Patio Budget
Traditional masonry pizza ovens — the dome and arch type built entirely on-site from refractory bricks — require 4,000 to 6,000 pounds of material, three to five days of skilled labor. A poured concrete foundation to support the weight. Total cost often runs $8,000 to $20,000. But prefabricated refractory brick inserts changed this calculus significantly. It’s now possible to incorporate a functional outdoor pizza oven into an outdoor kitchen patio at a price point most homeowners can actually reach.
The Fontana Gusto Wood/Gas Hybrid ($1,299) and the Chicago Brick Oven CBO-750 Hybrid Insert ($1,795) are both purpose-built inserts that sit in a pre-built concrete block enclosure. Both reach genuine pizza temperatures (700–900°F) with wood and gas options.
Structural Requirements
The enclosure supporting any pizza oven insert must be concrete block (CMU), brick, or stone. Not wood framing with cement board facing. Refractory brick inserts weigh 200 to 450 pounds and generate sustained high heat. Combustible framing materials are simply not appropriate here regardless of what any product spec sheet suggests. The concrete slab below also needs to handle the point load, which typically means a reinforced 5-inch slab or a purpose-built concrete block base.
Clearances are non-negotiable: minimum 12 inches to combustibles on all sides, 18 inches to any overhead combustible structure.
The honest advice before committing: spend one or two seasons with a portable oven like the Ooni Karu 16 ($599) first. Three seasons of real use will confirm whether you’ll actually cook in a pizza oven regularly enough to justify a permanent installation. The transition to a built-in makes much more sense once you have that baseline. And the Ooni can become a camping or tailgate oven afterward.
6. Composite Decking as a Patio Kitchen Base Material
Composite decking for an outdoor kitchen patio is a legitimate option, but it comes with specific performance boundaries that most product literature glosses over. The key question isn’t whether composite decking can work near an outdoor kitchen. It can — but whether your specific composite product is rated for the fire, heat, and load conditions a permanent grill station creates.
Most composite decking carries a Class C fire rating, which is fine for general deck use but inadequate directly under or adjacent to a permanently installed grill. Class A fire-rated composites are required within 36 inches of a built-in grill. TimberTech AZEK Vintage Collection is the standard example. This rating keeps the installation within fire code and most manufacturer warranties. The Transcend Lineage series from Trex has a Class B rating. Acceptable in some jurisdictions, worth checking with your local building department before specifying.
Heat and Load Considerations
Heat deflection is the other performance limit: composite decking starts to soften at 160 to 180°F surface temperature. Direct grill radiant heat can exceed this threshold during summer cooking sessions. The solution is a non-combustible pad — a concrete paver or natural stone section, minimum 24×24 inches — directly under the grill. This protects the composite from both heat and grease drips, which can permanently stain composite surfaces even if they don’t damage the structure.
For heavy outdoor kitchen islands with concrete countertops and full appliance suites, my honest recommendation is a concrete slab or natural stone patio base rather than composite decking. Composite handles the kitchen load, but a poured concrete slab eliminates warranty complications, provides a more stable base for masonry construction. Handles point loads from heavy counters more predictably. Save composite for the seating and dining areas where its aesthetic and comfort advantages are unambiguous.
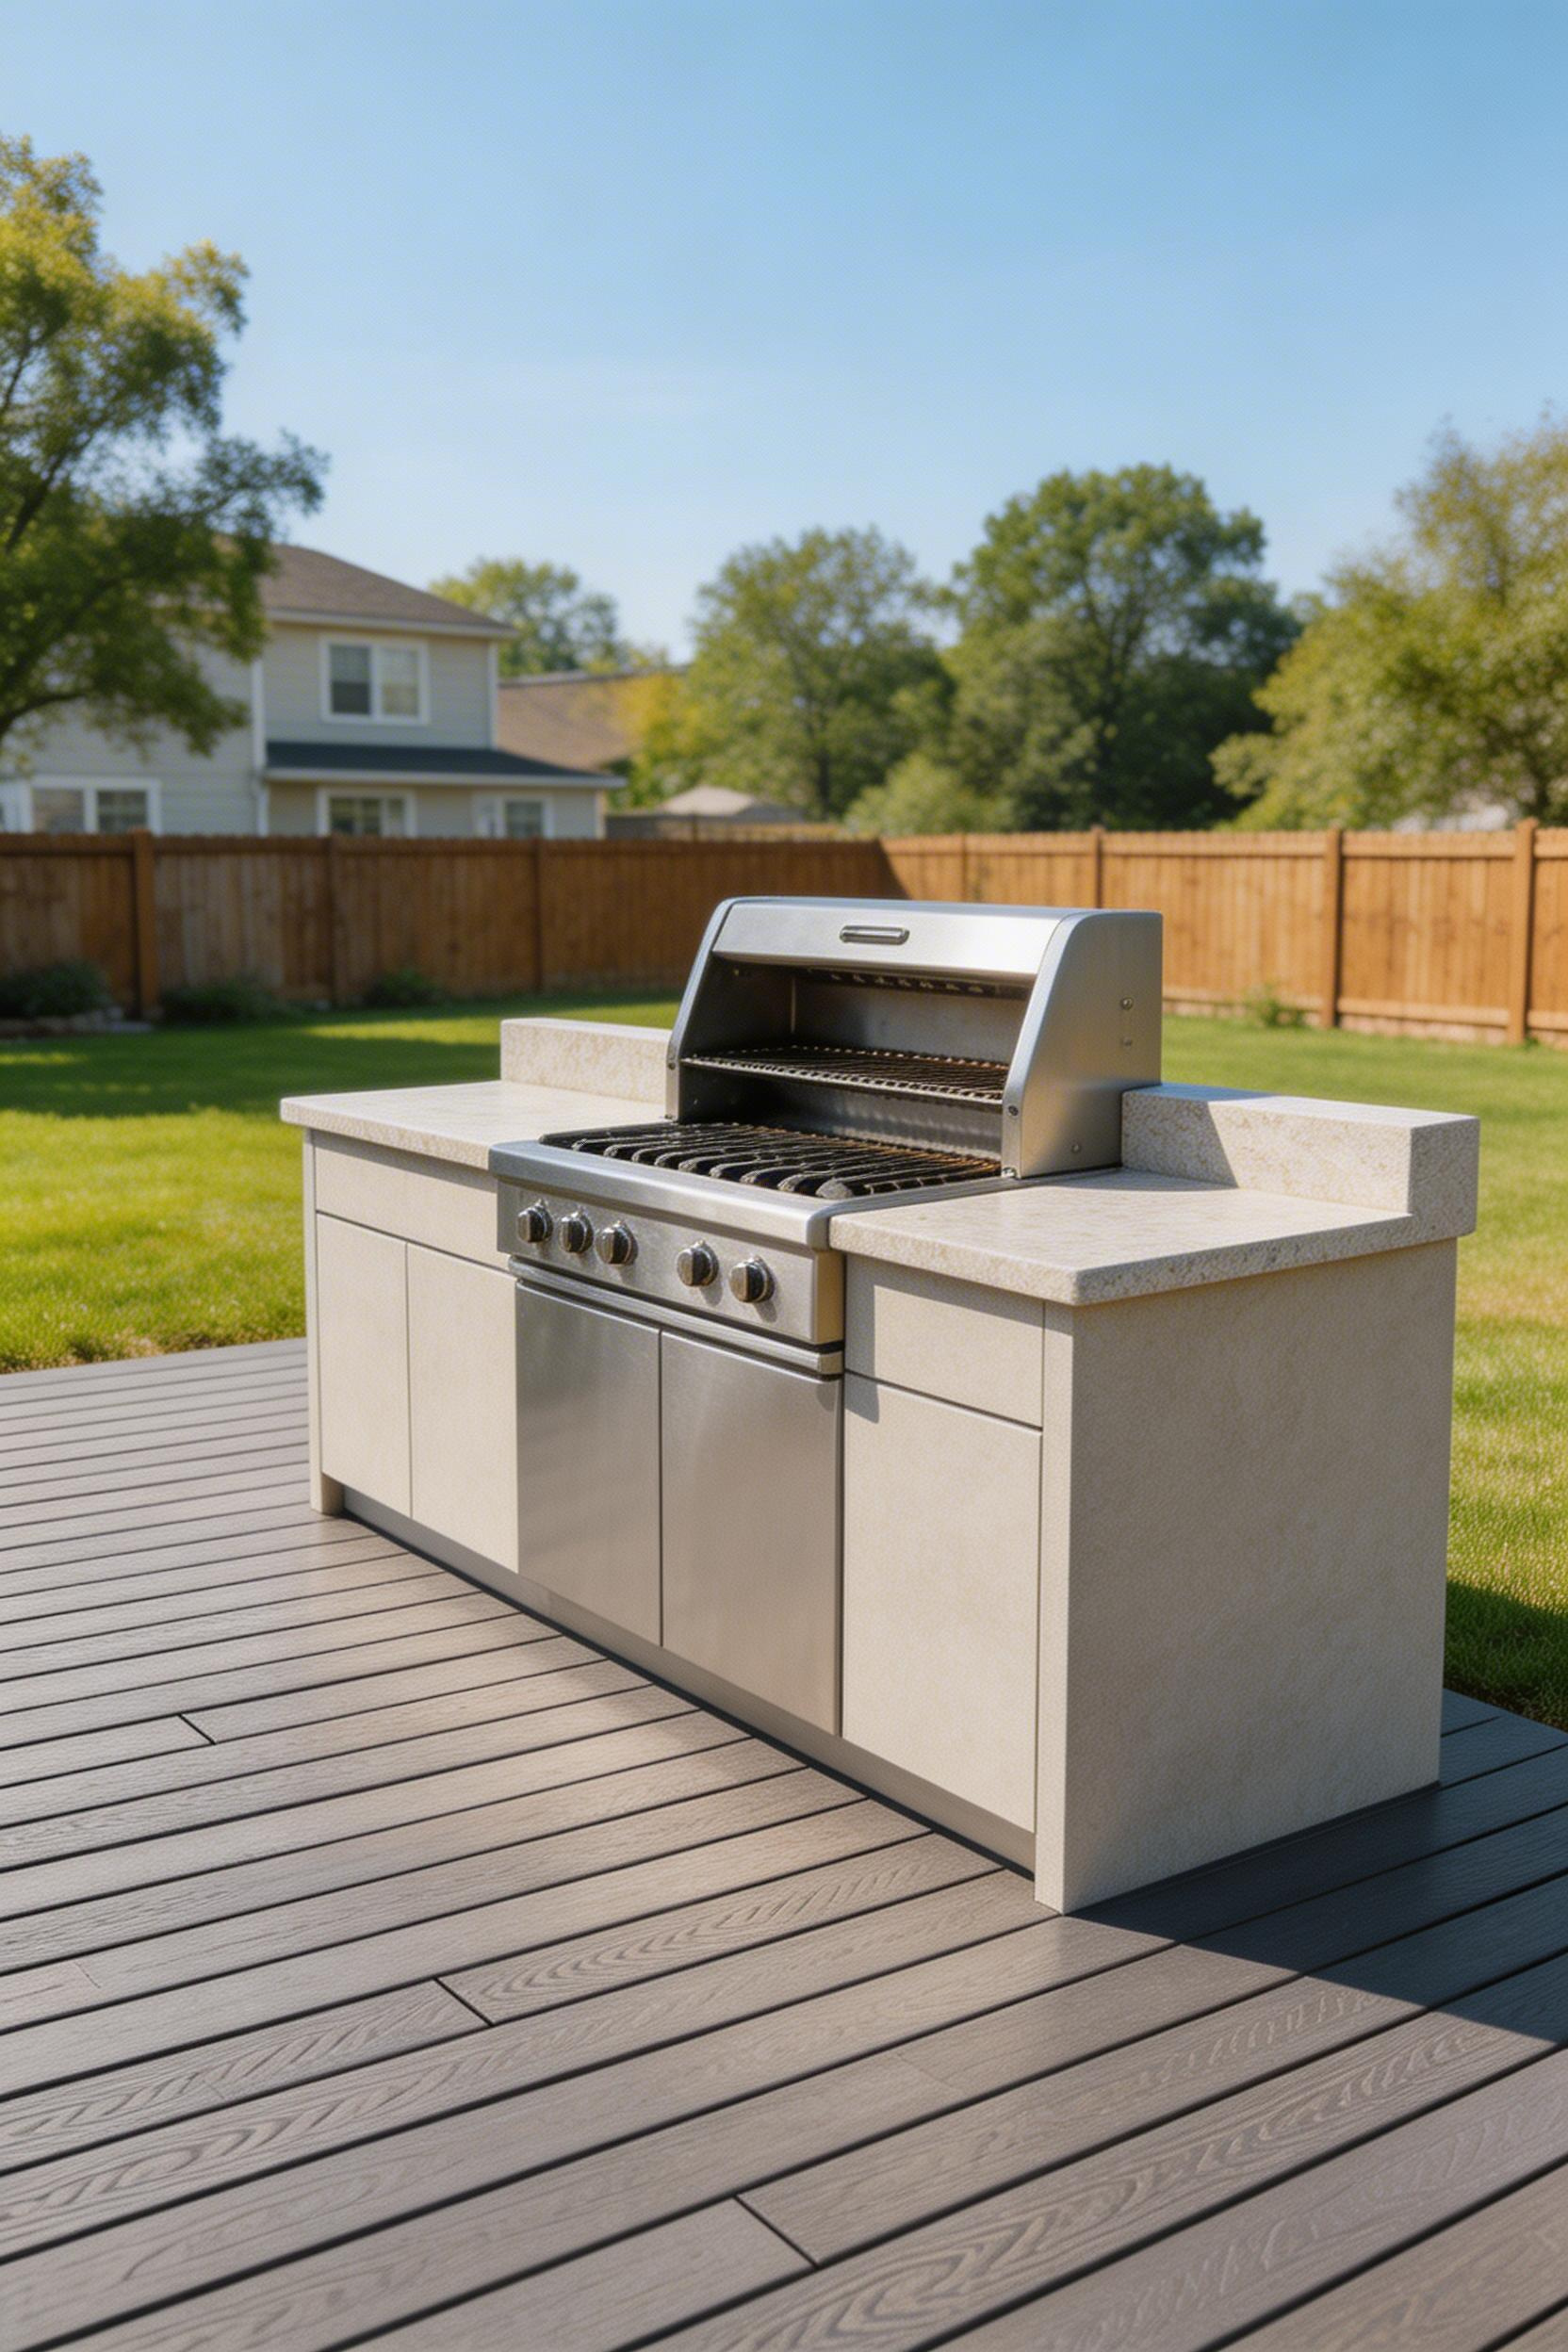
7. L-Shaped Outdoor Kitchen Layouts That Maximize Counter Space
The kitchen workflow triangle transfers to this setting with one key modification: the optimal perimeter shrinks from the indoor standard of 15 to 26 feet down to 12 to 18 feet. Outdoor cooking is less about multi-step preparation and more about grilling, assembling, and serving.
L-shaped layouts work best on patios of 200 square feet or more, with at least one 10-foot run and one 8-foot run. The grill should anchor one end of the L — not the corner. Corner grill placement creates clearance problems for the user and ventilation issues that push smoke in unpredictable directions. The sink belongs at the midpoint of the L, accessible from both counter runs.
Traffic Flow and Electrical Planning
Leave at least 42 inches of clearance between the outdoor kitchen counter face and any furniture or perimeter wall. Less than that, and the space becomes frustrating whenever multiple people are using the kitchen simultaneously. Which is exactly the scenario this space is designed for.
Electrical planning often gets postponed until late in the design process, which causes the most expensive change orders. GFCI outlets are required for all outdoor kitchen circuits per NEC Article 210.8. Refrigerators and specialty appliances need dedicated 20-amp circuits. Run gas line rough-in before the countertop goes down. Accessing a buried gas line after installation is expensive and disruptive.
Post-build surveys of outdoor kitchen patio owners consistently identify counter space as the feature they most wish they had expanded. The second most common regret is not including a sink. If the L-shape puts you over budget, a linear run with a sink is a better tradeoff than an L-shape without one. Cal Flame’s 10-foot L-Shape package at $4,299 gives a reasonable turnkey starting point. RTA Outdoor Living’s aluminum stud framing kits let you customize the layout at a lower material cost.
8. Outdoor-Rated Refrigerators Worth the Investment
The phrase “outdoor refrigerator” on a product listing can mean almost anything. This is a problem when you’re choosing an appliance that needs to operate reliably across ambient temperatures that range from 10°F in January to 105°F in August in many US climates.
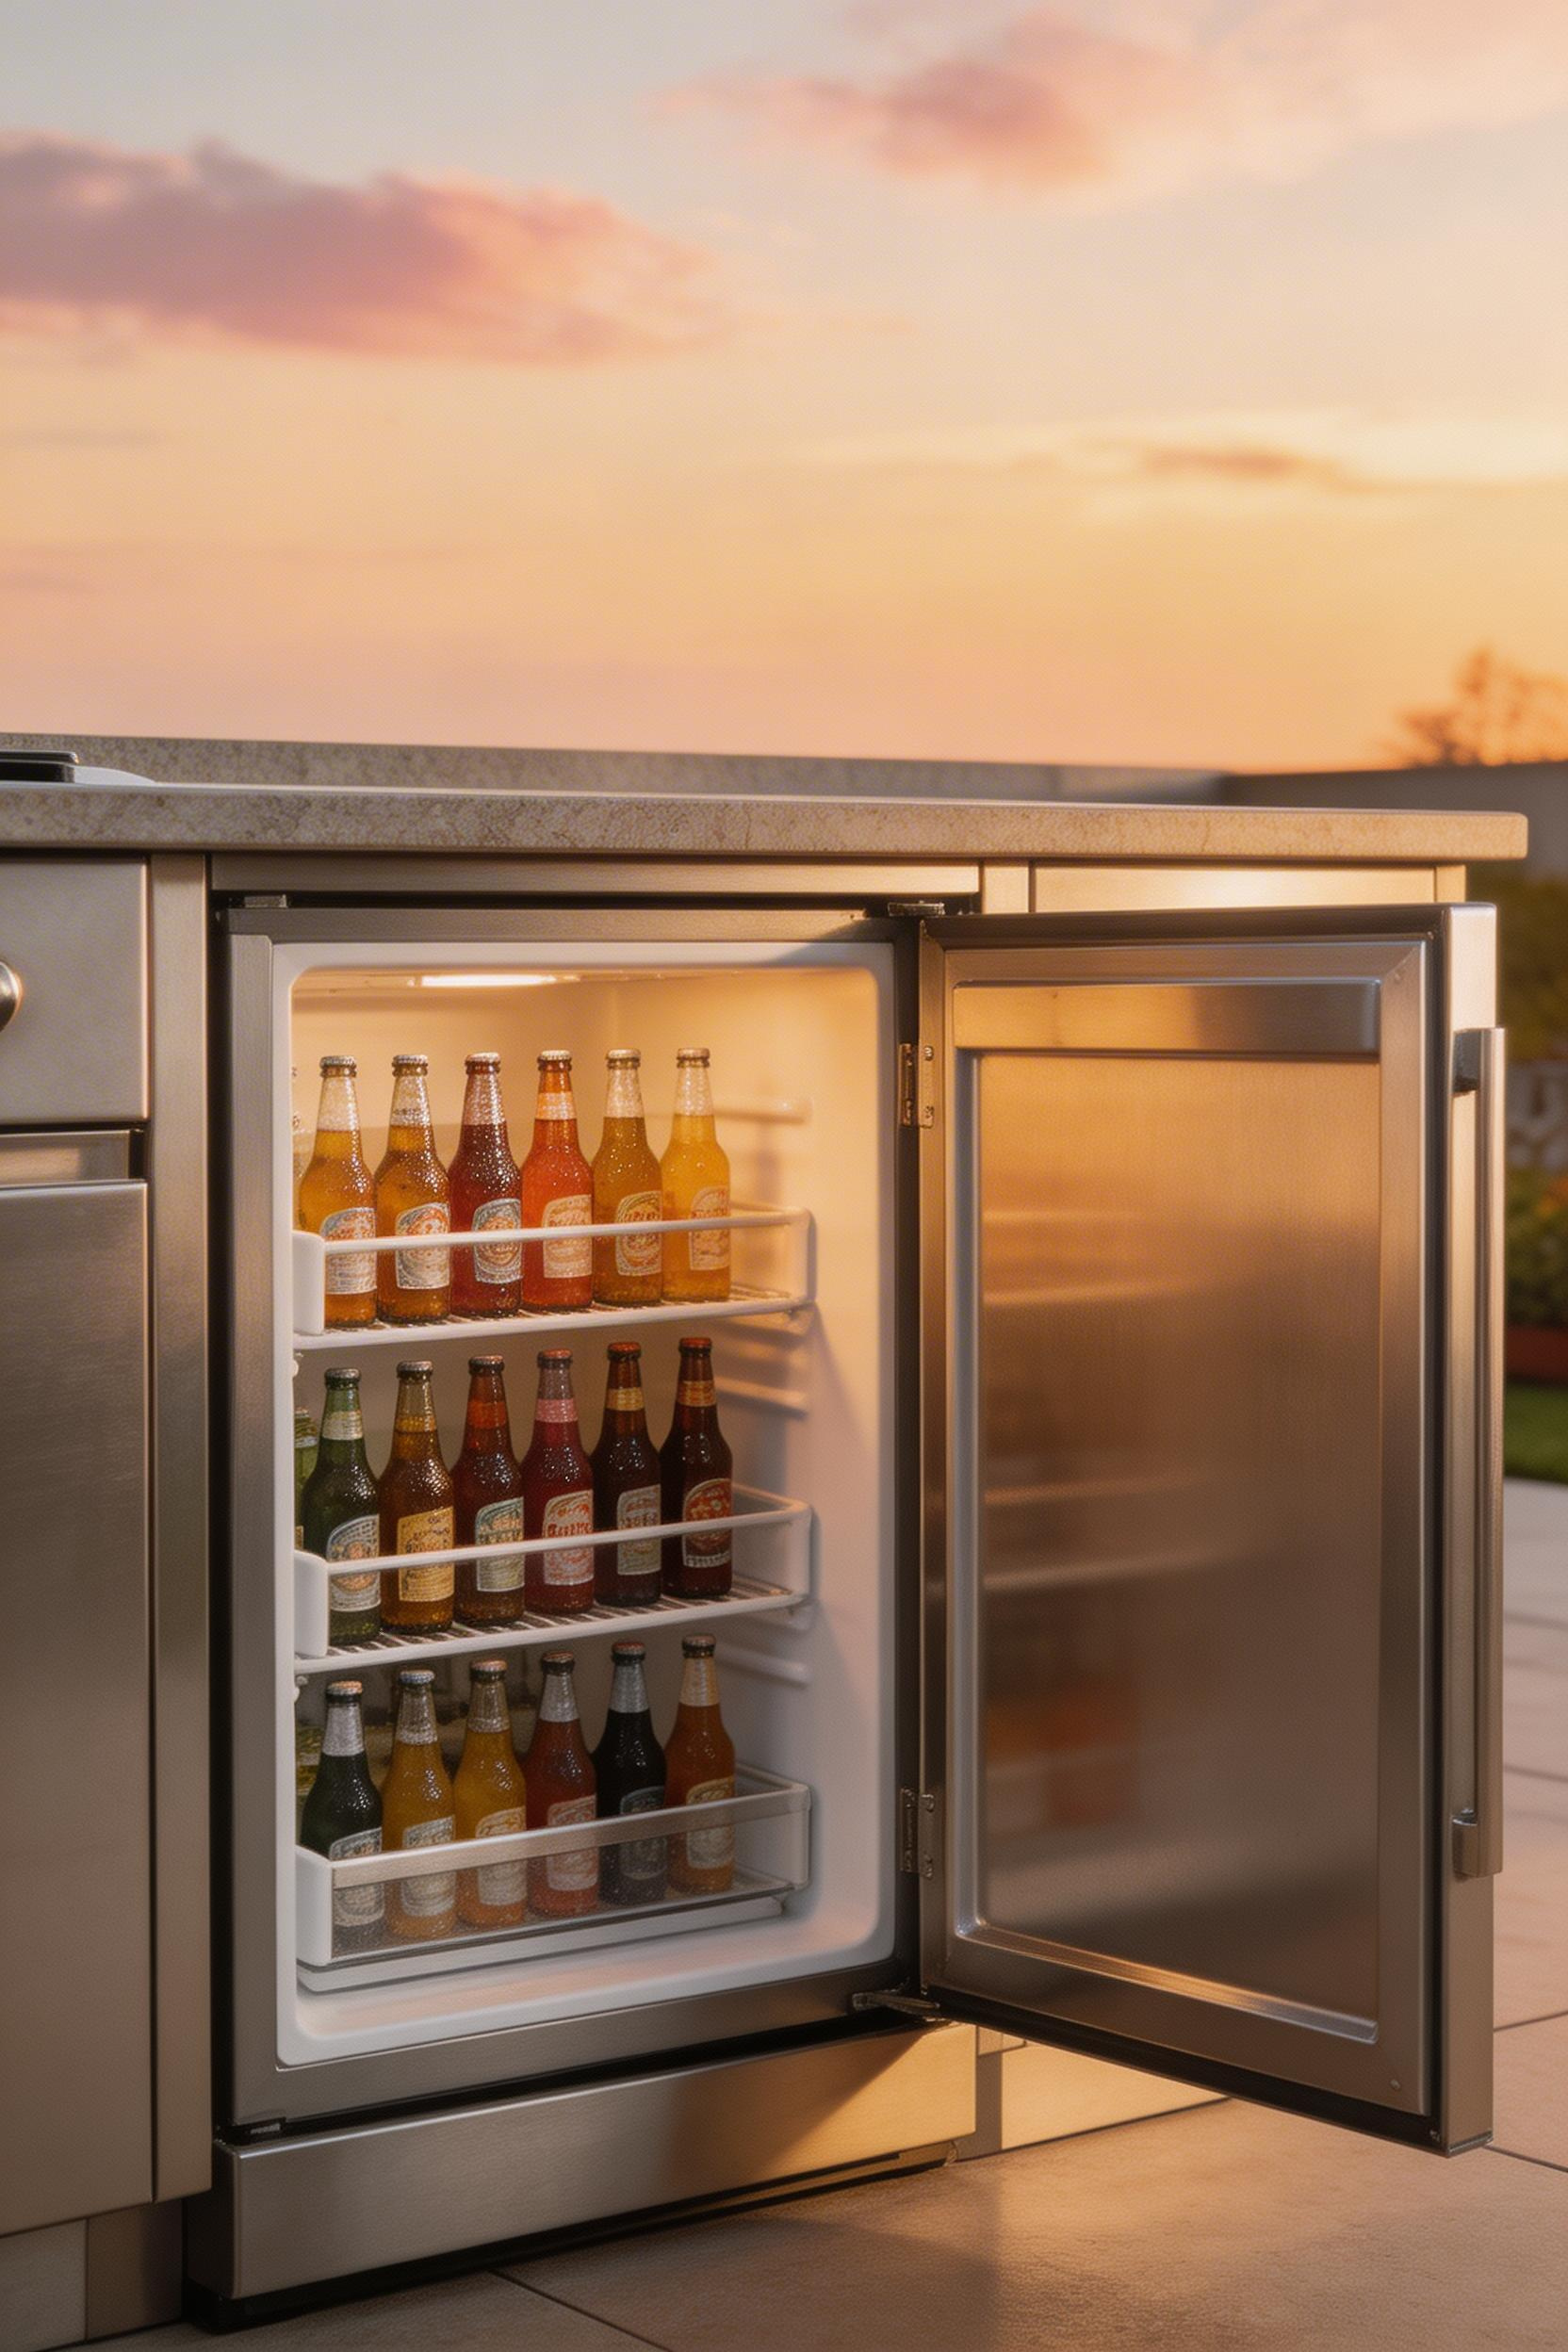
The certification to verify is UL 399. This requires the refrigerator to maintain safe food temperatures across an ambient range from 0°F to 110°F minimum. Indoor refrigerators are designed for a 60°F to 90°F ambient environment. Outside of that window, compressors overheat in summer or fail to run efficiently in winter. Consumer Reports testing found that four of nine refrigerators marketed as “outdoor” failed UL 399 standards in extreme temperature testing. Verify the certification on the specification sheet, not just the product listing.
The Best Outdoor Fridge Options
Perlick’s 24-inch Signature Series HP24RS at $1,099 is my benchmark recommendation: UL 399 certified, 5.2 cubic feet, rated to 120°F ambient, and American-made compressor with a 3-year parts warranty. Coyote’s C1RO24 at $799 is the strong mid-range choice. Same UL 399 certification, 5.3 cubic feet, and widely available from outdoor kitchen dealers. Lion’s 15-inch model at $449 is only suitable for a beverage-only setup in a smaller build.
In freeze-thaw climates, drain and power off outdoor refrigerators during sustained sub-zero periods. Even UL 399-rated units aren’t designed for weeks of sub-freezing ambient temperatures. I’ve seen people learn this with a $1,100 compressor replacement.
9. Granite vs. Quartzite for Outdoor Kitchen Countertops
The granite vs. quartzite debate for outdoor kitchen patio countertops is more than aesthetics. These are genuinely different rocks with different formation histories, and those differences produce measurable performance variations in outdoor conditions.
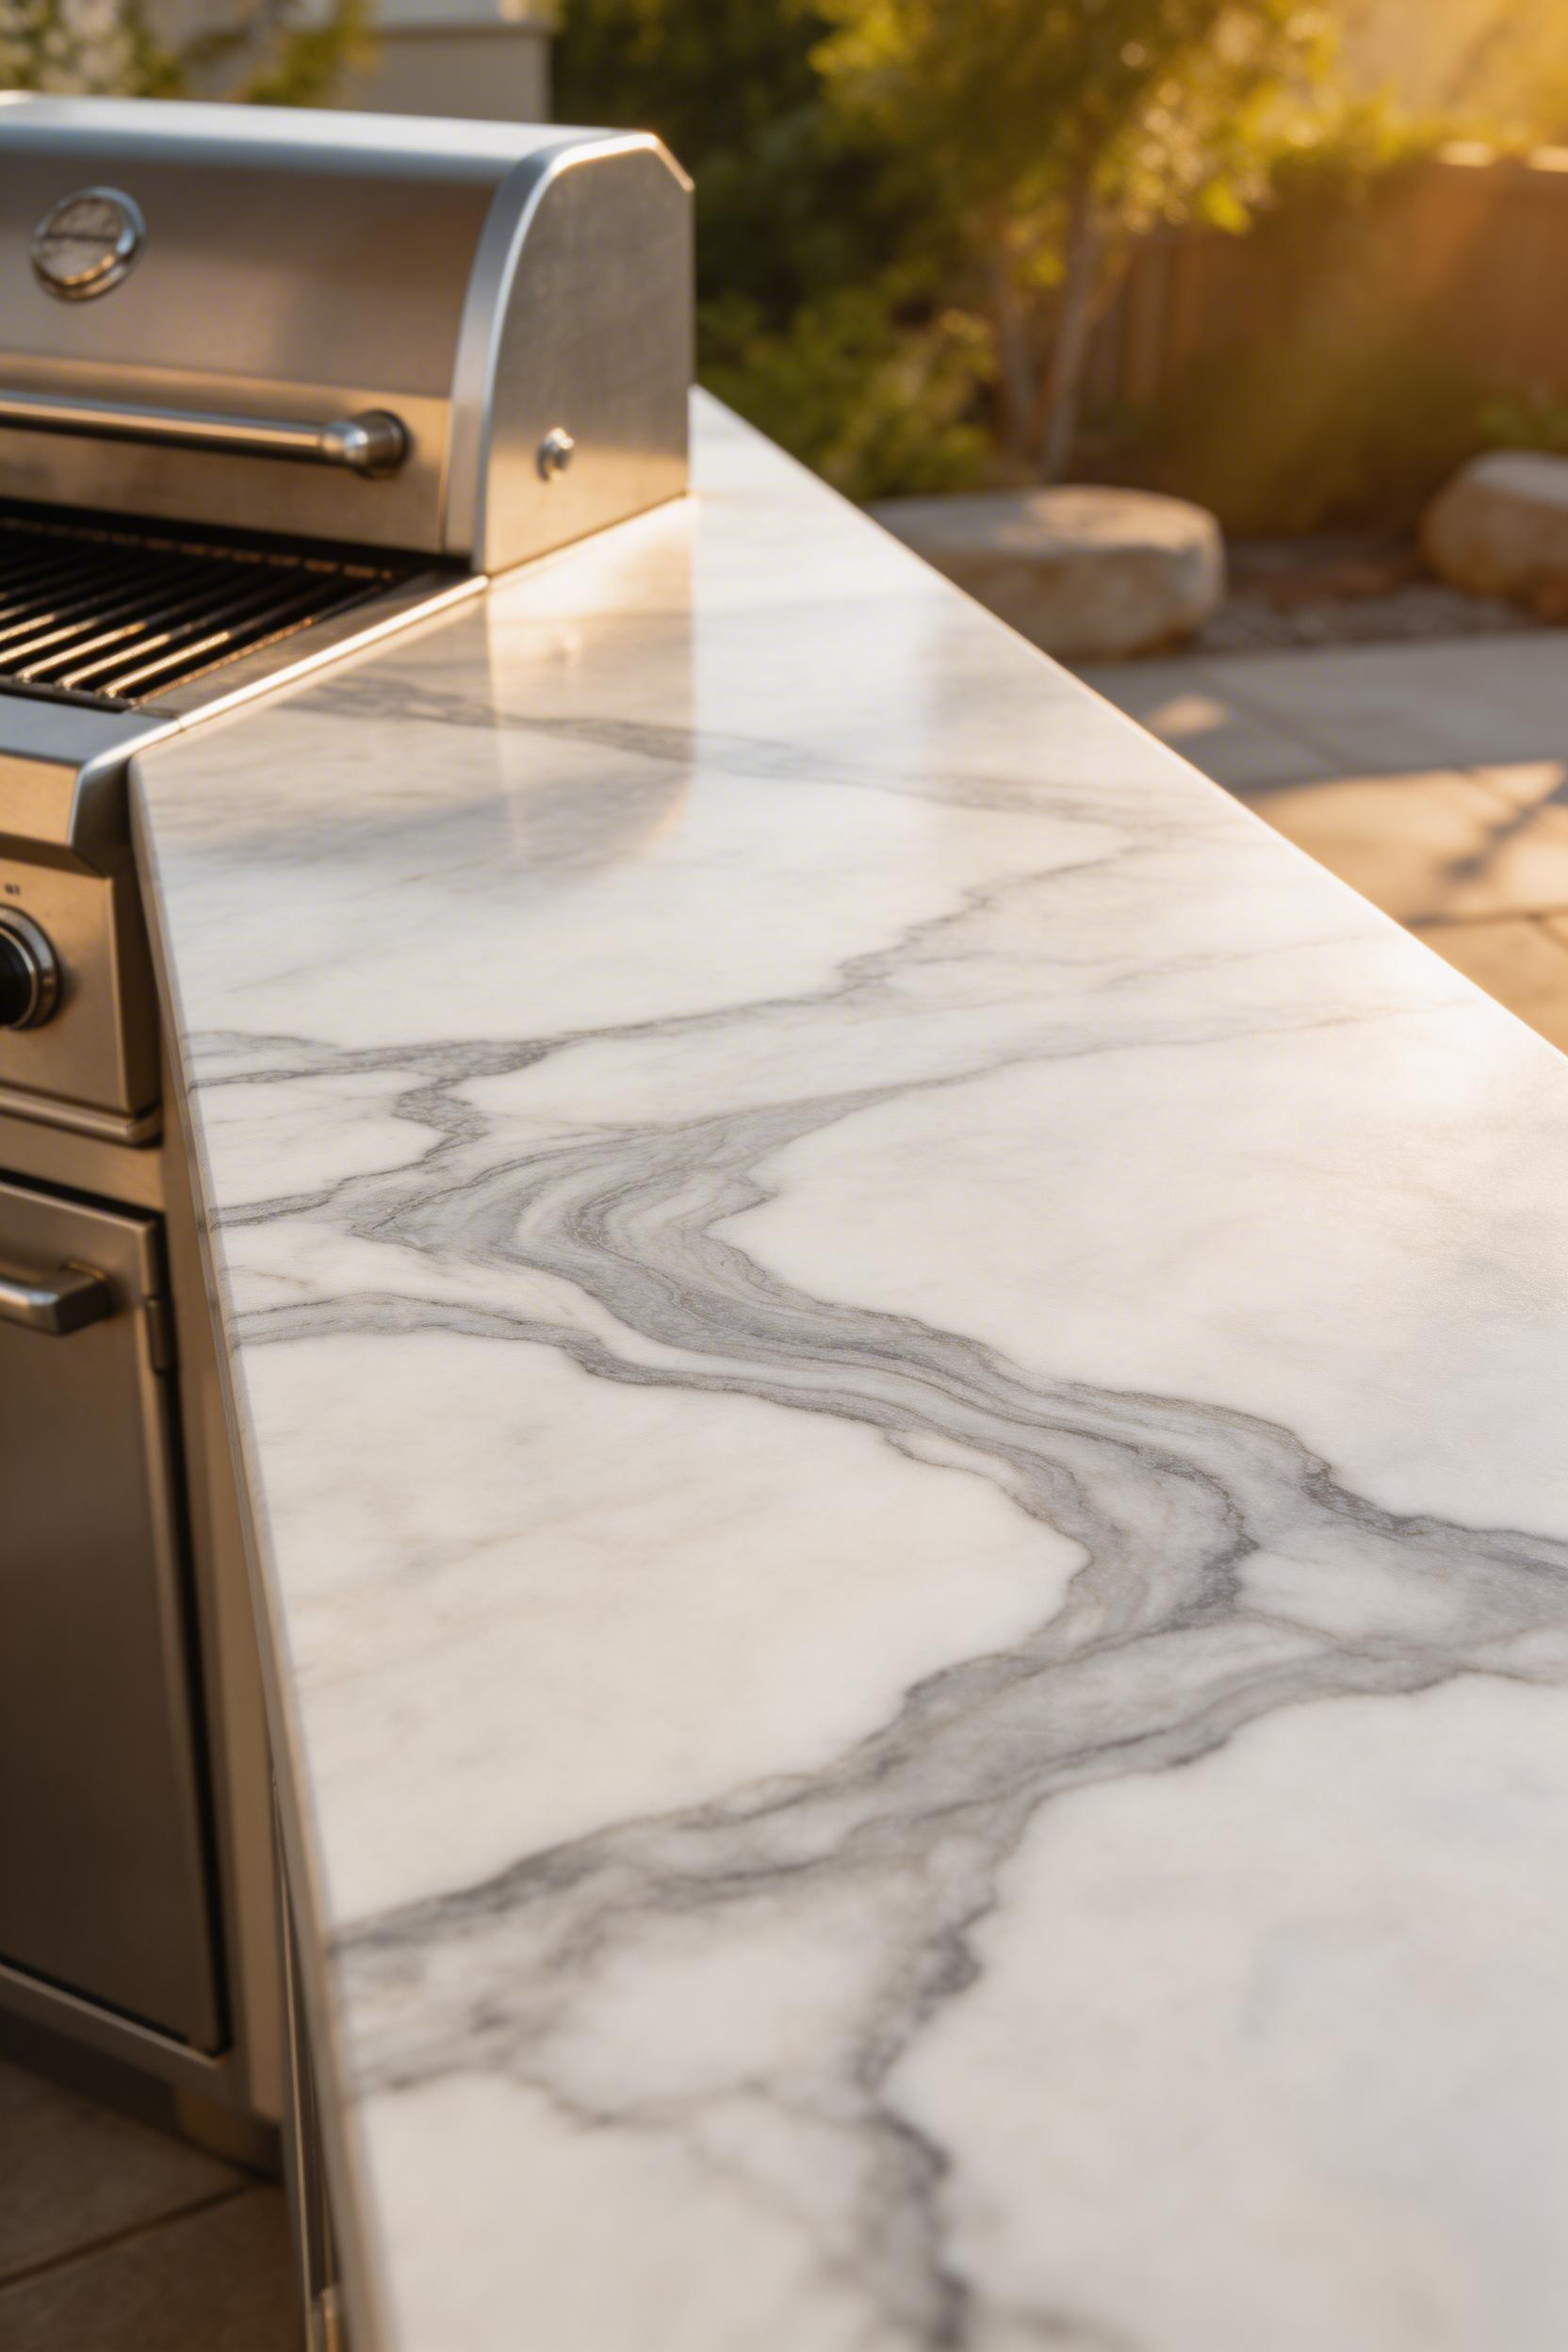
Granite is an igneous rock; quartzite is metamorphic, formed from sandstone under intense heat and pressure. Quartzite’s porosity — the percentage of void space that absorbs water, oil, and staining agents — runs 0.05 to 0.2 percent. Granite runs 0.2 to 0.4 percent. Both are low, but the difference matters outdoors where the counter is exposed to rain, cooking fat. Seasonal moisture cycles without the protection of an indoor environment.
UV Stability and the Quartzite Caveat
UV stability is where quartzite has a real advantage. Granite fades subtly over 10 to 20 years in direct sun. The feldspars that give it color are less UV-stable than the crystalline silica that dominates quartzite’s composition. For a west-facing installation in full afternoon sun for 6-plus hours daily, this difference is worth factoring in.
That said, many slabs sold as quartzite are actually marble — more porous and UV-reactive. The field test is simple: a dilute acid drop on a scrap piece. True quartzite won’t etch; marble will within 30 seconds.
Both stones require annual outdoor sealing with a penetrating impregnating sealer. Miracle Sealants 511 ($22 per quart) or StoneTech BulletProof ($35 per quart) are the professional standards. Neither changes the surface appearance; both are effective at 100 to 200 square feet per quart. A Marble Institute of America study found that outdoor stone countertops sealed at installation but never re-sealed showed significantly higher staining and surface erosion at five-year inspection. Those maintained on annual schedules performed far better. Re-sealing takes 20 minutes a year. Skip it, and the stone cost becomes a renovation cost within a decade.
Cost comparison: granite runs $40–$80 per square foot installed outdoors; quartzite runs $60–$120 per square foot. For a typical countertop of 30 to 50 square feet, the premium is noticeable but not prohibitive.
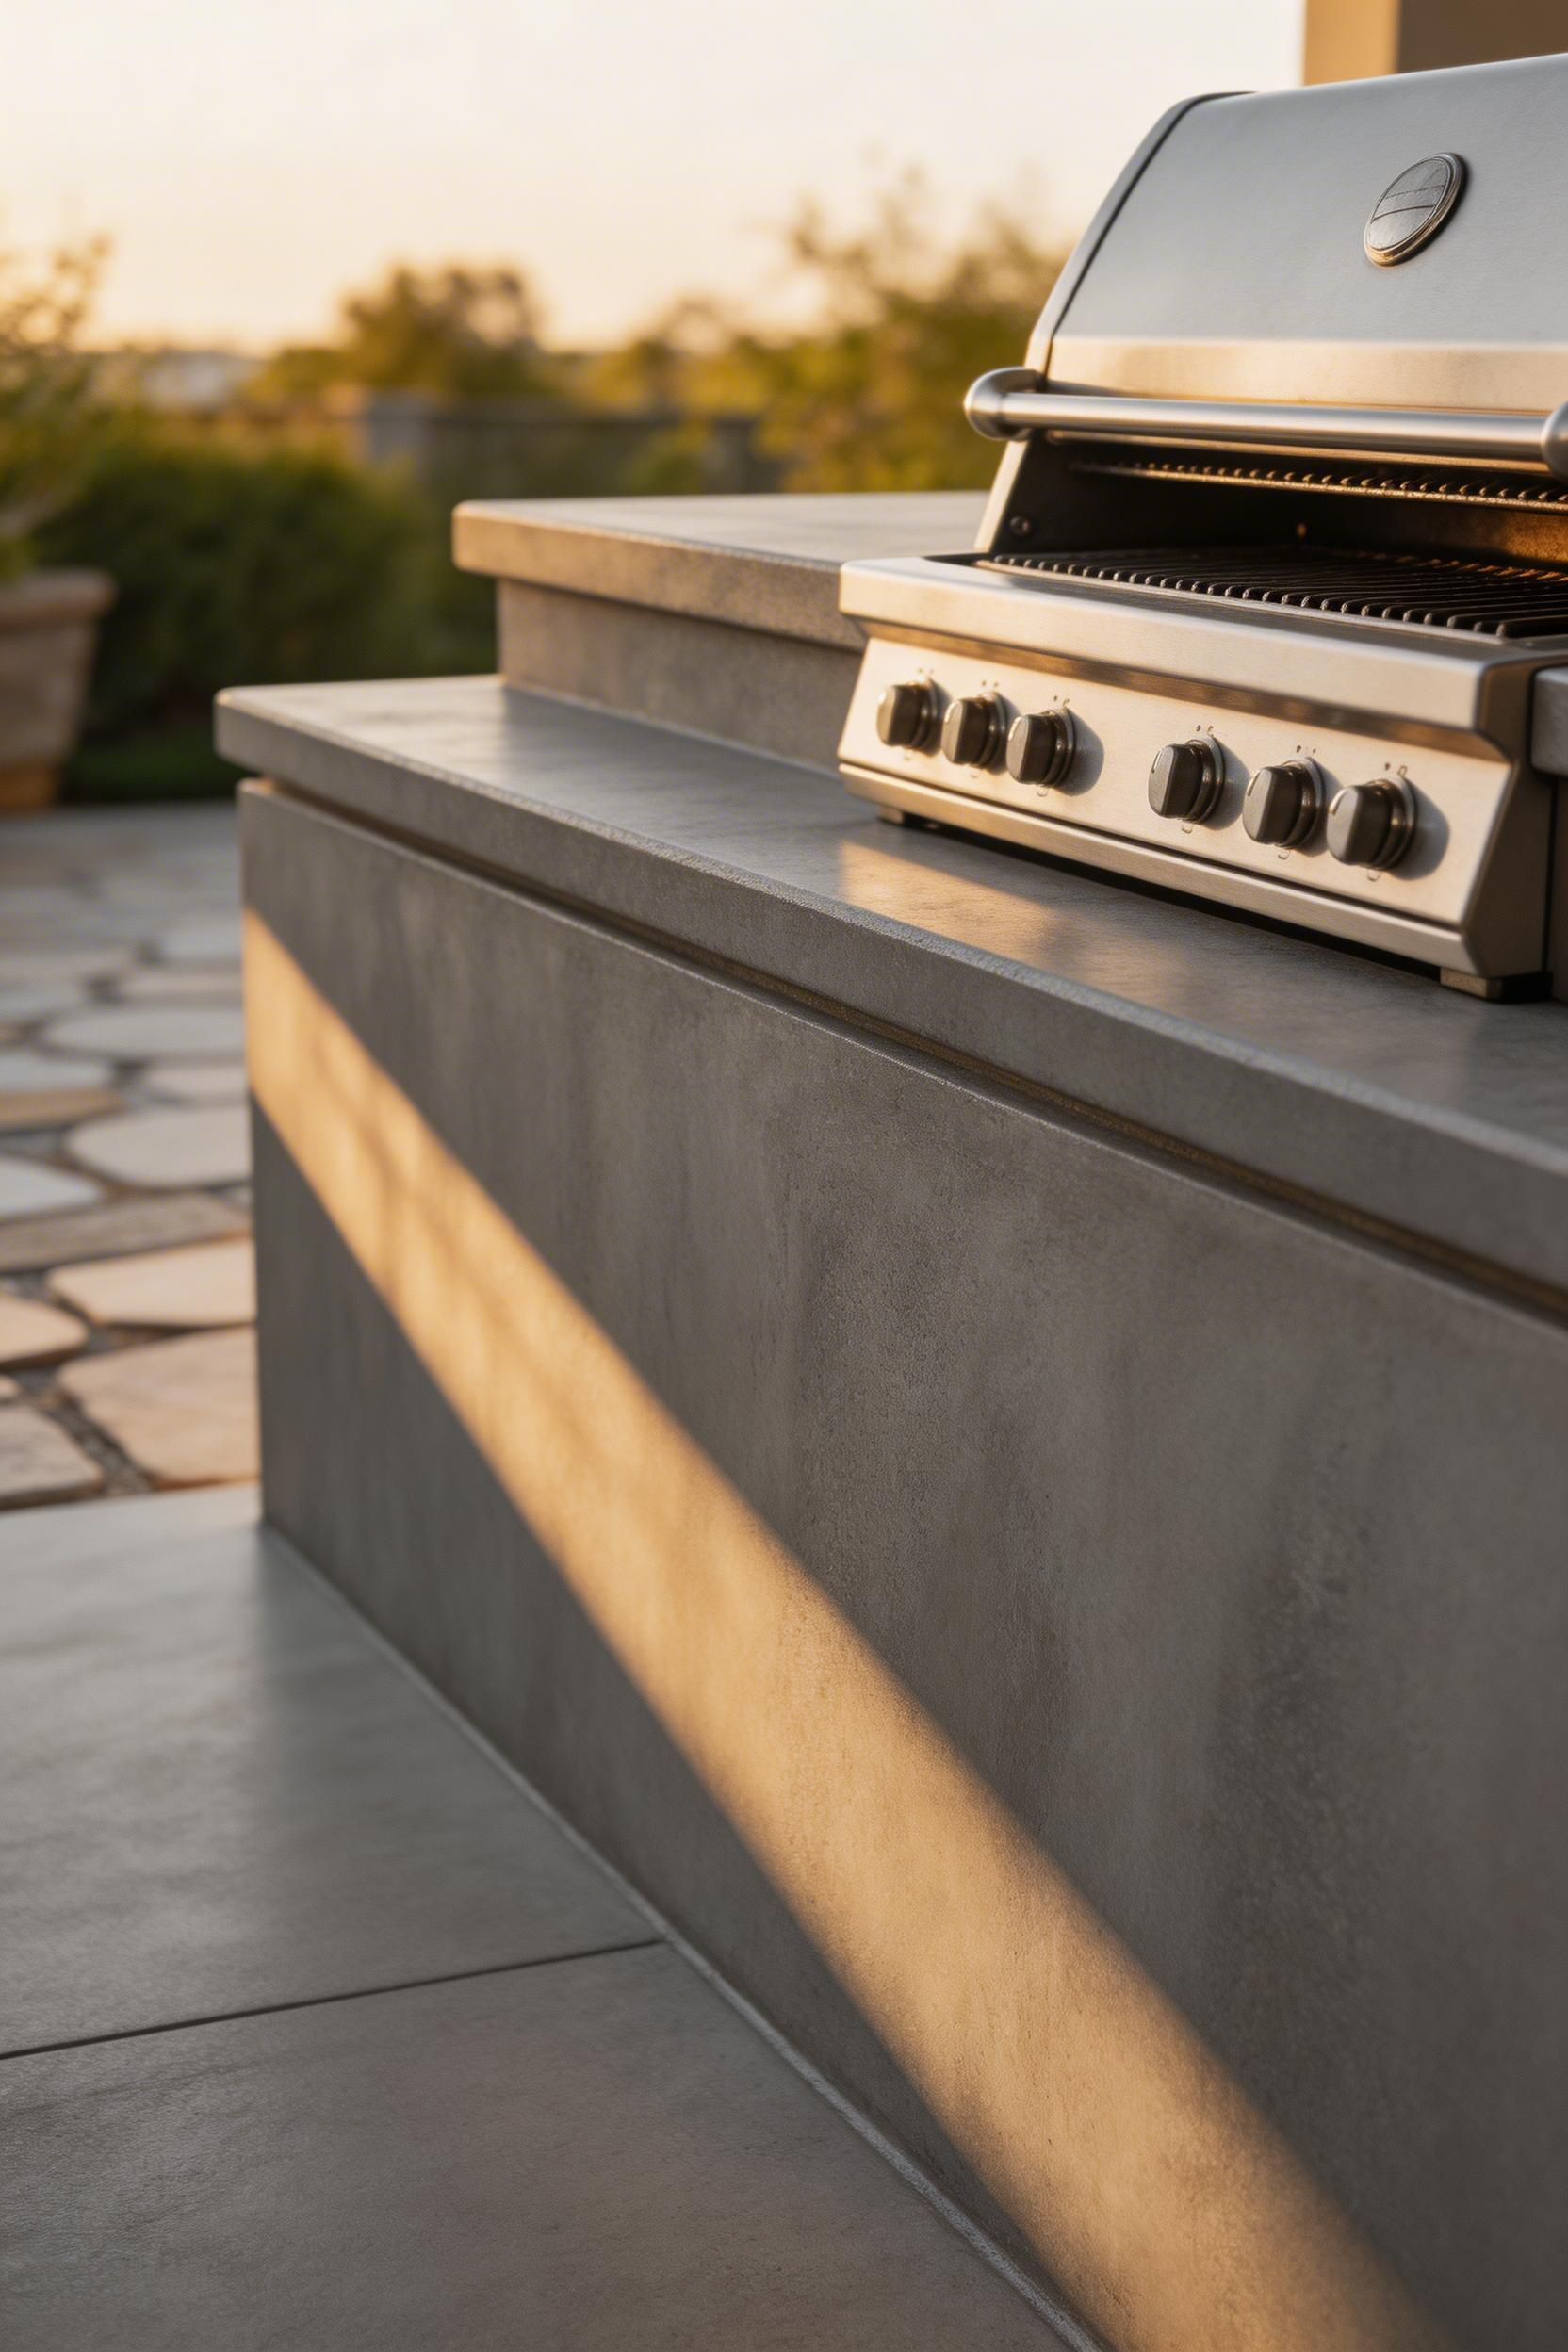
10. Gas vs. Charcoal vs. Pellet Grills in a Fixed Outdoor Kitchen
In a permanent outdoor kitchen patio build, the grill choice becomes a structural decision, not just a cooking preference. The framing, ventilation, utility connections, and clearance requirements all change depending on which fuel type you choose.
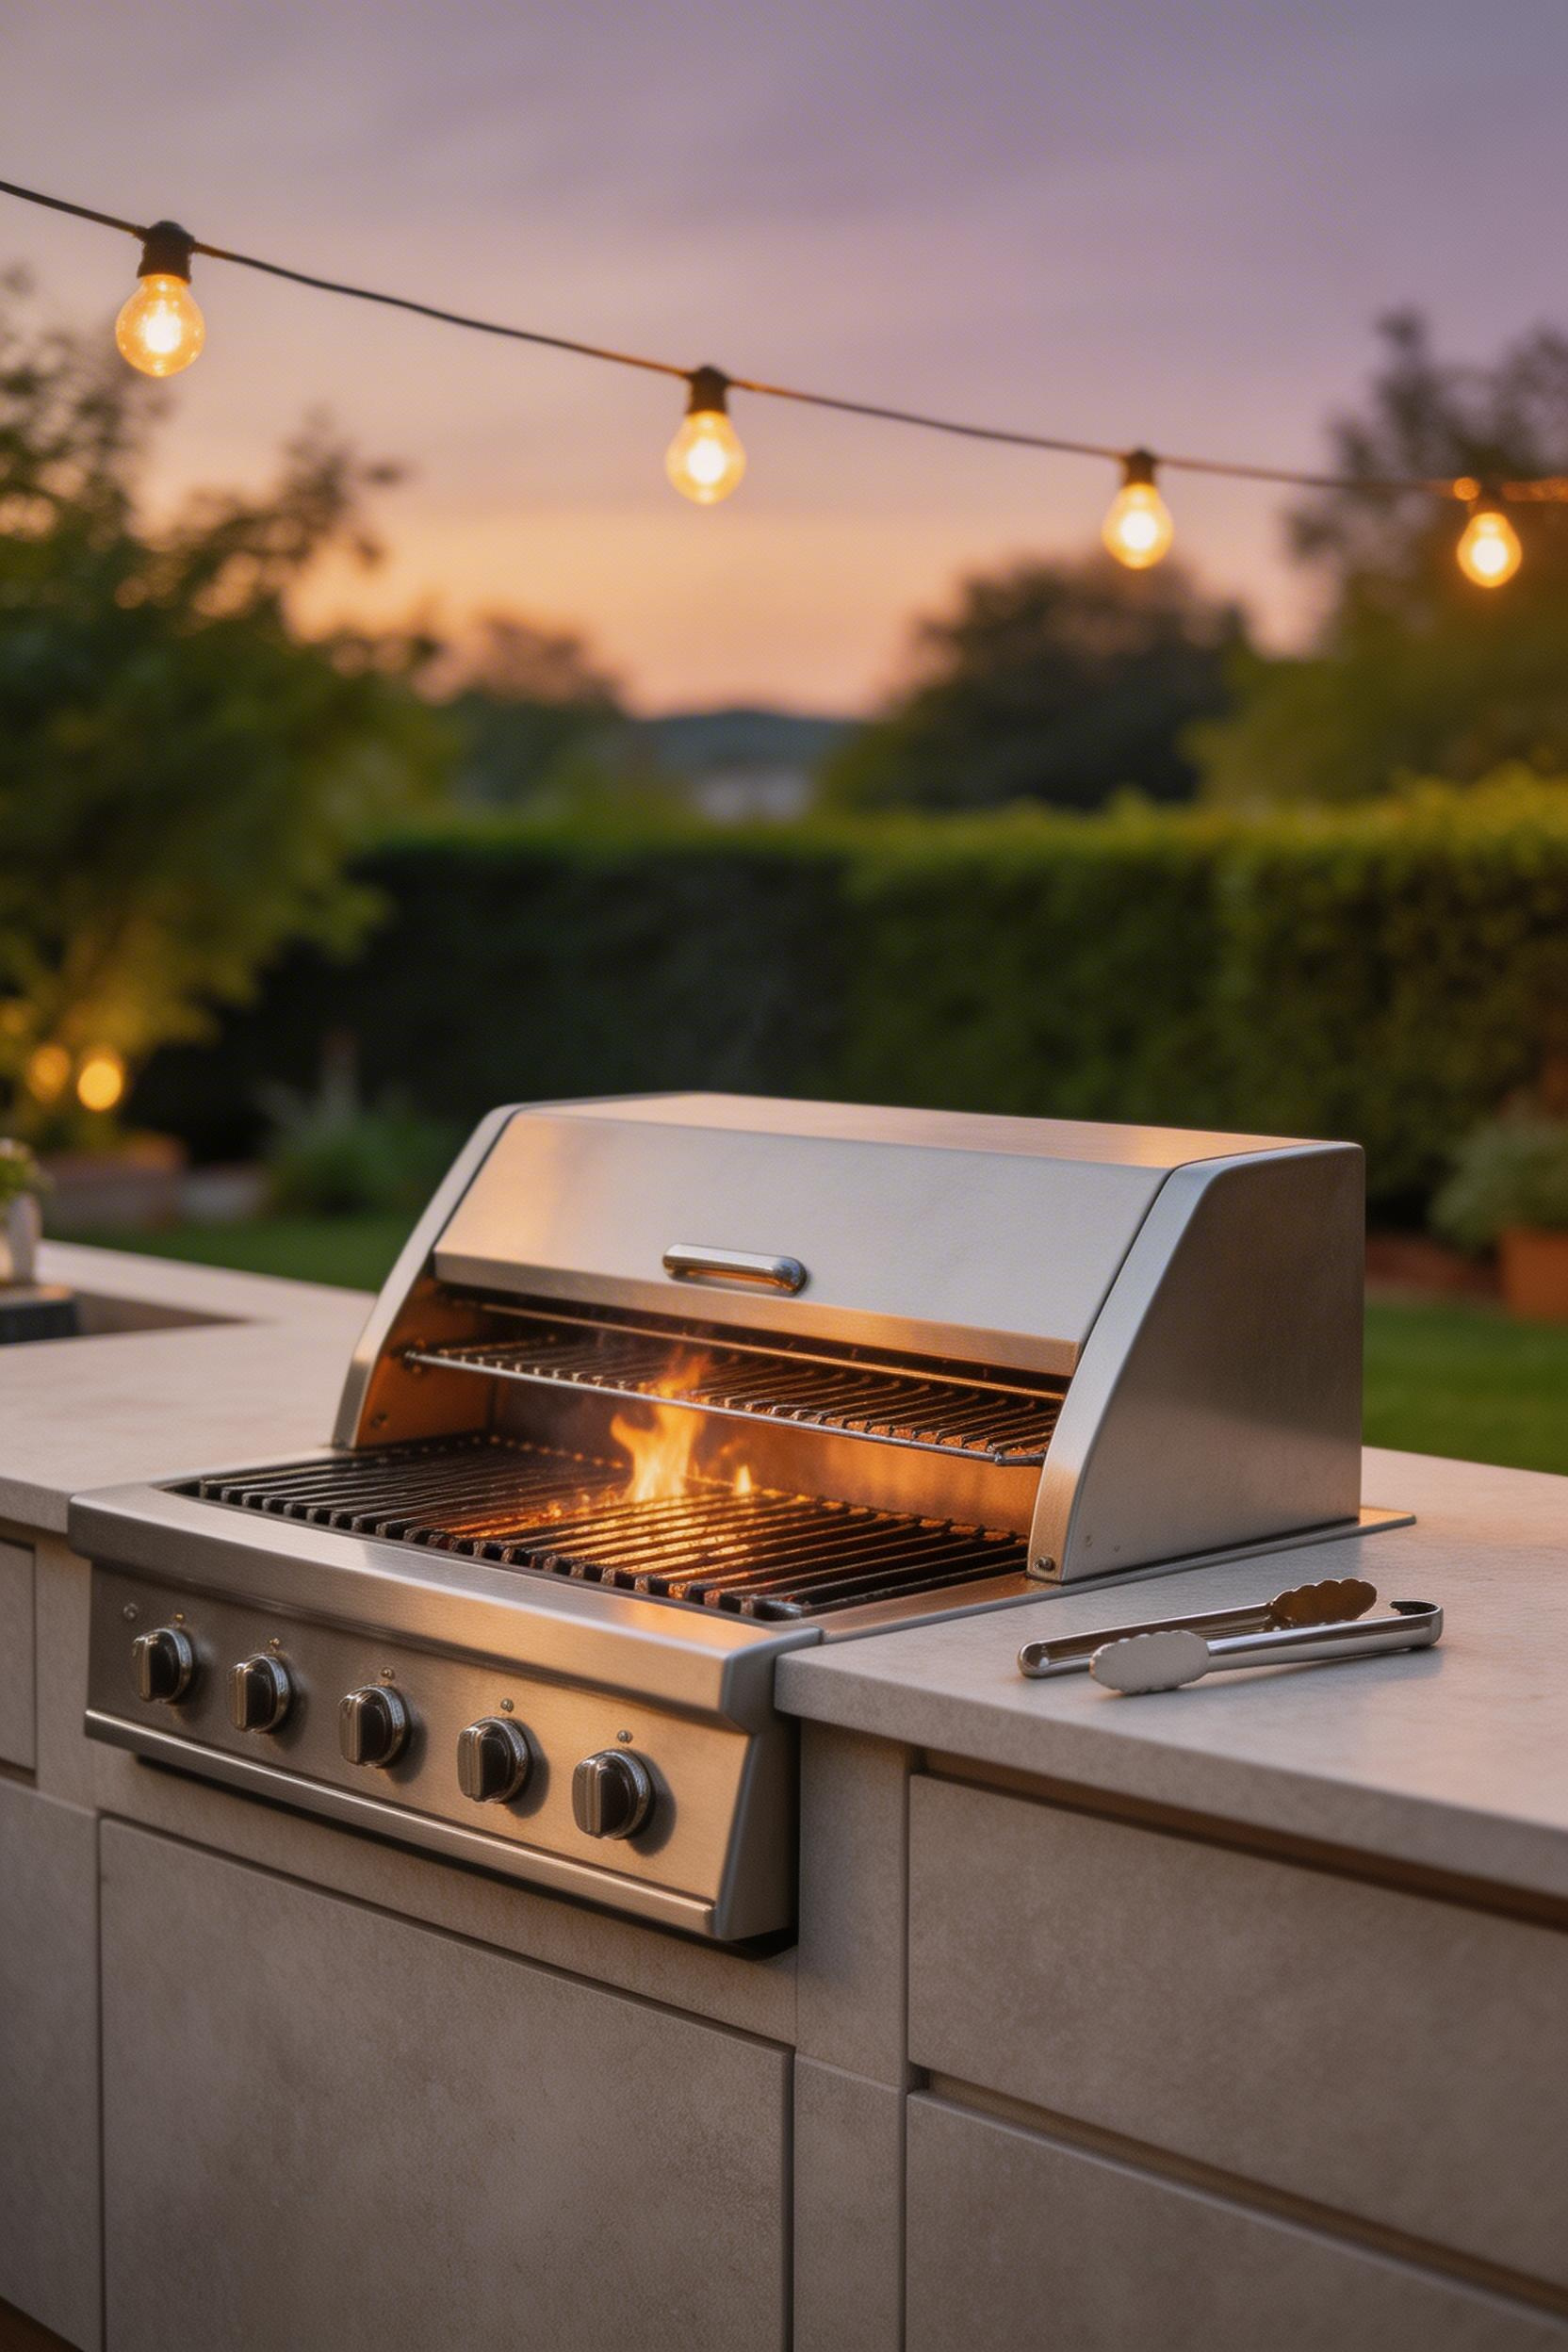
Gas grills are the dominant choice for permanent builds. HPBA data shows 78 percent of professional outdoor kitchen patio installations specify gas, and the reasons are practical. A gas grill drops into an enclosed island cabinet with relatively simple ventilation requirements: one square inch of ventilation per 100 BTU is the standard. Gas connections are a fixed shutoff valve and a flexible stainless connector, and the fuel supply is continuous.
What Each Fuel Type Requires
Charcoal grills produce heavier smoke that discolors surrounding stone and steel over time. Ash management also becomes an inconvenience in a permanently finished outdoor kitchen. The cooking experience is excellent; the maintenance cycle is less so.
Pellet grills are genuinely excellent for low-and-slow cooking and deserve more credit than they get. But a pellet grill requires a 110V electrical connection and produces combustion byproducts that need active ventilation. Both of which complicate a fully enclosed cabinet installation. Building a proper alcove with exhaust venting for a pellet grill adds $400 to $800 to the project, which narrows the cost advantage vs. gas.
For a permanent build, the Blaze 32-inch 4-Burner Built-In at $979 is the best value in its class. 55,000 BTU, 304 stainless construction, and cast stainless grates that hold heat well. Weber’s Summit S-660 Built-In at $3,499 is the premium benchmark with a 10-year warranty. If you’re grilling three or more times a week, gas wins on every practical dimension. Weekend-only use makes charcoal a legitimate choice.
Also consider your outdoor kitchen design layout before finalizing the fuel choice. Some configurations suit gas line routing better than others.
11. Waterproof Outdoor Kitchen Lighting That Survives the Elements
Outdoor kitchen lighting is one of the most under-specified elements of almost every patio design. Decorative string lights provide one to five foot-candles. The Illuminating Engineering Society recommends a minimum of 30 foot-candles for outdoor cooking task areas — a gap that leaves most patios too dark to cook in after sunset.
The IP rating system is how fixture waterproofing is measured. IP65 means the fixture is protected against low-pressure water jets from any direction — appropriate for covered outdoor kitchen patios. IP67 indicates the fixture can withstand temporary immersion to one meter for 30 minutes. The better spec for uncovered or partially covered spaces where rain can hit directly. IP68 is genuine submersion protection, useful in landscape applications but overkill for most contexts here.
Three Zones of Outdoor Kitchen Lighting
Task lighting over the grill and prep areas needs to deliver 50-plus foot-candles at the work surface. The most effective and budget-friendly way to achieve this is IP65-rated LED strip lights mounted under pergola beams or shelving directly over the work area. LEDMO’s 16-foot IP65 roll at $28 is a reasonable starting point, though it requires a weatherproof channel cover for long-term outdoor durability.
Ambient lighting sets the mood for the dining and seating area. Kichler’s Landscape LED Deck Light 2-pack at $89 (IP67) mounts to pergola beams and provides soft 3000K light. Avoid color temperatures above 4000K — too clinical for outdoor settings.
Specify dimmer-compatible LED fixtures throughout. The ability to step down from work brightness to dinner ambiance without getting up changes the feel of the space after dark.
For broader backyard lighting coverage beyond the kitchen zone, layered landscape lighting tied into the same control system creates a cohesive outdoor room.
12. Outdoor Kitchen Patio Screens for Wind, Privacy, and Bug Control
Most homeowners who add screens to this space expect bug control to be the primary benefit. Most of them are surprised to discover that wind control turns out to matter more in practice. Screens dramatically extend comfortable outdoor cooking weather at the shoulder seasons. When temperatures are right for outdoor living but a steady 15-mph breeze makes it unpleasant. And they block smoke from drifting into the seating area when wind direction is inconvenient.
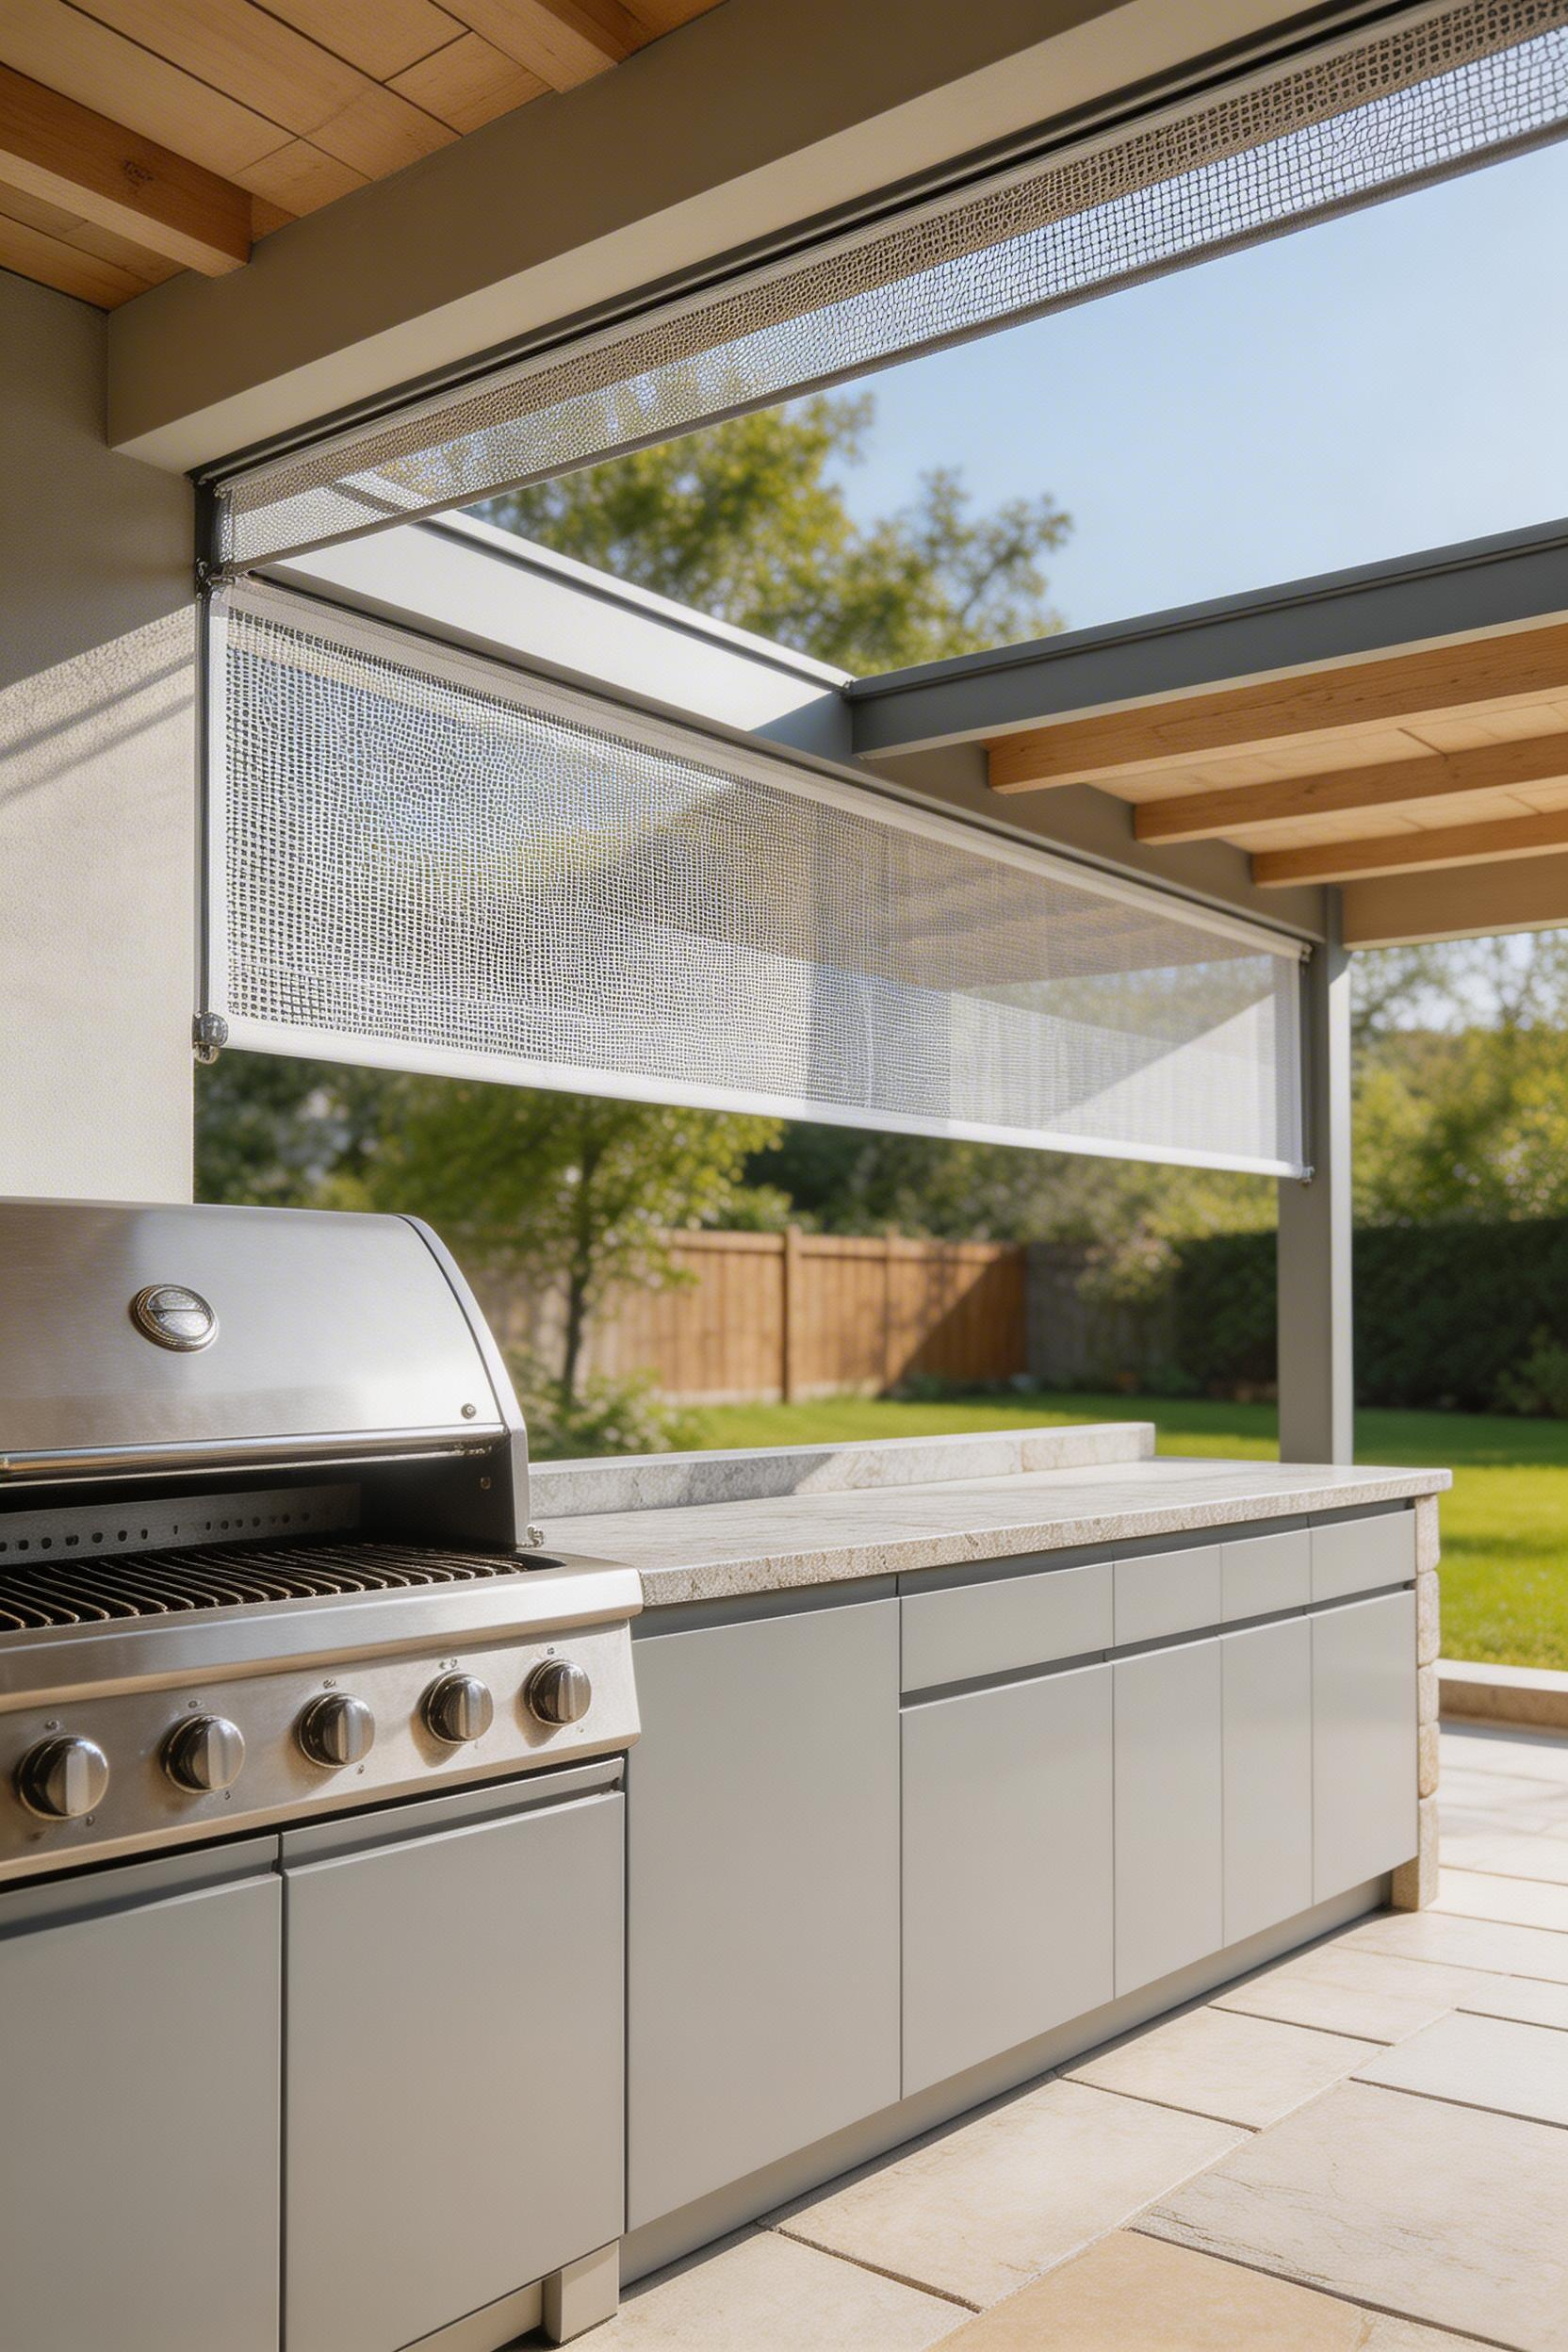
Motorized retractable screen systems give the most flexibility: open for the full outdoor feel, closed when wind or bugs become a problem. Phantom Screens is the industry leader at $2,500 to $5,000 per opening installed. Screen mesh density matters for pest control: 18×16 mesh handles most flying insects. 20×20 or finer is required to stop no-see-ums in coastal and tropical areas.
Polycarbonate windbreaks — 6mm panels in aluminum framing — are effective for wind control without blocking views, particularly near grill stations where steady wind affects flame stability. DIY panels using Lexan/TUFFAK polycarbonate sheet at $89 per 4×8 sheet are far cheaper than custom systems.
The Fan Alternative
Here’s the approach most screen salespeople won’t tell you: a strong outdoor ceiling fan rated for covered outdoor use is as effective as fine mesh screening at deterring flying insects. Bugs simply can’t navigate airflow above 6 to 8 miles per hour. A A Big Ass Fans Haiku L Series Outdoor at $1,199 reduces apparent temperature by 8–10°F through wind-chill effect and clears smoke from the cooking area. A National Pest Management Association study found active air circulation reduced biting insect complaints by 70 percent.
Fixed cedar privacy screen panels at $400 to $1,200 per 8-foot section solve privacy and some wind issues without any mechanical components. The right choice when the bug problem isn’t severe and visual separation from neighbors is the main goal.
13. Stamped Concrete Patios Around Outdoor Kitchens
Stamped concrete is the highest-risk, highest-reward surface choice for this type of project. When it’s specified and installed correctly, it provides a seamless, beautiful surface that can closely replicate natural stone at half the cost. When it’s done poorly — wrong mix design, missing control joints, early sealing — it cracks, fades, and peels within two years.
The mix design is the foundation of durability. Concrete slump at pour should be 4 to 5 inches. Wetter than that creates a weaker, more porous surface that absorbs staining and breaks down faster. Minimum slab thickness outdoors is 4 inches; 5 inches is the standard in freeze-thaw climates. Reinforcement with 3/8-inch rebar on an 18-inch grid is preferred over fiber mesh alone when the slab will support a heavy outdoor kitchen structure.
Control joints are the most preventable failure point. The American Society of Concrete Contractors estimates that 35 percent of stamped concrete failures in outdoor applications are directly attributable to inadequate or absent control joint placement. Place them every 8 to 10 feet in both directions, and at the perimeter of the outdoor kitchen footprint specifically. That structural edge is a stress concentration point.
Sealer Type and Reapplication Schedule
Color in stamped concrete comes from two sources: iron oxide pigment integral to the mix (holds through the full depth) or surface-applied color hardener (wears from the top over 5 to 8 years). Integral color is the more durable choice.
Avoid topcoat acrylic sealers on stamped concrete — they become slippery when wet and peel under heavy use. A penetrating sealer like Ghostshield Siloxa-Tek 8500 ($78/gallon) protects the concrete matrix without changing slip characteristics. Reapply every one to three years.
The first year after installation is the highest-risk period. Grease from the grill penetrates unsealed concrete almost immediately. Apply sealer before you cook on the adjacent surface for the first time. And keep a quart of the same product on hand for spot application after any heavy cleaning.
14. Outdoor Kitchen Storage That Survives Humidity and UV
Humidity does more damage to outdoor kitchen patio storage than any other variable — including rain. A cabinet that stays dry in a downpour can still corrode from the inside out in a climate with sustained 80-plus percent relative humidity. Even 304 stainless steel will show surface oxidation in these conditions over time. Standard indoor hardware fails within one to two seasons.
HDPE shelving inside outdoor kitchen cabinets is far superior to MDF, particle board, or even plywood. It doesn’t absorb moisture, won’t support mold growth, and is stable across the temperature range the space experiences. Typically from 0°F winter nights to 140°F sun-heated cabinet interiors in summer. Cut HDPE sheet to size at about $45 per 24×48-inch panel and you have shelving that will last longer than the cabinet structure around it.
Standard zinc-coated drawer slides corrode in one to two outdoor seasons. Accuride’s 3834 Stainless Steel Full Extension slides at $89 per pair are 316 stainless with soft-close dampeners — the right specification. Replace magnetic door catches with stainless barrel catches; magnetic housings corrode quickly.
Pest and Moisture Entry Points
Seal every cabinet penetration — gas lines, electrical conduit, drain lines — with fire-rated silicone caulk. These openings are the primary entry points for insects and rodents into cabinetry, and they’re almost always overlooked.
A semi-annual inspection — checking slides, door seals, and wipe-down of stainless surfaces — takes ten minutes and prevents expensive premature replacement. A study by Outdoors by Design found that 60 percent of outdoor kitchen cabinets in humid climates showed hardware degradation after three years with indoor hardware. Marine-grade hardware drops that to under 10 percent.
Consider pairing your build with complementary patio decorating ideas that extend the design language from the kitchen structure into the surrounding seating area. Cohesive detailing makes the outdoor kitchen feel like part of the backyard, not an appliance dropped into it.
15. Budget Outdoor Kitchen Patio Builds Under $5,000
A sub-$5,000 build is genuinely achievable, but it requires honest decisions about where money is doing structural work and where it’s doing cosmetic work. Cut corners on aesthetics and finish materials. Don’t cut corners on the grill, the structure, or the weatherproofing.
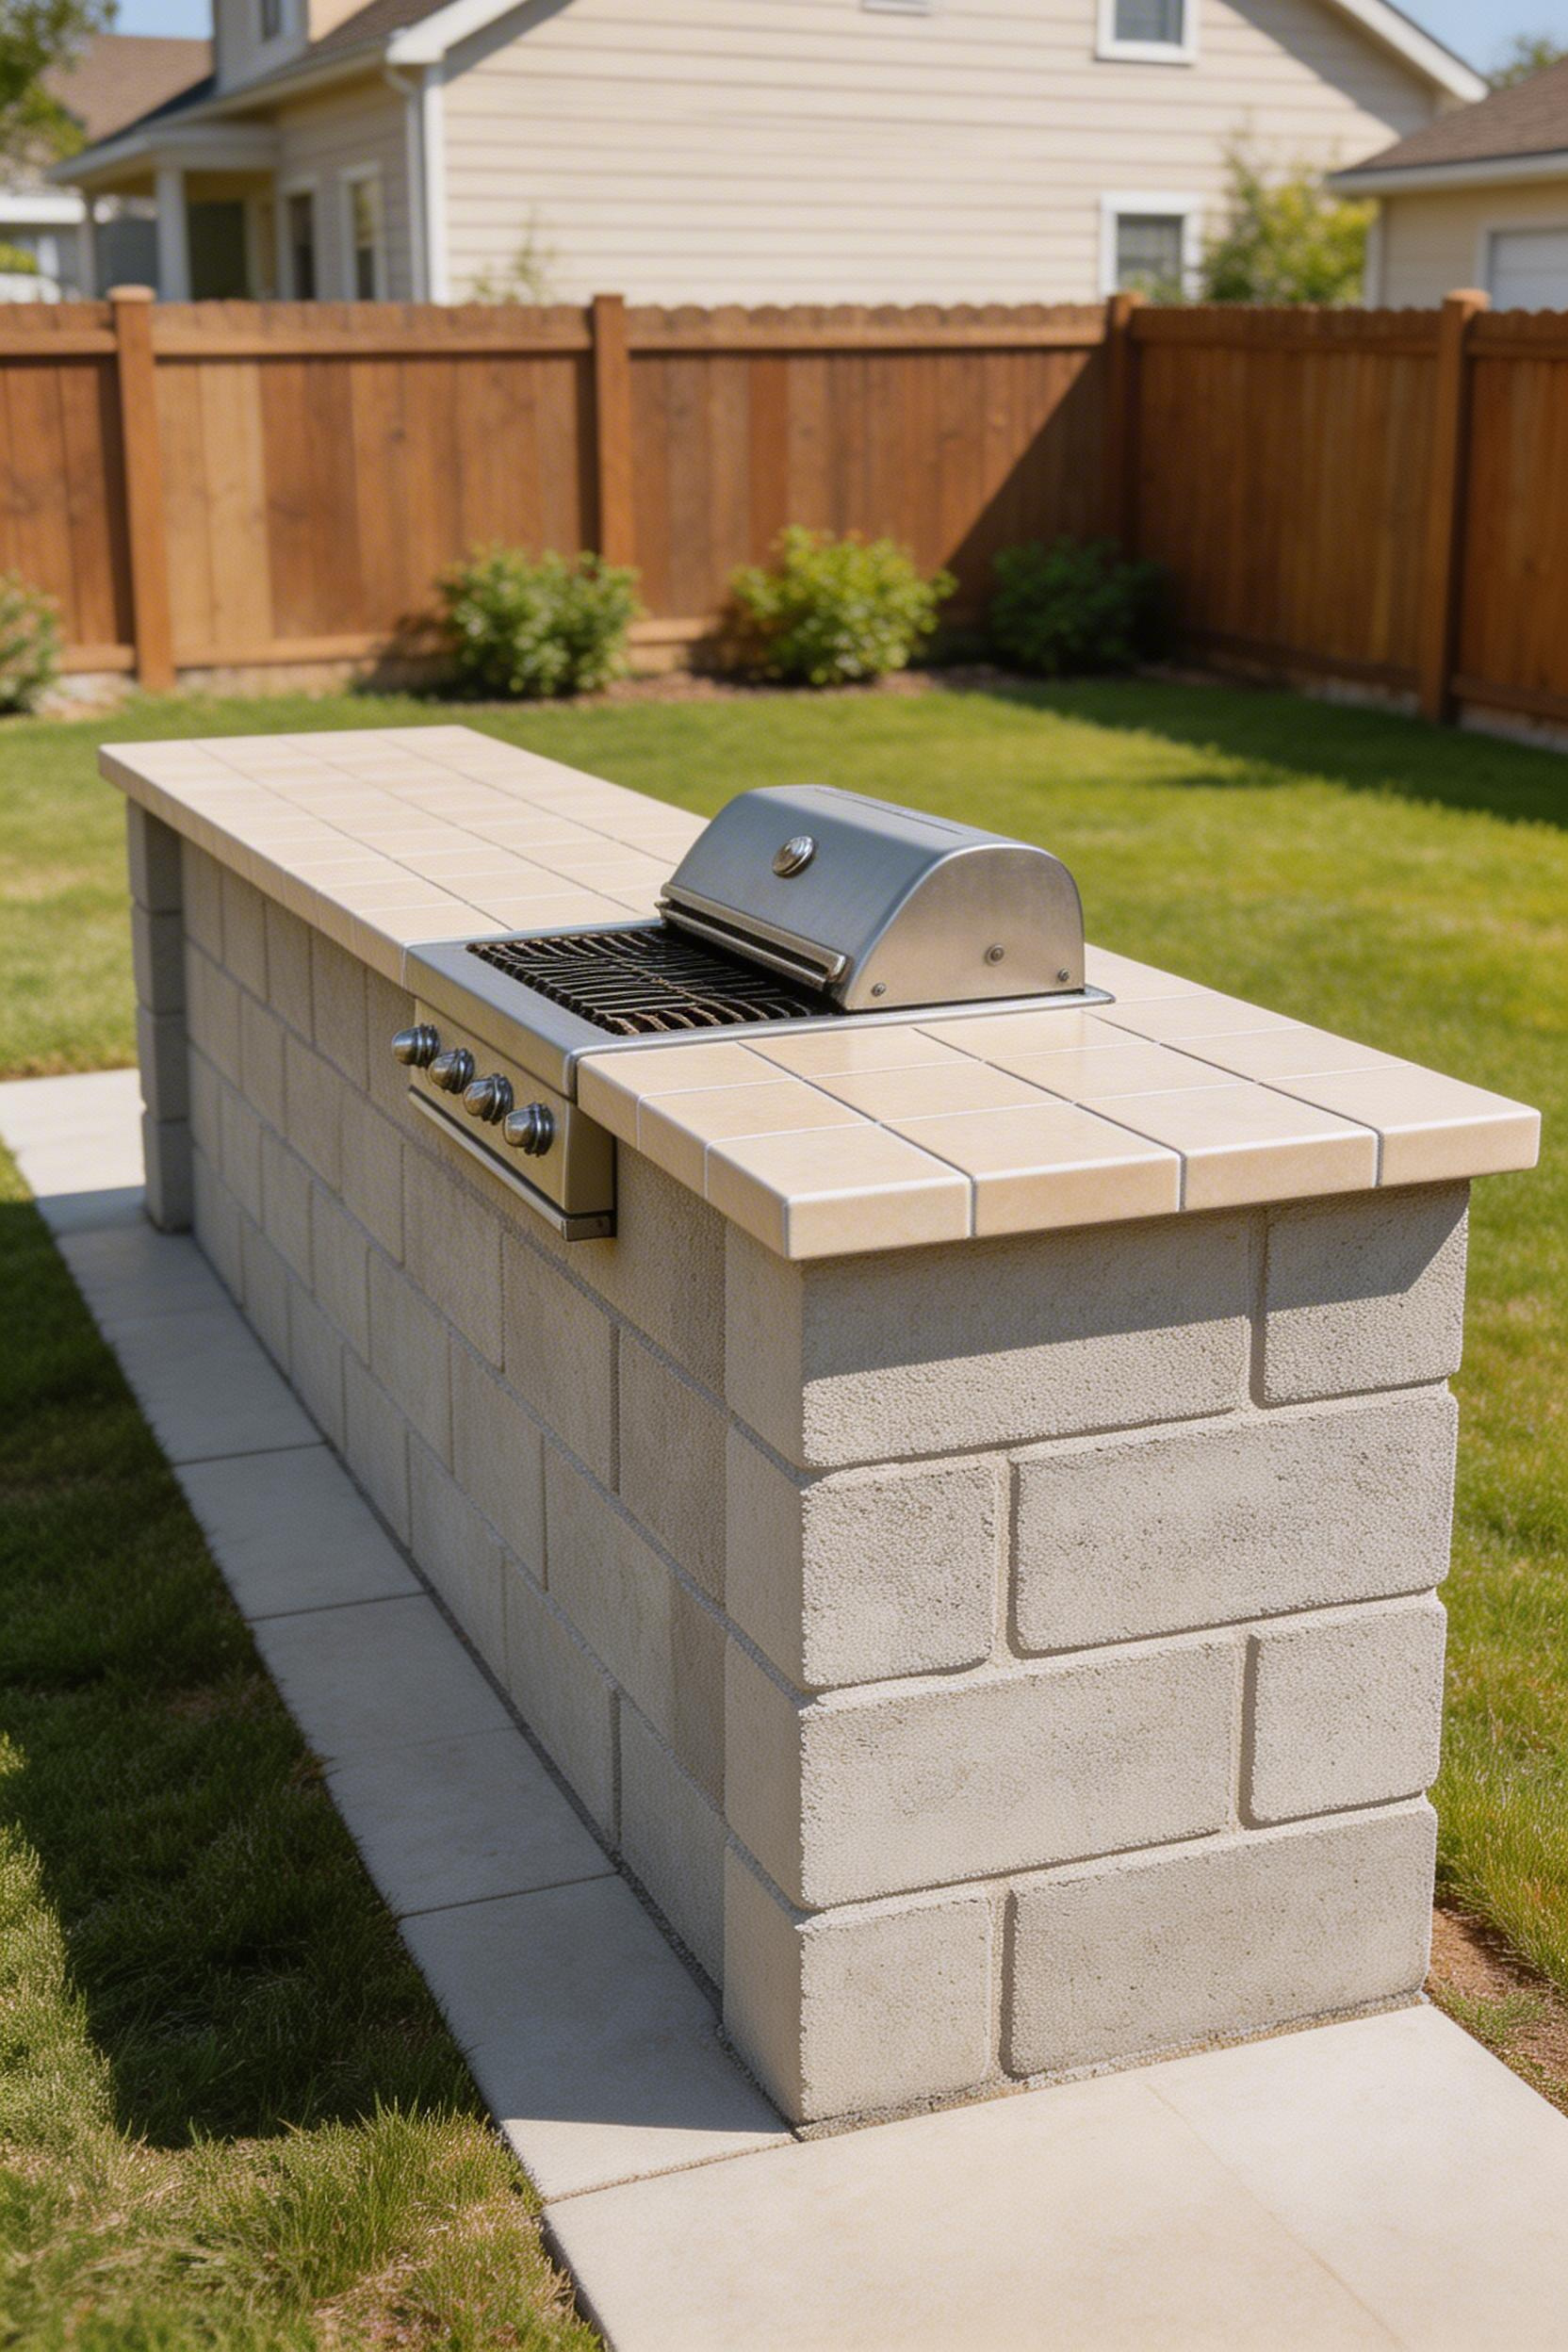
A realistic budget breakdown that works: grill $800 to $1,200, concrete block framing $400 to $700, cement board and stucco finish $200 to $400, porcelain tile countertop $300 to $600, lighting and electrical $200 to $400. A patio floor (use an existing concrete slab if you have one) $0 to $800. That totals $1,900 to $4,100 in materials, with the remainder covering fasteners, grout, caulk, and minor accessories. According to HomeAdvisor data, the national average for a professionally installed outdoor kitchen is $13,400. This budget range works because of DIY labor, not because of cheap materials.
The Budget Framework That Works
Concrete block (CMU) is the best framing material at this budget. It’s structural, fireproof, rodent-resistant, and costs $1 to $1.50 per block versus $8 to $12 for prefab stainless framing systems. A 10-foot linear outdoor kitchen needs approximately 60 to 80 standard 8x8x16 blocks. Cement board and stucco facing runs $3 to $6 per square foot in materials versus $15 to $30 per square foot for manufactured stainless facades. And it looks better with stone or tile countertops.
A single linear run — not an L-shape — is the right call at this budget.
The Napoleon Prestige 500 Built-In Head at $899 is the correct grill choice at this budget. A purpose-built drop-in with 500 square inches of primary cooking area and 66,000 BTU. The CalFlame 3-Burner Built-In Head at $649 is a legitimate alternative if $899 is out of reach.
Don’t skip running a proper gas line. A portable propane tank becomes the most annoying feature of this setup within one season — constantly checking levels and swapping cylinders mid-cook. A $200–$400 gas line run is the single best use of remaining budget after structure and grill. For more ideas on stretching your outdoor living budget, this overview of backyard ideas covers low-cost approaches that work alongside a built-in kitchen setup.
Getting Your Outdoor Kitchen Patio Right the First Time
The most expensive outdoor kitchen patio mistake isn’t a wrong grill choice or overspending on countertops. It’s rebuilding something after two seasons because the wrong materials failed. Every decision in this space has a weather dimension that indoor design simply doesn’t.
A few things I’d prioritize if I were starting from scratch: frost-proof porcelain tile with verified absorption specs, 18-gauge stainless framing with marine-grade hardware, a proper gas line to eliminate the propane tank frustration, and a cover over the cooking area. Even a simple polycarbonate pergola panel kit. Those four decisions significantly extend the functional life and make every subsequent upgrade more worthwhile.
Also worth considering before the build is final: spend a week observing your backyard’s actual conditions. Watch where the wind comes from at grilling time. Note how much afternoon sun hits the potential counter location. Check whether your neighbor’s second floor has a sightline into your cooking area. These details don’t appear in any layout diagram. They shape whether the outdoor kitchen patio becomes the most-used space in your home or a beautifully tiled regret. Get those observations right, and the material and layout decisions that follow get a lot easier.
For inspiration beyond the kitchen structure itself, explore related deck design ideas and backyard firepit ideas. Both help build out a complete outdoor room — not just a cooking station standing alone in the yard.


