Can we talk for a minute about the biggest mistake people make when they try to organize their kitchen? It’s what I call the “container-first” trap. They get overwhelmed, drive to a big-box store, and drop a few hundred dollars on beautiful, matching acrylic bins and bamboo dividers. They get home, stuff their clutter into these lovely new boxes, and for about a week, it feels amazing. But it never lasts.
That’s because they’ve mistaken tidying up for genuine organization. As a lighting designer, my job is to think about how light interacts with a space to create a mood and support a function. Clutter is the enemy of good lighting. It creates visual noise, chaotic shadows, and a sense of claustrophobia. Shoving that chaos into a pretty box doesn’t solve the problem—it just hides it. Real organization is about designing a system that lets your kitchen breathe. It’s about creating clarity and flow so every object has a purpose and a home. Forget the shopping trip for now. First, we need to change how you see your kitchen.
Master Your Space: Initial Planning & Assessment (Part 1)
Before you buy a single thing, you have to do the foundational work. This is the part everyone wants to skip, and it’s the single most important phase of the entire process. Think of it like an architect studying the site before designing the building. This is where we diagnose the problems, understand the landscape of your kitchen, and draw the blueprint for a system that will actually stick.
1. Conduct a Kitchen Inventory: What Do You Really Have?
You can’t organize what you don’t acknowledge. Right now, your cabinets are likely full of mysteries—three half-empty jars of paprika, a pasta roller you used once in 2017, and an ungodly number of mugs. The first step is to turn on the lights, metaphorically speaking. You need to pull everything out. Yes, everything.
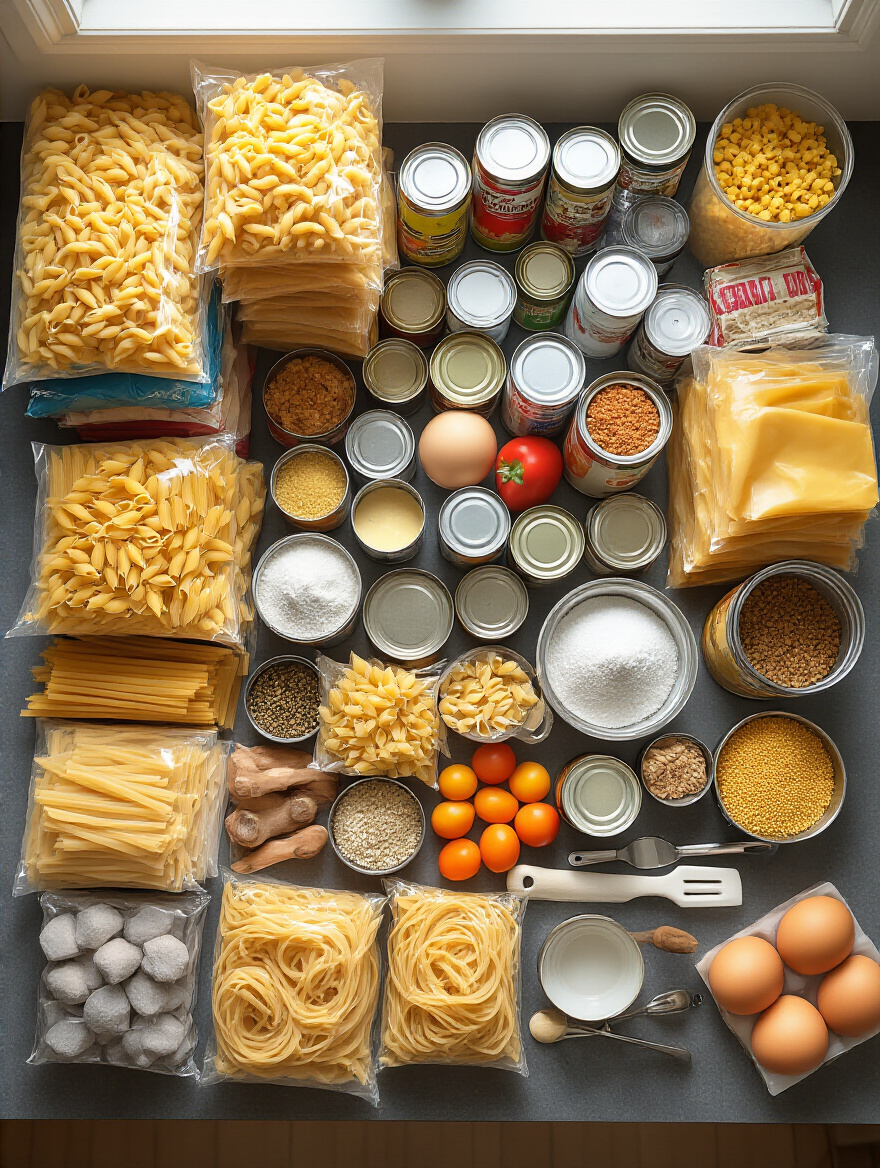
Lay it all out on your counters and dining table. You need to be confronted by the sheer volume of it all. This isn’t just about counting spoons; it’s about seeing the redundancies, the forgotten gadgets, and the expired goods. Only when you see the complete picture can you begin to make intelligent decisions about what deserves to occupy your most valuable real estate.
This process is about creating a baseline truth for your kitchen. Once you’ve conducted this honest audit, you’re no longer guessing about what you need; you’re operating from a position of fact-based clarity.
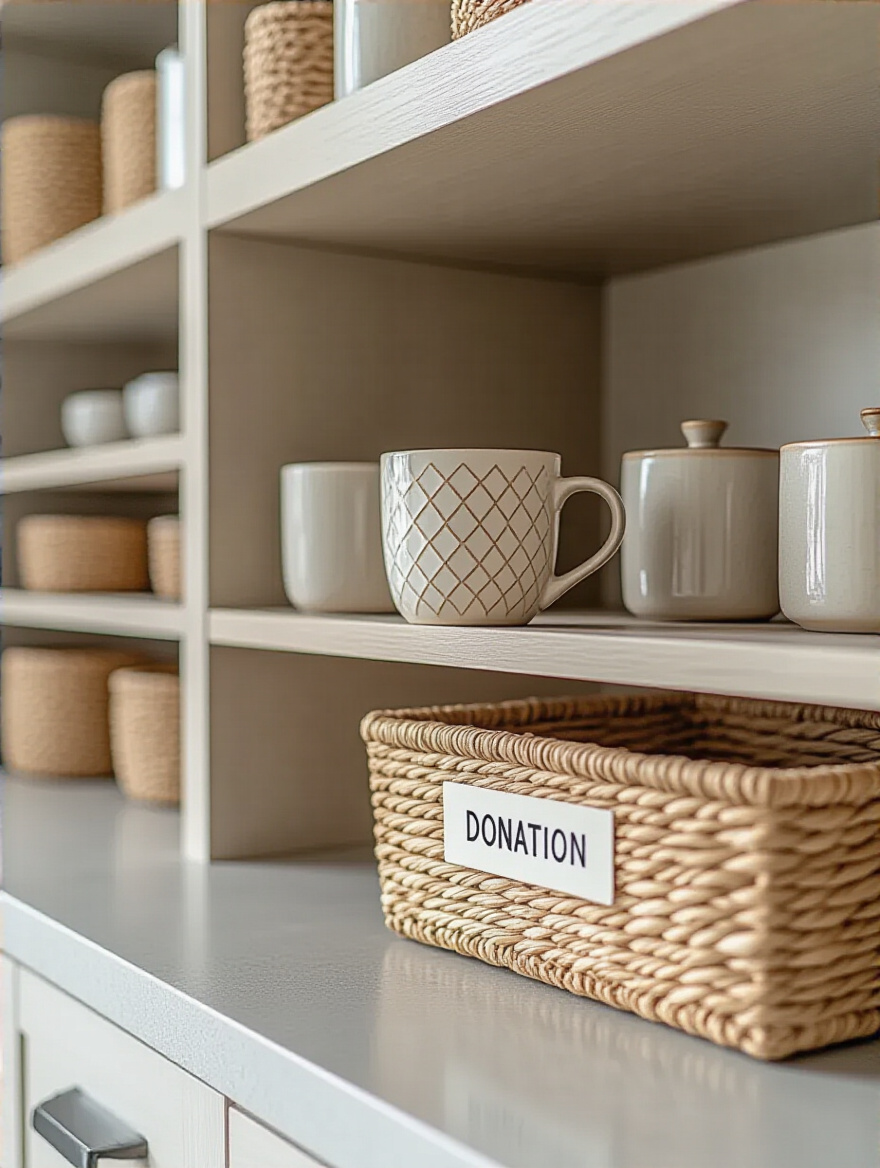
2. Declutter Before You Organize: Purge Unused & Expired Items
With everything laid bare, the purge begins. This is not the time for sentimentality about that gifted avocado slicer you’ve never touched. If you haven’t used it in a year, it goes. If it’s broken, it goes. If it’s a duplicate—be honest about how many whisks one person really needs—it goes. The goal here isn’t to create emptiness, but to create purpose.
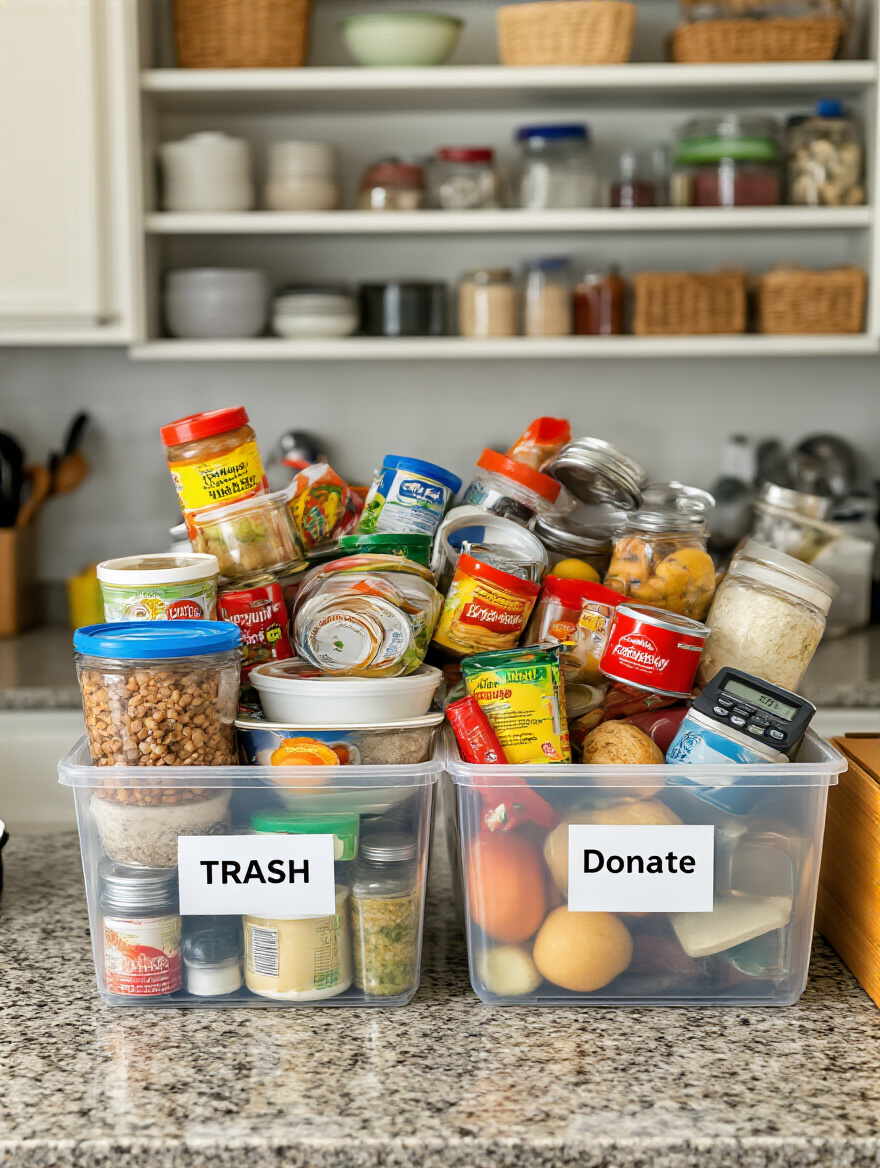
Every single item that earns its way back into your cabinets must have a clear function and justification for being there. This is the most liberating part of the process. I once had a client who discovered she could empty an entire top cabinet just by getting rid of novelty mugs and promotional water bottles. Suddenly, she had prime space for things she actually used every day. Organized clutter is still clutter. Be ruthless.
This single step will probably free up 20-30% of your space before you’ve even bought an organizer. Remember, the goal is to store what you need, not to find clever ways to hide things you don’t.
3. Define Your Kitchen Zones for Optimized Flow (Prep, Cook, Store, Wash)
Now we start thinking like designers. A kitchen isn’t just one big room; it’s a series of workstations. Your goal is to arrange your tools and ingredients to support a seamless workflow, minimizing unnecessary steps. Think of it as choreographing a dance—everything you need for a task should be within arm’s reach.
You need a Prep Zone (knives, cutting boards, mixing bowls), a Cook Zone (pots, pans, utensils, spices near the stove), a Storage Zone (pantry items, food storage containers), and a Wash Zone (soap, sponges, drying racks near the sink). When you store your spatulas right next to the stove instead of across the room, you shave seconds off your cook time and reduce mental friction. It seems small, but over time, it makes the entire experience of cooking feel effortless instead of frantic.
Zoning transforms your kitchen from a passive container for your stuff into an active partner in your daily life. It’s the difference between a space that works against you and one that works for you.
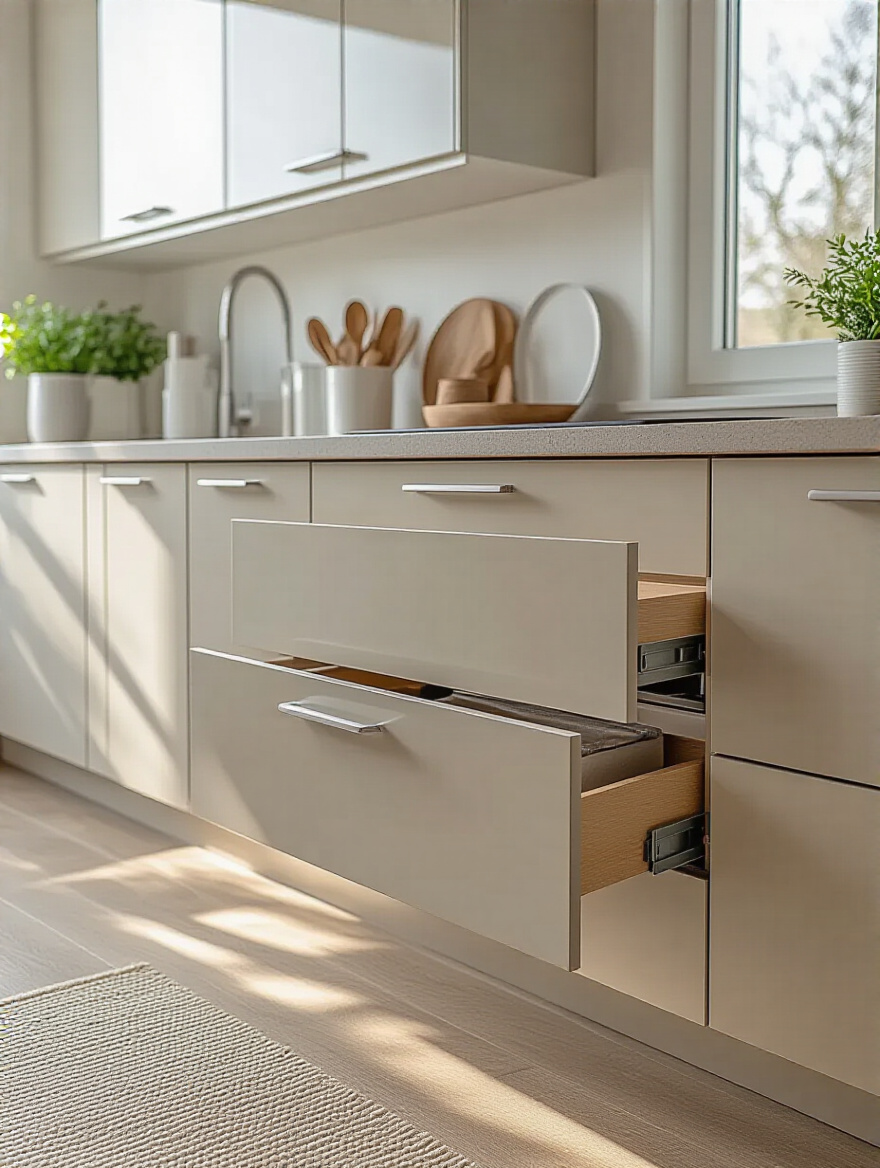
4. Measure Your Storage Potential: Maximize Every Cabinet & Drawer
Here’s where the technical precision comes in. Before you even browse for organizers online, grab a tape measure. Measure the interior width, depth, and height of every single drawer and cabinet you plan to organize. Write it down. Take photos and annotate them on your phone.
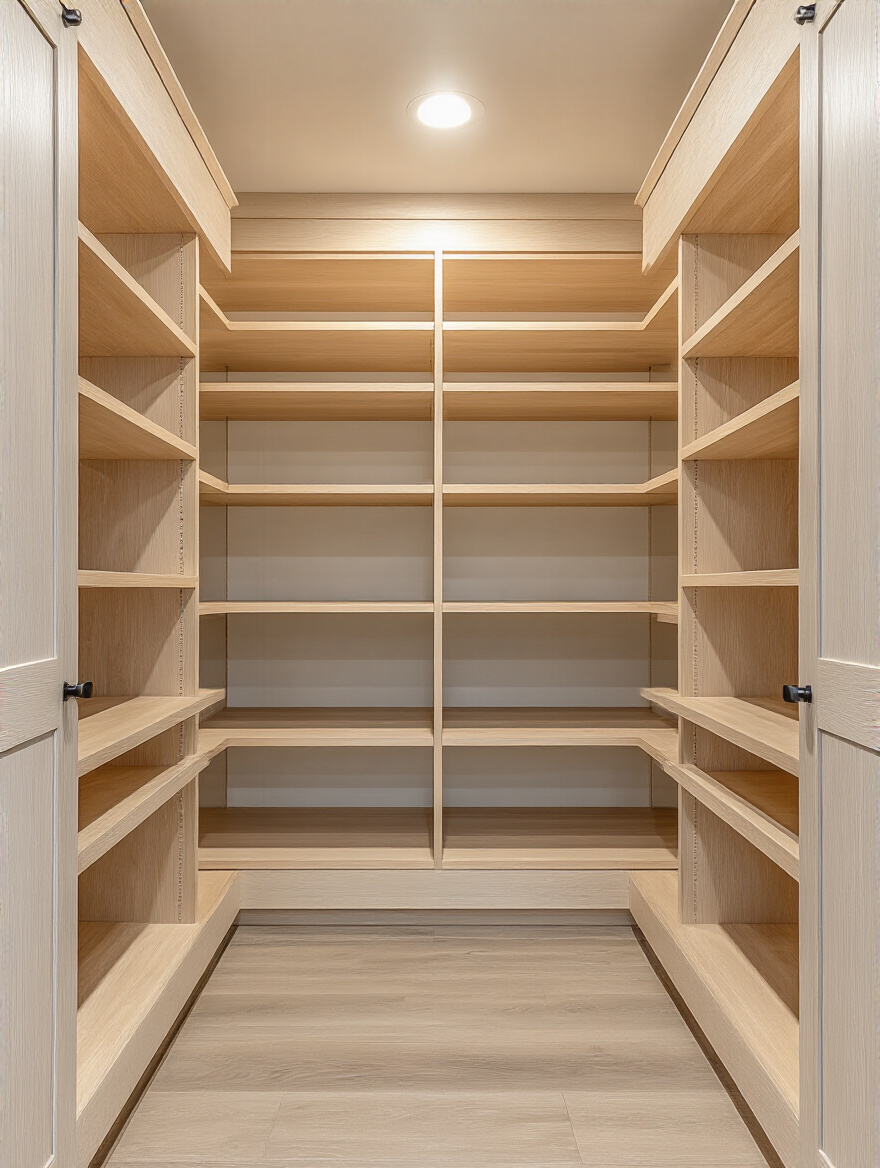
Why? Because guessing is for amateurs. There is nothing more frustrating than buying a set of beautiful dividers only to find they’re half an inch too long for your drawer. Measuring ensures a perfect, custom-like fit. It allows you to use every square inch of available space, eliminating the awkward gaps and dead zones that generic solutions often create. This is the step that separates a decent kitchen from a professionally optimized one.
Master Your Space: Initial Planning & Assessment (Part 2)
With your diagnostics complete, we move into the final stage of planning. This is where we bridge the gap between pure function and the aesthetic experience of being in your kitchen. An organized space that feels alien to your personal style won’t last, because you won’t enjoy maintaining it.
5. Establish a Budget & Style Vision for Cohesive Organizers
Organization is a design project, and every good design project needs a budget and a clear aesthetic vision. Decide ahead of time how much you’re willing to spend, and then decide what you want the space to feel like. Are you aiming for a warm, natural vibe with bamboo and woven baskets? Or a sleek, modern look with clear acrylic and clean lines?
Create a small mood board on Pinterest or just save a few images on your phone. Having this vision prevents you from buying organizers piecemeal, which results in a visually chaotic and mismatched system. A cohesive look isn’t just for looks—it reduces visual noise and makes your brain feel calmer every time you open a cabinet. It’s the finishing touch that makes your organizational system feel intentional and integrated, rather than like a desperate afterthought.
Strategic Solutions: Choosing & Implementing Organizers (Part 1)
Alright, you’ve done the hard work. You’ve inventoried, purged, zoned, and measured. Now—and only now—are you allowed to start shopping. This is the fun part, where we select the tools that will bring your blueprint to life.
6. Leverage Drawer Dividers for Cutlery, Utensils, & Small Gadgets
The chaotic utensil drawer is a universal kitchen evil. It’s a jumble of metal and plastic that damages your tools and wastes your time. This is the easiest, most satisfying fix. Don’t just get a standard cutlery tray; invest in expandable or modular dividers that fit your drawer perfectly.
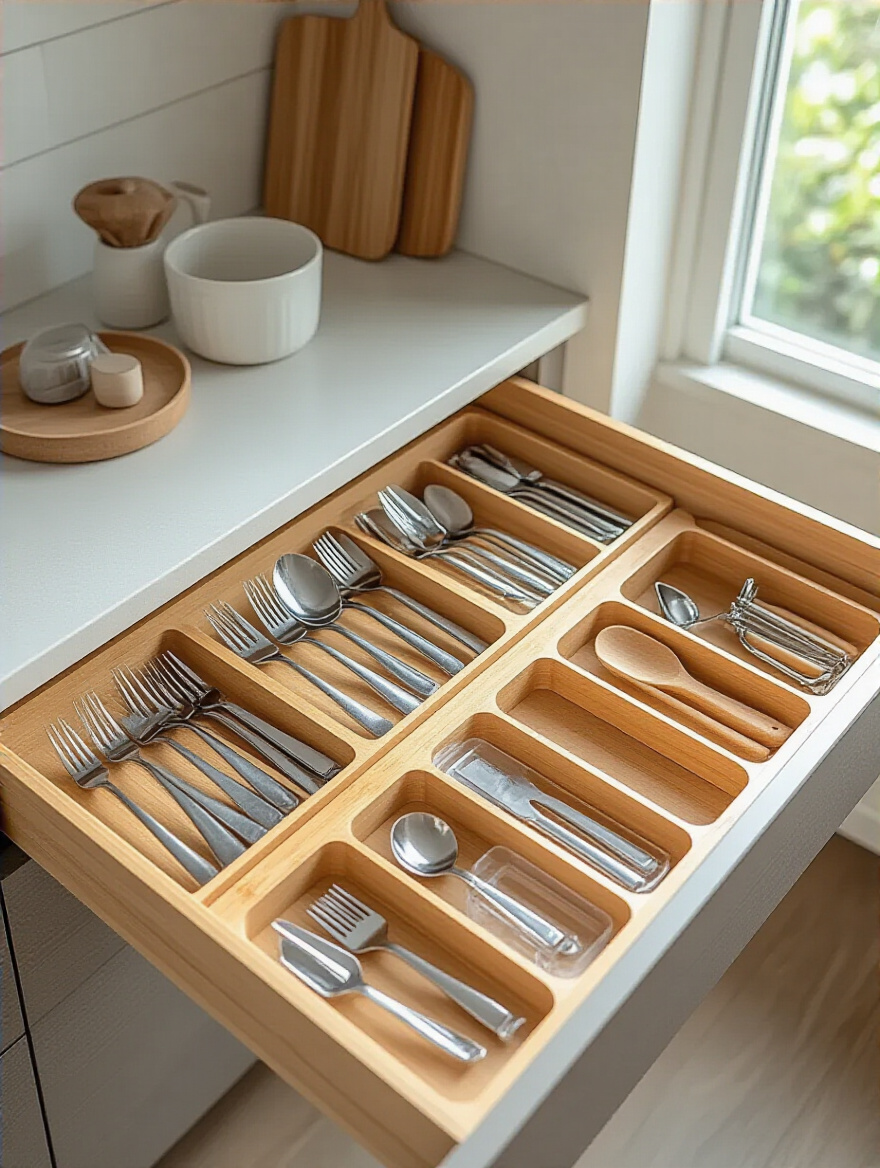
Create specific homes for everything: forks here, spatulas there, peelers and small gadgets in their own compartment. Suddenly, you can see everything at a glance. It’s not just neat; it’s efficient. You’ll stop buying duplicate tools because you can finally see the three can openers you already own.
This simple tool turns a high-friction annoyance into a moment of calm efficiency every time you reach for a spoon. It’s a small change with a huge daily impact.
7. Install Pull-Out Shelves & Roll-Out Bins for Easy Access to Lower Cabinets
Lower cabinets are black holes. Things go in the back and are never seen again, forcing you to get on your hands and knees just to find that one pot lid. This is a massive ergonomic failure, and the solution is brilliantly simple: pull-out shelves.
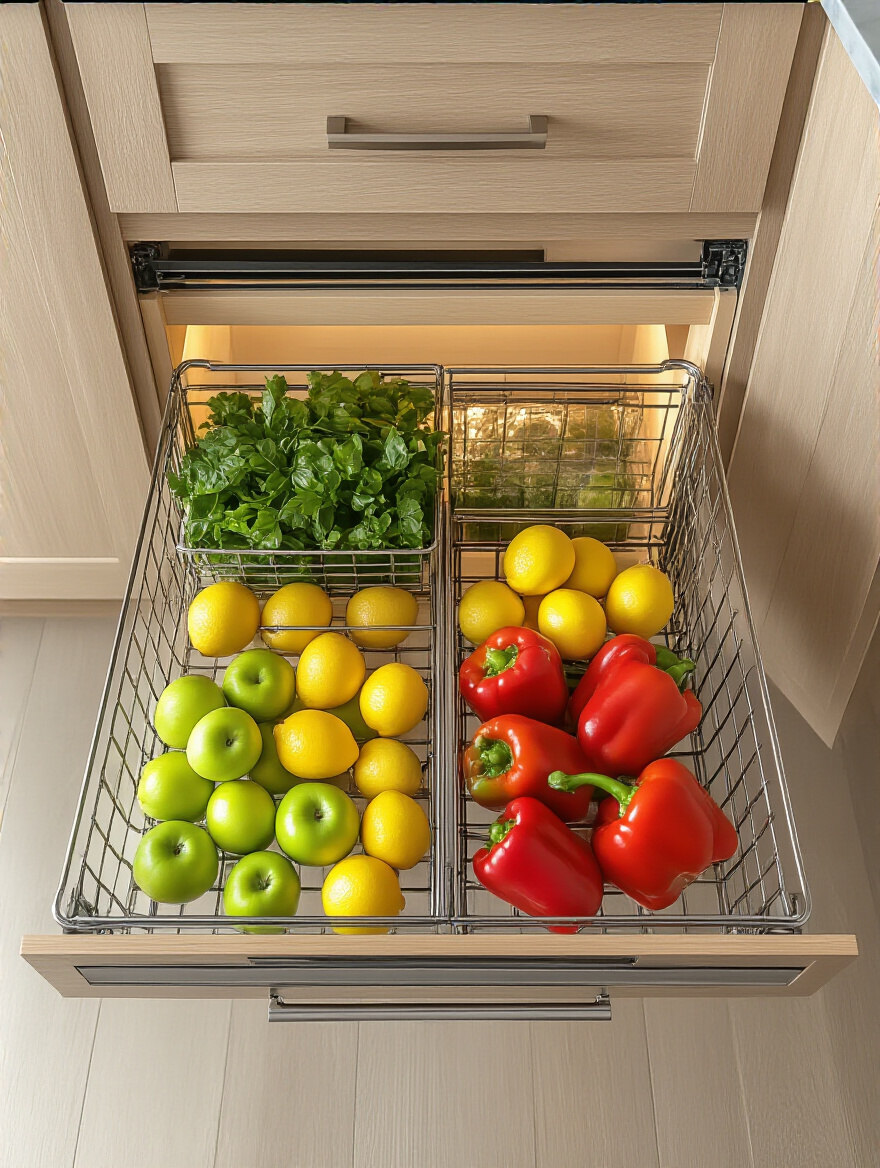
Installing roll-out shelves brings the contents of the cabinet to you. Instantly, everything is visible and accessible. This is an absolute game-changer for heavy items like stand mixers, pots, and pans. It eliminates the frustration and physical strain of digging around in the dark, and it effectively doubles the usable space in your deepest cabinets.
This upgrade feels like a luxury renovation, but it’s a relatively straightforward DIY project that completely transforms the functionality of the bottom half of your kitchen.
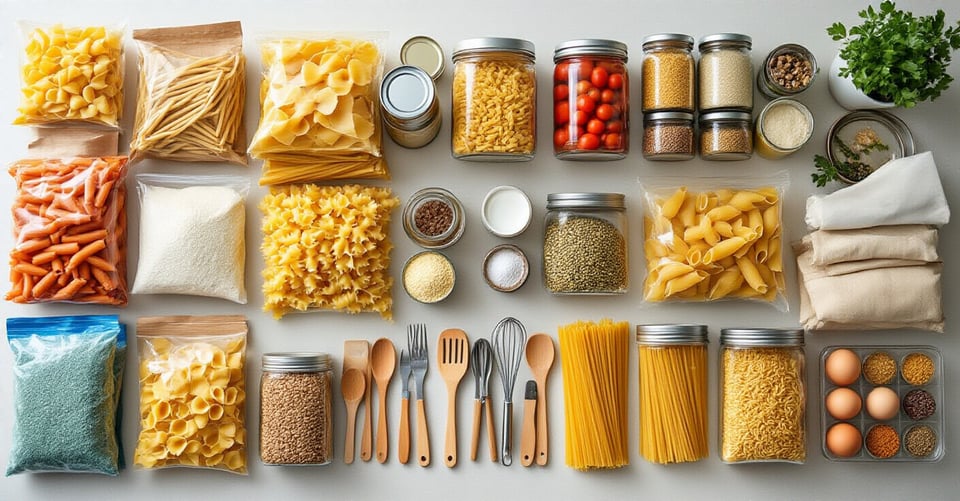
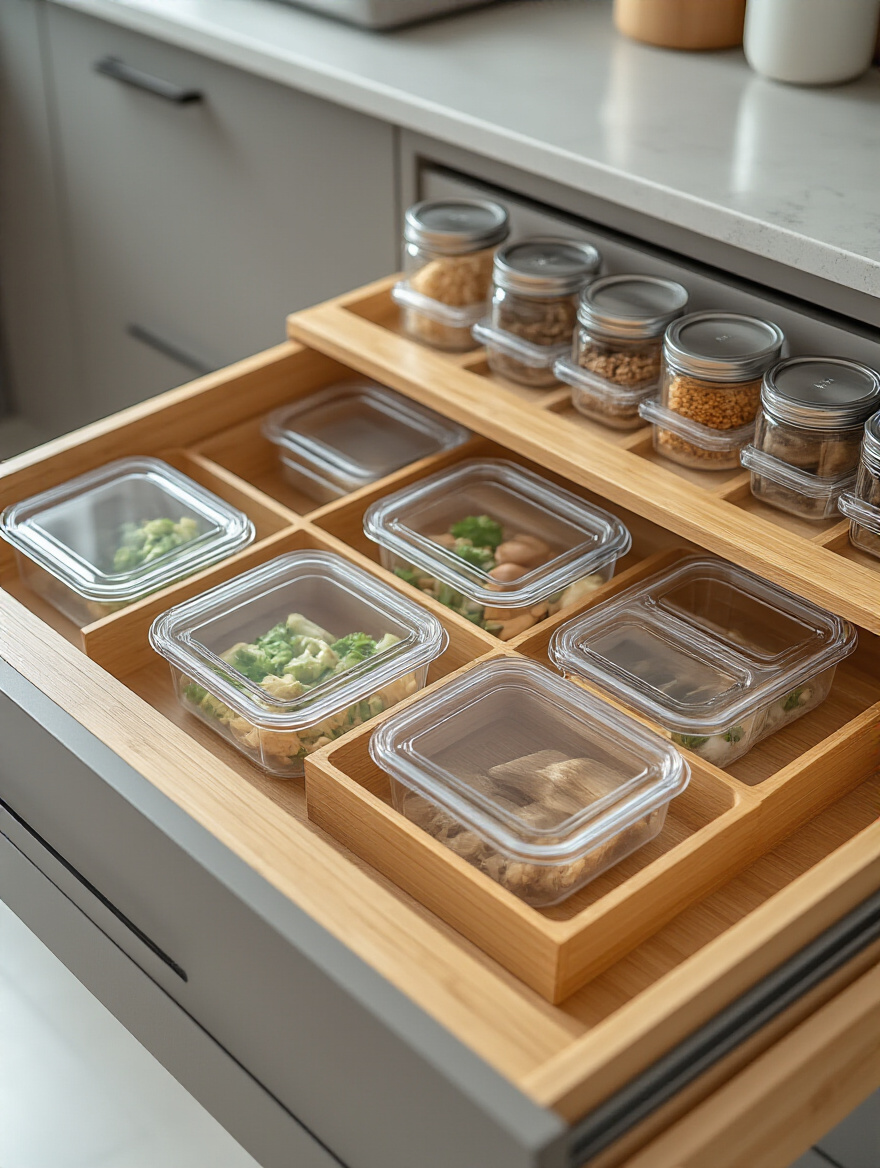
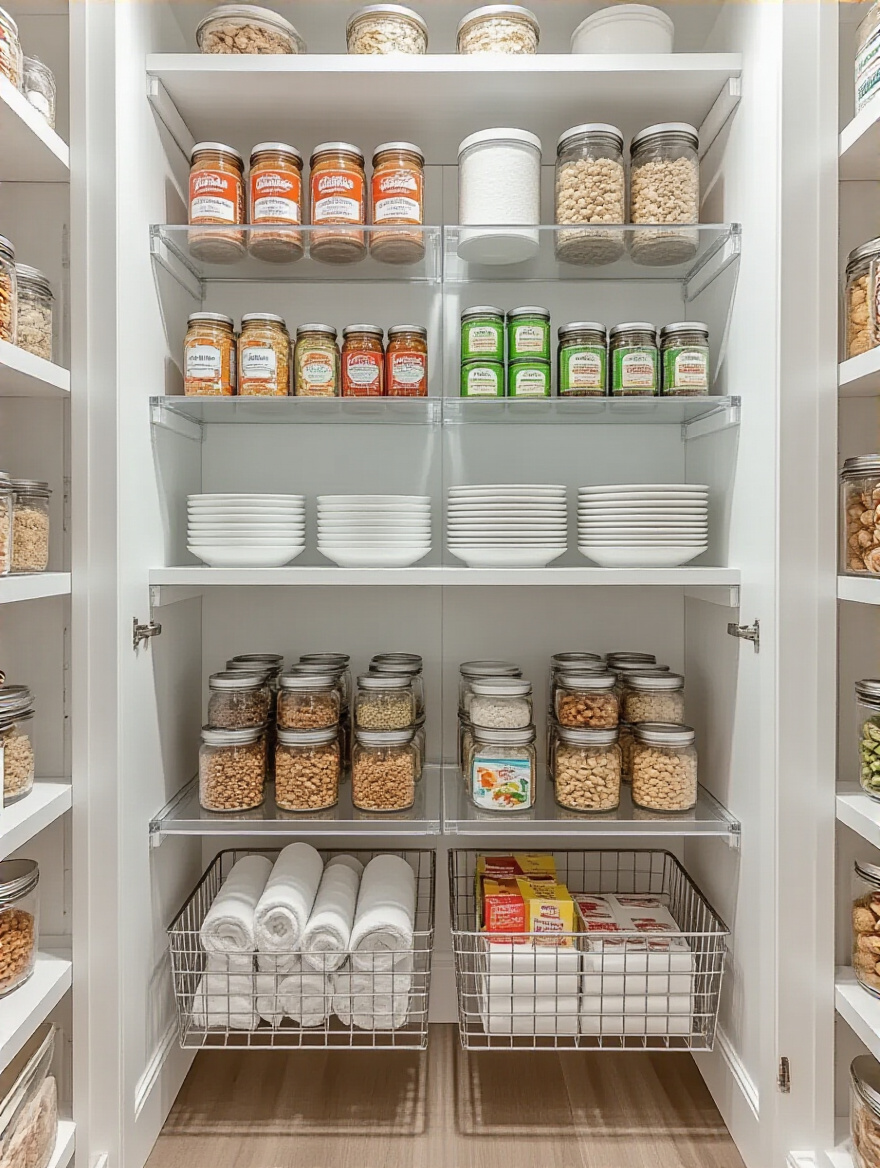
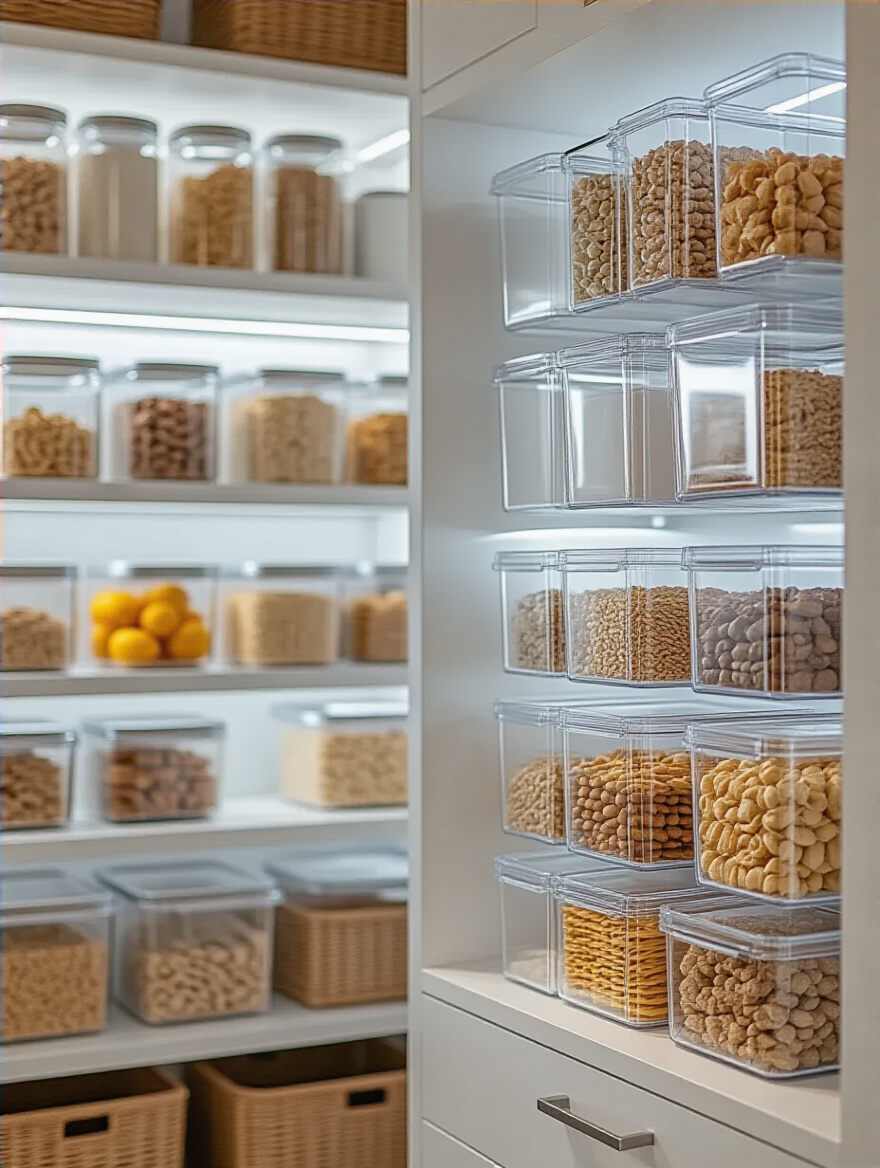
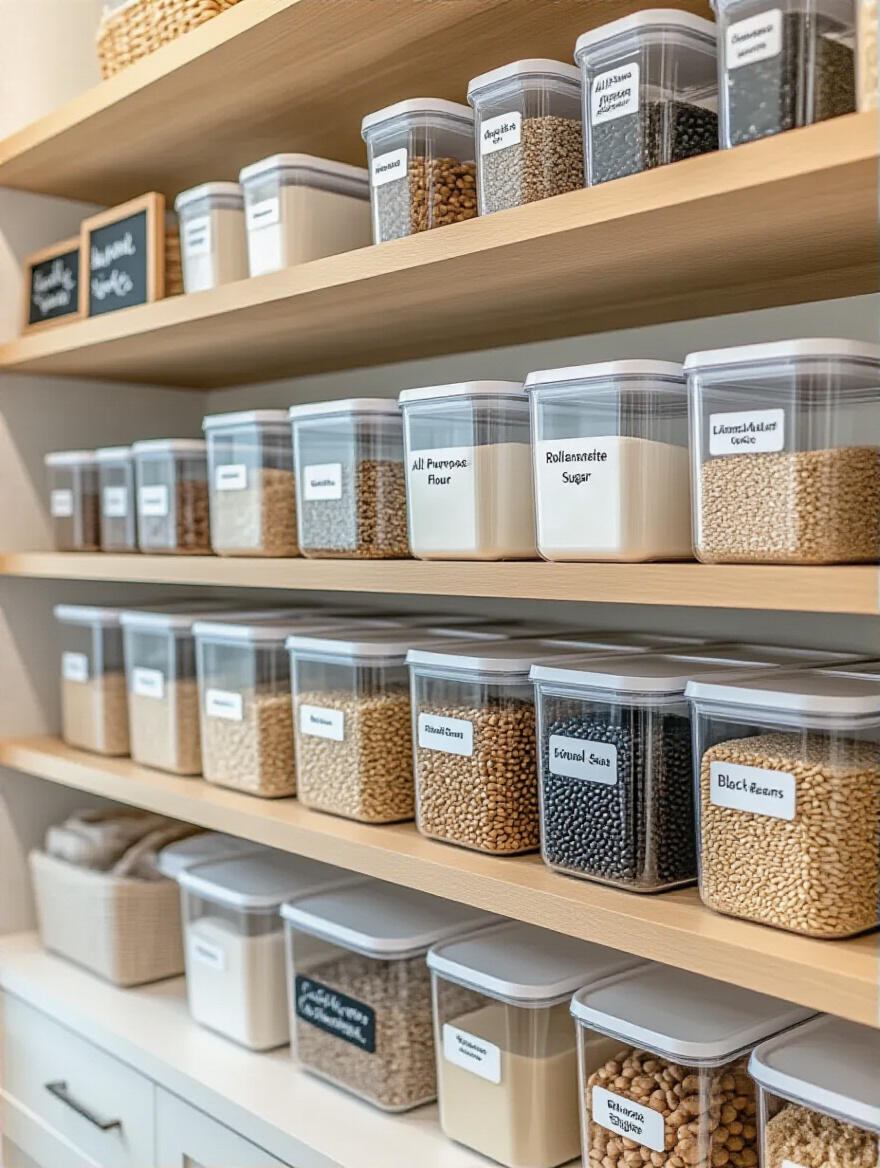
8. Optimize Pantry Space with Stackable Bins, Caddies, & Clear Containers
A pantry should be a clear, at-a-glance inventory of your food, not a chaotic jumble of half-open bags and precariously stacked cans. The key here is twofold: decanting and containing. Take grains, pastas, and snacks out of their bulky, mismatched packaging and put them into clear, airtight containers.
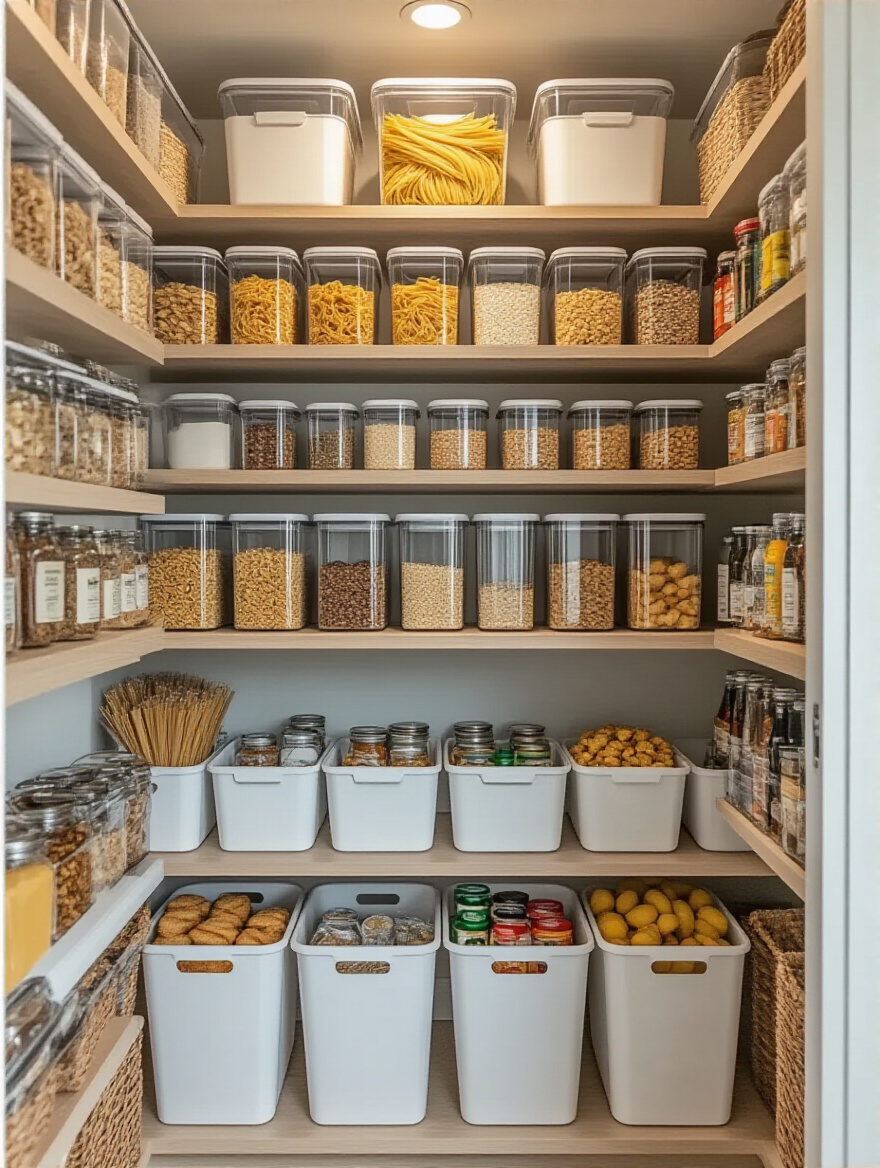
Use stackable bins or baskets to group like items: one for baking supplies, one for breakfast items, one for snacks. This is zoning on a micro-level. It allows you to see exactly what you have, which means less food waste and fewer duplicate purchases at the grocery store. Label everything. It takes a few hours to set up, but it saves you time and money every single week.
A clear, well-organized pantry doesn’t just look good; it actively helps you plan meals, write shopping lists, and reduce waste. It’s the brain of your kitchen’s entire storage system.
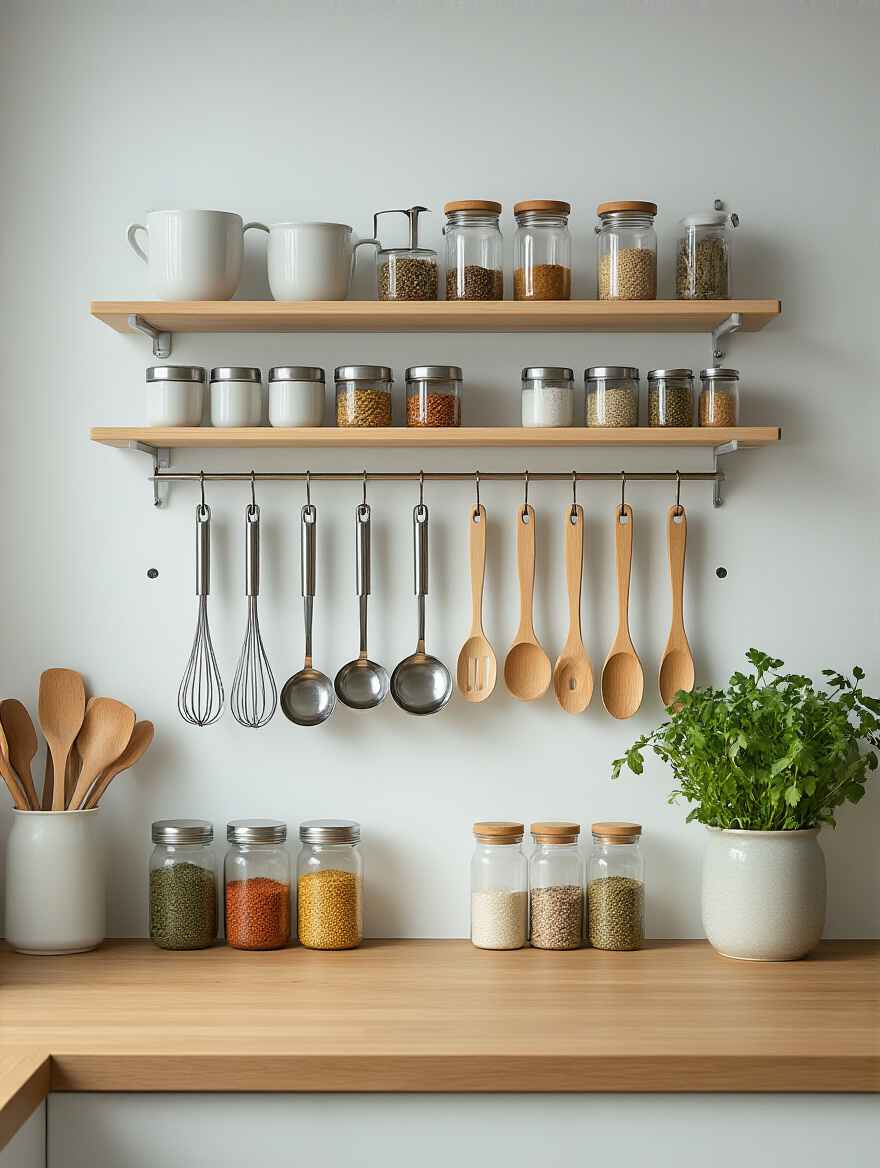
9. Maximize Vertical Space with Tiered Shelves & Under-Shelf Baskets
Most people think of storage in two dimensions: width and depth. They completely forget about height. That empty air between your shelves is wasted real estate. Tiered shelf risers are brilliant for things like cans, spices, and mugs, instantly doubling or tripling your storage and letting you see what’s in the back.
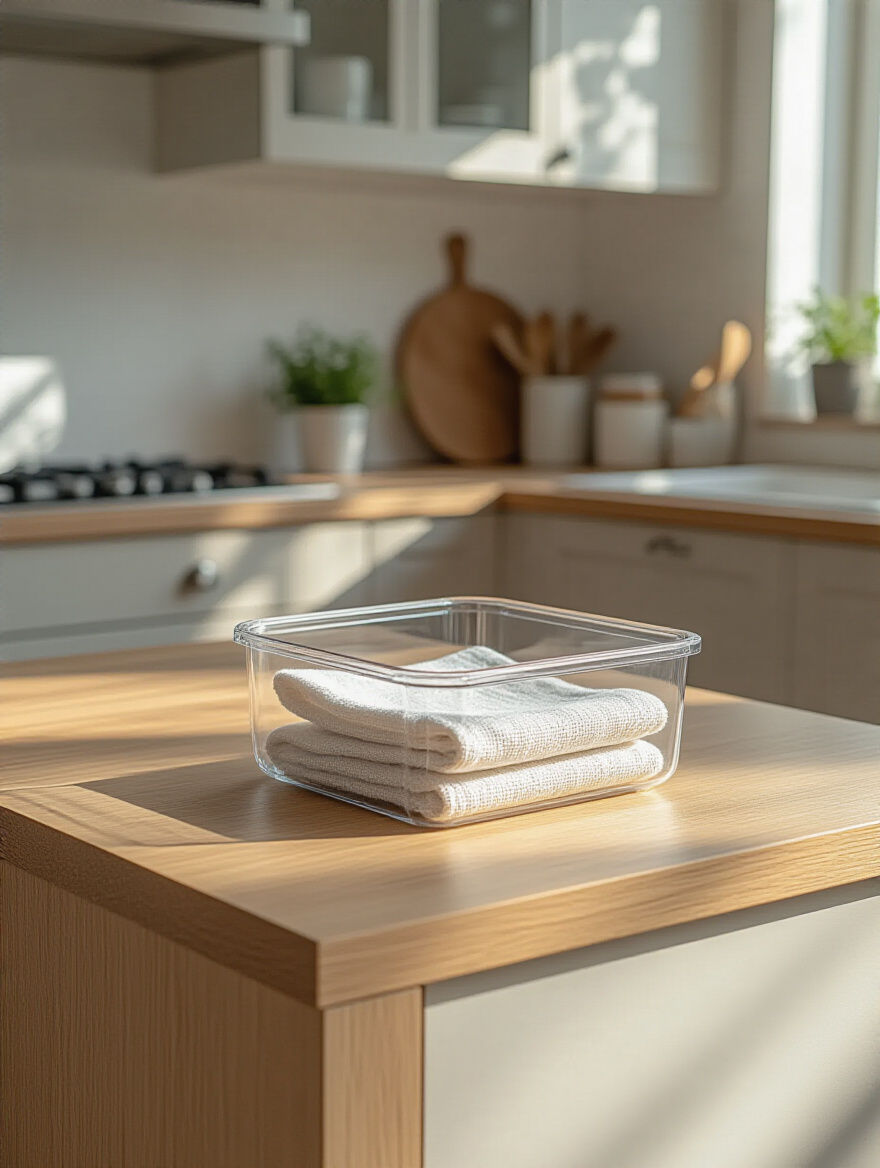
Even better are under-shelf baskets. These simple wire baskets slide onto an existing shelf and create a new storage level underneath, perfect for things like foils, wraps, or kitchen linens. It’s a cheap, easy way to instantly add more storage without drilling a single hole. Using vertical space is the secret to making a small kitchen feel twice as big.
Strategic Solutions: Choosing & Implementing Organizers (Part 2)
Now we’re moving beyond the basics into solutions that require a bit more creative thinking. These ideas are about harnessing the full potential of your kitchen’s architecture, turning dead zones into functional assets.
10. Utilize Wall-Mounted Racks for Pots, Pans, Lids, & Utensils
If your cabinets are overflowing with bulky pots and pans, look up. Your walls offer a ton of untapped storage potential. A well-placed pot rack—either hanging from the ceiling or mounted on the wall—can free up an entire lower cabinet.
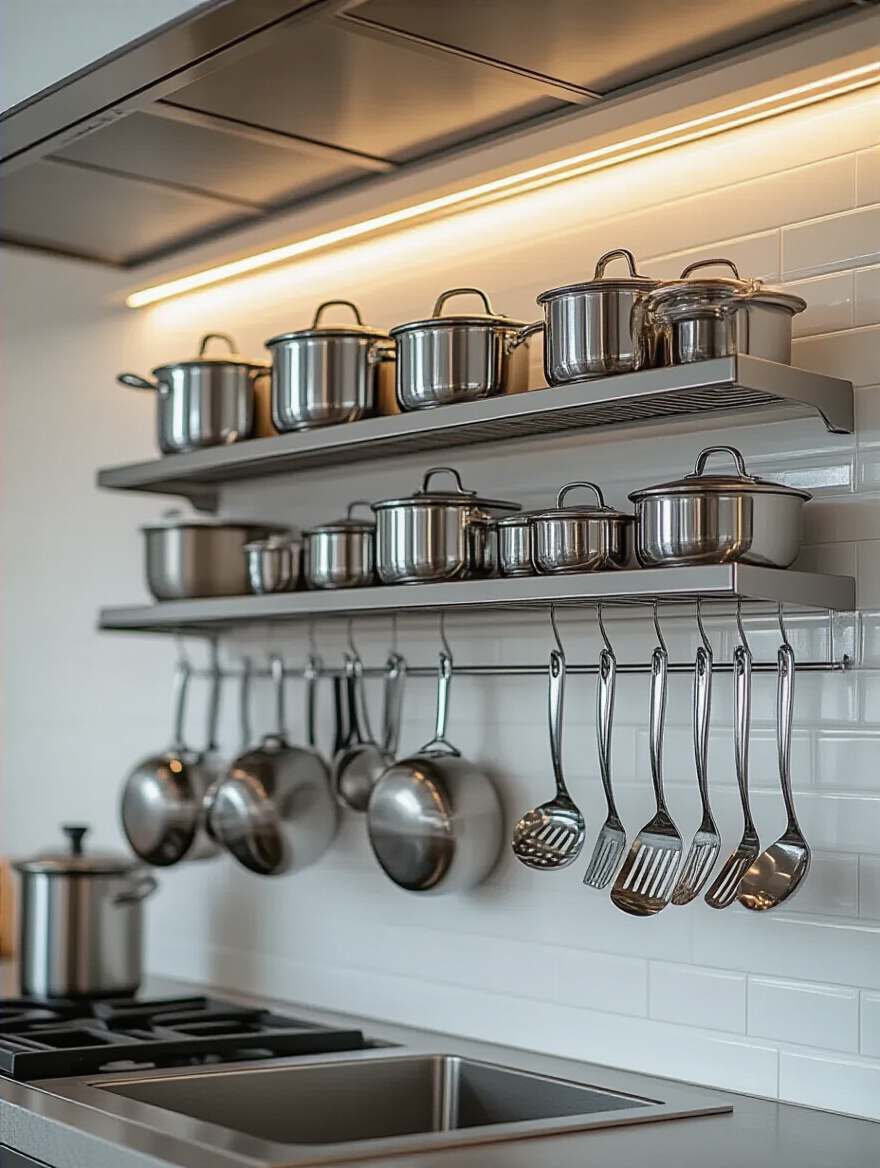
It keeps your most-used cookware visible, accessible, and safe from the scratches and dings that happen when they’re stacked. This isn’t just for farmhouse kitchens anymore; there are sleek, modern options that can become a beautiful design feature. Plus, having your pans right where you need them makes cooking feel more intuitive and professional.
This move takes the bulkiest items out of your precious cabinet space and turns them into a functional display. It’s smart, efficient, and adds a ton of character to the room.
Elevate Your Design: Aesthetic & Specialized Enhancements (Part 1)
We’ve covered function. Now let’s talk about form. These next few strategies are about elevating your organization from merely practical to truly beautiful. A system you love to look at is a system you’re more likely to maintain.
11. Embrace Clear Acrylic Organizers for a Visually Light & Cohesive Look
Here’s where those trendy acrylic organizers we talked about earlier come in, but now we’re using them with intention. The beauty of clear acrylic is that it organizes without adding visual weight. It feels light, airy, and clean.
Using clear bins in your fridge, pantry, or drawers lets you see everything at once, reducing the mental load of remembering where you put the mustard. They are perfect for containing small, spillable items and protecting your shelves. When used as part of a larger system (after you’ve purged and zoned!), they create a sophisticated, high-end look that makes your everyday items feel special.
12. Create a Dedicated Coffee or Tea Station with Styled Trays & Dispensers
If you have a daily ritual like making coffee or tea, give it the respect it deserves. Carve out a dedicated station on your counter or on a small bar cart. Consolidate your coffee maker, grinder, mugs, sugar, and tea bags all in one place.
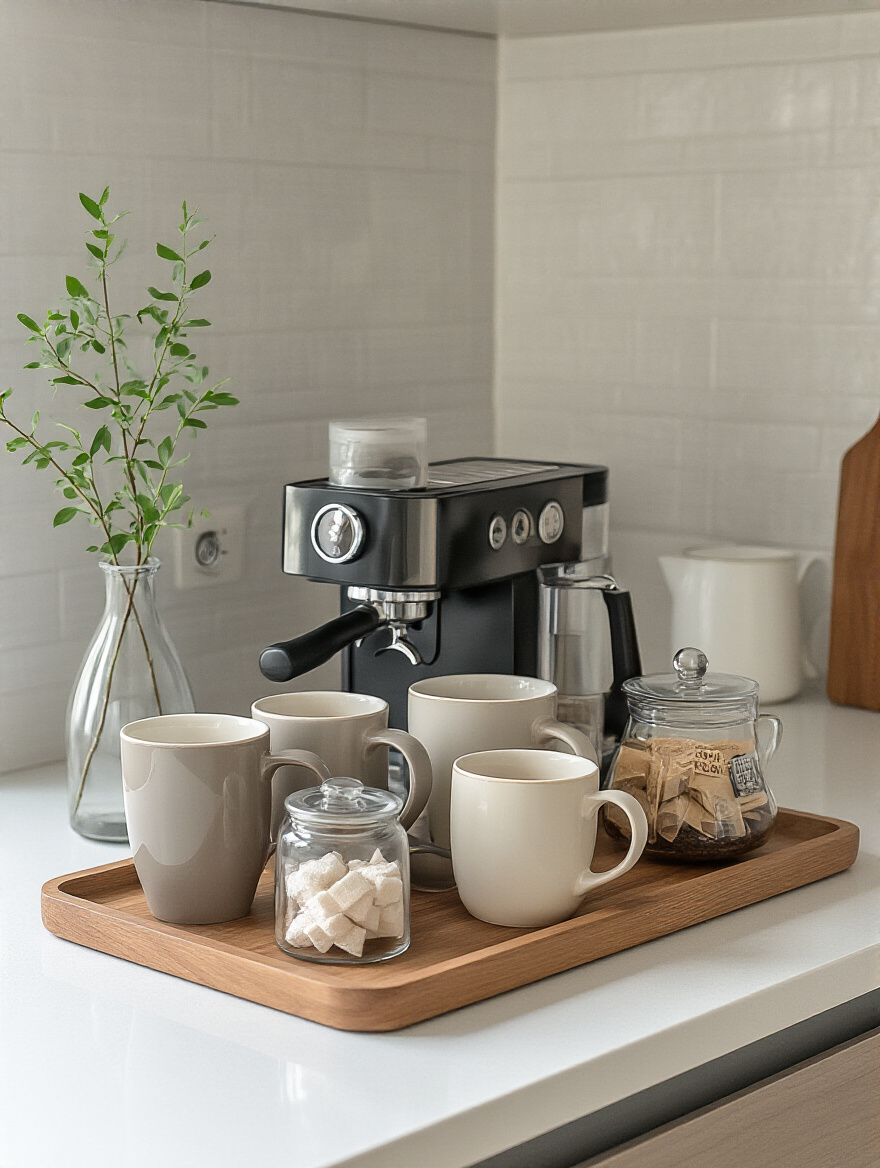
Use a stylish tray to visually anchor the zone and contain any spills. Put sugar or beans in beautiful, sealed dispensers. This isn’t just about organization; it’s about designing a moment. It transforms a cluttered corner into an intentional, enjoyable ritual that streamlines your morning routine and makes your kitchen feel like a high-end café.
13. Implement Hidden storage solutions: Toe-Kick Drawers & Built-In Organizers
This is next-level optimization. The space under your cabinets—the toe-kick—is usually dead space. But it can be converted into shallow drawers, perfect for storing things you don’t use often, like baking sheets, serving platters, or even pet food bowls.
Similarly, look for built-in solutions like slim pull-out spice racks next to the stove or organizers on the inside of cabinet doors. These are the details that professional kitchen designers use to squeeze every last drop of functionality out of a space. They keep things off the counter while making them incredibly accessible, giving you the best of both worlds.
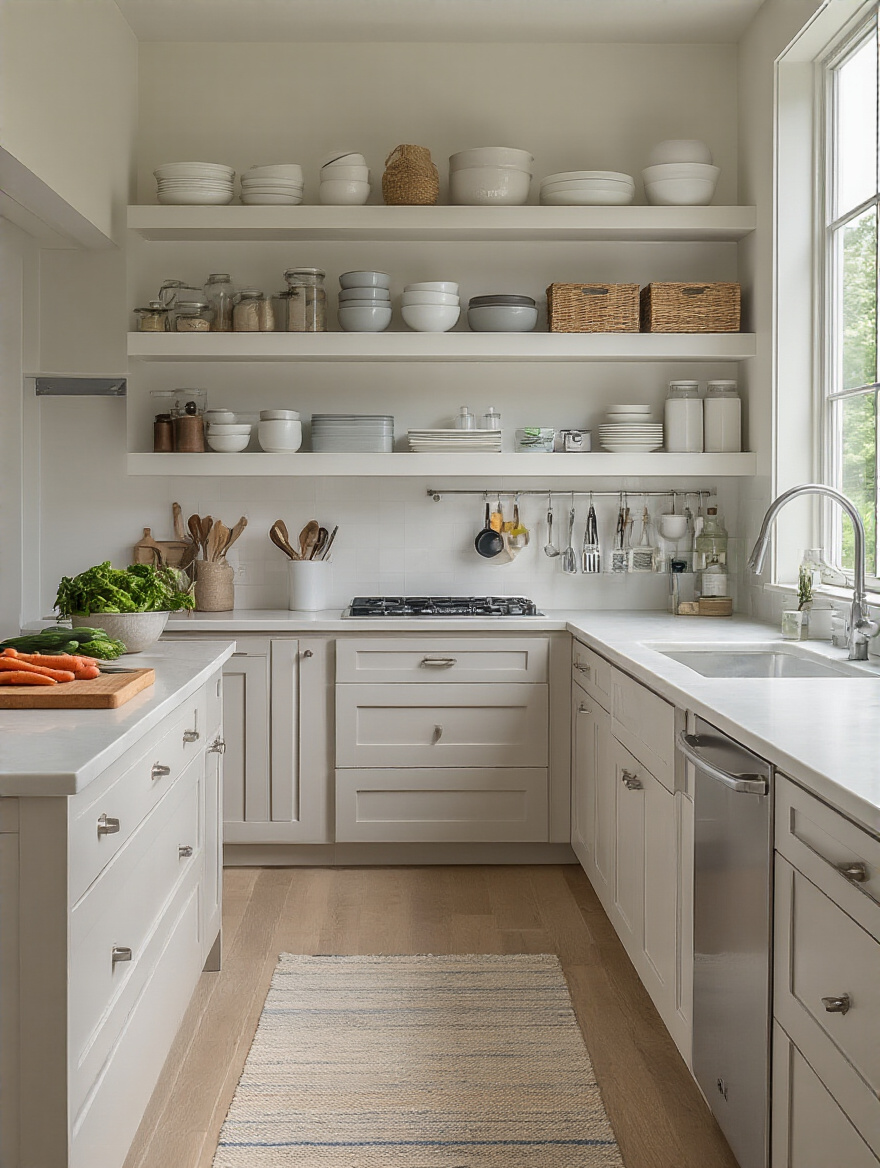
14. Style Open Shelving with Decorative Storage Baskets & Cookbooks
Open shelving can be beautiful, but it’s a magnet for clutter. The secret to making it work is to think like a merchandiser. It’s for display, not for bulk storage. Your best-looking dishes, glasses, and a curated stack of cookbooks should be the stars.

For the less attractive necessities (like extra napkins or bags of coffee beans), use beautiful, uniform storage baskets. A row of woven or wire baskets adds texture and warmth while hiding the visual chaos. This strategic blend of “show and conceal” is what makes open shelving look effortlessly chic instead of messy.
Elevate Your Design: Aesthetic & Specialized Enhancements (Part 2)
We’re in the final stretch of specialized solutions. These ideas are about bringing ultimate flexibility and personality into your kitchen, creating systems that can adapt and grow with you over time.
15. Introduce Pegboard Systems for Customizable & Accessible Tool Storage
A pegboard is the ultimate modular storage solution. Once reserved for garages, a well-designed pegboard can be an incredibly stylish and functional addition to a modern kitchen. It turns a blank wall into a completely customizable storage grid for utensils, small pans, spices, and more.
The best part is its flexibility. As your needs change, you can simply move the hooks and shelves around—no new holes in the wall. It keeps frequently used items off the counter but still visible and within easy reach, and it offers an industrial-chic aesthetic that feels both personal and highly organized.
Sustaining Order: Long-Term Maintenance & Smart Optimization
You can build the most beautiful, functional system in the world, but it will fail if you don’t maintain it. Organization is not a one-time project; it’s a set of habits. These final tips are the most important, because they are what will keep your kitchen feeling effortless for years to come.
16. Adopt a “One In, One Out” Rule to Prevent Future Clutter Build-Up
This is the golden rule of maintenance. For every new kitchen item you bring home, one similar item must leave. Bought a new, better spatula? The old, flimsy one gets donated. Got a new mug for your birthday? Choose a current mug to pass along.
This simple, non-negotiable rule acts as your kitchen’s immune system, fighting off clutter before it can ever take hold. It forces you to be a conscious consumer and ensures your storage spaces never become overstuffed again. It’s the single most powerful habit for staying organized permanently.
17. Schedule Regular Mini-Declutters: A 15-Minute Weekly Refresh
Don’t wait for things to get out of control. Set a timer for 15 minutes once a week—say, every Sunday afternoon—and do a quick kitchen reset. This isn’t a deep clean. It’s a maintenance sweep.
Put things back where they belong, sort through the mail that’s accumulated on the counter, wipe down your pantry shelves, and check for any nearly-empty containers. This tiny, consistent effort prevents small messes from turning into overwhelming projects. It’s the difference between constantly managing your system and having to rebuild it from scratch every six months.
18. Label Everything for Effortless Locating and Restocking
If you don’t label your containers, you’re only doing half the job. Labeling is the user interface for your kitchen. It removes all guesswork for you and everyone else in your household. No more opening five different canisters to find the flour.
A clear, consistent labeling system makes finding things faster, putting things away easier, and writing a grocery list a breeze. You can instantly see what you’re low on. Whether you use a label maker for a clean look or chalkboard labels for flexibility, this small detail makes your entire system more intuitive and sustainable.
19. Rethink Small Appliance Storage: Group & Contain in Designated Areas
Your stand mixer, blender, and air fryer are useful, but they are countertop hogs. Unless you use an appliance every single day, it does not deserve a permanent spot on your counter. Designate specific, accessible homes for these items.
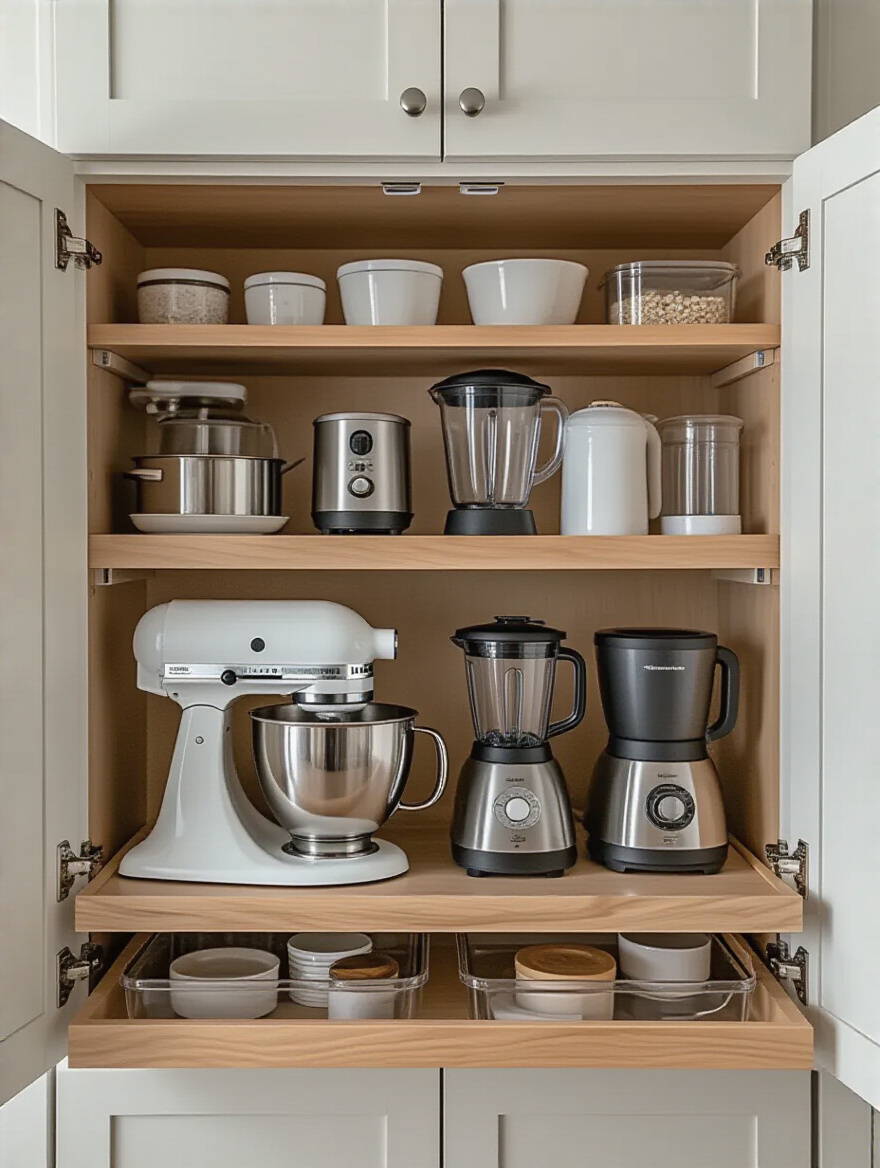
A heavy stand mixer could live on a pull-out shelf in a lower cabinet. A blender and its accessories can be contained in a bin on a pantry shelf. Creating an “appliance garage”—a cabinet with a lift-up door right on the counter—is a fantastic way to keep daily-use items like toasters and coffee makers hidden but instantly accessible. Reclaiming your countertop space is the final, glorious step to a kitchen that feels spacious, functional, and calm.
Conclusion
See the pattern? True, lasting kitchen organization has very little to do with buying fancy bins. It’s about a thoughtful, systematic approach: first understanding your space and your habits, then designing a custom-fit system, and finally, adopting the small routines that maintain it. This process transforms your kitchen from a source of stress into a place of creativity and joy.
Don’t try to tackle all 19 of these ideas at once. Pick one. Just one. Maybe you’ll start by decluttering a single drawer this weekend, or maybe you’ll finally measure your cabinets. Each small step builds momentum, and before you know it, you’ll have a kitchen that not only looks beautifully organized but feels fundamentally different—calmer, smarter, and more inspiring. You’ll have created a space that truly works.


