I walked into what should have been a showstopper kitchen last spring. The clients had invested $60,000 in custom cabinetry, honed marble countertops, and professional-grade appliances. Yet when I flipped the switch, the space felt flat. Lifeless. A single overhead fixture cast shadows across the workspace, and the beautiful details they’d paid for seemed to disappear into the gloom.
This is the moment I see over and over in my practice. Homeowners pour resources into surfaces and materials, then treat lighting as an afterthought—or worse, skip it entirely. Because here’s what most people don’t realize: lighting design is not decoration. It’s the difference between a kitchen that looks great in photos and a kitchen that actually works, where food prep feels safe and easy, where the space feels warm when you’re cooking dinner, and where the details you invested in actually get seen.
For nearly a decade, I’ve watched this pattern repeat, and I’ve learned exactly which lighting strategies solve 95% of kitchen problems. Some are simple tweaks—repositioning a single recessed light or adding under-cabinet LEDs. Others require more intentional planning, like building a proper three-layer lighting system or choosing the right pendant height. But every single approach in this list is rooted in how human eyes actually work and how light behaves in real kitchens.
The 15 kitchen lighting ideas ahead cover everything from foundational layering to smart controls. Whether you’re starting from scratch or fixing a kitchen that never quite felt right, these strategies will show you how light transforms a room that works into one you genuinely love being in.
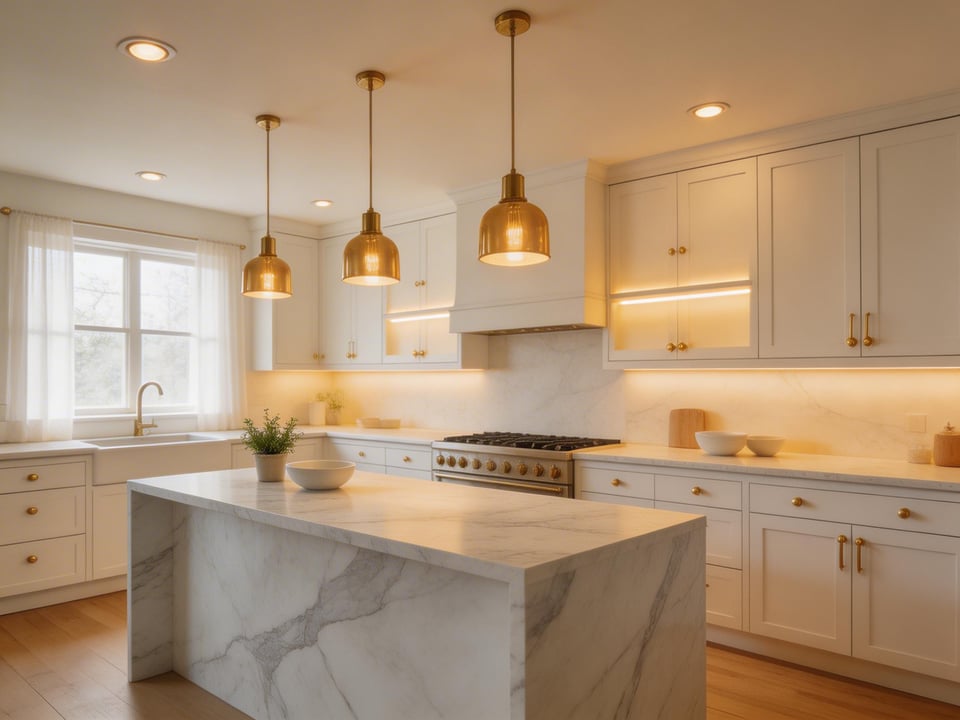
1. Layered Lighting: The Foundation of Proper Kitchen Design
Most kitchen lighting ideas start with a single overhead fixture—and that’s the first mistake. The moment you rely on one source, you create shadows, eye strain, and a space that feels one-dimensional. Professional kitchen design is built on three distinct layers, each doing a different job.
The Three-Layer System
Ambient is your fill light (150–200 lumens per square foot). Task lighting lets you actually see what you’re doing — chopping vegetables, reading a recipe — and requires 300–500 lumens per square foot in work zones. Accent is the personality layer: decorative fixtures that add visual interest, running about 10–20 percent of your ambient output.
These layers work together. A professional designer starts with task lighting first, then adds ambient fill to prevent shadows and dark corners. Accent comes last, bringing intentional visual focus.
Why Each Layer Matters
Ambient light alone leaves you working in dim zones. Task light alone feels clinical. But combine all three? The space suddenly feels intentional, layered, and genuinely comfortable to spend time in. Eighty-five percent of professional designers use this three-layer approach in their kitchen projects.
Start your lighting plan with a task audit. Where do you stand most often? At which counters do you prep food? That’s where your task lighting goes first. Products like Halo RL Series recessed LEDs ($20–35 each) and Kichler 4U under-cabinet strips ($70–90) are the working pieces. Then add your ambient layer—more recessed fixtures or a flush-mount ceiling light. Finally, choose a statement pendant or decorative fixture to make the space feel like your own. The one honest observation after years of this work: people always underestimate how much accent lighting they actually want. Don’t be timid here.
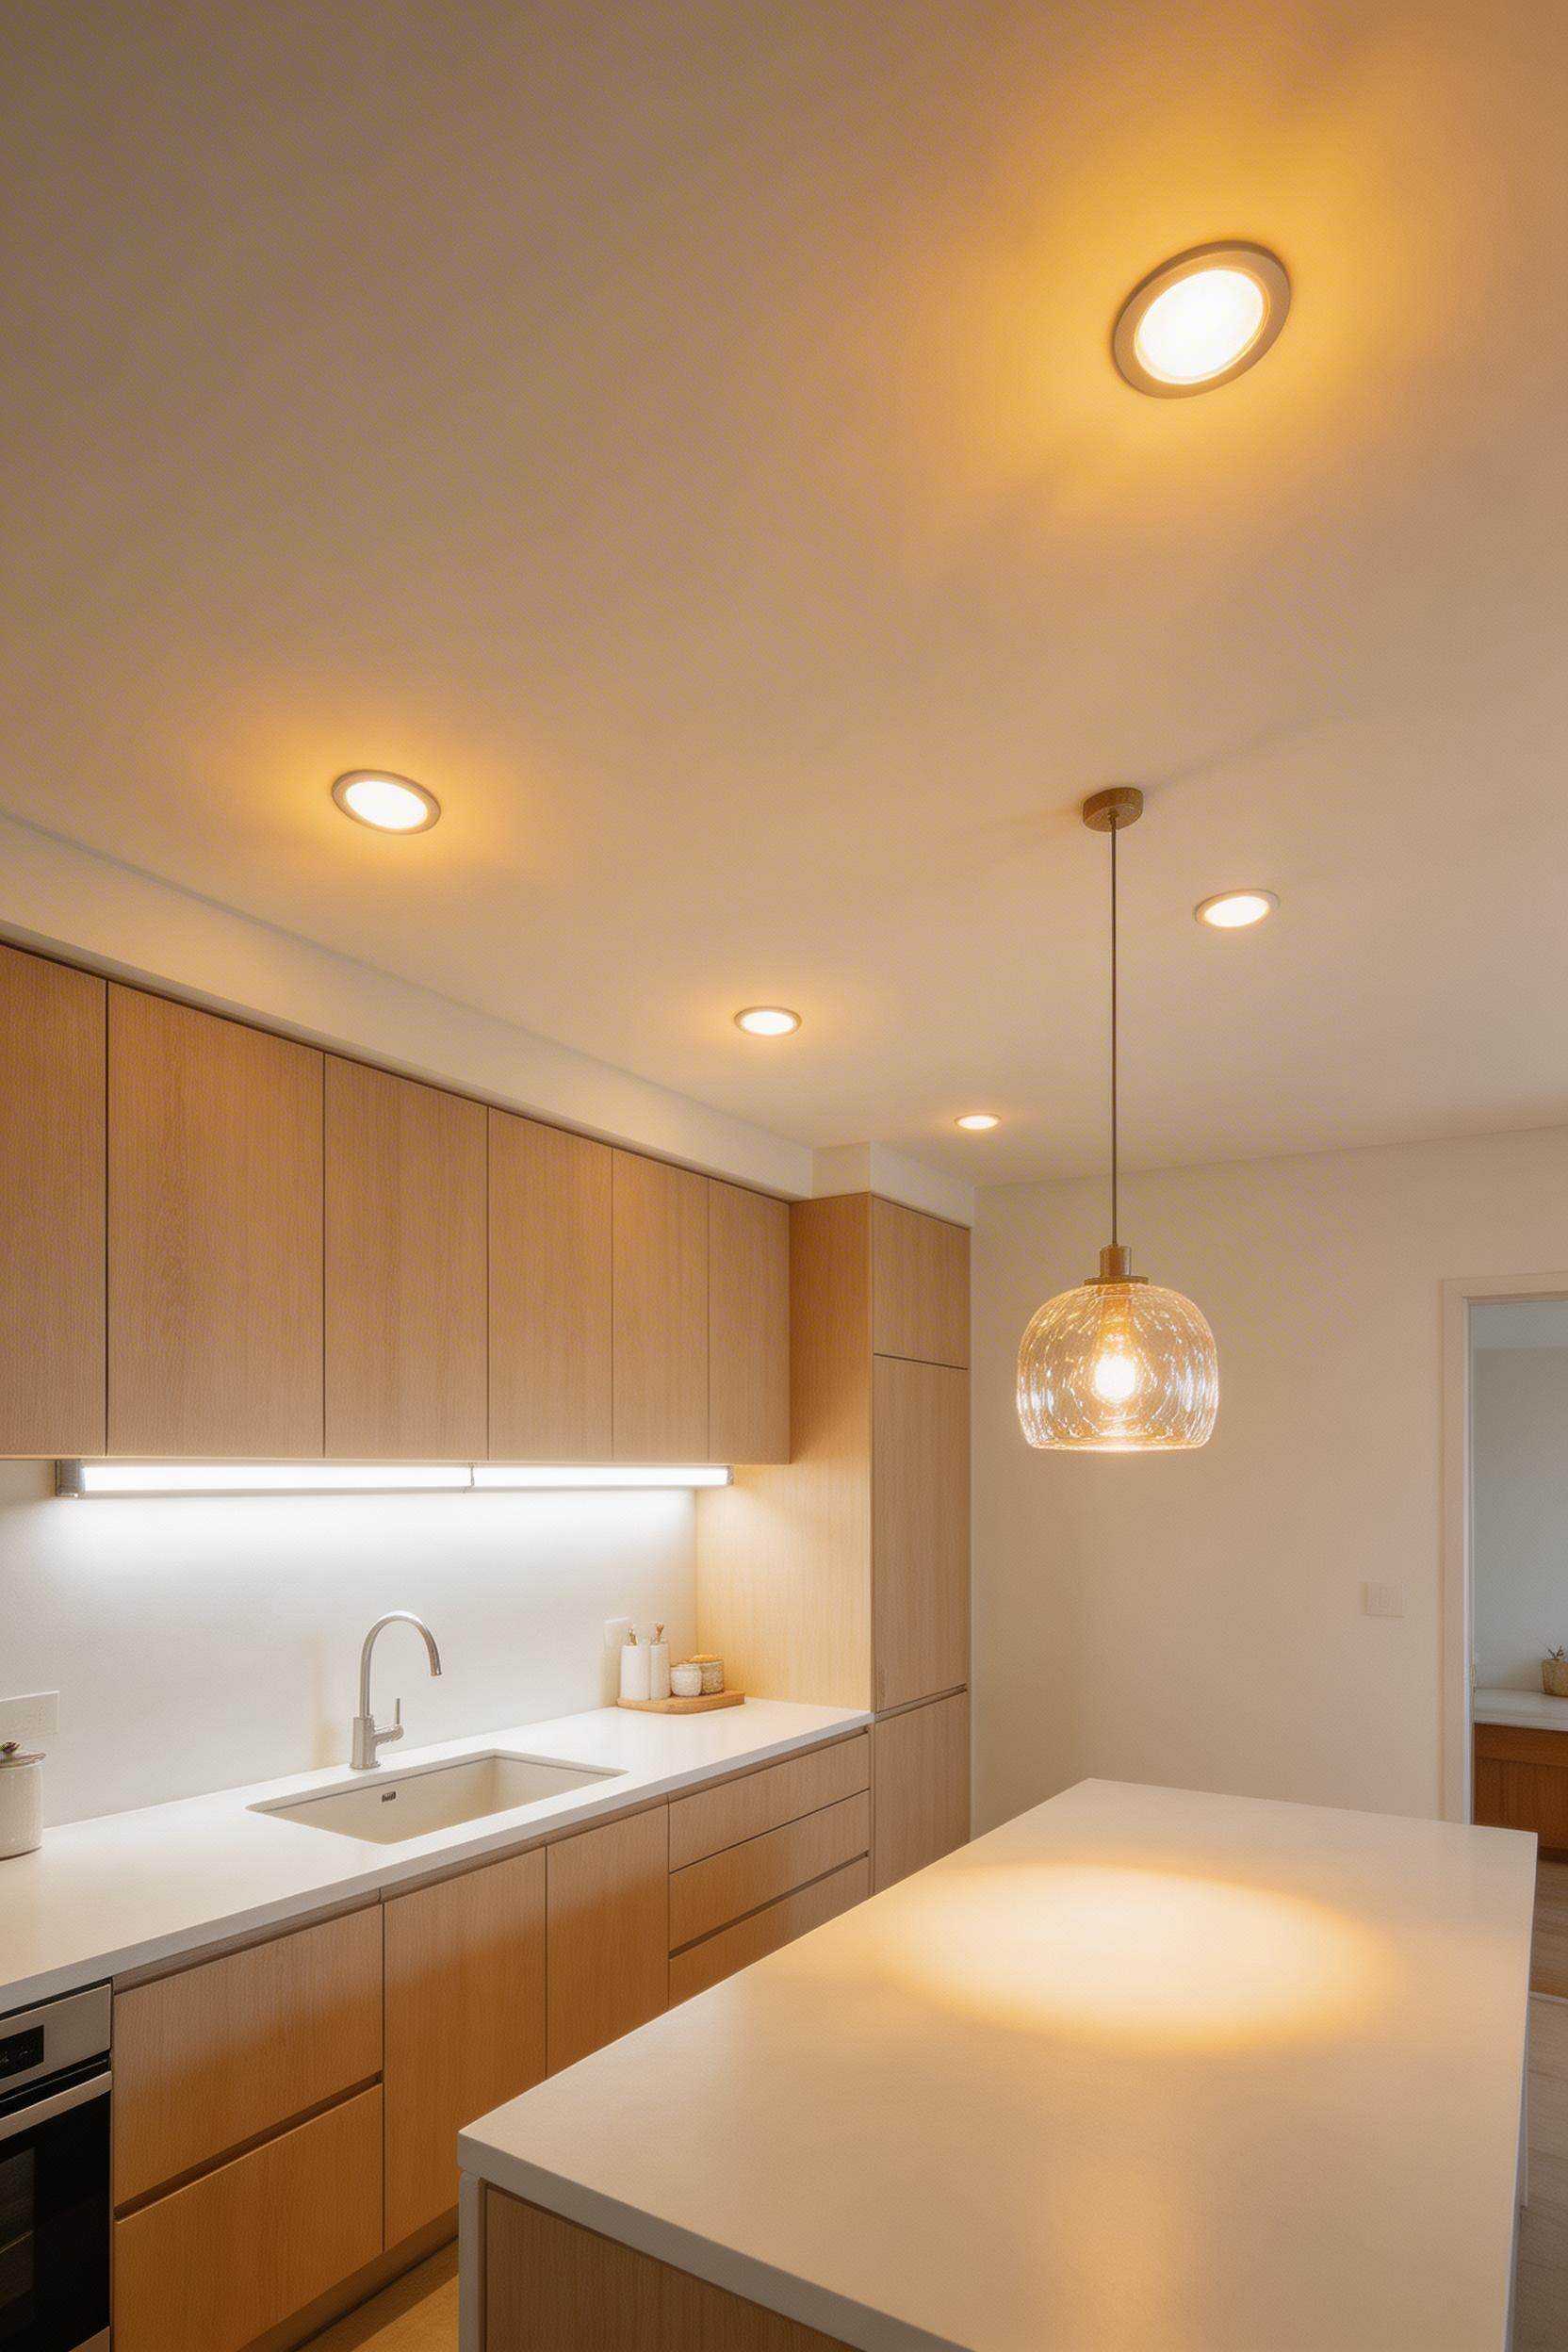
2. Recessed Lighting Layouts: Positioning for Actual Work
Most recessed lighting fails because it’s installed in the wrong place. I’ve walked into countless kitchens where lights sit directly above the cabinet line or, worse, directly above where you stand. The result is what I call “shadow head”—your head blocks the light and casts a shadow onto the exact surface where you’re trying to work.
The 2/3 Rule and Shadow Prevention
The math is simple: ceiling height divided by two equals distance from wall. An 8-foot ceiling means lights sit 4 feet from the wall. But the real fix is the 2/3 rule — position lights two-thirds of the way from wall to room center over work areas. This keeps light from casting shadows onto the countertop.
Even more precise: place lights 18–24 inches in front of where you actually stand. When you stand at a prep zone you’re typically 12–18 inches back from the edge. Lighting that’s positioned 18–24 inches in front of you hits the surface at an angle that eliminates shadow head 95 percent of the time.
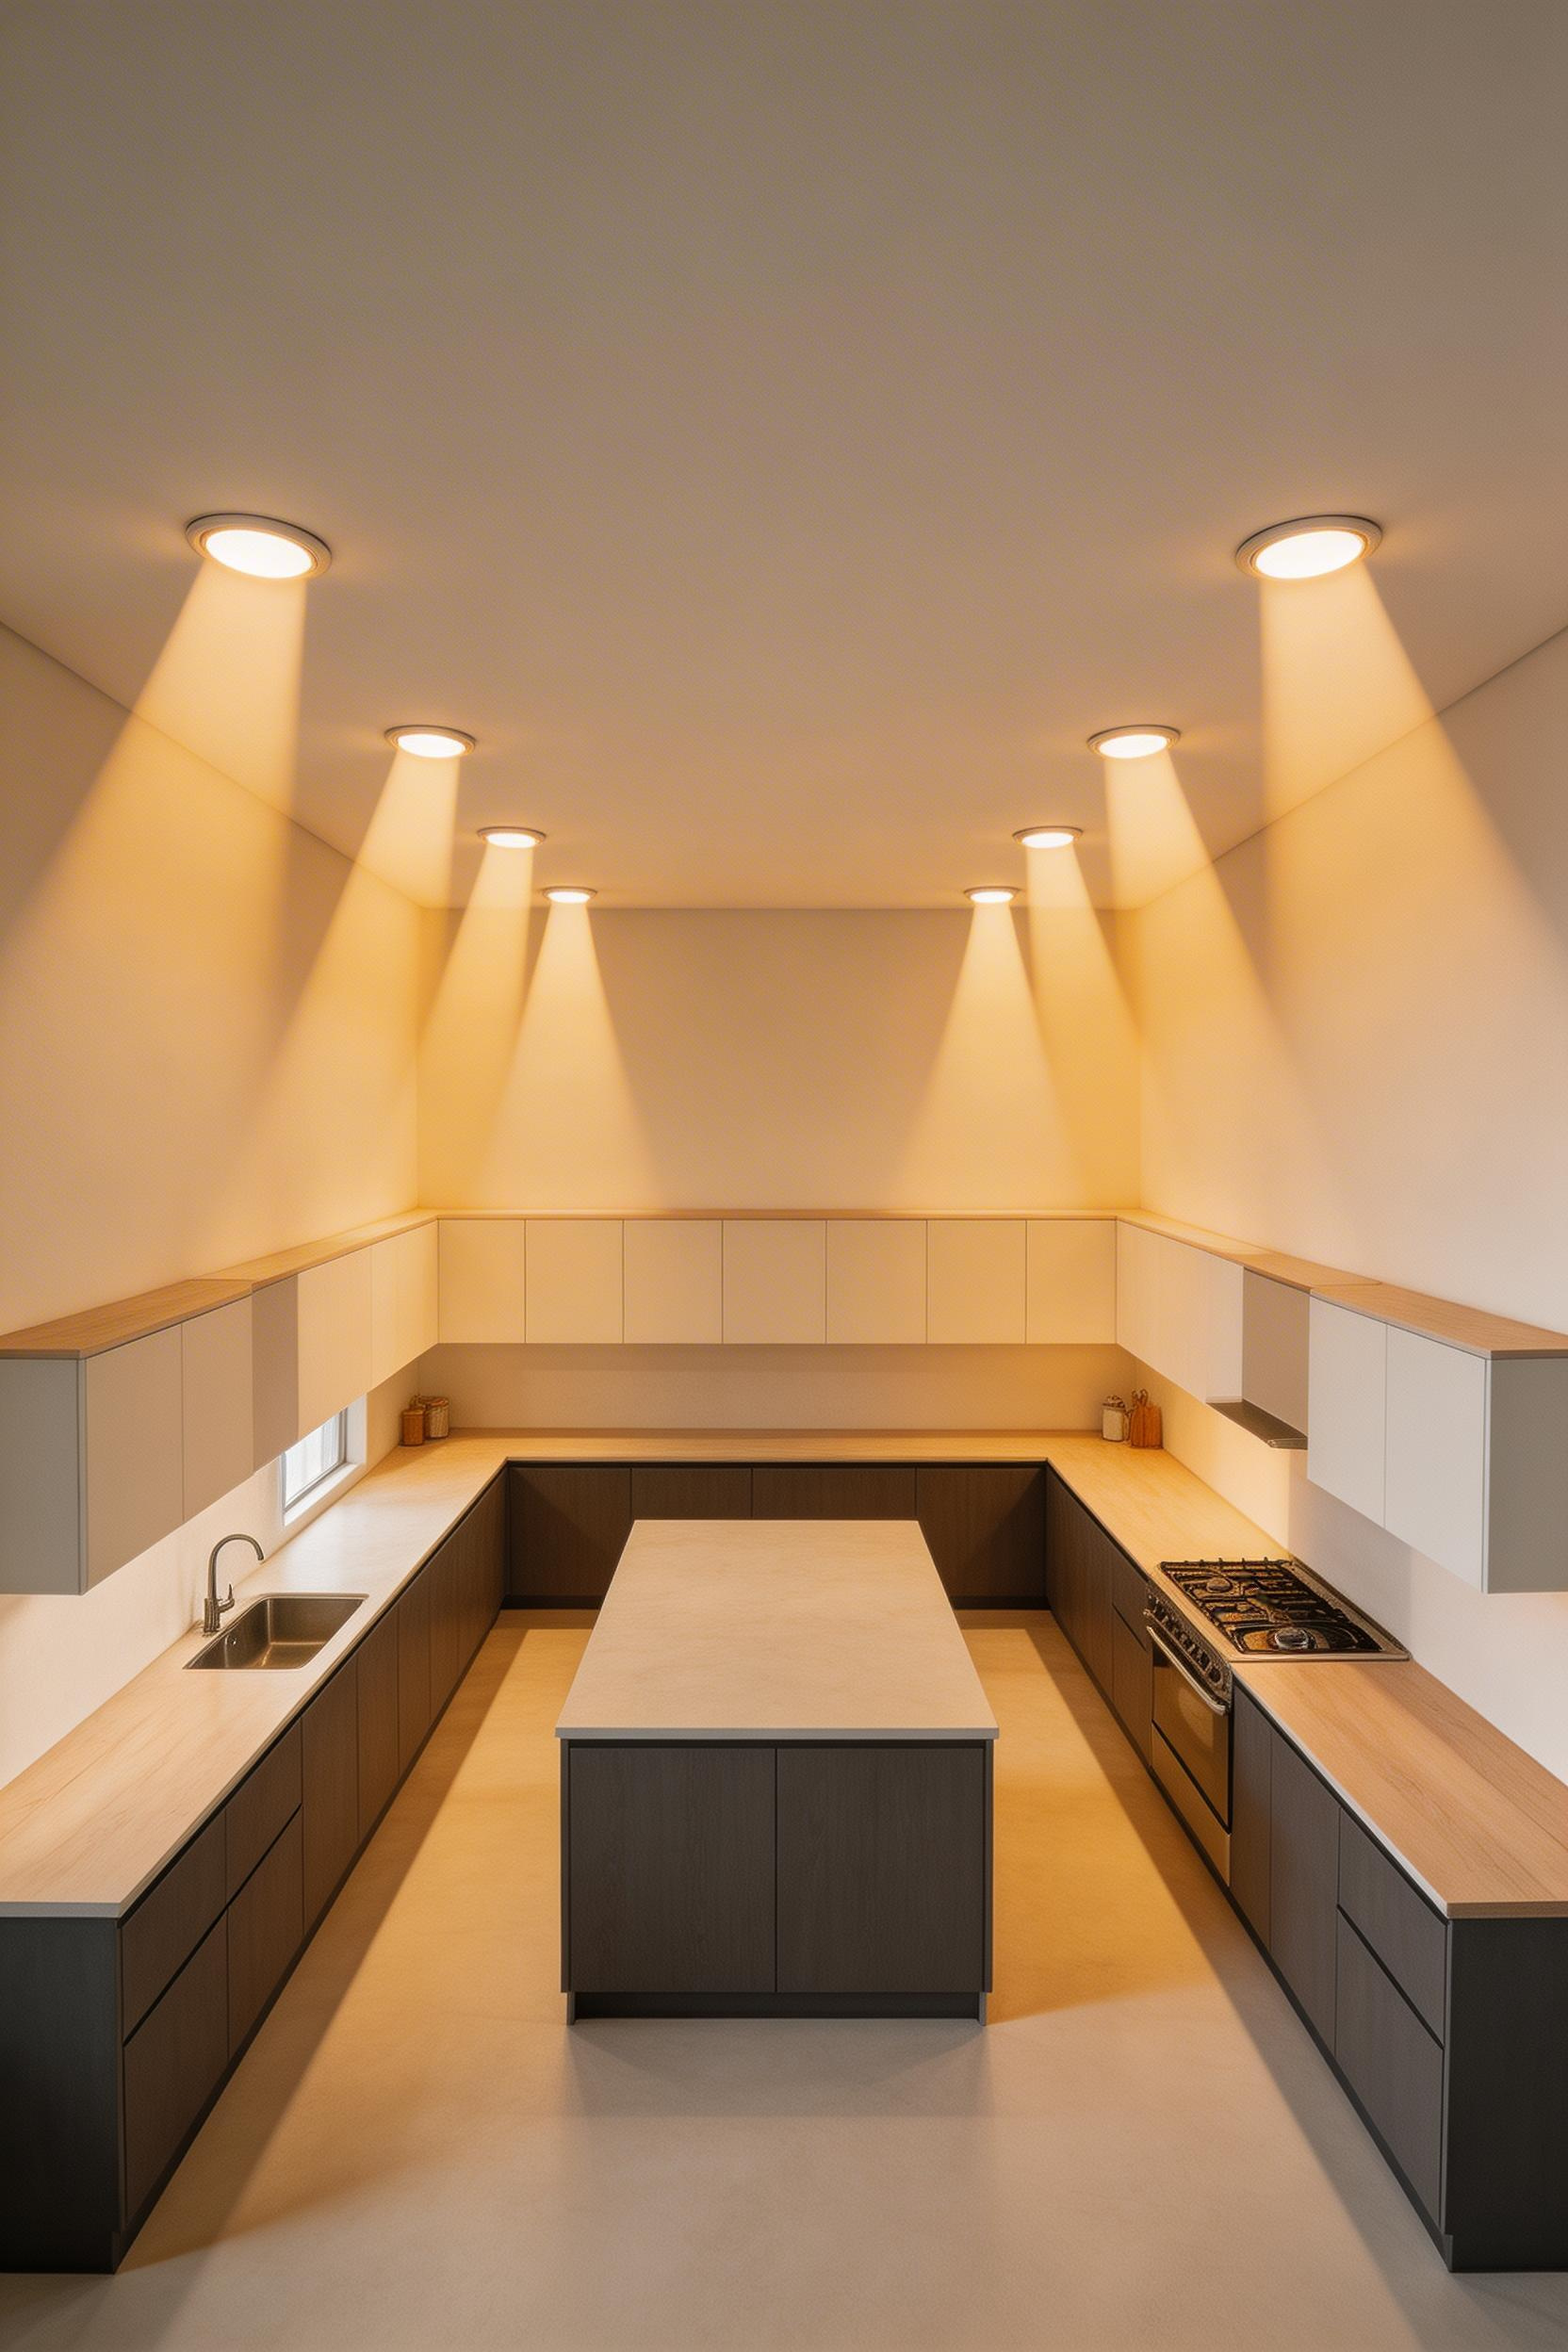
Spacing and Trim Selection
The spacing formula is simple: divide your ceiling height by two for distance from the wall, then space fixtures 4 to 6 feet apart. For an 8-foot ceiling, that’s 4 feet from wall, then fixtures every 4 to 6 feet running the length of your counter. Choose baffle trim for general work areas—it reduces glare and looks clean. Reflector trim maximizes light output when you need extra brightness. Adjustable gimbal trim lets you aim light where it matters most.
Baffle trim is forgiving and doesn’t look industrial. When you’re planning a kitchen lighting over island layout, these placement principles apply even more critically — an island has no wall reference, so positioning becomes your entire strategy.
3. Pendant Lights Over Island: Sizing and Hanging Height
Pendant sizing is where most homeowners go wrong. I see kitchens with beautiful islands paired with pendants that look like floating toys—way too small for the space. The math is straightforward, yet it matters enormously for how the room actually feels.
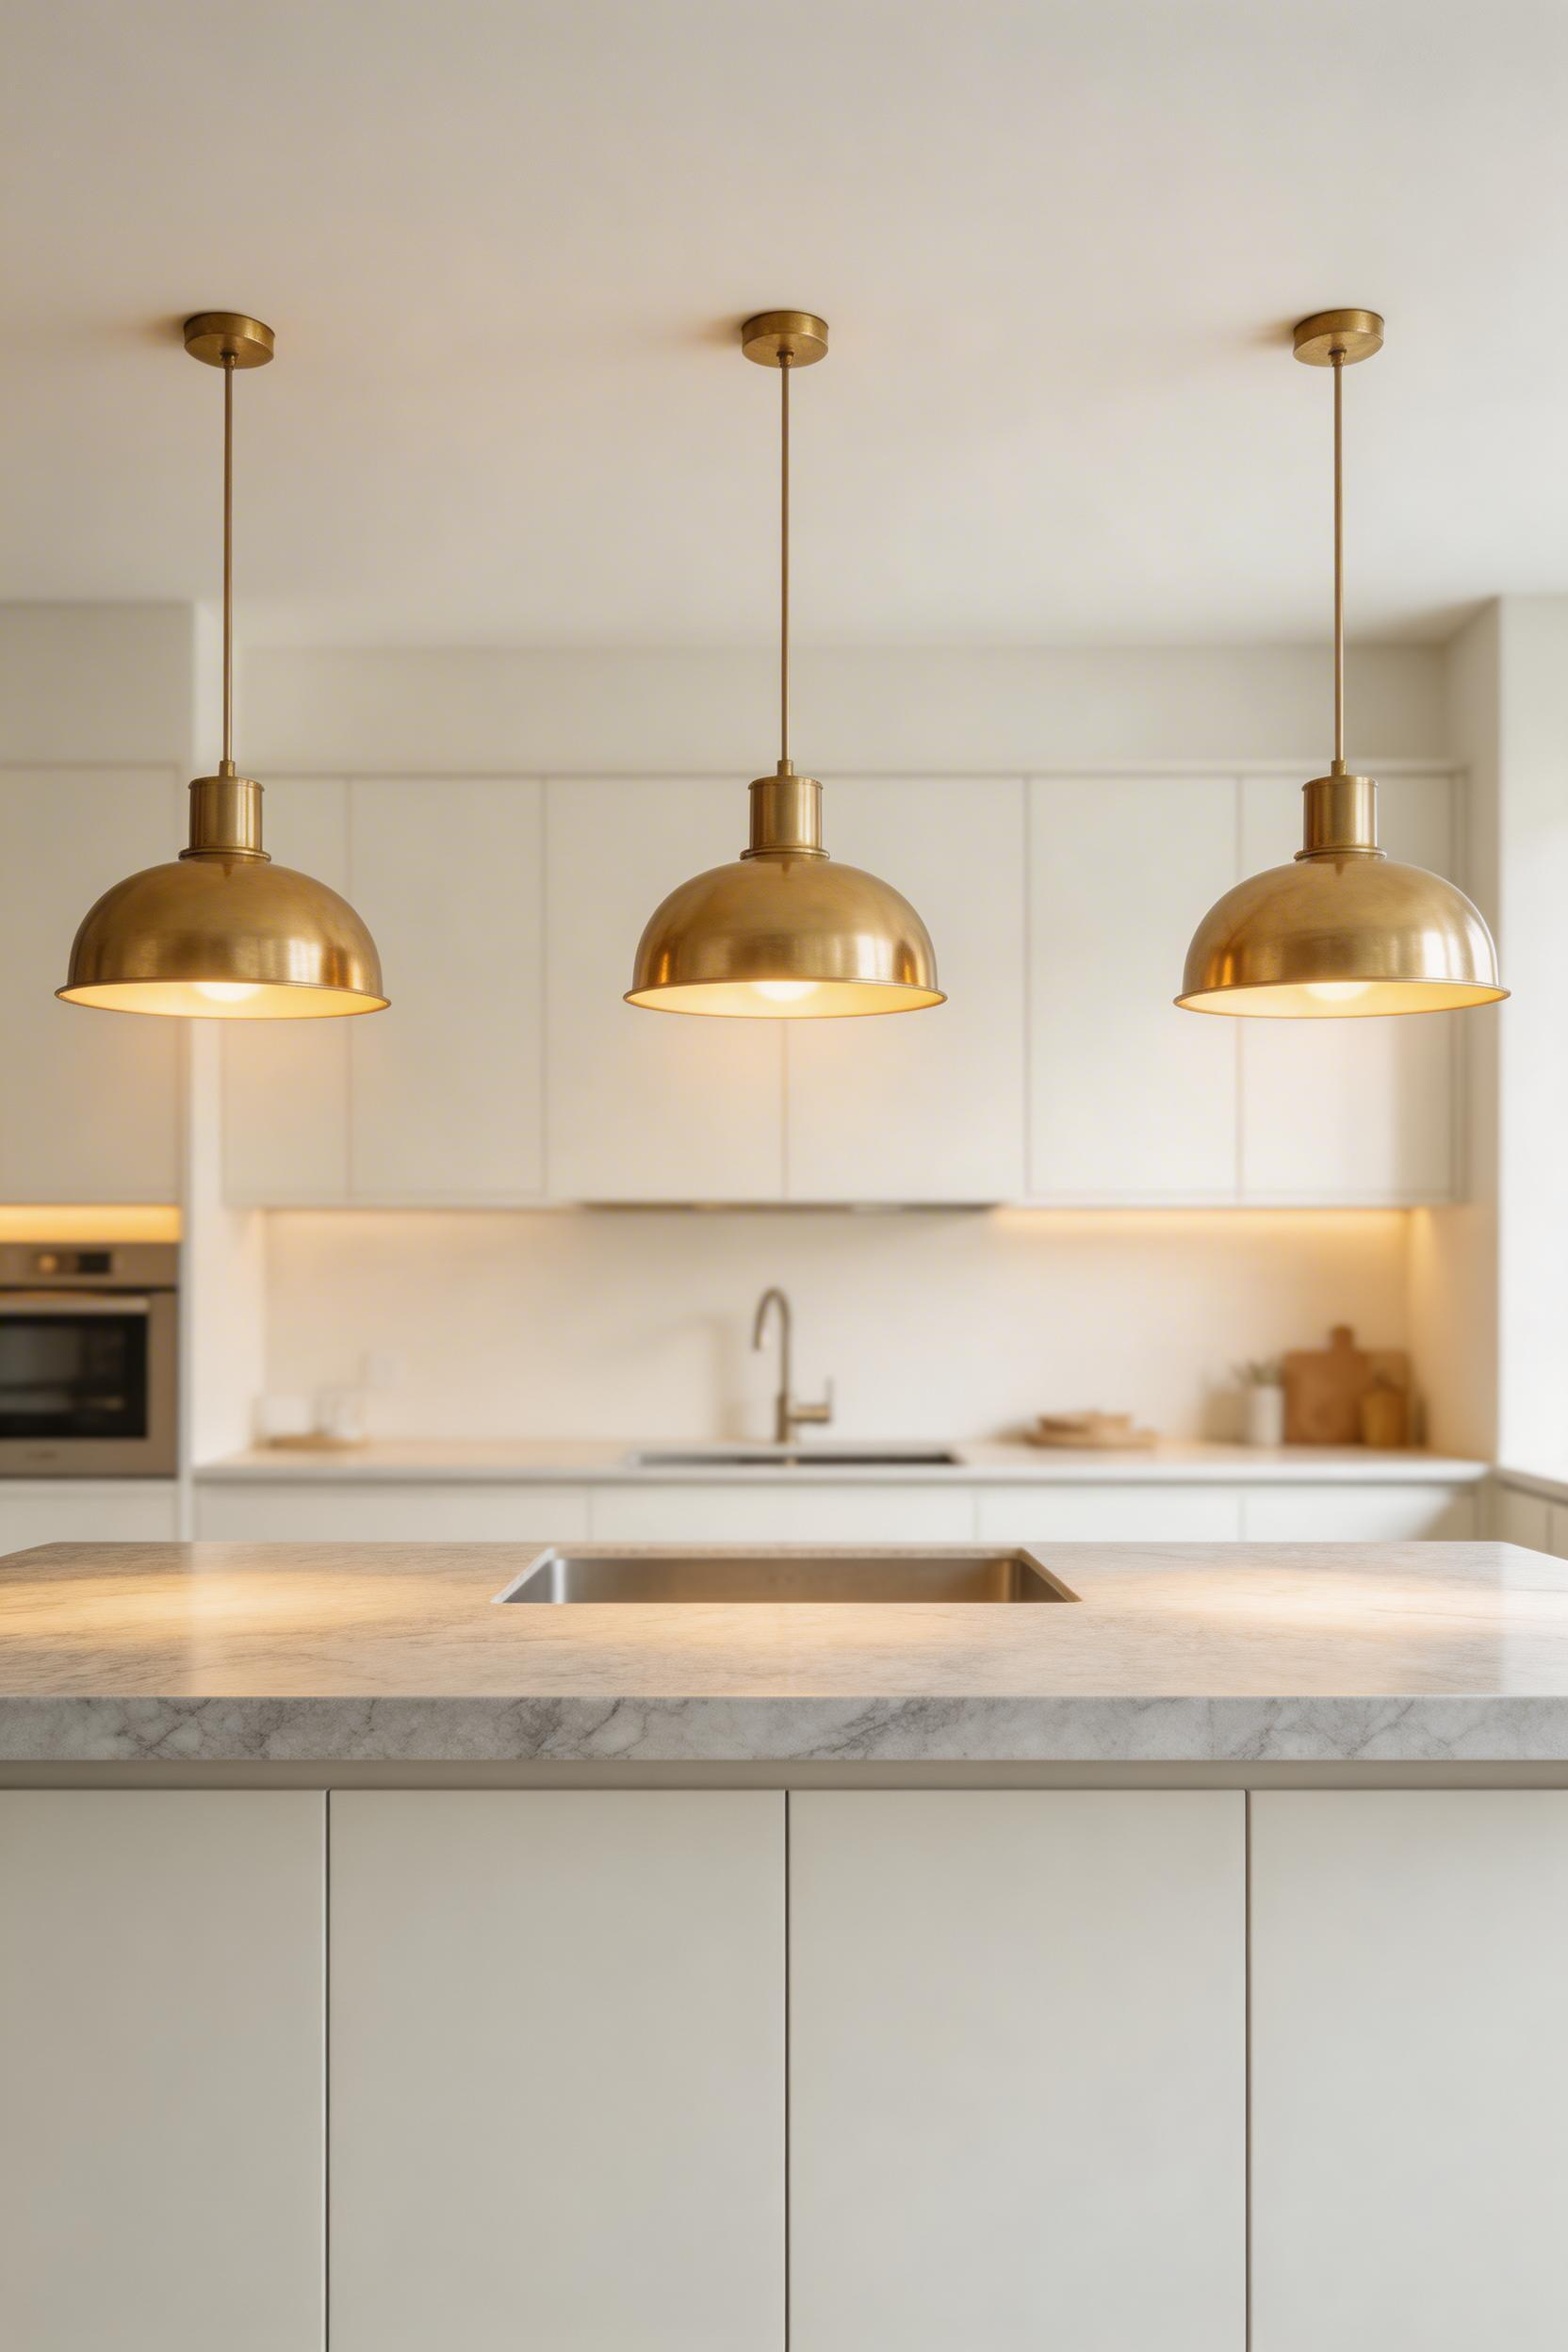
The Sizing Formula
Take your island length in inches and divide by three. A 60-inch island gets 20-inch pendants (or three smaller 8 to 10-inch pendants spaced evenly). A 48-inch island works with 16-inch pendants. This proportion feels right because it respects the visual weight of the island itself. Too small and the space feels fussy. Too large and pendants feel like they’re eating the room.
Once you’ve sized your pendants, hang them 28 to 36 inches above the countertop. For most kitchens with standard 9-foot ceilings, 30 to 32 inches is the sweet spot. If your ceiling is only 8 feet, drop them 28 to 30 inches. With 9-foot ceilings, you can go up to 36 inches and still maintain good scale. Space multiple pendants with at least 6 inches between them; ideally, center them 24 to 30 inches apart down the island length.
Style and Market Demand
The “floating toy” effect is real, and it happens because people default to pendants their local big-box store stocks. Mid-century modern styles ($80–200) bring warmth and intentionality. Farmhouse enamel fixtures ($75–180) add texture. Industrial cage lights ($70–160) work in transitional spaces. Glass globes ($90–220) feel timeless. The honest truth: pendant searches hit 88 out of 100 on Google Trends in 2025. People know they want this look, but scale matters more than style. Get the size and height right first, then choose the aesthetic that fits your kitchen’s personality. Also, remember that kitchen lighting over island is the first thing guests notice. Good kitchen lighting ideas for islands invest here first, and the room suddenly feels professionally designed.
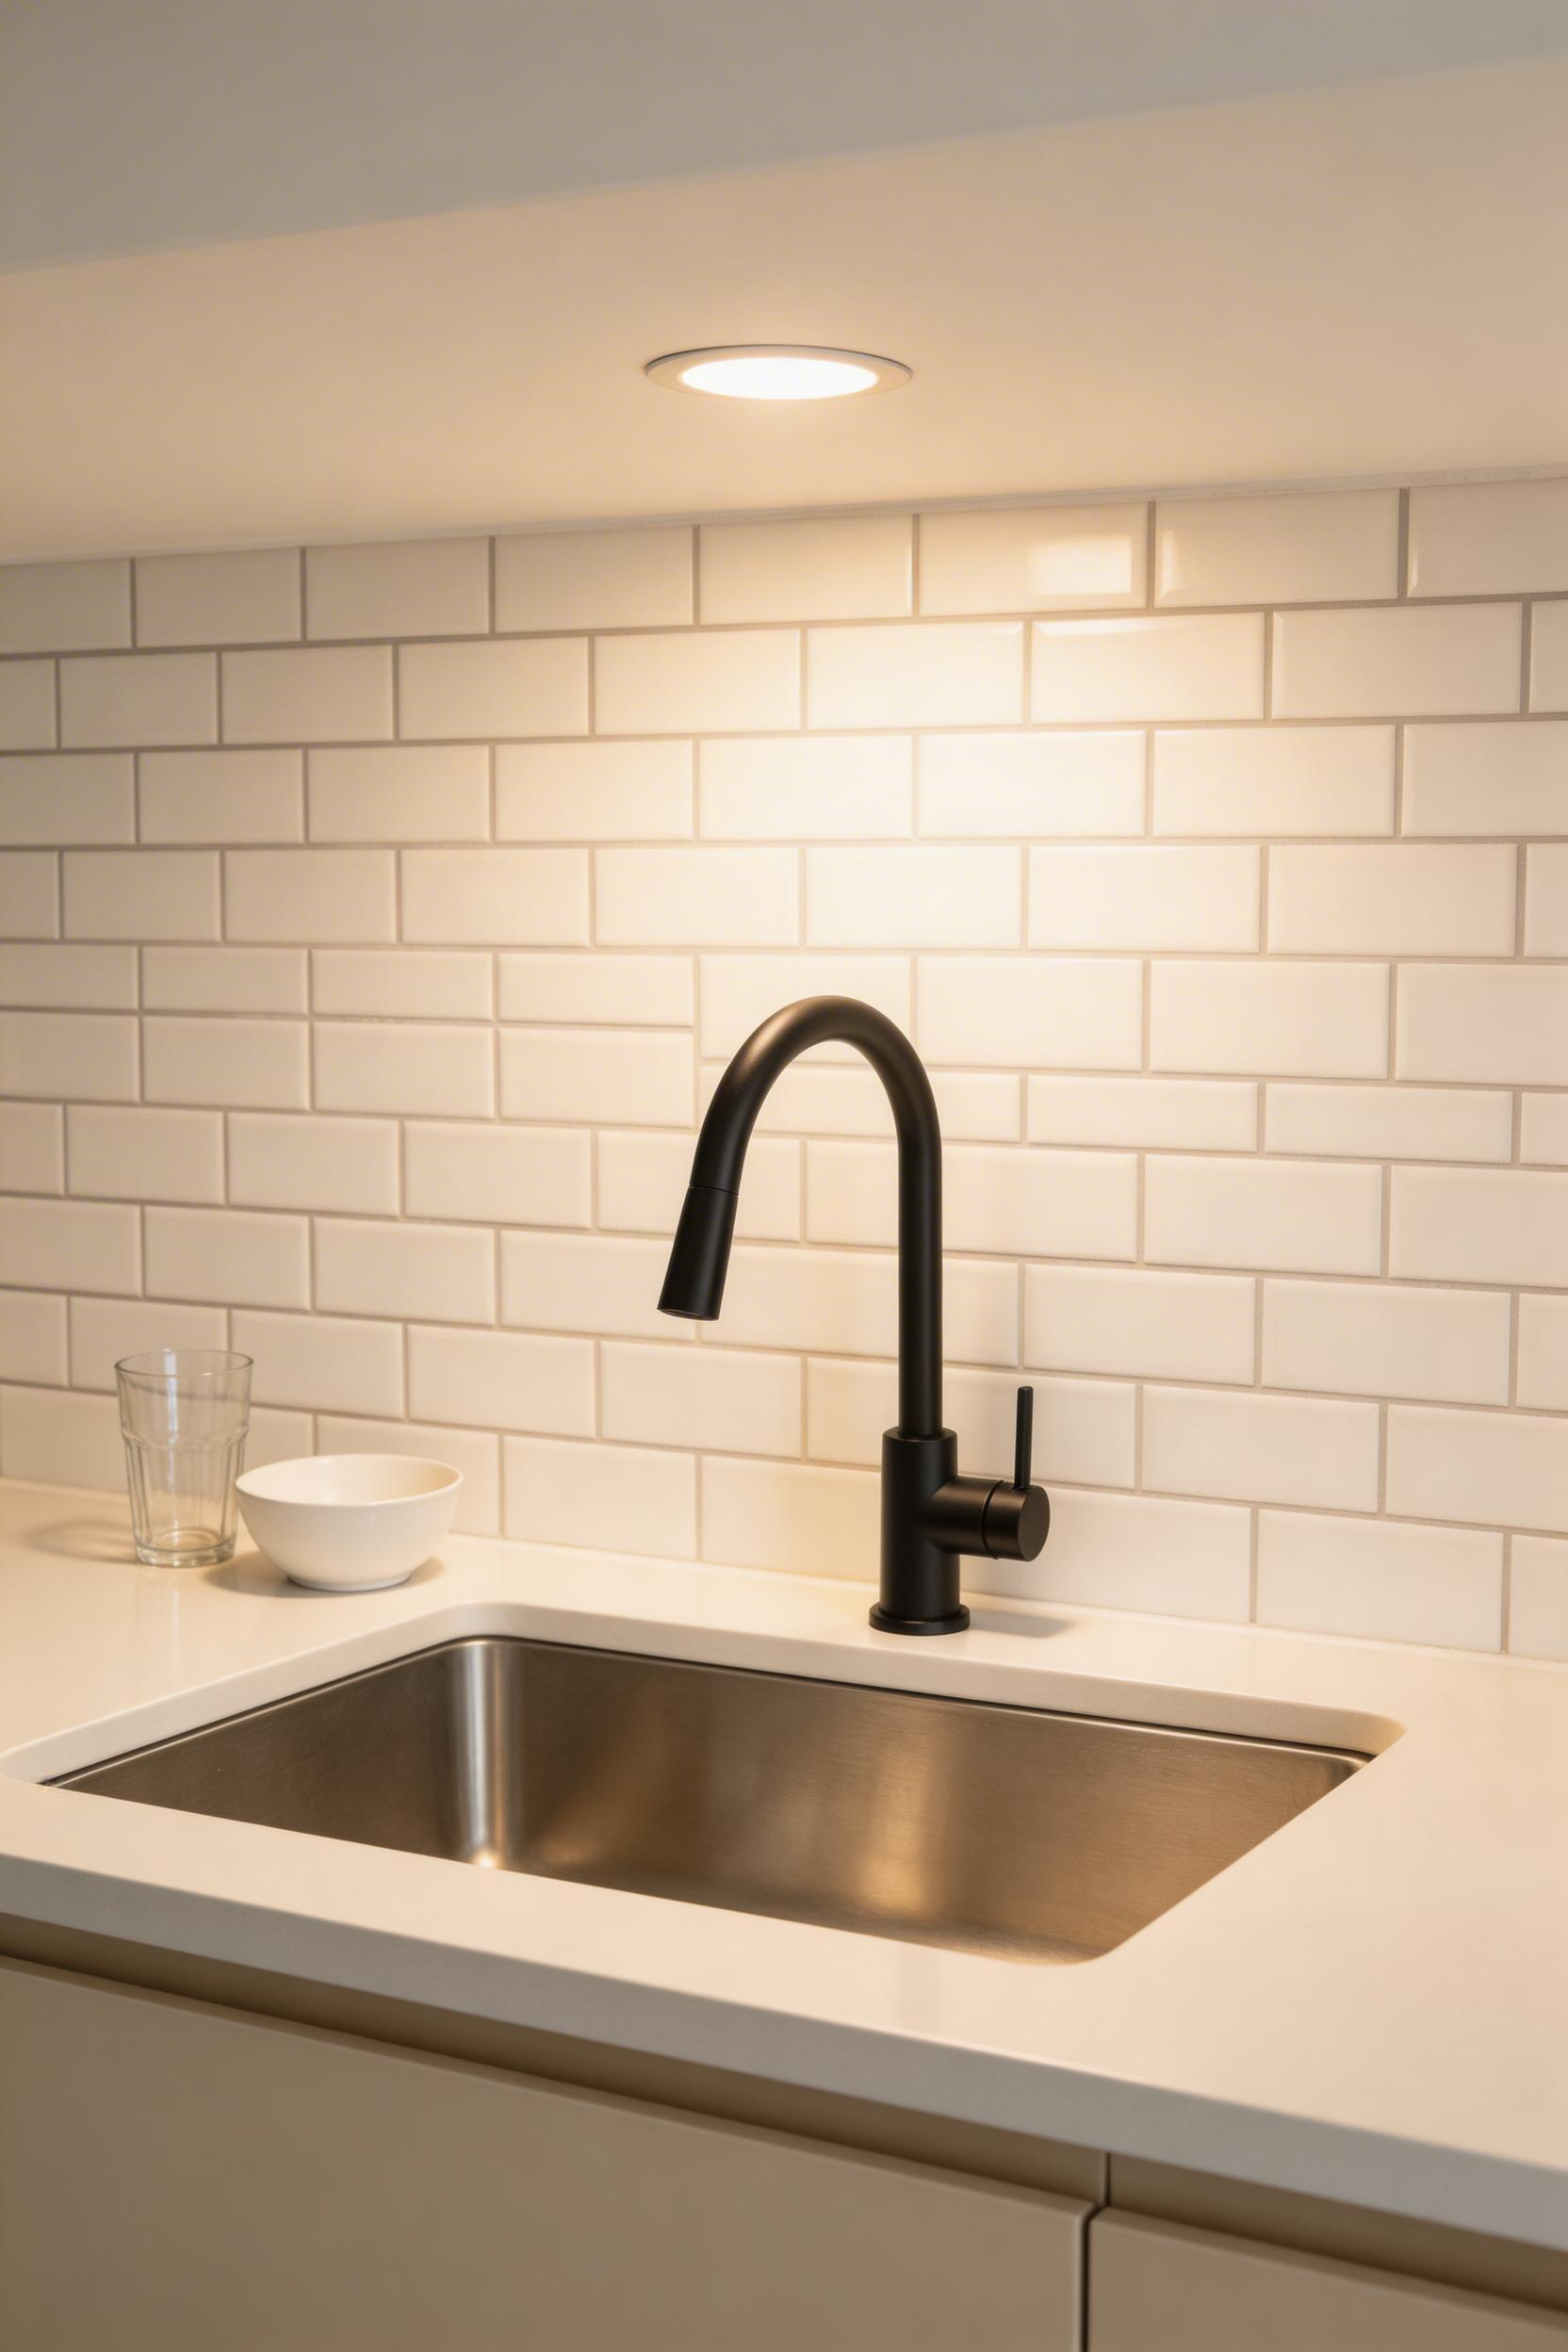
4. Under-Cabinet LED Strips: The Most Cost-Effective Upgrade
If you’re looking for maximum impact per dollar, this is it. Under-cabinet LED strips are the most cost-effective kitchen lighting upgrade available. You’ll spend $30 to $80 for a 30-inch run, and the transformation is visible the moment you turn them on.
Positioning and Color Temperature
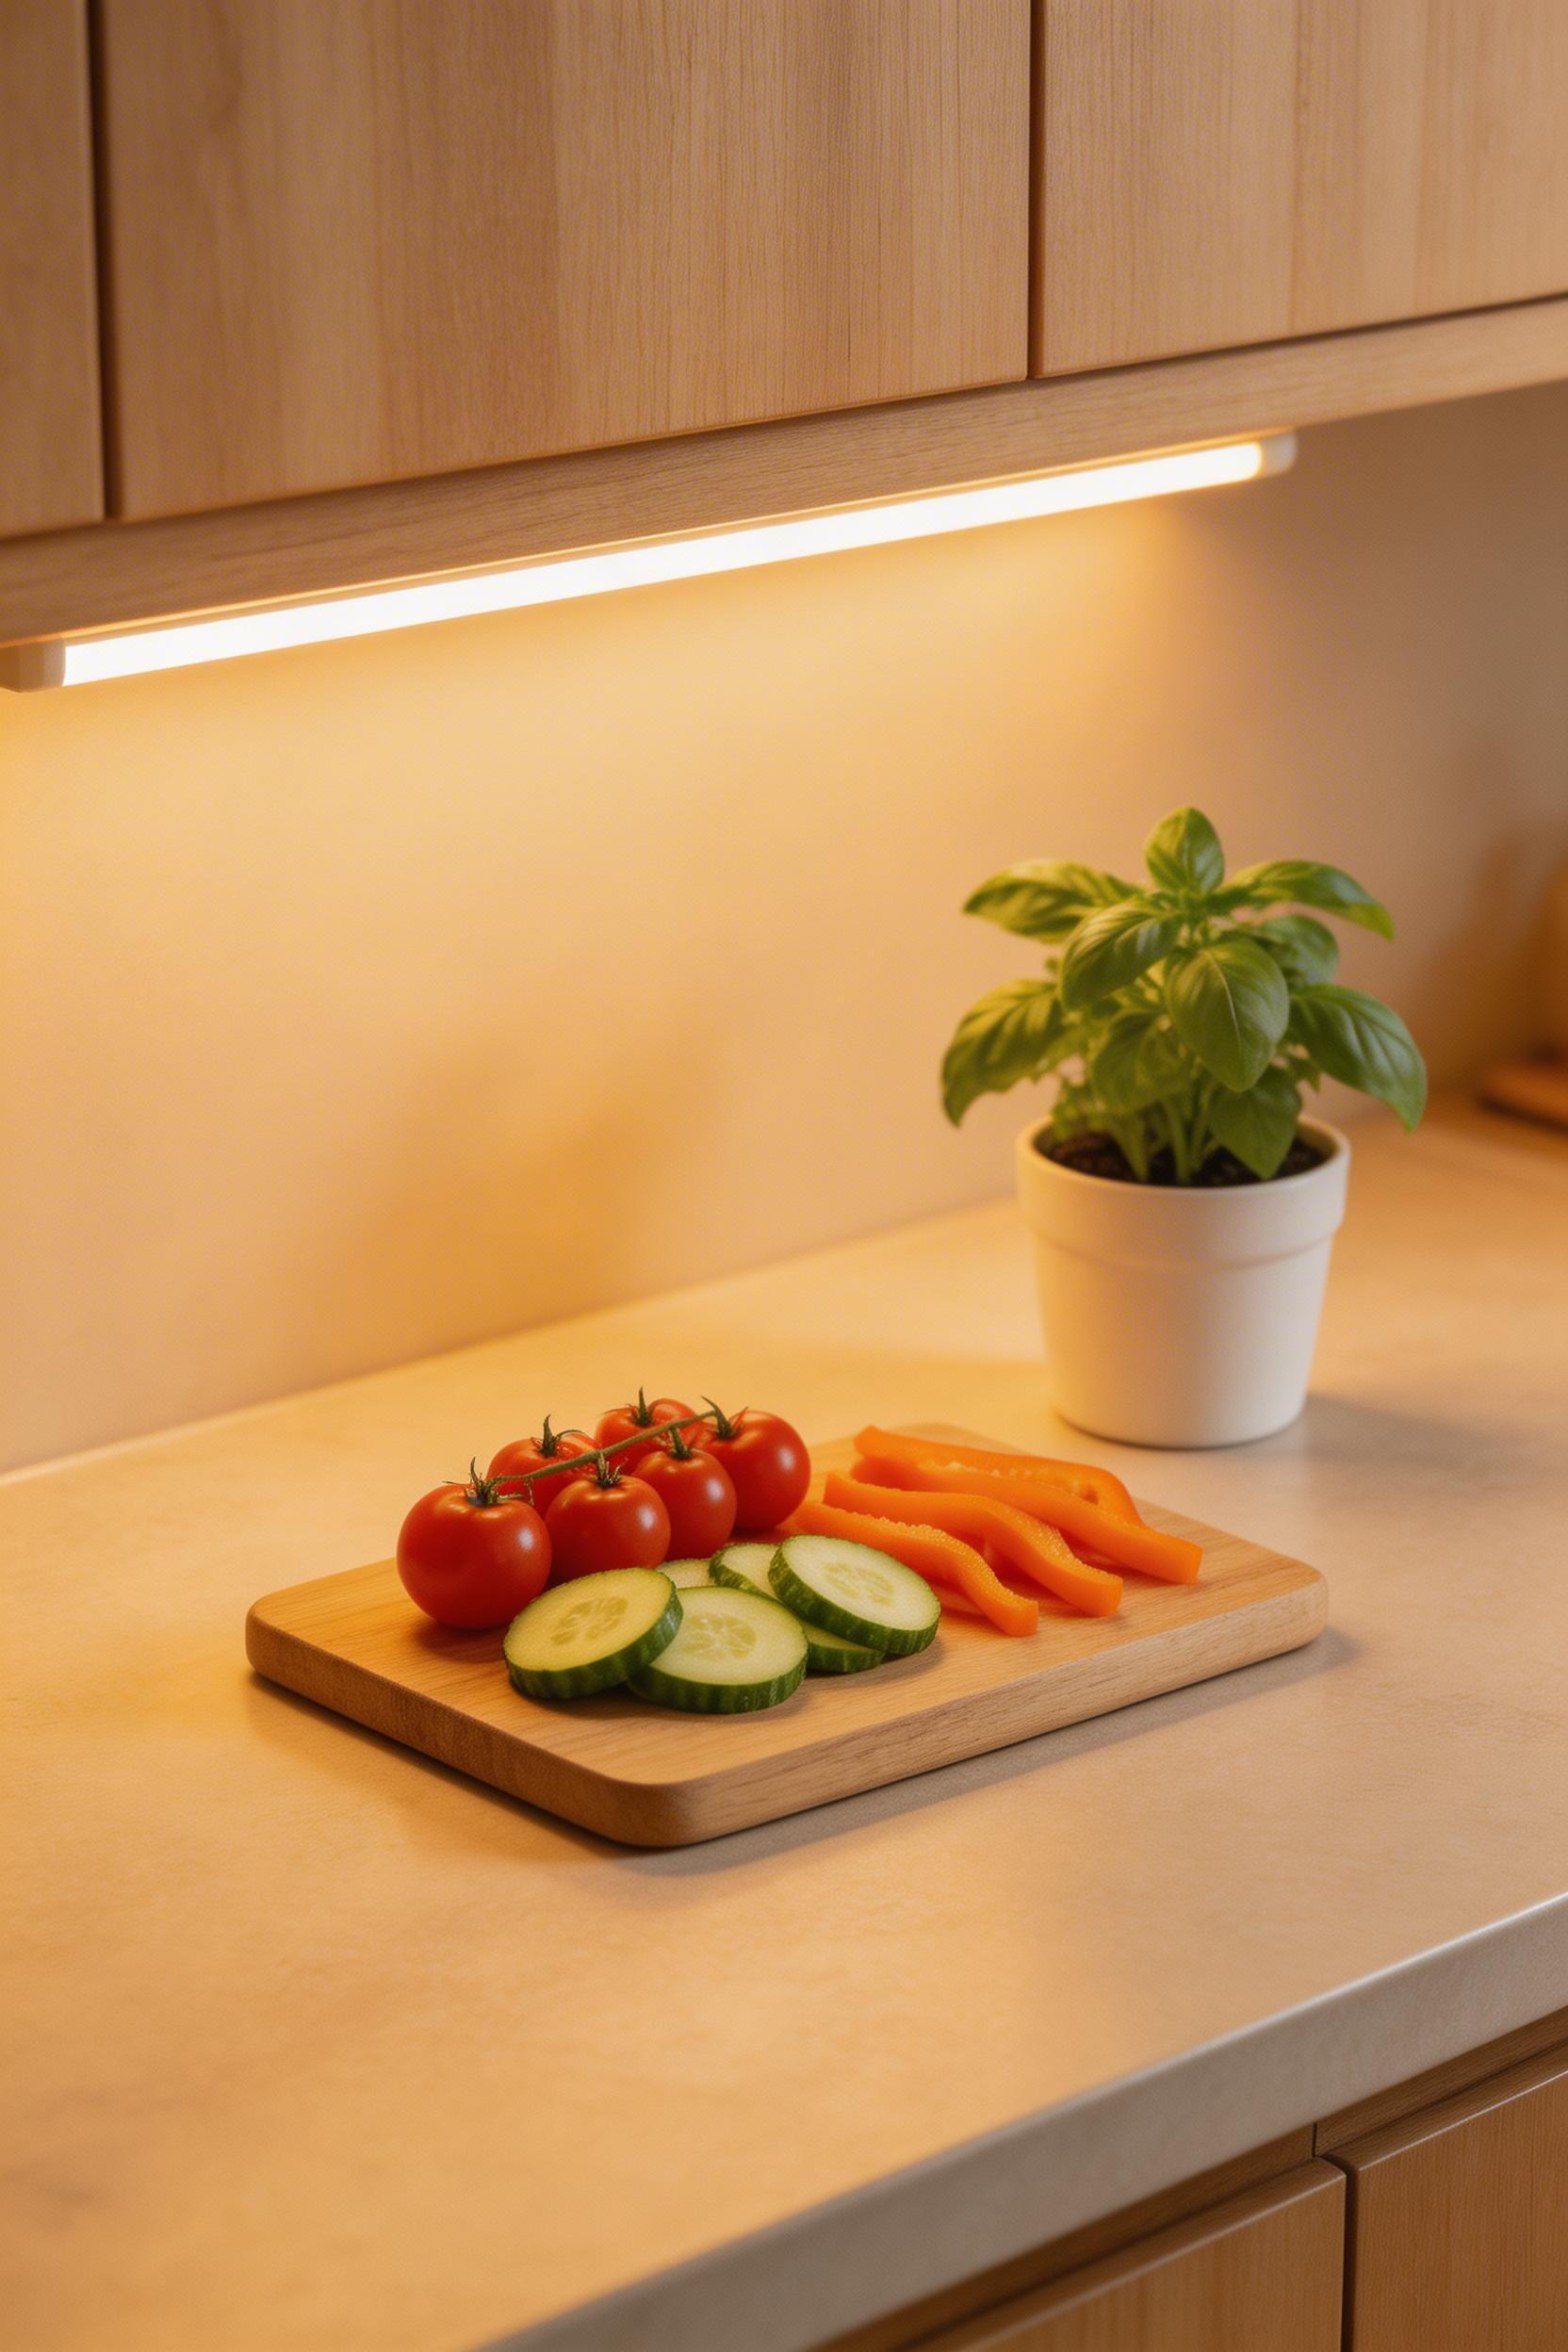
Most people install under-cabinet strips in the center of the cabinet base or too far back. That’s wrong. Position them at the front third of your cabinet—where the lip of the cabinet is closest to the countertop. This angle throws light onto your work surface without glare and without creating a shadow line on your counter itself.
Color temperature matters here. Choose 2700K for warm, traditional kitchens where you want everything to feel cozy. Use 3000K for balanced work light that’s neither too warm nor too cool—it works with almost any kitchen style. If your kitchen is heavily task-oriented with a serious prep zone, 3500K gives you that extra brightness without feeling cold. Hardwired strips look cleaner and feel permanent ($200–400 in electrician time). Plug-in strips are affordable and work fine if you plan your cord management carefully behind appliances or along baseboards ($30–80).
Dimmer Compatibility and Installation
Before you buy, verify dimmer compatibility. Not every LED strip is dimmable, and forcing a non-dimmable strip onto a dimmer circuit creates annoying flicker. Kichler 4U LEDs ($70–90 per section), Recesso Premium strips ($60–85), and Legrand Radiant fixtures ($50–100) all offer dimmable versions. Task Lighting Corp strips ($45–75) are budget-friendly and surprisingly reliable.
The satisfaction difference is significant: kitchens with recessed lighting only score 35 percent satisfaction; add under-cabinet LEDs and that jumps to 90 percent. Combined with optimal kitchen lighting principles, under-cabinet strips are your highest-ROI improvement.
5. Statement Chandelier: When and How to Use One
A chandelier in a kitchen sounds wrong to most people, but it ranks among the most effective kitchen lighting ideas when the space calls for it. The key is knowing when a chandelier actually belongs instead of when it’s just ornamental clutter hanging from your ceiling.
When a Chandelier Makes Sense
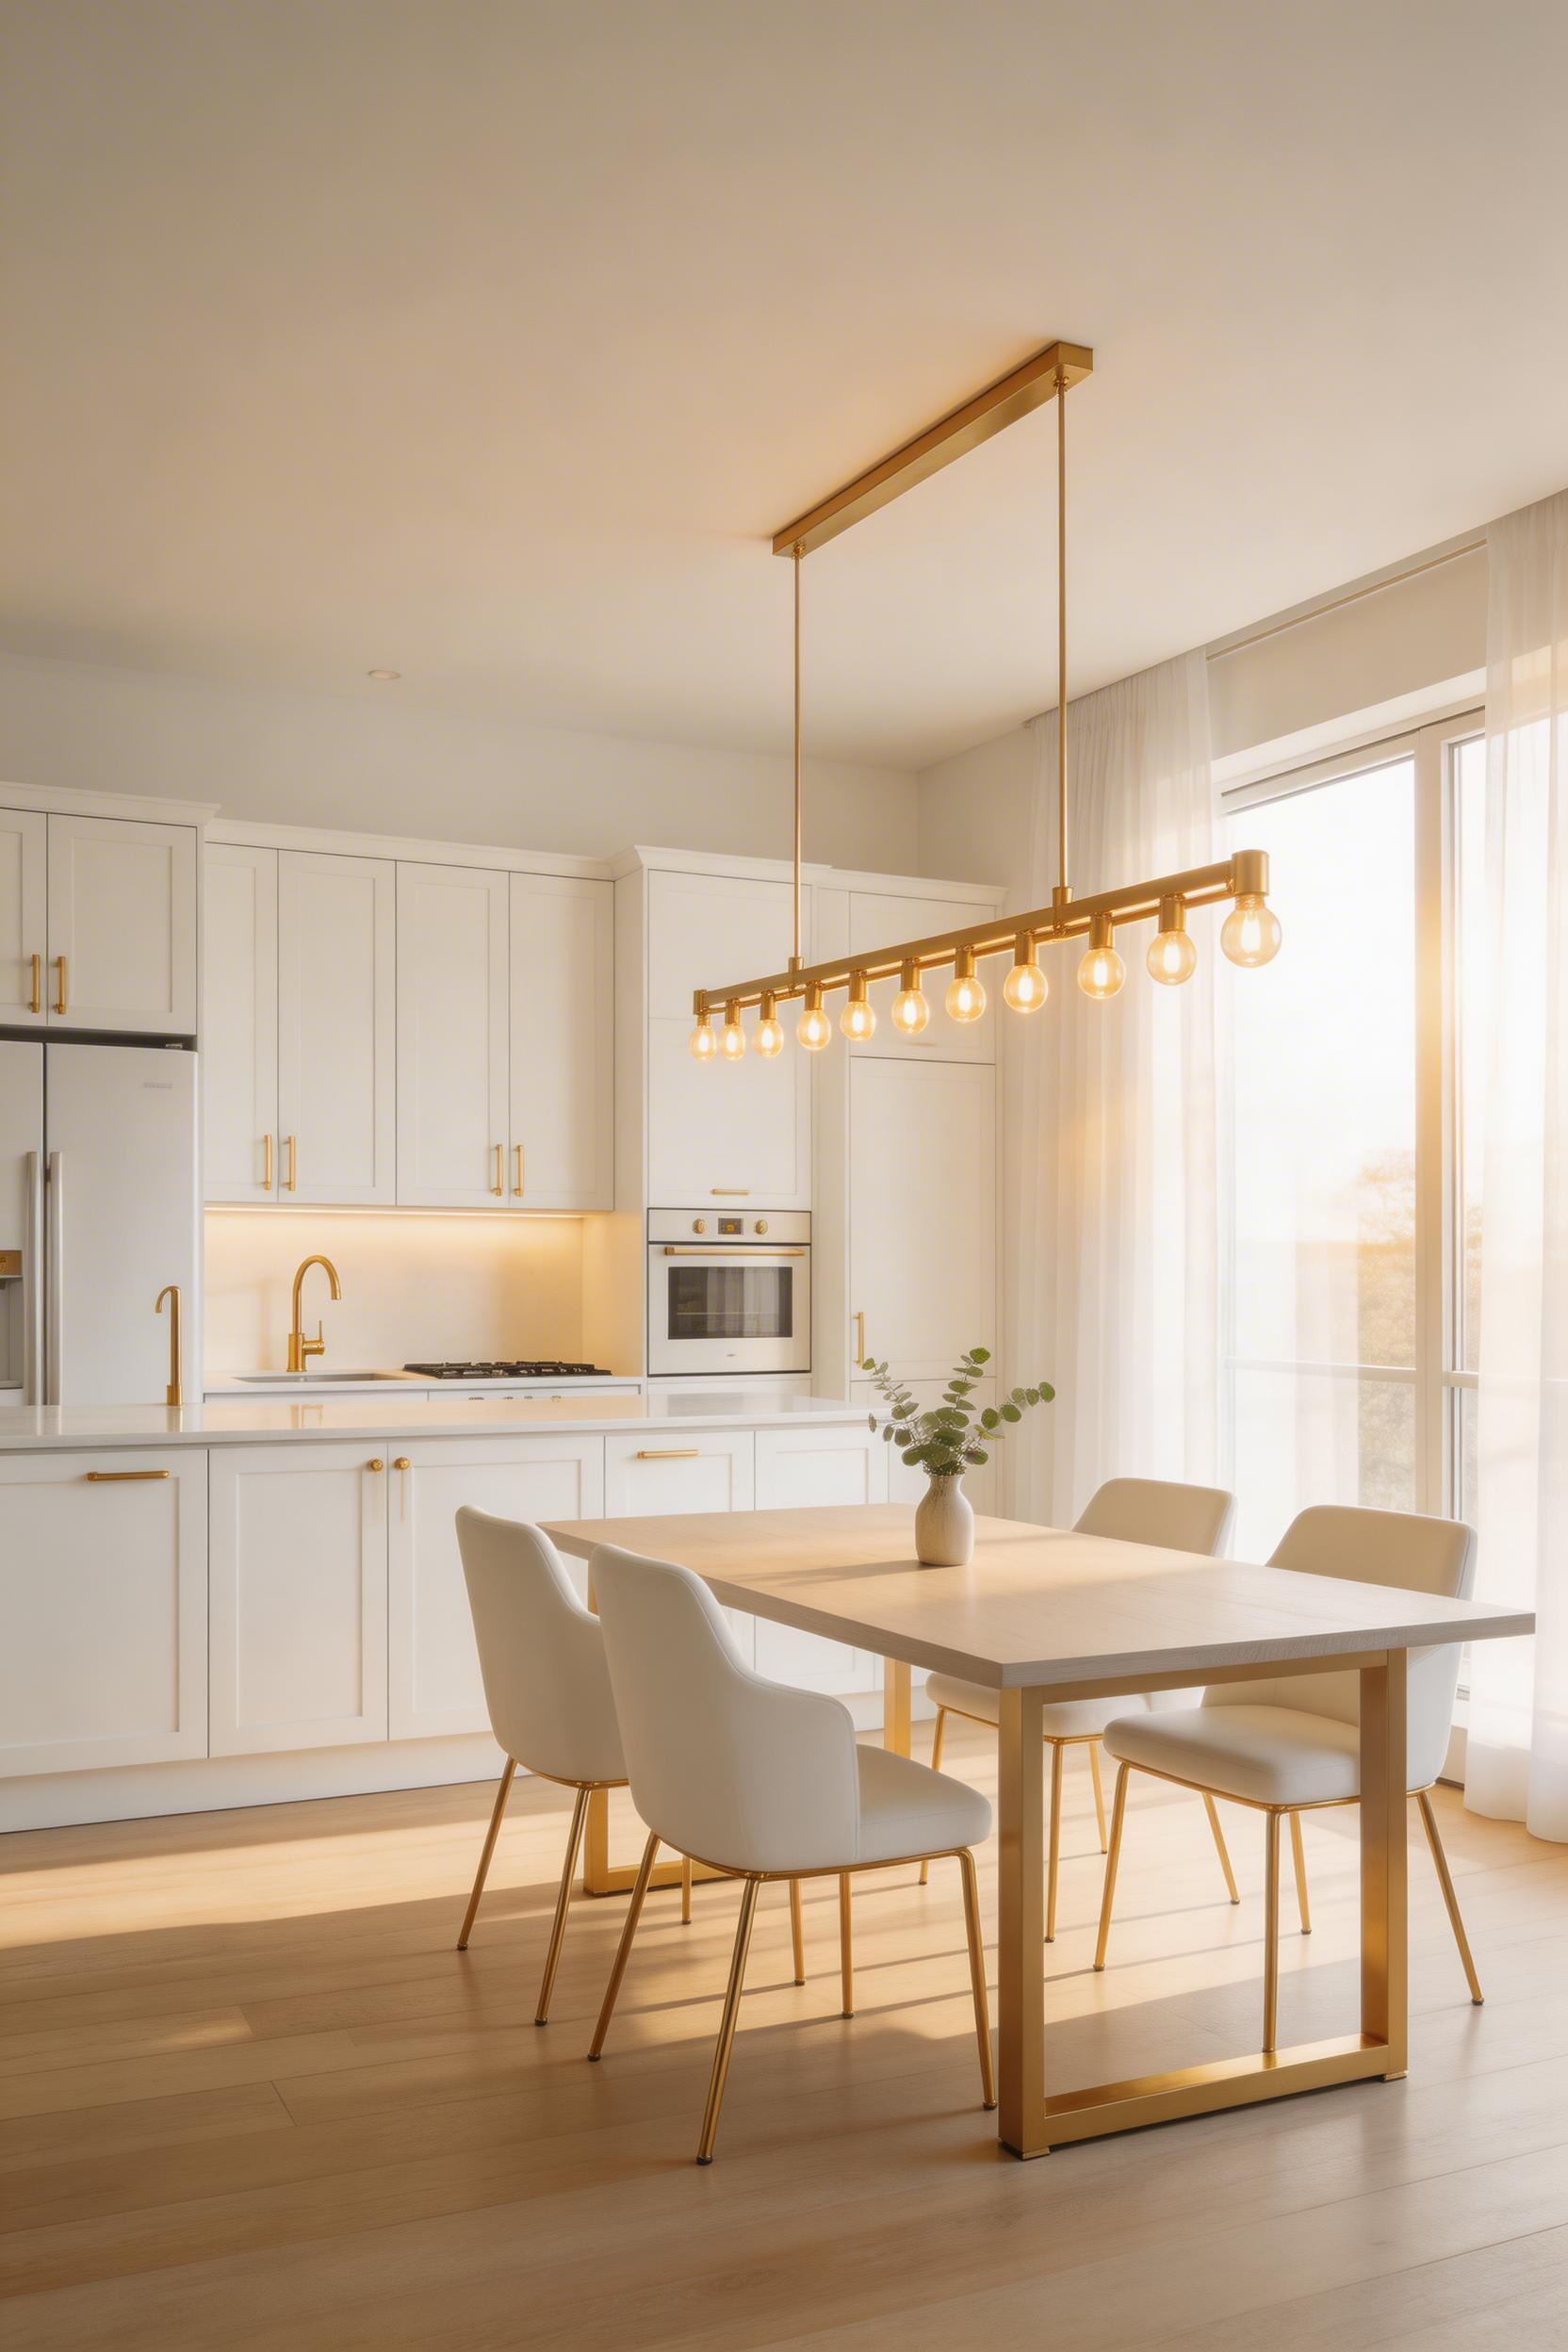
A chandelier belongs in a kitchen when you have an open-plan layout with a defined dining area, when your ceilings are 9 feet or taller, and when you’re lighting a table or eat-in zone rather than a prep area. It doesn’t replace your task lighting over cooking zones. Rather, it becomes the focal point for your dining space that happens to open into the kitchen. This is different.
The sizing formula: add your room’s length and width in feet, and that sum becomes your chandelier diameter in inches. A 12-by-10-foot kitchen gets a 22-inch chandelier. A 14-by-12-foot space works with a 26-inch fixture. Ensure at least 7 feet of clearance from floor to the bottom of the fixture. If you’re hanging it over a dining table, position the bottom 30 to 36 inches above the tabletop. For each additional foot of ceiling height above 8 feet, add 2 to 3 inches of hanging height.
Style Range and Market Insight
Linear and rectangular chandeliers ($250–600) feel modern and suit contemporary spaces. Drum fixtures ($180–450) work in transitional homes. Lantern styles ($150–500) bring traditional character. Designer statement pieces ($500–2,500 and up) become the room’s focal point. Here’s what the data shows: statement lighting appears in 80 percent of kitchen remodels with $75,000-plus budgets. People with serious remodel budgets understand that a statement piece elevates the entire space. Though chandeliers aren’t for every kitchen, when they fit your layout and ceiling height, they justify their investment through sheer visual impact.
6. Track Lighting for Open Plans: Flexibility When You Need It
Open-plan kitchens present a unique lighting challenge. Your space flows into dining and living areas, so fixed recessed lights become a permanent commitment. Track lighting solves this by giving you adjustable heads that can redirect light as your needs evolve.
Track Systems and Head Spacing
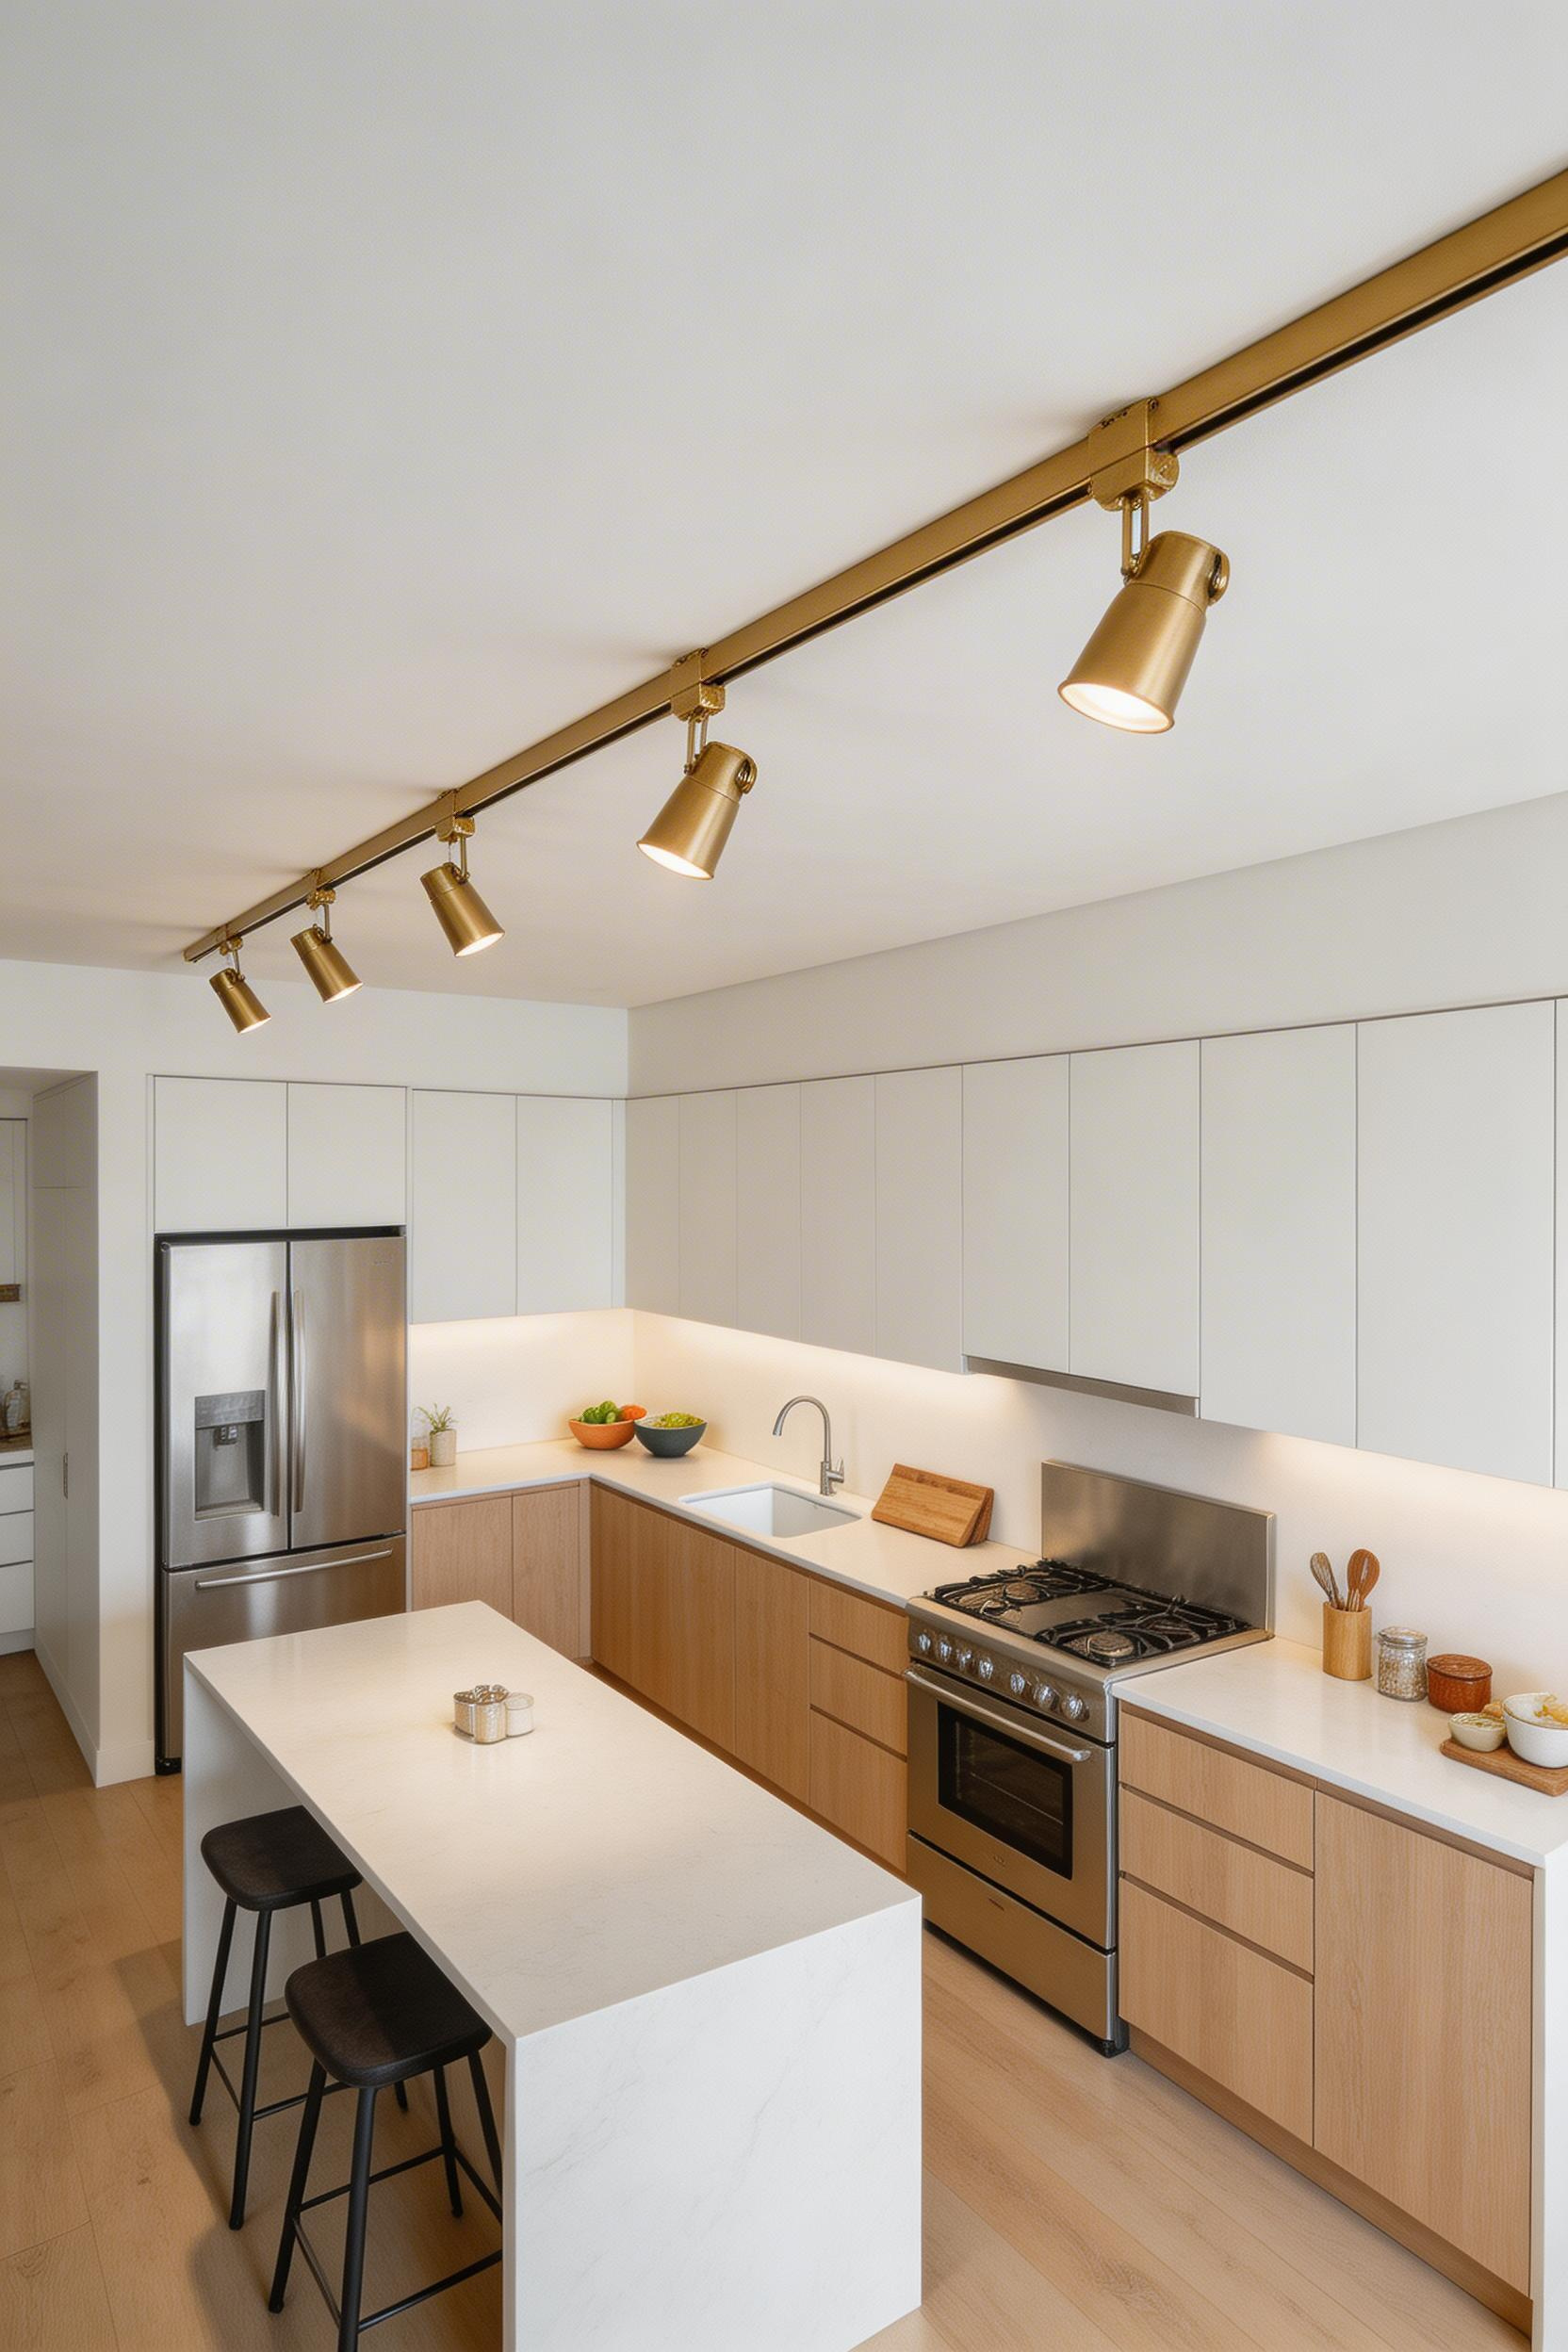
Modern linear track lighting looks cleaner than traditional H/J/L track systems. Linear mounts flush to the ceiling and feels contemporary. You can also find pendant-style track systems that hang down for more visual statement. Whatever system you choose, space heads based on your ceiling height. Eight feet calls for one head every 4 feet. Plan 300 to 600 lumens per head depending on your ambient lighting needs.
Track lighting has seen a 68 percent adoption increase in open-plan kitchens from 2020 to 2024. Designers specify it constantly because it solves a real problem: you can’t always predict where light will work best until you live in the space. A head that was perfectly positioned for prep work might need to shift once you start using your island for dining. Adjustable heads let you evolve without rewiring.
Modern Track Brands and Installation
Kichler Basics Pro linear track ($200–400) offers clean design and reliable dimmer compatibility. Lumens Studio modern systems ($250–500) bring designer aesthetics. WAC Lighting ($180–380) provides flexible options for both residential and commercial-grade installations. Track lighting works especially well in kitchens where recessed positions were installed incorrectly or where you need to add light to an island after initial construction.
Track systems require electrical work, so consult a licensed electrician. The upfront cost is slightly higher than standard recessed fixtures, but the flexibility pays off in open-plan spaces. For context on where track fits in the bigger picture, modern kitchen lighting trends shows that linear track is quickly replacing recessed-only designs.
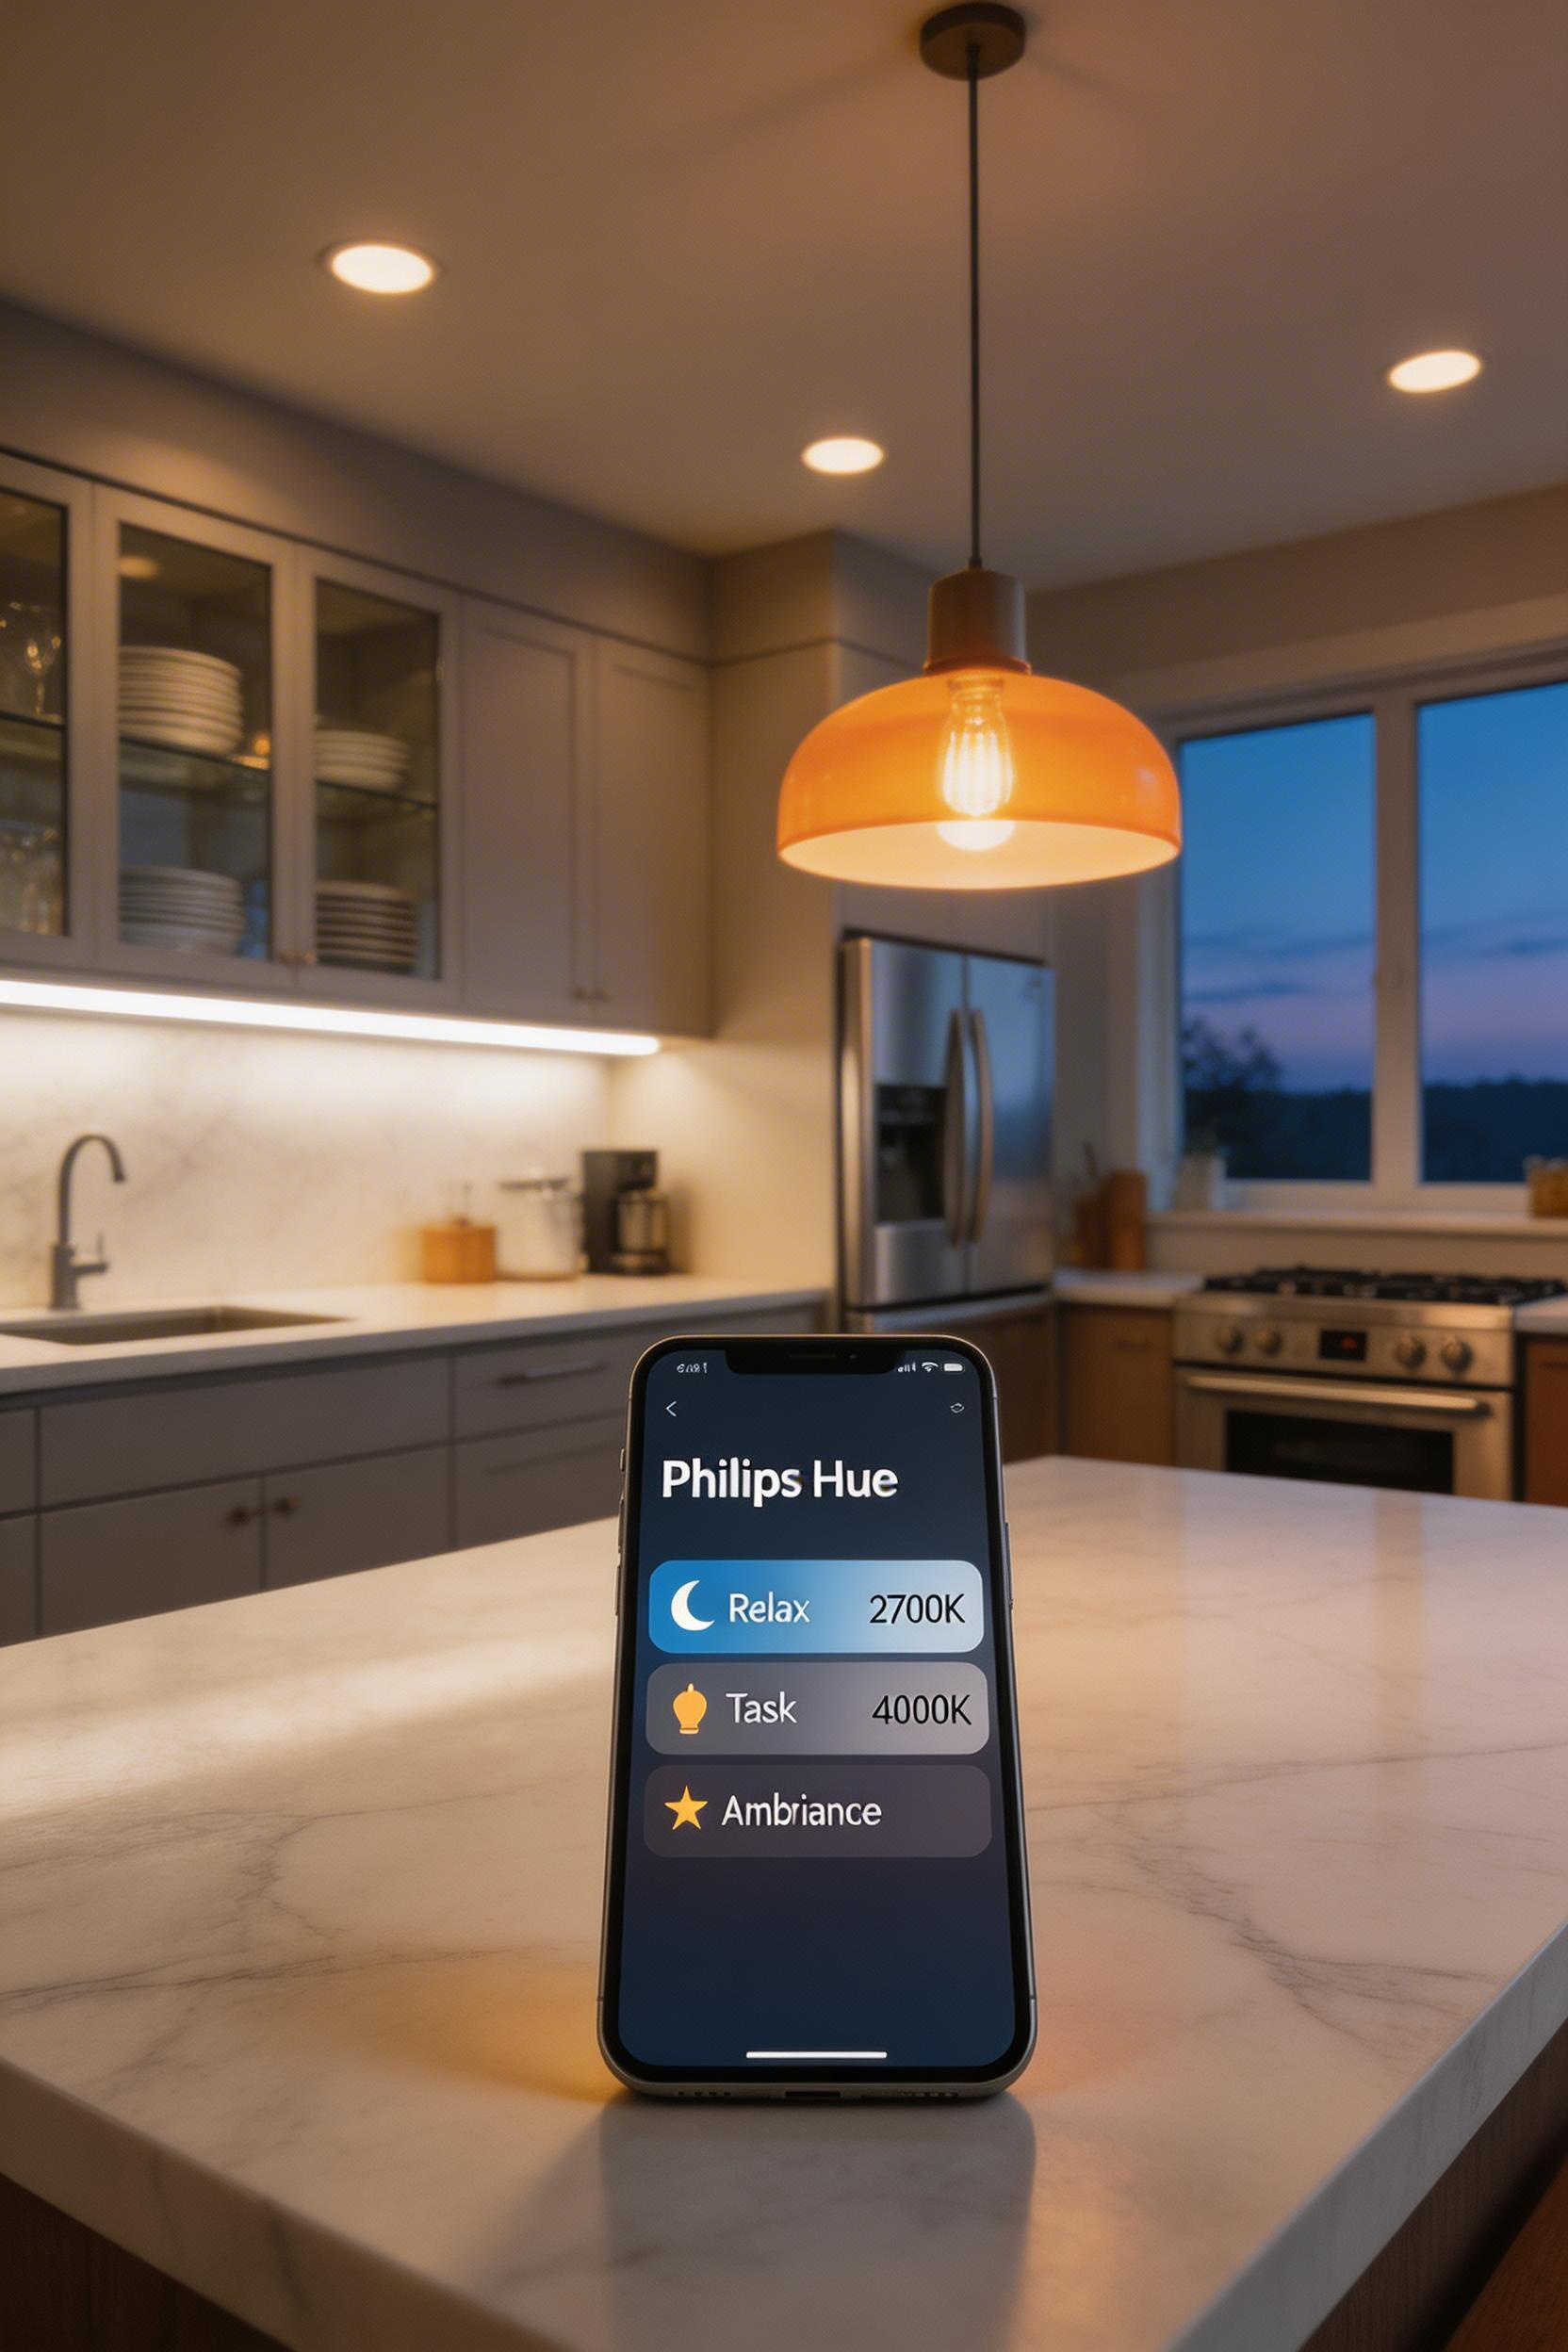
7. Color Temperature: The Kitchen Lighting Idea That Changes Everything
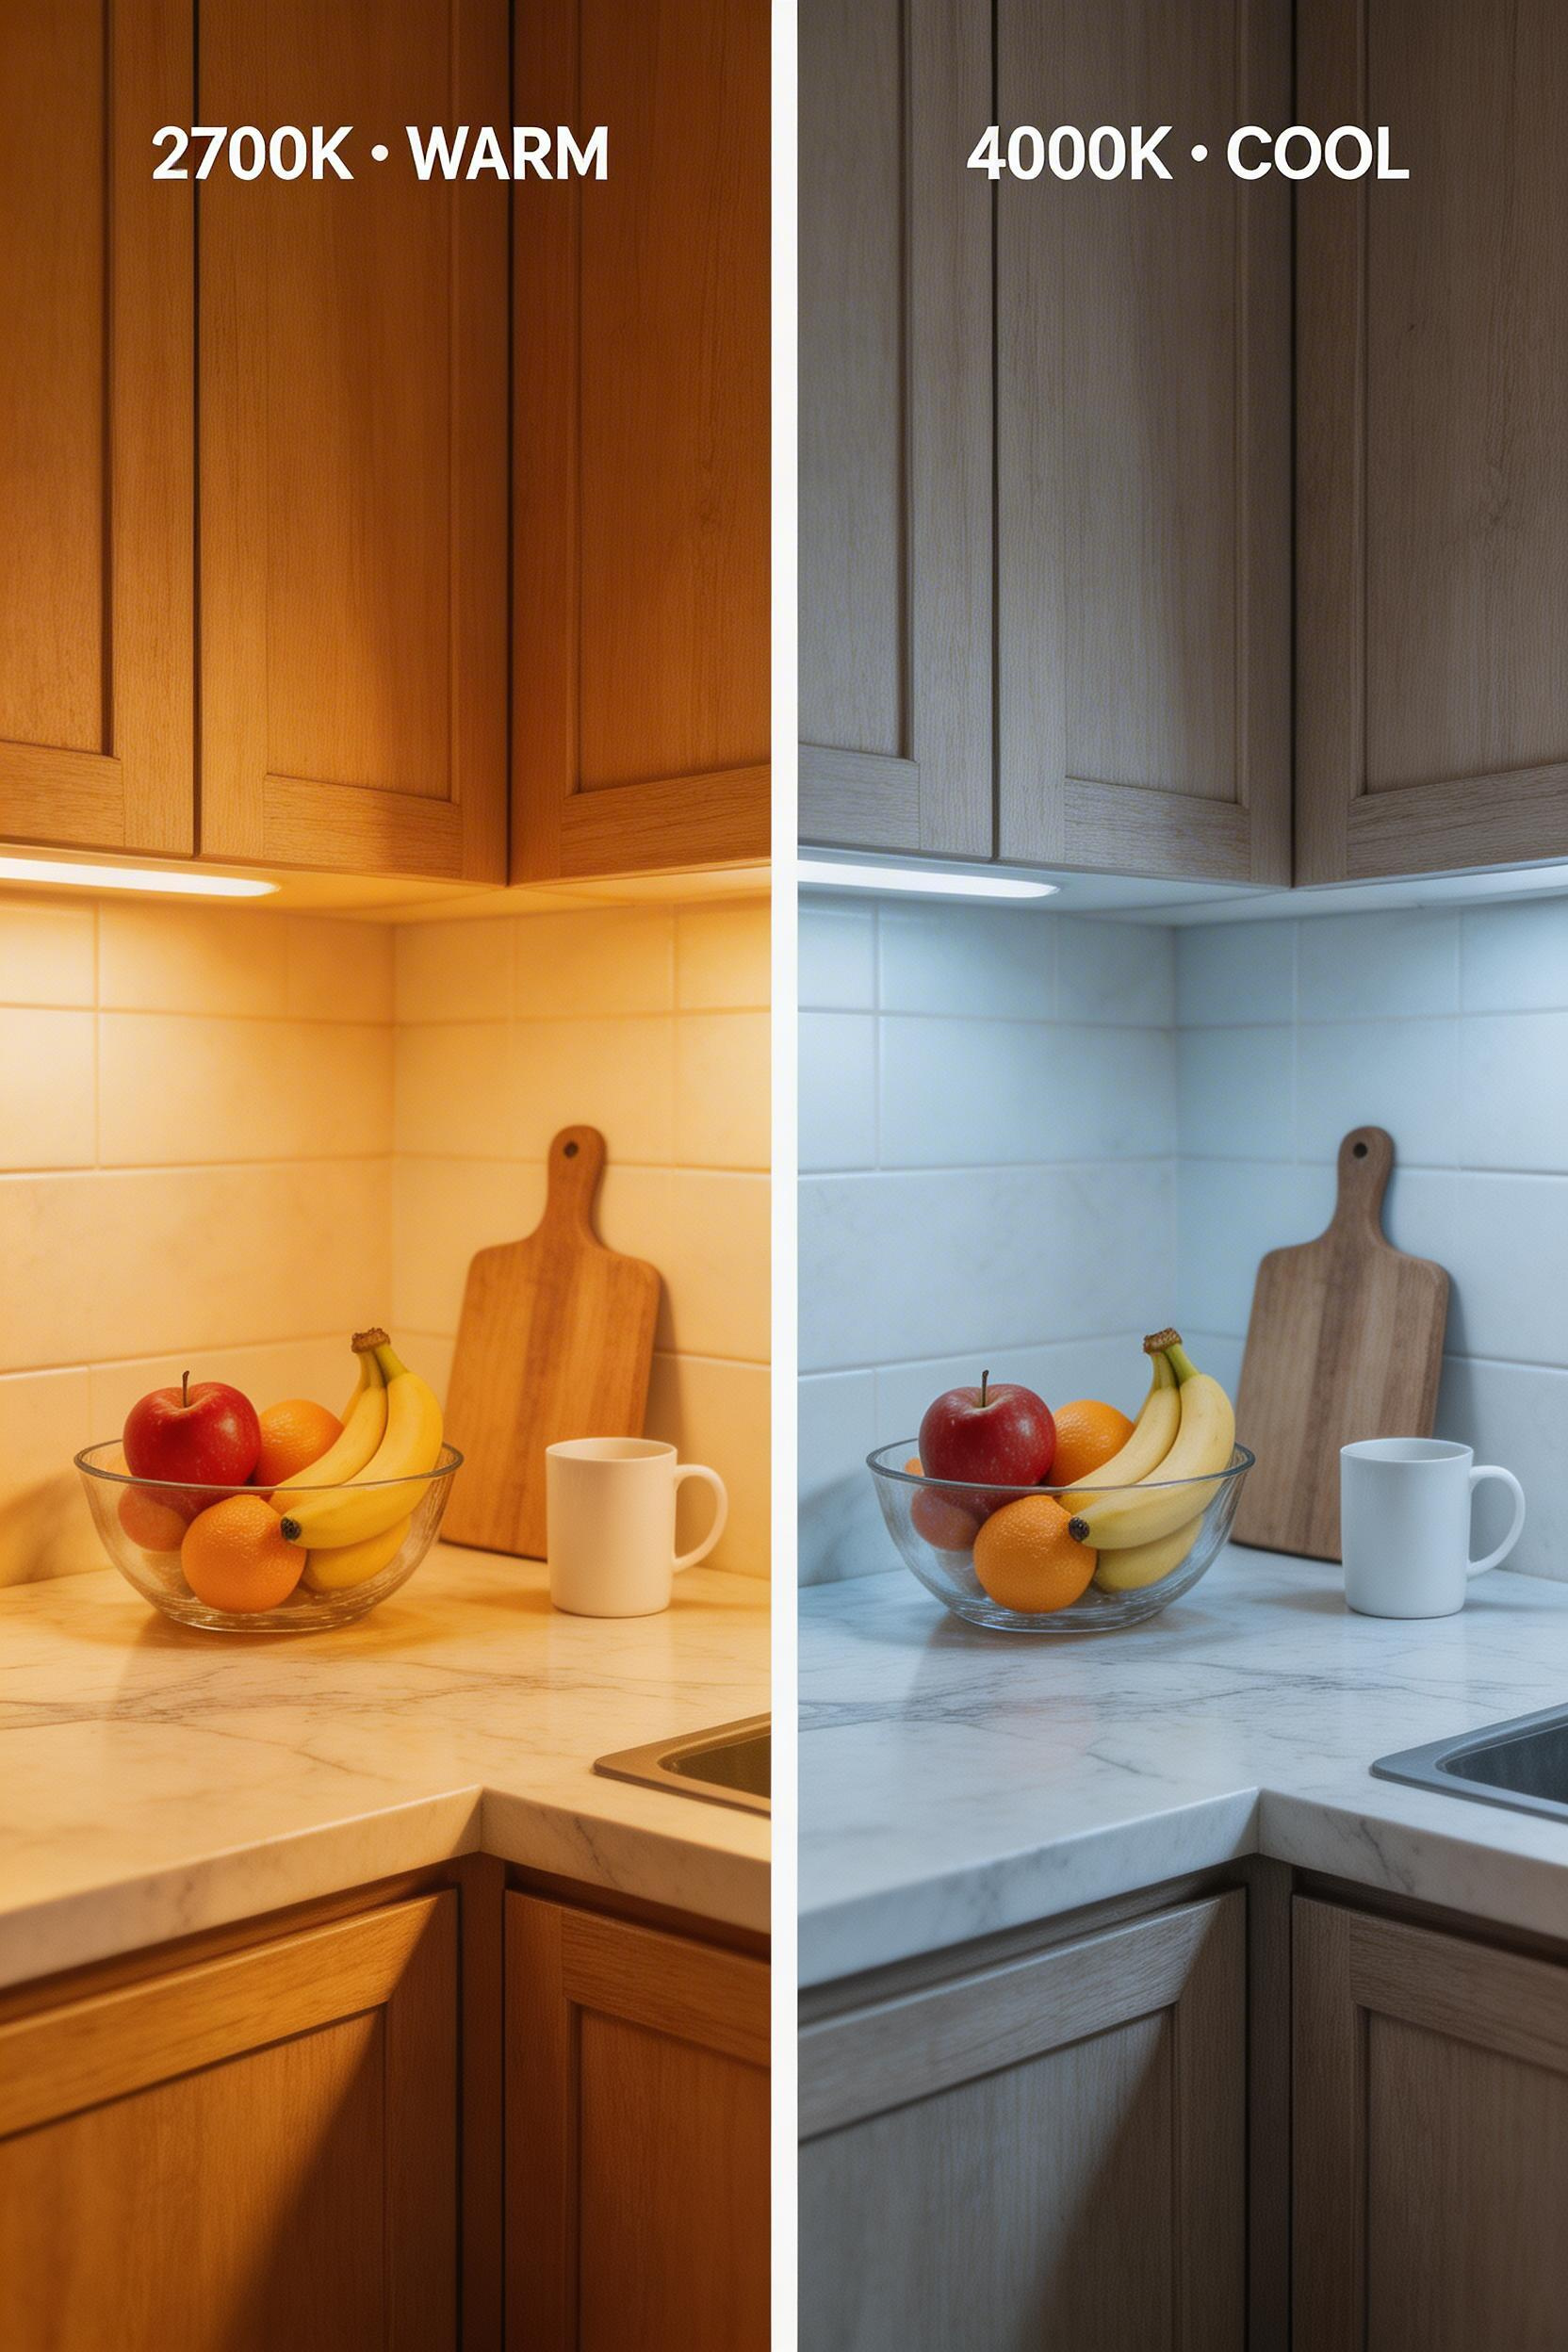
This choice affects everything. The difference between 2700K warm white and 4000K cool white isn’t subtle. It changes how your kitchen feels, how food looks, and whether your cabinetry actually appears the color you thought you chose.
Understanding Kelvin Temperature
Among all kitchen lighting ideas, color temperature is the most misunderstood. Kelvin is the measurement unit — lower equals warmer and yellower, higher equals cooler and bluer. At 2700K, warm white flatters wood cabinets, cream tile, and warm metals — ideal for dining areas. Neutral 3000K works with almost any kitchen style and is often the best all-around choice. At 3500–4000K, light becomes bright and cool, making white cabinets pop and giving prep zones a professional feel.
Also worth noting: Color Rendering Index (CRI). Aim for 90 minimum; 95+ makes food look most natural. Grocery stores use 95+ CRI because it makes produce and meat look fresher — the same logic applies at home.
The Biggest Mistake and Performance Data
The single biggest mistake I see is mixing very different color temperatures in the same kitchen. A 2700K pendant over the dining area paired with 4000K under-cabinet strips creates a jarring visual disconnect. Your eye keeps jumping from warm to cool, and the space feels disjointed. Choose one temperature family—either 2700K throughout for warmth, or 3000-3500K for brightness and versatility—and commit to it.
Retail lighting studies show that 4000K increases perceived food freshness by 25–30 percent. But 2700K still improves freshness perception by 15 percent over no dedicated lighting. So context matters. If your kitchen opens to a dining area, lean warm. If it’s a serious work zone, neutral to cool works better. Kichler color-selectable fixtures ($70–100) let you test before committing; Philips Hue ($80–120) gives full flexibility.
8. Dimmers: Why LED Compatibility Actually Matters
A dimmer on a standard incandescent bulb was always straightforward. Dimming an LED is completely different, and most residential dimmers are incompatible with LEDs. The result is flicker that makes you crazy and light that doesn’t dim smoothly—or dims strangely at low levels.
LED Dimmer Technology
Traditional TRIAC and leading-edge dimmers cause flickering with 95 percent of LED bulbs. So forget what you know about dimmers. You need trailing-edge (also called ELV) dimmers. This technology is specifically designed for LED loads and eliminates that annoying flicker. Trailing-edge dimmers solve 95 percent of LED flickering issues. Leading-edge dimmers achieve only 15 percent success with LEDs. That’s a huge difference.
Lutron Caseta ($50–70) is the industry standard for reliability. It’s a hub-based smart system that works with Alexa, Google Home, and Apple HomeKit. Leviton Decora Smart ($40–70) operates on Wi-Fi direct (no hub needed) and carries a 5-year warranty. For straightforward setups without smart home ambitions, it works perfectly well. For more complex lighting schemes, Lutron’s ecosystem is worth the slight extra investment.
Scene Building and Energy Savings
Install separate dimmers for different circuits: one for your main ambient circuit, one for pendant lights, and one for under-cabinet strips. This lets you create scenes. Morning mode might be 70 percent ambient plus 100 percent task. Cooking mode hits 100 percent on everything. Dinner mode dims ambient to 30 percent, turns off task, and dims accent lights to create ambiance. These scenes transform your kitchen’s function and feeling throughout the day.
Dimming lights to 25 percent brightness extends LED lifespan by 200 percent and reduces energy use proportionally. So a dimmer isn’t luxury — it’s a practical investment. Pair your dimmer setup with energy-efficient kitchen lighting practices and you’ve built a system that works hard, looks great, and costs less to run.
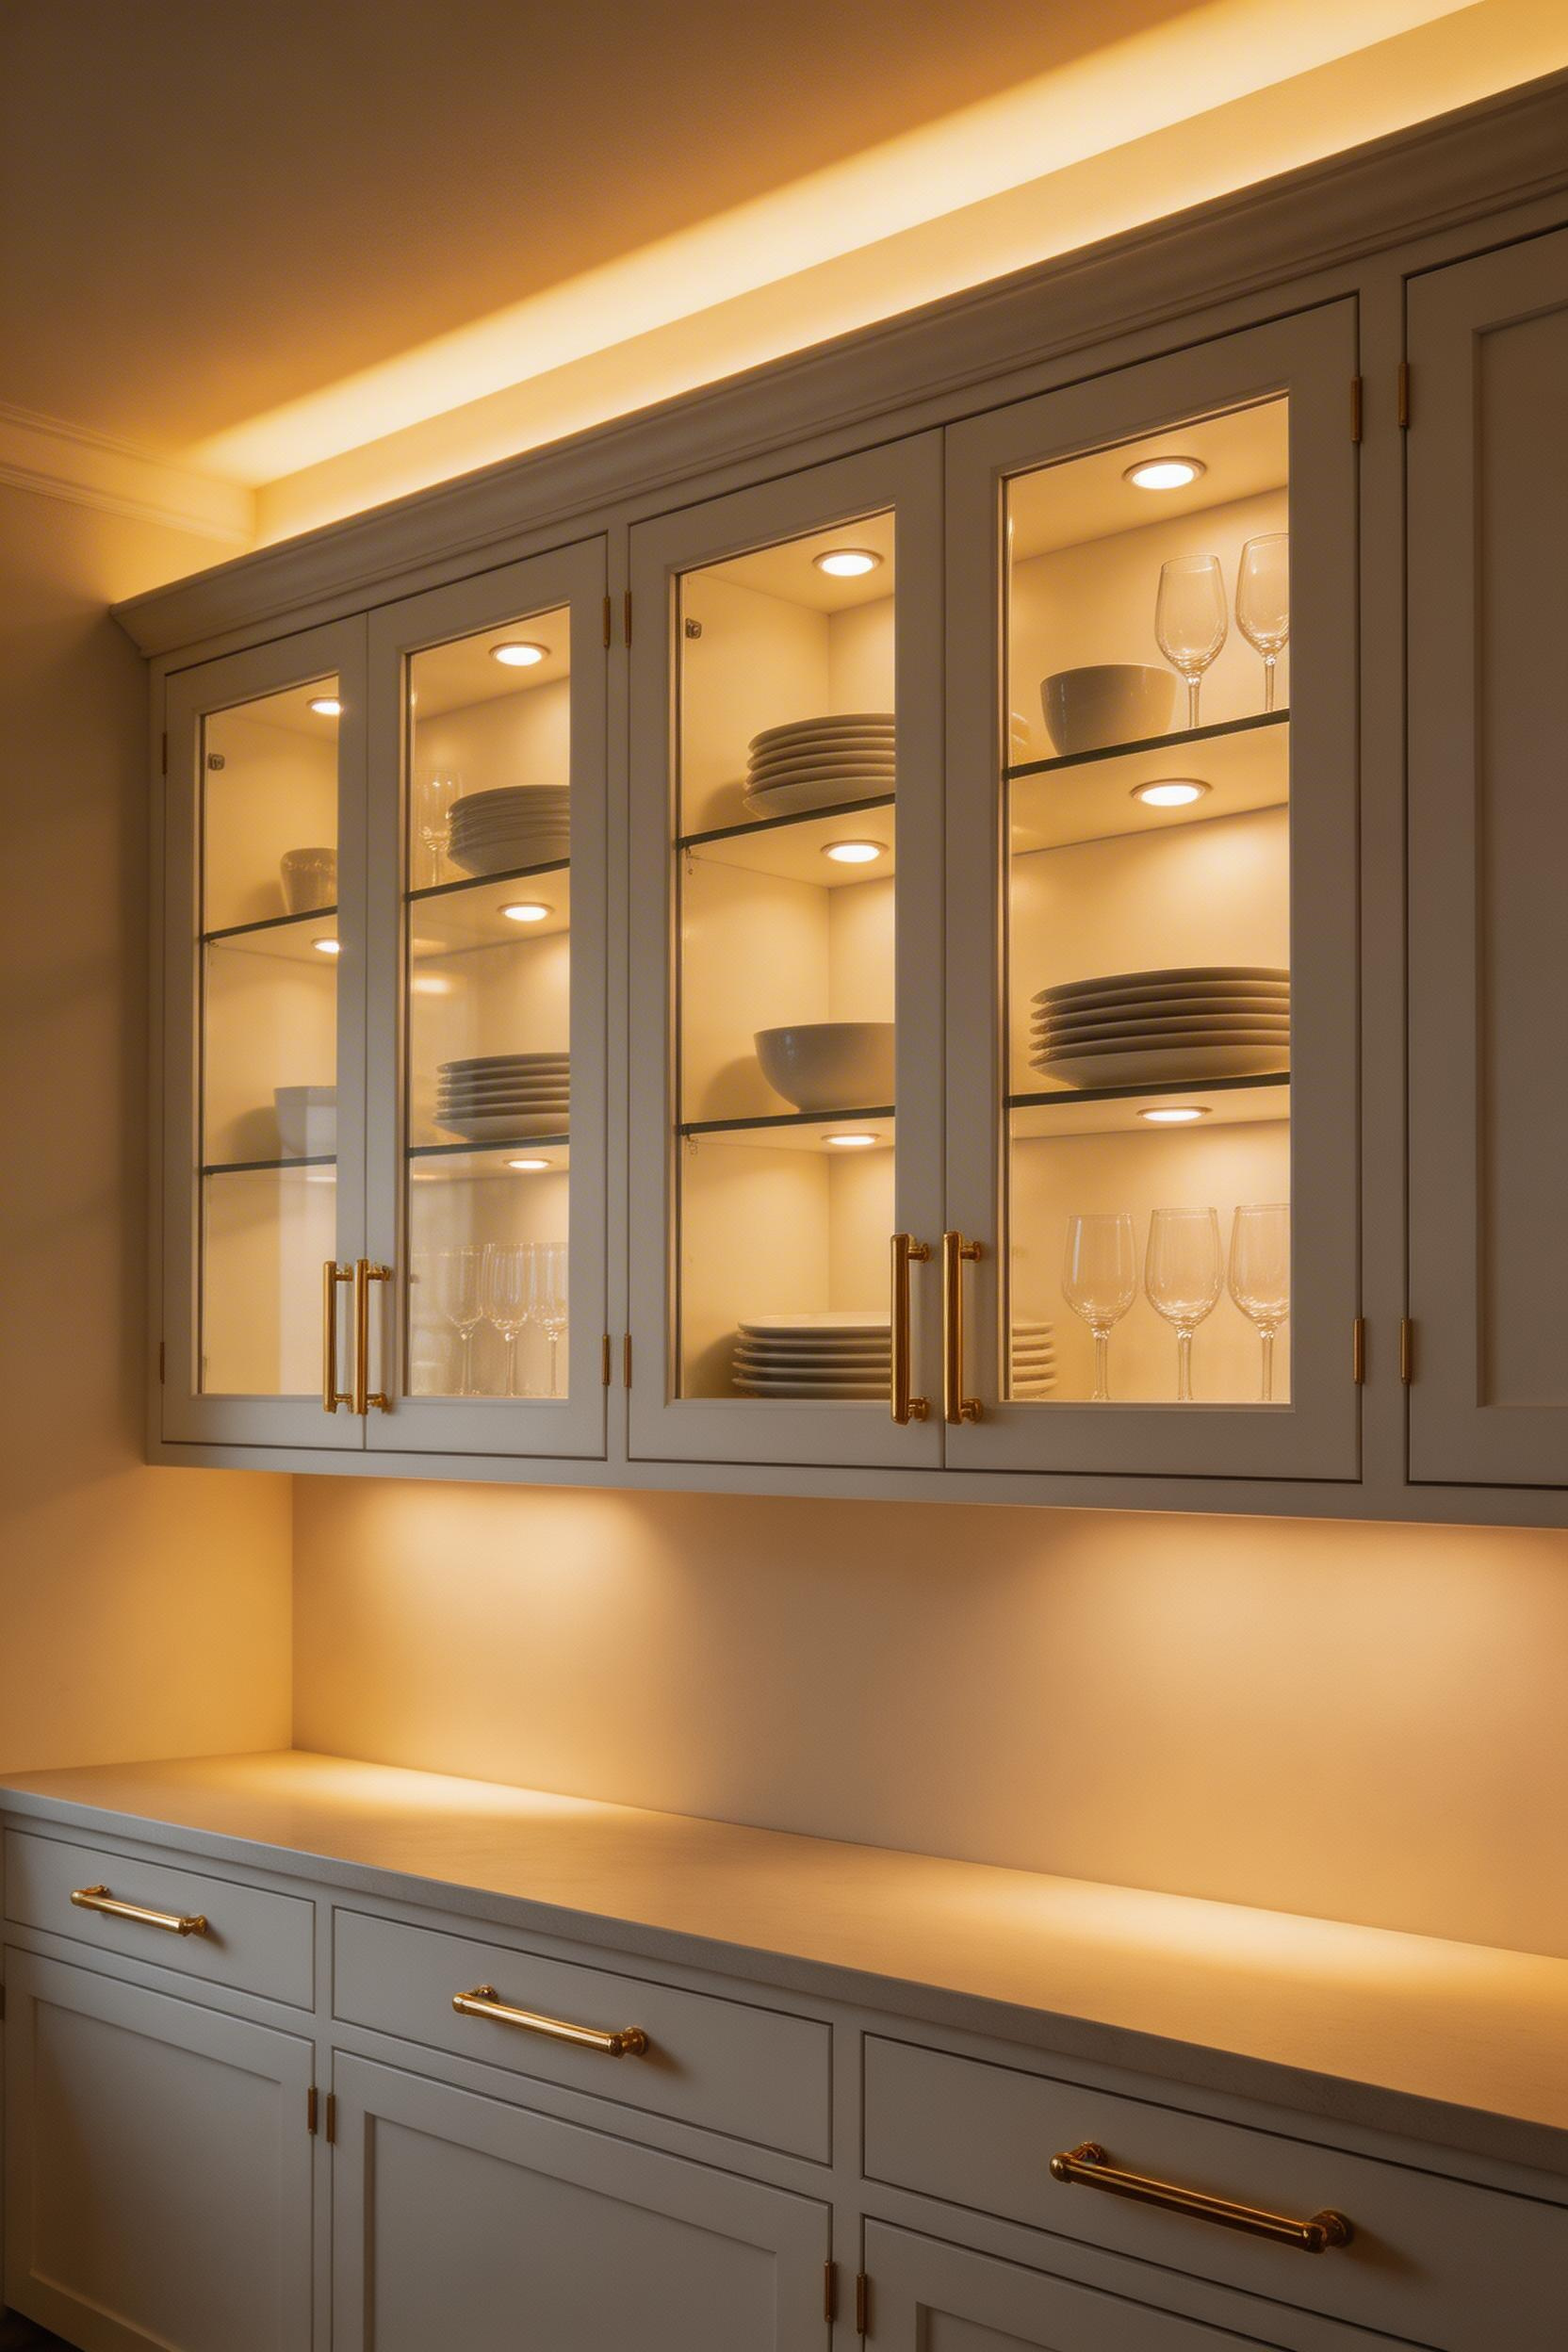
9. Cabinet Lighting: Above, Inside, and Below
Cabinet lighting is the secret layer that most homeowners forget about—yet it’s the difference between a kitchen that feels functional and one that feels intentionally designed. I’ve worked with plenty of clients who thought their cabinets were strictly utilitarian storage. Then we layered in cabinet lighting: LEDs above the cabinets pointing upward, strips inside glass-fronted cabinets showing off dishware, and toe-kick lighting at the base creating that floating effect. Suddenly, the kitchen doesn’t clock out at 9 p.m. The cabinets become part of the lighting story. This is where kitchen lighting ideas shift from “solving a problem” to “creating atmosphere.”
The Layering Strategy That Actually Works
Top-of-cabinet uplighting is pure drama. LED strips or puck lights mounted on the top surface of wall cabinets pointing toward the ceiling create vertical visual height. Since ceiling height affects how spacious a kitchen feels, this matters. For a 10-foot-long cabinet run, aim for 200-500 lumens per linear foot. Kichler puck lights or Philips Hue strips ($49-95) work well here. The key is positioning: lights should be hidden from direct view when you’re standing, but visible in the glow they cast upward.
Interior Cabinet Display Lighting
Glass-fronted cabinets need interior lighting to become display features. LED strips inside cabinets illuminate dishware, glassware, and cookbooks. This works only if the contents are actually worth displaying—white interiors, clean lines, coordinated pieces. Aspectled strips ($25-45) or professional Kichler systems ($65-95) provide even illumination without hot spots. The glow creates a jewelry-box effect that reads as intentional and curated.
The Toe-Kick Effect
Toe-kick lighting—LED strips tucked into the recess at the base of lower cabinets—serves dual purposes. Functionally, it’s a gentle night-light guiding foot traffic. Visually, it makes cabinets appear to float off the floor, adding perceived depth. This is where kitchen lighting ideas become subtle. The glow should be barely noticeable in daylight but essential in darkness.
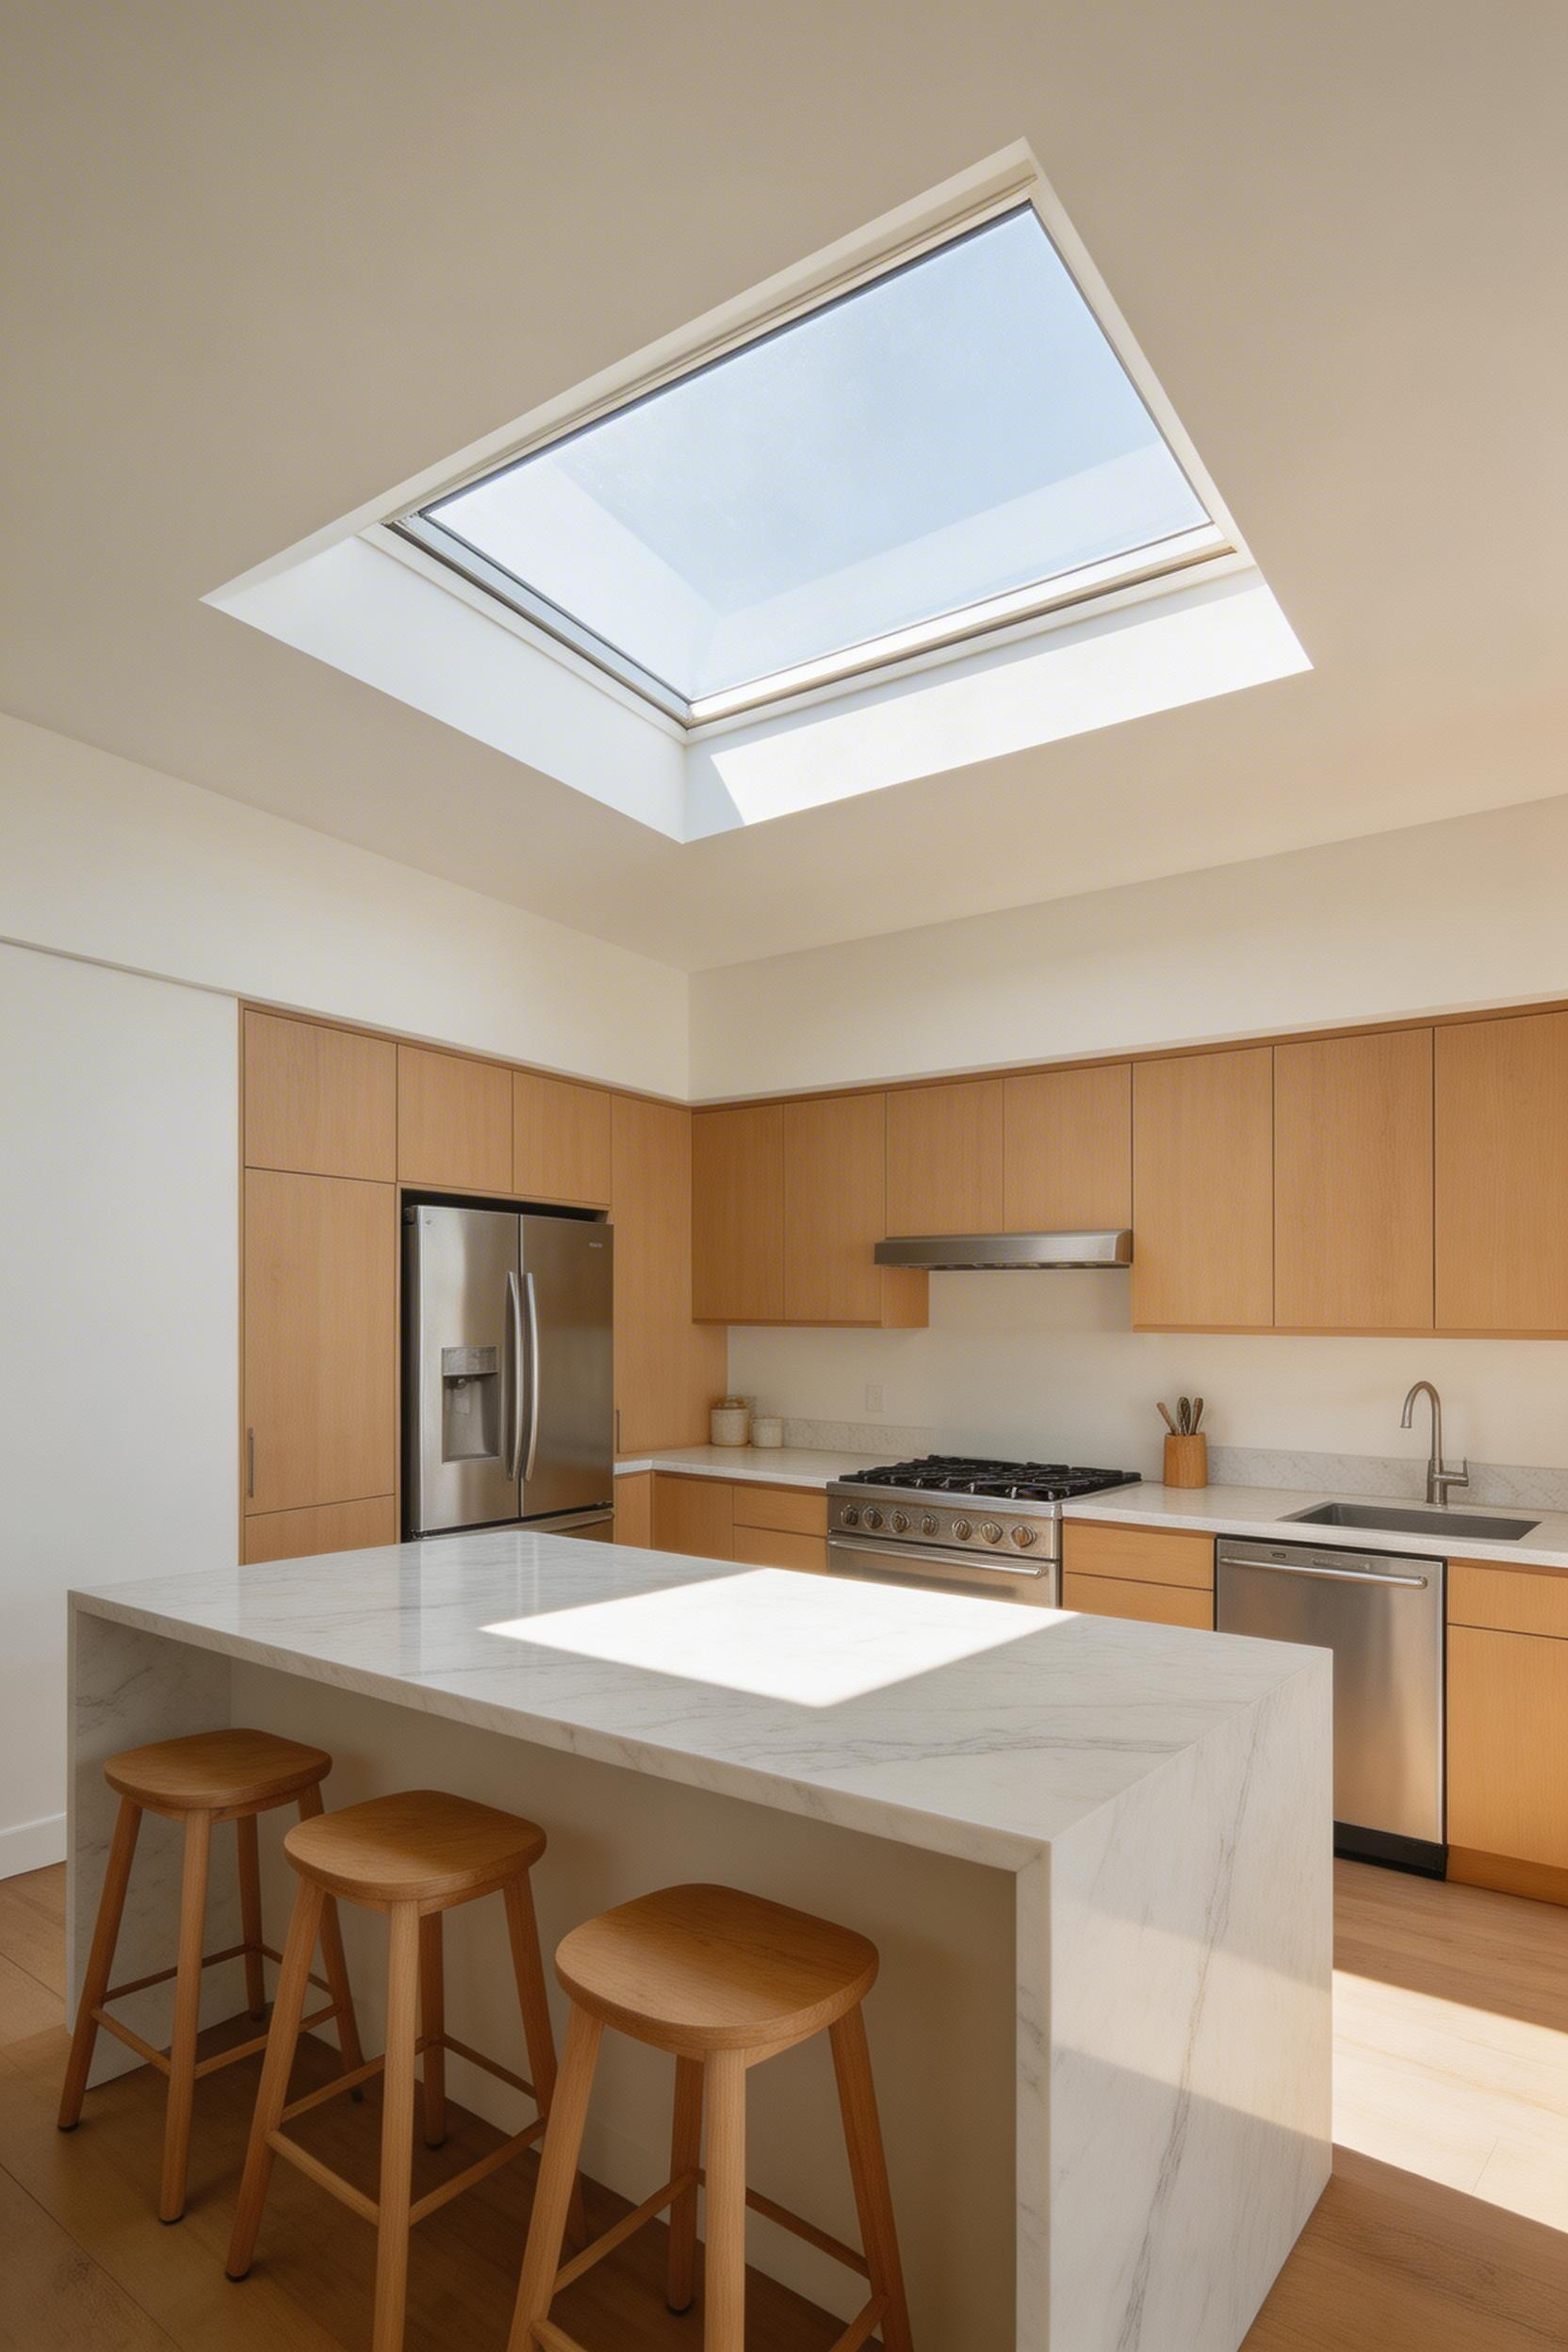
10. Skylights and Sun Tunnels: The Most Transformative Upgrade
If there’s one kitchen lighting idea that delivers more return on atmosphere than any fixture, it’s natural light. I’ve watched the difference a skylight or sun tunnel makes, and it’s not subtle. Natural light does what no LED can: it shifts throughout the day, connects you to weather and time, and makes food look exactly as it should. A Harvard Medical School study found that 40-60 minutes of daily natural light exposure reduces depression by 28%. That’s not interior design—that’s neuroscience. If your kitchen lacks windows, a sun tunnel or skylight transforms the entire environment.
Skylights vs. Sun Tunnels: What Actually Works
Full skylights are the gold standard for light transmission—80-90% of exterior light reaches the kitchen interior. A VELUX fixed skylight costs $3,600-7,200 installed, depending on size and roof complexity. For kitchens where roof-cutting isn’t practical, solar tubes (sun tunnels) offer an alternative. A VELUX sun tunnel or Solatube 160DS transmits 75-85% of exterior light through a reflective tube running through the attic space. Cost is roughly $750-1,100 installed. Both solutions reduce artificial lighting needs by 40-60% during daylight hours, which impacts your energy bill directly.
Placement Matters More Than You’d Think
North-facing skylights provide consistent, indirect light without glare—ideal for work surfaces. South-facing skylights maximize brightness but create harsh shadows over the island if positioned directly overhead. The pro move: offset the skylight from your main task zone. Place it over the dining area or sink instead. This prevents squinting while prepping food. Energy savings alone justify the cost, but the psychological benefit—feeling connected to weather and time—is what clients remember most.
Budget-Friendly Alternative
If you’re exploring budget-friendly kitchen lighting ideas, a skylight may not be in play this year. That’s fine. Start with what you have: clean windows, minimal window treatments, and proper task lighting at work surfaces. You can always add a skylight later.
11. Semi-Flush and Flush Mount Fixtures for Low Ceilings
Eight-foot ceilings are common in older homes, and they create a specific problem: pendant lights hang too low and feel cramped. Your kitchen lighting ideas have to adapt. This is where semi-flush and flush-mount fixtures earn their place. These fixtures hug the ceiling, creating visual breathing room without hanging down into the workspace. The trick is choosing fixtures that read as intentional, not builder-grade. Shape, finish, and material make all the difference.
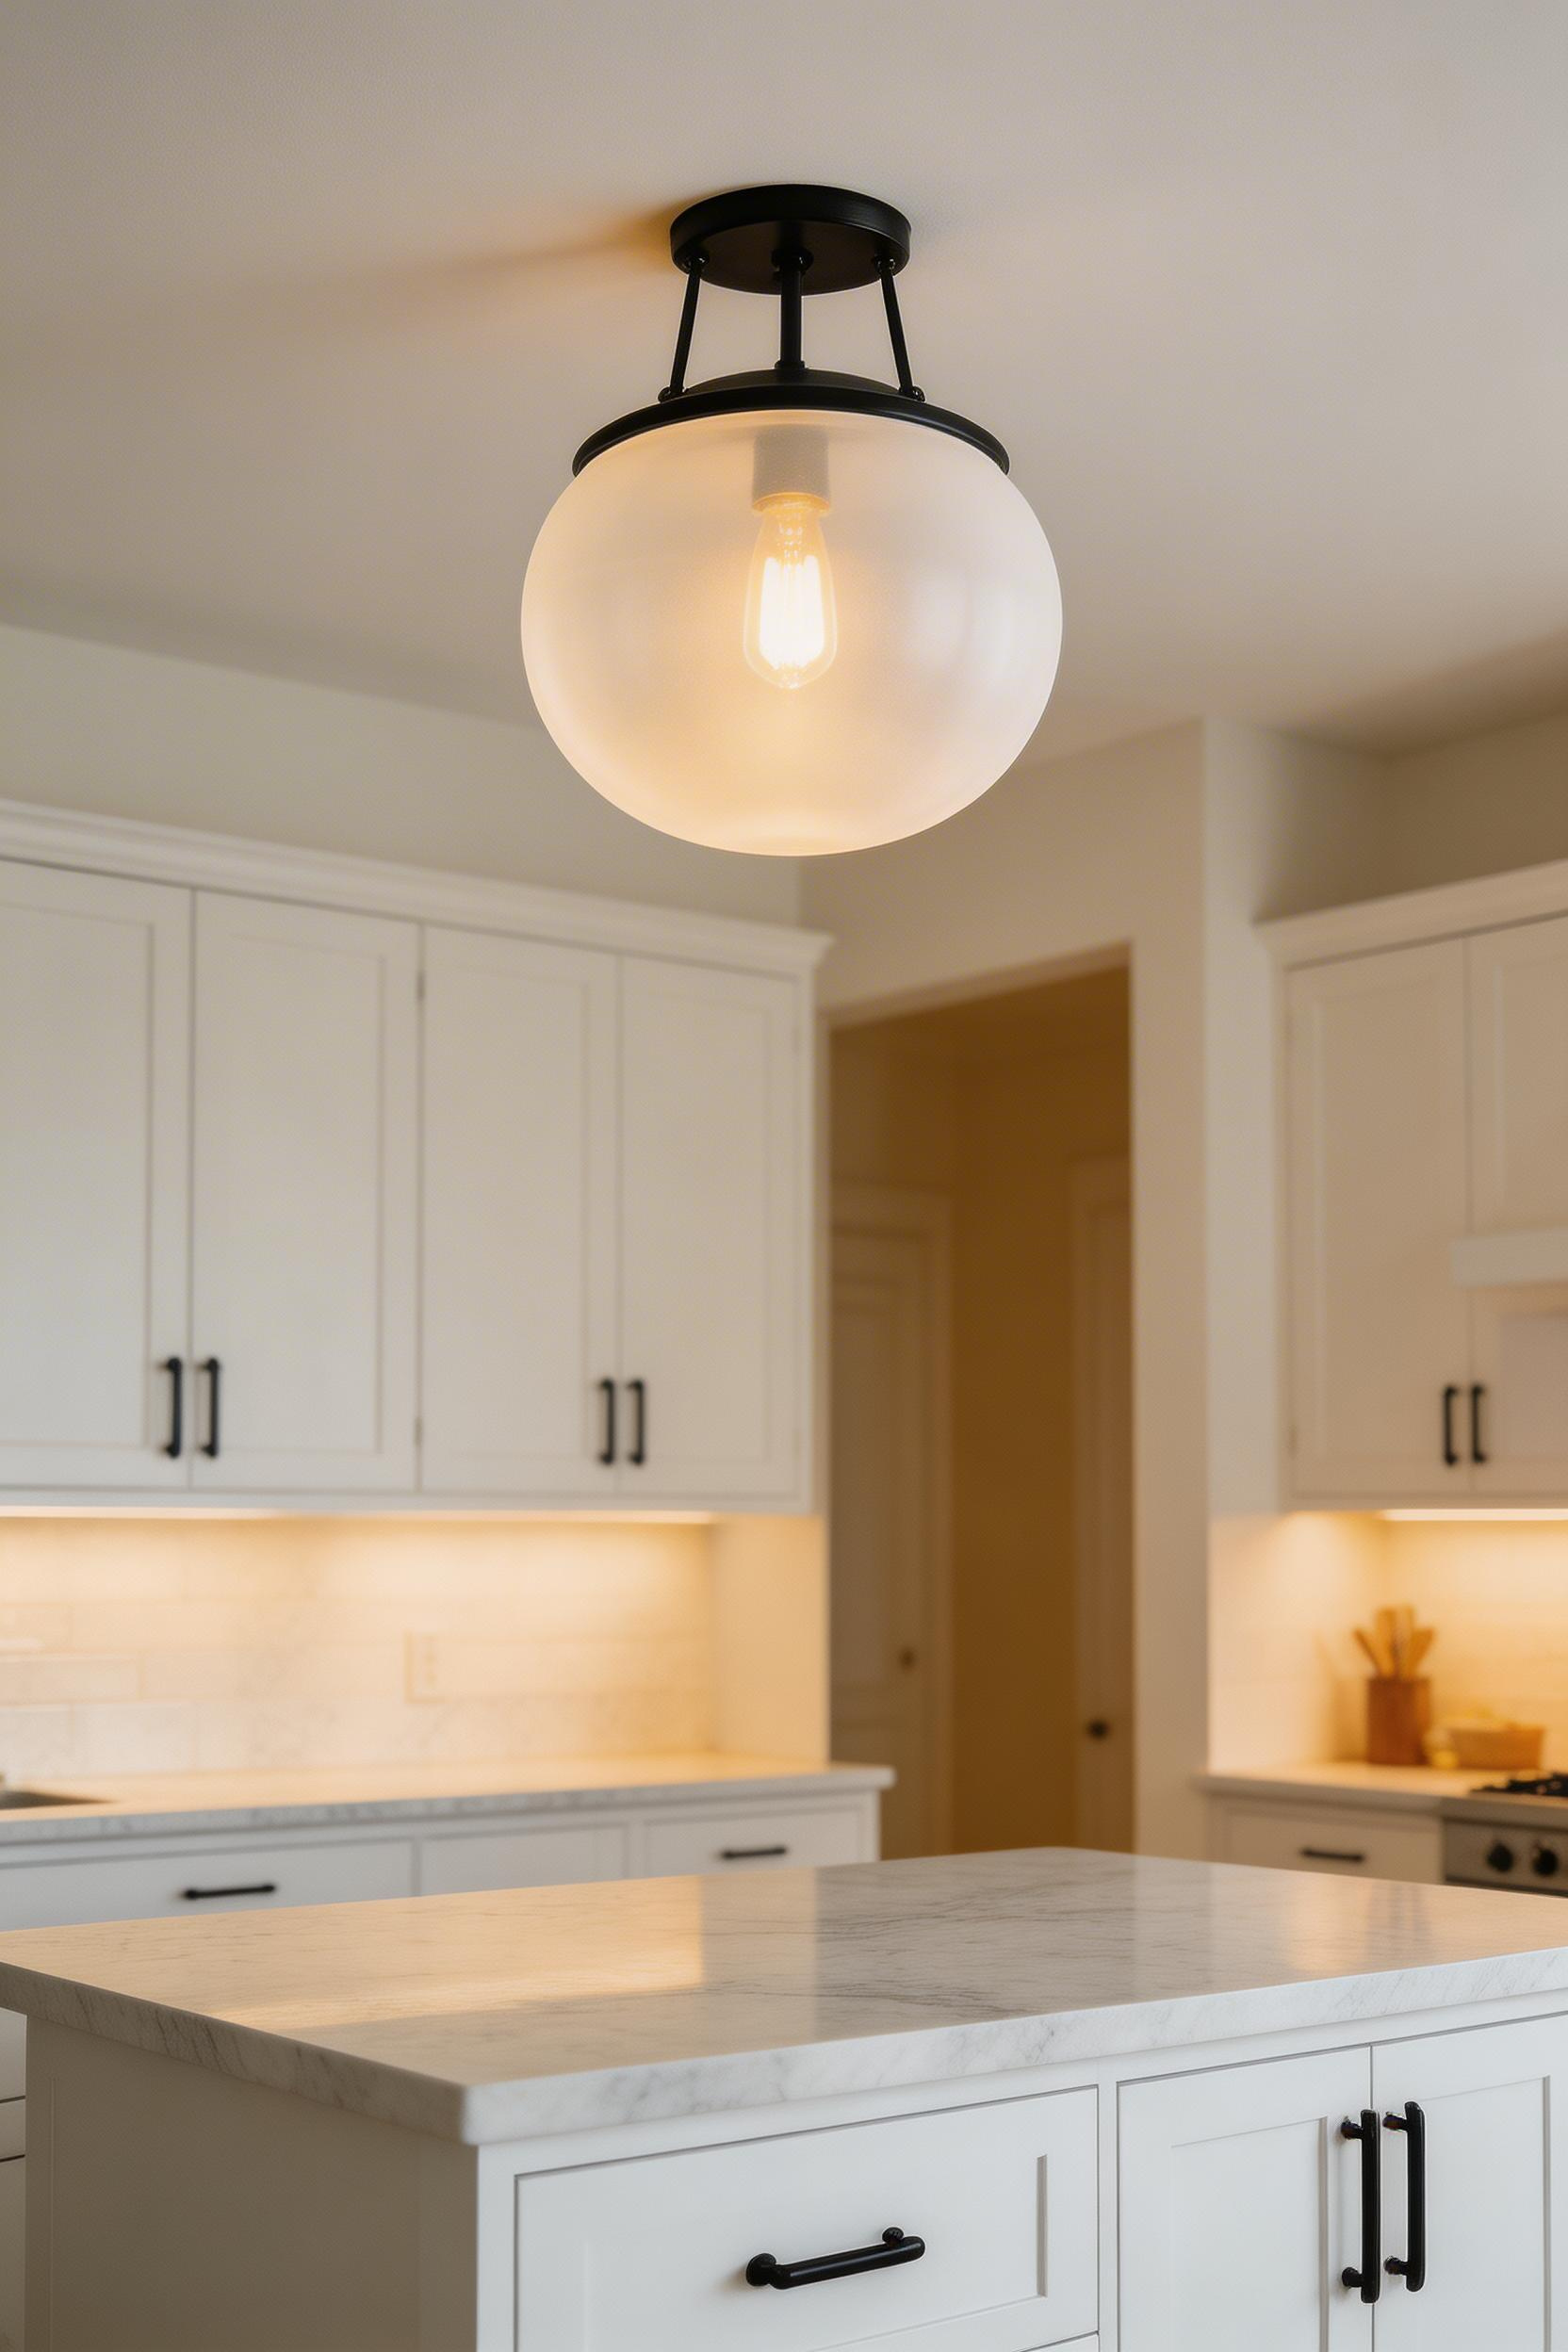
Choosing the Right Style for Your Space
Three styles dominate intentional low-ceiling kitchens: schoolhouse globe (frosted white glass with black hardware), industrial disc (metal dome with exposed socket), and drum shade (fabric-wrapped). These read as designed choices, not defaults. Schoolhouse Electric fixtures ($185-295) set a high standard, but Claxy industrial alternatives ($45-85) capture the same aesthetic at half the cost. Size matters—in a 10×10 kitchen, choose a 15-20″ diameter fixture; for 12×15 kitchens, go 20-24″ or pair two 14-16″ fixtures for balanced coverage.
The Ceiling Claustrophobia Factor
Design research shows that diffused glass covers reduce that ceiling-bearing-down sensation by 28% compared to bare-bulb fixtures. Frosted glass or fabric diffusers soften the light and make the space feel less boxed in. Choose fixtures with upward-reaching shapes—avoid wide, flat disc designs that visually push the ceiling down. The goal is fixtures that create vertical visual flow.
Combining with Ambient Light Layers
Even with a flush-mount as your primary overhead source, you’ll need support. Add under-cabinet task lighting for countertop work and recessed lights around the perimeter for overall brightness. A single flush-mount fixture, no matter how stylish, can’t do all the work. The best kitchen lighting ideas always layer fixtures by function.
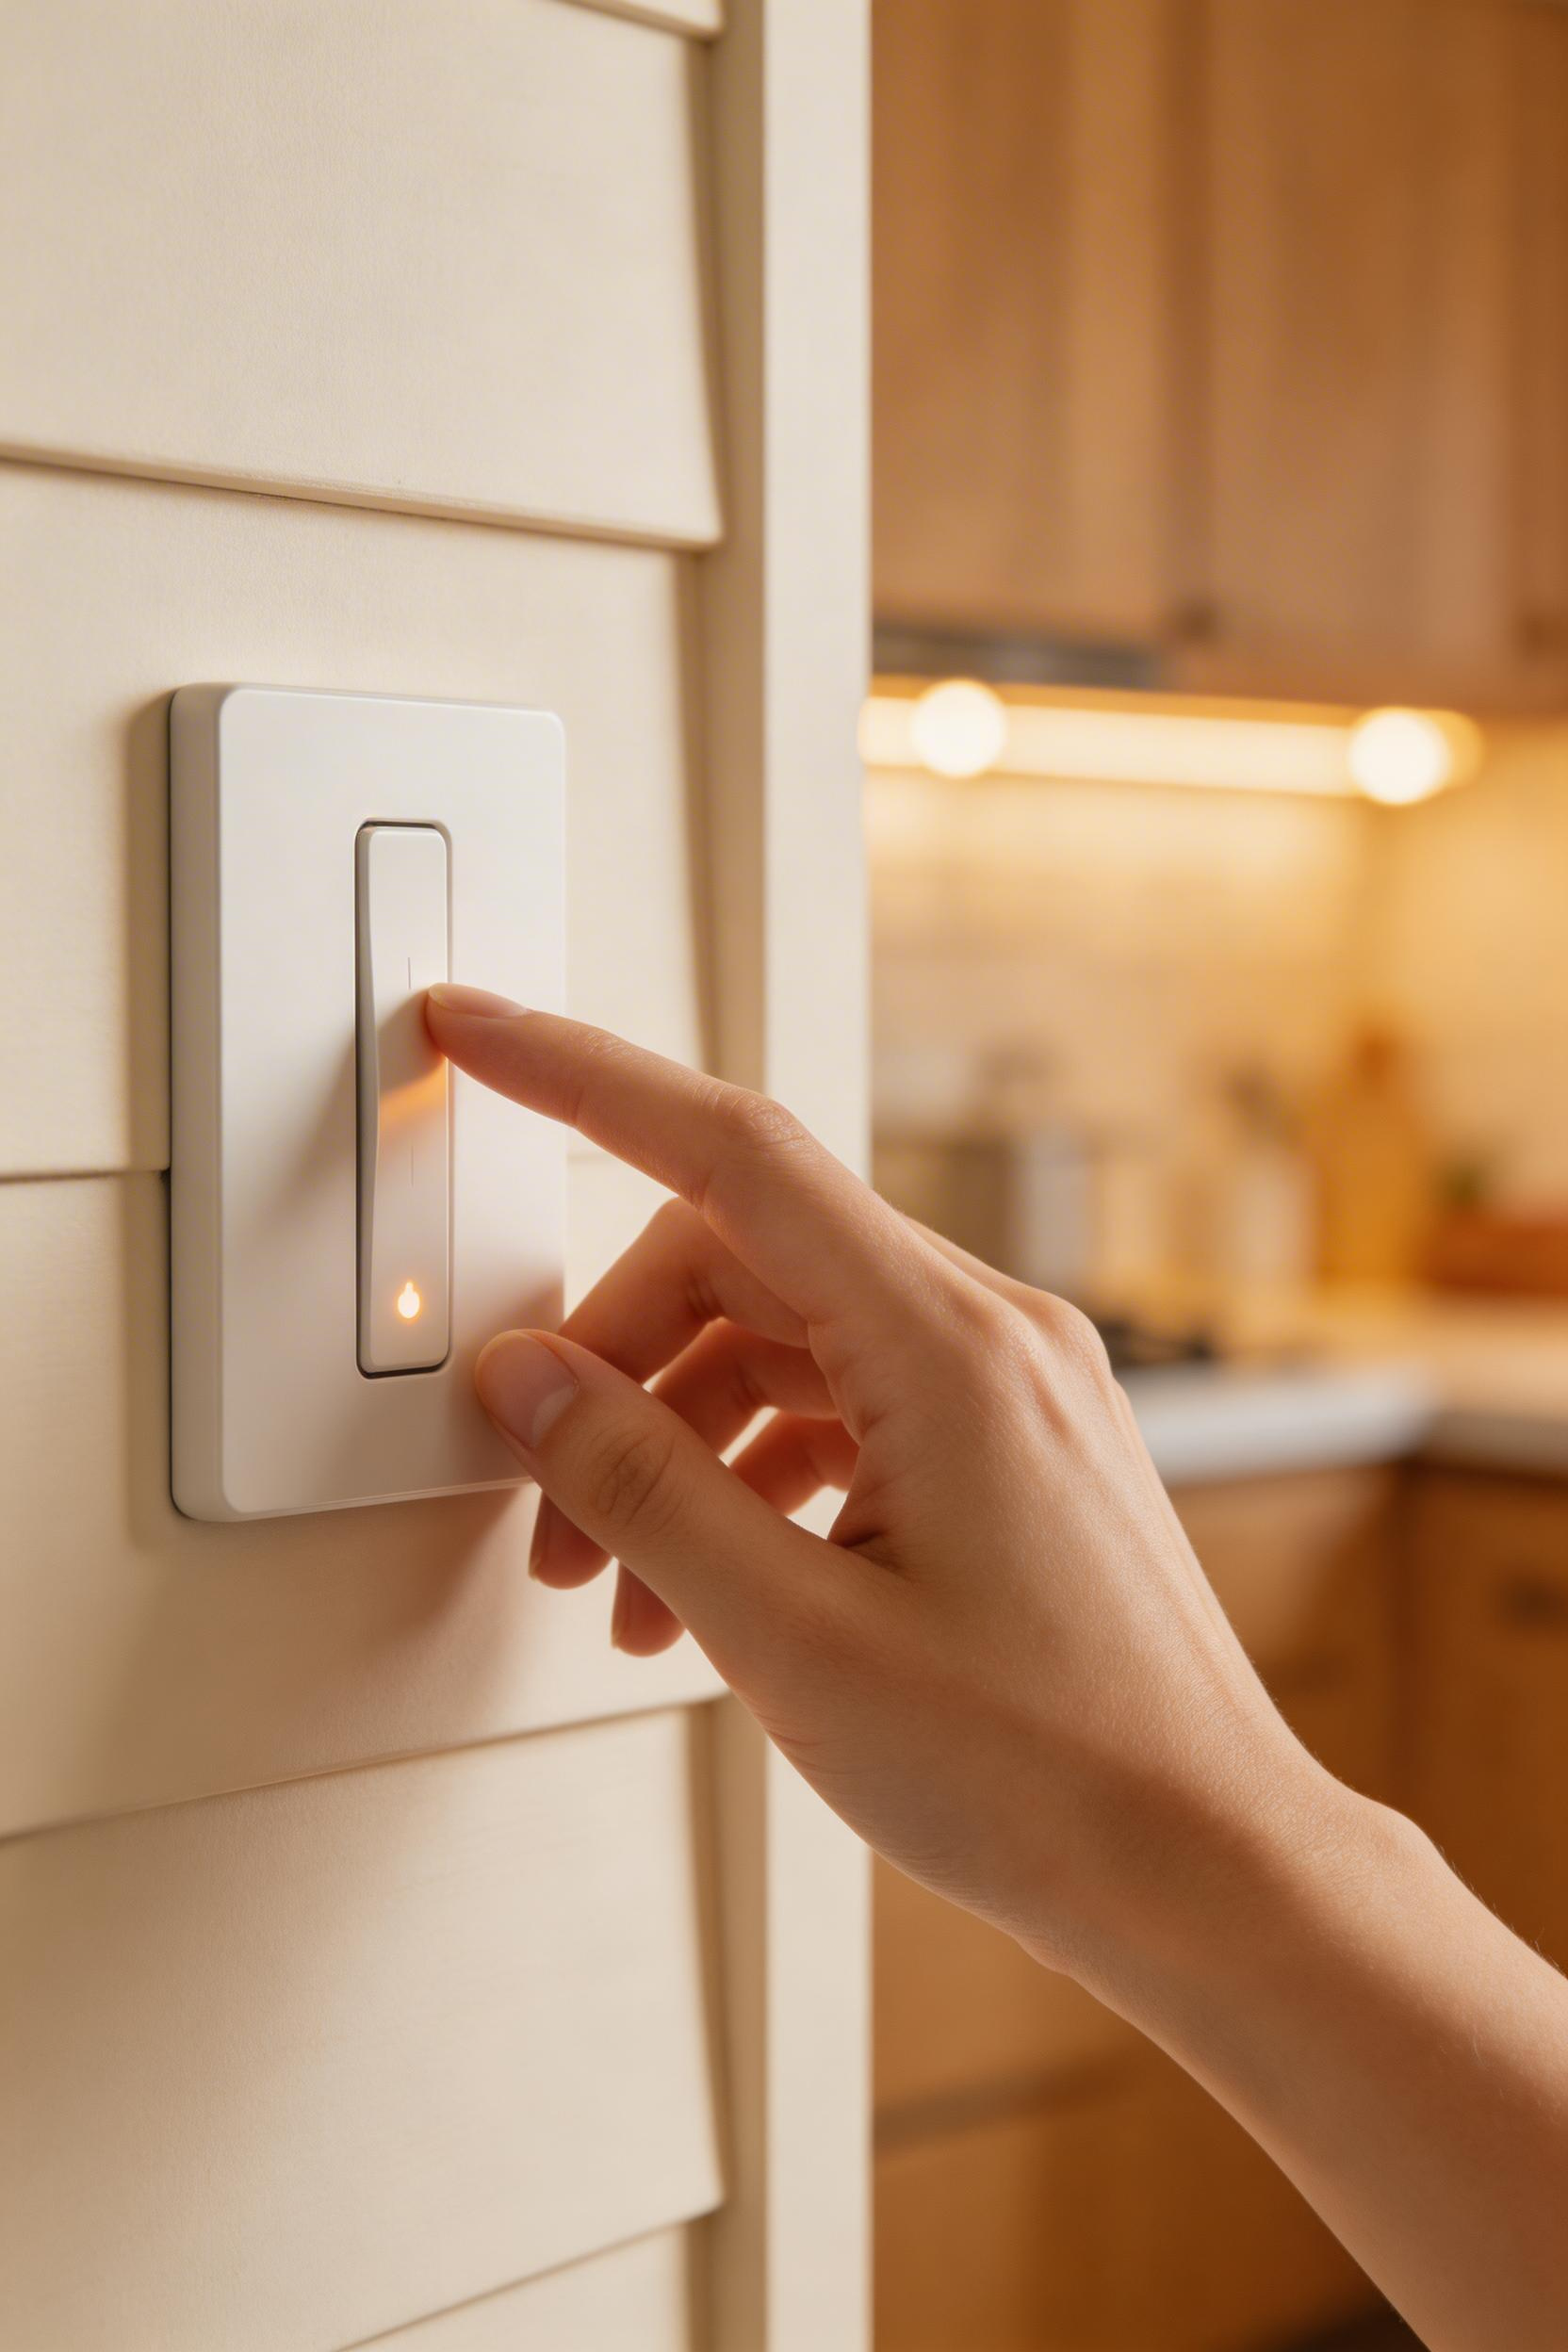
12. Smart Lighting Systems: Control That Grows With You
Smart lighting systems aren’t a luxury—they’re how modern kitchens actually function. I recommend starting small: pick one smart dimmer and integrate it gradually. The payoff is immediate. Philips Hue White Ambiance ($48.99 for two bulbs) supports 16 million colors and scenes. Lutron Caseta ($50-75 per dimmer) is the most reliable ecosystem, working with Alexa, Google Home, and Apple HomeKit. An MIT study from 2023 found that smart color-temperature adjustment improves circadian rhythm quality by 31%. That means better sleep, better mood, better energy levels. Kitchen lighting ideas that adapt to your body’s needs aren’t just convenient—they’re genuinely healthier.
Building Your Smart System Without Overspending
Start with one smart dimmer controlling your main overhead fixture. Lutron Aurora ($40-50) snaps over any existing switch without needing a neutral wire—perfect for older homes. Once that’s working, add smart bulbs to pendants or accent fixtures. Philips Hue bulbs ($15-30 each) work with the Aurora remote or your phone. Then, if you want full integration, add a hub. Lutron Caséta Pro Hub costs $100 and unlocks automation, voice control, and scheduling. This modular approach spreads cost over time and lets you learn the system gradually.
The Scenes That Matter Most
Three scenes solve 80% of kitchen lighting use: “Morning” (warm 2700K at 80% for coffee and breakfast), “Cooking” (neutral 3000K at 100% for precise food prep), and “Dinner” (warm 2200K at 30% for evening relaxation). Smart dimming reduces annual energy use by 25-35%, so your electric bill actually shrinks while your control expands. Since smart color-temperature adjustment improves sleep quality measurably, this pays dividends beyond just convenience.
Does every kitchen need smart lighting? No. But if you’re already planning a lighting overhaul, adding smart controls costs only slightly more than standard fixtures. The flexibility pays for itself quickly.
13. Sink and Task Zone Lighting: The Most-Overlooked Work Area
The kitchen sink is your most-used task area and almost universally the worst-lit. I can’t count how many times I’ve watched someone scrubbing dishes in shadows, squinting at their hands. IES standards call for 70-80 footcandles at the sink surface—that’s the light intensity needed for detailed work. Most ambient recessed lighting provides only 20-30 footcandles. You’re not lighting for general visibility; you’re lighting for work. This distinction is why proper kitchen lighting ideas prioritize task zones over even, flat ceiling coverage.
The Math Behind Sink Lighting
Light levels vary by task: 30 footcandles for general ambient, 50 for food prep, 70–80 for sink detail work. A single ceiling fixture centered in the room rarely reaches the sink at adequate intensity. The solution is a dedicated recessed LED positioned 12–18 inches forward of the sink, aimed directly at the basin. Proper positioning reduces eye strain by 35 percent and improves visibility by 40 percent.
Alternative Solutions for Windows and Alcoves
If your sink sits under a window, a pendant hung above the window frame works well—provided it’s centered over the sink basin, not off to one side. For sinks in kitchen islands, a single pendant positioned 30-36 inches above the countertop handles task lighting cleanly. For sinks in alcoves or corners, a pair of wall sconces flanking the window provides balanced light without creating shadows.
Avoiding the Obvious Mistake
The most common error is assuming a single ceiling fixture adequately lights the sink. Kitchen lighting ideas work when task zones get dedicated fixtures. Pair your dedicated sink light with ambient recessed lights spaced 6–8 feet apart for overall fill — this keeps the sink bright while the kitchen feels balanced. The same positioning principles that apply here also translate well to kitchen lighting over table situations, where intensity and aim matter more than most people expect.
14. Vintage and Industrial Fixtures: Making the Statement Work
Vintage and industrial fixtures add character instantly. Edison cage pendants, enamel factory shades, schoolhouse designs—these styles signal intention and taste. But here’s where most homeowners stumble: they buy three mismatched vintage pieces thinking eclecticism equals style. It doesn’t. The rule I follow is simple: one strong vintage statement piece plus simple supporting fixtures. Match the vintage fixture finish to one other metal in the room—your cabinet hardware, faucet, or appliance. This single discipline reads as 40% more intentionally designed, according to interior design research.
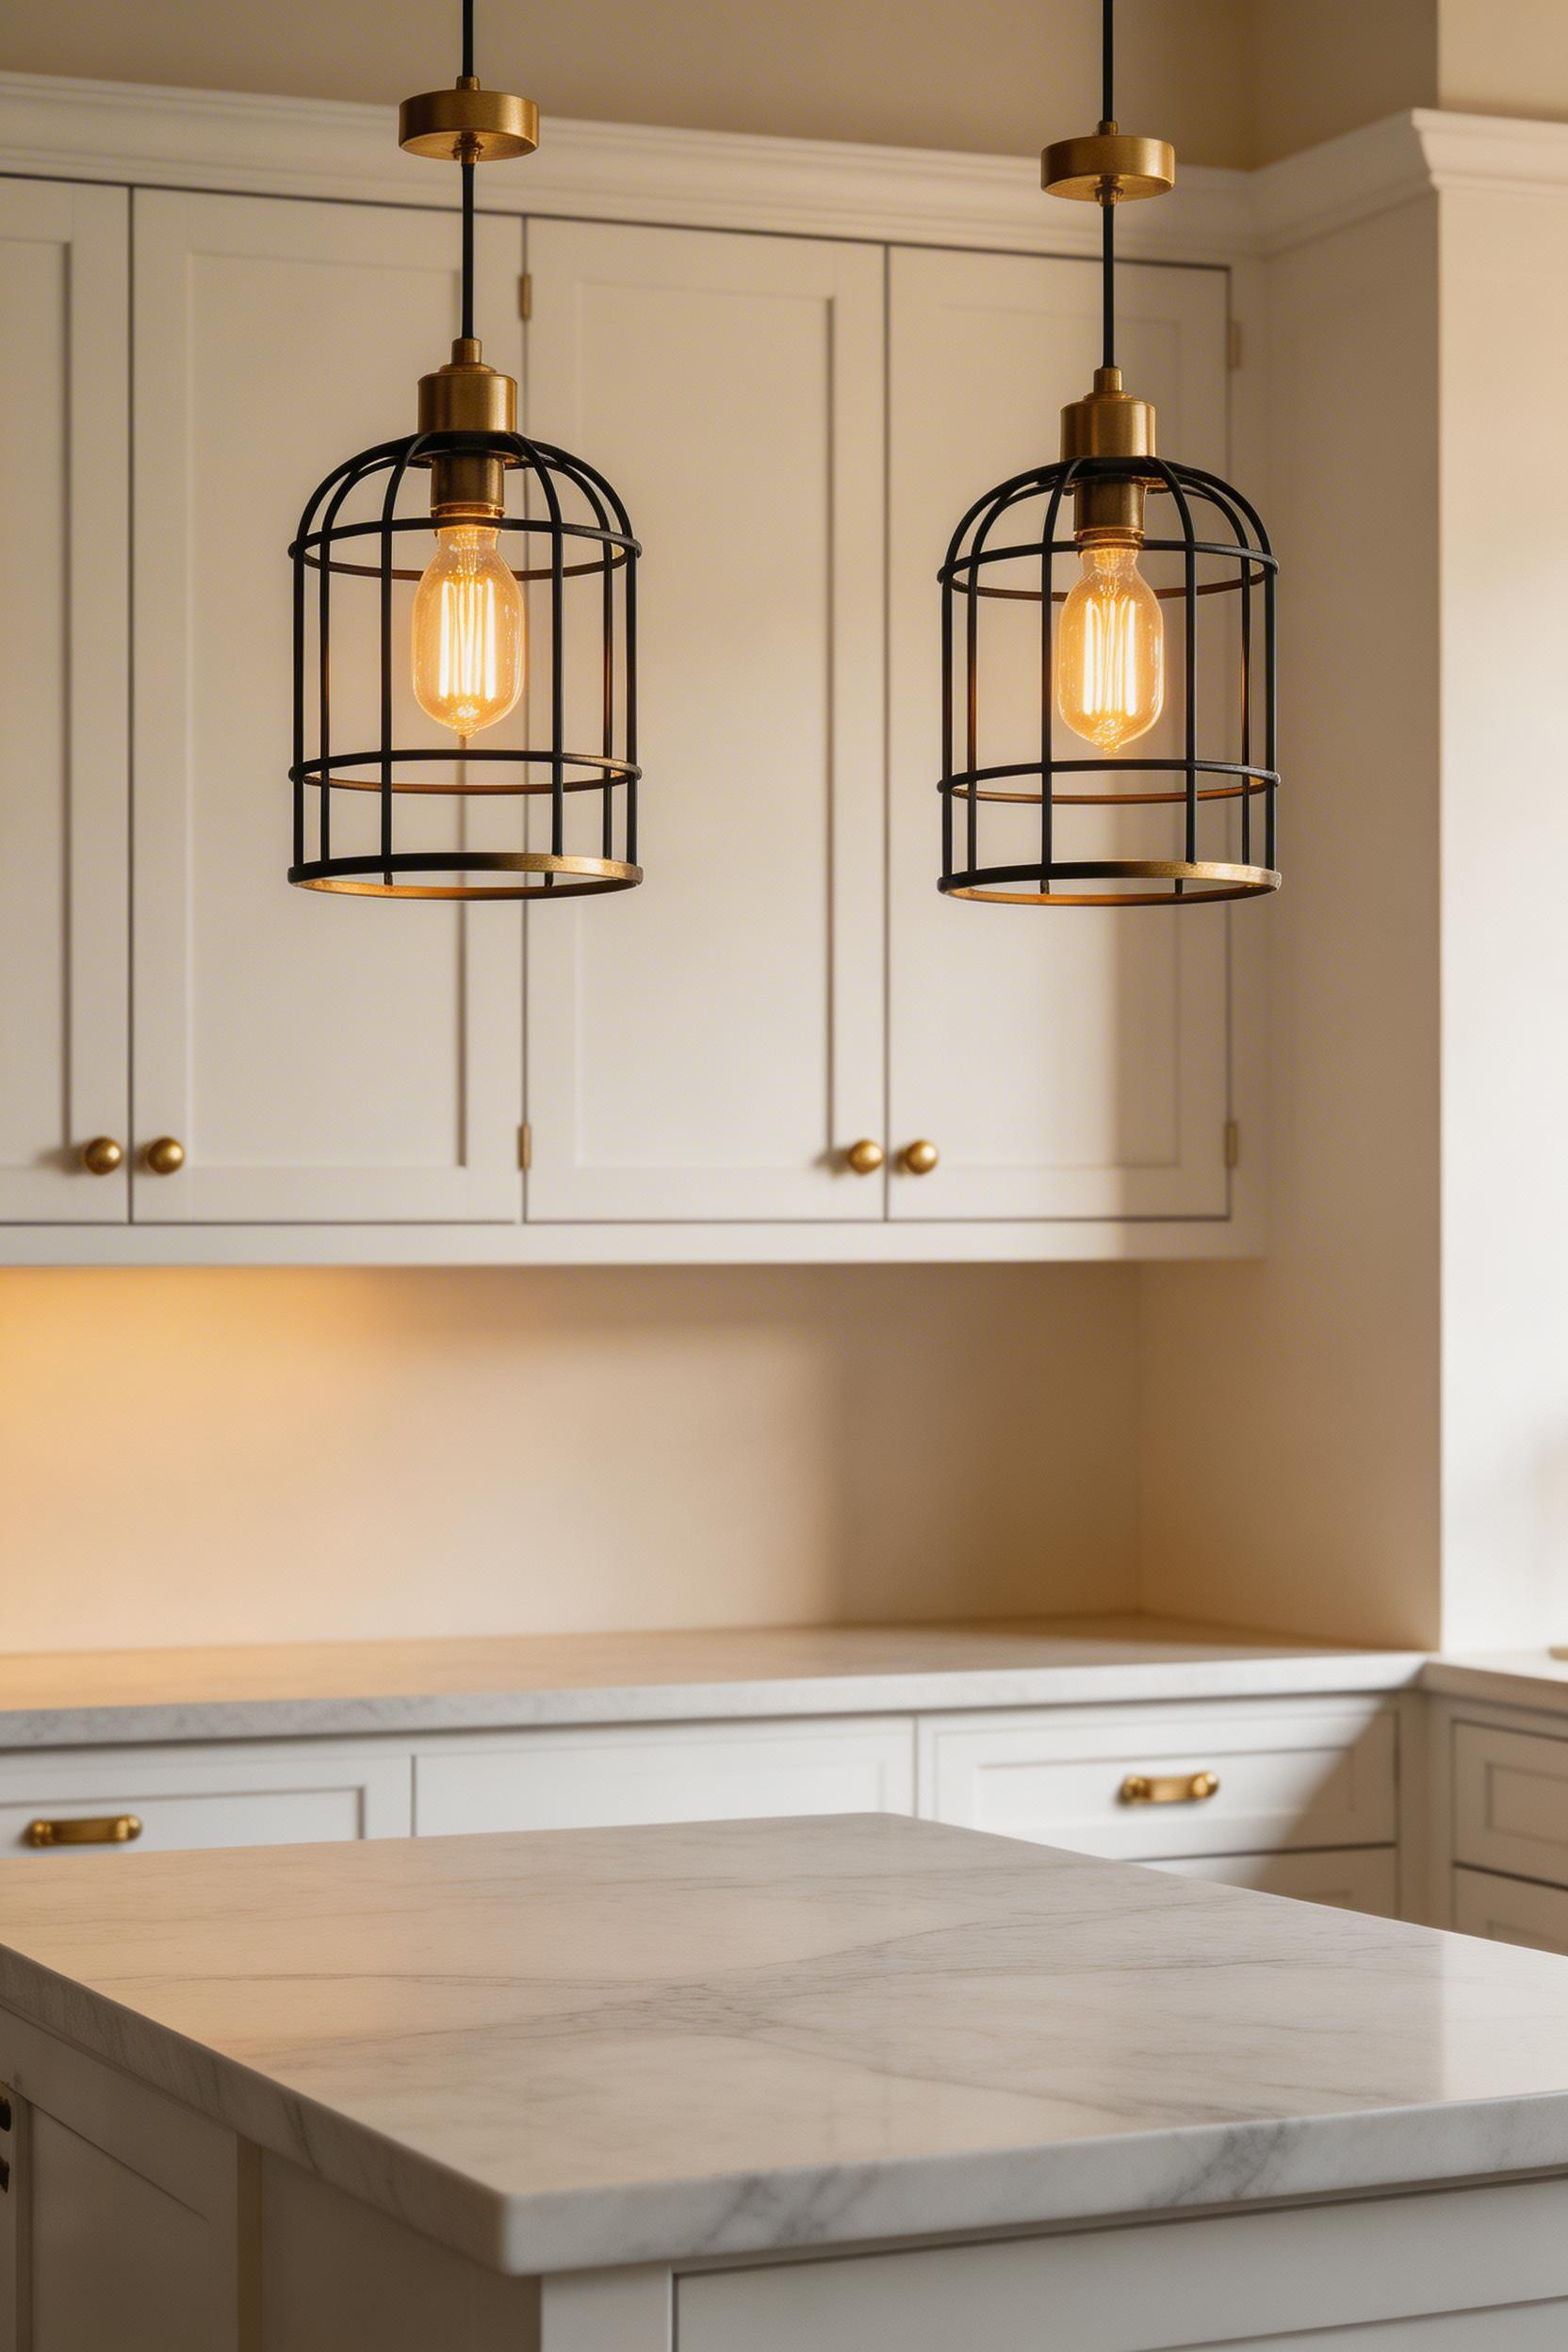
Finish Matching: The Secret Rule
Brass pendants work best with warm wood cabinetry, cream or white countertops, and traditional or transitional kitchens. Matte black fixtures pair with dark cabinets, white or gray countertops, and modern spaces. Chrome or nickel works with stainless appliances and contemporary design. The moment you introduce a second finish without connecting it to existing hardware, the kitchen reads as confused rather than curated. One strong vintage statement—say, two matched Edison cages over your island—paired with clean, simple supporting fixtures (recessed lights, under-cabinet strips, a flush-mount) creates a cohesive vision.
Where to Find Vintage Pieces Without Breaking Budget
Restoration Hardware pieces ($195-395) offer authentic reproductions with modern LED compatibility. Wayfair industrial styles ($65-130) deliver similar aesthetics at mid-range pricing. Thrift store finds ($15-40) can work if you’re willing to rewire them and ensure electrical code compliance. The temptation to mix styles is real, but I’ve never seen a kitchen improved by four different vintage aesthetics competing for attention. Restraint is the design principle that actually works here.
The Practical Concern
Vintage-style fixtures should still meet kitchen lighting standards. A single Edison cage pendant over an island provides ambient light and visual interest but won’t supply adequate task lighting for food prep. Layer it with under-cabinet LEDs and recessed ambient lights. Kitchen lighting ideas succeed when vintage aesthetic combines with practical function.
15. Lighting Layout Planning: The Step Every DIYer Skips
This might be the most important item on this entire list, and it costs nothing: spend an evening with graph paper, a pencil, and a measuring tape. I’ve watched lighting mistakes happen because homeowners bought beautiful fixtures, then realized there’s no logical place to hang them. The most expensive kitchen lighting idea is the one you buy before you know where it goes. NKBA research shows that 70% of homeowners underestimate lumen needs by 30-40%, and professional lighting plans reduce fixture returns and changes by 85%. One evening with a pencil prevents months of regret.
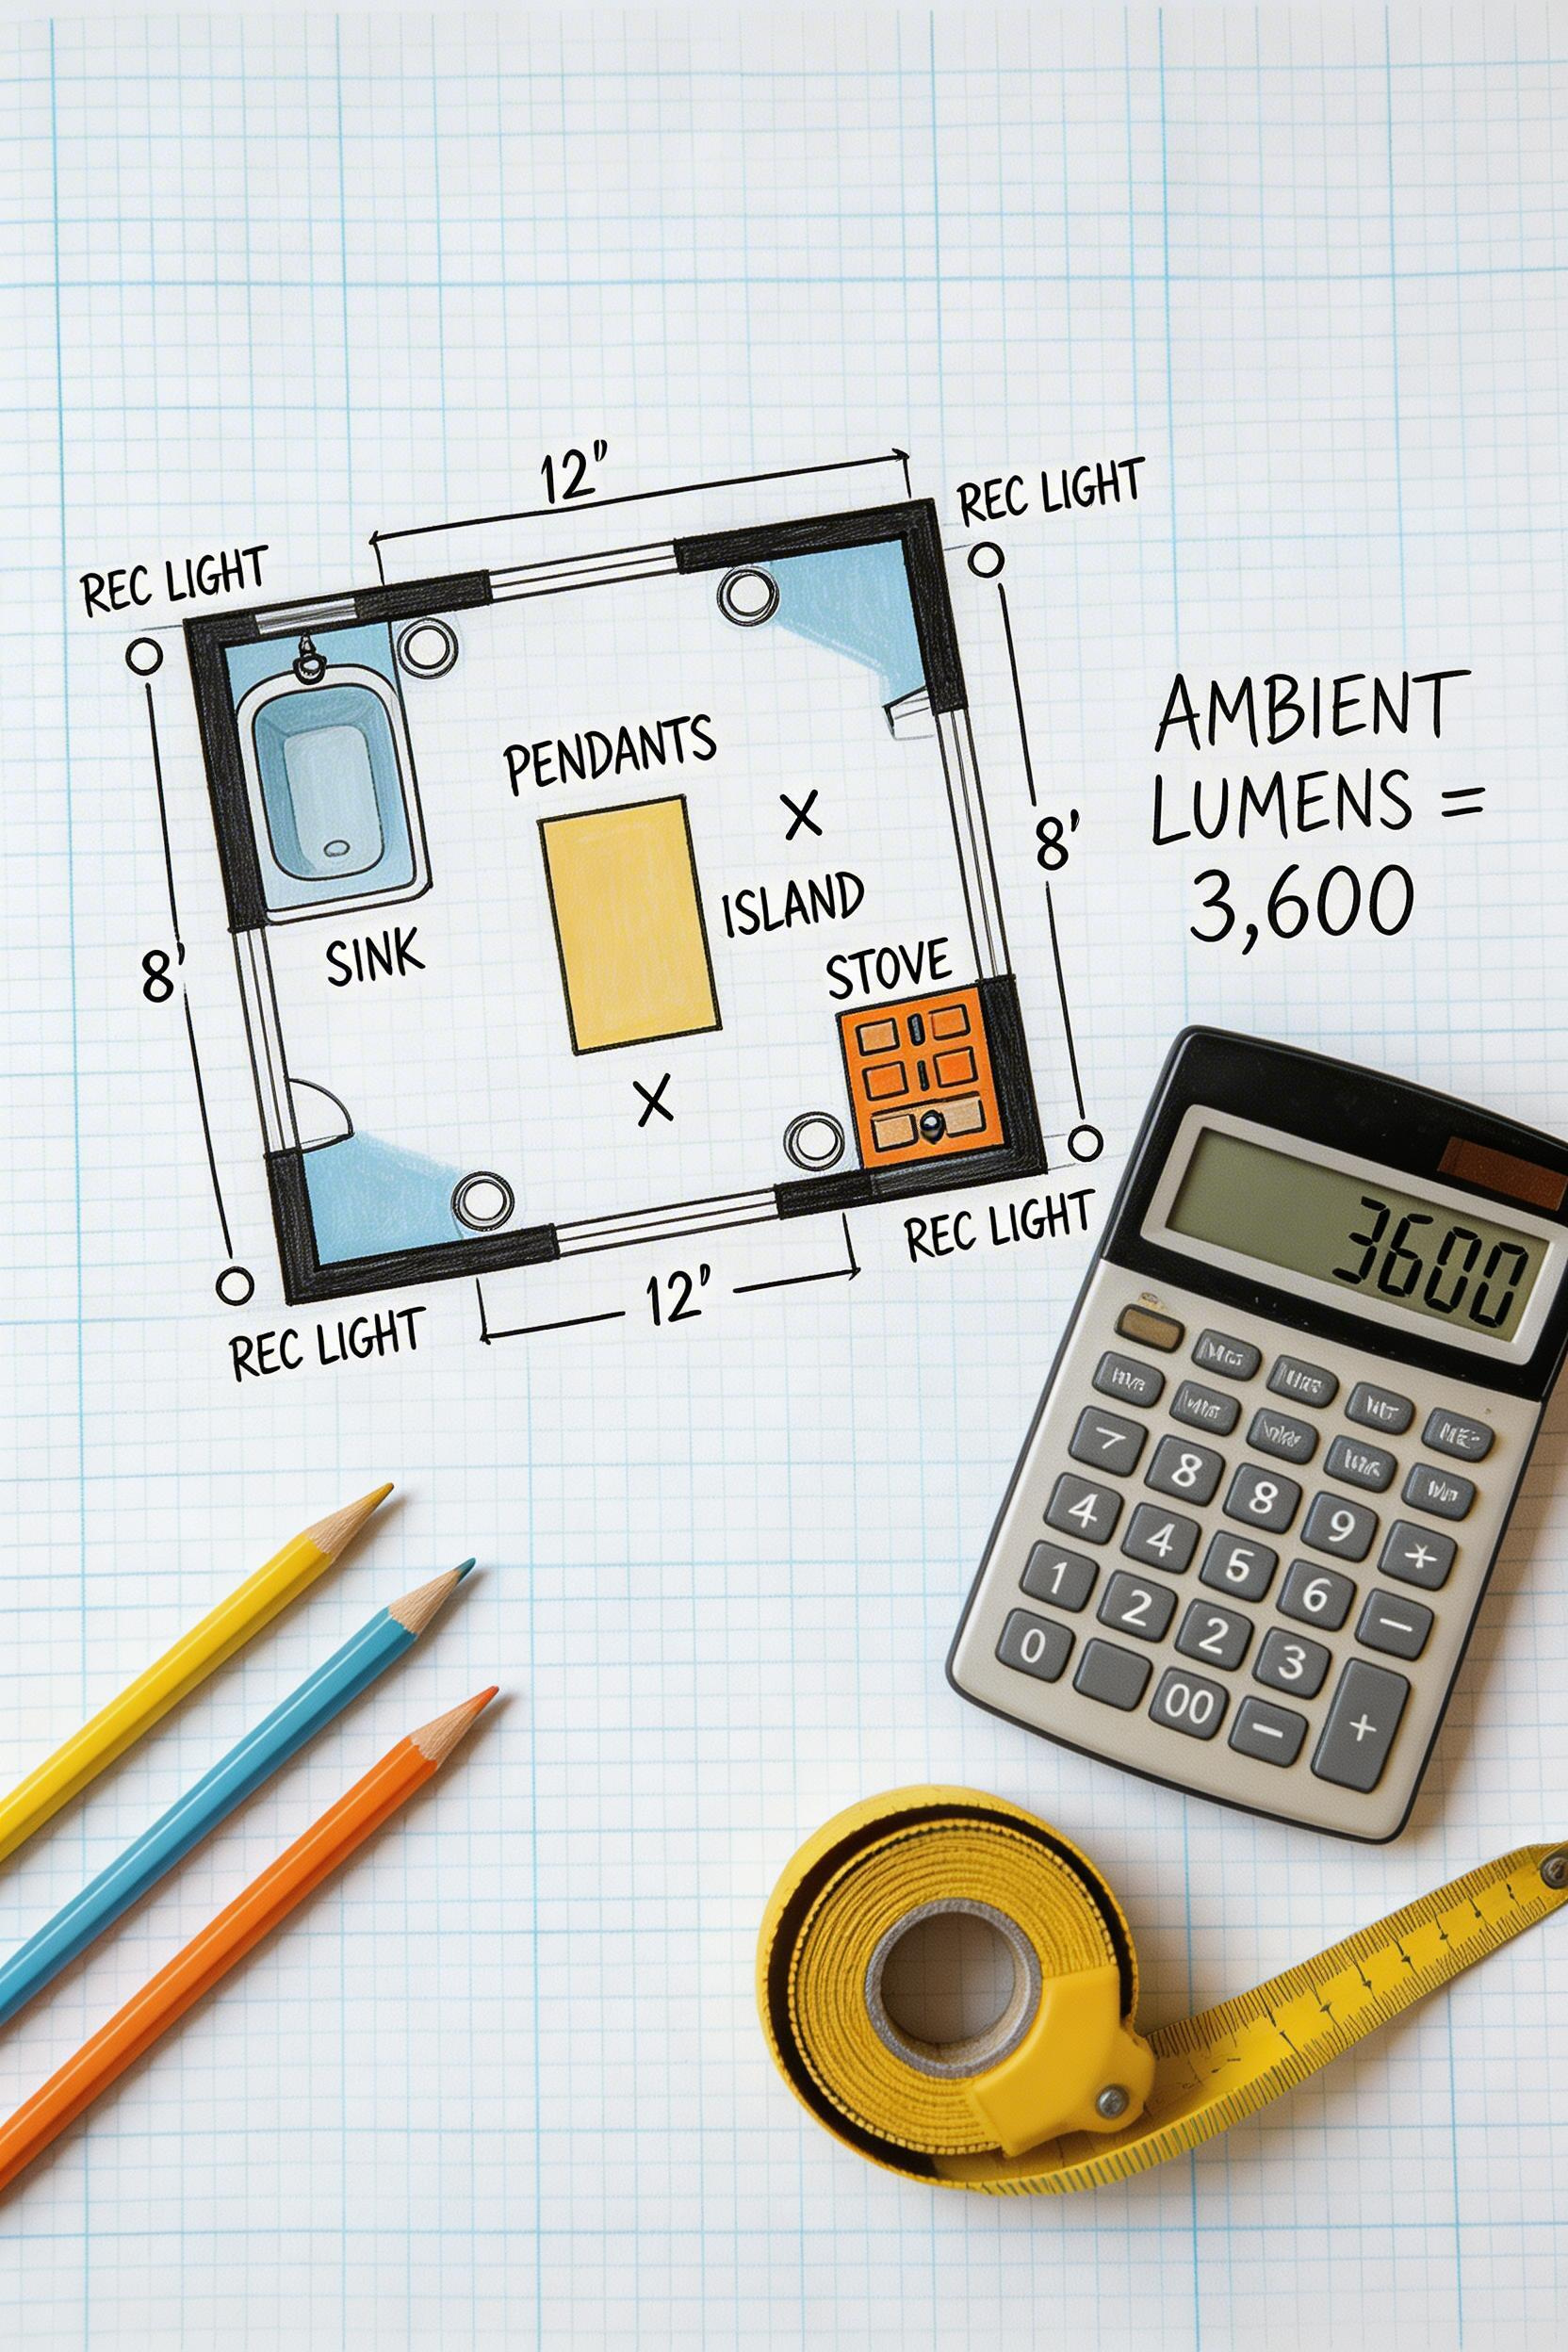
The Five-Step Planning Process
First, measure your kitchen and mark window, outlet, and switch positions. Second, mark task zones on your sketch — island, sink, stove, prep counter. Third, assign fixture types to each zone (under-cabinet or recessed for task; recessed grid or chandelier for ambient; cabinet or toe-kick for accent). Fourth, calculate lumens: ambient requires 20 lumens per square foot; task zones need 50. A 12×15 kitchen needs 3,600 ambient lumens plus 1,600 for an island task zone. Finally, place fixtures on paper, checking for shadows and coverage gaps.
Tools That Help
Graph paper and pencil are free. Lutron Design Center (free online tool) visualizes recessed layouts. Photon Lighting Calculator (free app) handles the math. Spending one evening with these tools prevents the most common installation mistakes — like discovering your pendant position only after the ceiling is patched.
The Real Cost of Skipping This Step
Buying kitchen lighting ideas without planning first causes returns, rewiring, and frustration. A gorgeous pendant casts a shadow over the island; you add a second to balance it, realize they’re too bright, then add a dimmer. It cascades. Professional plans prevent this by forcing you to think through coverage and placement before purchasing.
Light It Right: Your Kitchen Lighting Transformation Starts with One Layer
The revelation most clients experience is this: great kitchen lighting isn’t about buying expensive fixtures. It’s about understanding that lighting works as a system. Task lighting without ambient light feels spotty. Ambient light without task zones creates shadows during food prep. Accent lighting alone is pure decoration with no function. The kitchens that transform are the ones where these three layers work together, each supporting the other.
Start with under-cabinet LEDs. I’ve recommended this throughout this list because the return on investment is undeniable—$60-150 per linear foot, installed easily, dramatically improves visibility and safety at countertops, and adds warmth to the entire space. It’s the highest-impact kitchen lighting idea per dollar spent. Once that’s done, add recessed ambient lighting in a grid pattern (6-8 feet apart depending on room size). Then, if budget allows, introduce accent lighting or task-specific fixtures like pendants over the island or sconces at the sink.
Don’t wait for the perfect lighting plan to materialize. Spend an evening with graph paper, measure twice, and decide on rough zones. This single step prevents most costly mistakes. Then build incrementally. Your kitchen doesn’t need a $5,000 lighting overhaul to feel transformed. It needs intentional layers that work together, installed thoughtfully, and dimmed when appropriate. That’s what separates a kitchen that’s lit from a kitchen that feels alive.


