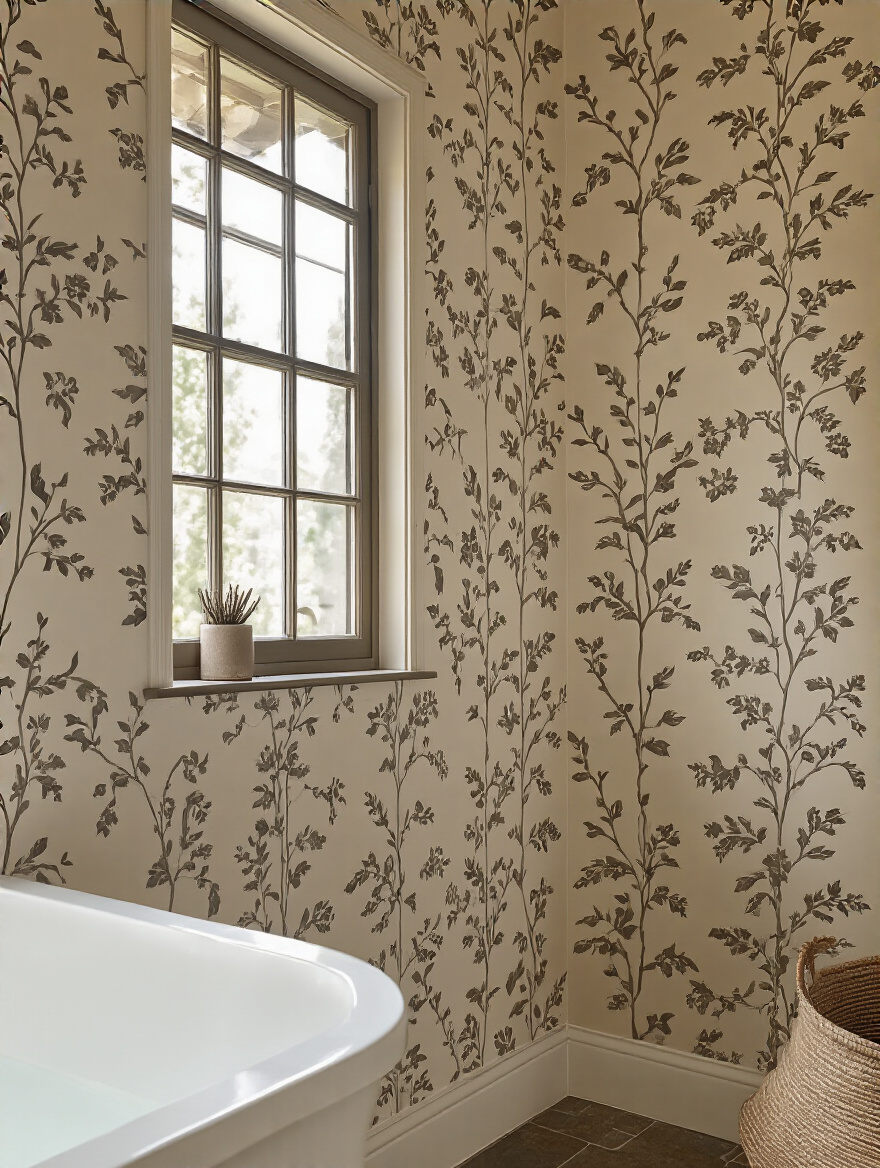
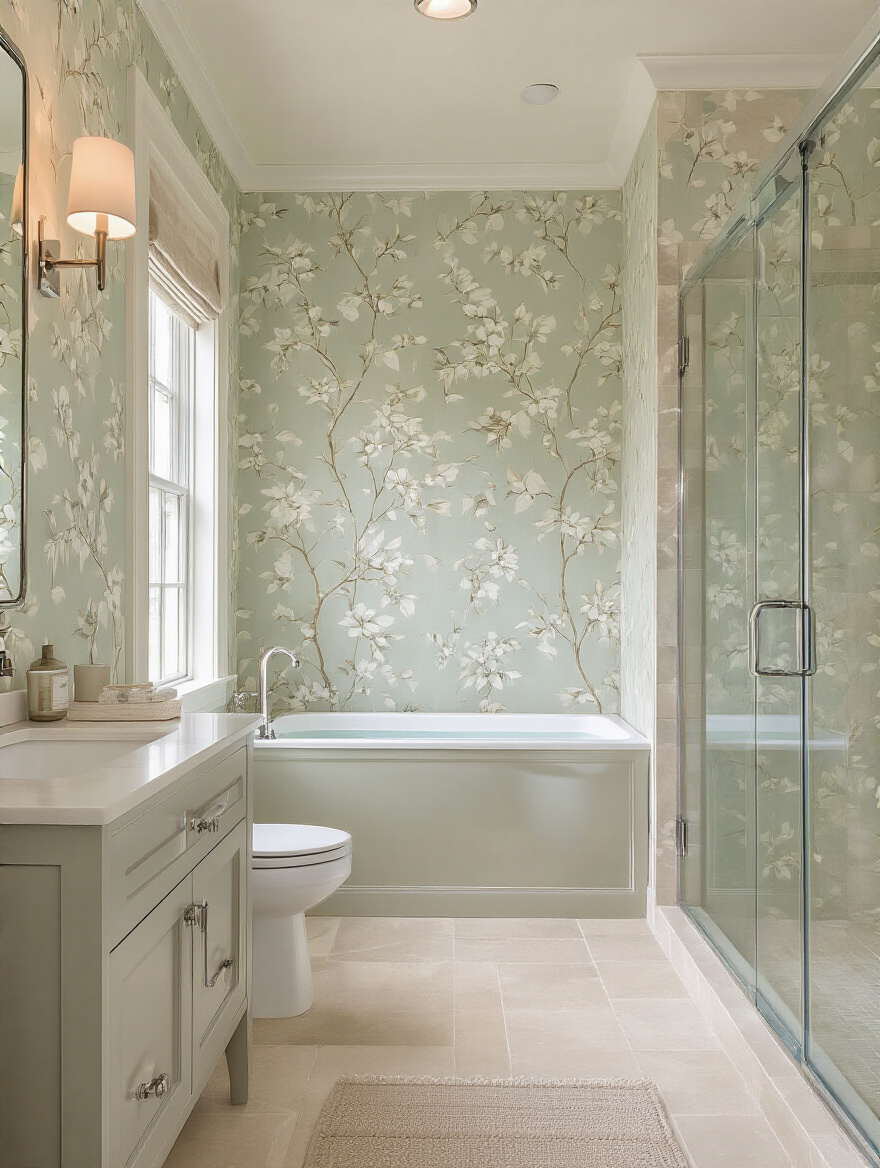
Picture this: It’s Tuesday morning. The alarm jolted you awake, the coffee isn’t ready, and you’re already running through a mental list of deadlines. You step into the bathroom to get ready, and the first thing you feel is… calm. The walls aren’t just a sterile white; they’re covered in a soft, climbing vine pattern that seems to breathe with you. The gentle texture and deep, calming green instantly lower your shoulders. You take a deep breath. Your day hasn’t even started, but you’ve already had a moment of peace.
That’s the power we’re talking about. A bathroom isn’t just a functional box for plumbing. It’s the space where you begin and end your day, a place for private ritual and reset. And the walls are the largest surface in that room—they’re either adding to your stress or helping you shed it. Most articles focus on making it look “stunning,” but I want you to focus on how it makes you feel. Let’s walk through how to create that sanctuary for yourself.
Laying the Foundation: Smart Planning for Bathroom Wallpaper
Before you even fall in love with a pattern, we have to talk about the part everyone wants to skip. This is the deep, foundational work. Think of it not as a chore, but as preparing the vessel. You wouldn’t pour fine tea into a dirty cup, and you can’t create a calming space on a chaotic foundation. These first steps ensure your beautiful new walls don’t just look good for a week, but feel good for years.
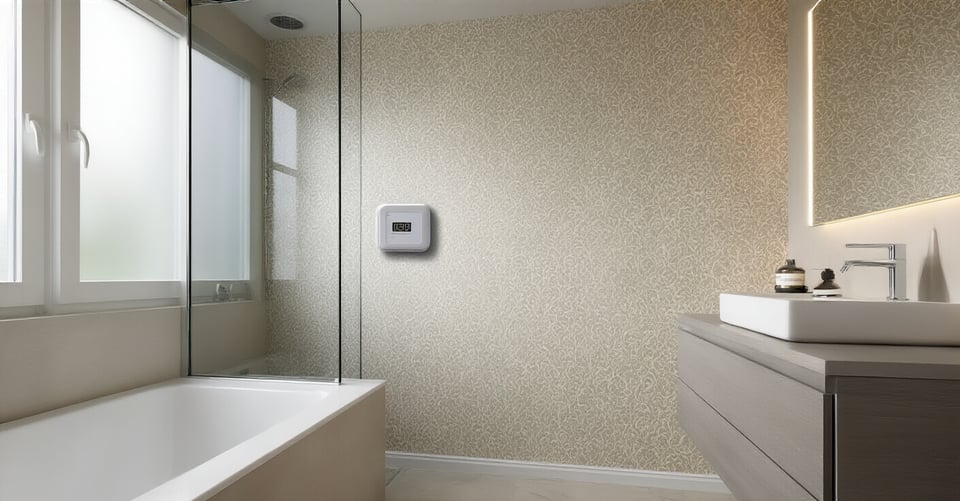
1. Assess Bathroom Humidity & Ventilation for Longevity
You know the question I get most often? It’s not about patterns. It’s, “Will it peel?” And my answer is always the same: your wallpaper doesn’t have a problem, your air might. The real enemy of a bathroom sanctuary isn’t a splash of water; it’s the air itself when it’s thick with moisture and has nowhere to go. That lingering dampness is what invites peeling, bubbling, and that faint, musty scent of mildew that completely undermines any sense of clean.
So before you do anything else, just stand in your bathroom after a hot shower. Feel the air. Is it heavy and sticky? Does the mirror stay fogged for ages? That’s your sign. Your room can’t breathe. The goal here is to create an environment where the air can circulate and dry itself out, which is far more important than what brand of wallpaper you buy. A good exhaust fan isn’t a luxury; it’s the lungs of the room. Making sure your bathroom can exhale properly is the first, most critical step to ensuring your walls feel as serene as they look.
This is the hidden groundwork that makes the beautiful part possible. Get this right, and everything else we do will be built on a foundation of health and stability.
2. Select Wallpaper Material Resistant to Moisture and Mildew
Okay, can we talk about something everyone gets wrong? They see a tag that says “bathroom friendly” or “washable” and think they’re set. But there’s a world of difference between materials. The big mistake I see is when people use a paper-backed vinyl. It sounds good, right? Vinyl on top! But that paper underneath is like a little sponge, and if even a tiny bit of steam gets into a seam, it will hold that moisture, and you’ll eventually get that mildewy smell. It’s a sensory betrayal.
I learned this the hard way with a client years ago. She fell in love with a stunning, textured grasscloth for her powder room. It was technically “vinyl coated.” But in her main bathroom, with a steamy shower used daily, the subtle, earthy scent it had at first turned into a permanent damp-basement smell within a year. We had to tear it out. The lesson? Your wallpaper needs to be a shield, not a sponge. Solid vinyl is your best friend in a full bath. It’s non-porous. It doesn’t just resist water; it ignores it. For a powder room with no shower, you can be more adventurous. But for your daily-use sanctuary, function has to lead.
Now, that doesn’t mean your walls have to feel like plastic. Modern vinyls have incredible textures and finishes. Let’s get a few samples so you can actually feel the difference.
3. Accurately Measure Walls and Account for Pattern Repeat Waste
There’s nothing more jarring to a creative project than running out of your materials halfway through. It breaks the flow, introduces stress, and turns a joyful transformation into a frustrating puzzle. That’s what happens when you don’t account for pattern repeat. You see, a pattern isn’t just printed on a roll; it has a rhythm. You have to cut away sections of paper to make sure that climbing vine or geometric shape lines up perfectly from one strip to the next.
Forgetting this is the number one reason people run short. Here’s the shortcut I wish I knew when I started: after you calculate what you think you need, always—and I mean always—buy one extra roll. Always. Don’t even question it. Consider it your “peace of mind roll.” If the project goes perfectly, you have a spare for any future scuffs or repairs, ensuring a perfect color match. If you make a mistake, it’s not a catastrophe. That single extra roll transforms potential panic into a calm “no problem.”
This isn’t about waste; it’s about honoring the pattern and ensuring the process of creating your sanctuary is as peaceful as the sanctuary itself.
4. Define Your Bathroom’s Style & Desired Mood Before Choosing
This is my favorite part. Before you even look at a single wallpaper sample, close your eyes and ask yourself one question: “When I walk in here in the morning, how do I want to feel?” Forget trends. Forget what you saw on a design show. Connect with the feeling. Do you need to feel energized and awake? Or do you need to feel calm, centered, and cocooned? The answer to that question is your compass. It will guide every choice you make.
Words like “spa-like,” “vibrant,” “serene,” “luxurious,” or “playful” are your true north. If your word is “serene,” you’ll naturally gravitate toward soft, organic patterns, muted colors, and gentle textures. If it’s “energizing,” you might look for crisp geometrics or bright botanicals. This is the absolute opposite of corporate design speak; it’s deeply personal. The BS everyone else says is to match your fixtures. I say, match your soul. The fixtures can be changed. The way a room makes you feel is fundamental.
Your bathroom is the first and last energetic space you inhabit each day. Let’s make sure it’s serving you.
5. Gather Inspiring Visuals and Create a Cohesive Mood Board
I used to think mood boards were just for designers. A bit precious, you know? But then I realized they aren’t about making a pretty collage; they’re about creating a sensory map for your space. This is how you make sure the cool, smooth feel of your chrome faucet doesn’t end up clashing with the warm, earthy energy of the wallpaper you love. It’s where you bring all the elements into conversation with each other before you commit.
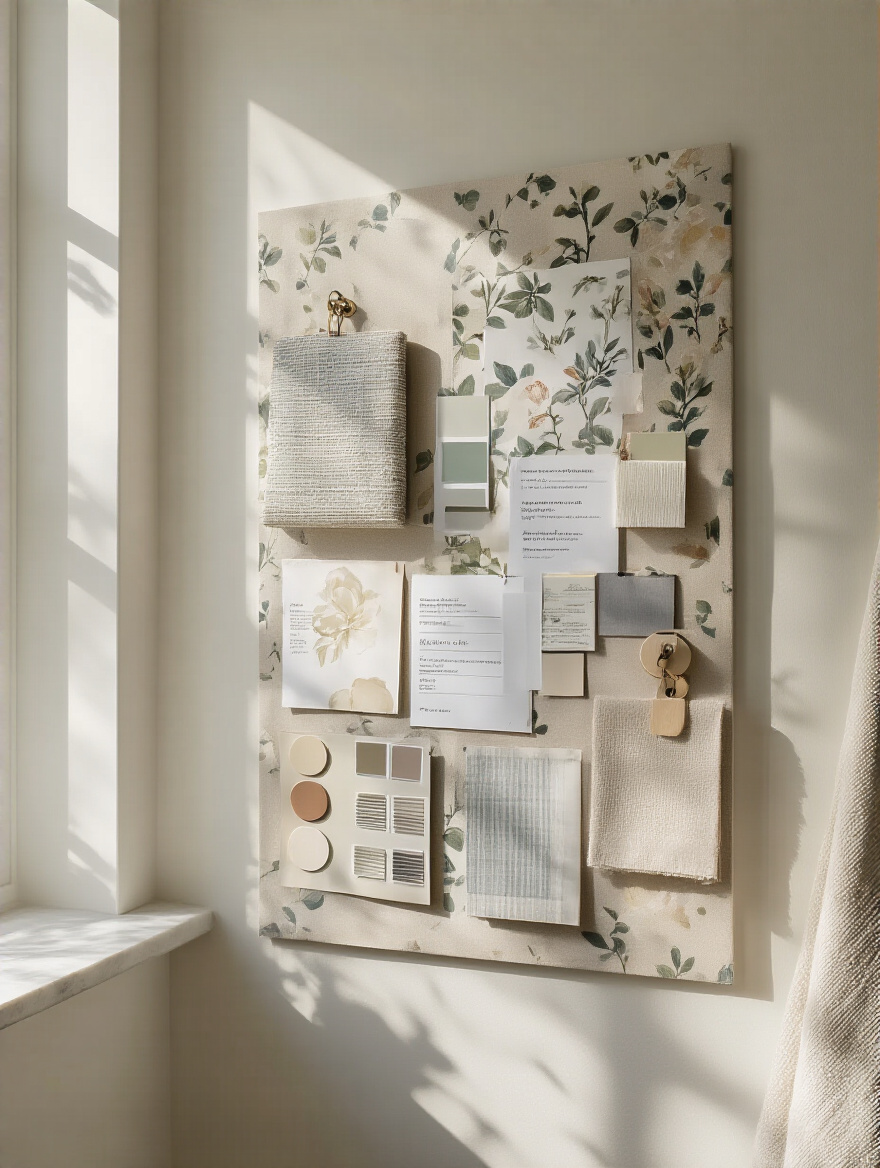
Here’s my advice: make it physical if you can. Print out a picture of your chosen wallpaper. Get a paint chip for the trim color. Find a small tile that resembles your floor. Add a fabric swatch for the color of your towels. Maybe even include a picture of a plant you want to bring in. Then, pin it all to a board and live with it for a few days. Put it in the bathroom and look at it in the morning light, then again at night. Does the conversation between the elements feel harmonious? Or is one piece yelling over the others?
This little ritual saves so much guesswork. It grounds your vision in reality and ensures the final space feels integrated and whole, not like a collection of disconnected ideas.
6. Consider Professional Consultation vs. Embracing DIY Savings
Okay, let’s have an honest talk about this. The impulse to DIY is strong, especially when you see the potential savings. But I want you to think of this not just in terms of money, but in terms of energy. What is the goal here? To create a sanctuary. If the process of wrestling with sticky paper, mismatched seams, and crooked cuts in a tiny space makes you want to scream, have you defeated the purpose before you’ve even begun?
A professional installer brings an energy of calm, quiet competence. They have the right tools, the muscle memory, and the patience born of experience. They see a tricky corner around a window not as a crisis, but as a simple Tuesday. You are paying for that peace. However, if you are someone who finds a deep, meditative joy in meticulous, hands-on projects, then DIY can be a beautiful act of infusing your own energy into the walls of your home. Be honest with yourself about where you fall on that spectrum.
There’s no right answer here. But choosing the path that preserves your peace of mind is always the right investment for a sanctuary space.
Design & Application: Bringing Your Wallpaper Vision to Life
You’ve done the deep work. You understand the room’s breath, you’ve chosen your materials with intention, and your sensory map is clear. Now comes the magical part—bringing it all to life. This is where the energy of preparation transforms into physical beauty. It’s a slower, more mindful process than painting, but the result is a depth and personality that paint can never quite replicate.
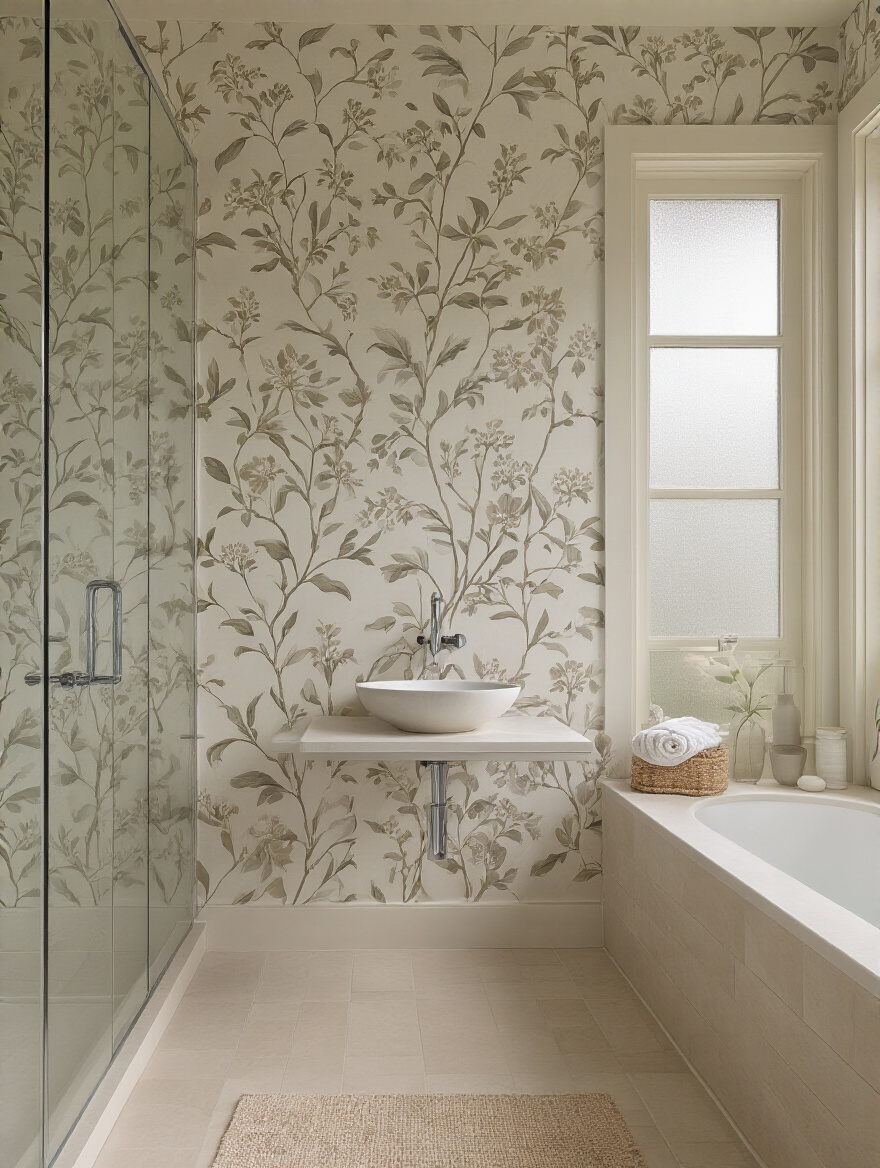
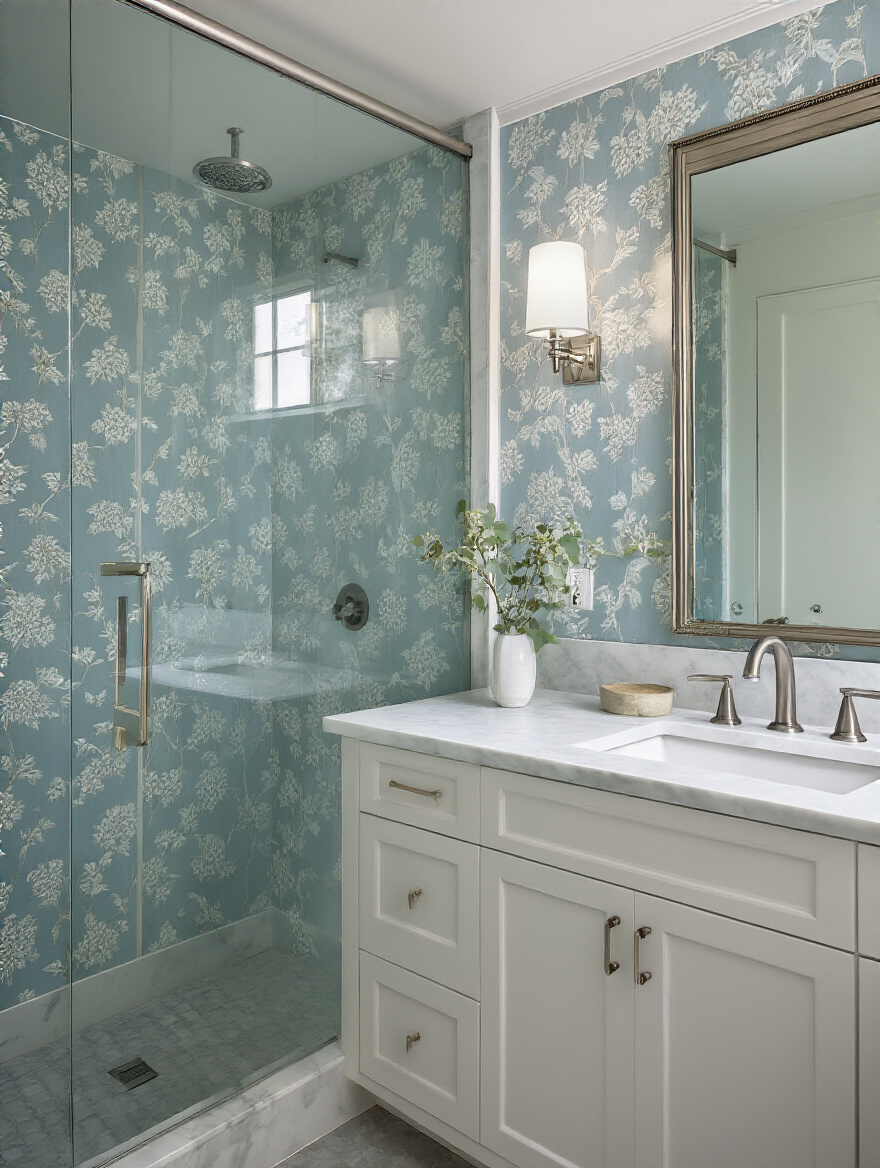
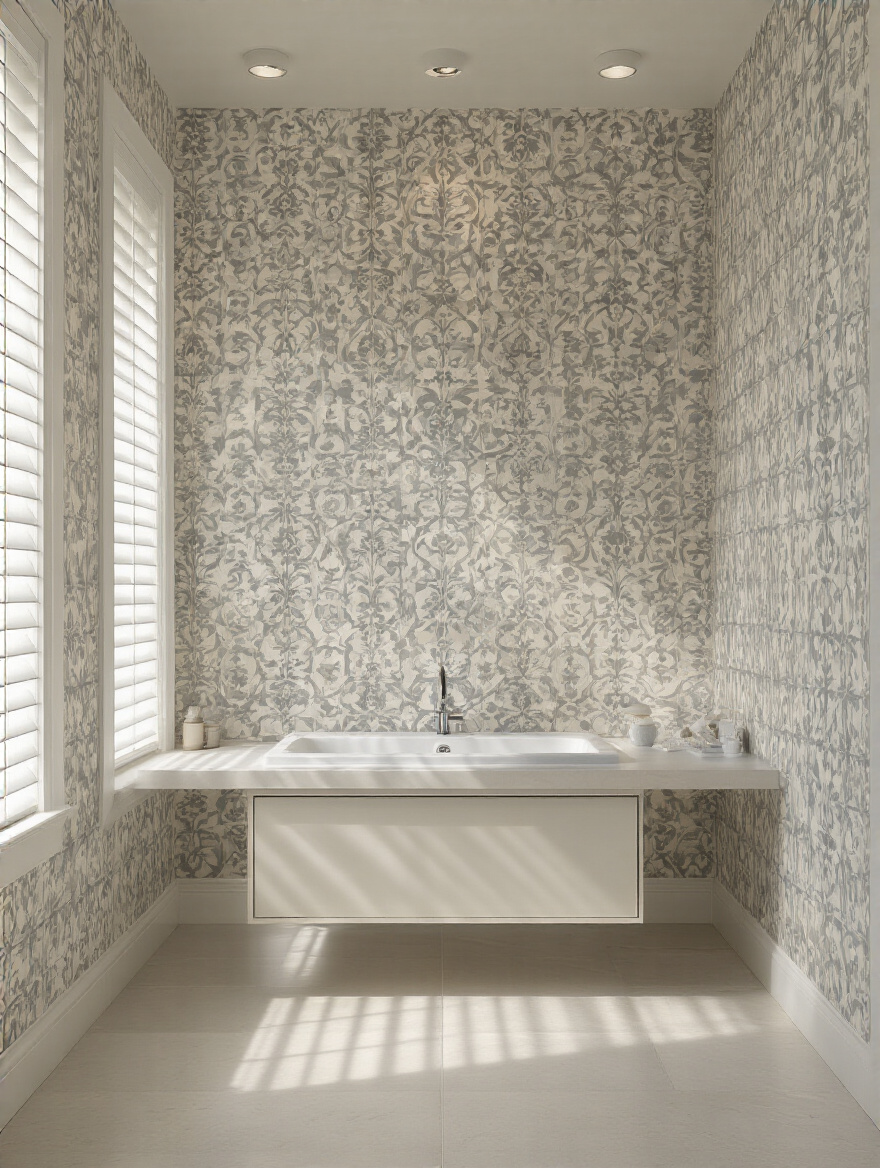
7. Harmonize Wallpaper Patterns with Existing Fixtures and Tiles
Think of your existing fixtures—the tile, the vanity, the sink—as the keynotes in a chord. Your wallpaper is the new note you’re adding. Does it create a beautiful, resonant harmony, or does it create a jarring dissonance? This isn’t about being “matchy-matchy.” It’s about ensuring all the elements are in a graceful conversation with one another. A sharp, modern geometric wallpaper might feel like it’s shouting at a soft, traditional pedestal sink.
The trick is to look at the lines. Are your tiles square and linear? A wallpaper with curved, organic shapes could provide a beautiful, soft contrast. Do your fixtures have rounded edges? A pattern that echoes those curves will feel naturally cohesive. Look at the undertones, too. If your tile has a cool, gray undertone, a wallpaper with a creamy, warm background can feel “off,” even if you can’t quite put your finger on why. It’s a subtle energetic clash.
Bring a large sample of the wallpaper into the bathroom. Hold it up next to the tile, the vanity, the mirror. Don’t just look at it; feel it. Let your intuition tell you if the conversation is working.
8. Choose Colors and Hues for Impact, Mood, and Cohesion
Color is pure energy. It is the quickest way to change the entire nervous system of a room. It’s not just decoration; it’s a science. Soft blues and greens can actually trigger a parasympathetic response, telling your body it’s safe to relax. Warm terracotta or soft peachy tones can feel nurturing and grounding. A crisp, clean pattern with high contrast can feel awakening and energizing.
Remember that question we started with? How do you want to feel? That is your color guide. But here’s the secret almost everyone forgets: light. The color you see in the store under fluorescent lights will be a completely different being in your bathroom. You have to see it in its intended home. Tape a large sample to the wall and watch it through the day. How does it look in the bright morning light? How does it feel in the soft, artificial light at night when you’re brushing your teeth?
The color you choose isn’t static; it lives and breathes with the light in your space. Give yourself time to get to know it in all its moods before you commit to it full-time.
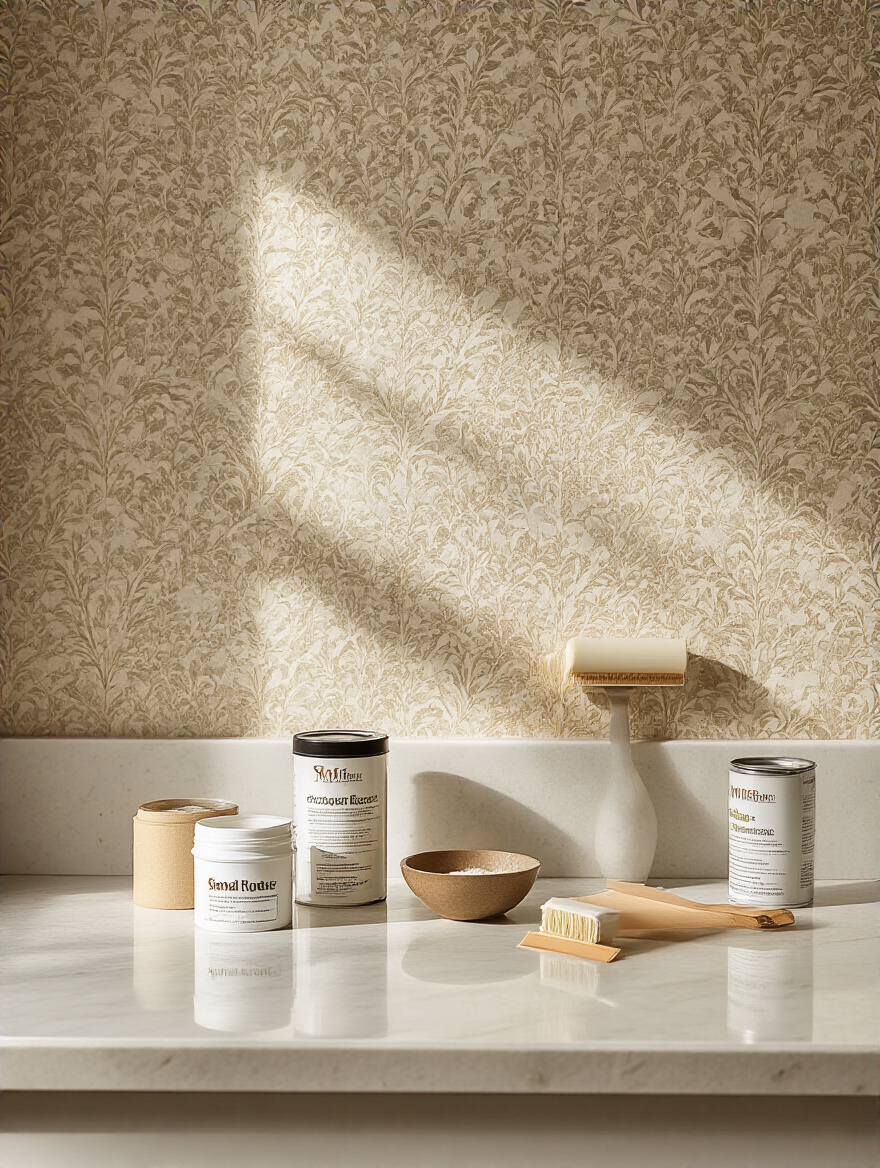
9. Properly Prepare Wall Surfaces for Flawless Adhesion and Durability
If your mood board is the soul of the project, wall prep is its skeleton. It’s the invisible structure that holds everything up, and you can’t skimp on it. This part feels tedious, but I invite you to reframe it as a ritual. When you’re washing the walls, you are cleansing the old energy. When you’re spackling tiny holes and sanding them smooth, you are creating a flawless, peaceful canvas, removing the imperfections and scars of the past.
The most important step here, the one that’s absolutely non-negotiable in a bathroom, is the primer. But not just any primer. You need a specific wallpaper primer/sealer. This is the BS everyone else glosses over. They’ll just say “prime the wall.” Regular paint primer is designed to help paint stick. Wallpaper primer (often called a ‘size’ or ‘sealer’) is different. It creates a protective barrier that prevents the moisture from the adhesive from soaking into your drywall. And crucially, it makes the wallpaper strippable later, so you don’t destroy your walls if you ever want to change it.
Think of it as creating the perfect, receptive surface. You’re telling the walls, “We’re ready for something beautiful,” and making it easy for them to receive it.
10. Understand Different Adhesives for Best Wallpaper Results
Here’s a secret from the pros: the paper is the art, but the adhesive is the trust. Choosing the right glue is an act of commitment to your project. And please, hear me when I say this: the “one-size-fits-all” tub of universal paste from the hardware store is not your friend here. Not in a bathroom. It’s like using a cheap, flimsy frame for a masterpiece painting. It will eventually fail and let the art down.
The needs of a heavy, solid vinyl wallpaper are completely different from a lighter non-woven paper. And more importantly, the humid environment of a bathroom demands an adhesive with extra muscle. You want to look for a heavy-duty, “strippable” vinyl adhesive, and make sure it contains a fungicide. This is your insurance policy against mold and mildew trying to grow behind your beautiful walls. It’s an invisible detail that protects the sensory experience of the room for years to come.
Read the back of your wallpaper roll. It will tell you what it needs. Listen to it. Honor its request by giving it the specific, trustworthy partner it needs to do its job beautifully.
11. Master the Art of Pattern Matching and Seam Alignment
This is the meditative part. This is where patience becomes a design tool. Trying to rush pattern matching is like trying to rush a yoga pose—you’ll just end up frustrated and off-balance. The goal is for the seams to disappear, for the pattern to flow across the wall as if it were one continuous, seamless mural. It’s a kind of magic.
The secret shortcut is a plumb line or a laser level. Your first strip must be perfectly, mathematically vertical. Don’t trust your eye, and don’t trust the corner of the wall (houses are never perfectly square). This first perfect line is your anchor. Every single piece that follows will align with it. As you hang each new piece, don’t press it down firmly right away. Gently slide it into place until the pattern on the edge locks in perfectly with the piece beside it. It’s like finding that “click” when you solve a puzzle.
Then, gently “butt” the seams together so they touch without overlapping. They should kiss, not wrestle. Smooth the paper outwards from the center to push out any air bubbles. Take your time. Breathe. This is the craft.
12. Seamlessly Trim Edges and Navigate Architectural Obstacles
The final act of wallpapering is about honoring boundaries. The clean, crisp line where the wallpaper meets the ceiling, the baseboard, or the window frame is what gives the entire project a finished, professional feel. And the secret to this is devastatingly simple: a brand-new, razor-sharp blade. Not a kind-of-sharp blade. A brand new one.
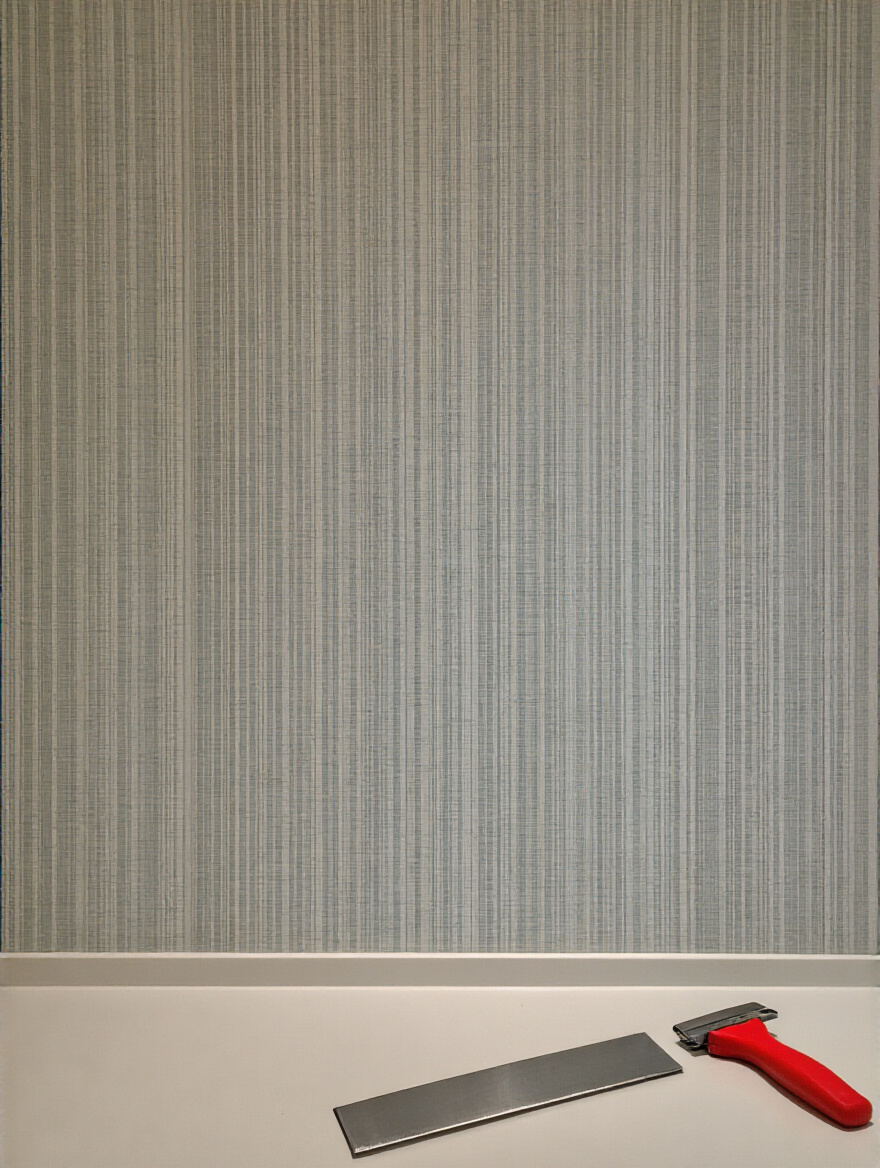
A dull blade doesn’t cut; it tears and snags the wet paper, leaving a fuzzy, amateurish edge that will be the first place to peel. The single best tip I can give you is to snap off a new segment of your utility knife blade for every single long cut you make. It feels wasteful, but I promise you it is the kindest thing you can do for your wallpaper and your sanity. Use a wide putty knife or a metal straightedge as your guide, press it firmly into the crease, and draw your sharp blade along it in one smooth, confident motion.
This is the moment that makes all the preparation worth it. It’s the final, clean line that says, “It is finished. And it is beautiful.”
Conclusion
So you see, it’s never just been about picking a pretty pattern. It’s about a holistic process of transforming a space. You’ve learned to listen to the room, to prepare your canvas with intention, to choose materials that support your vision not just visually, but functionally and sensorially. You’ve infused the walls with a quiet care that will radiate back at you every time you step into the room.
By seeing your bathroom walls not as a surface to be decorated, but as an opportunity to create a container for peace, you’ve done more than a design project. You’ve invested in your own well-being. Now, every morning when you enter that space, you’ll be met not with stark utility, but with a gentle, beautiful reflection of the calm you’ve so thoughtfully cultivated. Your oasis is waiting.


