Hey there, fellow DIY enthusiasts! Ready to roll up your sleeves and transform your kitchen into a stunning masterpiece? Well, grab your coffee, and let’s dive into the exciting world of backsplash installation together. As someone who’s turned more than a few drab spaces into jaw-dropping showcases, I can tell you that nothing beats the satisfaction of stepping back and admiring your handiwork.
Now, I know what you’re thinking – “Caleb, isn’t installing a backsplash a job for the pros?” But let me tell you, with a little guidance and some elbow grease, you can create a backsplash that’ll make your heart sing every time you walk into the room. In this guide, we’ll walk through every step of the process, from choosing the perfect tiles to putting the finishing touches that will make your kitchen shine. So, are you ready to embark on a DIY adventure that’ll save you some serious cash and give you major bragging rights? Let’s get started!
Planning Your Dream Backsplash
Let’s roll up our sleeves and dive into the exciting world of backsplash planning! As someone who’s transformed more than a few kitchens in my day, I can tell you that the key to a stunning backsplash lies in the preparation. So, grab a cup of coffee, and let’s map out your kitchen’s new focal point together.

Choosing the Right Backsplash Material
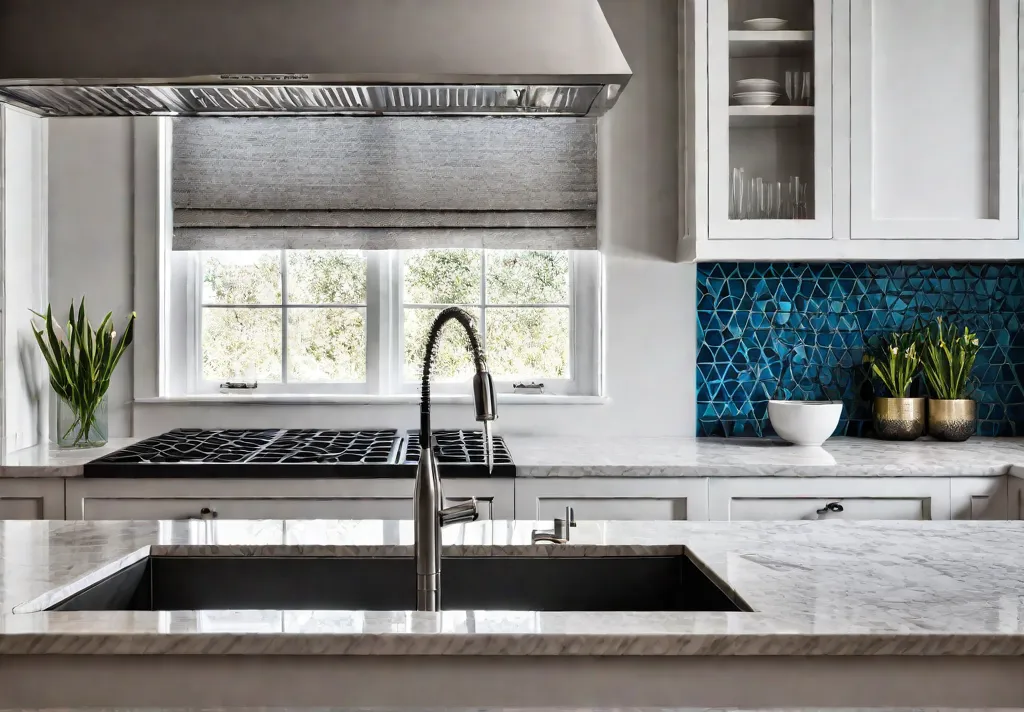
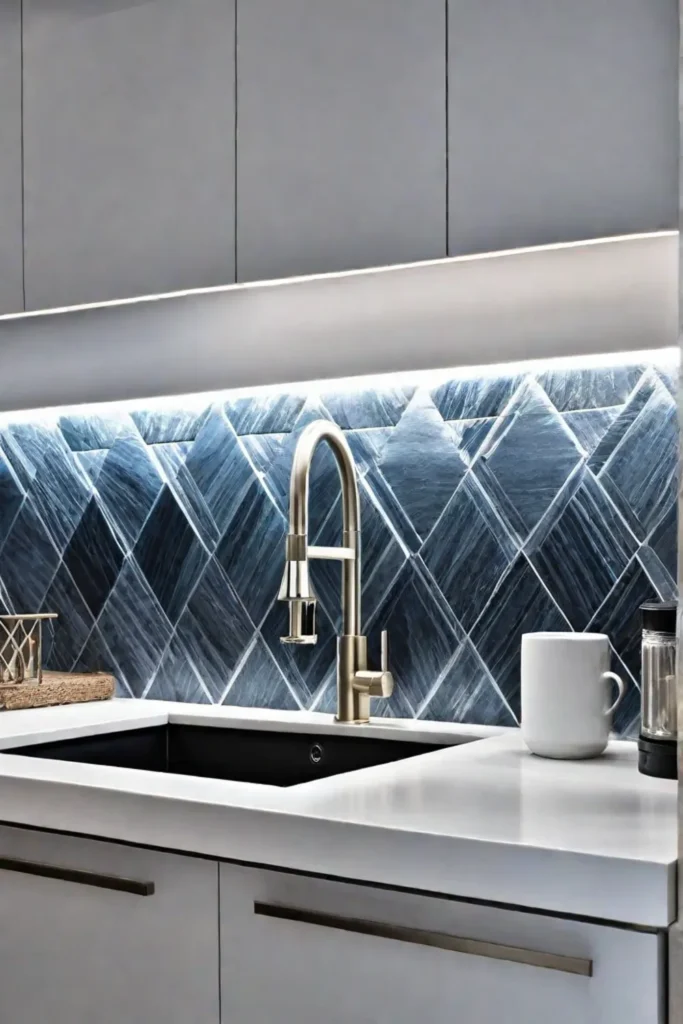
When it comes to backsplash materials, we’re spoiled for choice these days. From classic subway tiles to sleek glass and rugged natural stone, the options are endless. But here’s the thing – your backsplash isn’t just about looks. It needs to stand up to splashes, spills, and the occasional cooking mishap.
In my experience, here are a few popular options and their pros:
- Ceramic or porcelain tiles: Durable, easy to clean, and budget-friendly
- Glass tiles: Reflective and modern, perfect for brightening up small spaces
- Natural stone: Adds warmth and character, but requires more maintenance
- Stainless steel: Sleek and industrial, great for contemporary kitchens
Remember, your backsplash should complement your countertops and cabinets. I once saw a kitchen with a gorgeous reclaimed wood backsplash that tied in beautifully with the rustic beams overhead – it was like bringing a piece of the forest indoors!
Measuring and Mapping Your Space
Now, let’s talk about measurements. Trust me, there’s nothing worse than running short on tiles mid-installation or realizing you’ve over-ordered by a mile. Here’s my foolproof method:
- Measure the length and height of each wall section needing backsplash.
- Multiply these measurements to get the square footage.
- Add 10% extra for cuts, breakage, and future repairs.
- Don’t forget to subtract the area of windows, outlets, and appliances.
Pro tip: Use painter’s tape to outline your backsplash area. It’ll give you a visual guide and help you plan for tricky spots like outlets or corners.
Budgeting for Your Backsplash
Let’s talk numbers. On average, a professional backsplash installation can set you back $1,000 to $2,500, while a DIY job might cost you $200 to $600 for materials. That’s a pretty significant saving if you’re willing to put in the elbow grease!
To keep your budget in check:
- Compare prices from different suppliers
- Look for sales or clearance items
- Consider mixing high-end feature tiles with more affordable options
I’ve found some great deals at local tile shops and even salvage yards. Don’t be afraid to get creative – some of my favorite backsplashes have been happy accidents born from budget constraints!
Bringing It All Together
Remember, your backsplash is more than just a practical feature – it’s an opportunity to express your style and breathe new life into your kitchen. Whether you’re drawn to the timeless charm of subway tiles or the earthy allure of natural stone, the perfect backsplash is out there waiting for you.
As you plan, keep in mind the overall look you’re going for, your budget, and the practical needs of your space. And don’t forget to have fun with it! After all, the best part of DIY is putting your stamp on your home.
Now that we’ve got our plan in place, it’s time to roll up our sleeves and get to work. In the next section, we’ll be gathering our tools and materials, making sure we’re fully equipped for the task ahead. Trust me, having the right gear can make all the difference between a smooth installation and a DIY disaster!
Gathering Your Tools and Materials
Before we start transforming your kitchen or bathroom, let’s make sure we’ve got all the right tools and materials at our fingertips. Trust me, having everything ready to go will make this project as smooth as a perfectly laid tile.
Must-Have Tools for the Job
Let’s start with the tools that’ll be your trusty companions throughout this adventure:
- Tile cutter or wet saw
- Notched trowel
- Grout float
- Rubber mallet
- Level
- Measuring tape
- Tile spacers
- Sponges and buckets
- Safety glasses and work gloves

Now, I’ve got to tell you about my favorite recent addition to my toolbox – a laser level. This nifty gadget has been a game-changer for getting those perfectly straight lines. It’s like having an extra set of hands but with laser precision!
Material Checklist: From Tiles to Grout
Next up, let’s talk materials. Here’s what you’ll need to gather:
- Tiles of your choice
- Tile adhesive
- Grout
- Grout sealer
- Caulk
- Backer board (if needed)
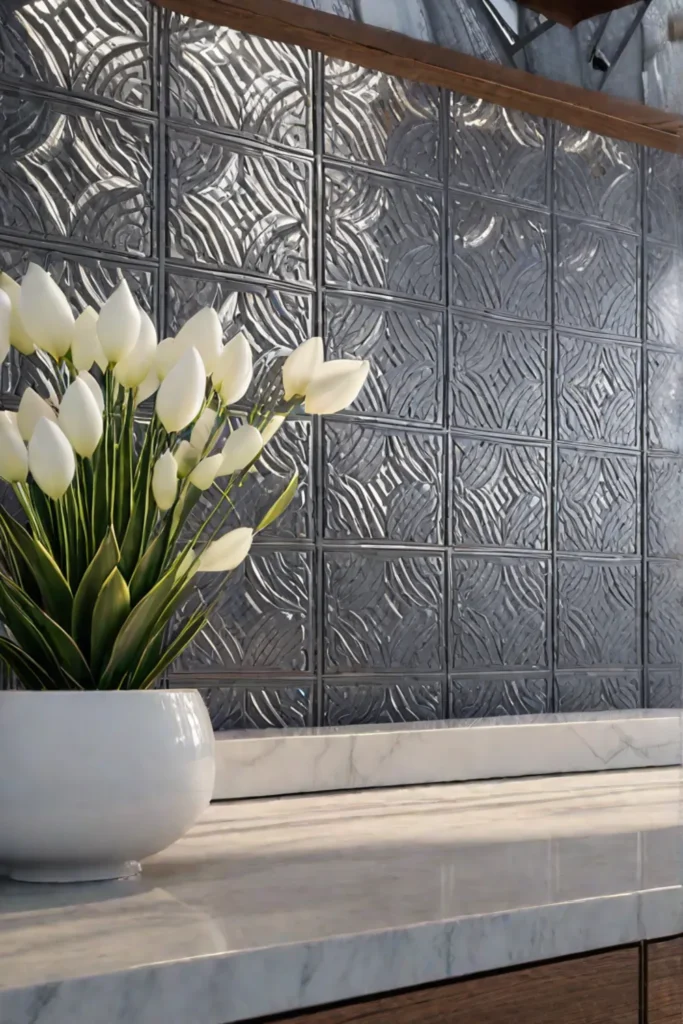
When it comes to tiles, the world is your oyster! I recently completed a project using recycled glass tiles, and let me tell you, the way they catch the light is mesmerizing. If you’re looking for an eco-friendly option, consider tiles made from recycled materials or sustainably sourced natural stone.
Safety First: Protecting Yourself and Your Space
Before we get our hands dirty, let’s talk safety. Always wear safety glasses to protect your eyes from flying tile chips or adhesive splatter. Work gloves are a must to keep your hands safe and clean. And don’t forget to lay down some drop cloths to protect your countertops and floors – trust me, your future self will thank you for this extra step!
Where to Find Quality Materials Without Breaking the Bank
Now, I know what you’re thinking – “Caleb, this all sounds great, but where can I find these materials without emptying my wallet?” Well, I’ve got some tricks up my sleeve for you. Local hardware stores often have great deals, especially if you catch their seasonal sales. Don’t be afraid to check out salvage yards or Habitat for Humanity ReStores for unique, affordable tiles. And for those specialty tools you might only use once, consider renting from a local tool library or borrowing from a handy neighbor.

The Secret to a Professional-Looking Finish
Here’s a little secret I’ve learned over the years – the quality of your adhesive and grout can make or break your project. Opt for a high-quality, polymer-modified thin-set for your adhesive. It might cost a bit more, but it’ll give you a stronger bond and more working time. For grout, look for options with built-in sealants to save you a step and ensure long-lasting protection against stains and moisture.
Remember, folks, having the right tools and materials isn’t just about making the job easier – it’s about setting yourself up for success. With everything in place, you’ll be well on your way to creating a backsplash that’ll make your heart sing every time you walk into the room.
As we wrap up our prep work, it’s time to turn our attention to the canvas we’ll be working on. In the next section, “Prepping Your Walls for Success,” we’ll dive into the crucial steps of preparing your walls to ensure your beautiful new backsplash has the perfect foundation. Get ready to roll up those sleeves even further as we tackle the nitty-gritty of wall preparation!
Prepping Your Walls for Success
Trust me, I’ve learned the hard way that skimping on this step can turn your dream backsplash into a nightmare faster than you can say “uneven tiles.” So, grab your tools, and let’s get those walls ready for their stunning new look!
Cleaning and Repairing the Wall Surface
First things first, we need to give those walls a good once-over. Here’s my tried-and-true method:
- Remove any existing backsplash or wallpaper.
- Wash the walls with a mild detergent solution to remove grease and grime.
- Inspect for cracks, holes, or uneven spots.
- Fill any imperfections with a spackling compound.
- Once dry, sand the patched areas until smooth.

Remember, folks, a smooth surface is the key to a flawless backsplash. I once ignored a small bump on my kitchen wall, thinking the tile adhesive would cover it. Boy, was I wrong! That tiny imperfection threw off my entire tile pattern, and I ended up having to start over. Learn from my mistakes and take the time to create a perfectly level canvas.
Priming and Protecting Your Work Area
Now that we’ve got our walls smoother than a fresh jar of peanut butter, it’s time to prime and protect. Here’s the lowdown:
- Choose a primer suitable for your wall material (drywall, plaster, etc.).
- Apply the primer evenly using a roller or brush.
- Allow it to dry completely (usually 24 hours).
While that primer is working its magic, let’s talk protection. I’m all about sustainable living, so instead of using disposable drop cloths, I prefer to repurpose old bed sheets or tablecloths. Drape these over your countertops, cabinets, and flooring to catch any wayward adhesive or grout.
Pro tip: Use painter’s tape to secure the protective coverings in place. It’s an extra step that’ll save you a world of headaches later on.
The Science of Proper Preparation
Now, I know some of you might be thinking, “Caleb, do I need to prime? Can’t I just slap those tiles on and call it a day?” Well, let me tell you, the science behind proper wall preparation is fascinating stuff.

Different primers are designed to tackle specific issues:
- Moisture-resistant primers prevent water damage in high-humidity areas.
- Bonding primers improve adhesion on slick or glossy surfaces.
- Stain-blocking primers cover up those stubborn marks that refuse to budge.
By choosing the right primer, you’re not just making your backsplash look pretty – you’re extending its lifespan and protecting your walls from potential moisture damage. It’s a win-win for both your home and the environment!
Addressing Common Wall Woes
Let’s face it, not all walls are created equal. Here’s how to tackle some common issues:
- Uneven surfaces: Use a self-leveling compound to create a flat base.
- Moisture damage: Treat with a mold-inhibiting primer before proceeding.
- Old, crumbling plaster: Consider installing a cement board for a stable surface.
Remember, ignoring these issues now can lead to costly repairs down the road. A little extra effort in the preparation stage will save you time, money, and a whole lot of frustration in the long run.

As we wrap up our wall prep, take a moment to admire your handiwork. That smooth, primed surface is the perfect blank canvas for your backsplash masterpiece. You’ve laid the groundwork for a stunning and long-lasting installation that’ll make your kitchen or bathroom shine for years to come.
Now that we’ve got our walls prepped and ready, it’s time to roll up our sleeves and get to the exciting part. In the next section, we’ll be Mastering the Art of Backsplash Installation. Get ready to transform your space and unleash your inner tile artist!
Mastering the Art of Backsplash Installation
Now it’s time to roll up our sleeves and dive into the heart of our backsplash project. I’ve spent countless hours perfecting this craft, and I’m excited to share my tried-and-true techniques with you. Let’s transform that blank canvas into a stunning focal point that’ll make your kitchen sing!
Laying Your First Tile: Starting Strong
The key to a professional-looking backsplash lies in a strong foundation. Here’s how to kick things off:
- Find your starting point: Typically, this is the center of your wall or behind the stove.
- Draw level lines: Use a laser level or traditional level to mark your starting line.
- Apply adhesive: Spread a thin layer of adhesive using a notched trowel.
- Place your first tile: Press it firmly into place, wiggling slightly for good adhesion.
- Add spacers: These little heroes ensure even grout lines.
Pro tip: Take a step back and double-check your first tile’s placement. It sets the tone for your entire project!

Cutting Tiles for a Perfect Fit
Now, here’s where the real magic happens. Cutting tiles might seem daunting, but with the right tools and techniques, you’ll be slicing through ceramic like a hot knife through butter.
For straight cuts:
- Use a manual tile cutter for most jobs
- Score the tile firmly, then snap it along the line
For intricate cuts:
- Invest in a wet saw for precise, clean cuts
- Use a tile nipper for small, detailed work-around outlets
Remember, measure twice, and cut once. It’s not just a catchy phrase – it’s the golden rule of tiling!
Creating Eye-Catching Patterns
Let’s talk about the fun part – patterns! The layout of your tiles can dramatically impact the overall look of your kitchen. Here are a few classic patterns to consider:
- Brick pattern: Offset each row by half a tile for a timeless look
- Herringbone: Create a dynamic V-shaped pattern for added visual interest
- Basketweave: Alternate horizontal and vertical tiles for a woven effect
Whichever pattern you choose, use graph paper to plan it out beforehand. Trust me, this extra step will save you headaches down the line.

Tackling Tricky Spots
Corners and outlets can be the Achilles’ heel of many a DIY backsplash project. But fear not! Here’s how to handle these challenging areas:
For corners:
- Measure and mark your cut line
- Use a wet saw for a clean, precise cut
- Dry-fit the tile before applying adhesive
For outlets:
- Turn off the power and remove the cover plate
- Use a tile nipper to make small, careful cuts
- Test-fit frequently to ensure a snug fit
Remember, patience is your best friend here. Take your time, and don’t be afraid to make multiple small cuts to achieve the perfect fit.
Troubleshooting Common Issues
Even the most experienced DIYers encounter hiccups. Here are some common problems and their solutions:
- Uneven tiles: Use a rubber mallet to gently tap them into place
- Adhesive drying too quickly: Work in smaller sections
- Gaps between tiles: Adjust your spacers or use wider grout lines
The key is to stay calm and problem-solve. Every challenge is an opportunity to improve your skills!
As we wrap up the installation phase, take a moment to admire your handiwork. Those perfectly aligned tiles and crisp, even lines are a testament to your newfound mastery. But our journey isn’t over yet – we’re about to put the finishing touches on our masterpiece.
Next up, we’ll dive into “Grouting and Sealing: The Finishing Touches.” This crucial step will bring your backsplash to life, protecting it for years to come. So grab a cup of coffee, take a breather, and let’s get ready to put the final polish on your stunning new backsplash!

Grouting and Sealing: The Finishing Touches
Alright, we’ve made it to the home stretch! It’s time to roll up our sleeves and tackle the final steps that’ll truly bring your backsplash to life. Grouting and sealing might not be the most glamorous parts of the process, but trust me, they’re crucial for a long-lasting, professional-looking finish. So let’s dive in and make sure your hard work pays off!
Applying and Cleaning the Grout
Picture this: you’re standing in your kitchen, admiring the beautiful tile work you’ve just completed. But those gaps between the tiles? They’re like blank spaces in a story, waiting to be filled. That’s where grout comes in, my friends. Here’s how to make it happen:
- Choose your grout wisely: Sanded for wider gaps, unsanded for narrow ones.
- Mix the grout to a peanut butter-like consistency.
- Using a rubber float, spread the grout diagonally across the tiles.
- Work in small sections, ensuring every gap is filled.
- Wait about 15-20 minutes for the grout to set slightly.
- Wipe away excess grout with a damp sponge, rinsing frequently.
- Once dry, remove any remaining haze with a microfiber cloth.
Pro tip: For those tricky corners and edges, I like to use a small paintbrush to apply the grout. It gives you more control and helps achieve those crisp, clean lines we’re all after.
Sealing Your Backsplash for Protection
Now, let’s talk about sealing – the unsung hero of backsplash longevity. Think of it as a protective shield, guarding your beautiful handiwork against the slings and arrows of kitchen life (or in this case, splatters and spills).
First things first, patience is key. Allow your grout to cure for at least 48-72 hours before sealing. I know it’s tempting to rush, but trust me, giving it time to fully set will pay off in the long run.
When you’re ready to seal, here’s what you need to know:
- Choose a high-quality penetrating sealer for the best results.
- Apply the sealer with a small brush or applicator, following the grout lines.
- Work in small sections, wiping away any excess from the tile surfaces.
- Allow the sealer to dry completely (usually about 24 hours) before exposing it to water.

Remember, different sealants have different application methods, so always follow the manufacturer’s instructions. It’s not just a suggestion – it’s your ticket to a properly protected backsplash.
The Science Behind the Shine
Ever wonder why sealing is so important? It all comes down to porosity. Grout, and some types of tile, are porous materials – meaning they have tiny holes that can absorb liquids and stains. A good sealer fills these pores, creating a barrier that repels water, oil, and other potential stain-makers.
But here’s the kicker: if you skip the sealing step, or do it improperly, you’re leaving your backsplash vulnerable. We’re talking about potential mold growth, stubborn stains, and even structural damage over time. Not exactly the kitchen of your dreams, right?
Wrapping It Up
As we put the finishing touches on our backsplash project, remember that grouting and sealing are more than just final steps – they’re the key to ensuring your hard work stands the test of time. Take your time, follow the steps carefully, and don’t be afraid to step back and admire your handiwork along the way.
With your backsplash properly grouted and sealed, you’ve not only created a beautiful focal point for your kitchen but also a durable, easy-to-clean surface that’ll serve you well for years to come. Now that’s something to be proud of!
As we wrap up this DIY journey, let’s take a moment to reflect on everything we’ve accomplished. In our conclusion, we’ll recap the key steps, celebrate your newfound skills, and maybe even spark some ideas for your next home improvement adventure. Ready to put a bow on this project? Let’s head to the finish line!
Final Thoughts
Well, my fellow DIY warriors, we’ve come to the end of our backsplash adventure, and what a journey it’s been! From planning and prepping to laying those final tiles and sealing them to perfection, you’ve transformed your kitchen into a work of art. Take a moment to step back and admire your handiwork – that stunning backsplash is a testament to your newfound skills and creativity.
Remember, every time you whip up a meal or entertain guests in your kitchen, that beautiful backsplash will be there, silently reminding you of what you’re capable of. You didn’t just install tiles; you breathed new life into your space, added value to your home, and gained the confidence to tackle even bigger projects. So, what’s next on your DIY horizon? A bathroom renovation? A custom headboard? Whatever it is, I know you’ve got the skills to make it happen. Now go forth and conquer your next home improvement challenge – your inner DIY superstar is ready to shine!