
Picture this: you’re standing in a tile showroom. It’s an ocean of possibilities—gleaming porcelain, veined marble, jewel-toned glass. It’s exciting, right? But it’s also an ocean of potential mistakes. That gorgeous, soft limestone that looks amazing on the wall will get absolutely annihilated by a dropped can of tomatoes on your kitchen floor. That busy mosaic you fell in love with will fight every other element in your open-concept space. This is where everyone gets overwhelmed and ends up with a kitchen that’s just… fine.
For centuries, master builders and artisans didn’t just pick pretty things; they understood the soul of their materials. They knew how stone would wear under foot, how glaze would catch the light, how a certain clay would feel cool in the summer. They had an intuitive and scientific grasp of how materials tell a story. Now, you have access to that same way of thinking. These aren’t just tips; they’re the foundational principles that separate a functional kitchen from one that feels deeply, soulfully right. Forget the corporate speak and the fleeting trends. Let’s talk about what actually matters.
Foundational Planning & Strategic Assessment for Your Kitchen Tiles (Part 1)
Before you even think about color or pattern, we need to lay the groundwork. This is the boring-but-critical part that ensures your beautiful new tiles don’t crack, get stained into oblivion, or make you trip and fall. Getting this right is the difference between a project that lasts decades and one that becomes a regret in two years.
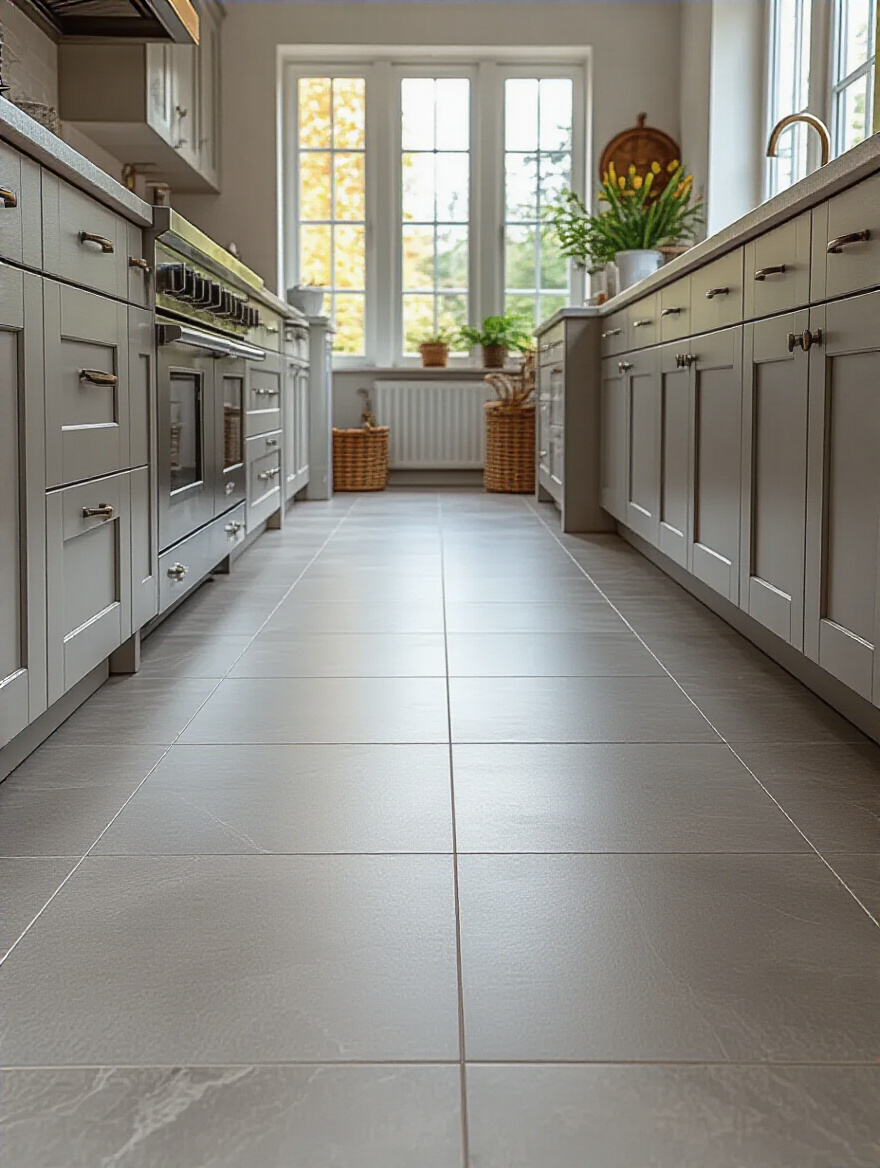
1. Assess Kitchen Traffic Patterns to Determine Tile Durability Needs
You know what people always ask me? “What’s the best tile for a kitchen?” The real question is, “What’s the best tile for your kitchen?” Think about it. The path from your fridge to your stove is a superhighway. The floor under the barstools gets scraped and scuffed. The spot in front of the sink sees more spills and dropped forks than anywhere else. These are your high-impact zones, and they demand a tile with guts.
This is where a little science comes in handy. The PEI (Porcelain Enamel Institute) rating tells you how much abuse a tile can take, from Class 1 (walls only) to Class 5 (heavy commercial traffic). For most kitchen floors, you shouldn’t even look at anything less than a PEI 3, and for those high-traffic superhighways, a PEI 4 is your best friend. Choosing a tile based on looks alone in these zones is like wearing silk shoes for a hike. It’s a recipe for disaster.
2. Align Tile Material and Style with Your Overall Kitchen Aesthetic
Okay, let’s talk about getting star-struck. It’s easy to walk into a showroom and fall for a bold, graphic tile. But that tile has a personality, and you need to ask if it will get along with your cabinets, your countertops, and the overall feeling of your home. A rustic, chiseled-edge travertine tile has no business in a sleek, high-gloss minimalist kitchen. They don’t speak the same language. You’ll end up with a space that feels visually confusing.
The secret is to think of your kitchen as a complete outfit. Your cabinets are the suit, your countertops are the shirt, and your tile is the perfect accessory that pulls it all together. Don’t just grab something shiny off the shelf. Bring samples home. See how they look next to your cabinets in the morning light and under your kitchen lights at night. Create a mood board with all your materials to ensure they’re telling a cohesive story, not shouting over each other.
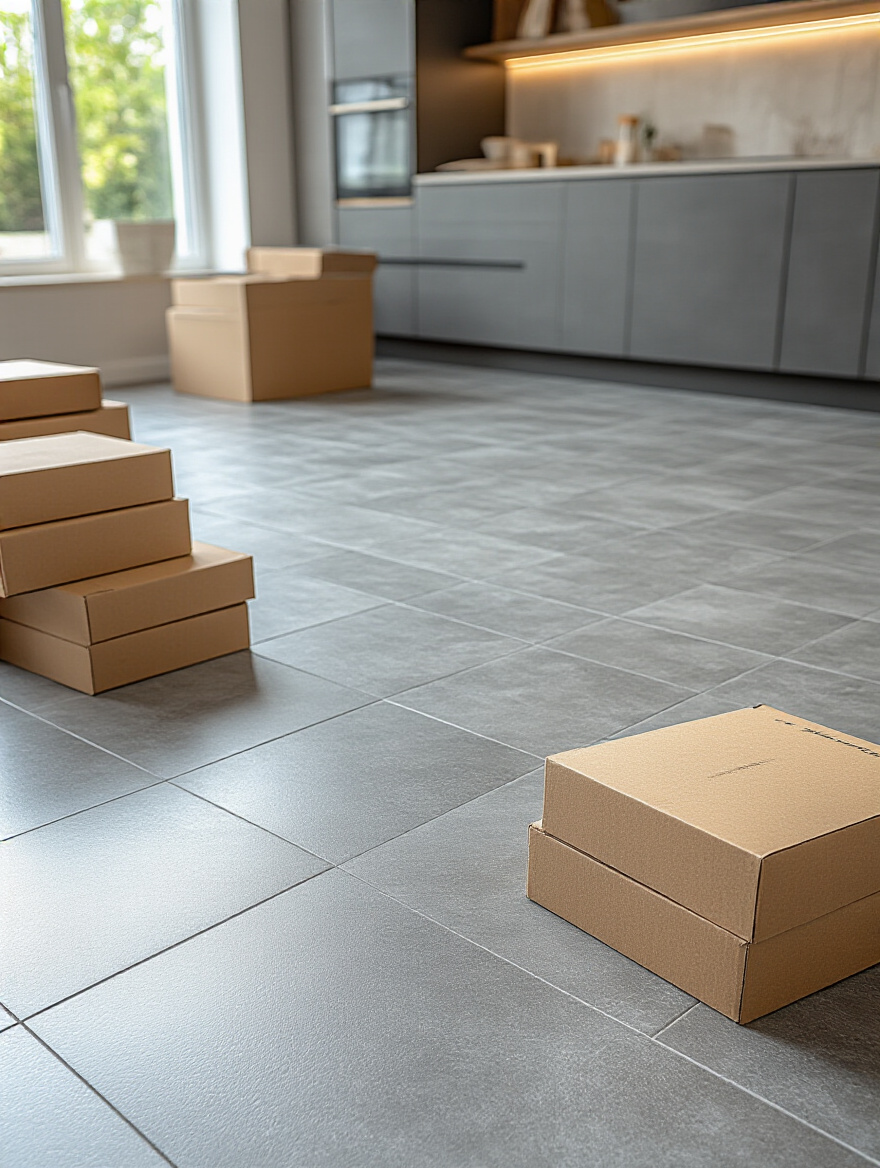
3. Accurately Measure and Calculate Tile Quantities to Prevent Costly Shortages
I have to confess something. Early in my career, I eyeballed a small backsplash job. I thought, “It’s a tiny space, how hard can it be?” I ended up two tiles short. Two. The problem was, the tile came from a specific batch, and the new box the store had was from a different run. The color was ever so slightly off. It was a nightmare that taught me a lesson I will never, ever forget: measure twice, order once, and always add extra.
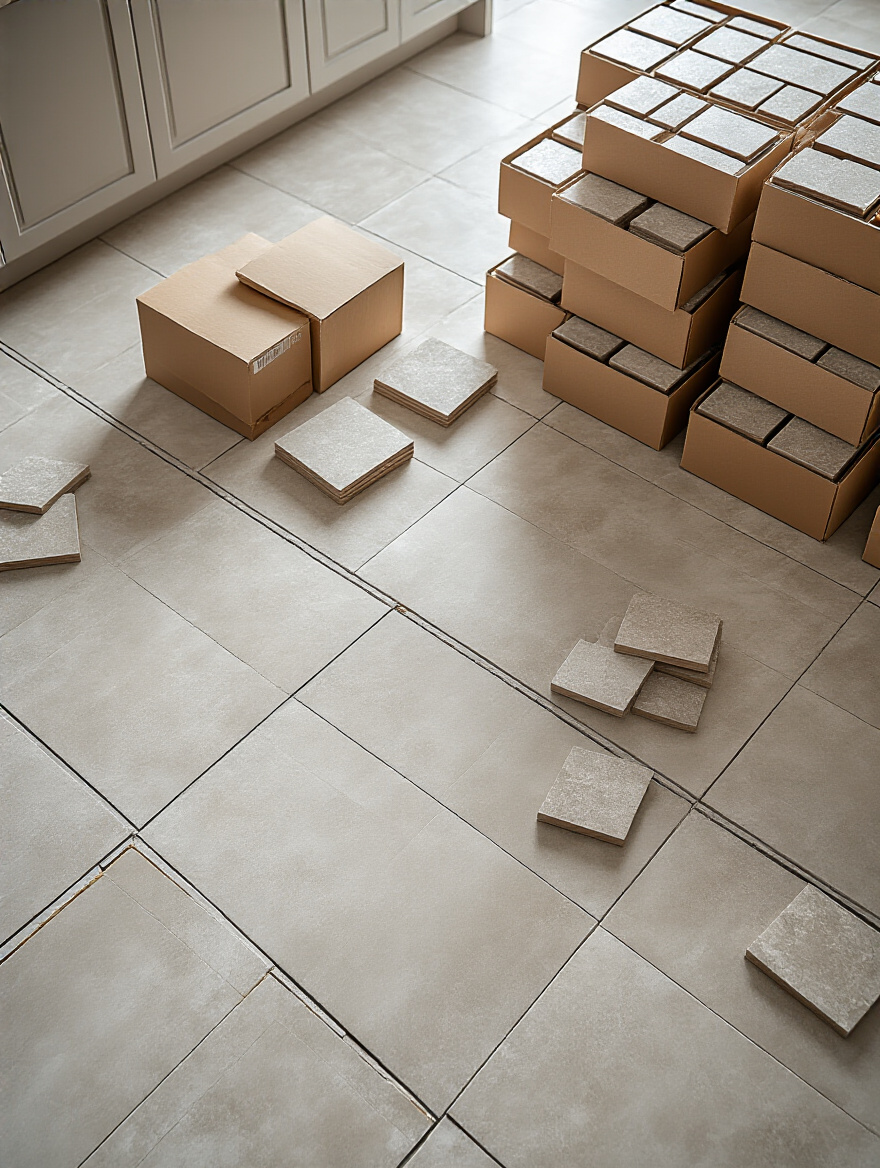
The industry standard is to add 10-15% extra for waste, cuts, and mistakes. For complex patterns like herringbone or chevron, I lean closer to 20%. The BS everyone tells you is that you can just order more if you run out. Don’t believe it. Tile dye lots are like fingerprints; no two are exactly the same. Having that extra box stored in your garage for future repairs is the cheapest insurance policy you’ll ever buy.
4. Budget for Tiles, Installation, and Contingencies to Avoid Surprises
The price tag you see on the tile in the store? That’s a lie. Not a deliberate lie, but a lie of omission. That price is just the beginning of the story. It doesn’t include the mortar, the grout, the backer board, the cost to demolish the old floor, and most importantly, the skilled labor to install it all perfectly. Labor can easily be 50% or more of the total project cost.
And then there’s the contingency fund. Every renovation project has a surprise waiting for you. I once worked on a project where we pulled up old vinyl and found a subfloor that had the structural integrity of a wet graham cracker. It was a complete gut job we hadn’t planned for. Without a 15-20% contingency fund set aside, that discovery would have derailed the entire project. Don’t just budget for the kitchen you can see; budget for the one you can’t.
Foundational Planning & Strategic Assessment for Your Kitchen Tiles (Part 2)
Now that we’ve covered the fundamentals of planning and thinking like a material scientist, there’s one more crucial step before a single drop of mortar is mixed. This technique is the final bridge between your vision and reality, ensuring the pattern flows and the finished product is flawless.
5. Plan Tile Layouts with Dry Placement for Optimal Visual Flow
Before you commit with adhesive, you need to have a dress rehearsal. A “dry fit” is exactly what it sounds like: laying out your tiles on the floor without any mortar. This is, without a doubt, the most important 30 minutes of your entire installation. It’s where you find the soul of the layout. You’ll immediately see if starting your pattern from the center of the room will leave you with an awkward, paper-thin sliver of a tile against the wall.
This is your chance to play. Shift the whole layout six inches to the left. See how that changes the cuts you’ll have to make around the island. This is where you avoid the tiny, infuriating mistakes that will stare back at you for the next 20 years. Take a picture with your phone once you’ve perfected it. This becomes the blueprint, the treasure map, for your flawless installation. It’s the ultimate shortcut to a professional result.
Selecting Materials & Mastering Installation Techniques (Part 1)
Alright, the strategy is set. Now we get to the tactile part—the materials themselves and the science of putting them together so they last. This is where we geek out on what makes one material better than another for a specific job and ensure the hidden stuff—the prep and adhesives—is done right.
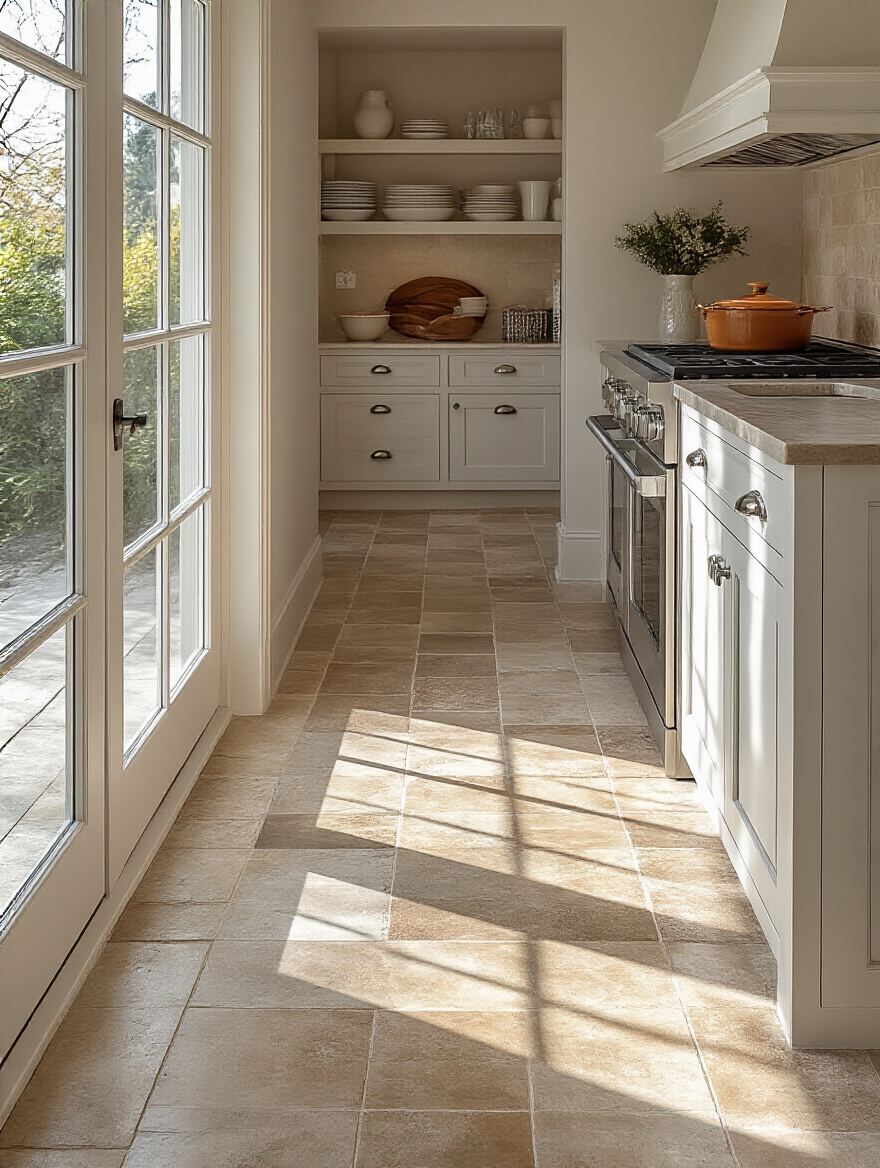
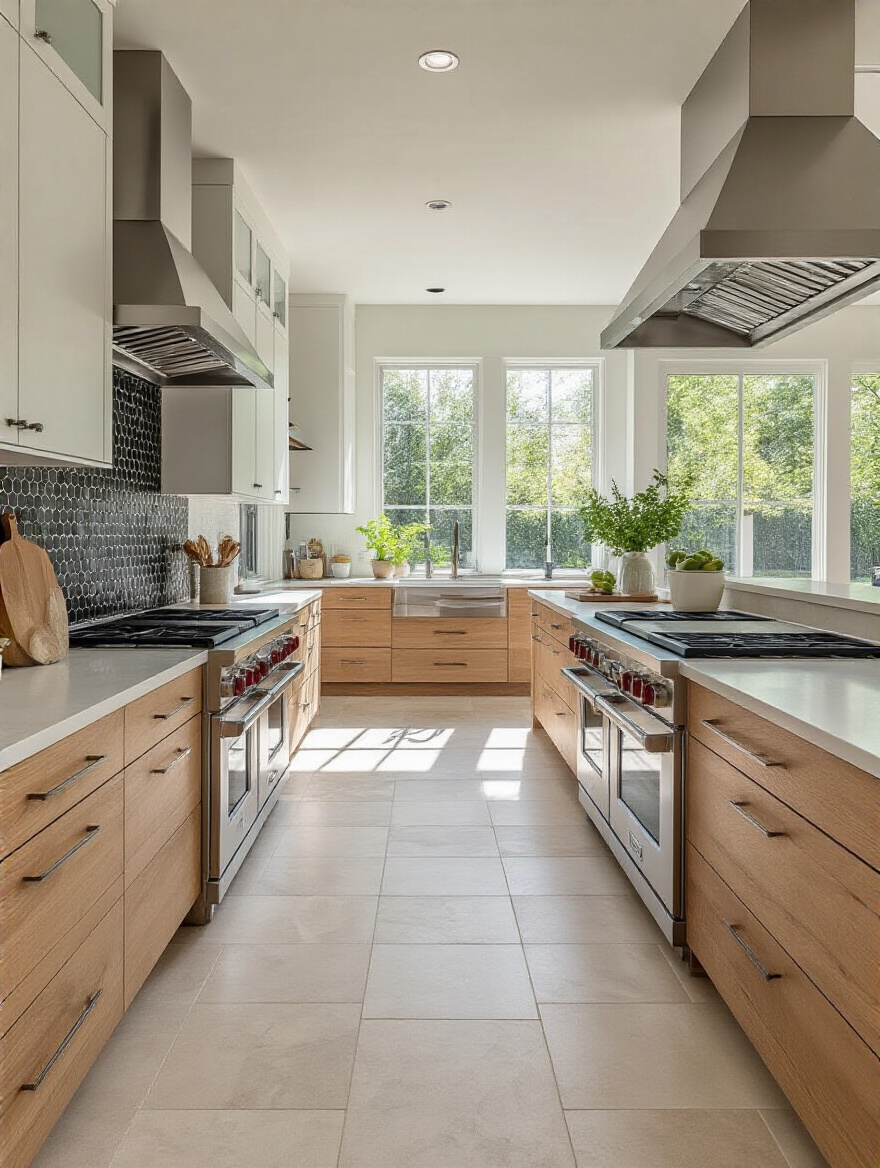
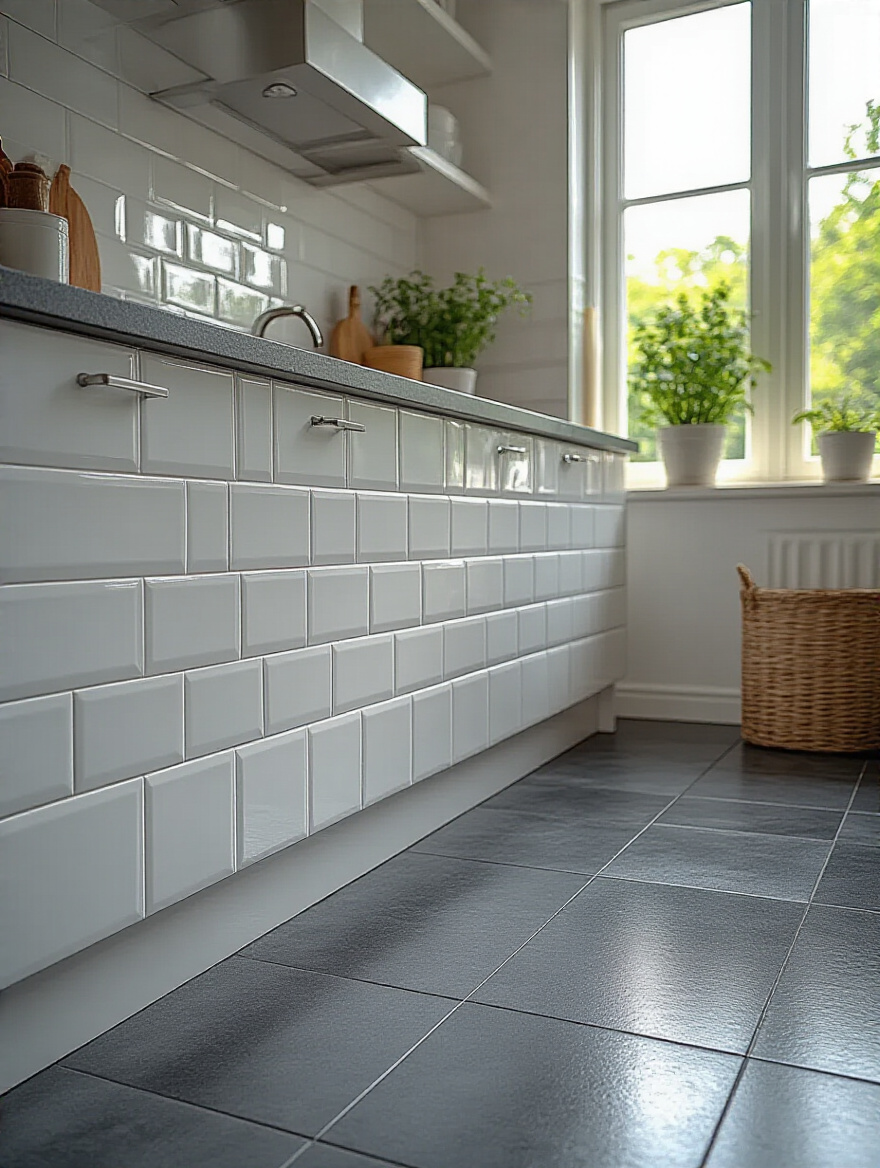
6. Leverage the Benefits of Porcelain for High-Traffic Kitchen Floors
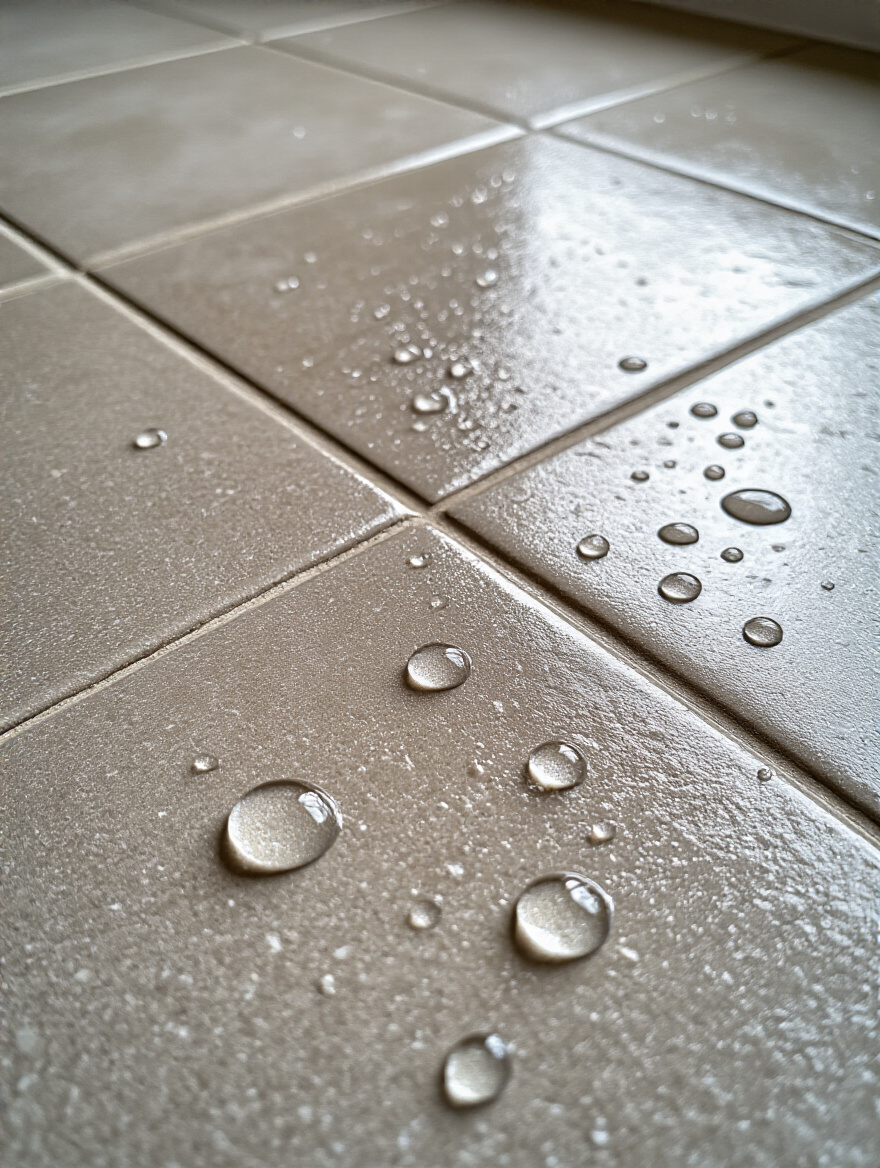
If you want one material that can handle nearly anything a kitchen can throw at it, it’s porcelain. Think of ceramic tile as a well-made cake; porcelain is more like a dense, solid brownie. It’s made from finer clays and fired at a much higher temperature, which makes it incredibly dense, less porous, and tough as nails. This density is key. It means water, wine, and olive oil spills will sit on the surface, waiting to be wiped up, rather than seeping in and creating a permanent stain.
Because it’s so durable, it’s the undisputed king of high-traffic kitchen floors. It resists scratches from dog claws, scuffs from dragged chairs, and chips from dropped pots far better than its ceramic cousin. Look for “through-body” or “full-body” porcelain, where the color runs all the way through the tile. That way, if you do get a deep chip (which is hard to do!), it will be far less noticeable because the color underneath is the same.
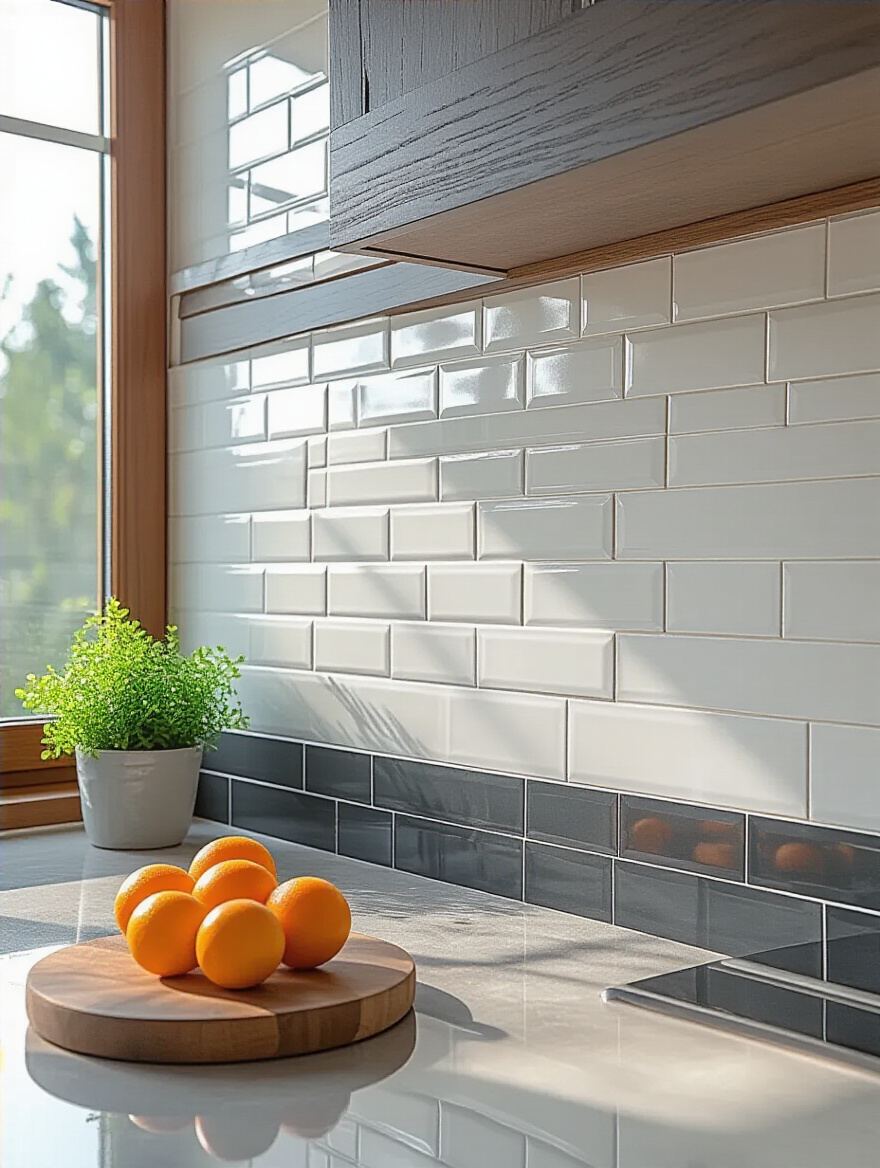
7. Explore Ceramic Tiles for Versatile and Cost-Effective Backsplash Solutions
Now, where porcelain is the workhorse, ceramic is the artist. It’s more affordable, lighter, and easier to cut, which makes it an absolute dream for backsplashes. A backsplash doesn’t take the same beating as a floor; it doesn’t have to withstand foot traffic or dropped appliances. Its main job is to look beautiful and be easy to clean when spaghetti sauce explodes. Ceramic excels at this.
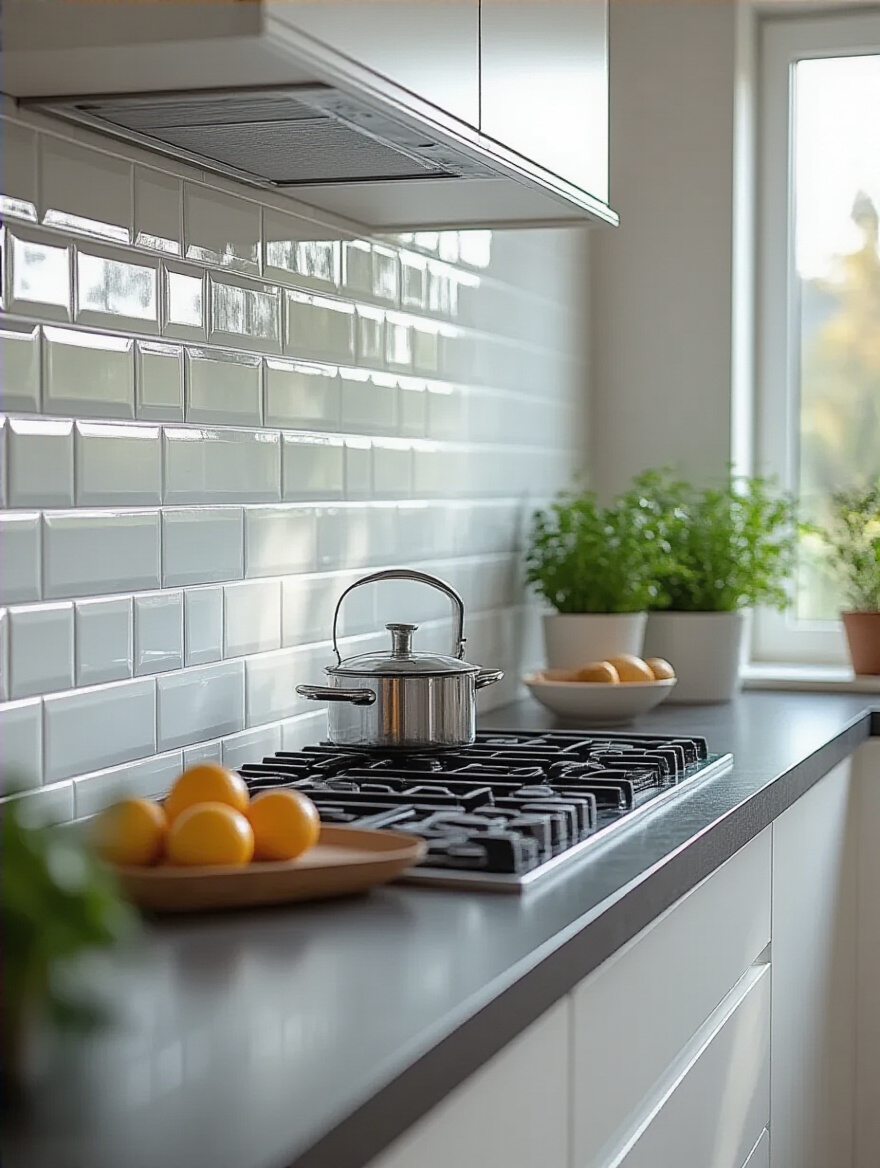
The design possibilities with ceramic are virtually endless. You can get glazes in every color imaginable, from glossy and reflective to matte and earthy. It can be shaped into classic subway tiles, intricate mosaics, or bold, modern shapes. This is where you can inject a ton of personality into your kitchen without breaking the bank. The glaze on ceramic creates a non-porous, glass-like finish that makes wiping away grease and grime an absolute breeze.
8. Consider Natural Stone for Unique Texture and Premium Appeal in Backsplashes
This is where we talk about materials with a story. Every piece of natural stone—marble, granite, travertine, slate—is a unique slice of geological history. No two tiles will ever be identical. The veining in marble, the crystals in granite… that’s pure, unadulterated nature, and it brings an organic, luxurious energy into a space that man-made materials can only imitate. For a premium, one-of-a-kind backsplash, nothing beats it.
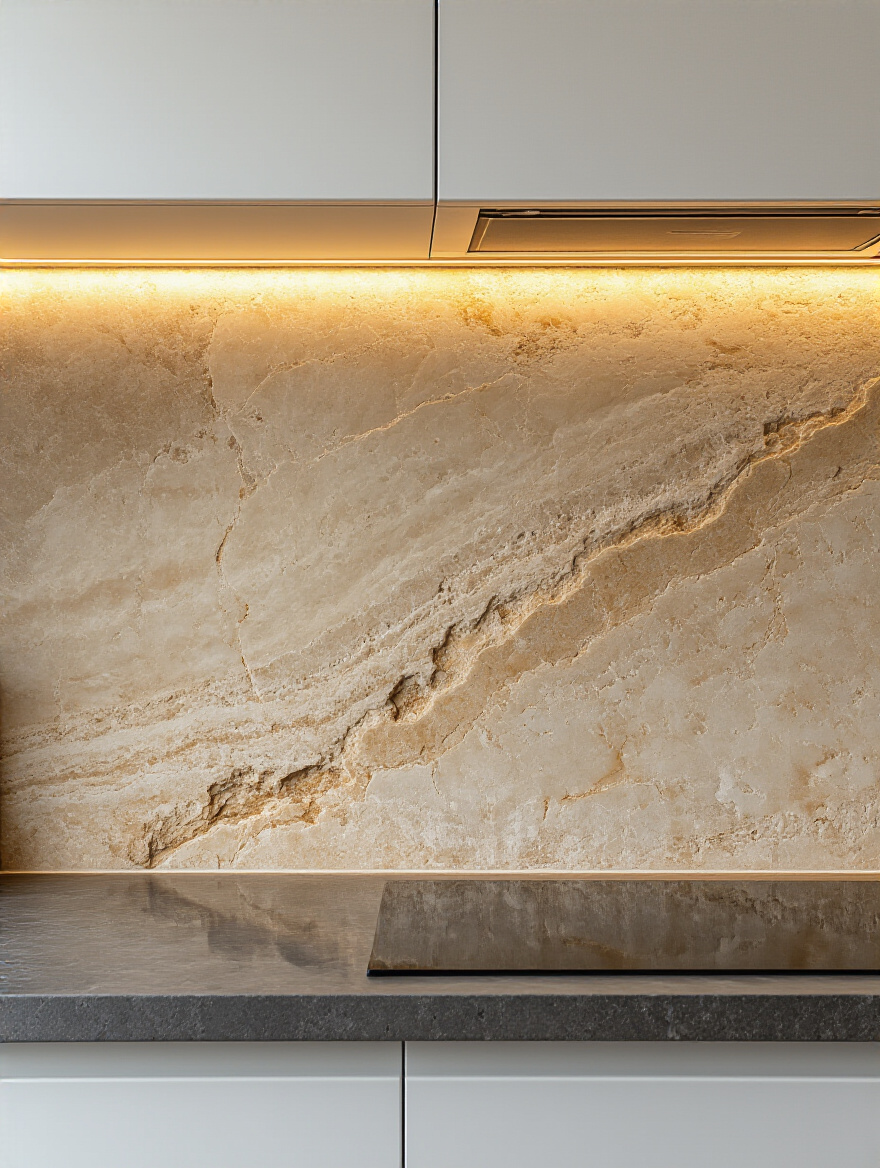
But let’s call out the big BS here: anyone who tells you natural stone is low-maintenance, especially in a kitchen, is either lying or has a personal chef. Most natural stones are porous to some degree. Marble, in particular, will etch (a chemical burn) if it comes into contact with acids like lemon juice or vinegar. This isn’t a flaw; it’s a feature of the material. To live with it, you must seal it properly and regularly, and you have to be okay with it developing a patina of life over time.
9. Ensure Proper Subfloor Preparation for Long-Lasting Floor Tile Integrity
Forget everything else I’ve told you. If you only remember one thing, let it be this: your tile job is only as good as the subfloor it’s sitting on. You can have the most expensive, perfectly installed porcelain, but if the subfloor beneath it is uneven, flexing, or dirty, the tiles will crack. Guaranteed. Grout lines will crumble. It will be a catastrophic failure.
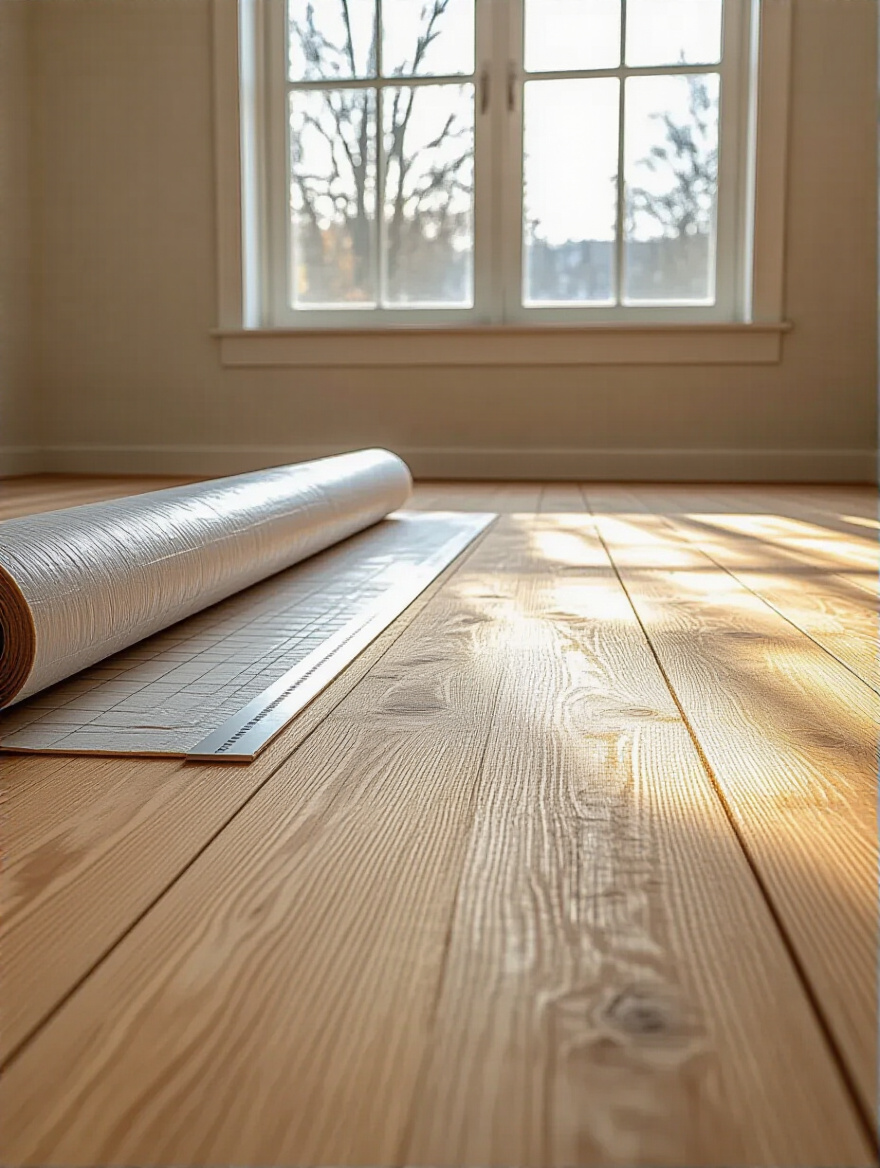
The subfloor needs to be three things: flat, stable, and clean. Flat means no major dips or bumps. Stable means it doesn’t bounce or flex when you walk on it (this is a common issue with older wood subfloors). Clean means free of any dust, old adhesive, or grease that could prevent the mortar from getting a death grip. Using a self-leveling compound to flatten a surface and an uncoupling membrane (like the bright orange Schluter-DITRA mat) to absorb movement is not an upsell; it’s a necessity for a long-lasting job.
Selecting Materials & Mastering Installation Techniques (Part 2)
We’re in the weeds now, dealing with the nitty-gritty details that elevate an installation from “DIY-looking” to “indistinguishable from a pro.” The things we discuss here—adhesives and spacers—are the unsung heroes of a great tile job.
10. Select the Correct Adhesive and Mortar for Your Specific Tile Type
You wouldn’t use Elmer’s glue to build a bookcase, right? The same logic applies here. “Thinset mortar” isn’t a one-size-fits-all product. There are specific formulations for every type of tile and situation. Using the wrong one is one of the most common—and most disastrous—mistakes you can make. It’s the hidden cause behind tiles that inexplicably pop loose a year later.
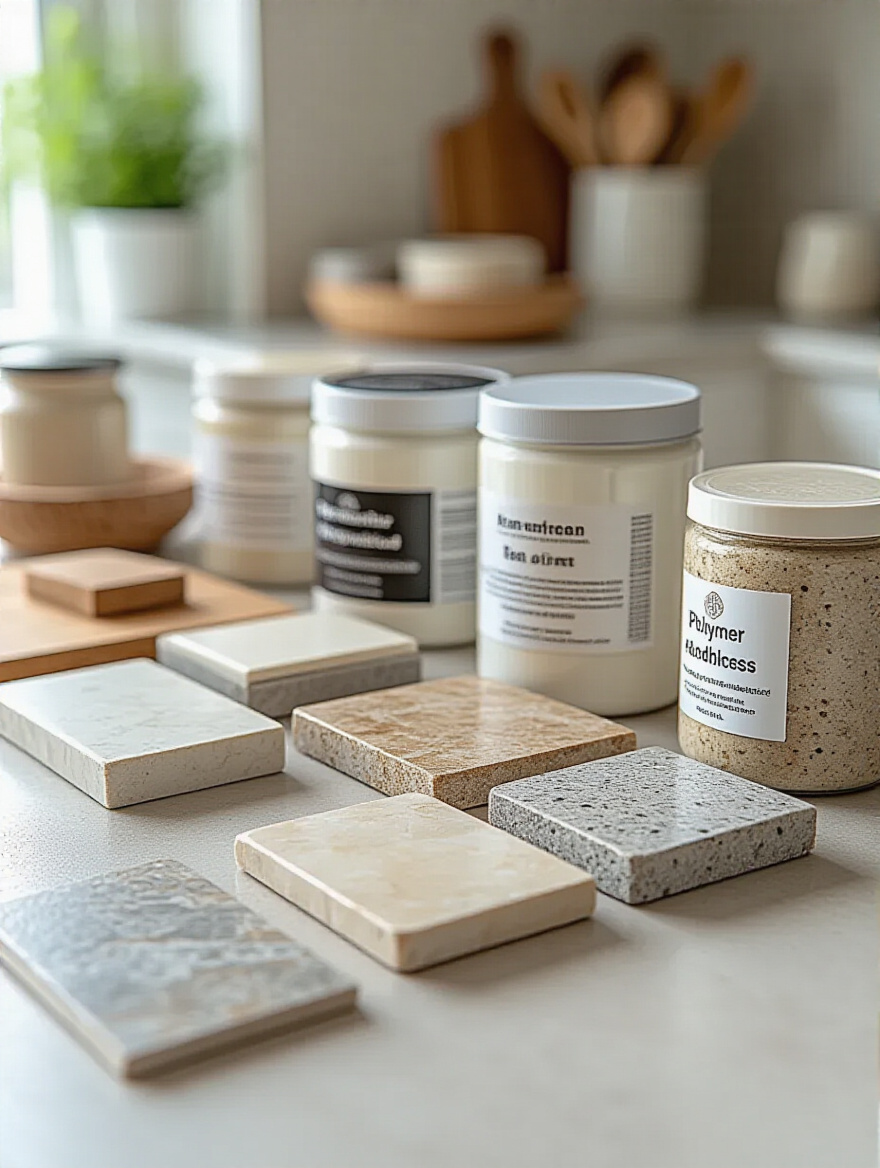
Large-format tiles, for example, require a special “LVT” or “medium-bed” mortar that can support their weight without slumping and prevent hollow spots underneath. Glass tiles need a bright white thinset so the grey color of standard mortar doesn’t show through and alter the tile’s hue. And if you’re tiling over a heated floor system, you need a polymer-modified mortar that has the flexibility to handle expansion and contraction. Always read the bag and match it to your tile. It’s a 5-minute check that can save you a $5,000 headache.
11. Utilize Consistent Spacers to Achieve Professional and Even Grout Lines
Can we talk about my biggest pet peeve? It’s when I see a tile installation where the grout lines are wavy and inconsistent. It screams “amateur hour” and completely undermines the beauty of the tile itself. The secret to perfectly uniform, arrow-straight grout lines is painfully simple: use tile spacers. Every tile. Every corner. No exceptions.
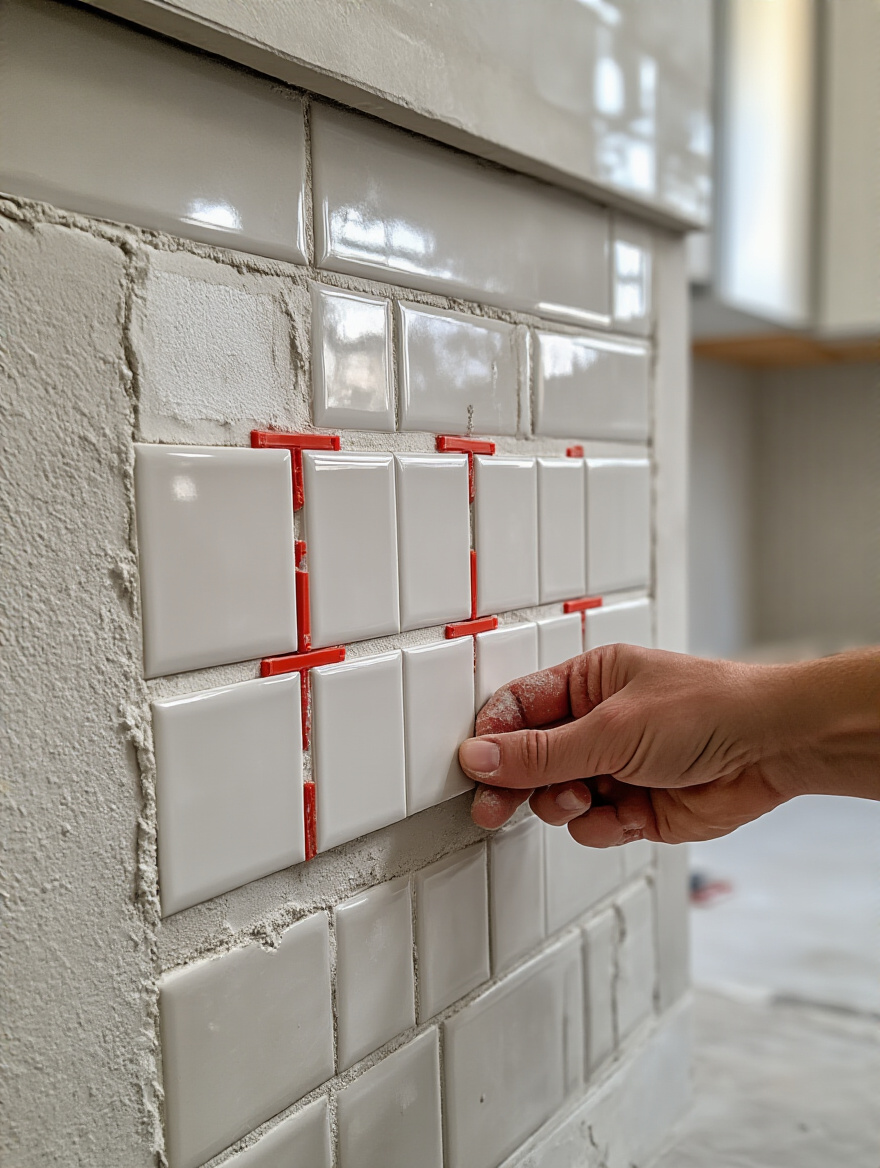
These little plastic crosses are the easiest and cheapest way to ensure a professional finish. They take the guesswork out of spacing and lock the tiles in place while the mortar sets, preventing any frustrating shifting. For large format tiles, take it a step further and use a tile leveling system. These are clips and wedges that not only create the gap but also force the faces of adjacent tiles to be perfectly flush, eliminating “lippage”—that awful feeling when one tile edge is higher than its neighbor.
Elevating Aesthetics & Crafting Distinctive Style with Tiles (Part 1)
With the technical foundation solidly in place, we can now pivot back to the artistry. These next sections are all about the design choices that inject personality and create that rich, layered feel that defines a truly exceptional space.
12. Choose Grout Colors to Either Contrast or Harmonize with Your Tiles
Grout is not just the stuff that fills the gaps; it’s a powerful design tool. Think of it as the outline in a drawing. A dark, contrasting grout with a white subway tile will create a bold, graphic, and slightly industrial look. It makes every single tile “pop” and celebrates the grid of the pattern. It’s a statement.
On the other hand, using a grout color that closely matches your tile—a harmonizing grout—does the opposite. It blends the lines, making the entire surface feel more like a single, seamless plane of texture and color. This is a fantastic trick for making a small space feel larger, as it creates an uninterrupted visual field. There’s no right or wrong answer here; it’s about deciding whether you want to emphasize the shape of the tile or the overall surface.
13. Incorporate Decorative Border Tiles and Feature Mosaics for Accent
A wall of a single tile can sometimes feel a bit monotonous. This is where accent tiles come in to play the role of jewelry. A simple, elegant border tile can frame a section of your floor like a beautiful area rug, defining a space without needing a physical wall. A stunning mosaic behind your stove creates an immediate and undeniable focal point, an piece of permanent art for your kitchen.
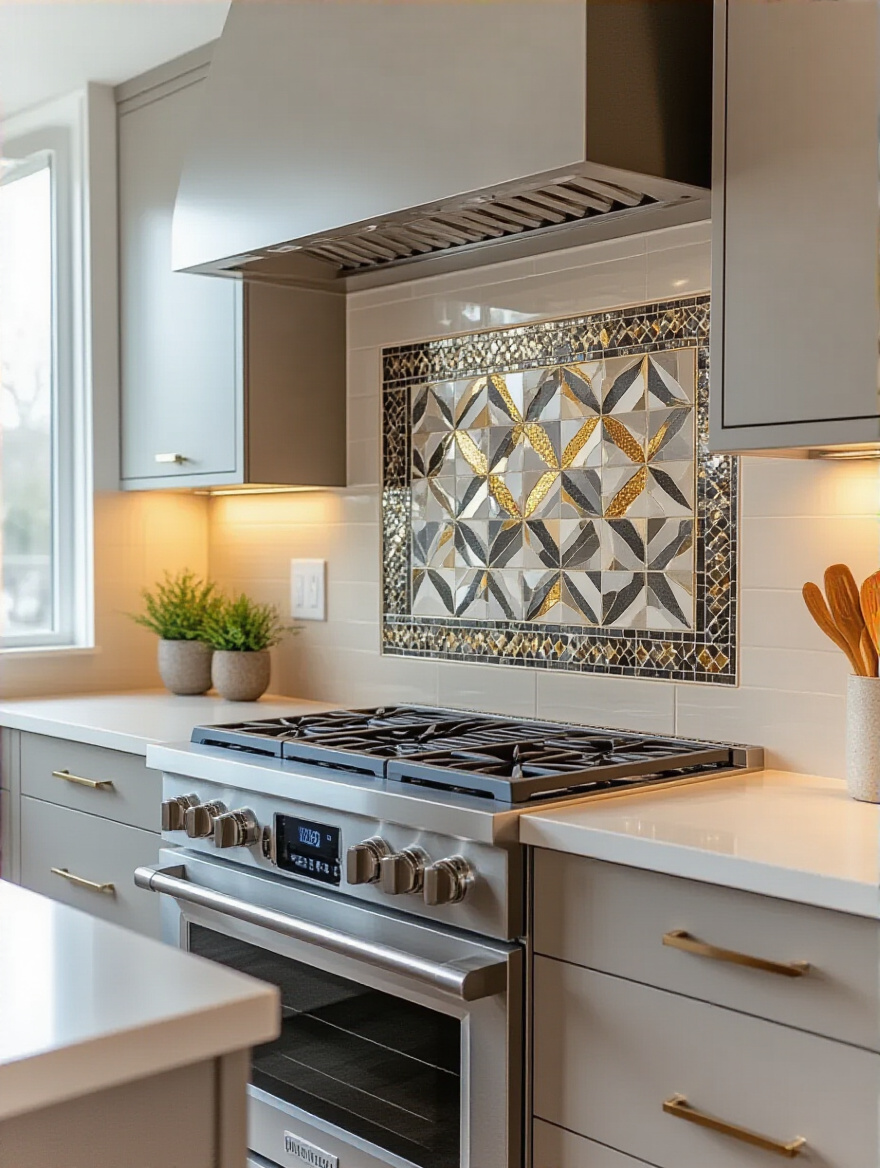
The key here is restraint. The goal is to add a point of interest, not to create visual chaos. I once saw a kitchen where the homeowner loved accents so much they used three different mosaics and two different borders. It was a dizzying mess. Pick one star for the show. Let the mosaic behind the range be the hero, and let the rest of the tile be the quiet, elegant supporting cast.
14. Create Visual Interest with Herringbone, Subway, or Chevron Laying Patterns
The exact same rectangular tile can have a completely different personality depending on how you lay it. A standard brick-like (subway) pattern is classic, timeless, and clean. Turn those same tiles 45 degrees into a herringbone pattern, and suddenly you have a sense of movement, luxury, and sophisticated drama. Lay them in a chevron pattern, and you get a modern, energetic V-shape that draws the eye.
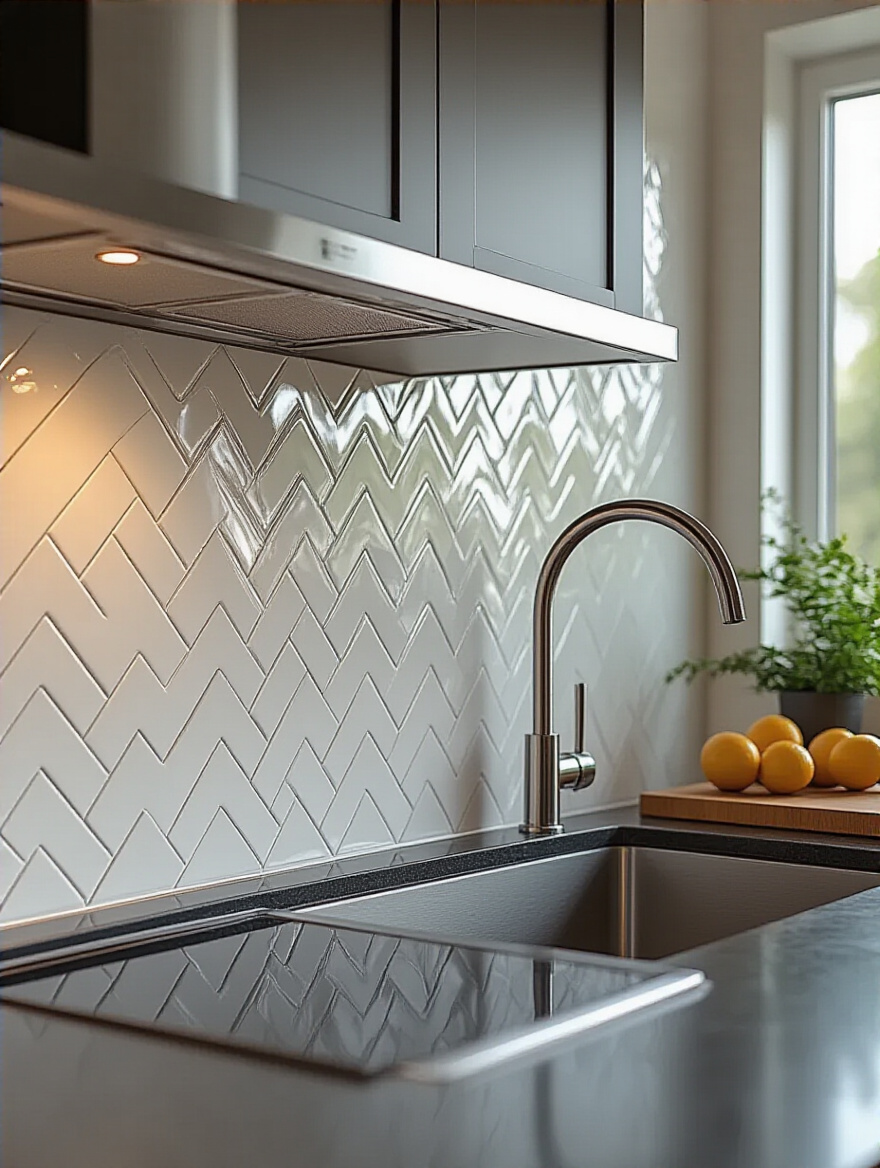
This is one of the easiest ways to get a high-design look without paying for more expensive tile. The material cost is the same; you’re just manipulating the pattern. Just remember that complex patterns like herringbone require more intricate cuts, which means you’ll need to order more overage (that 15-20% we talked about) and the installation labor will likely be more expensive. It’s a trade-off, but the visual payoff can be immense.
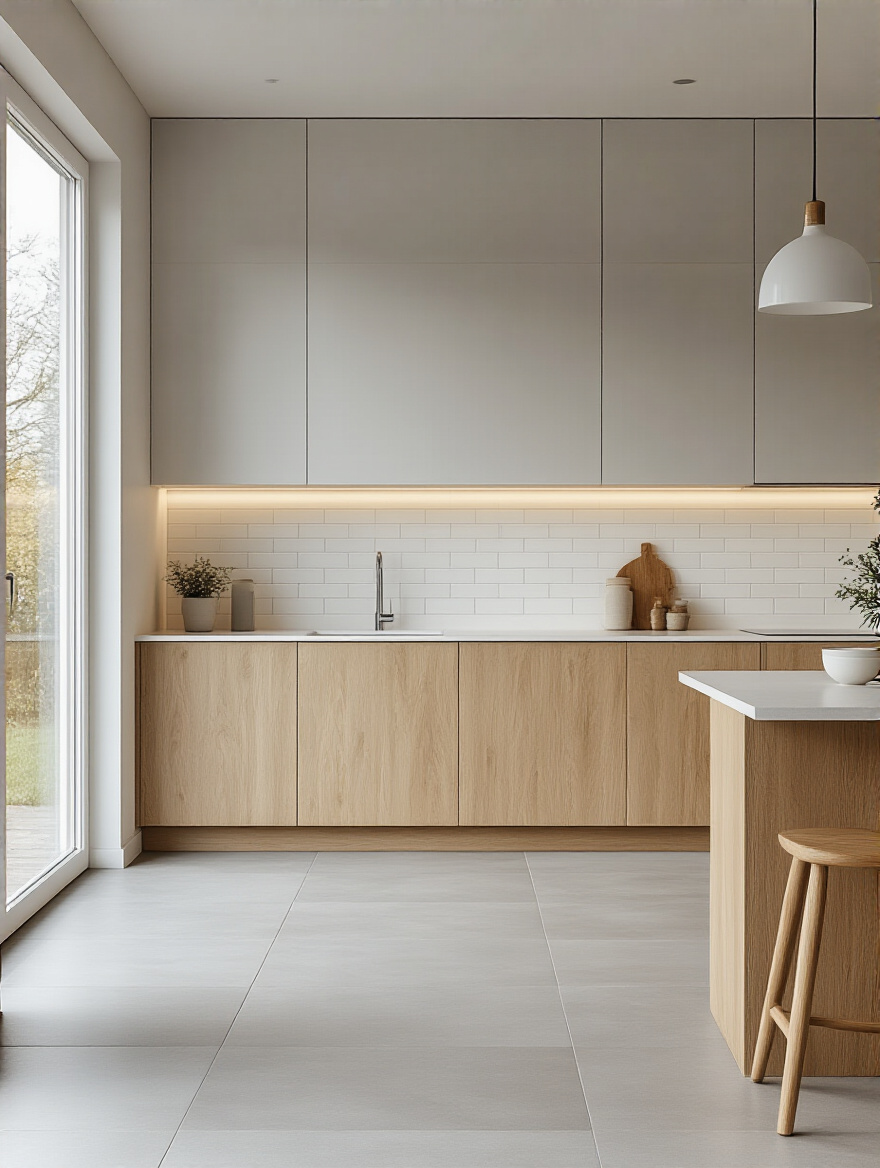
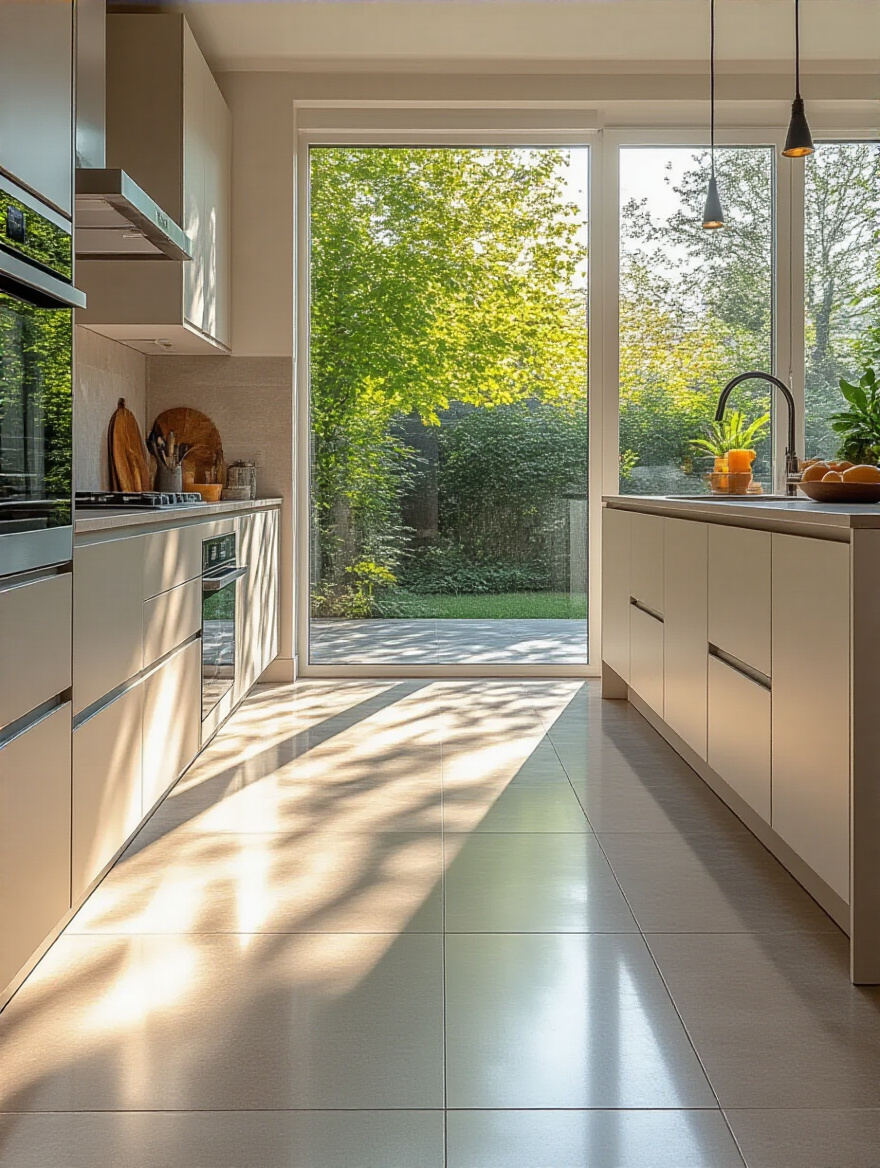
15. Use Large Format Tiles to Make Small Kitchens Feel More Expansive
This is one of my favorite tricks for small kitchens, and it works because it’s a bit counterintuitive. You’d think that putting big tiles in a small room would feel overwhelming, but the opposite is true. Our brains perceive space based on the number of visual interruptions. Lots of small tiles mean lots of busy grout lines, which chops up the floor and makes the space feel smaller and more cluttered.
A large format tile (think 12×24 inch or even 24×24 inch) drastically reduces the number of grout lines. The result is a calmer, more serene and continuous surface that tricks the eye into seeing one large, unbroken plane. Pair a large format tile with a harmonizing grout color, and you’ve got a powerful recipe for making a cramped kitchen feel open, airy, and far more luxurious.
Elevating Aesthetics & Crafting Distinctive Style with Tiles (Part 2)
We’re continuing our dive into aesthetic mastery, focusing now on how tile can solve specific environmental challenges—like a lack of light—and bring order to the wonderful chaos of modern, open-concept living.
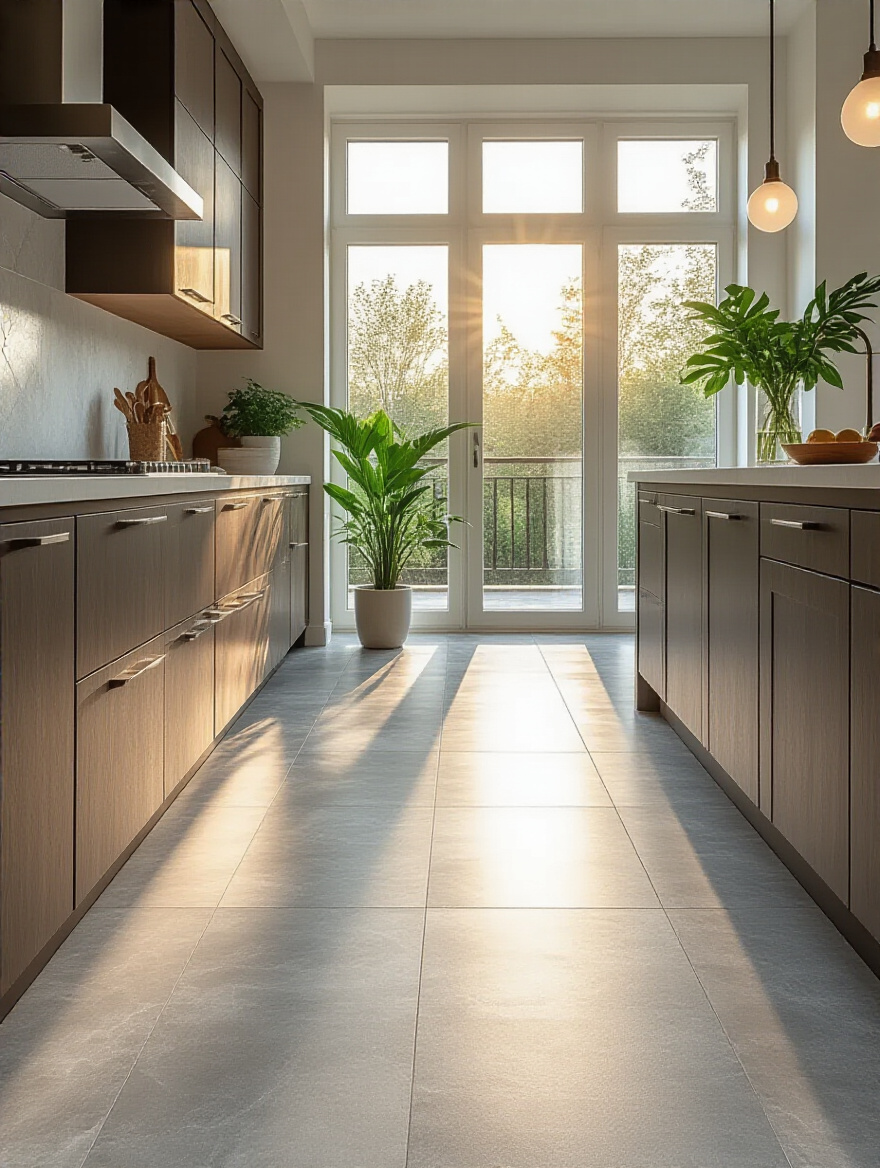
16. Brighten Dark Kitchens with Reflective Glazed Tiles or Lighter Hues
If your kitchen lacks big windows or gets poor natural light, your tile choice can be your secret weapon. Think of your tiles as a team of tiny mirrors. A tile with a high-gloss glaze—especially in a light color like white, cream, or a pale pastel—will catch and bounce every bit of available light around the room, whether it’s from a window or an under-cabinet light. This is basic physics working in your favor.
The difference can be dramatic. I worked on a basement kitchen that felt like a cave. We installed a glossy, off-white backsplash that extended all the way to the ceiling. The effect was immediate. It amplified the artificial light so effectively that the room felt brighter, bigger, and infinitely more welcoming. Choosing a matte finish in a dark space is a common mistake; you’re throwing away a huge opportunity to manipulate the light and energy of the room.
17. Define Kitchen Zones by Varying Tile Types or Patterns in Open Concepts
Open-concept living is great, but it can also feel like a giant, undefined box. This is where your flooring can do the work of walls without actually building any. By simply changing the tile pattern or material, you can create distinct “zones” that signal a change in function. For example, you can have a durable, large-format porcelain in the main cooking “workstation.”
Then, you can transition to a warmer, wood-look porcelain plank in the adjacent dining area or use a patterned tile to create a “rug” effect under your island seating. This is a sophisticated design technique that adds layers and intention to the space. It helps anchor furniture and provides a subtle psychological cue that you’re moving from one “room” to another, bringing a sense of order and intimacy to a large, open area.
Advanced Applications, Common Pitfalls & Long-Term Tile Care (Part 1)
You’re almost at the finish line. But a great design is a sustainable one. This final stretch is about integrating advanced features that enhance comfort, avoiding rookie mistakes during installation, and knowing how to protect your investment for the long haul.
18. Implement Underfloor Heating Systems for Ultimate Kitchen Comfort
Let me tell you, there are few things more luxurious on a cold morning than stepping onto a warm tiled floor with bare feet. Underfloor heating (UFH) systems are a game-changer, turning the biggest downside of tile (its coldness) into its greatest strength. Tile is an excellent thermal conductor, which means it transfers that gentle, radiant heat from the system below into the room incredibly efficiently.
It’s a more comfortable, even heat than forced air, which creates drafts and cold spots. And yes, it’s an added expense upfront, but it can actually be more energy-efficient than running traditional radiators. The critical part is insulation. You must install insulation boards under the heating system to ensure you’re pushing all that glorious warmth up into your room, not down into your foundation.
19. Avoid Common Tile Installation Mistakes by Prioritizing Precision
Can we just agree that “good enough” is never actually good enough when it comes to tile? A tiny error at the beginning of a row will multiply and become a massive, glaring mistake by the time you get to the other side of the room. This is why precision is non-negotiable. It’s about using a laser level, not just your eyeball. It’s about planning your layout so you have balanced cuts on both sides of a wall, not one full tile and one tiny sliver.
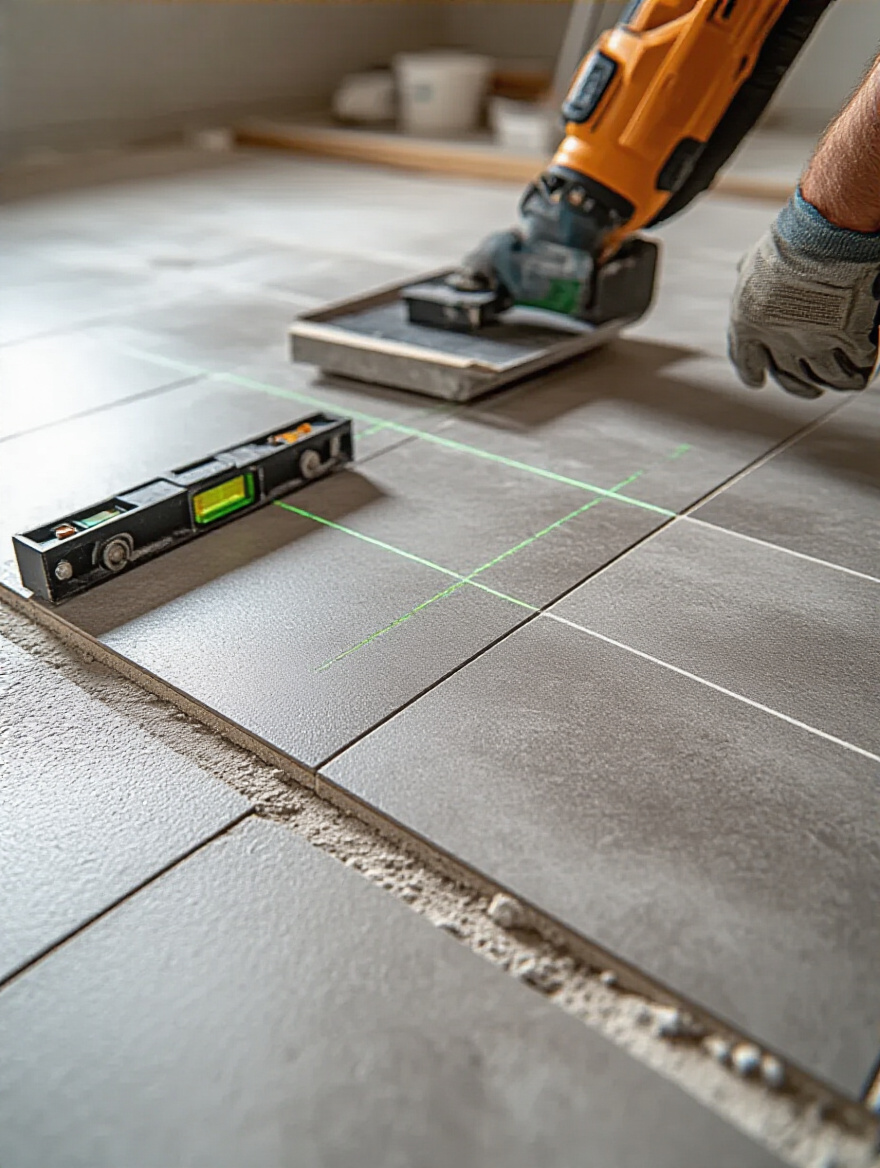
The biggest mistake I see is improper mortar coverage. People will just plop a few dollops of mortar on the back of a tile and stick it to the wall. This leaves hollow spots. Any impact over a hollow spot will crack the tile. You must use a notched trowel to create an even, ribbed bed of mortar and “back-butter” large tiles with a thin layer to ensure you get at least 95% coverage. It’s the only way to create a rock-solid, permanent bond.
20. Protect Grout and Tile Surfaces with Regular Sealing for Stain Resistance
Grout is basically a cement-based sponge. Left unsealed, it will happily soak up coffee, red wine, oil—anything you spill on it. This is why sealing your grout is not an optional step; it is an absolute requirement in a kitchen. A good quality impregnating sealer works by penetrating the pores of the grout and creating an invisible shield that repels water and oil.
The process is simple but tedious: clean the grout thoroughly, let it dry completely, and then carefully apply the sealer. The most common mistake is not wiping off the excess sealer from the face of the tile. If you let it dry there, it will leave a hazy, dull film that is a nightmare to remove. Seal once after installation, and then plan to reseal every year or two in high-use areas. It’s a weekend afternoon project that protects your investment for years.
21. Establish a Consistent Cleaning Routine to Preserve Tile Luster and Grout Color
You don’t need harsh, aggressive chemicals to keep your tile looking new. In fact, they can do more harm than good, stripping away sealers and even etching the glaze on some tiles. The best way to maintain your tile is with a simple, consistent routine. Wipe up spills as soon as they happen. Sweep or vacuum regularly to remove abrasive grit. Mop weekly with a pH-neutral cleaner and warm water.
For deeper grout cleaning, a simple paste of baking soda and water and a stiff brush works wonders without using harsh chemicals. The secret isn’t in scrubbing furiously once every six months; it’s in gentle, regular maintenance that never lets grime build up in the first place. Think of it like brushing your teeth—a little effort every day prevents massive problems down the road.
Advanced Applications, Common Pitfalls & Long-Term Tile Care (Part 2)
Finally, we need to talk about life. Life happens. A pan gets dropped, a chair leg gouges a tile. Knowing how to handle these minor emergencies without calling in a pro is the final piece of mastering your tiled space, ensuring it stays beautiful for its entire lifespan.
22. Learn How to Effectively Repair Chipped or Damaged Kitchen Tiles
Hearing that sickening crack as a heavy pot slips from your hands and hits your new tile floor is a heart-stopping moment. But it doesn’t have to mean a huge, expensive repair. For small chips or hairline cracks, there are fantastic epoxy-based repair kits available that can make the damage virtually disappear. This is another reason to keep that extra box of tiles—sometimes a full replacement is the only answer.
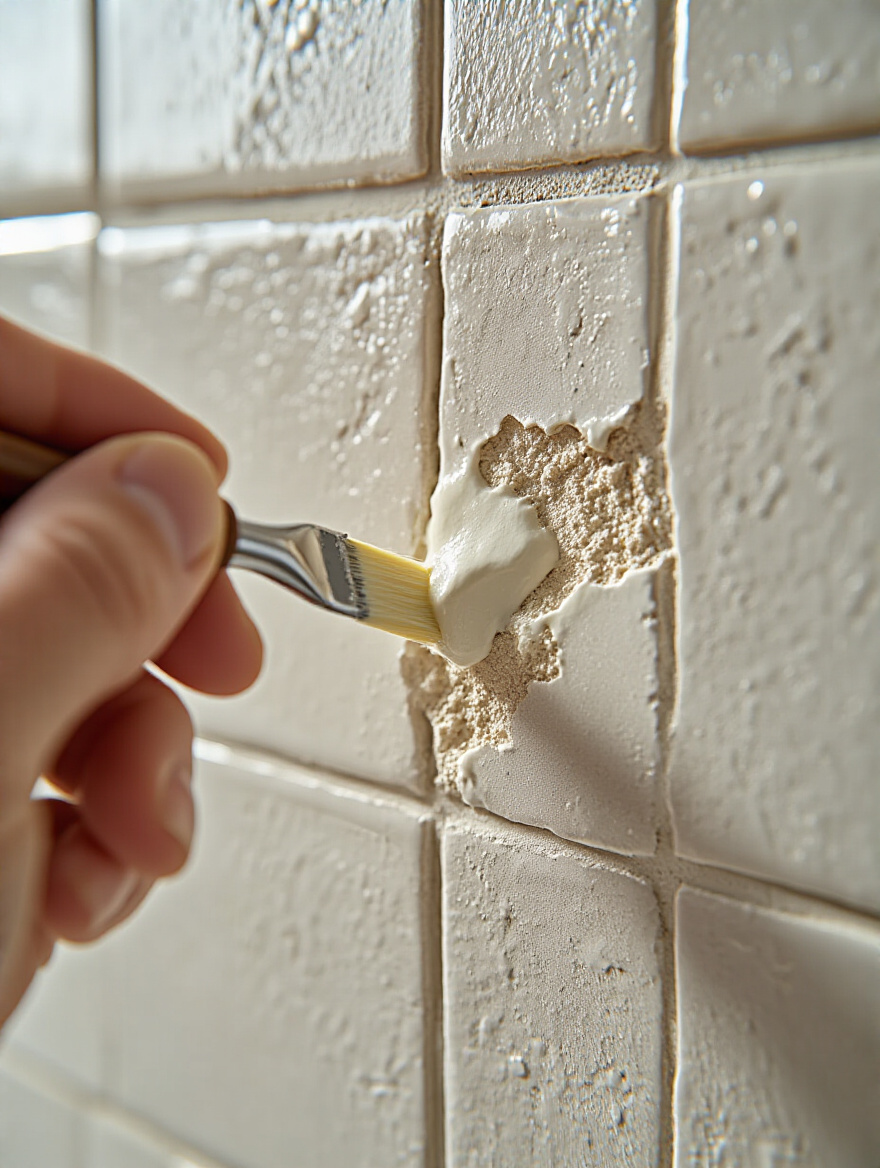
The trick to a good repair is all in the prep work and color matching. The area must be surgically clean for the epoxy to bond properly. Many kits come with tints that you can mix to perfectly match your tile’s specific shade and even replicate its subtle specks or veining. It takes a little patience and an artistic eye, but patching a small chip for $20 feels a whole lot better than paying a contractor hundreds to replace the whole tile.
Conclusion
So there you have it. Choosing kitchen tile isn’t just about picking a color. It’s a conversation between art and science, aesthetics and physics. It’s understanding that the unseen foundation is just as important as the beautiful surface, that the grout line is as powerful as the tile itself, and that a material’s story is woven into how it feels, sounds, and wears over time. Your kitchen isn’t just a room; it’s the backdrop to your life’s story, a place of nourishment and connection.
Don’t settle for “fine.” Use these principles to choose materials that speak to you and to each other. Create a space that engages your senses—the smooth, cool feel of porcelain, the earthy texture of stone, the way light dances off a glazed surface. This is your chance to craft a kitchen that is not only built to last but is a deep and true reflection of you. Now go build something brilliant.


