Picture this: You’re standing in a kitchen that should be your dream. It’s got the brand new cabinets, the slick quartz countertop, the exact farmhouse sink you saw on Pinterest. It cost a fortune. But it feels… dead. Sterile. You can’t put your finger on it, but the magic just isn’t there. Can we talk about this? This is the moment I see homeowners have all the time, right after they’ve spent thousands of dollars and can’t figure out why their new kitchen feels more like a surgical suite than the heart of their home.
The truth is, a beautiful kitchen isn’t a checklist of expensive items. It’s a feeling. It’s an experience created by how all those elements—the surfaces, the layout, the flow—play with the most important, and most often misunderstood, ingredient: light. I’m an architectural lighting designer, and I’ve seen light transform lifeless rooms into spaces that feel incredible. So let’s cut through the noise. I’ll walk you through what really matters, from the foundation up, and show you how to build a kitchen that not only looks amazing but feels alive.
Foundations: Planning Your Kitchen’s Decorative Style
Before you pick a single paint chip or cabinet pull, you have to get the bones right. Think of this as the boring part that saves you from expensive, soul-crushing mistakes later. This is where you map out how you’ll actually live in the space, not just how it will look in a photo.
1. Define Your Kitchen’s Core Functional Zones for Optimal Flow.
Everyone throws around the term “work triangle”—the path between your sink, stove, and fridge. And sure, that’s important. But what really matters is thinking about your kitchen in terms of zones for specific tasks: storing food, prepping, cooking, cleaning, and maybe even a coffee or drinks zone. The goal isn’t just to make the triangle short; it’s to stop you from running back and forth across the entire kitchen just to make a salad. A well-zoned kitchen is about creating little mission-control stations.
When you group tasks, your workflow becomes intuitive. Your prep zone has the knives, cutting boards, and trash bin right there. Your cooking zone has the oils, spices, and pots right by the stove. This isn’t just about efficiency; it’s about making cooking less chaotic and more joyful. I had a client whose prep space was across the kitchen from their compost bin. They were constantly dripping onion skins and carrot peels across their beautiful new floor. Fixing that flow changed everything.
Once you nail down the function, you can start thinking about style. It’s a lot easier to make something beautiful when it already works perfectly.
2. Select a Cohesive Design Style: Modern, Farmhouse, or Industrial Chic.
Please, I’m begging you, don’t just start picking things you like individually. A modern faucet, a farmhouse sink, and industrial stools might all be cool on their own, but together they can create a jarring, confused mess. You need a North Star—a single, cohesive style that guides every single choice you make, from the big-ticket items down to the soap dish. It’s the difference between a curated room and a garage sale.
Create a mood board. It sounds cheesy, but it works. Pin images of kitchens you love and then—this is the important part—analyze why you love them. Is it the clean lines? The rustic wood? The raw materials? Once you identify the core DNA of the style you’re drawn to, every other decision becomes simpler. You’re no longer asking, “Do I like this tile?” You’re asking, “Does this tile fit my Modern Farmhouse aesthetic?” It’s a filter that eliminates bad choices before you can even make them.
This up-front decision on style is also what sets you up for great lighting. A minimalist kitchen demands a different lighting approach than a cozy, traditional one.
3. Maximize Small Kitchen Appeal with Clever Space-Saving Layout Tricks.
If you have a small kitchen, stop thinking about what you can add and start thinking about how to make every inch work harder. Small spaces are all about clever tricks and optical illusions. You’re not going to magically gain square footage, but you can absolutely make it feel twice as big. U-shaped or galley layouts are your best friends here because they create an efficient, contained workspace.

Think vertically. Floor-to-ceiling cabinets draw the eye up and make the room feel taller. Use wall space for magnetic knife strips or pot racks to free up precious counter and drawer real estate. And get smart with your appliances. A counter-depth fridge doesn’t jut out and disrupt the flow. An 18-inch dishwasher can be a lifesaver. It’s all about multi-functionality: an island on wheels, a pull-out cutting board. These aren’t just gimmicks; they are genuinely transformative in a tight space.
From a lighting perspective, this is huge. Smart layouts in small kitchens prevent you from casting shadows on your own workspace, a common issue that makes small kitchens feel even more cramped.
4. Plan Your Decoration Budget Wisely for High-Impact Kitchen Updates.
Here’s a hard truth: without a budget, you don’t have a plan. You have a wish list. And wish lists get expensive, fast. Before you do anything, you need to have a brutally honest conversation with yourself about money. Create two columns: “Must-Haves” and “Nice-to-Haves.” Then, get at least three quotes for every major job. You’ll be shocked at the price differences.
The biggest mistake I see is people skimping on the things they touch and use every day to afford something purely decorative. A good budget allocates for quality where it counts: durable countertops, well-made cabinet hardware, and, of course, a layered lighting plan. And always, always have a contingency fund. Set aside 15-20% for the unexpected—because I promise you, there will always be something unexpected hiding behind a wall. A $5,000 kitchen refresh can look more transformative than a poorly planned $20,000 one if you put the money in the right places.
A smart budget also accounts for professional help where it matters most, like with electrical work. You don’t want to mess around with that.
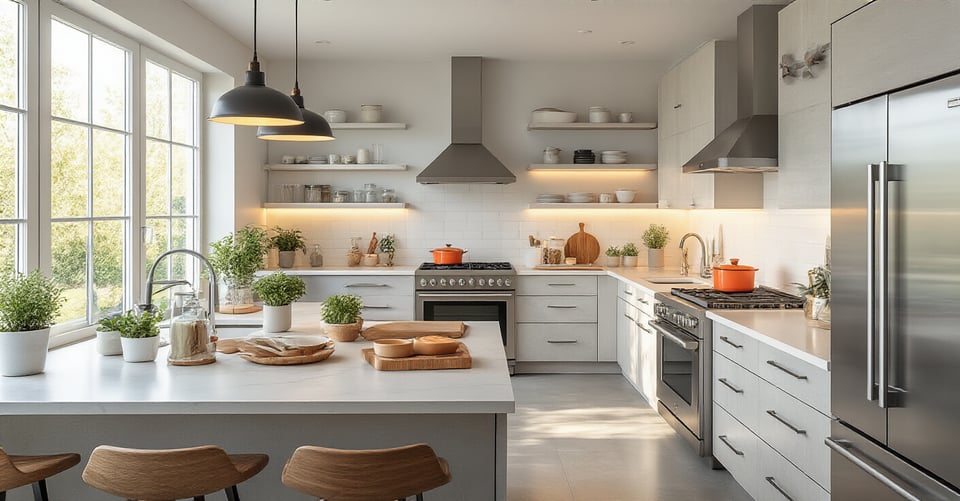
Core Elements: Major Surfaces and Structures
Okay, with the plan in place, it’s time to choose the big players. These are the surfaces that create the canvas of your kitchen. And as a lighting guy, let me tell you—these surfaces are everything. They absorb light, they reflect light, they give your lighting plan something to work with. Choosing them correctly is half the battle.
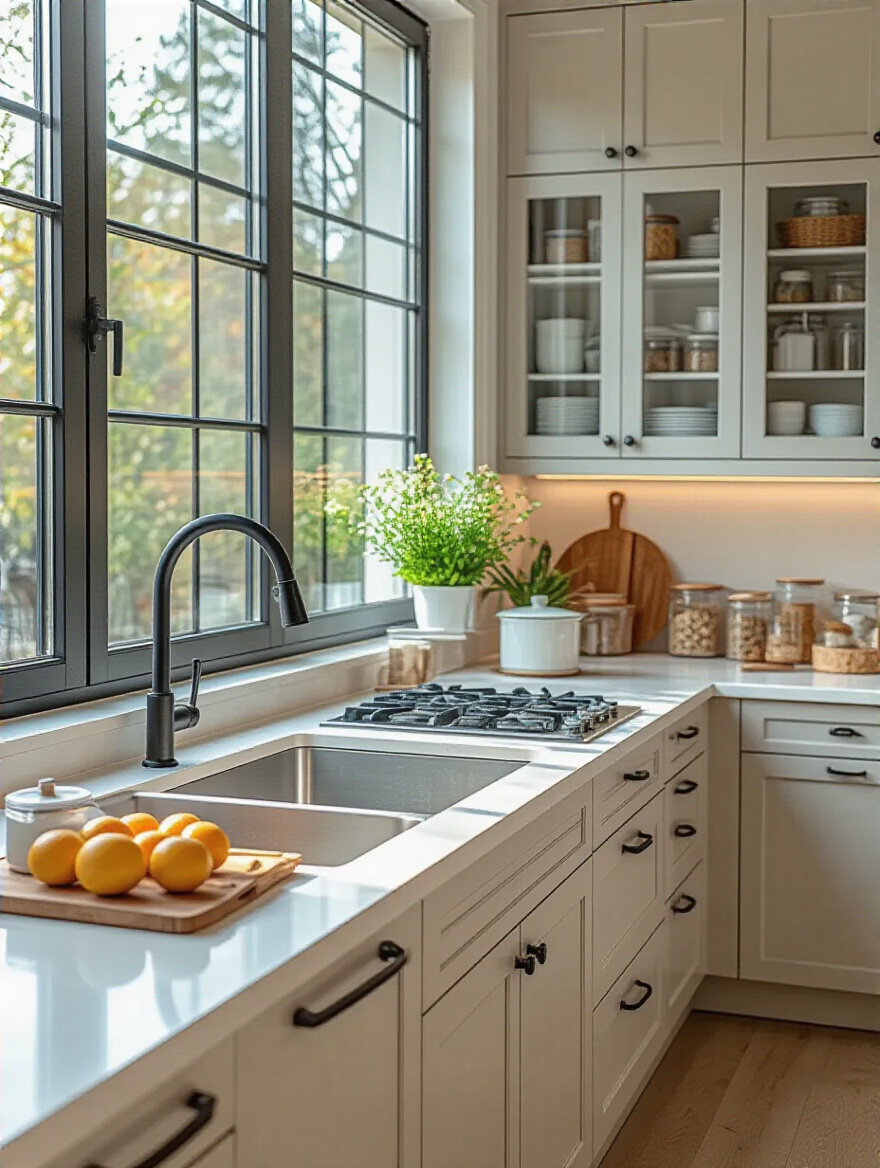
5. Choose Cabinet Finishes and Hardware for Lasting Visual Appeal.
Your cabinets are the single biggest visual element in your kitchen. They set the entire tone. The biggest debate is often paint versus stain, but the real secret is the finish. A matte or flat finish will soak up light, creating a soft, velvety look, but it can make a room feel darker. A semi-gloss or high-gloss finish will bounce light around, making the space feel brighter and bigger, but it will also show every single fingerprint.
This is a design decision you have to make with your kitchen’s natural light in mind. I once had a client with a north-facing kitchen (meaning weak, cool light all day) who insisted on dark, matte cabinets. The room felt like a cave, no matter how many lights we added. We ended up having to add extra layers of lighting just to compensate. For the hardware, think of it as jewelry. It should feel good in your hand—heavy, solid. It’s a small detail that makes a huge difference in how premium the kitchen feels.
Now that we’ve covered the vertical planes, let’s talk about the surfaces where all the action happens.
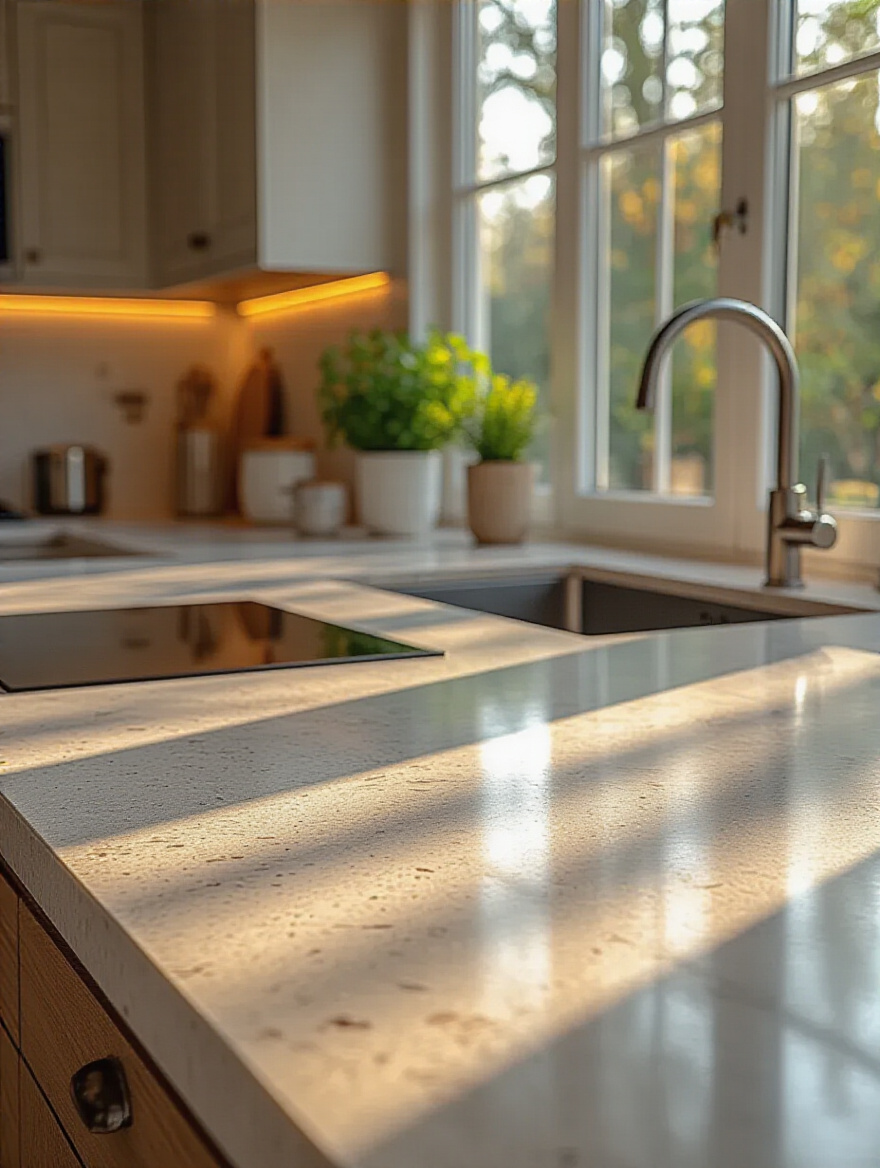
6. Select Durable, Aesthetic Countertop Materials Like Quartz or Granite.
Your countertop is your workhorse. It has to be durable. But it’s also a massive horizontal surface that will either reflect or absorb light. A gleaming white quartz will act like a giant reflector, bouncing light from your windows and fixtures up onto the ceiling, making the whole room feel brighter. A dark, honed granite or soapstone will do the opposite, creating a more dramatic, moody feel by absorbing light. There’s no right or wrong answer, but you have to be intentional.
People obsess over quartz versus granite, but the real choice is between a material that needs maintenance (like sealing marble or granite) and one that’s basically bulletproof (like quartz). Be honest with yourself about your lifestyle. If you have kids who spill grape juice and a partner who leaves coffee rings, porous natural stone might not be your friend. Test samples in your own home. See how they look in the morning light and under your artificial lights at night.
Once your countertops are chosen, you need something to protect the wall behind them. That’s where the fun begins.
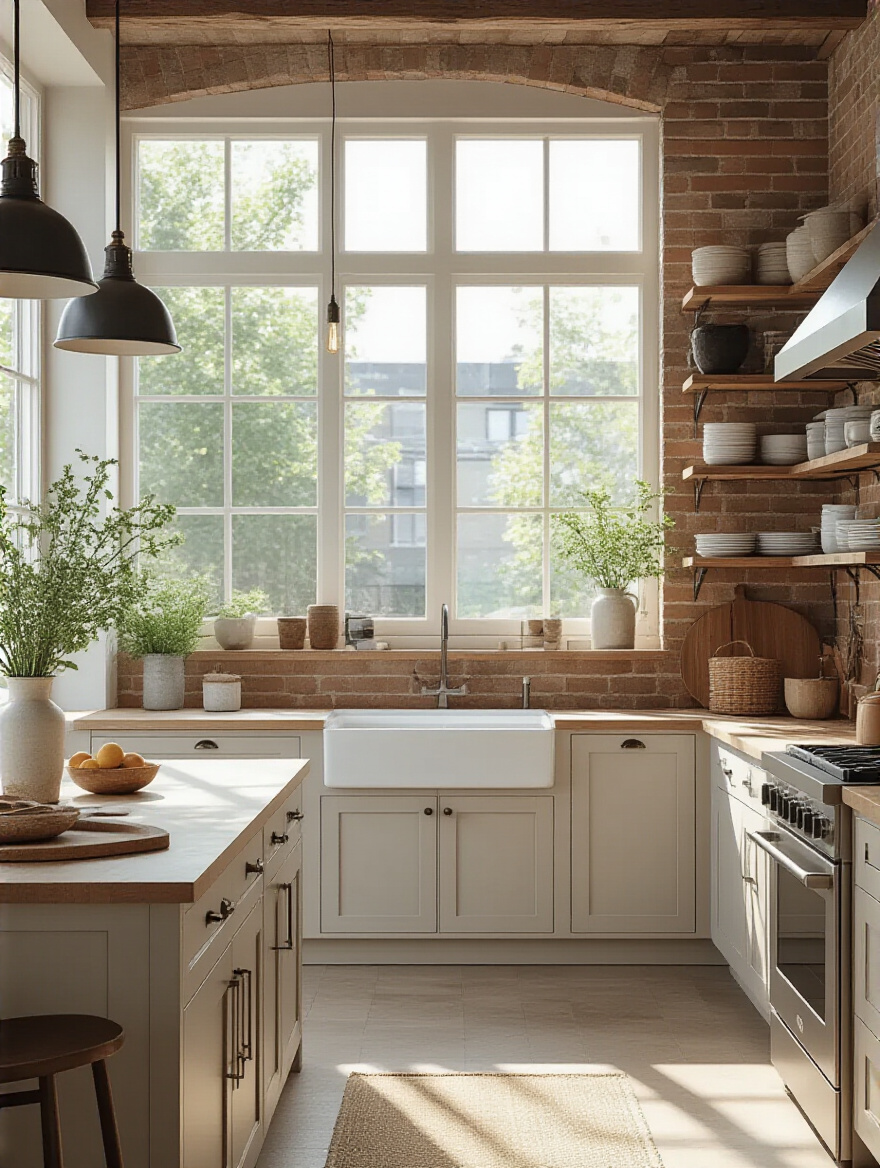
7. Integrate a Statement Backsplash to Elevate Your Kitchen’s Character.
The backsplash is your chance to have some fun. It’s where you can inject personality without committing to a huge expense or a permanent change. But a statement backsplash doesn’t have to scream. It can be a slab of the same stone as your countertop, running all the way up the wall for a seamless, luxurious look. Or it could be a beautifully textured, handmade tile that adds a human touch.
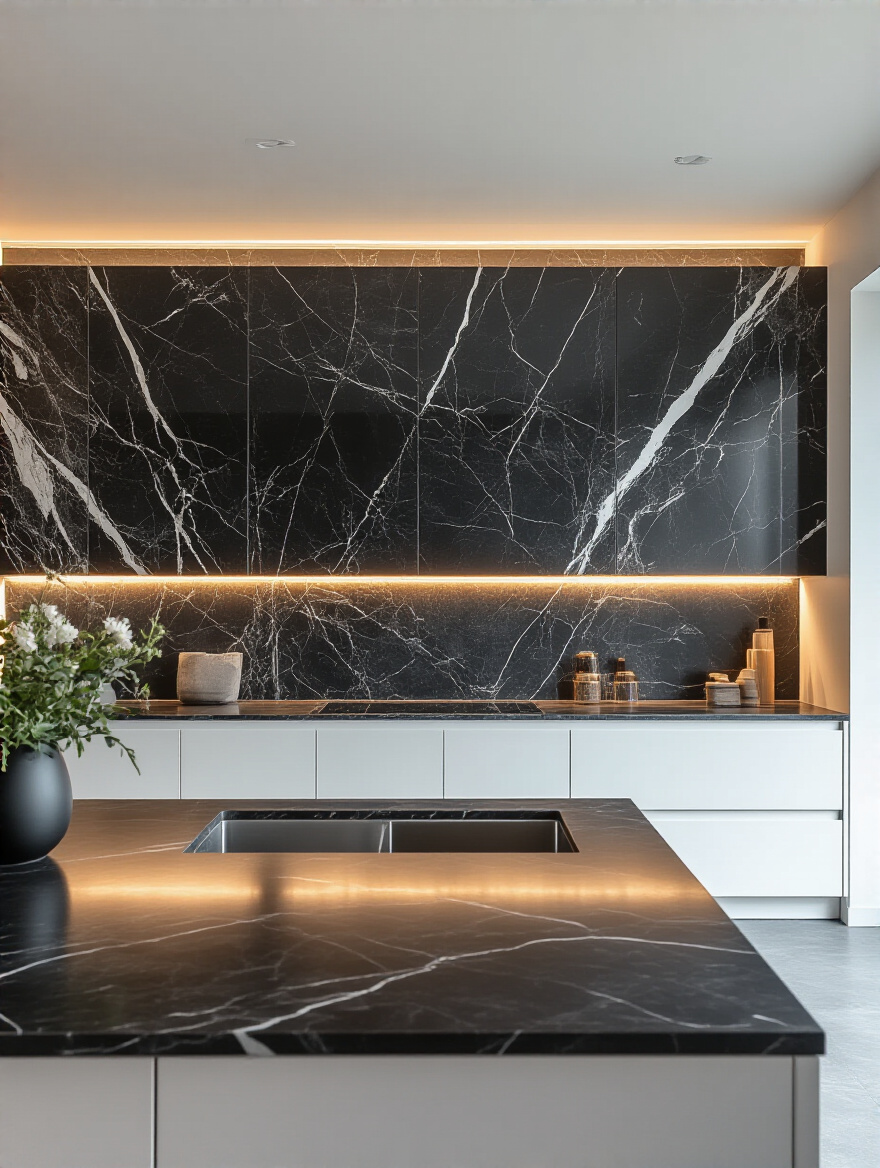
From a lighting standpoint, the backsplash is critical. Your under-cabinet lights will hit this surface directly. This is called “grazing.” A smooth, glossy tile will create bright, specular hotspots. A textured, matte tile will catch the light beautifully, creating a rich interplay of shadow and highlight that adds incredible depth. I always advise clients to hold their backsplash samples vertically under their cabinets with a flashlight shining down on them to see exactly how they’ll look when installed.
This interplay of surfaces brings us to the biggest surface of all: the walls.
8. Apply Harmonious Wall Colors to Enhance Kitchen Brightness and Mood.
Paint is the cheapest and fastest way to completely change the feeling of a room. In a kitchen, you want colors that are not only harmonious with your cabinets and countertops but also work with your light. The secret here is understanding a paint’s Light Reflectance Value, or LRV. It’s a number from 0 (pure black) to 100 (pure white) that tells you how much light a color reflects. A color with a high LRV will bounce light around and make a space feel bigger and brighter. A low LRV color will absorb light and create a cozier, more intimate vibe.
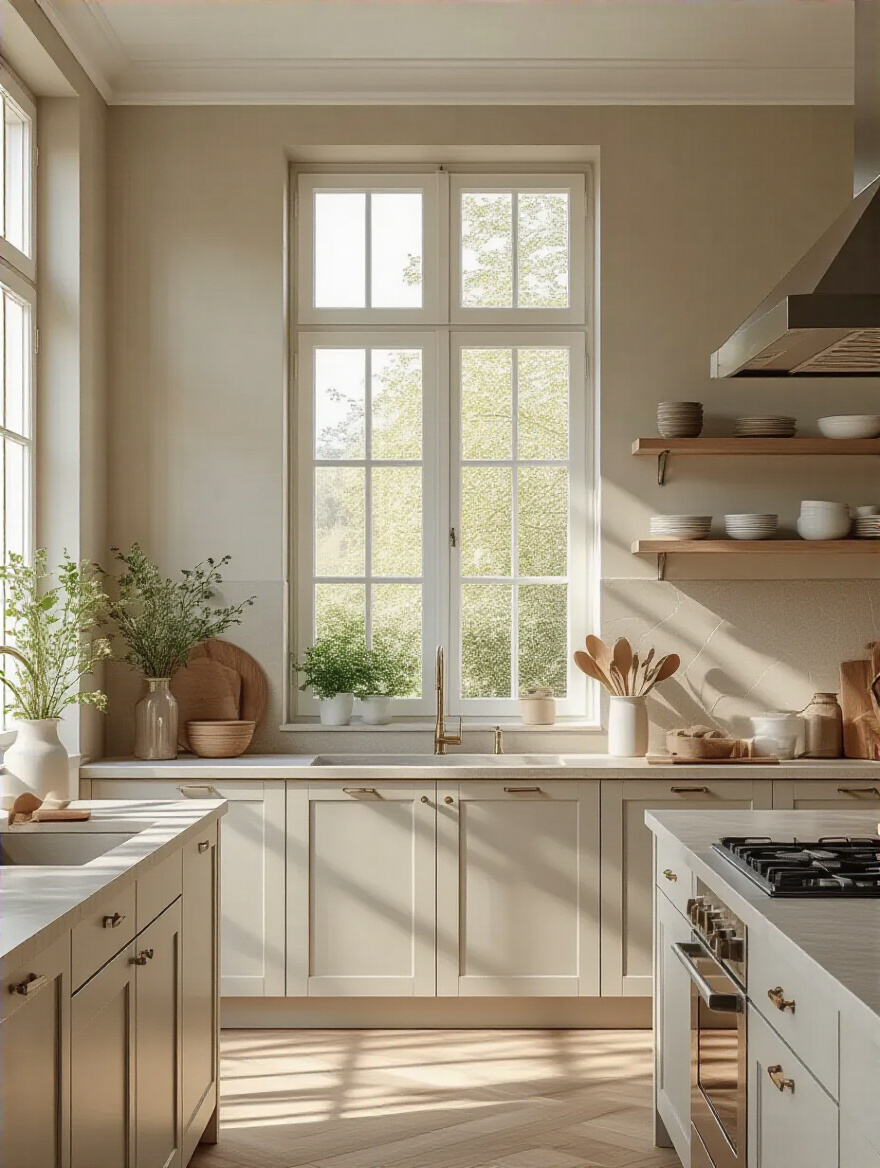
So, if you have a small kitchen with limited natural light, picking a paint with an LRV of 70 or higher is a smart move. But it’s not just about white. There are beautiful light grays, soft blues, and warm off-whites that have high LRVs. Again, always test large swatches on your walls. The same color can look completely different depending on the light in the room. And don’t forget the finish! An eggshell or satin finish is best for kitchens; it’s durable, wipeable, and has a gentle sheen that helps reflect a bit of light.
With the walls painted, the last major surface to consider is the one under your feet.
9. Explore Flooring Options for Style, Durability, and Easy Maintenance.
The floor is another huge surface that impacts the light in your room. A dark floor will ground the space but absorb light, while a light-colored floor will make the whole room feel airier. But for a kitchen floor, durability is king. It needs to withstand spills, dropped pans, and constant traffic. This is not the place for delicate, high-maintenance materials.
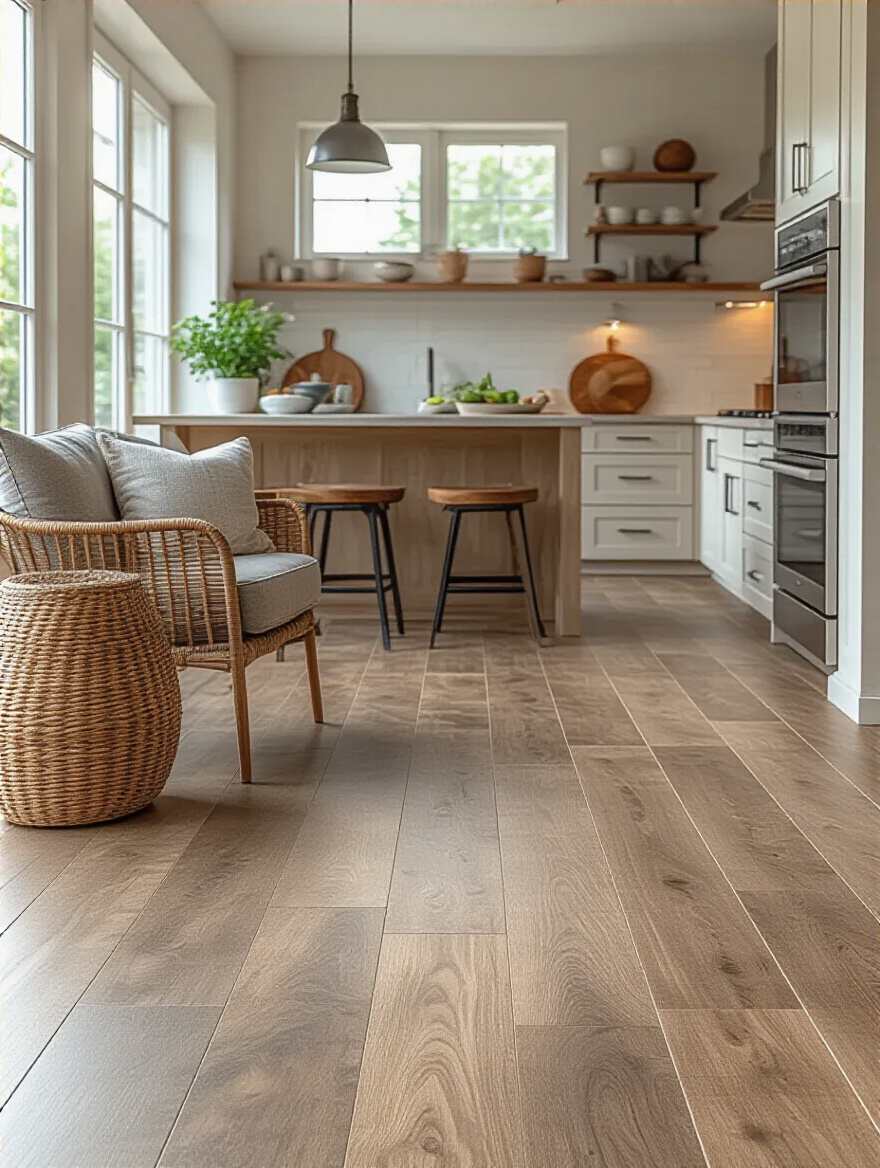
Luxury Vinyl Plank (LVP) has been a game-changer. It’s nearly indestructible, 100% waterproof, and the new versions look shockingly like real wood or stone. Porcelain tile is another classic workhorse—it’s tough and easy to clean. Just be mindful of the grout lines. The fewer grout lines (meaning, the larger the tiles), the easier it is to keep clean. And please, think about comfort. You spend a lot of time standing in your kitchen. A floor with a little bit of give, like LVP or even cork, can be a lot easier on your back and feet than rock-hard tile.
Now that the big surfaces are handled, let’s zoom in on the details that bring the space to life.
Styling & Function: Details That Elevate Your Space
This is where you bridge the gap between a functional box and a personalized home. The small details are what tell your story and make the space uniquely yours. They are the final layer that sits on top of all the foundational work you’ve already done.
10. Utilize Open Shelving Strategically for Display and Easy Accessibility.
People have strong feelings about open shelving. The biggest lie is that you have to put all your mismatched, chipped mugs on display. No. The key is strategic use. Open shelving is for two things: displaying beautiful objects you love, or providing quick access to everyday items that are also good-looking (like a neat stack of white plates or your matching glassware).
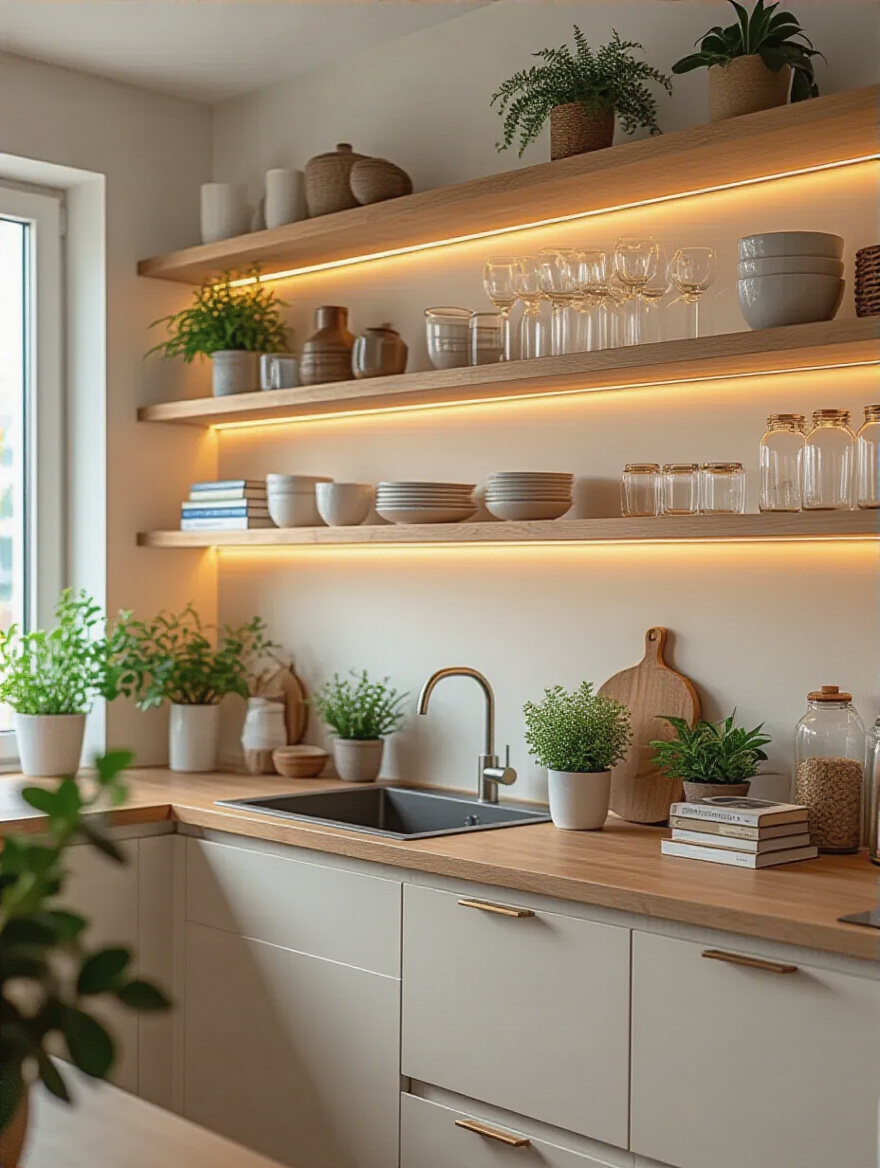
I love open shelving because it’s a perfect opportunity for accent lighting. A discreet LED strip tucked into the front edge of the shelf can wash down the wall behind it, or you can use small, adjustable puck lights to spotlight specific objects. It breaks up the monotony of a wall of upper cabinets and adds a layer of depth and visual interest that makes a kitchen feel custom and thoughtfully designed. But be honest with yourself: if you’re not a tidy person, it might just become a clutter magnet.
And that brings me to the clutter you don’t want on display.
11. Incorporate Smart Storage Solutions for Clutter-Free Countertops.
The ultimate luxury in a kitchen is a clear countertop. Clutter is visual noise, and it kills the calm, serene vibe you’re trying to create. The only way to achieve this is with ruthless, brilliant storage. You need a designated home for everything, especially the stuff you use daily but don’t want to look at. Think appliance garages—a section of cabinetry with an outlet inside where you can hide the toaster and blender.
Drawer organizers are non-negotiable. Dividers for cutlery, spices, and utensils are essential. Pull-out pantry shelves mean you’ll never lose that can of beans in the back again. My favorite trick is a deep drawer right next to the stove for pots and pans. It’s so much better than digging around in a low cabinet. The point is to make it easier to put things away than to leave them out. Good storage isn’t a feature; it’s a behavior-changing system.
When your counters are clear, it gives the other design elements—like your seating—room to shine.
12. Select Unique Bar Stools to Define Your kitchen island Seating Area.
Bar stools are not just a place to sit; they are sculptures. They are a fantastic opportunity to inject personality, color, or texture into your kitchen without a huge commitment. If your kitchen is very neutral, a set of colorful stools can be the perfect pop. If your kitchen has a lot of hard, clean lines, stools with a soft, curved shape or plush upholstery can provide a much-needed contrast.
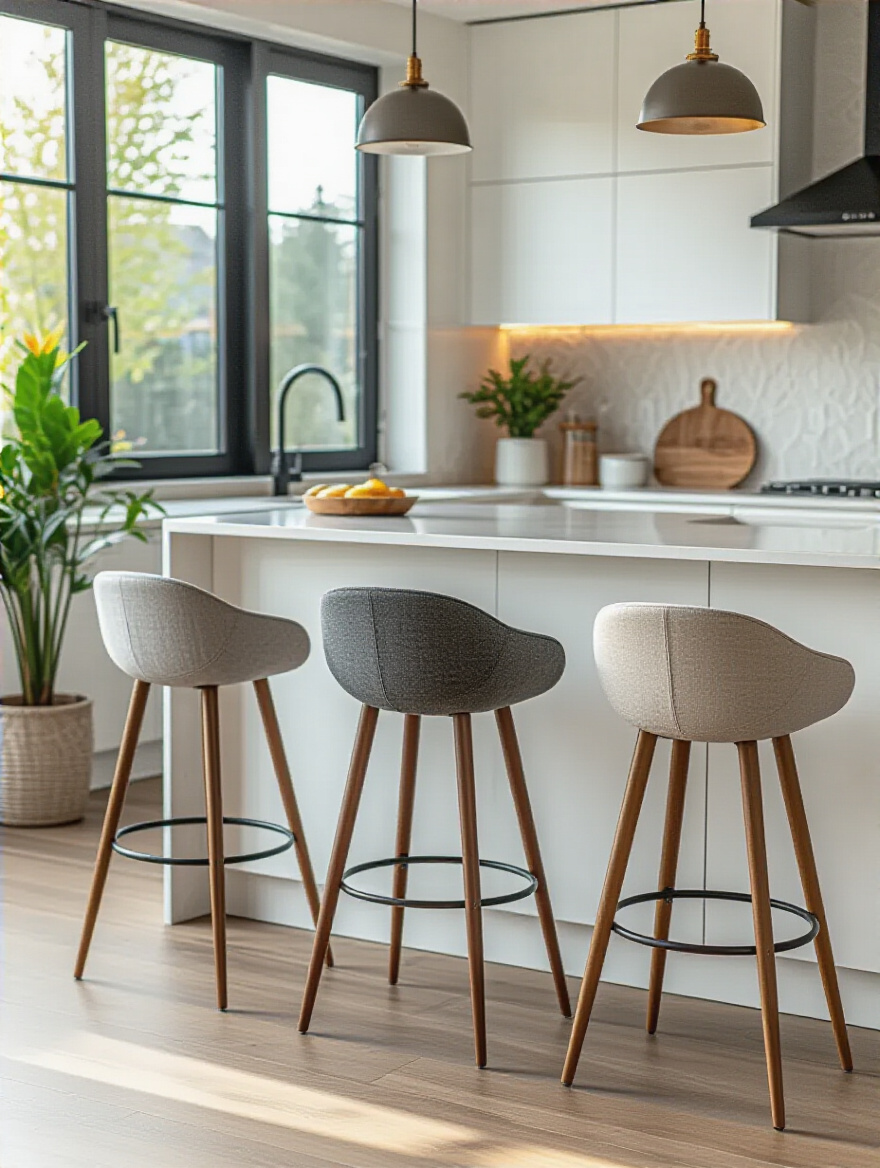
Pay attention to scale and comfort. Measure your counter height and allow for 10-12 inches of space between the seat and the underside of the counter for legroom. And if you plan to actually sit on them for more than five minutes, consider stools with a low back and a footrest. A beautiful but uncomfortable stool is just a very expensive dust collector. They are a chance to make a statement, so don’t just go for the most basic option.
These stools, along with other elements, start to build the personality of the room.
13. Add Artwork or Decorative Elements Reflecting Your Personal Style.
A kitchen without art is a kitchen without a soul. And “art” doesn’t have to mean an expensive painting. It can be a collection of beautiful cutting boards leaning against the backsplash, a vintage landscape painting you found at a flea market, or even a framed photo of your family. It’s about adding a human touch. It tells your guests, and reminds you, that a real person with a real life lives here.
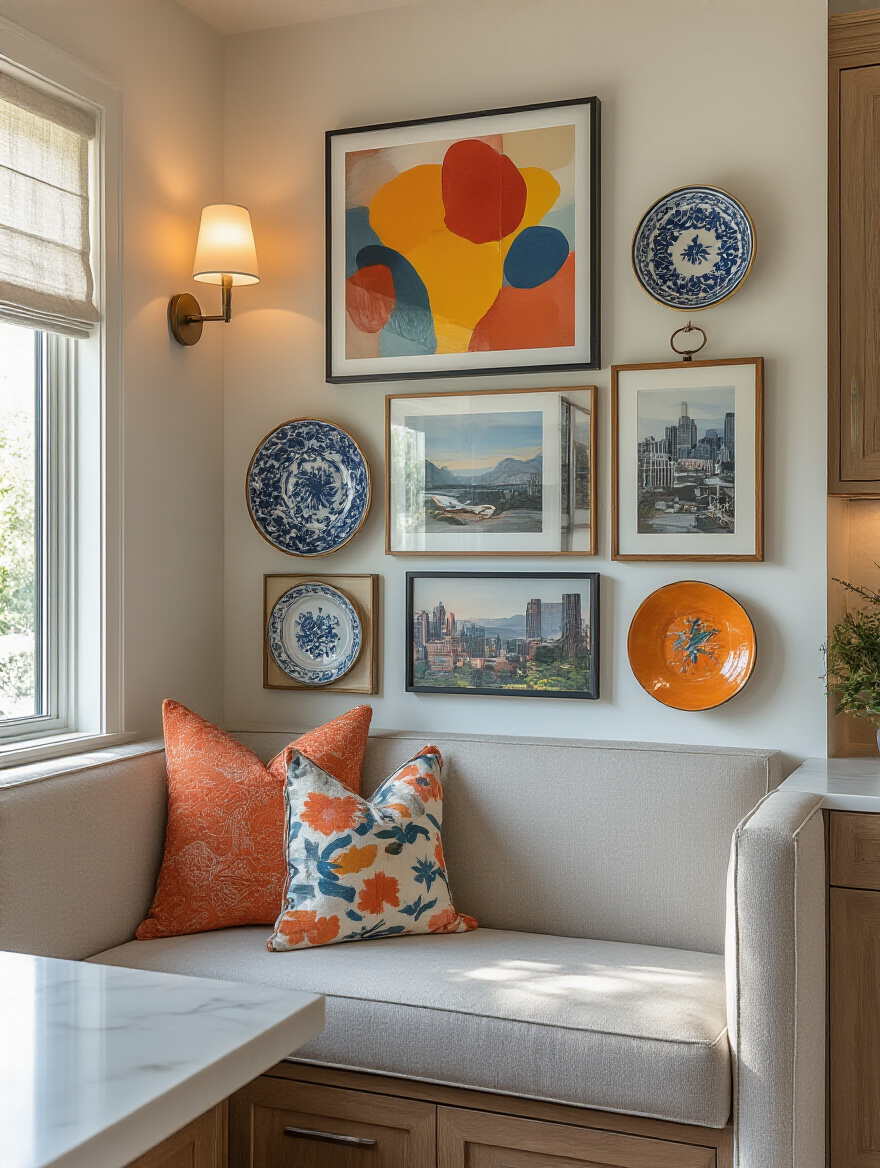
Find a spot that’s out of the splash zone. The wall above a small desk area, the end of an island, or on some open shelving are all great spots. I also love using items that are both functional and beautiful. A gorgeous ceramic fruit bowl, a stylish pepper mill, or a sculptural kettle can sit on the counter and earn its keep both functionally and aesthetically. This layer of personalization is what separates a catalog kitchen from your kitchen.
Another way to inject life and personality is with something, well, alive.
14. Introduce Greenery and Plants to Bring Natural Vibrancy Indoors.
Every room is better with a plant in it. Period. In a kitchen, full of hard surfaces like stone, metal, and wood, the soft, organic shape of a plant provides a welcome and necessary contrast. It literally breathes life into the space. A small pot of herbs on the windowsill is not only beautiful but also incredibly useful. A trailing pothos on top of the cabinets can soften the hard lines.
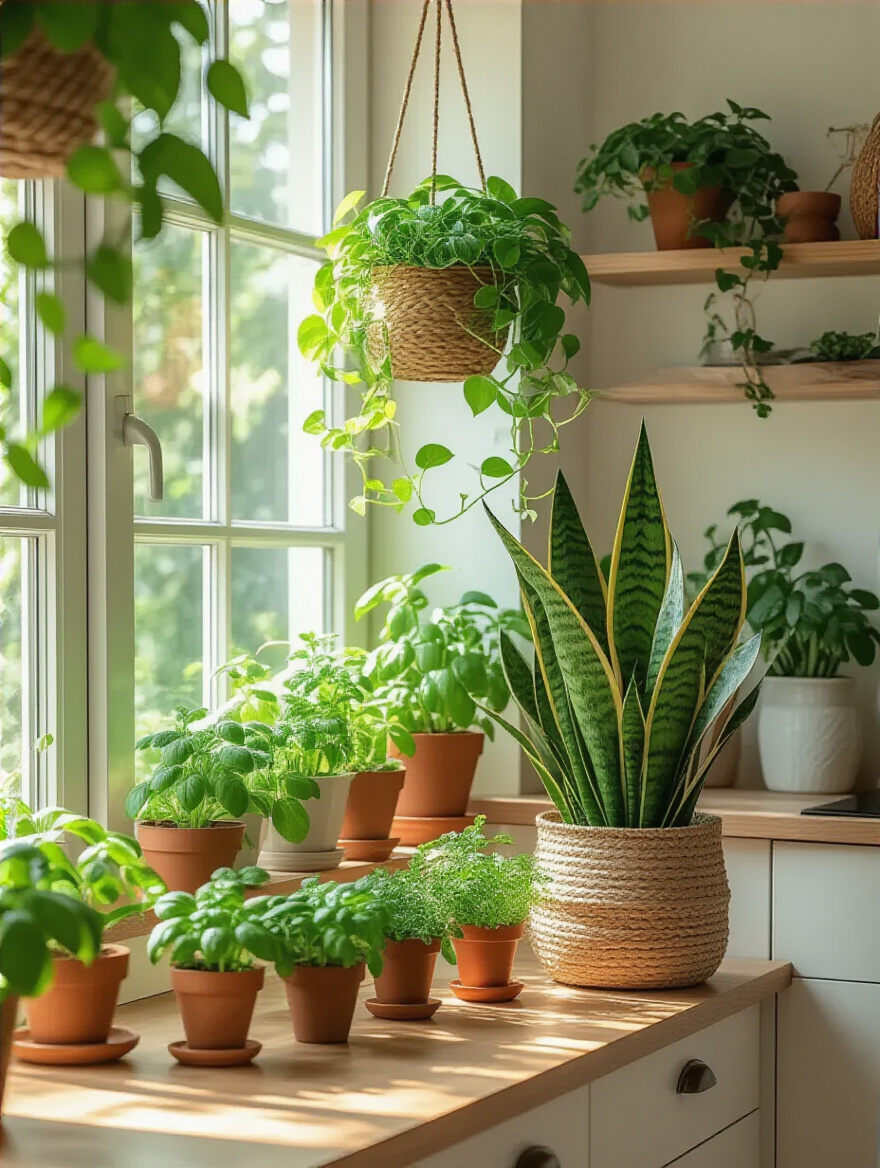
You don’t need a green thumb. There are plenty of nearly-indestructible plants that will forgive you if you forget to water them. A snake plant or a ZZ plant can handle low light and neglect like a champ. Beyond the aesthetic benefits, studies have shown that having plants around just makes us feel better. They purify the air and connect us to the natural world, which is especially important in a room as functional and machine-heavy as a kitchen.
Now, let’s get to my favorite part. The single most powerful tool for changing the entire mood of your kitchen.
Illumination & Ambiance: The Power of Kitchen Lighting
This is it. This is the secret weapon. You can get every other detail right, but if you mess up the lighting, the entire project will fall flat. Good lighting isn’t about one bright light in the middle of the ceiling. That’s a rookie mistake that creates a flat, shadowy, and deeply uninviting space. Great lighting is about building layers. It’s about having the right light, in the right place, for the right task.
15. Layer Kitchen Lighting for Both Task Efficiency and Ambient Mood.
Forget thinking about “lights.” Start thinking in layers. There are three layers you need, and they all do different jobs.
When you have all three layers on separate controls, you have complete power over the mood. Bright task lights for chopping, soft ambient for dinner, and just the accent lights for a late-night glass of wine. That’s how you make a kitchen come alive.
- Ambient Light: This is the general, overall illumination for the room. It’s the foundation. It can come from recessed downlights (cans), a central decorative fixture, or even light bouncing off the walls. Its job is just to help you navigate the space safely without it feeling like a dungeon.
- Task Light: This is the most important layer in a kitchen. It’s the bright, focused light you need right over your work surfaces—your countertops, your sink, your stove. This is your under-cabinet lighting, pendants over an island, or a light over the sink. Without good task lighting, you’re always working in your own shadow.
- Accent Light: This is the fun layer. The magic. It’s the light that adds depth, drama, and personality. It’s the light inside a glass-front cabinet that makes your glassware sparkle, or a small spotlight aimed at a piece of art, or a warm glow from a table lamp in a corner. It creates focal points and makes the room feel sophisticated.
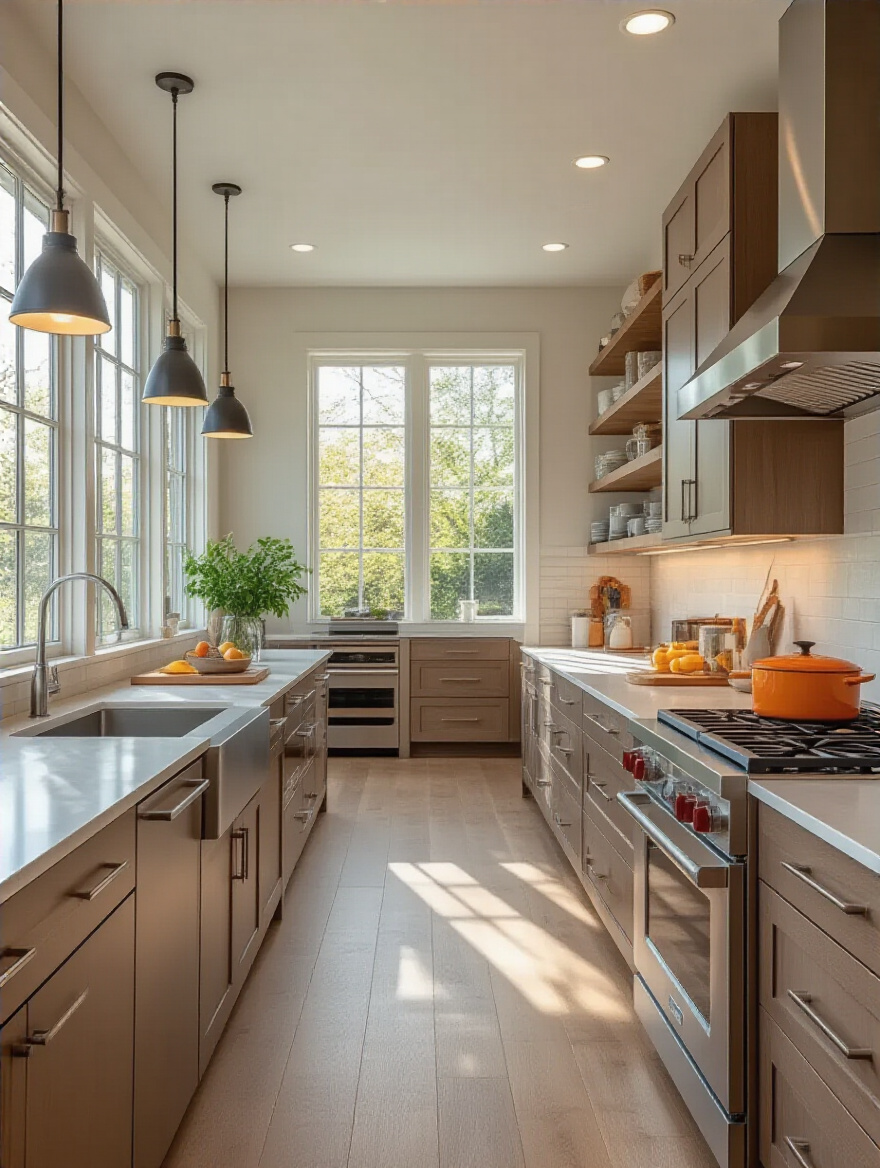
16. Choose Pendant Lights to Create a Striking Focal Point Over Islands.
Pendants over an island are both task lighting and jewelry. They have to do two jobs: look great and provide excellent light for the work happening below. The biggest mistake people make is hanging them too high, where they just become another ambient light source, or too low, where they block your view of the person across from you. A good rule of thumb is to hang the bottom of the pendant 30-36 inches above the countertop.
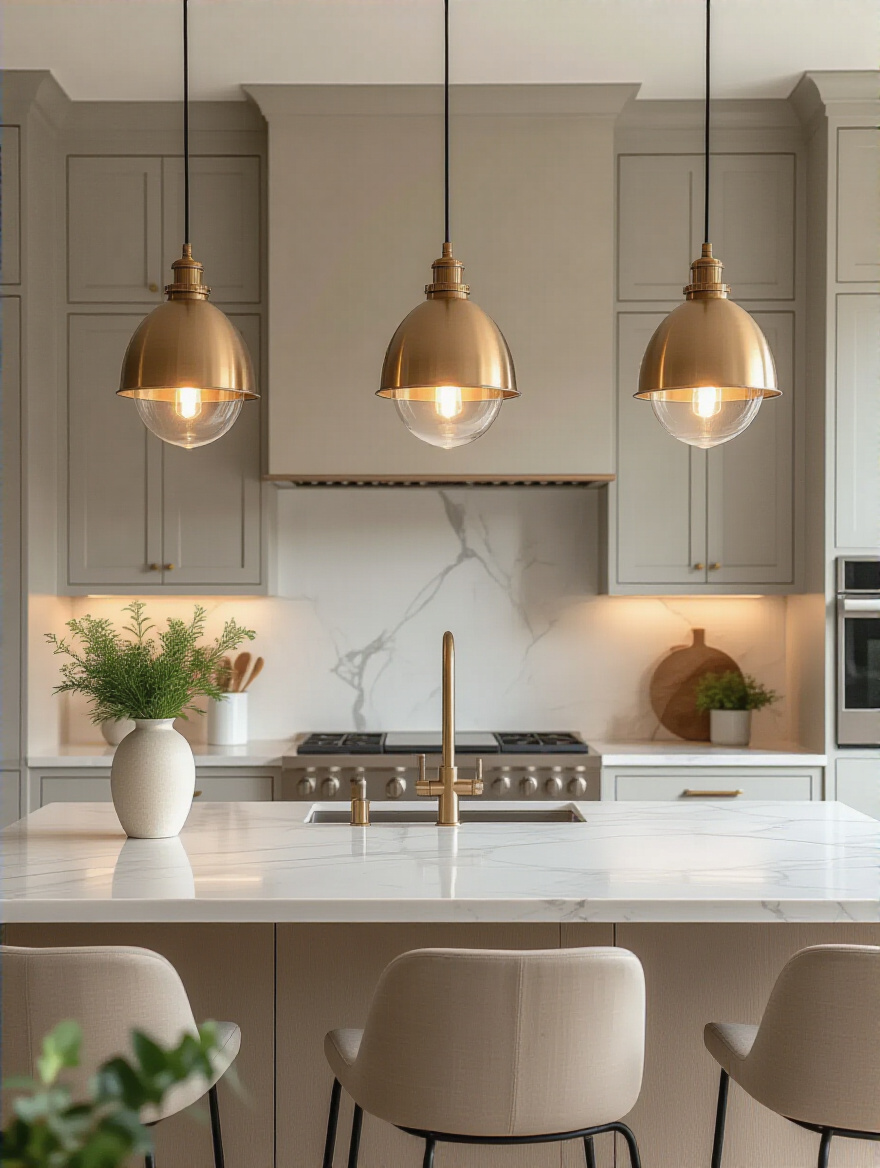
Scale is also critical. Tiny pendants over a massive island look silly. A few larger, more substantial pendants often look better than a bunch of small ones. And think about the light they cast. A pendant with a metal or opaque shade will cast a dramatic pool of light directly downwards. A pendant with a glass or fabric shade will provide that same downward light but also a soft, diffused glow out to the sides, contributing to the room’s ambient light.
Pendants are a focal point, but they can’t do all the work. They need a partner.
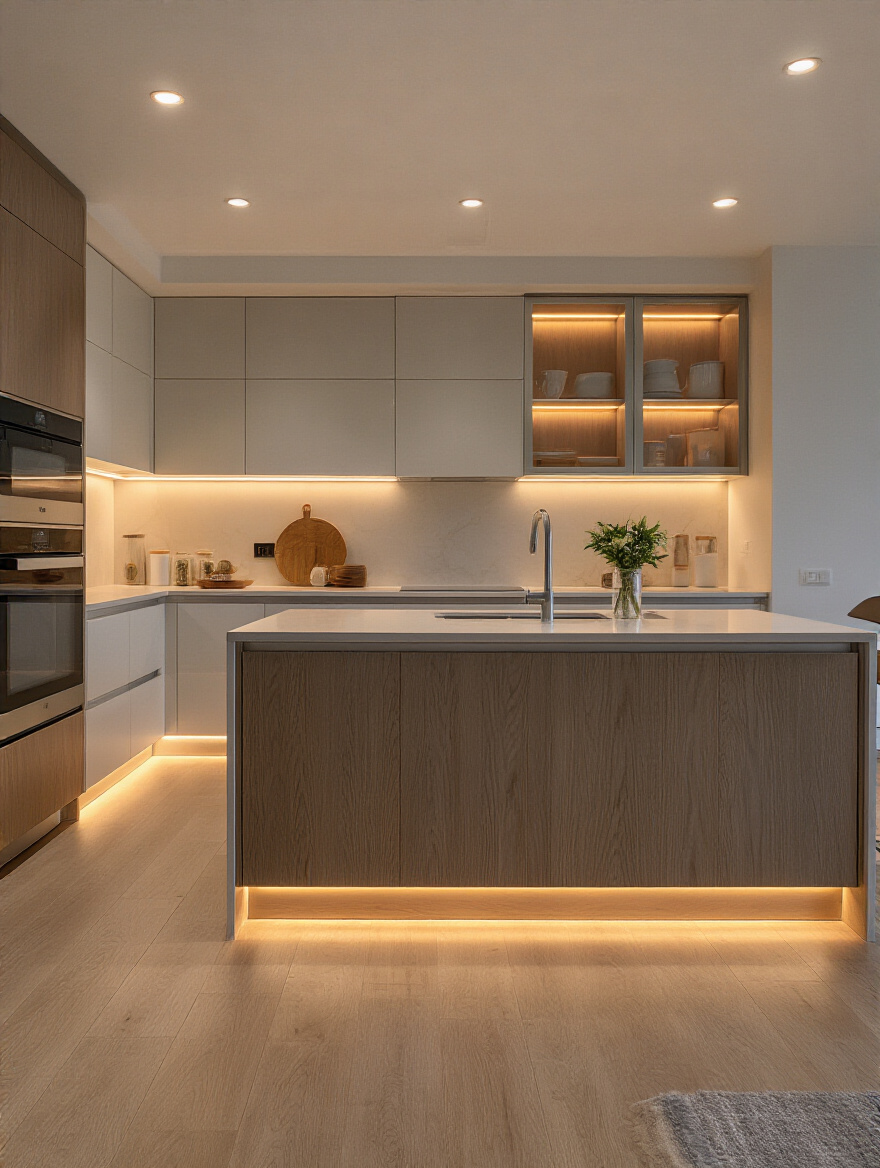
17. Install Under-Cabinet Lighting for Enhanced Task Visibility and Warm Glow.
If you can only afford one lighting upgrade in your kitchen, make it this one. Under-cabinet lighting is an absolute non-negotiable. It is the single most effective way to make your kitchen feel more functional and look more expensive. It puts bright, shadow-free light exactly where you do most of your work—on the countertops. No more chopping in your own shadow cast by the overhead lights.
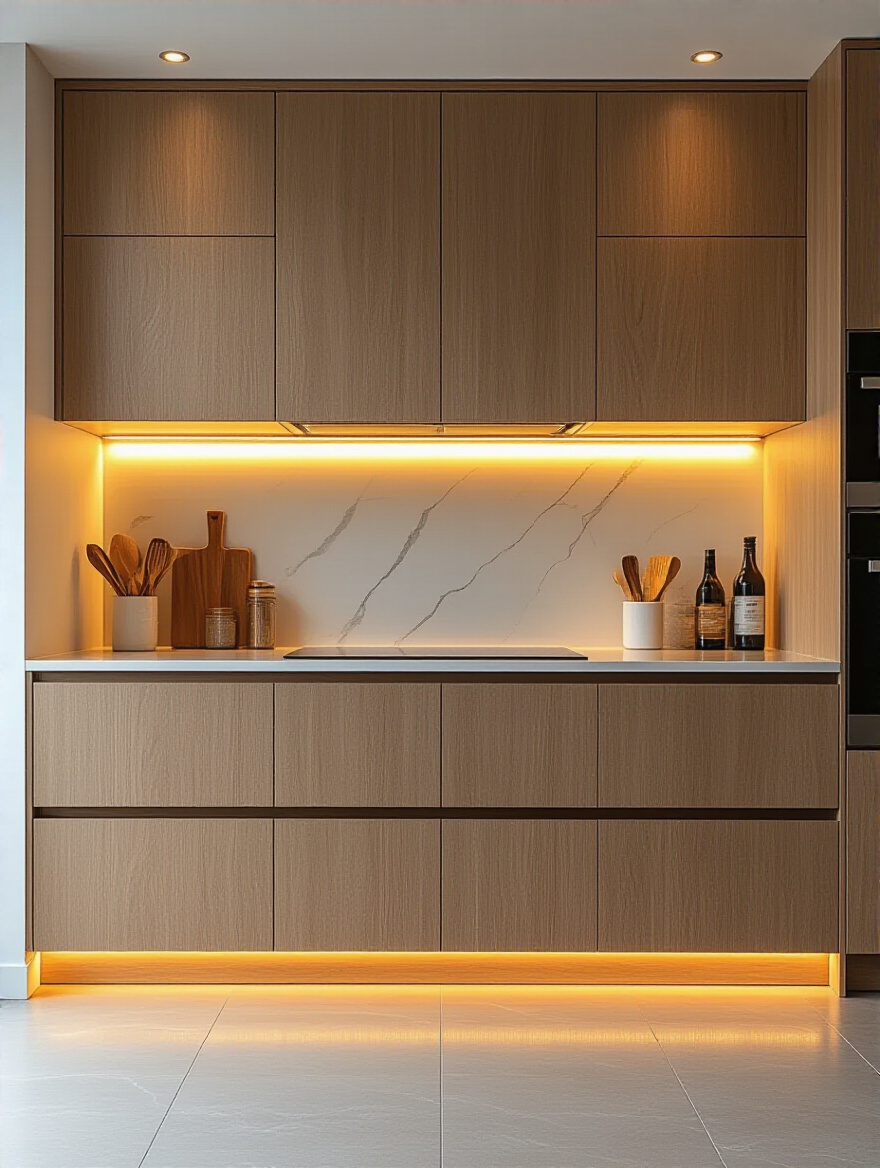
I had a client who was about to spend $40,000 on a full renovation because her kitchen felt “dark and dreary.” I convinced her to first spend just $800 to have an electrician install under-cabinet LED tape lights. She called me a week later and cancelled the renovation. The difference was that dramatic. For the best effect, install the LED strip towards the front of the cabinet, not the back. This way, it illuminates the entire counter evenly instead of just grazing the backsplash.
Great lighting isn’t just about the fixtures, but also about the light that’s already there.
18. Optimize Natural Light by Decluttering Windows and Using Sheers.
The best light is free light. Before you spend a dime on fixtures, maximize the natural light you already have. Step one is simple: get all the junk off your windowsills. That clutter is literally blocking light. Step two is to ditch any heavy, dark window treatments. A kitchen is not the place for blackout curtains.
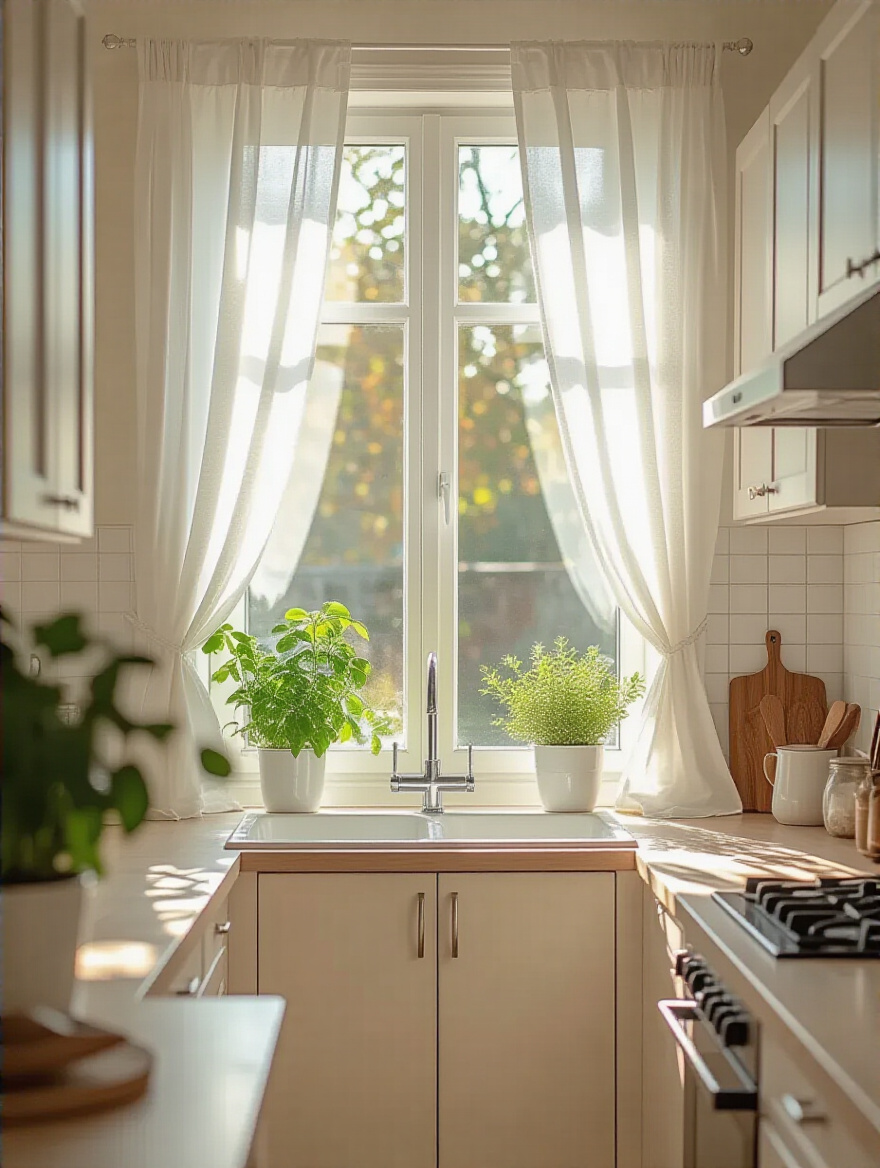
If you need privacy, opt for sheer curtains, a translucent roller shade, or top-down/bottom-up blinds. These options allow you to maintain privacy while still letting that beautiful, diffused daylight flood the space. And don’t forget to clean your windows! It sounds silly, but a dirty window can cut down on the amount of light entering a room by a surprising amount. Light-colored walls and reflective surfaces (like a glossy backsplash or stainless steel appliances) will then pick up that natural light and bounce it deeper into the room.
Finally, the ultimate secret to all good lighting…
19. Employ Dimmable Light Switches to Adjust Ambiance for Different Occasions.
A light switch that only turns on and off is a missed opportunity. Every single light in your kitchen should be on a dimmer. All of them. This is not a luxury; it’s a necessity for a functional, modern space. A dimmer switch gives you the power to change the entire mood of the room in an instant.
During meal prep, you can have your task lights at 100% for maximum visibility. When you sit down to eat, you can dim them down to 30% for a relaxed, restaurant-like vibe. At the end of the night, you can turn everything off except for the under-cabinet lights dimmed to a very low 10% for a warm, gentle glow that acts as a nightlight. This level of control is what makes a space truly versatile. Just make sure your bulbs and your dimmer switches are compatible (especially with LEDs) to avoid any annoying flickering or buzzing.
With the mood set, it’s time for the final details that pull everything together.
Finishing Touches: Personalization & Maintenance
You’ve built the foundation and layered in the magic. This final stage is about adding the little details that make the kitchen yours and, just as importantly, keeping it looking great for years to come.
20. Select Hardware and Fixtures That Complement Your Overall Design Scheme.
Hardware and fixtures are the finishing touches that can make or break a design. Think of your cabinet pulls, faucet, and light fixtures as a family of related, but not identical, objects. They don’t all have to be the exact same finish. In fact, mixing metals can add a lot of depth and sophistication, as long as it’s done intentionally. A good rule is to pick one dominant metal (say, matte black for all your cabinet hardware and pendants) and one accent metal (like a beautiful brass faucet).
Most importantly, these are the things you will touch and interact with every single day. Choose a faucet that feels solid and works smoothly. Choose cabinet pulls that are comfortable to grip. It’s a small detail, but it contributes to the overall feeling of quality and thoughtfulness in the design. It’s the tactile experience of living in the space.
Your functional tools can also be part of this curated aesthetic.
21. Display Curated Cookware and Appliances for Both Utility and Visual Appeal.
Stop hiding all your beautiful tools! A high-quality copper pot, a sleek stand mixer, or a collection of wooden spoons in a ceramic crock can be part of the decor. The key is curation. This doesn’t mean leaving everything out on the counter. It means strategically choosing a few items that are both beautiful and frequently used, and giving them a place of honor.
A wall-mounted pot rack above an island or a magnetic knife strip can look incredibly chic and professional while also being highly functional. This approach says, “A person who loves to cook lives here.” It adds character and warmth, blurring the line between a sterile workspace and an inviting living area. It makes the kitchen feel more like a chef’s workshop and less like a laboratory.
As we bring more useful tools into our kitchens, it’s important they integrate seamlessly.
22. Integrate Tech-Savvy Gadgets Without Sacrificing Aesthetic Appeal.
The best technology is invisible. A truly smart kitchen isn’t one with screens and blinking lights everywhere. It’s one where technology is seamlessly integrated to make your life easier without cluttering up the aesthetic. Think about panel-ready appliances that disappear behind custom cabinetry, or a microwave drawer tucked away in an island.
My favorite tech integration is the planned charging station. Design a dedicated “tech drawer” with built-in outlets and USB ports where everyone can charge their phones and tablets out of sight. No more mess of cords on the counter. Another great one is pop-up outlets that sit flush with the countertop until you need them. It’s all about planning for the technology you use so it serves you without becoming a visual distraction.
Next, think about how to make your kitchen welcoming for others.
23. Create a Small, Functional Coffee or Drink Station for Guests.
A dedicated beverage station is one of the most thoughtful things you can do for your guests, and for yourself. It moves the entire drink-making operation out of your primary work triangle. When you’re hosting, guests can help themselves to coffee, tea, or a glass of wine without getting in your way while you’re trying to cook.
It doesn’t have to be huge. A small section of countertop with your coffee maker, an electric kettle, and a tray with mugs, sugar, and spoons is all you need. Place it somewhere accessible but out of the main traffic flow. It signals to your guests that they should make themselves at home, and it makes entertaining feel much less frantic and more enjoyable for everyone.
Finally, the most important tip of all, and the one most people neglect over time.
24. Maintain Kitchen Cleanliness and Organization to Preserve Decoration Appeal.
You can have the most beautifully designed kitchen in the world, but if it’s covered in clutter and grime, it will never look good. The most important design principle is to keep it clean. All the hard work you put into selecting finishes, layering light, and curating decor is wasted if it’s hidden under a pile of mail and dirty dishes.
Implement a “10-minute nightly reset.” Before you go to bed, wipe down the counters, load the dishwasher, and put everything back in its designated home. It’s a small habit that makes a world of difference. An organized, clean kitchen allows your design choices to shine. It honors the investment you made and ensures that the space continues to be a source of joy, not stress, for years to come.
Conclusion
So, there you have it. Building a dream kitchen isn’t about following a rigid formula or buying the most expensive things. It’s about being intentional. It’s about understanding that every choice—from the finish on your cabinets to the type of light bulb in your pendant—contributes to a final feeling. Your kitchen is the backdrop to your daily life. It’s where you start your day with coffee, where you create meals for people you love, and where some of the best conversations happen.
By layering function, style, personality, and—most importantly—light, you’re not just creating a beautiful room. You’re crafting an experience. You’re building a space that supports you, inspires you, and feels incredible to be in. Don’t be afraid to make bold choices, and trust your gut. Your perfect kitchen is waiting for you.


