Here’s something I’ve learned after years of designing architectural lighting: the most successful designers spend only about 20% of their time choosing fixtures. The other 80%? We’re focused on a hidden framework that most people miss entirely. It’s not about finding the prettiest chandelier. It’s about building a system of light that shapes the entire experience of a room.
Too often, homeowners think great lighting is about one statement piece. This is the single biggest misconception I encounter. It leads to rooms that are flat, glaring, or just… off. A truly exceptional space is sculpted with layers of light, each with a specific job. As a lighting designer, my work combines the precision of engineering with the understanding that light is the magic that brings a room to life.
This guide will walk you through the 20 strategic steps I use, progressing from the essentials to the techniques the pros rely on. We’ll move beyond just picking fixtures and learn to think about light systematically. Forget just illuminating a room; we’re going to learn how to create moments.
Essential Dining Room Lighting Fundamentals (Part 1)
Before we talk about artistry, we have to master the physics. These are the non-negotiable rules that form the foundation of any great lighting plan. Getting these technical details right ensures your lighting is comfortable, functional, and visually balanced.
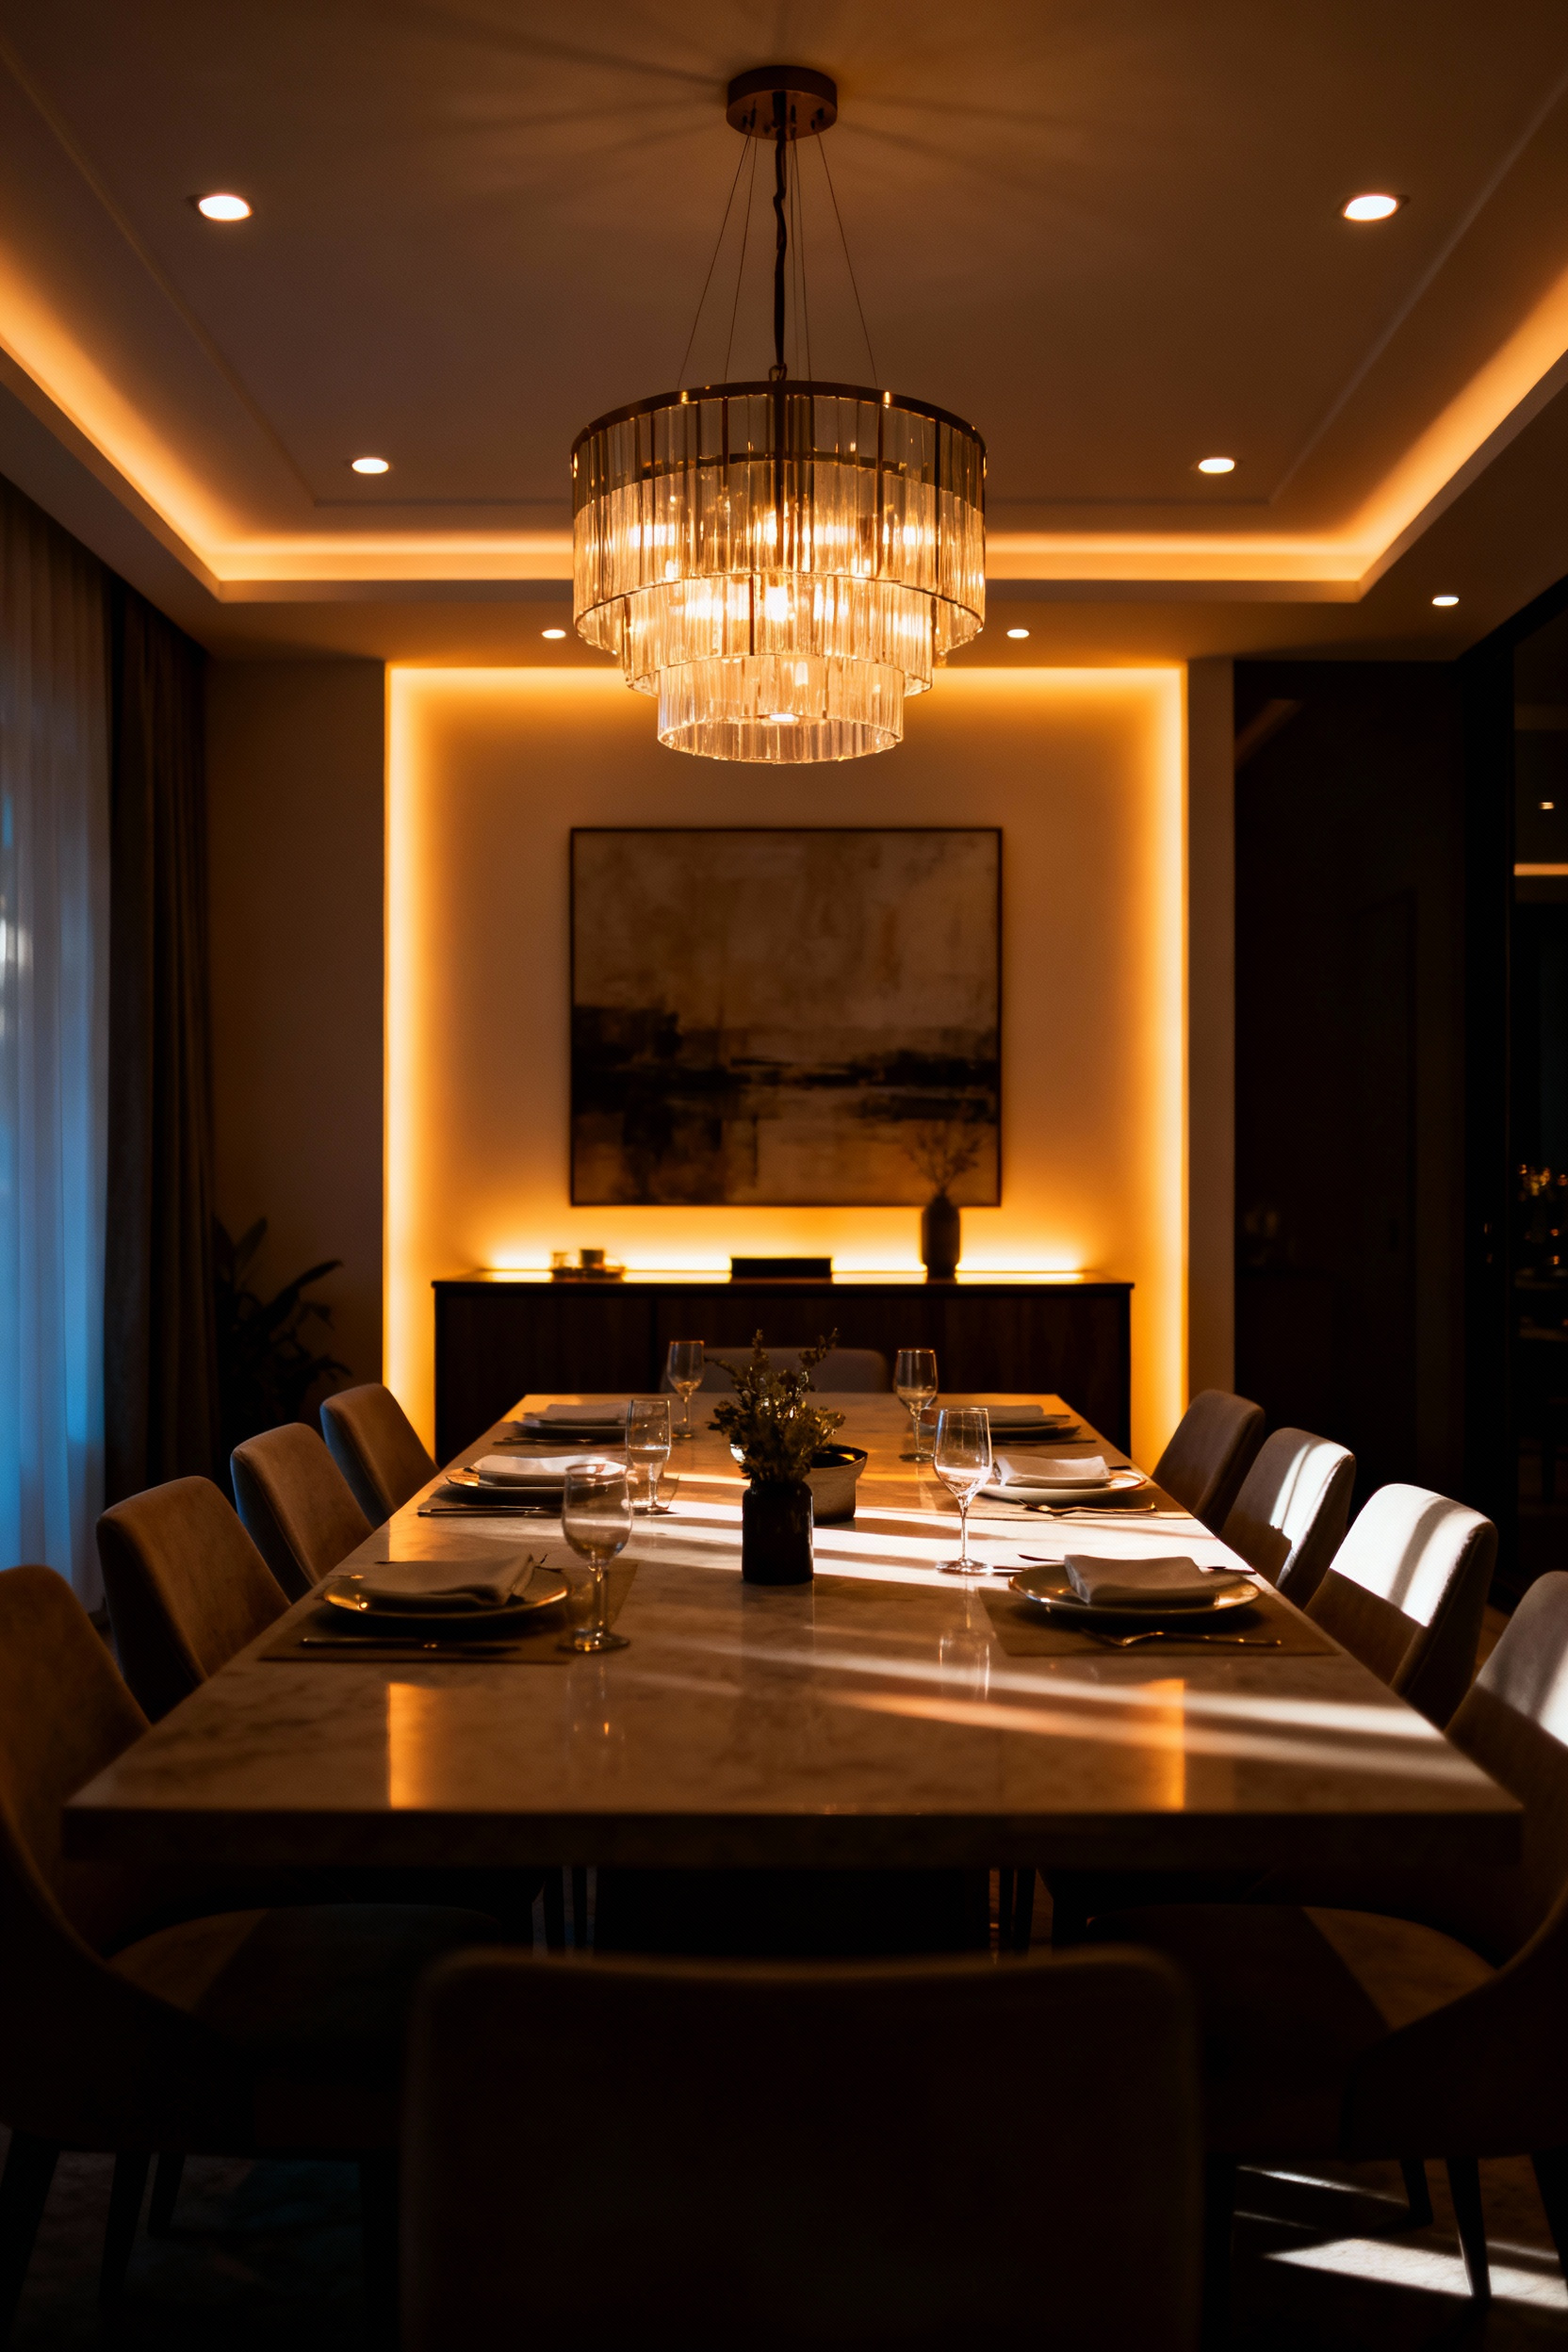
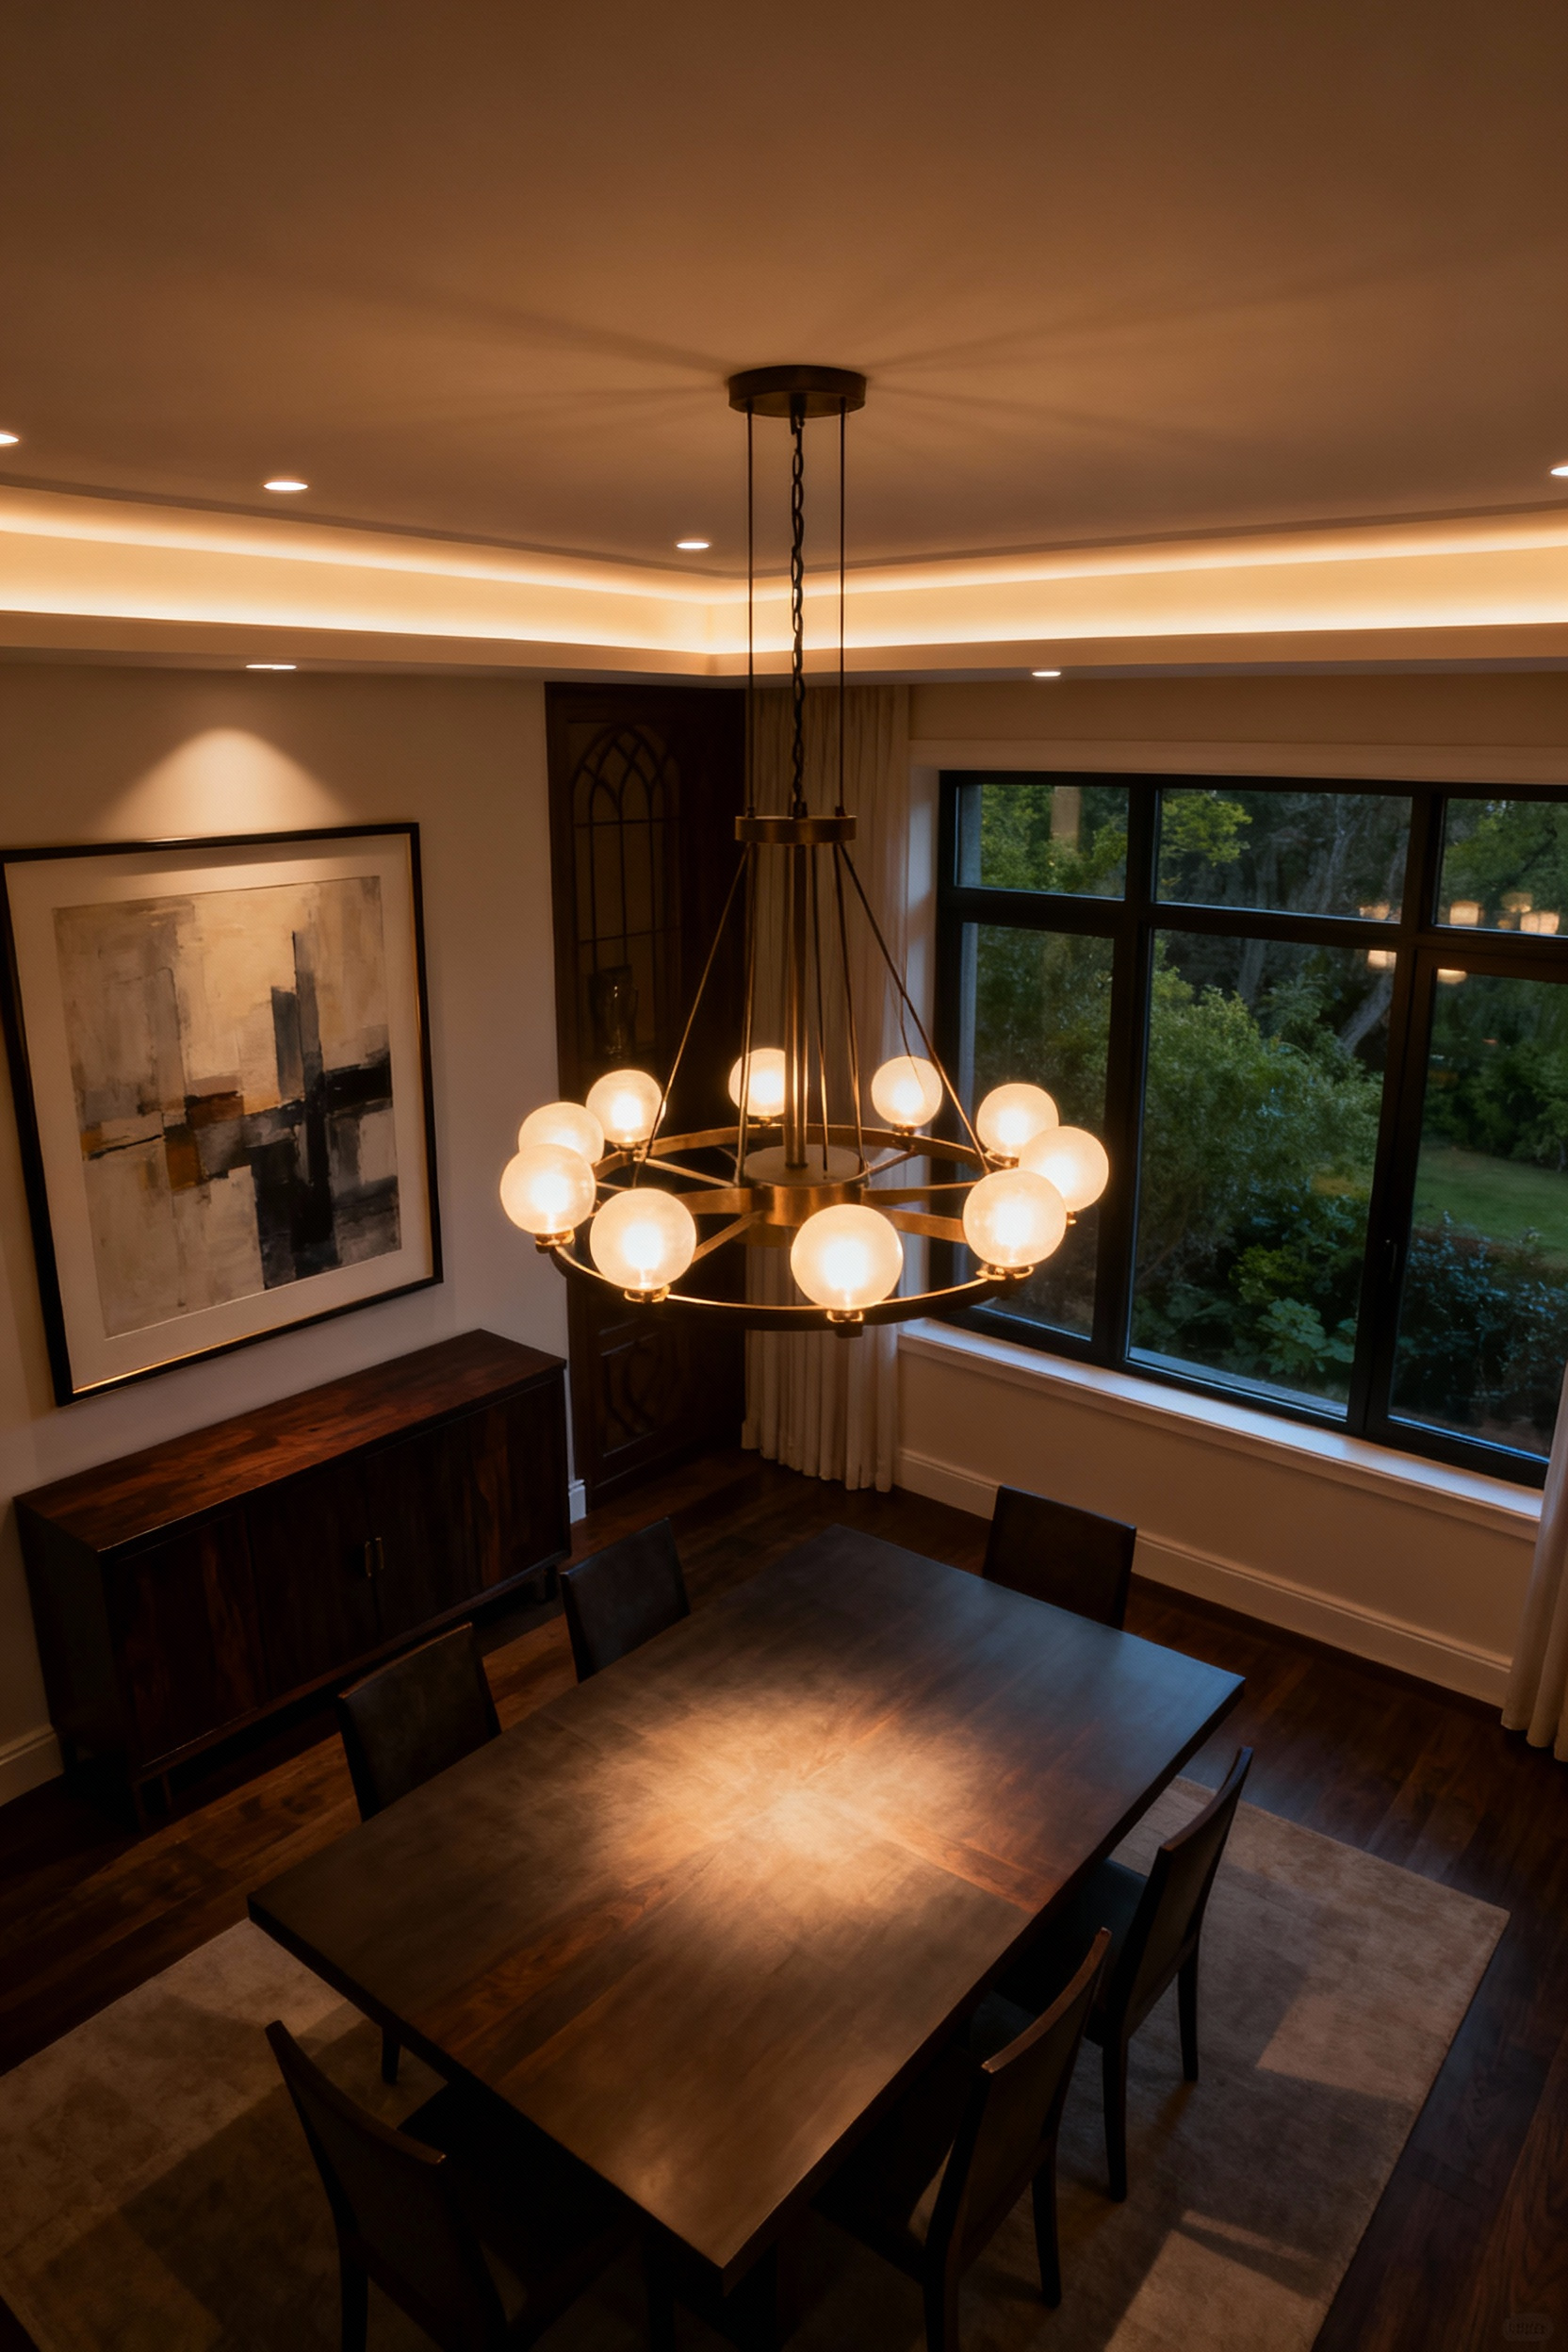
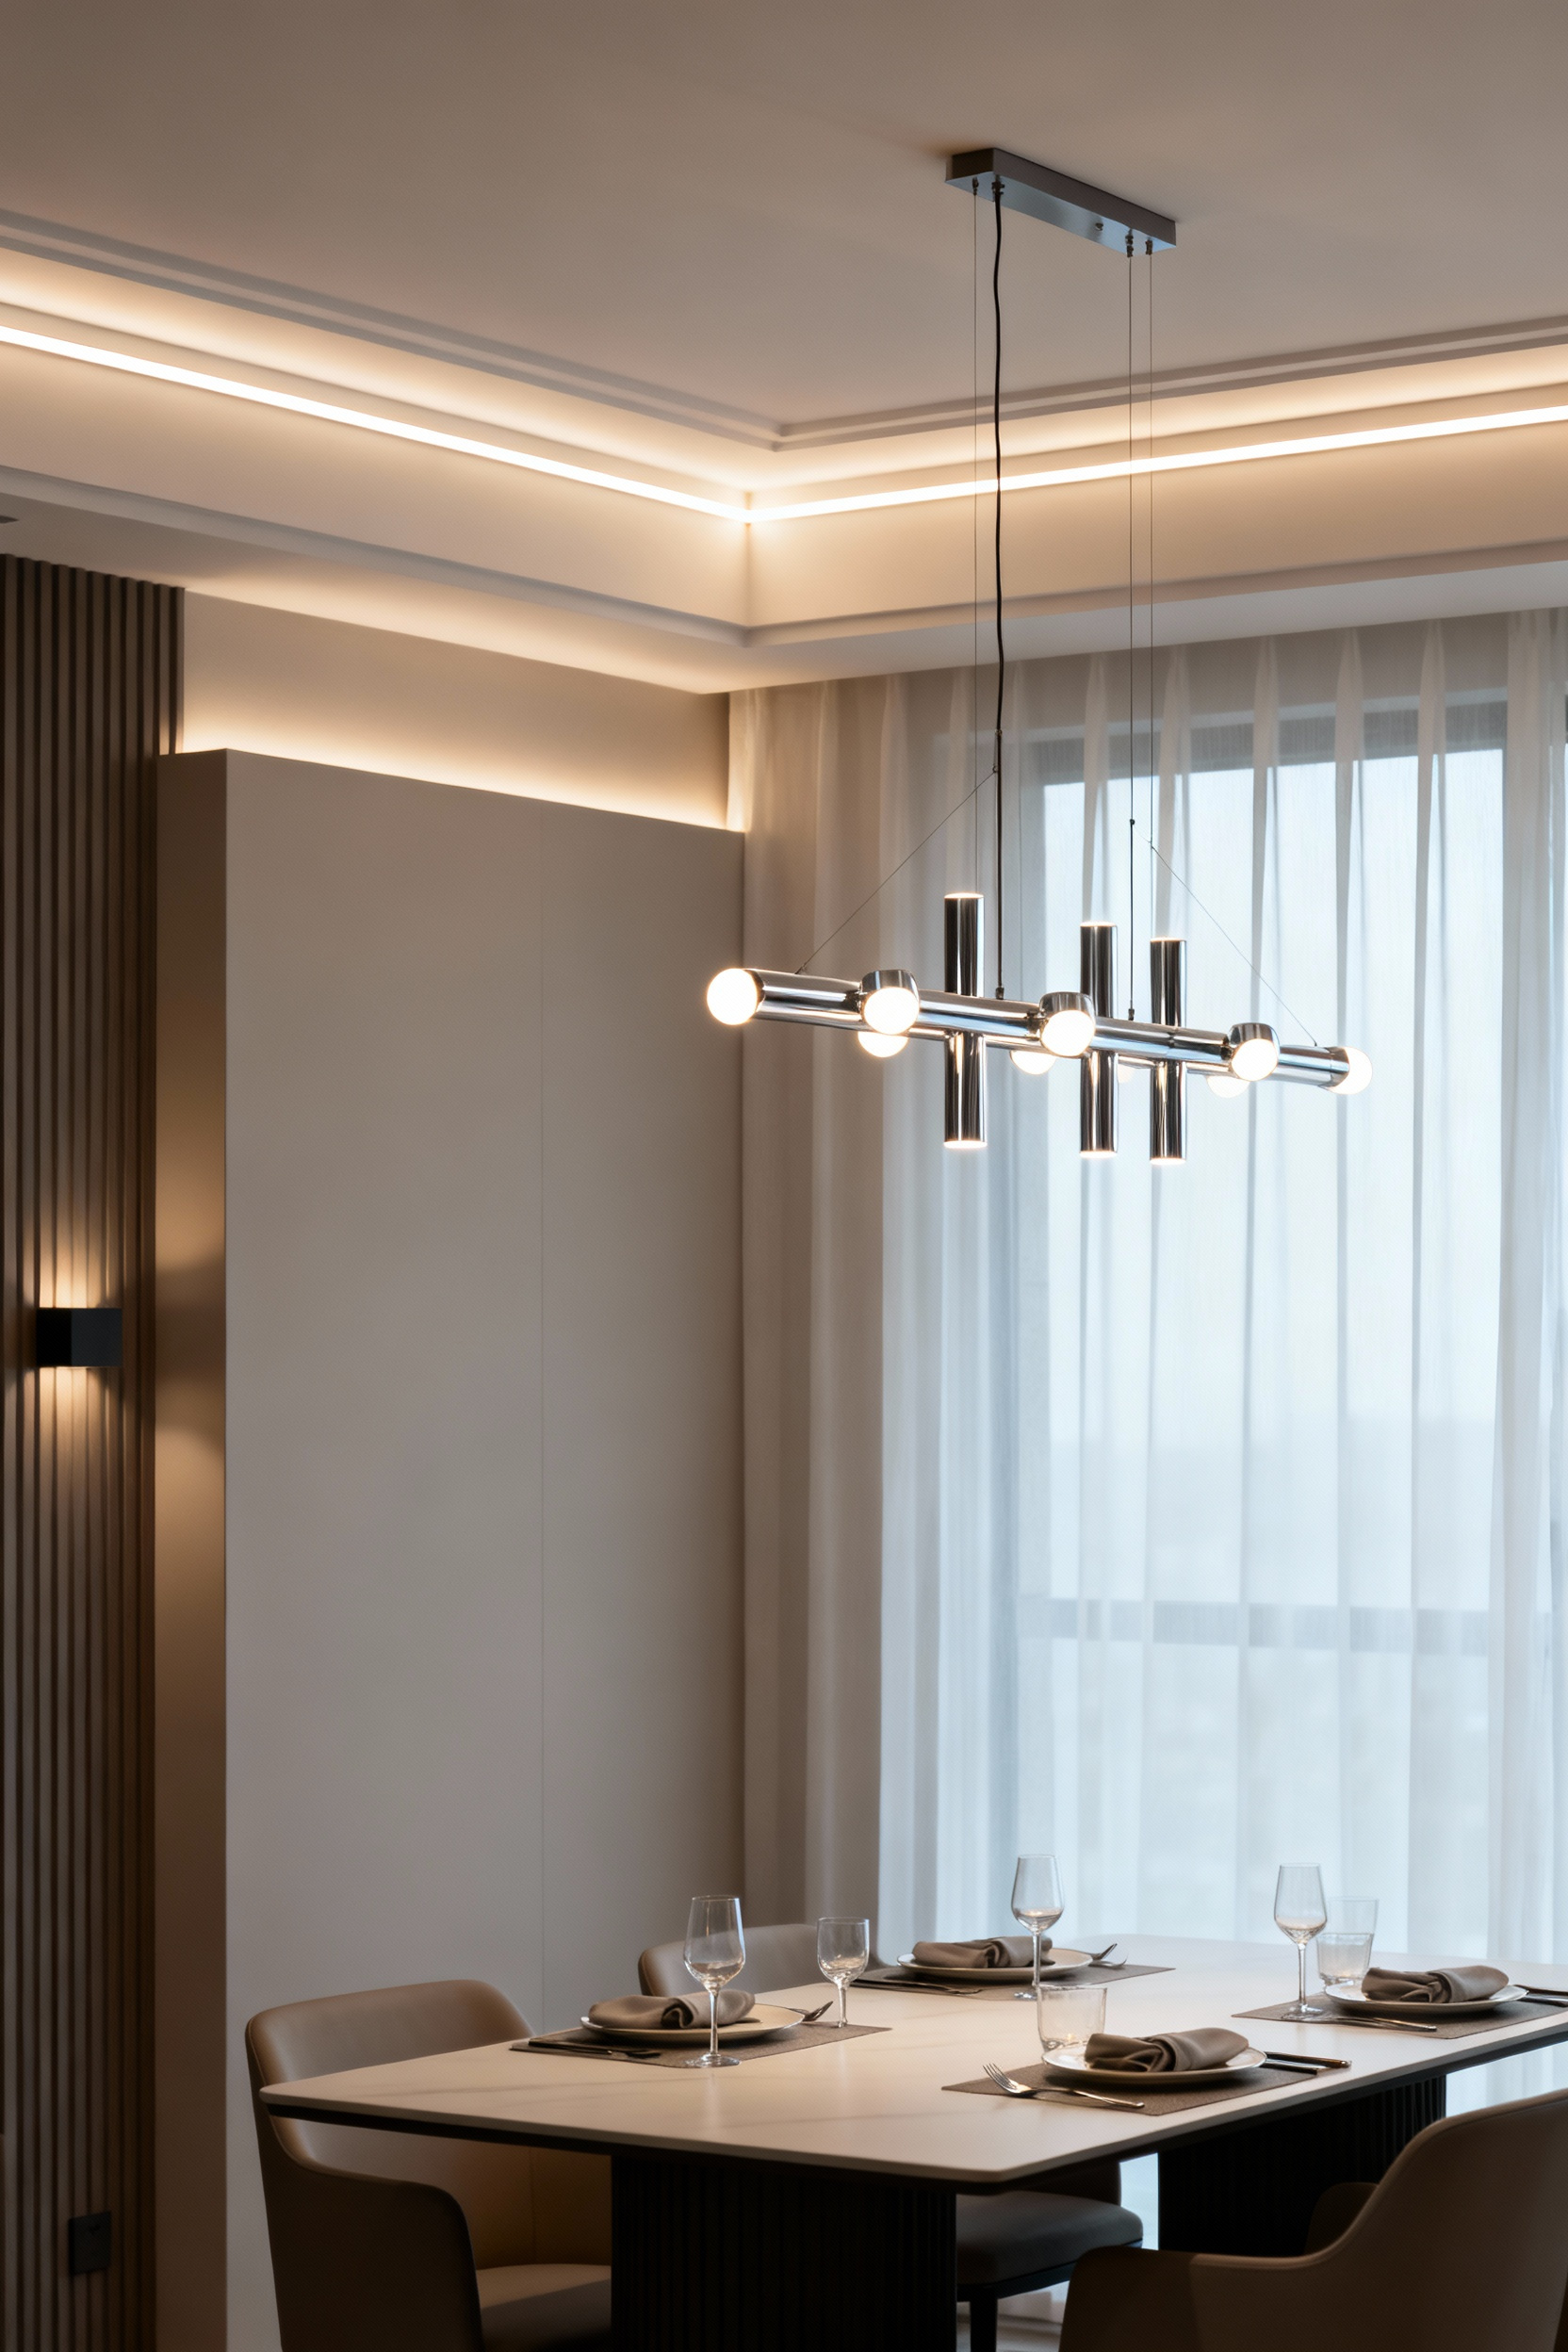
1. Sizing Your Chandelier: Getting the Diameter and Height Exactly Right
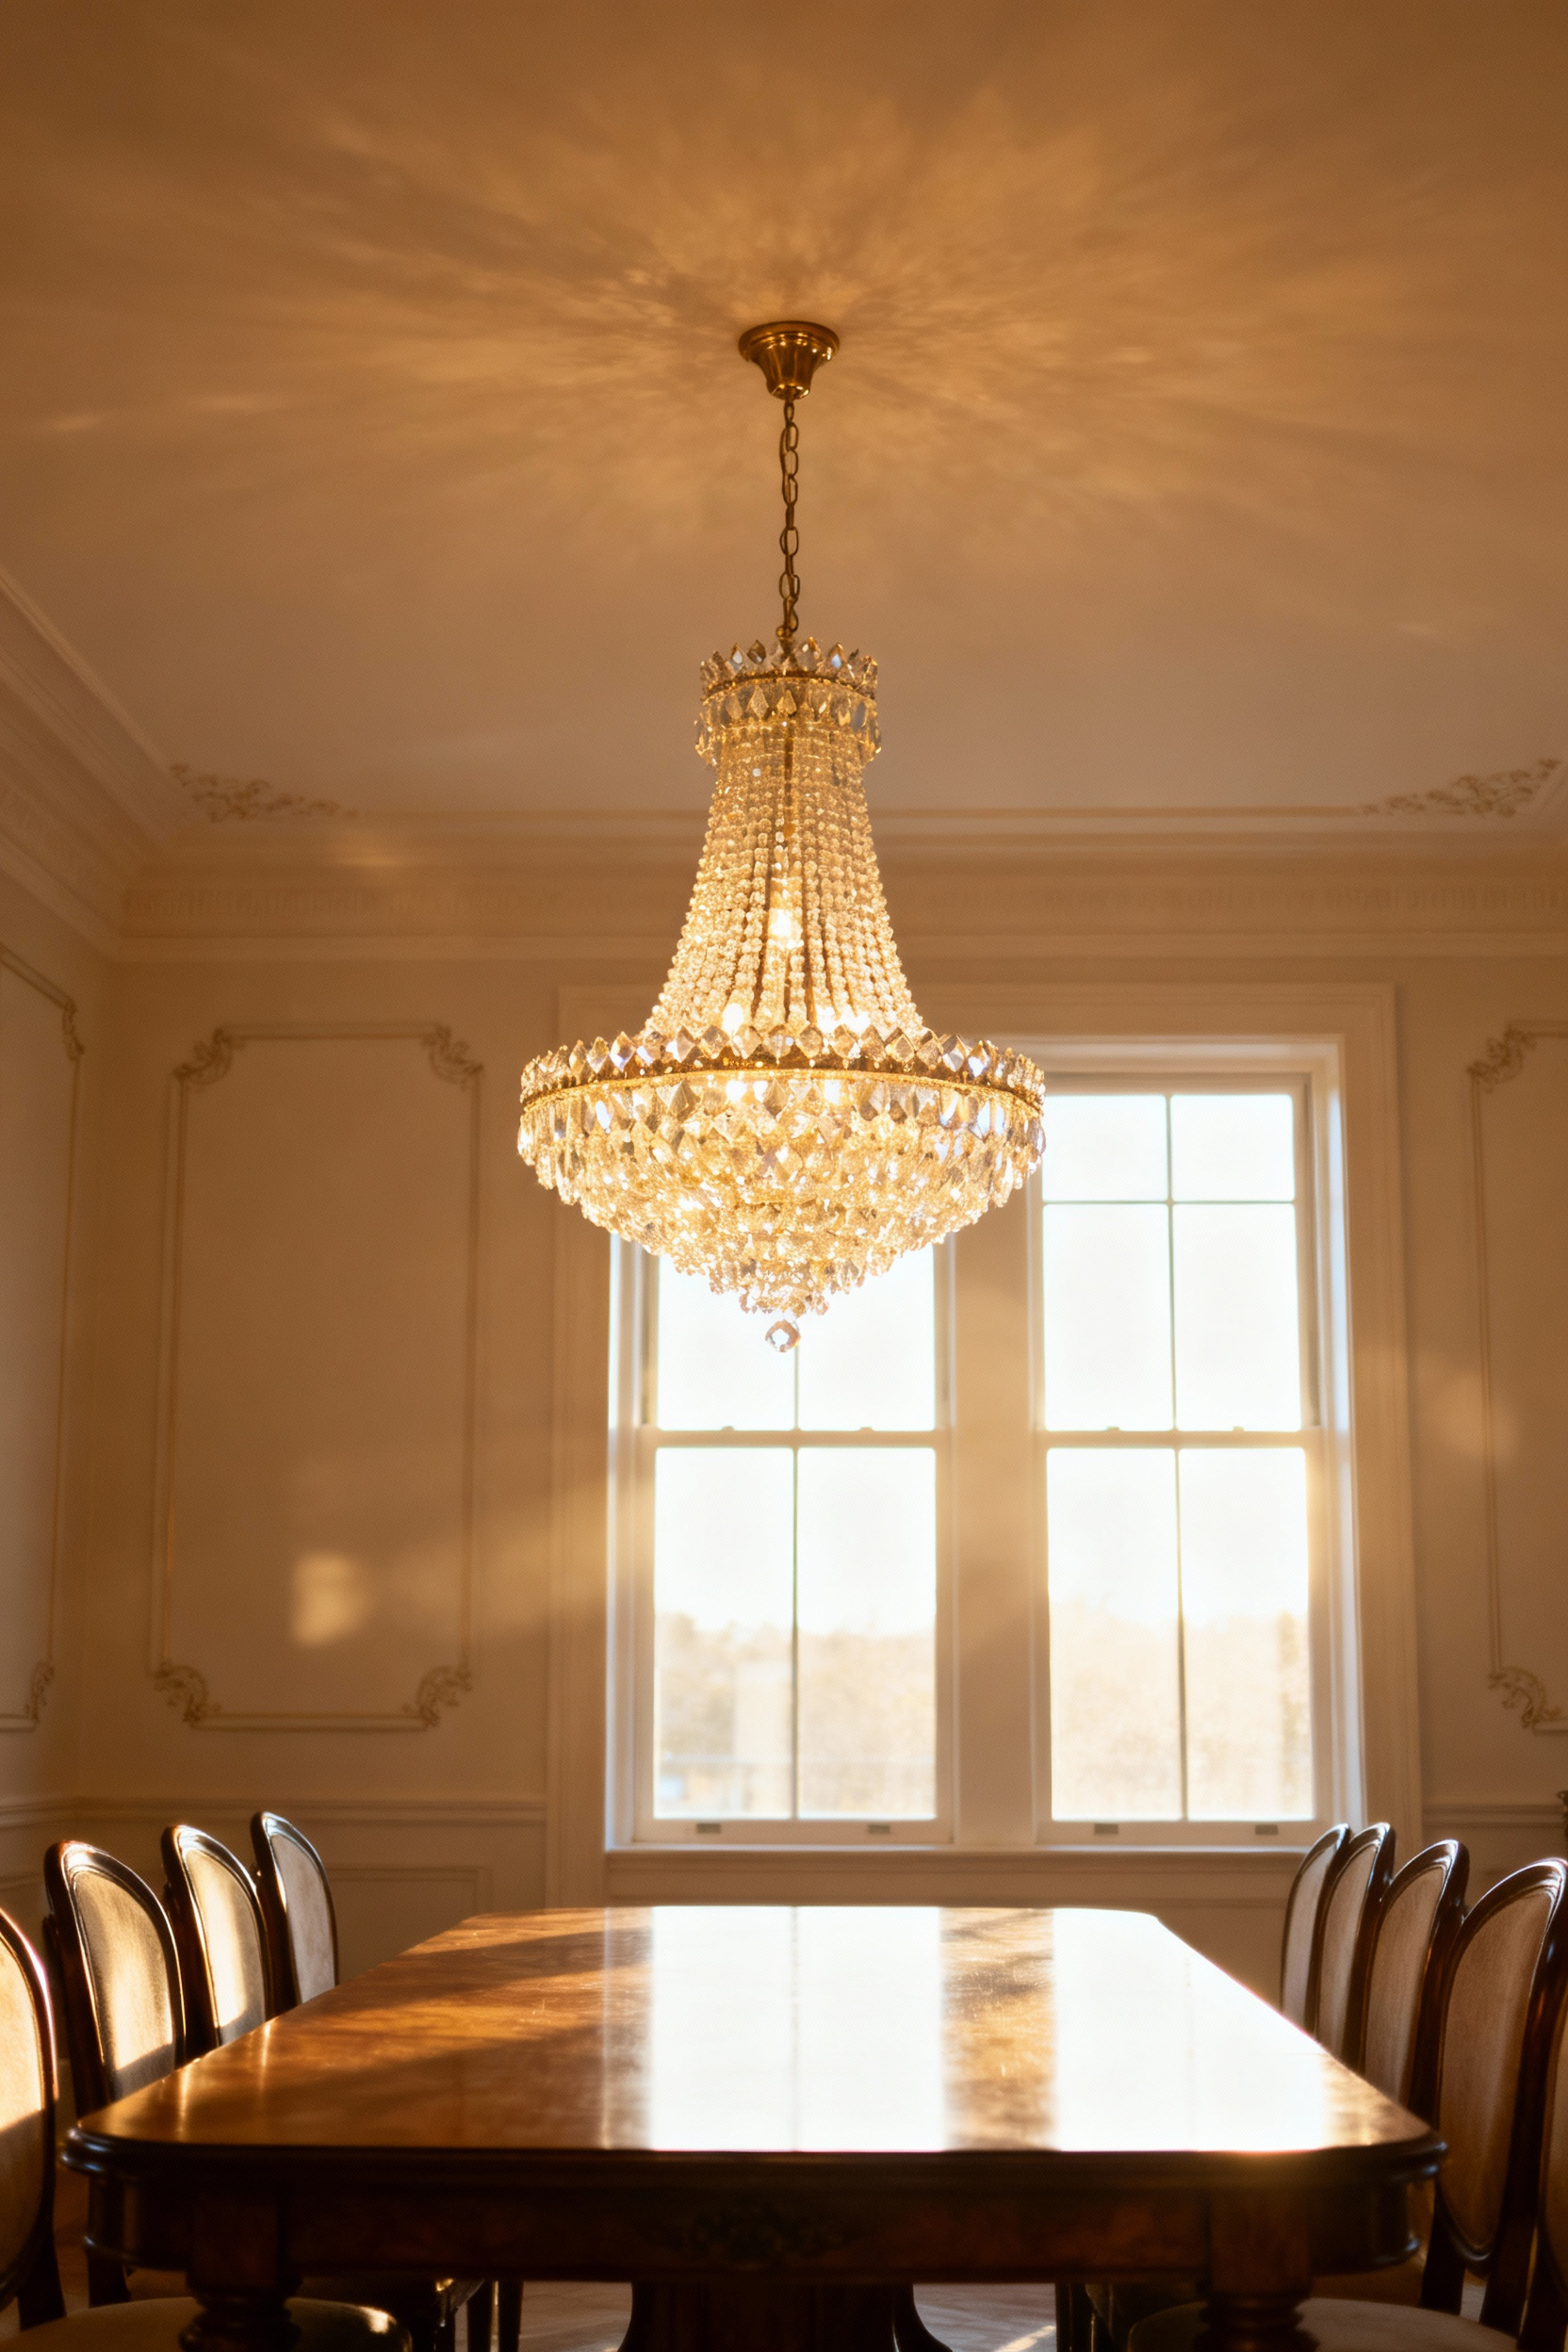
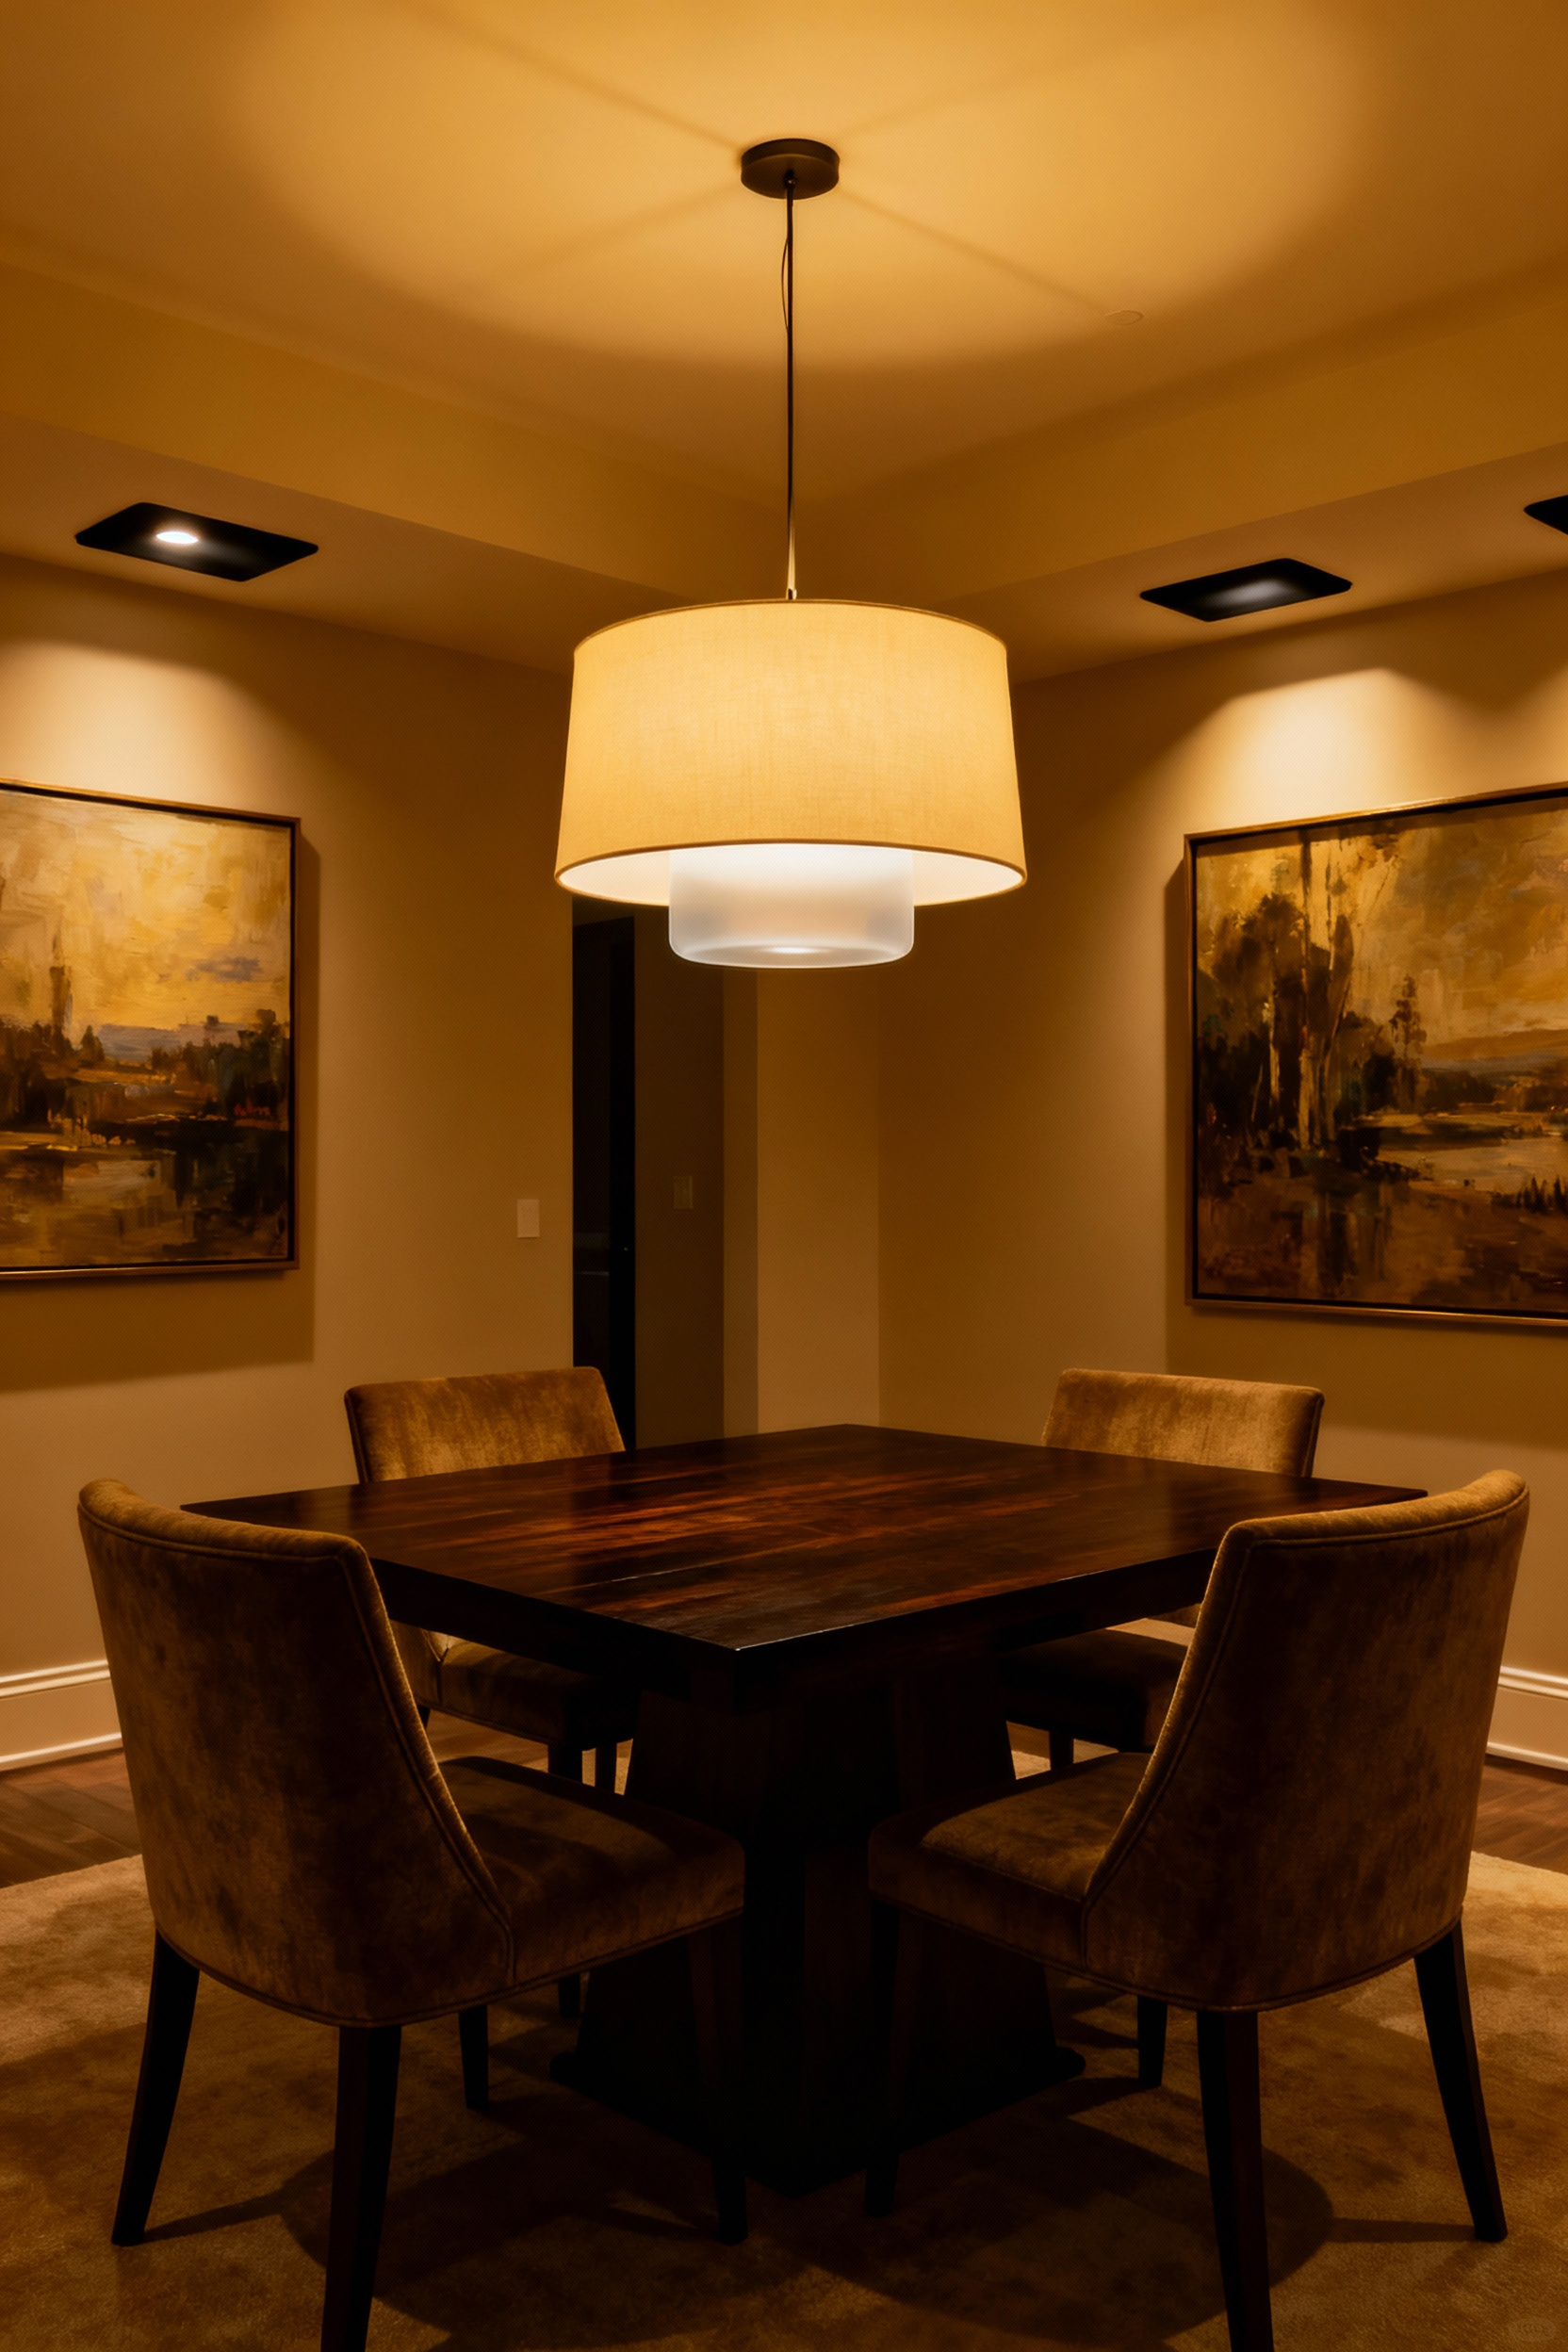
The centerpiece fixture is the anchor of your room, and its scale is everything. For diameter, the classic rule is solid: take the room’s length and width in feet, add them together, and that sum in inches is your target diameter. So, a 12′ x 14′ room suggests a 26″ chandelier. But here’s the thing: visual weight often matters more than strict measurements. A delicate, airy wire-frame fixture can be larger than the rule suggests, while a heavy, dark iron fixture might need to be smaller to avoid overpowering the space.
The height is even more critical. The bottom of the fixture should hang 30 to 36 inches above your tabletop. This is the sweet spot that illuminates the table without blinding your guests or blocking sightlines across the table. For ceilings over 9 feet, you can inch toward the 36-inch mark or even slightly higher, but be careful. In my lighting design practice, I always create a quick mock-up—even just a cardboard cutout on a string—to see how the fixture truly occupies the space before the electrician arrives. It’s a simple step that has saved countless projects from costly mistakes.
2. Lighting the Whole Table: Strategies for Long, Rectangular Tables
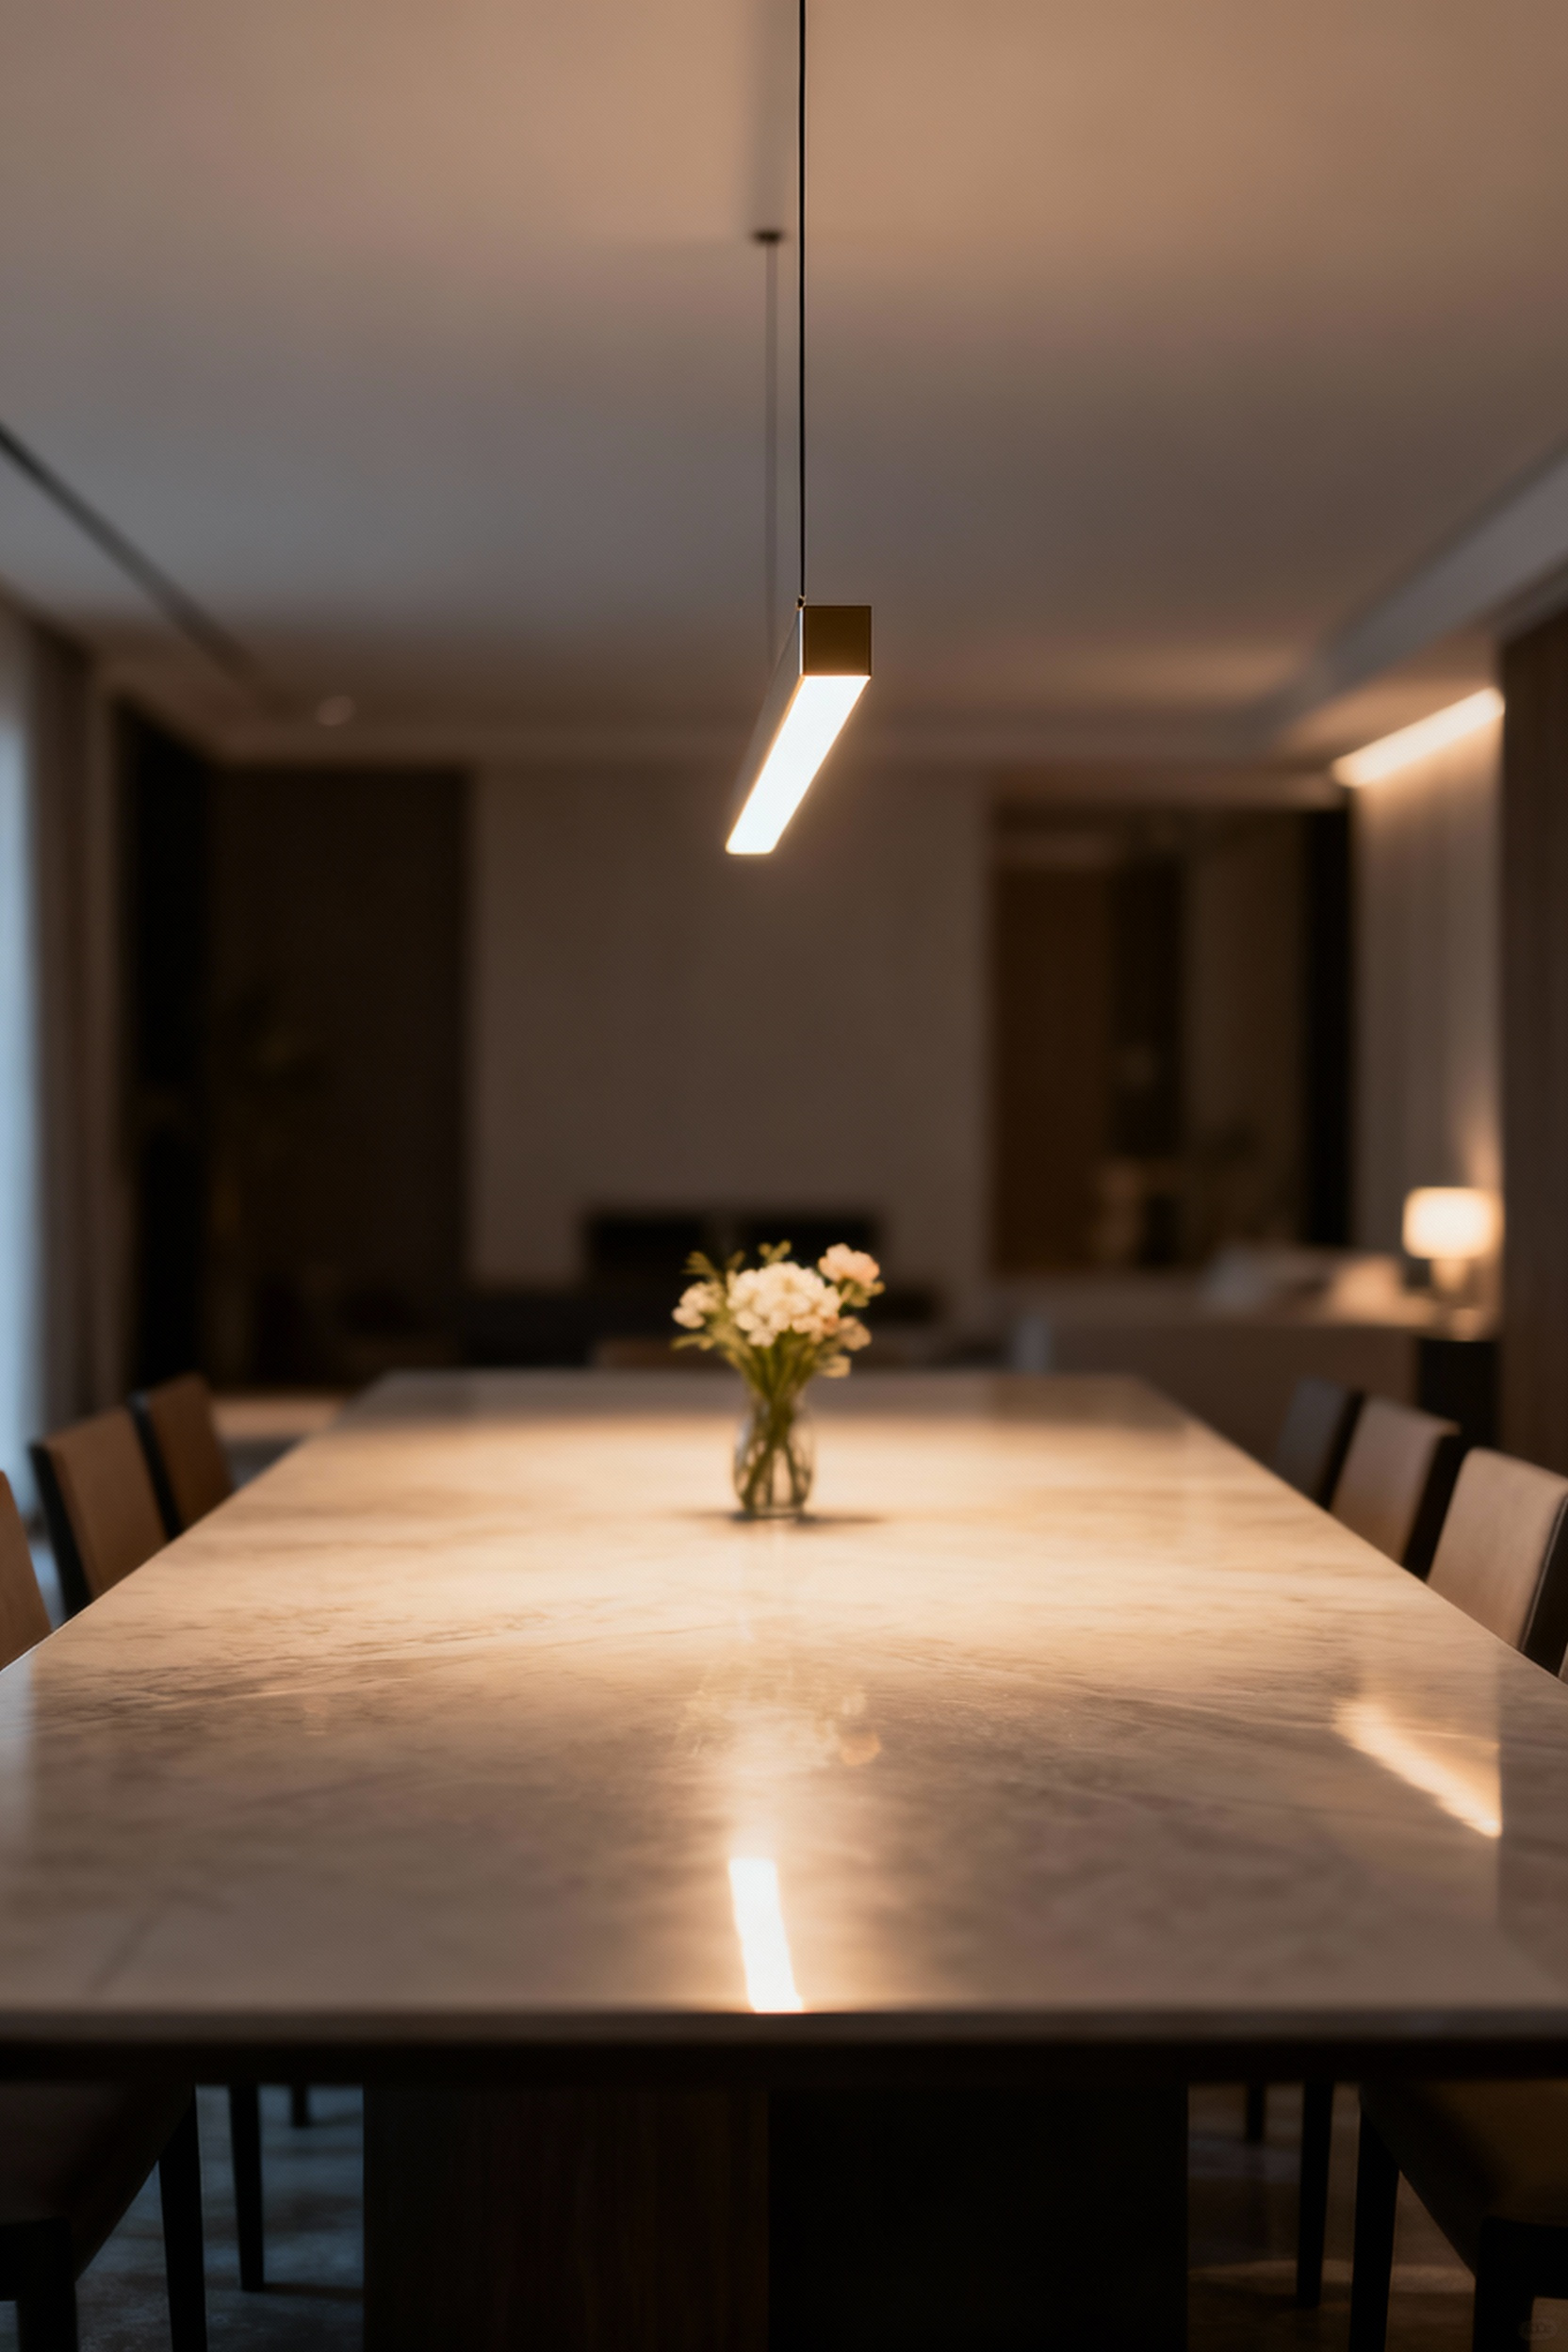
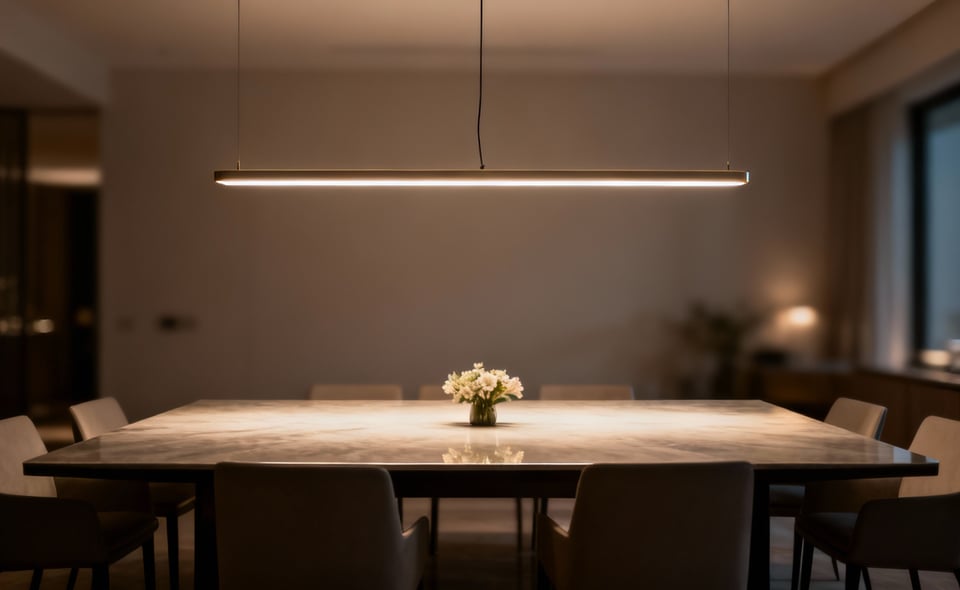
A single chandelier centered over a long rectangular table almost always fails. It creates a bright “hot spot” in the middle while the ends are left in a dim haze. For any table longer than about 72 inches, you need to think linearly. The simplest solution is a linear suspension fixture that spans a majority of the table’s length.
A more dynamic approach is using multiple pendants. Two or three smaller fixtures in a row provide beautiful, even light. The key is spacing. A trick I use is to divide the table’s length by the number of pendants plus one. For two pendants over an 8-foot (96-inch) table, you’d divide by three, placing them at the 32-inch and 64-inch marks. This ensures balanced illumination and visual rhythm. What I tell my homeowners is to treat multiple pendants as a single cohesive sculpture, not just separate lights. They need to relate to each other in height and spacing to feel intentional.
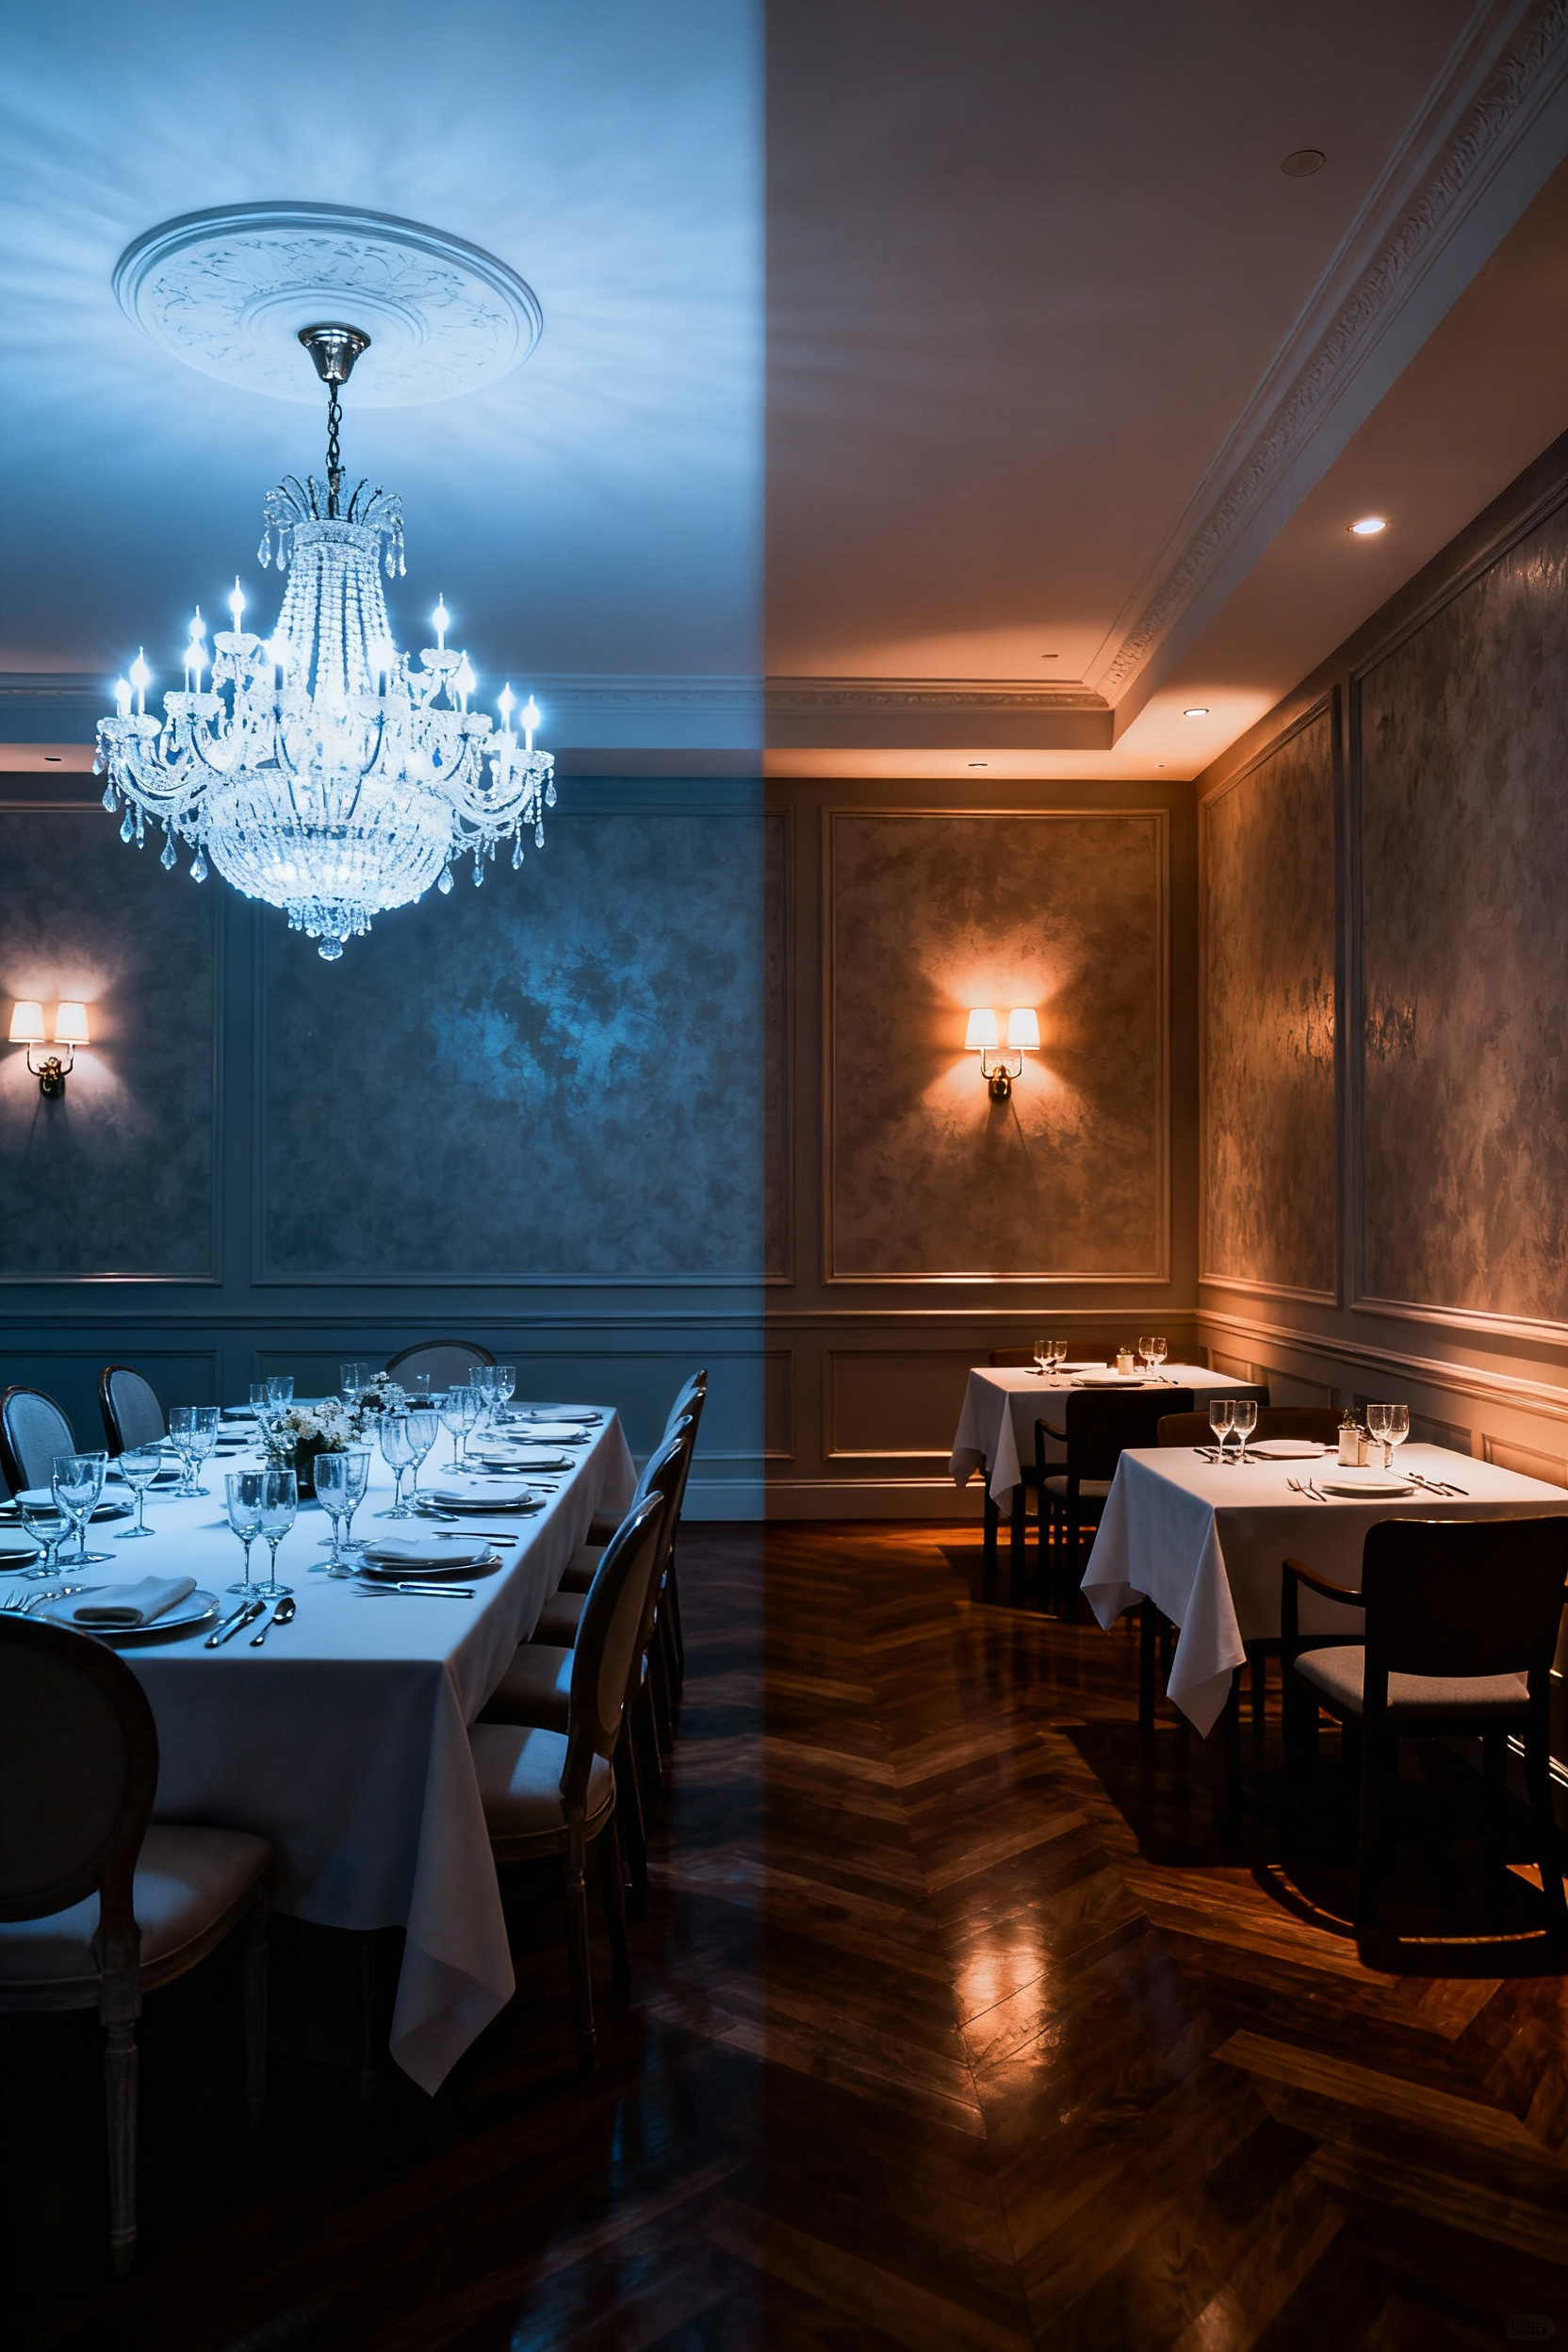
3. Setting the Mood with Color Temperature (Kelvin)
Color temperature is the single most powerful tool for controlling a room’s atmosphere, and it’s measured in Kelvin (K). Think of it as the color of the light itself, from the warm, amber glow of a candle (around 1800K) to the crisp blue of midday sun (5000K+). For a dining room, where you want intimacy and warmth, the target is 2700K. Period. This temperature has a soft, golden quality that’s incredibly flattering to skin tones and makes food look rich and delicious.
Going cooler, even to 3000K, starts to feel more commercial and less residential. And anything 4000K or above is a disaster for a dining space—it feels clinical and sterile. What really gets me is when I see beautiful, expensive dining room lights fitted with harsh, cool-toned bulbs. It completely undermines the entire design. Invest in high-quality 2700K LED bulbs and ensure every single light source in that room—from the chandelier to the lamps—is the same color temperature for a cohesive, enveloping glow.
4. The Power of Control: Why Dimmers Are Non-Negotiable
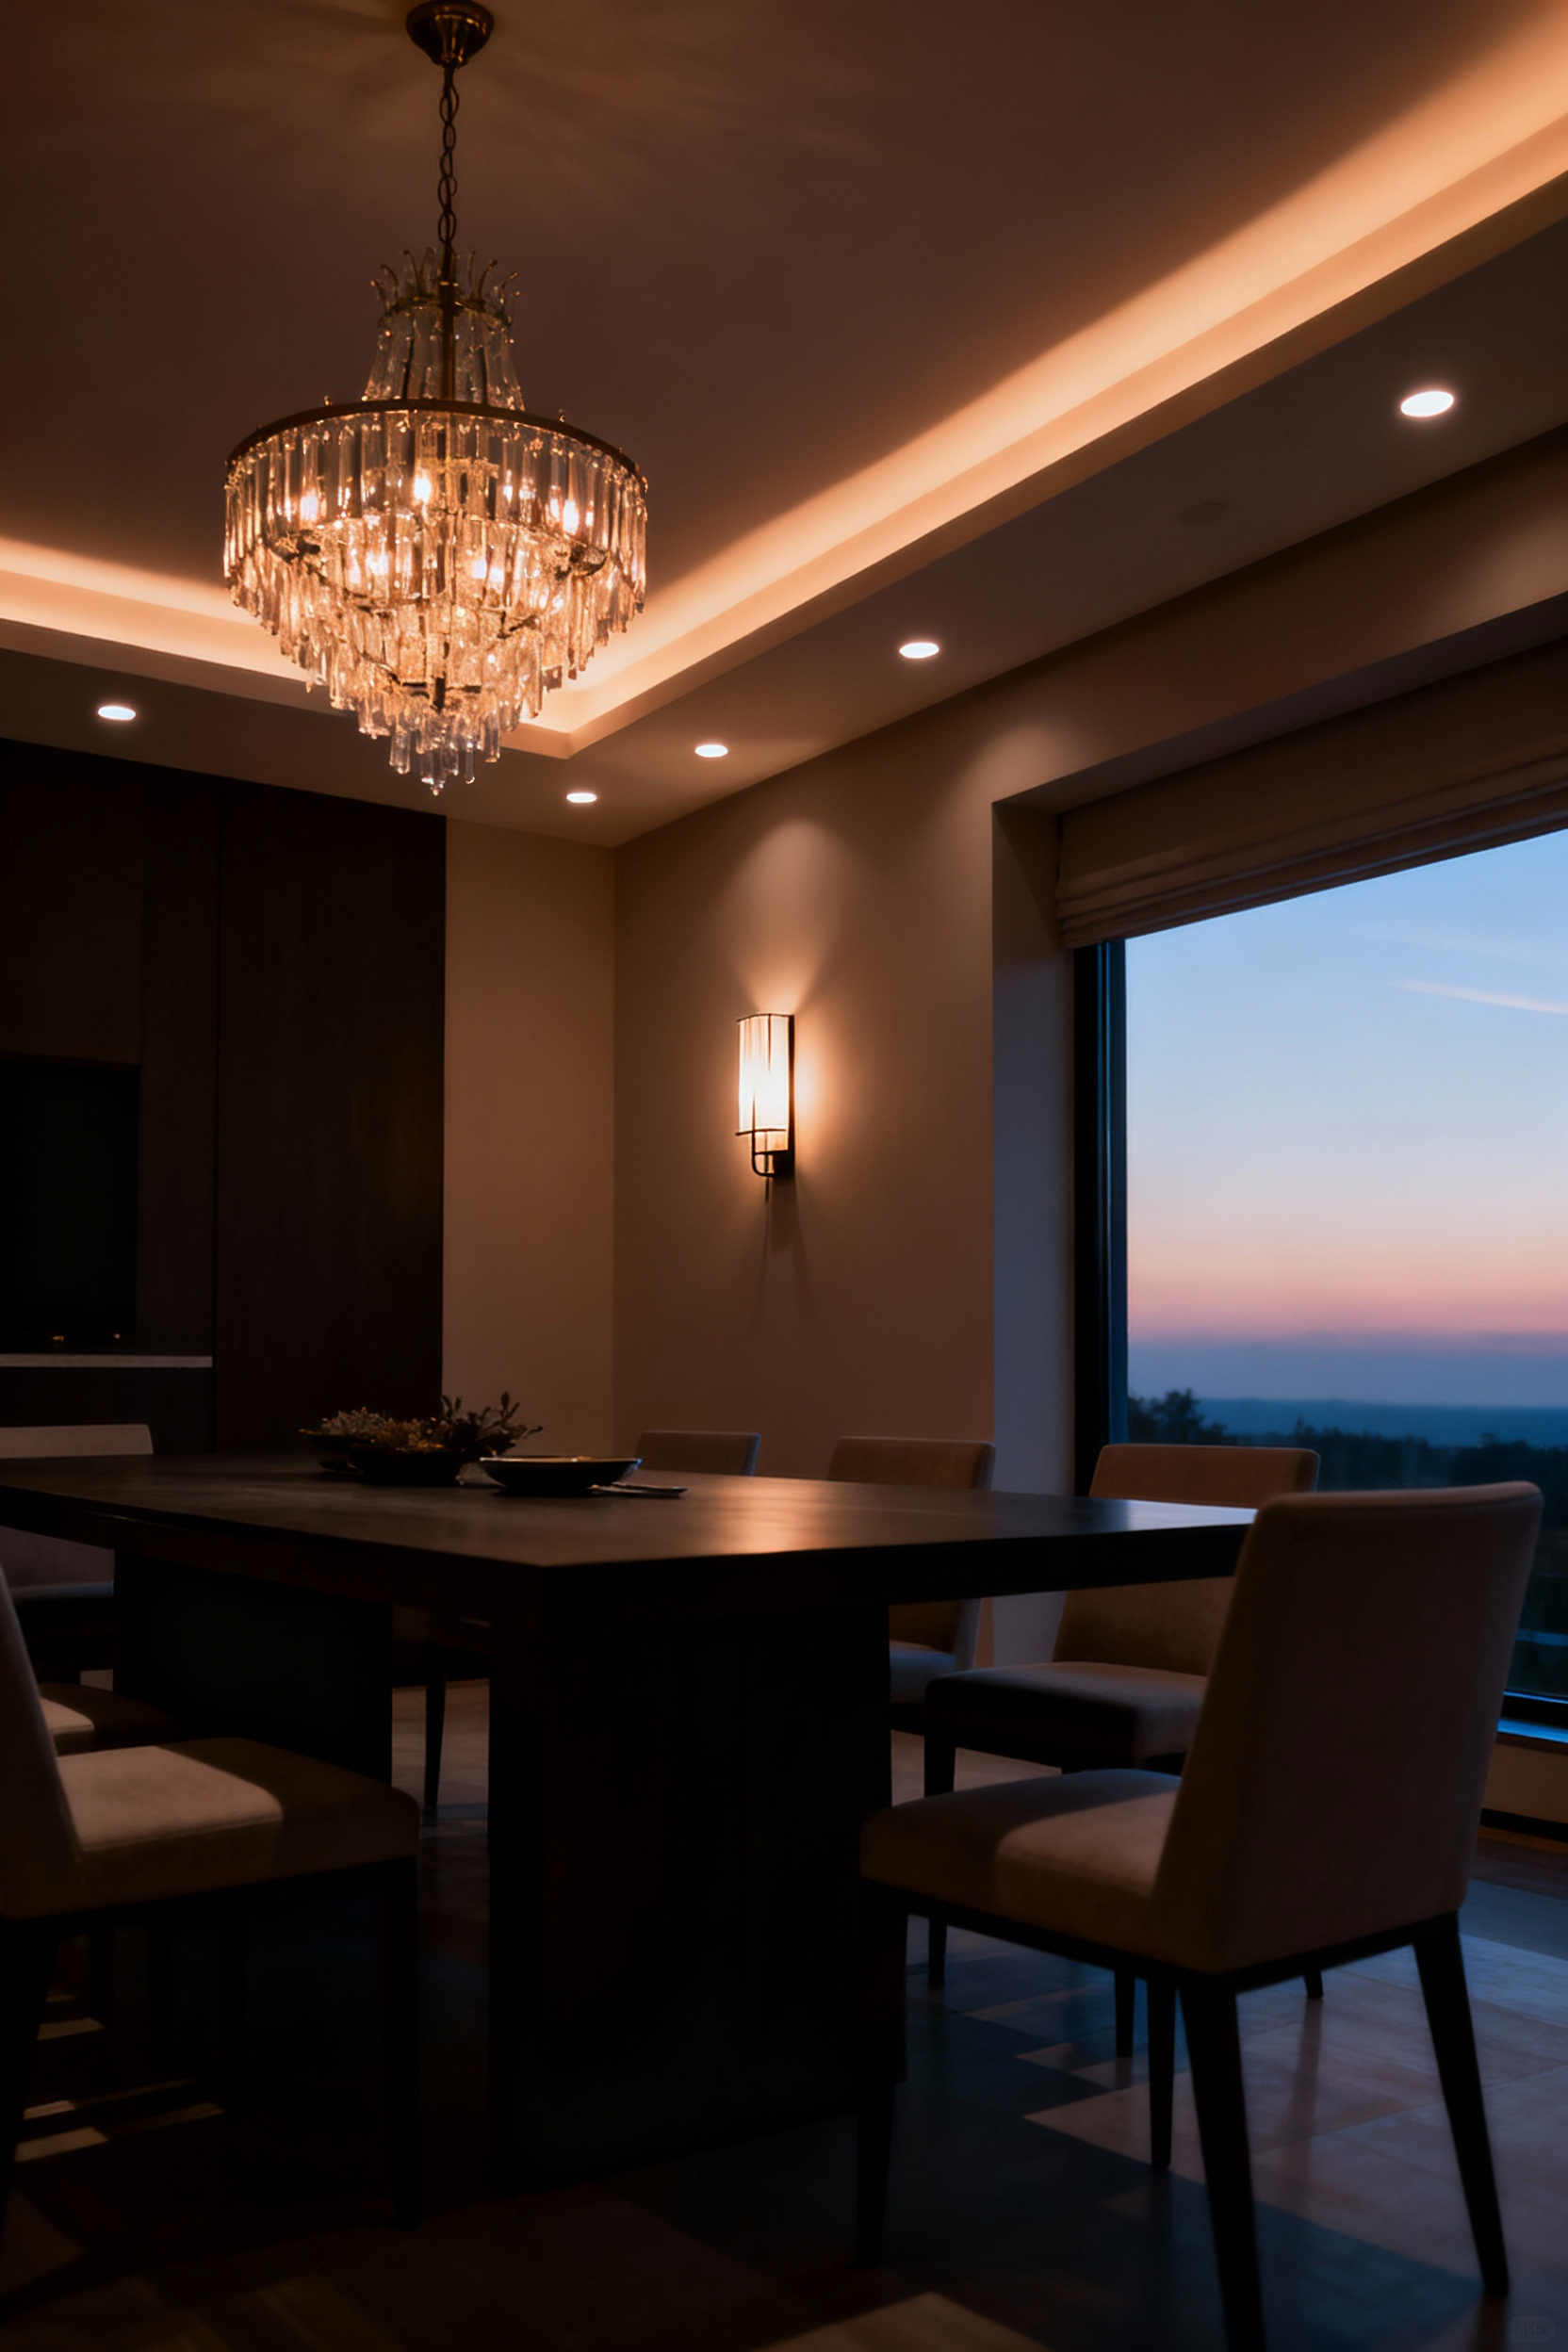
If you take only one piece of advice from this guide, let it be this: put every single light in your dining room on a dimmer. A dining room without dimmers is a room with only one mood. Full brightness is great for cleaning or homework, but for dinner? You need the ability to dial it back to create intimacy.
But here’s the critical detail: not all dimmers work with LED bulbs. I learned this the hard way years ago. Using an old incandescent dimmer with a modern LED will cause flickering, buzzing, or an abrupt on/off switch instead of a smooth fade. You must use a dimmer rated for LEDs, like an ELV (Electronic Low Voltage) model. And for a truly professional setup, put different layers of light on separate dimmers. The chandelier, the wall sconces, the art lights—controlling each one independently gives you the power to completely transform the room’s character on a whim. It’s the difference between having light and choreographing it.
Essential Dining Room Lighting Fundamentals (Part 2)
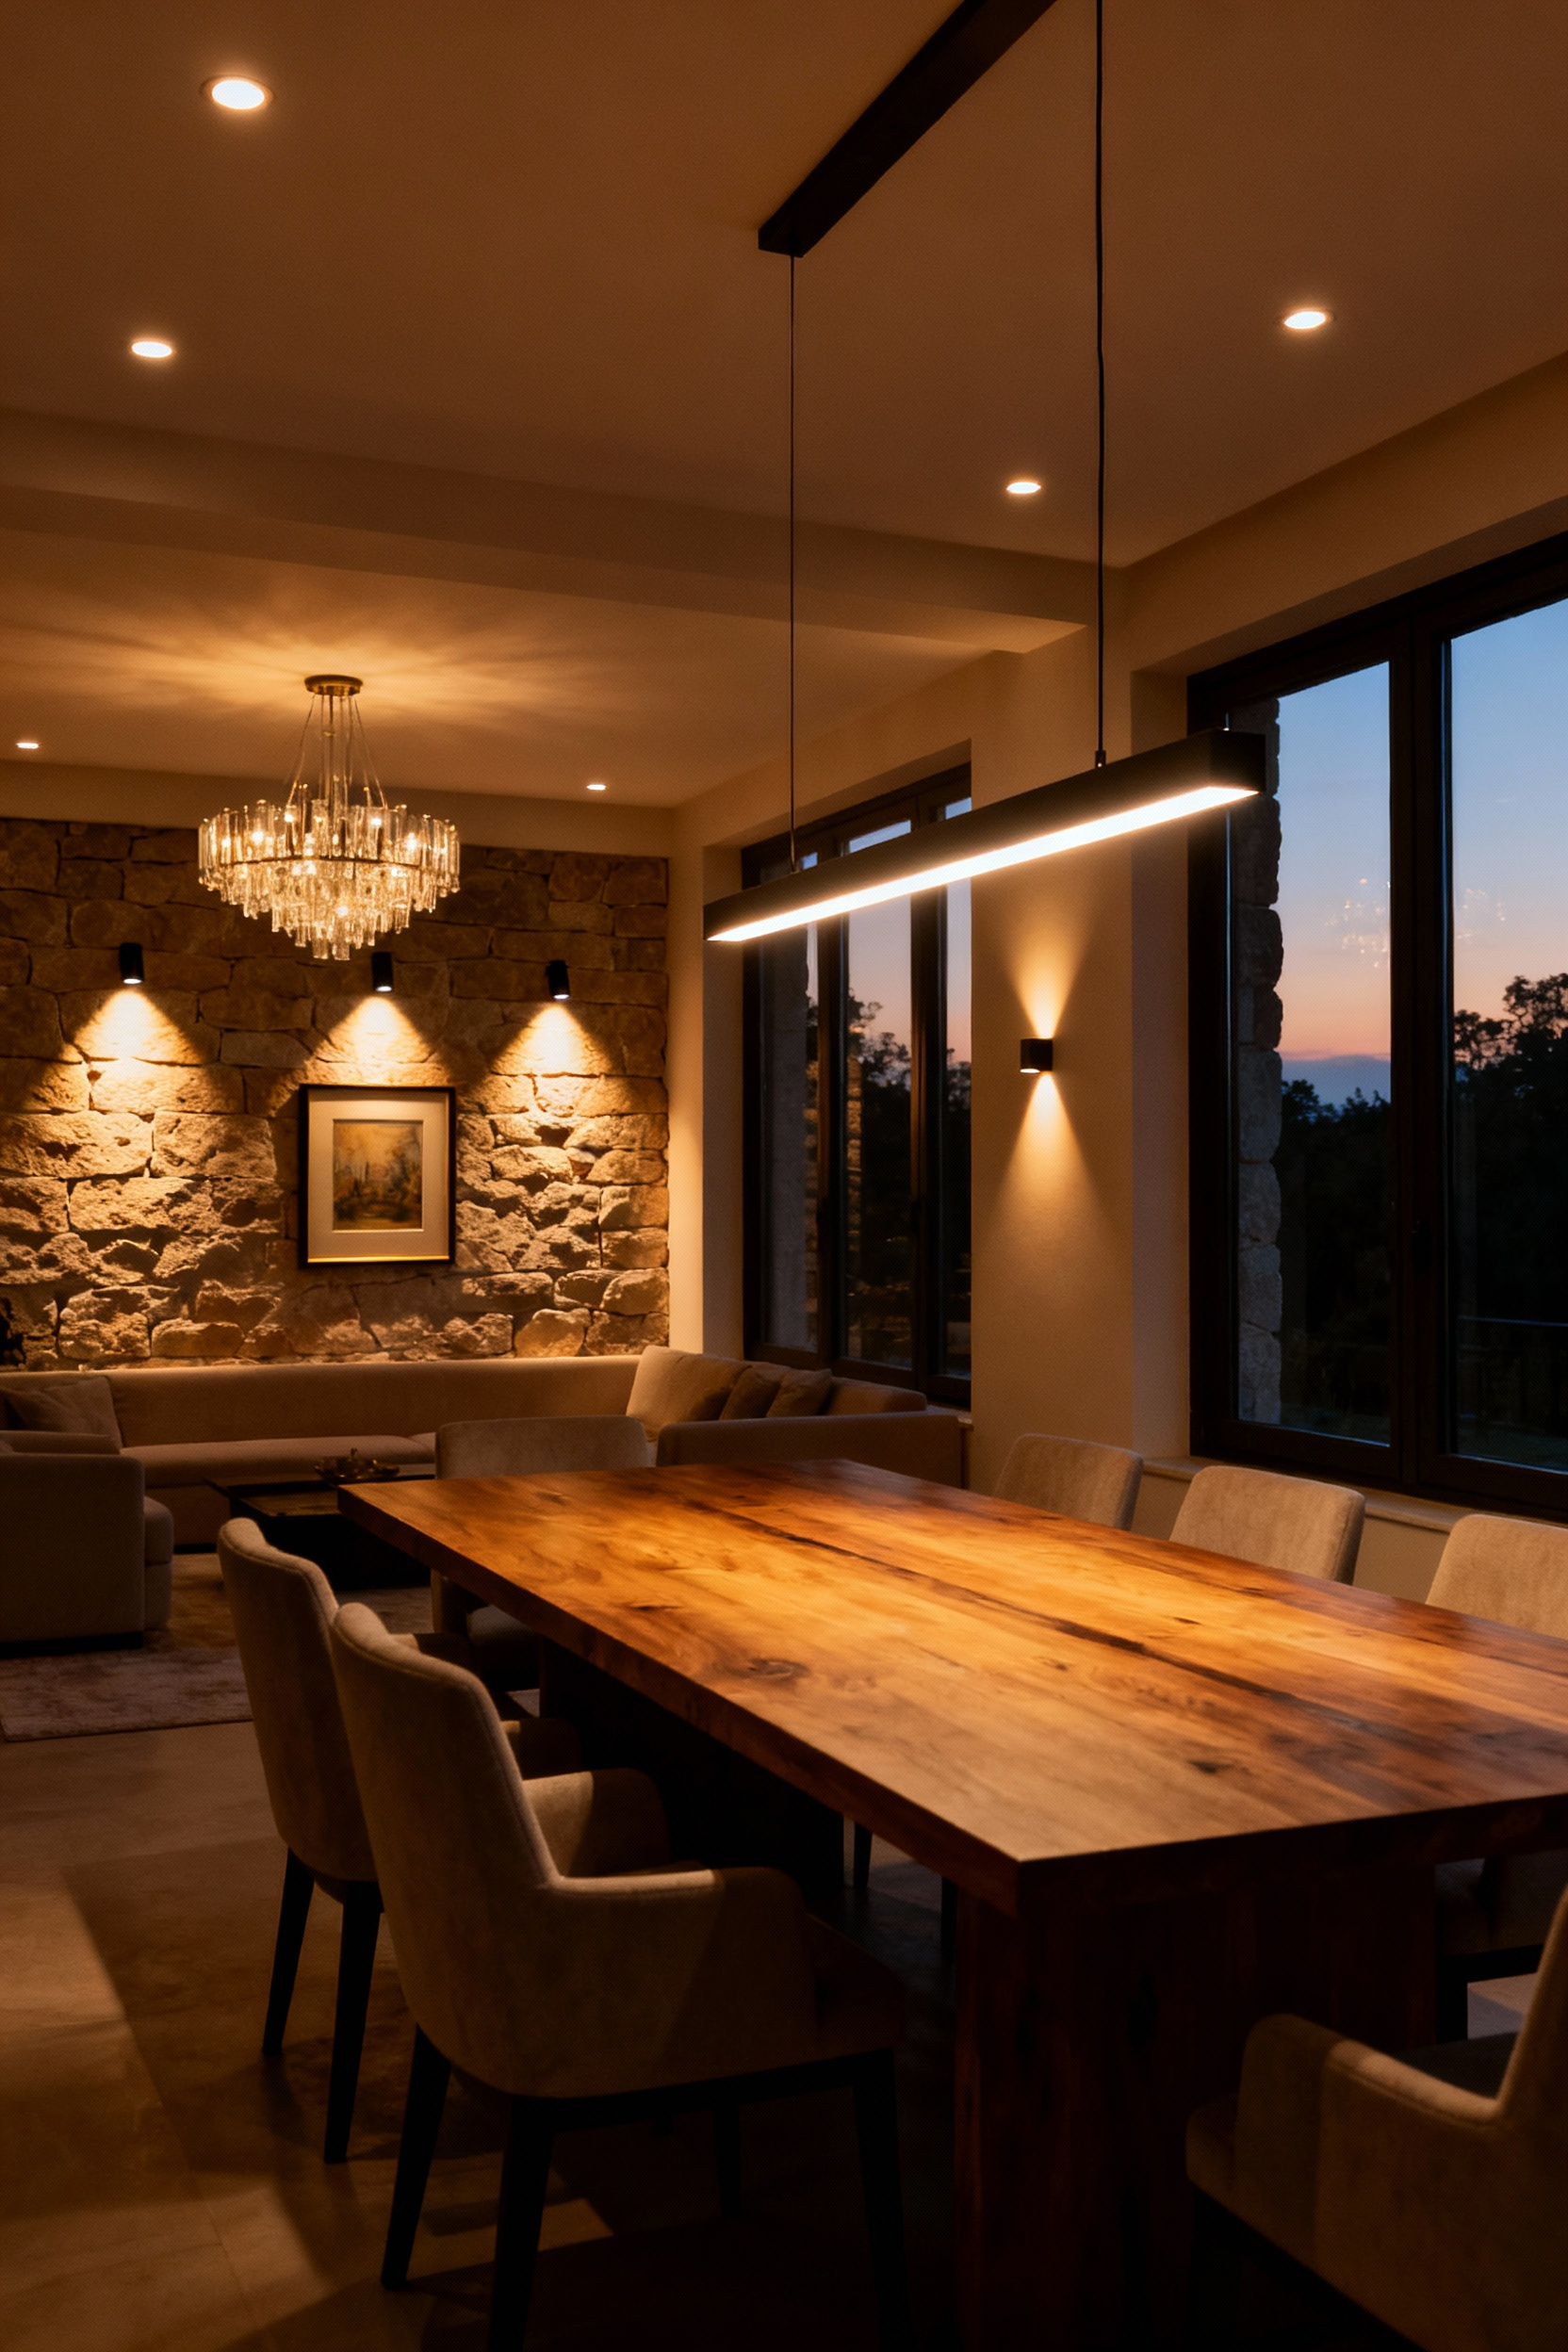
5. Understanding the Three Layers of Light: Ambient, Task, and Accent
A perfectly lit room is never the result of a single light source. Professional lighting design is built on three distinct layers that work together. Thinking in these layers is the key to creating depth and functionality.
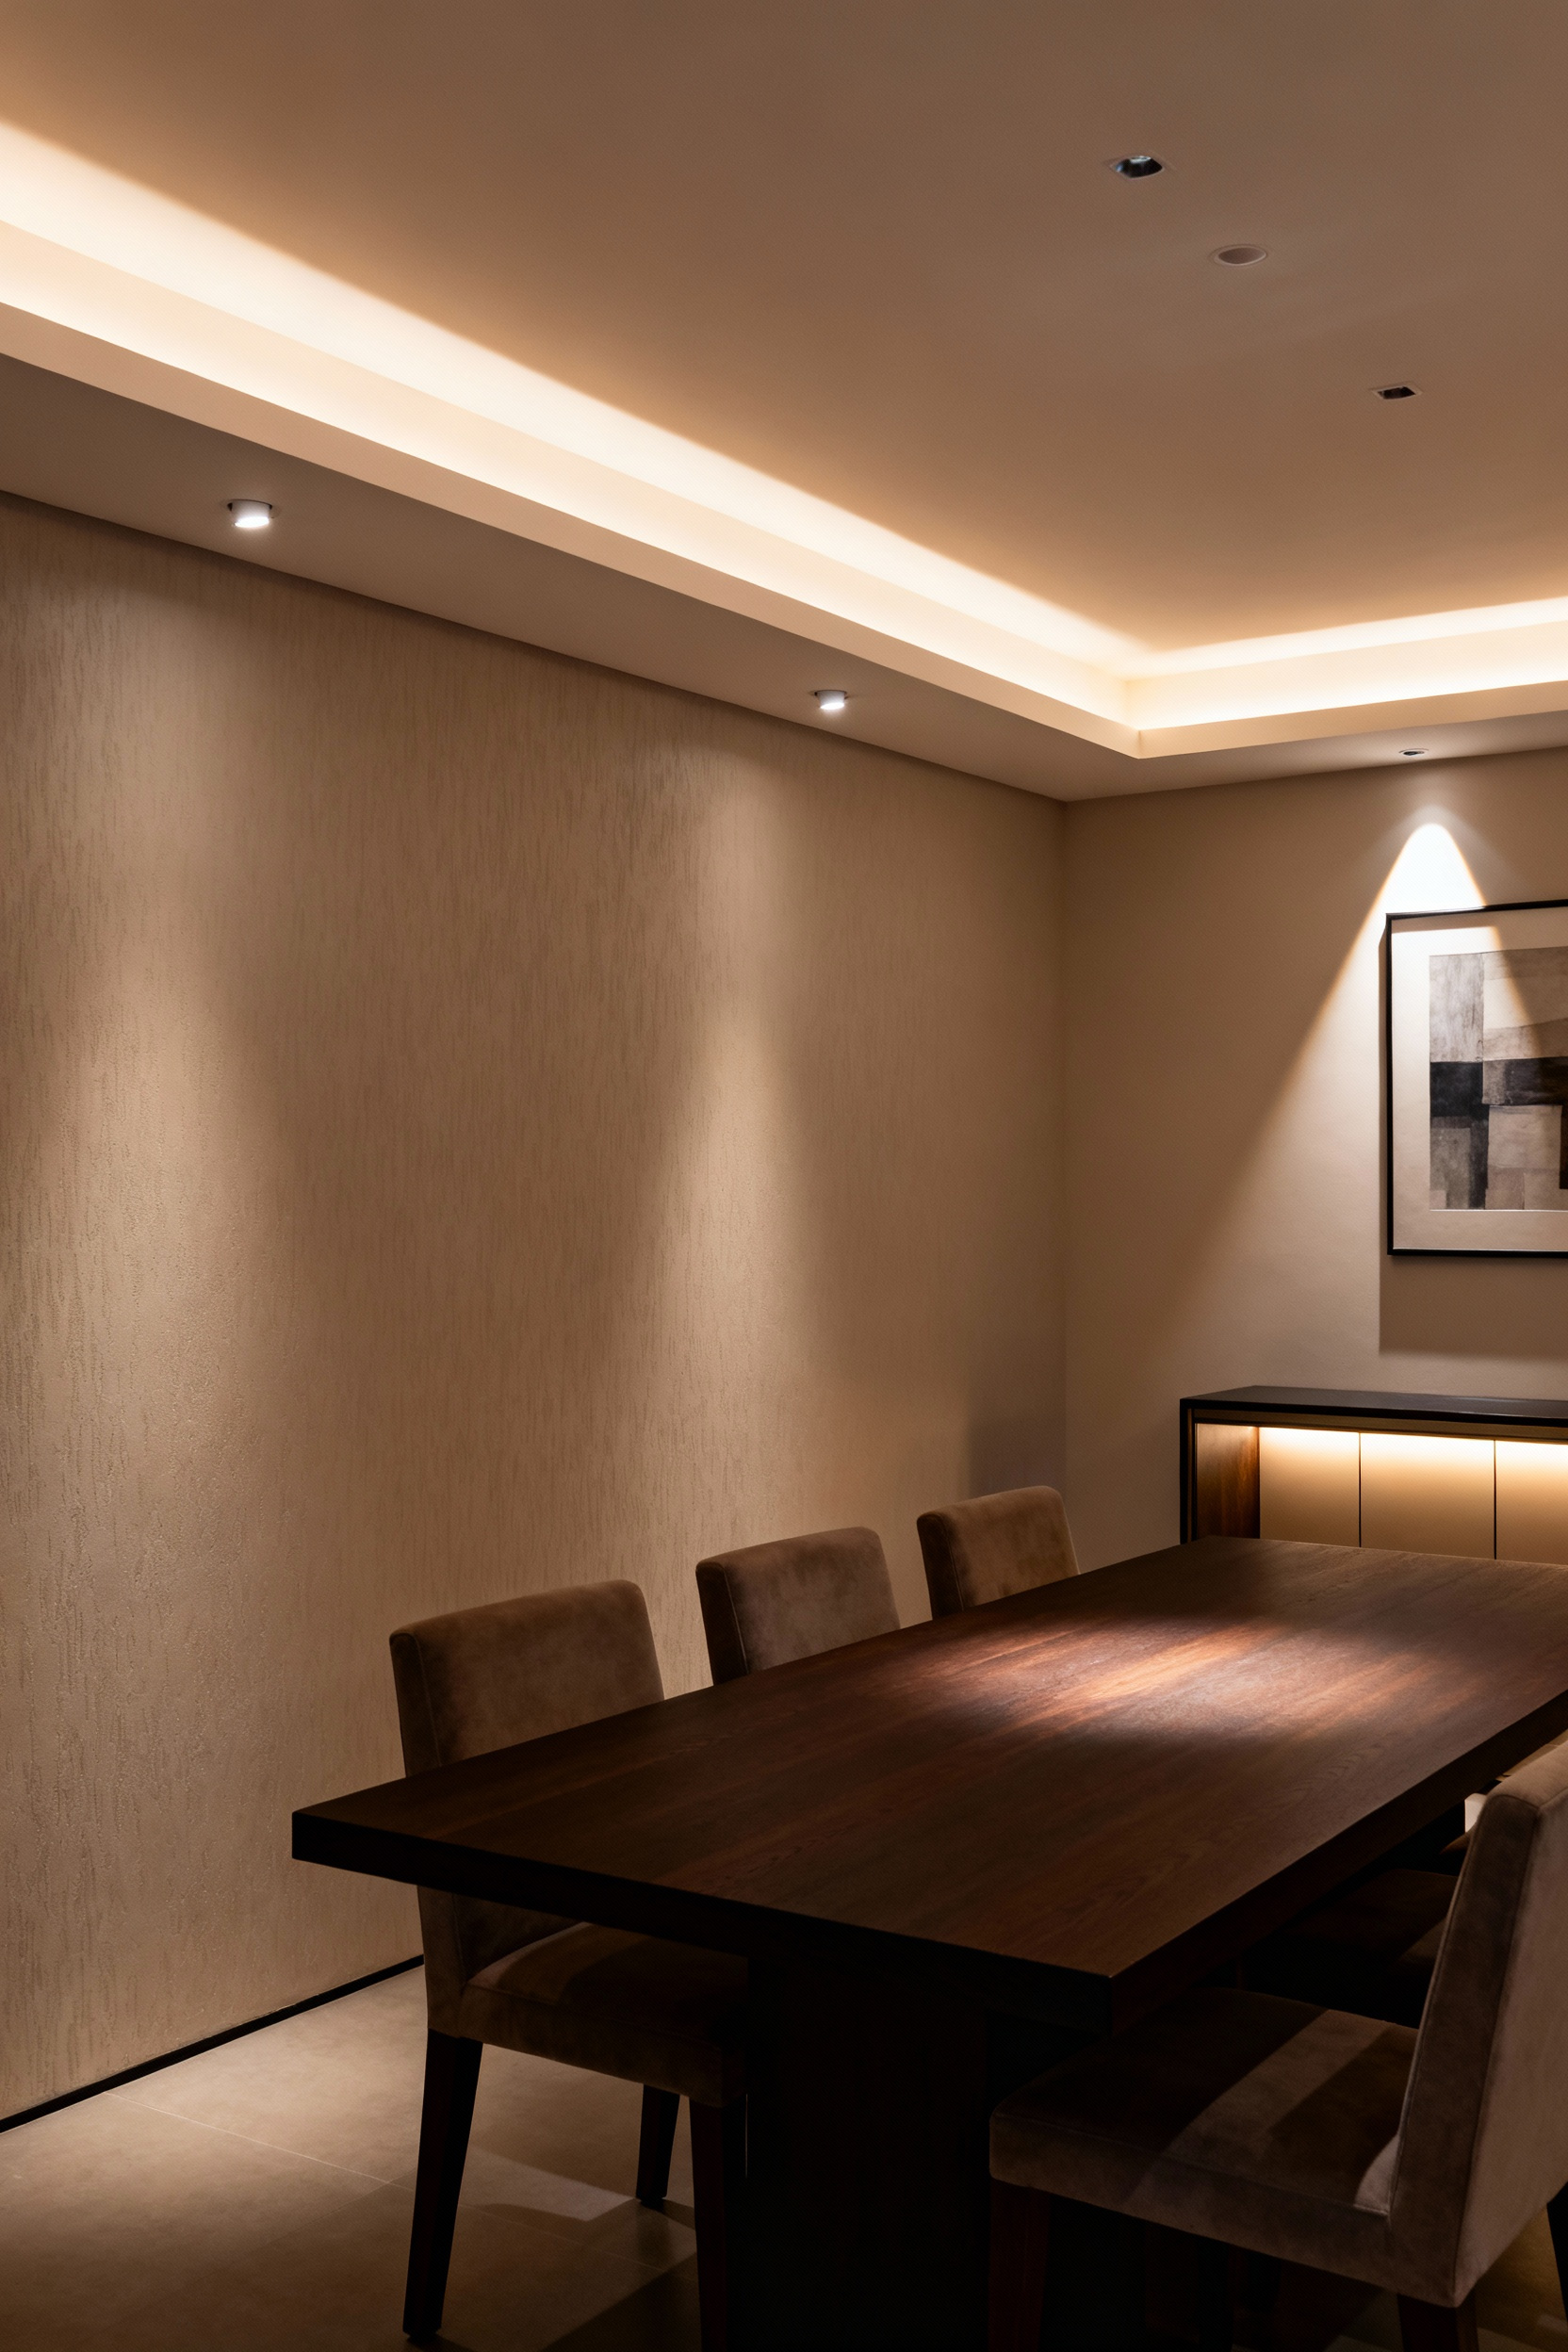
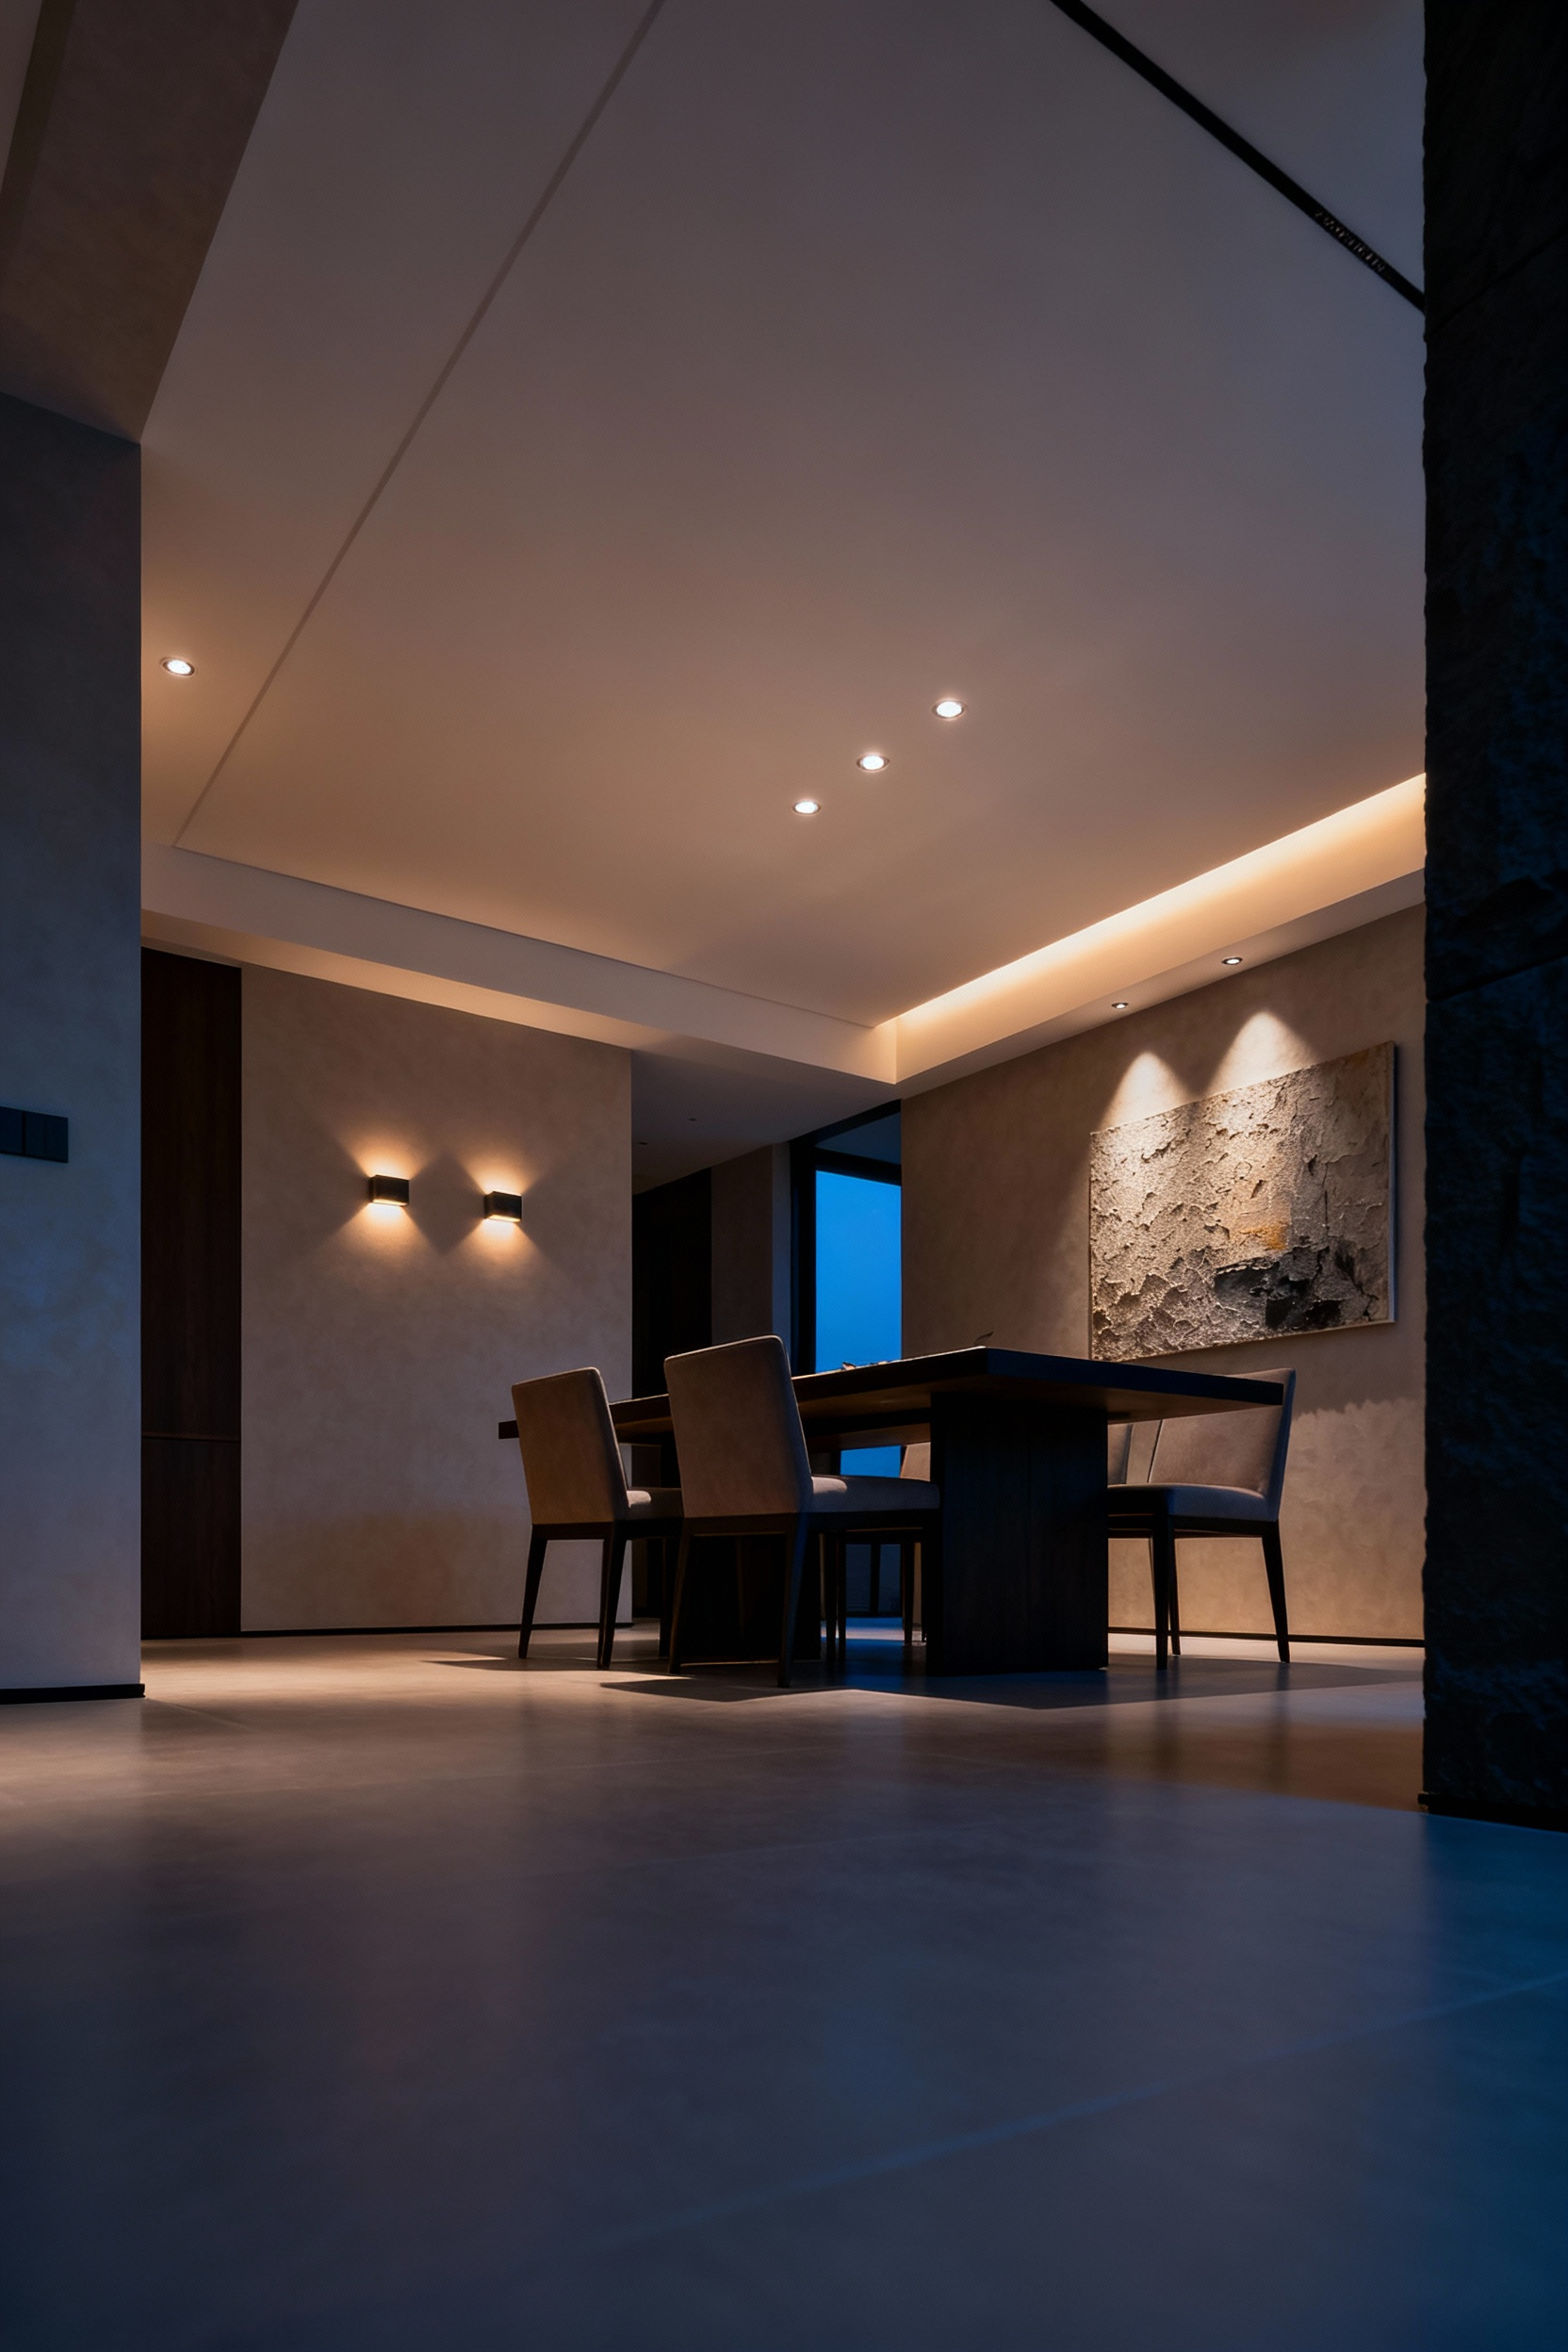
Ambient light is the general, overall illumination of the room. It’s the foundational layer that lets you see and navigate the space comfortably. Think of it as the base coat of paint. This light usually comes from your main chandelier, recessed downlights, or cove lighting that washes the ceiling. Its job is to provide a soft, even glow.
Task lighting is more focused and is aimed at a specific activity. In a dining room, the most obvious task is eating, so the light directly over the table is a form of task lighting. But it also applies to a buffet where you might serve food, a bar cart where you mix drinks, or a built-in where you display china. Under-cabinet lights or a small, targeted lamp on a sideboard are perfect examples.
Accent lighting is the final, dramatic layer. It’s the “jewelry” of the lighting plan. Its sole purpose is to create visual interest by highlighting something specific—a piece of art, a textured wall, a plant, or an architectural detail. This is done with track lights, picture lights, or narrow-beam recessed spots. In my design practice, I’ve found that a well-placed accent light is what takes a room from simply “well-lit” to “wow.” It creates contrast, depth, and a focal point that tells you where to look. Mastering the interplay between these three layers is the true secret to sophisticated design.
Elevating Your Dining Room Lighting Approach (Part 1)
With the fundamentals in place, we can move on to more advanced techniques. This is where we start using light to sculpt the space, enhance architecture, and build a truly dynamic and responsive environment.
6. Beyond the Chandelier: Crafting a Three-Point Lighting Scheme
The concept of three-point lighting comes from photography, and it’s designed to make a subject look three-dimensional and compelling. We can adapt this for interiors. Your main chandelier or pendant over the table acts as the “key light,” providing the primary illumination. But if that’s all you have, the rest of the room falls into shadow, making the space feel smaller and less inviting.
To fix this, we introduce a “fill light.” This is softer, indirect ambient light that fills in those harsh shadows and reduces contrast. Wall sconces are perfect for this, as are lamps on a buffet or light bounced off the ceiling from hidden cove fixtures. Finally, a subtle “backlight” or accent light adds separation and depth. This could be a picture light over a piece of art or a small uplight behind a plant in a corner. This technique pulls the walls away and makes the room feel richer and more complex. It’s a system that ensures the whole room glows, not just the table.
7. Adding Height and Drama with Sconces and Uplights
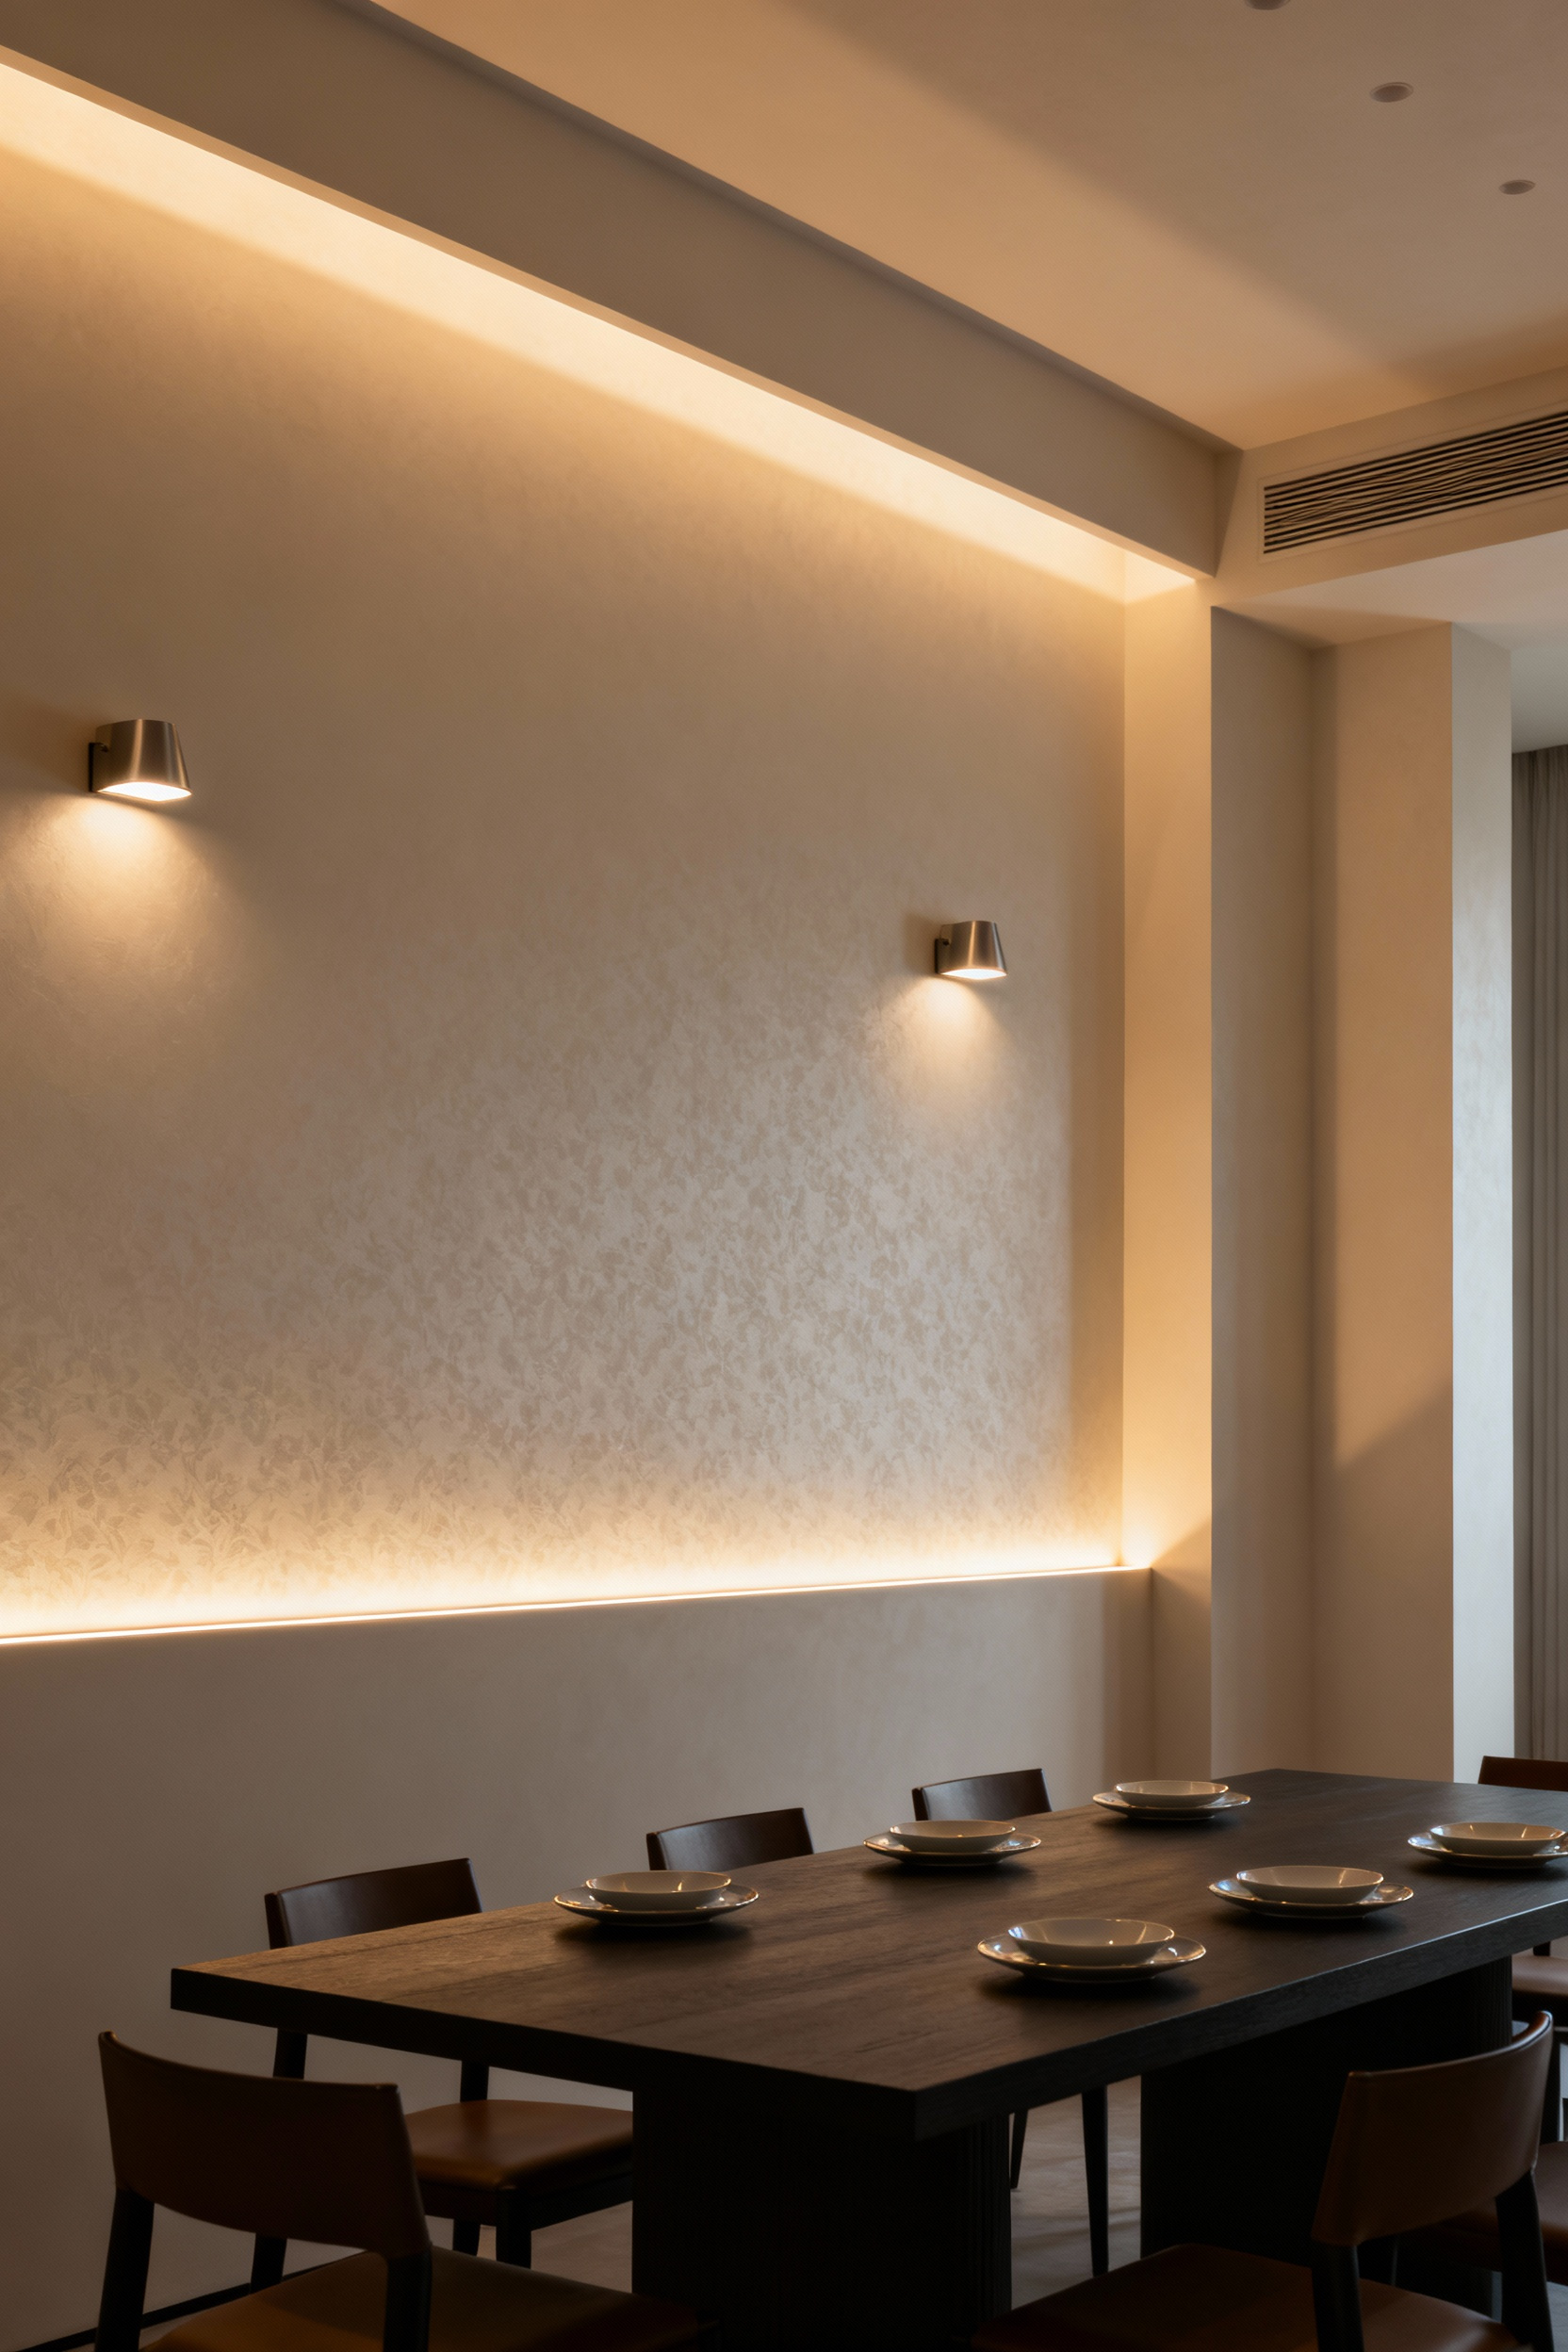
Wall sconces are one of the most underutilized tools in residential lighting. They do more than just provide light; they activate the walls themselves, adding verticality and architectural interest. Sconces that cast light both up and down can make a standard 8-foot ceiling feel taller by washing it with light, drawing the eye upward.
Uplights, often hidden on the floor behind a large plant or atop a tall cabinet, are another powerful tool. By throwing a soft plume of light up a wall, you create a sense of drama and depth. I’ve noticed in many of my projects that what homeowners perceive as a “dark” room often just has dark corners and walls. By strategically placing sconces or uplights, we can lift those shadows and make the entire space feel brighter and more expansive without adding a single overhead fixture. They are the perfect complement to your central dining room lights.
8. Using Recessed Lighting with Surgical Precision
Recessed lighting gets a bad rap because it’s so often done poorly, resulting in a “ceiling acne” effect. When done right, however, recessed lights are the invisible workhorses of a great lighting plan. The key is to use them with purpose, not just sprinkled across the ceiling.
One of my favorite techniques is the “wall wash.” Instead of pointing a recessed light straight down, you use a fixture with a special trim designed to skim light down a vertical surface. Placing these about 2-3 feet from a wall can make a small room feel significantly larger and brighter by illuminating its boundaries. For accent lighting, an adjustable “pinhole” recessed light with a narrow beam (around 20 degrees) can put a perfect circle of light on a centerpiece or a piece of art, making it pop with gallery-quality precision. It’s about using them strategically for ambient fill and sharp accents, not as the primary source of light.
9. The Art of Pairing: Multiple Pendants as a Single Statement
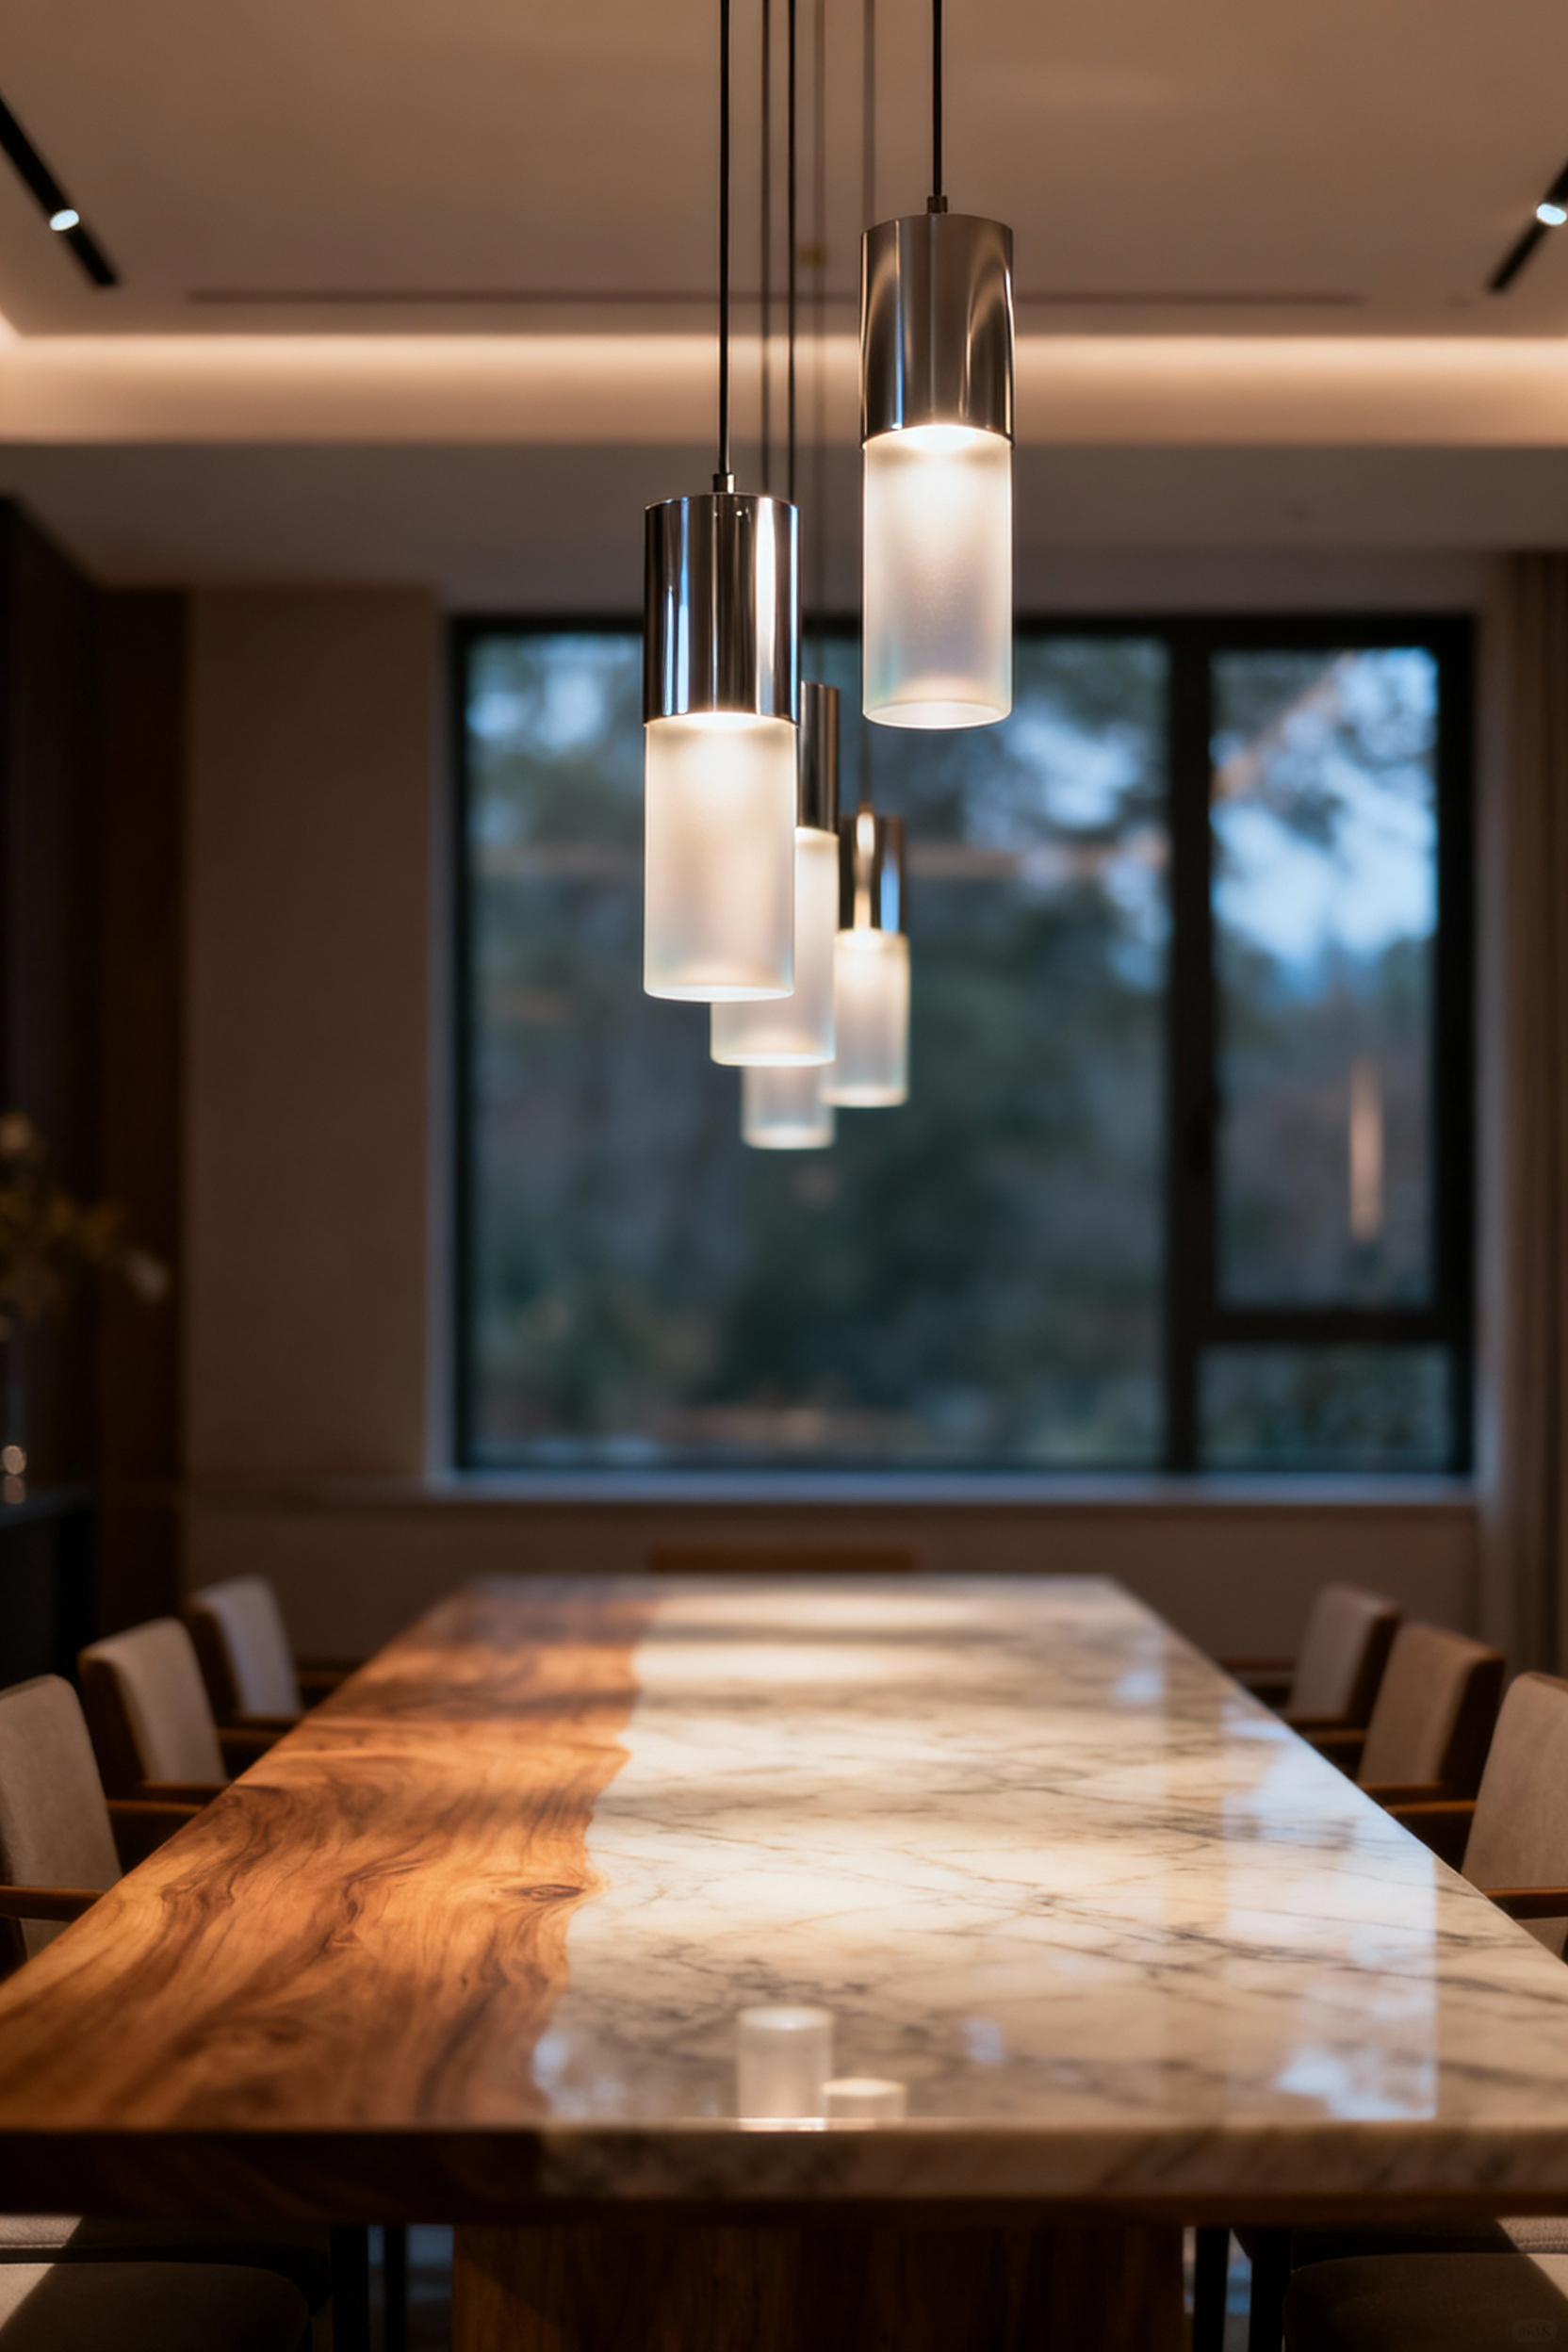
For a large or long table, a single pendant can look comically undersized. Using multiple pendants isn’t just a functional solution for better light distribution; it’s a major design opportunity. Whether you hang a row of identical pendants for a clean, rhythmic look or a cluster of varied fixtures at different heights for a more sculptural feel, the goal is the same: create a single, unified visual statement.
The key to a successful cluster is variation in height and a tight grouping. You want it to read as one large, textured chandelier, not a random collection of lights. For a linear arrangement, precision is everything—the spacing must be perfect, and the heights must be identical (unless a staggered effect is your deliberate goal). I learned this when designing for a massive 14-foot table; we used five pendants, and spending an extra hour with the electrician and a laser level to get the spacing exactly right made all the difference between looking professional and looking like a mistake.
Elevating Your Dining Room Lighting Approach (Part 2)
Here we get into the details that separate good design from truly great design. These are the nuanced applications that add layers of polish, comfort, and professional-grade functionality to your dining space.
10. Illuminating Buffets and Displays with Under-Cabinet Lighting
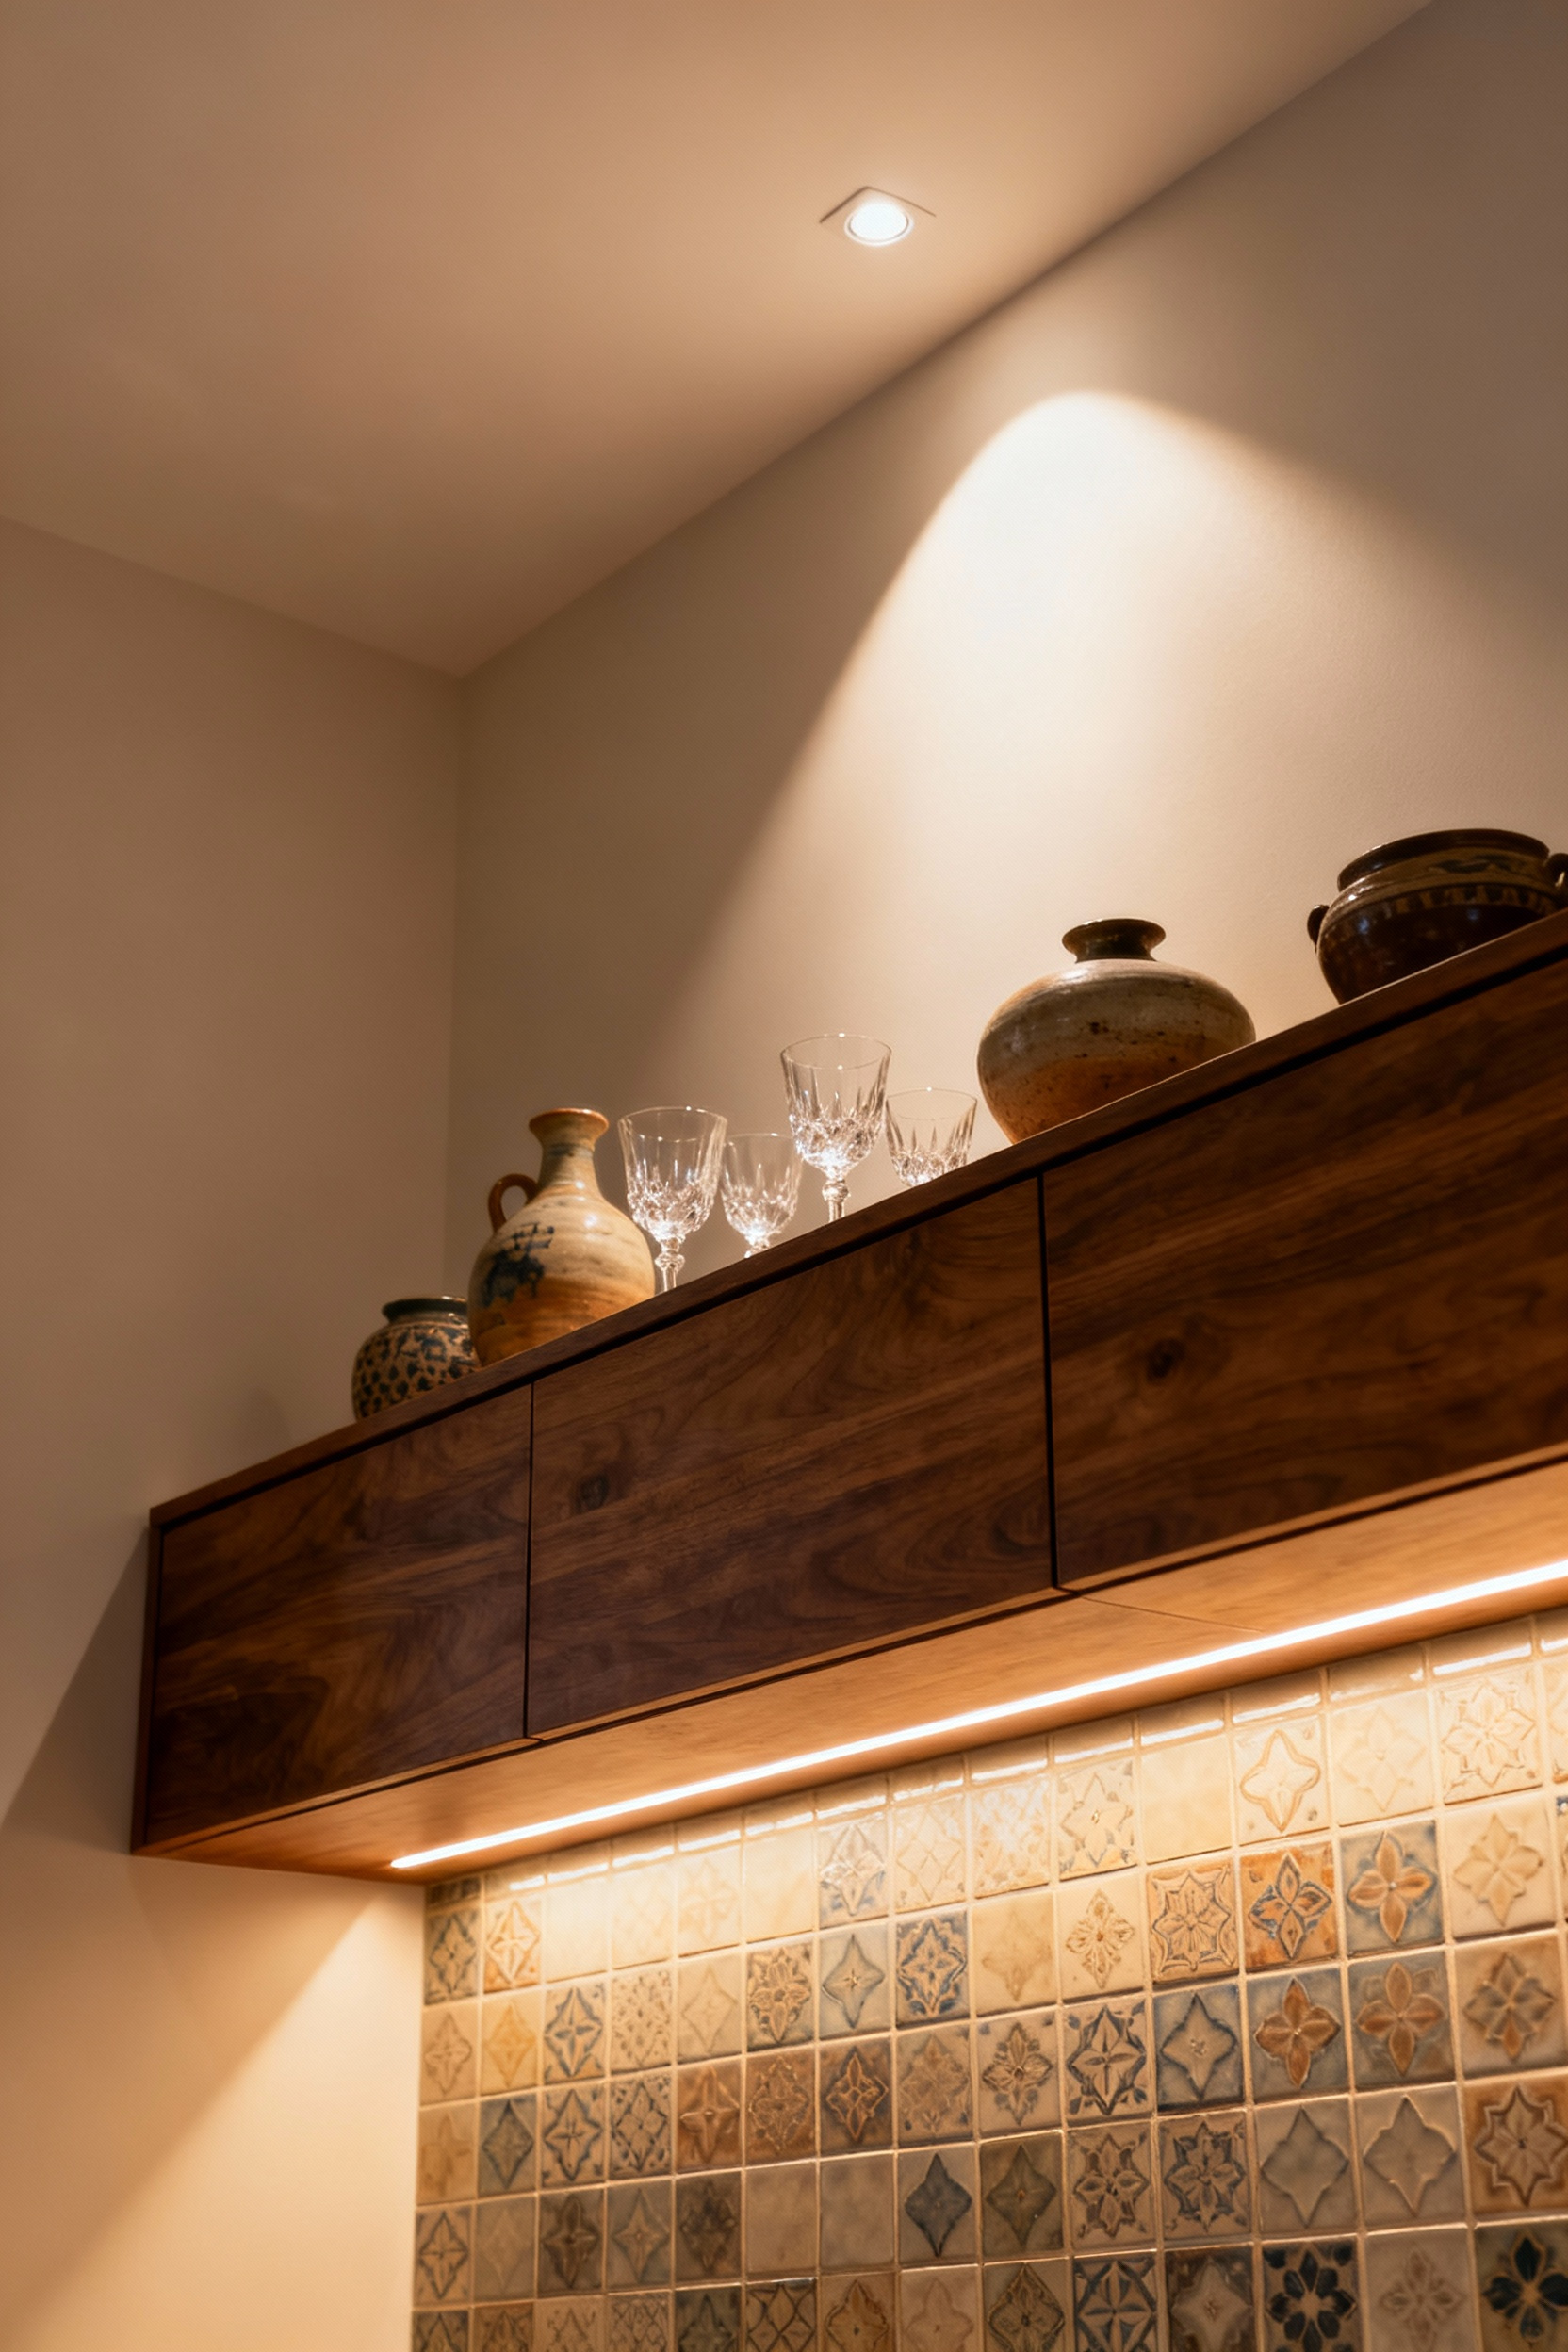
A buffet, sideboard, or built-in cabinet is a prime piece of dining room real estate. Leaving it in the dark is a missed opportunity. Adding under-cabinet lighting is a relatively simple upgrade that provides both beautiful accent lighting and useful task lighting for serving. It draws attention to your display of china or glassware and creates a soft, ambient glow that contributes to the room’s overall layering.
For the cleanest look, use slim LED tape lights tucked into a channel with a diffuser. This hides the individual diodes and produces a smooth, continuous line of light rather than distracting dots. What I tell my homeowners seeking better lighting is to connect these lights to the same smart system as the main dining room lights. This way, your “Dinner Party” scene can include the buffet lights at a soft, 20% glow, adding depth and a touch of luxury without any extra effort.
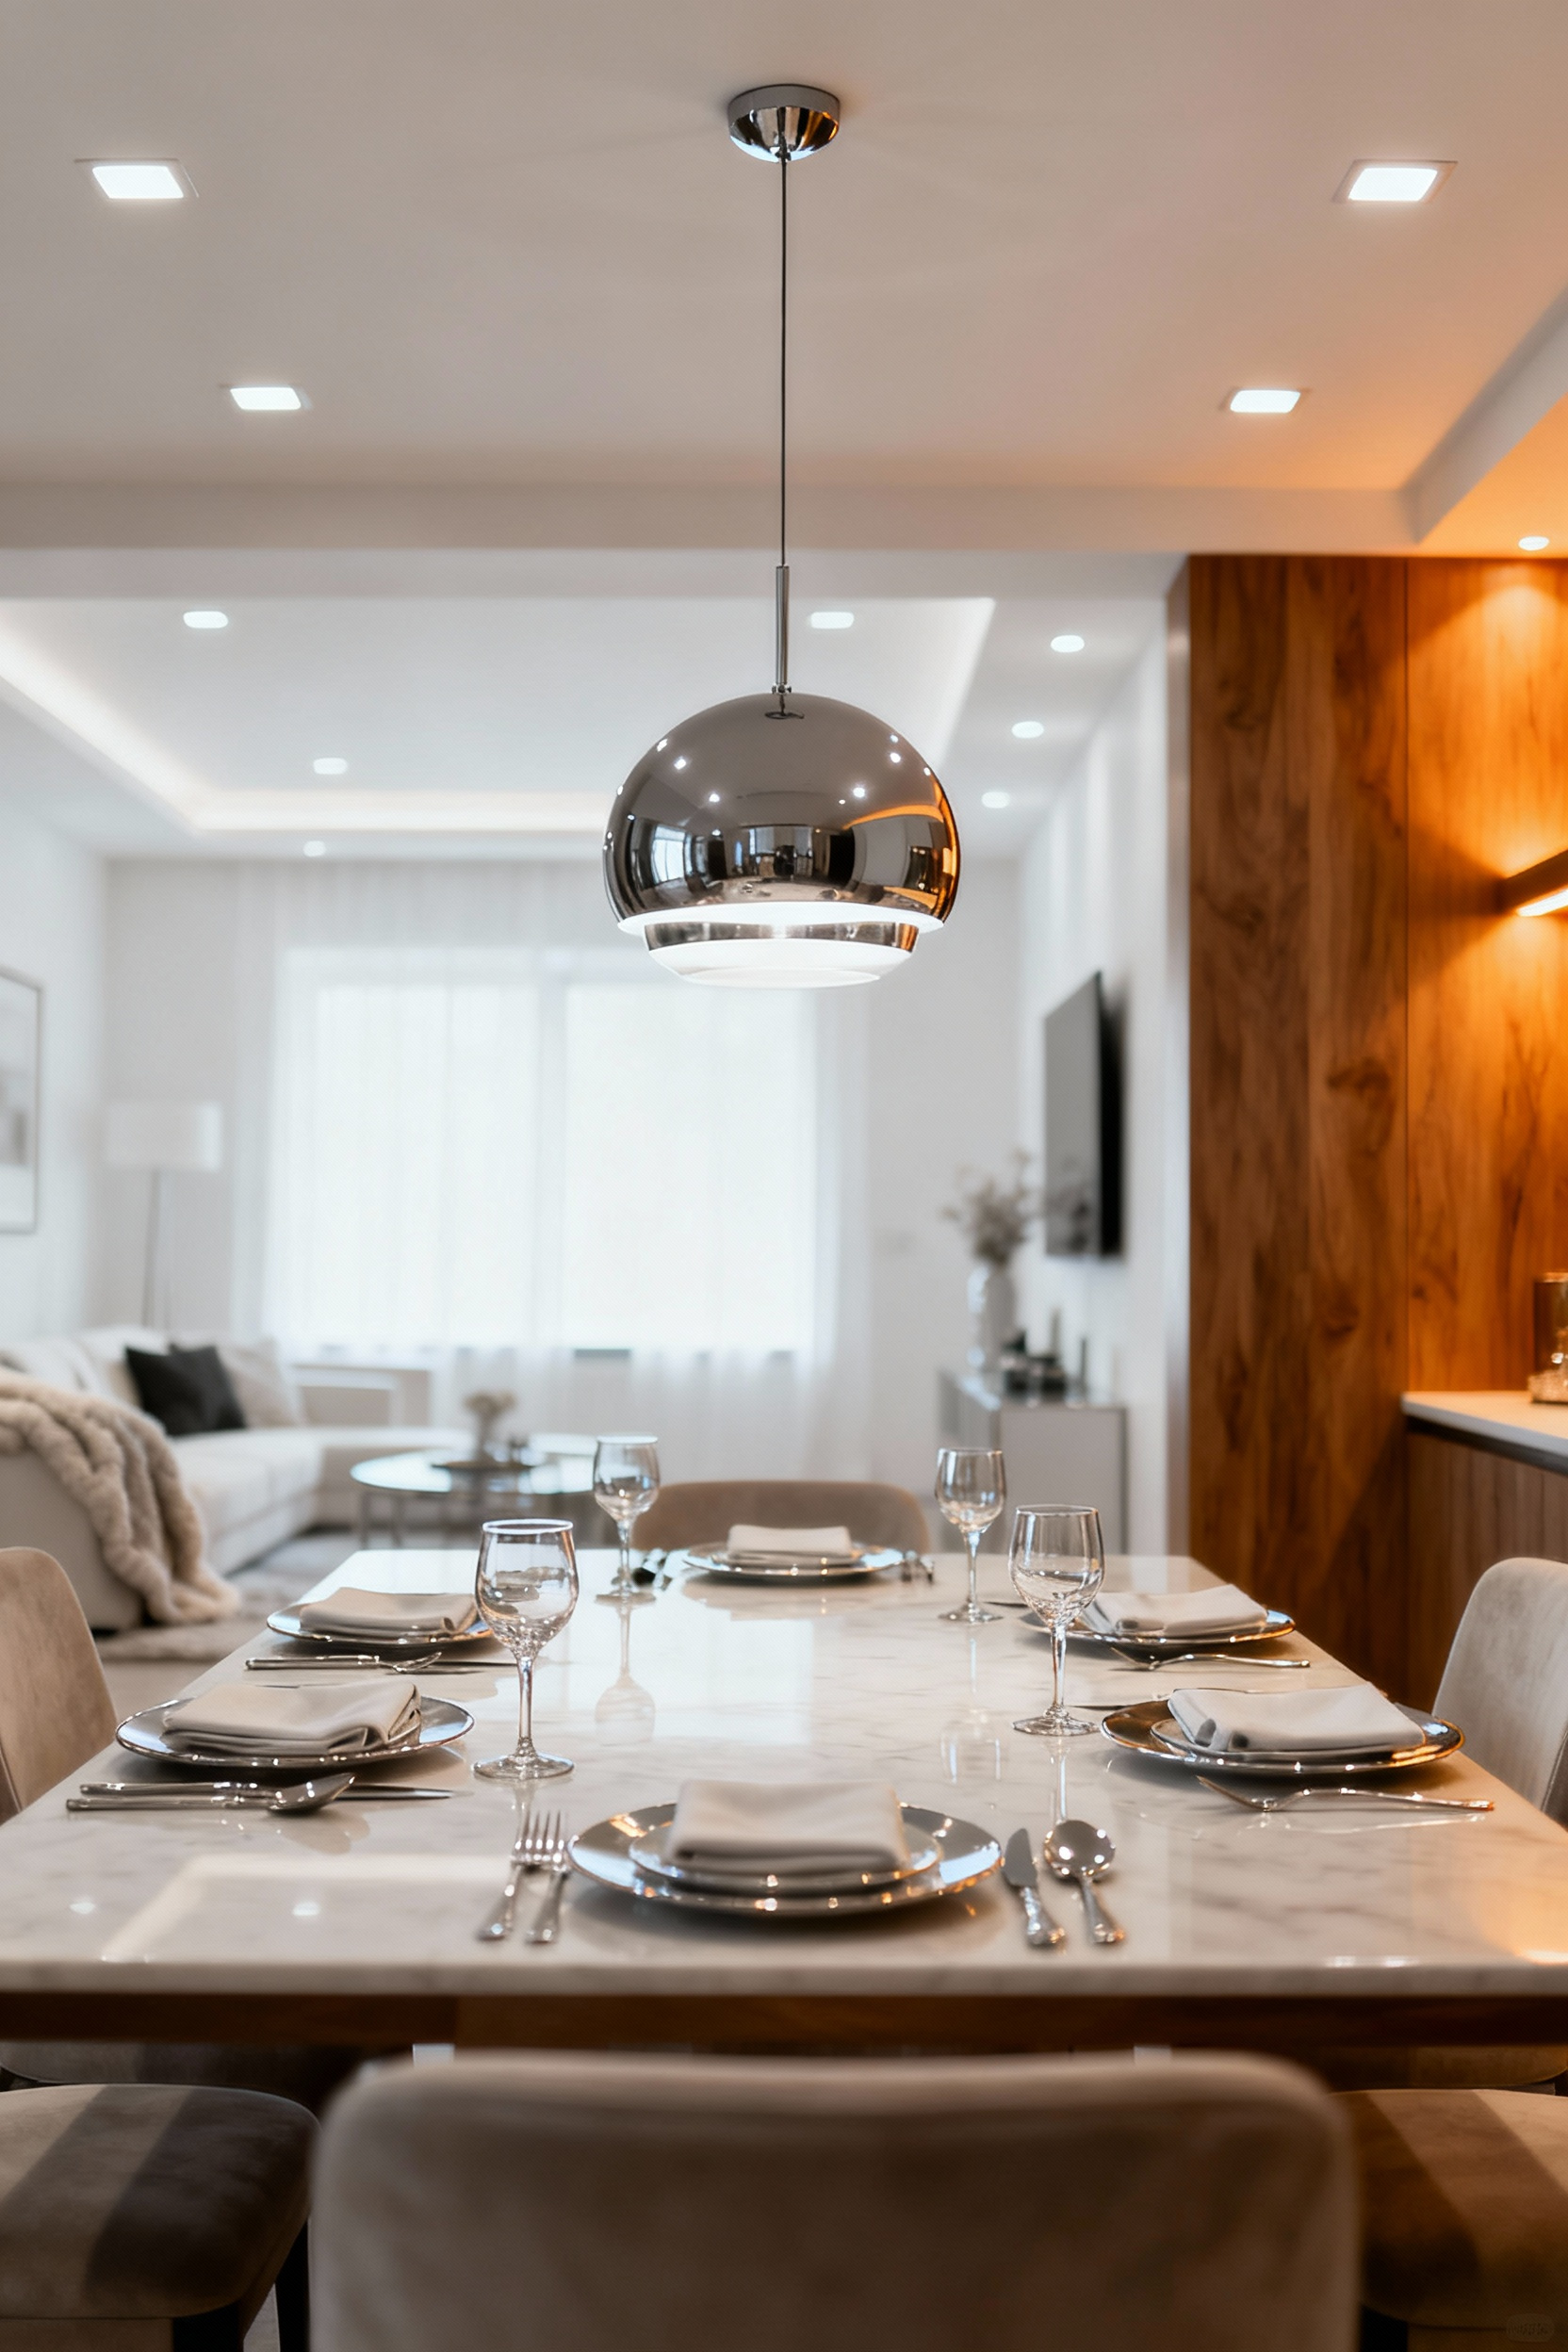
11. The Silent Killer of Ambiance: Eliminating Glare
You can have the most beautiful fixture in the world, but if it creates glare, it’s a failure. Glare is any light that shines directly into someone’s eyes, causing discomfort. It’s the fastest way to ruin a dinner party. The primary culprits are fixtures with exposed, clear bulbs or pendants hung too low, placing the light source in the direct line of sight for seated guests.
When selecting fixtures, always look for those with shades or diffusers that soften the light. Frosted glass, fabric shades, or fixtures where the bulb is recessed are all good choices. Placement is also key. If you’re using recessed spotlights to accent the table, aim them at the centerpiece, not at the place settings where the light can reflect off plates or silverware directly into a diner’s face. In my lighting design practice, I am ruthless about eliminating glare; a comfortable visual environment is paramount for a space designed for lingering conversation.
12. Programming Your Life: The Magic of Smart Lighting Scenes
Smart lighting is about so much more than turning lights on with your phone. Its real power is in creating “scenes”—pre-programmed lighting recipes that you can call up with a single button press or voice command. This is how you make a multi-functional dining room work effortlessly. You can design scenes that perfectly match how you actually live.
For instance, you could have a “Homework” scene that puts the chandelier at 100% and keeps other lights off for focus. A “Dinner Party” scene could dim the chandelier to 60%, bring up wall sconces to 30% for ambiance, and turn on a picture light to highlight your art. A “Cleanup” scene could blast everything to full brightness. Programming these scenes transforms you from a light switch operator into a conductor, orchestrating the room’s entire mood in an instant.
Professional-Level Dining Room Lighting Strategies
Now we’re getting into the deep cuts—the strategies and considerations that define a truly professional and bespoke lighting plan. This is where we think about the lighting as an integral part of the home’s architecture and design language.
13. Layering for a Modern Life: Lighting the Multipurpose Dining Room
The formal, single-use dining room is a thing of the past for many families. Today, it’s often the office, the classroom, and the craft center. Your lighting must be flexible enough to support all of these activities. A holistic layering strategy is the only way to achieve this. You simply can’t light a room for a dinner party and a Zoom call with the same setup.
This requires independent control over your lighting layers. The ambient light (recessed fixtures) can provide clean, functional brightness for daytime work. The main decorative fixture (the chandelier) can take over for dining, dimmed low for atmosphere. The accent lights (art lighting) can be turned on to signal a shift from work to relaxation. From my work in lighting design, the most successful multipurpose rooms are those where the lighting can completely change the room’s function and feel. This isn’t an afterthought; it needs to be planned from the very beginning.
14. Speaking the Same Language: Unifying Fixtures in an Open-Concept Space
In an open-concept home, the dining room lights don’t exist in a vacuum. They are in direct conversation with the fixtures in your kitchen and living room. They don’t all have to match—in fact, they shouldn’t—but they do need to feel like they belong to the same family.
The easiest way to achieve this is by creating a “finish family.” For example, choose brushed brass as your common thread. Your dining chandelier might be brass and black, your kitchen pendants all brass, and a living room floor lamp might have a brass accent. They are different in form but related by material. You can also create cohesion through shape (e.g., repeating curves or clean lines) or material (e.g., using fixtures with glass shades of a similar type). The goal is a curated collection, not a matching set, which creates a far more sophisticated and intentional look.
15. The Power of the Beam: Using Beam Angle to Create Focus
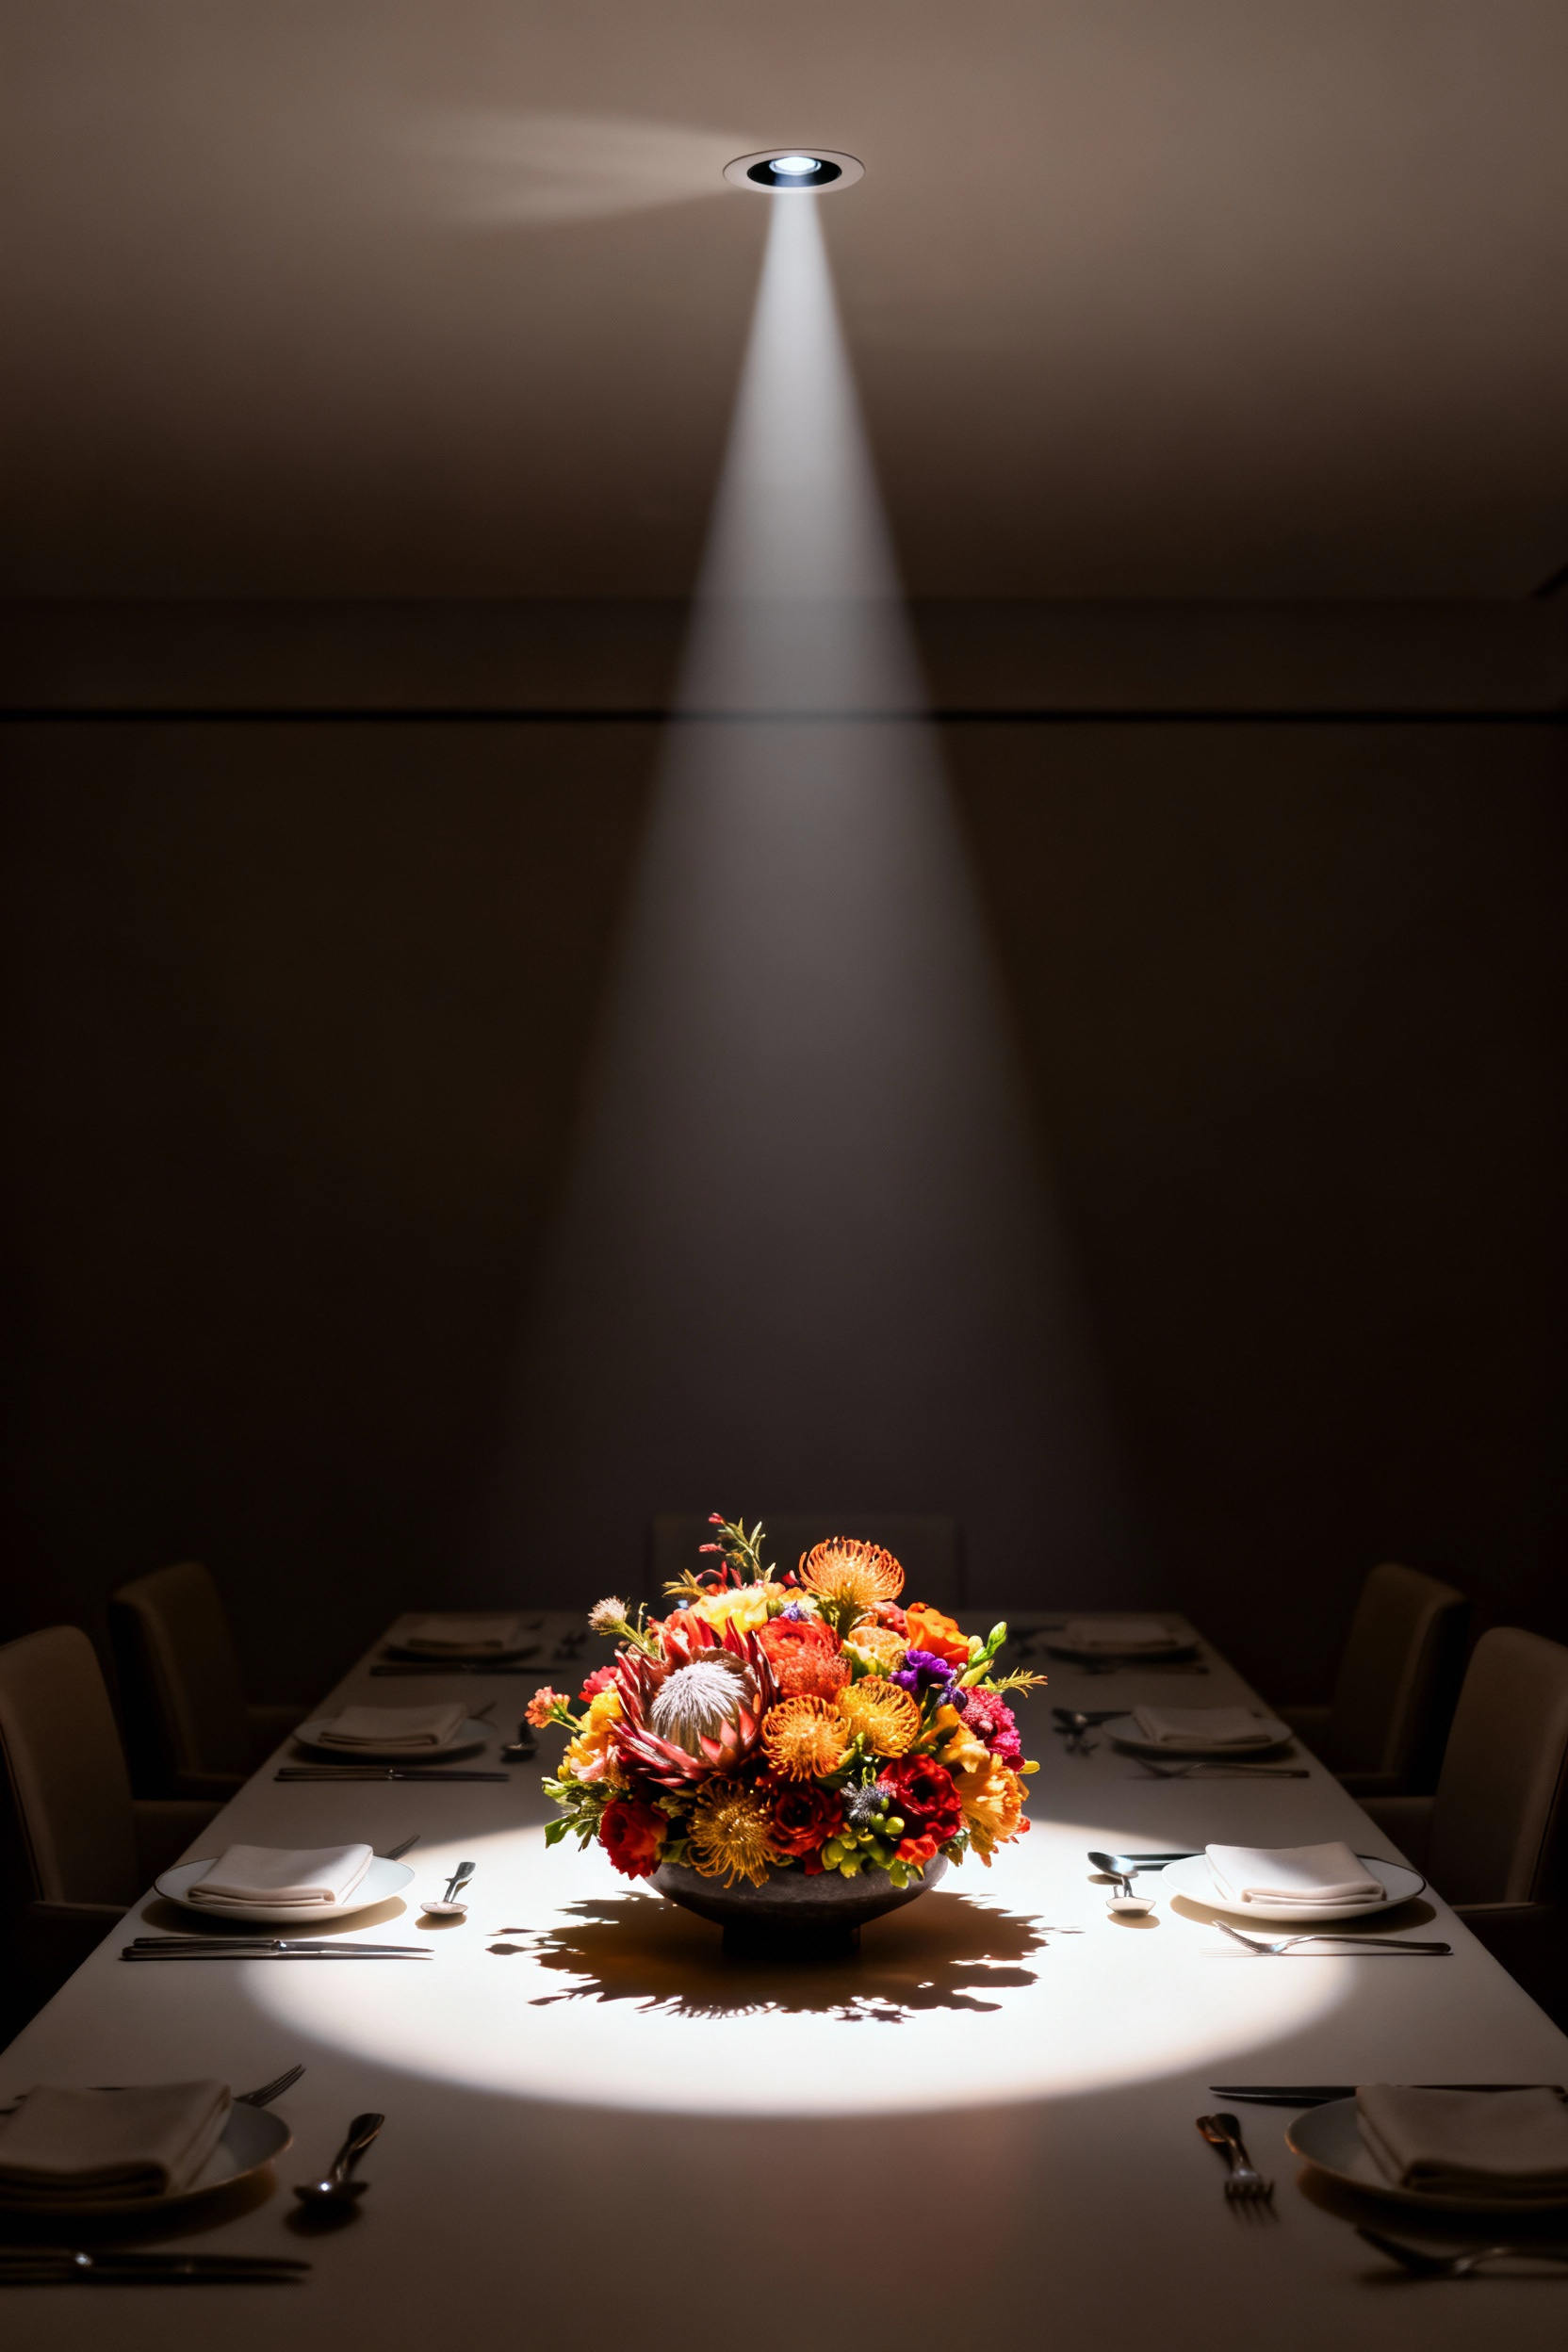
This is where the engineering side of lighting design really comes into play. For accent lighting, the “beam angle” of a bulb—measured in degrees—determines how wide or narrow the cone of light is. Using the wrong beam angle is like trying to paint a detailed portrait with a paint roller. A wide “flood” light (40 degrees or more) is great for ambient wash, but it’s terrible for creating drama.
To make a centerpiece on your table truly pop, you want a very narrow beam, somewhere between 10 and 25 degrees. When aimed from an adjustable recessed fixture, this creates a crisp, high-contrast pool of light that makes the object seem to glow from within, with minimal spill onto the surrounding place settings. Checking the beam angle specs when you’re buying recessed or track lighting is a pro move. It’s a small detail that makes a massive difference in the final result, turning simple highlighting into theatrical art.
16. Calling for Backup: When to Hire a Lighting Professional
You can accomplish an incredible amount on your own with the right knowledge. But there are times when bringing in a professional is the smartest move. If you’re undertaking a major renovation, building new, or have a particularly tricky space (like a double-height ceiling or complex architectural details), a lighting designer can save you time, money, and heartache.
We can create detailed photometric plans to predict exactly how light will behave in a space before a single hole is cut. We have access to trade-only fixtures and can even design custom pieces for a truly unique installation. More importantly, we can integrate the lighting plan seamlessly with your architect’s and interior designer’s vision. I’m still figuring out how to explain this without it sounding like a sales pitch, but honestly, it’s like hiring a structural engineer for a complex build—it’s about ensuring the invisible foundation is solid and expertly executed.
Mastering Dining Room Lighting Integration
The final step is to think beyond individual strategies and see the entire dining room as one integrated lighting ecosystem. This is about making all the parts work together seamlessly to create an environment that feels effortless and intuitive.
17. Effortless Transitions: Choreographing Automated Lighting Scenes
This builds on the idea of smart lighting scenes but takes it a step further by focusing on the transitions. It’s one thing to press a button to activate a “Dinner” scene; it’s another to have the room transition into it automatically and gracefully.
Imagine your home’s system knows the sun has set. It can then slowly fade up the landscape lights outside the dining room window while simultaneously crossfading the interior lights from a bright, functional “evening prep” scene to your soft, intimate “dinner” scene over the course of five minutes. These automated, subtle shifts make the technology disappear, creating an environment that simply feels right for the moment. In my lighting design practice, choreographing these transitions is a key part of creating a luxury experience; the lighting should anticipate your needs, not just react to your commands.
18. The Ultimate Light Source: Working with Natural Light
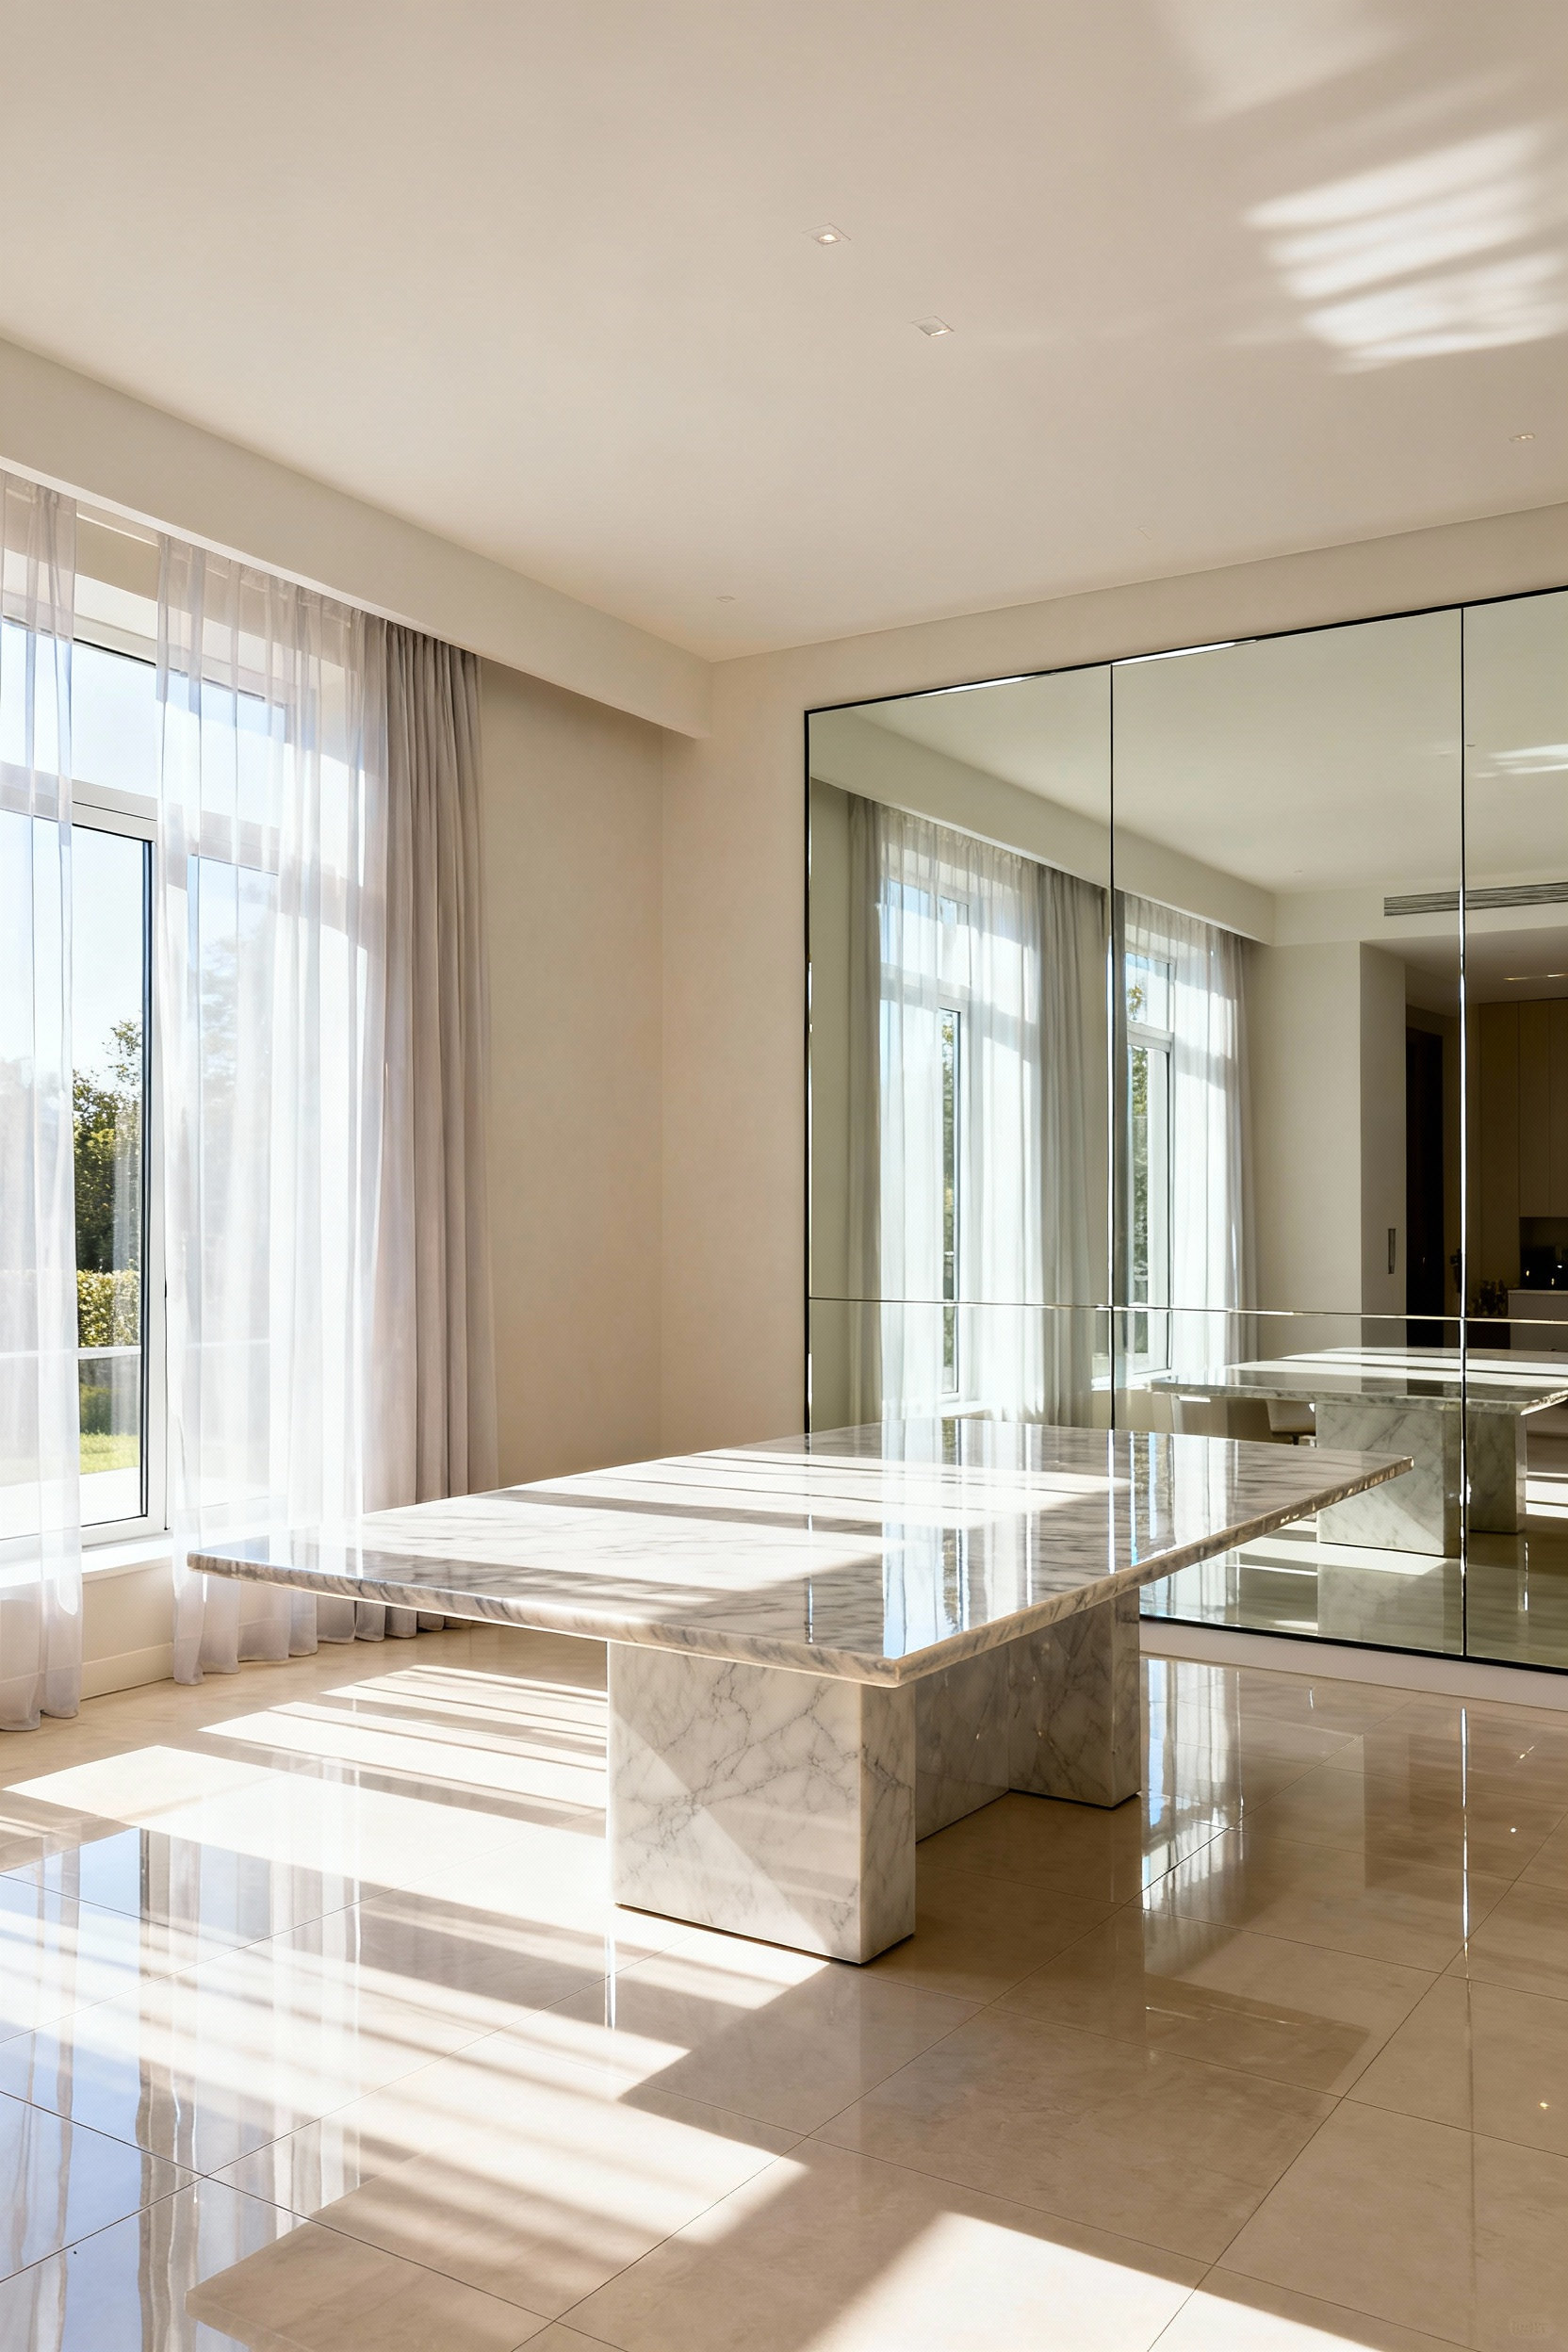
The best light source you have is the sun, and it’s free. Any good lighting plan starts with maximizing and controlling natural light. The role of your artificial dining room lights during the day should be to supplement, not supplant, the daylight. This means placing mirrors strategically to bounce light into darker corners or choosing light, sheer window treatments that diffuse harsh sun without blocking it entirely.
The color of your walls also plays a huge role. A paint’s Light Reflectance Value (LRV) tells you how much light it reflects. Lighter colors with higher LRVs will make the most of the available daylight, reducing your need for artificial lights and creating a brighter, more airy feel. I’ve seen projects where simply repainting dark walls did more to brighten a dining room than adding several new fixtures. Your electric lighting system should be designed to take over seamlessly as this beautiful natural light fades.
19. Creating a Gallery Wall: Using Specialty Picture Lights
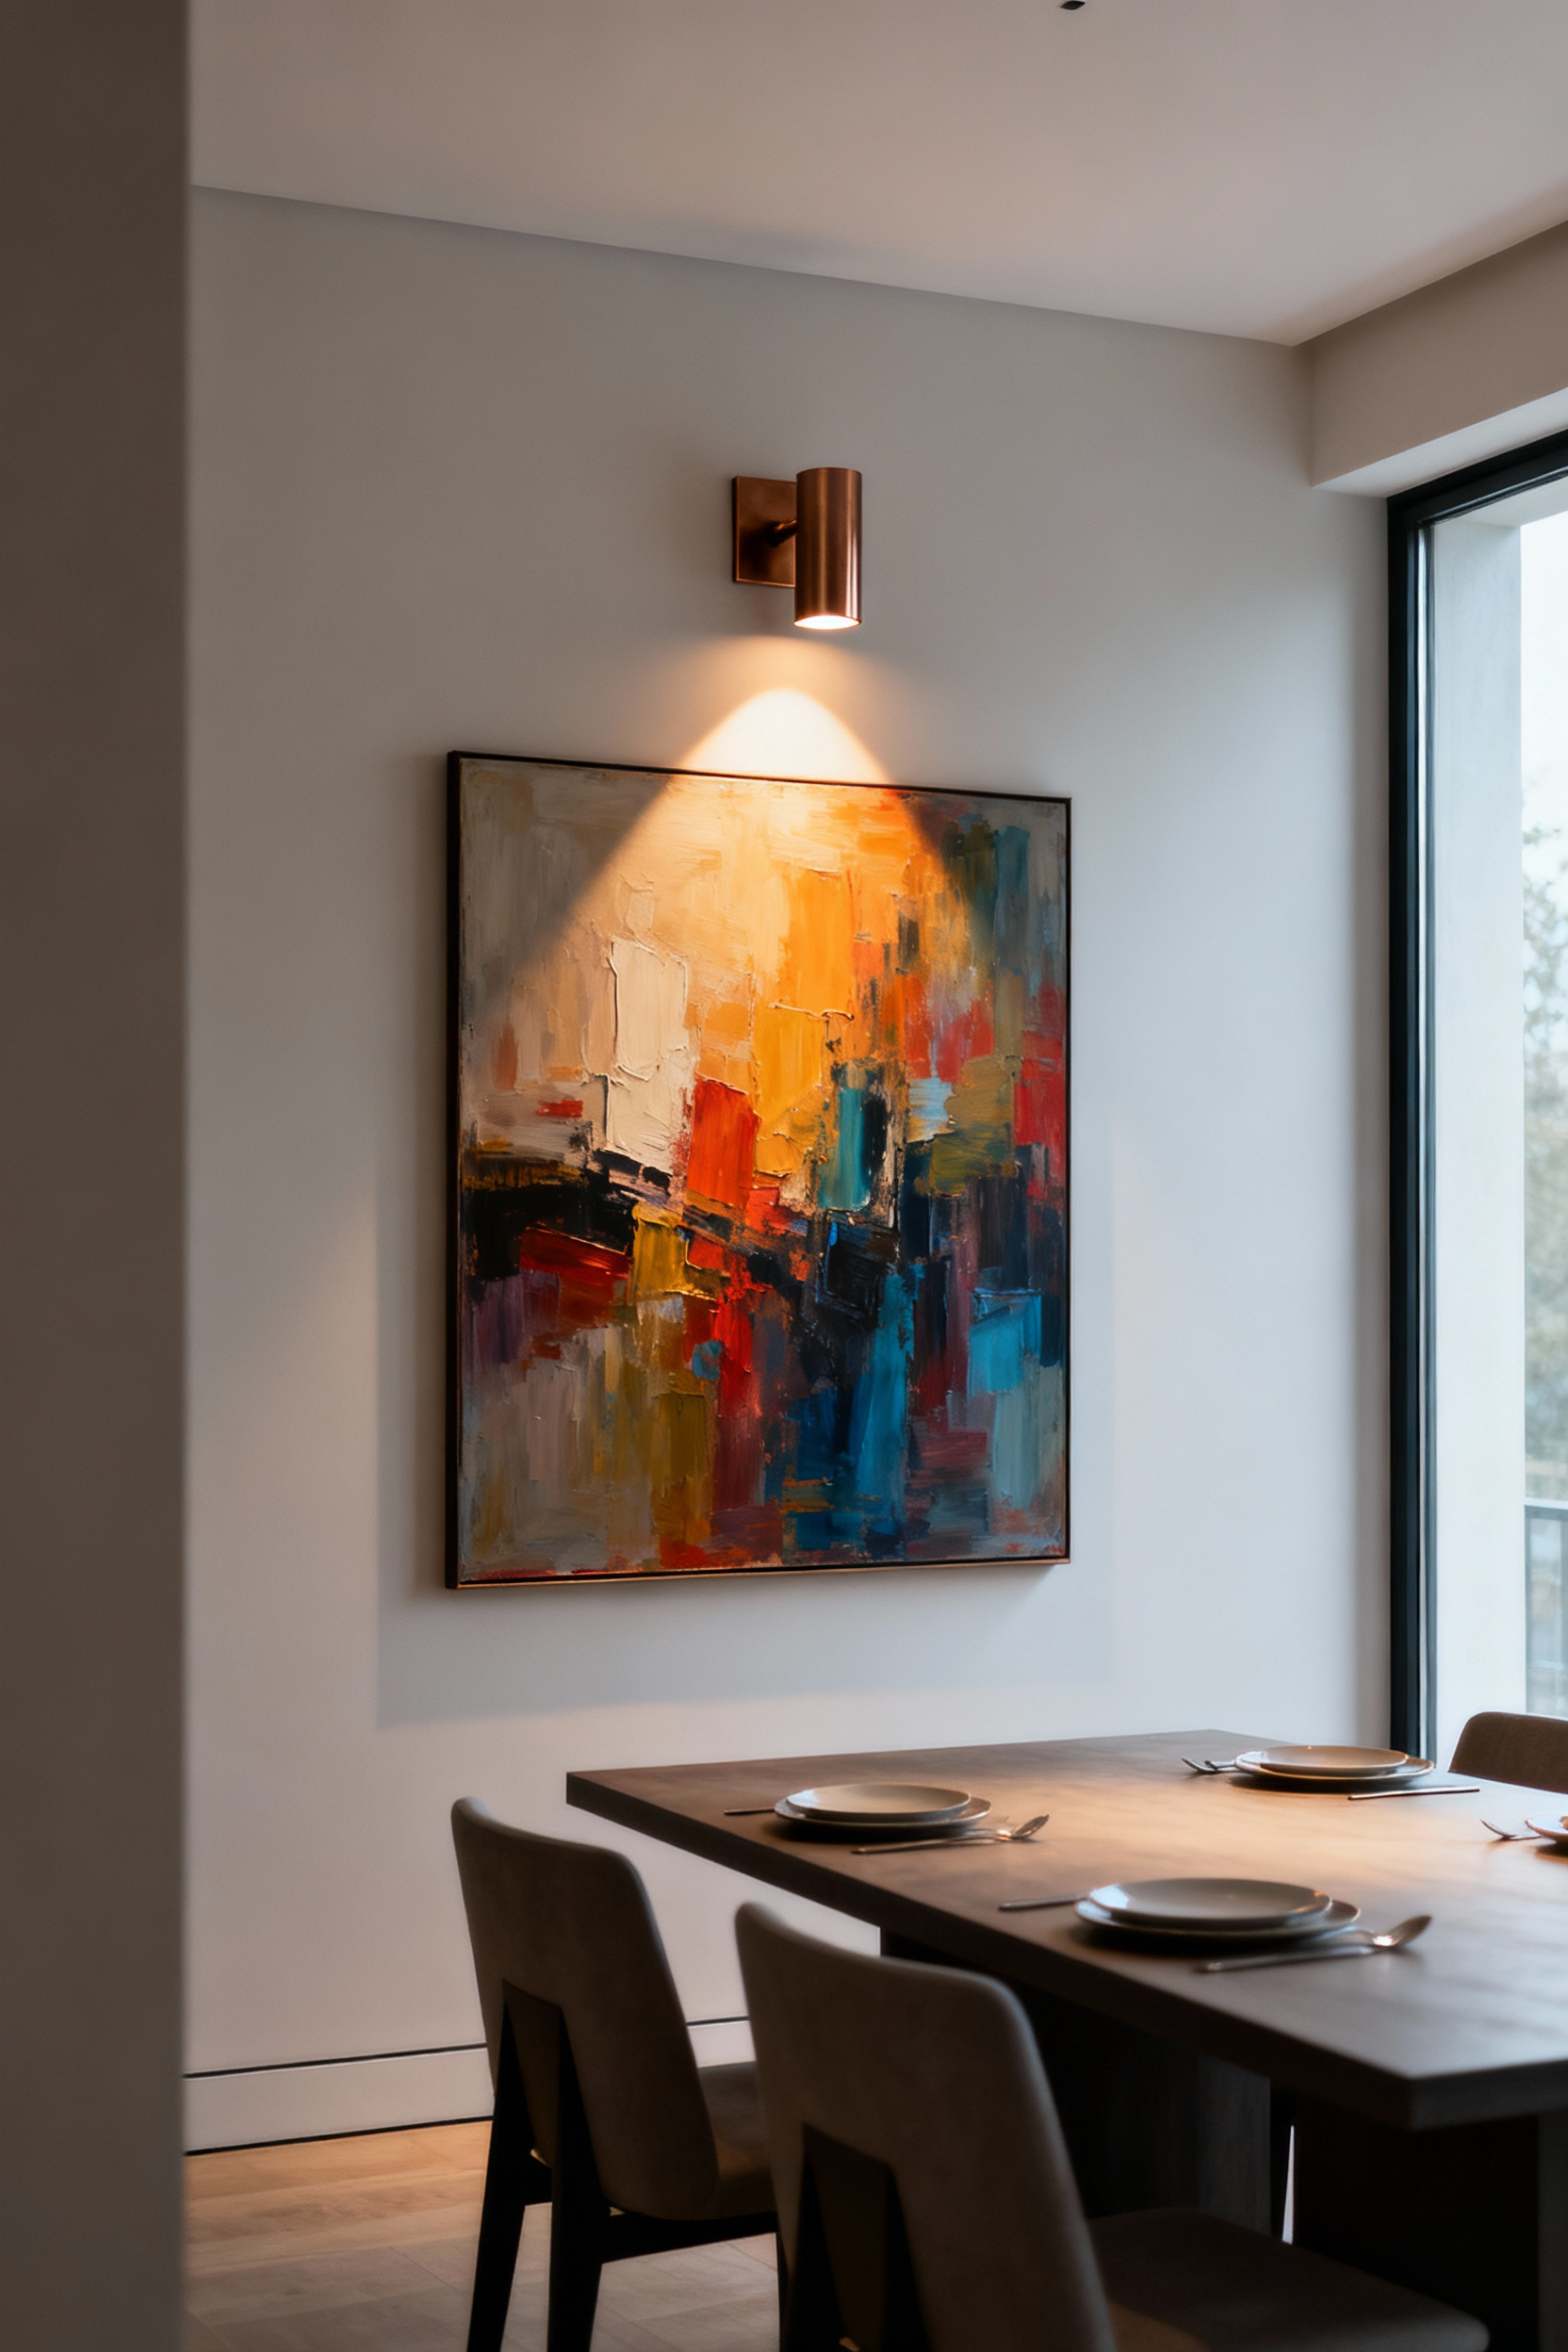
For a truly curated look, specialty lighting like picture lights can elevate a dining room into a personal gallery. Unlike a general spotlight, a picture light is designed to provide a perfect, even wash of light across the face of a single piece of art. It’s an intimate, focused way to draw attention to pieces that are important to you.
The key technical detail here is the Color Rendering Index (CRI), a scale from 0 to 100 that measures how accurately a light source reveals the true colors of an object. For art, you want a CRI of 90 or, ideally, 95+. A low-CRI light can make vibrant reds look dull and subtle blues appear grey. Investing in high-CRI picture lights ensures your artwork looks exactly as the artist intended. It’s a detail that communicates sophistication and a deep appreciation for the art itself.
20. Smart and Sustainable: Energy Efficiency as a Design Principle
Good design is efficient design. In today’s world, creating an energy-guzzling lighting plan is not just wasteful; it’s a sign of a dated approach. Fortunately, modern technology makes efficiency easy. The first step, of course, is using 100% LED sources. The energy savings are massive, and their long lifespan means less maintenance.
Beyond that, advanced controls are your best tool. Occupancy sensors that automatically turn lights off in an empty room are a no-brainer. Daylight sensors that dim your artificial lights when the room is getting plenty of sun are another brilliant and seamless way to save energy. These aren’t just eco-friendly gadgets; they are components of a truly smart, responsive system that saves money and reduces hassle. A well-designed, energy-efficient lighting plan is a hallmark of quality and forward-thinking design.
Conclusion
We started with the idea that truly great lighting isn’t about the fixture; it’s about the system. Across these 20 strategies, we’ve journeyed from the essential physics of placement and color to the art of layering and automation. You now have the framework professionals use to transform a room from simply being lit to being alive.
The real takeaway is that light is your most powerful design tool. It can make a small room feel large, a cold room feel warm, and a simple meal feel like a special occasion. By moving past the single chandelier and embracing a layered, controlled, and thoughtful approach, you can create a dining space that is not only beautiful but deeply functional and emotionally resonant.
So, I encourage you to experiment. Start seeing the light in your own home not as a utility, but as a medium. Layer it, shape it, and control it. When you do, you’ll find that your dining room lights do more than just illuminate; they create the perfect atmosphere for every memory you make there.
Meta Description: Master your dining room lights with 20 expert strategies from a lighting designer on layering, fixture selection, glare control, and smart tech.


