Picture this: You’re starting your morning not with the jolt of an alarm, but with the quiet ritual of stepping out onto your balcony or patio. The air is cool and smells faintly of damp earth and blooming jasmine. You pour a cup of tea, and your fingers brush against a fuzzy mint leaf, releasing a fresh, invigorating scent. This small, portable oasis isn’t just a collection of plants in pots; it’s a sensory sanctuary you’ve built for yourself.
People always ask me how to create that feeling, and the secret isn’t some complicated formula. It’s about understanding that a container garden is a tiny, self-contained ecosystem that needs a little more intention than a garden in the ground. You are its sun, its rain, its soil. But don’t let that intimidate you. It’s simpler than you think to create a space that nourishes you right back. Forget the corporate-speak and confusing advice; let’s talk about what actually works.
Getting Started: Planning Your Portable Oasis (Part 1)
This first step is everything. So many people rush to the nursery, fall in love with a plant, and then wonder why it dies a month later. Planning your sanctuary isn’t about spreadsheets; it’s about observation. It’s about listening to your space and understanding its unique energy before you ask anything to grow there.
1. Assess Sunlight Exposure for Optimal Plant Placement
Before you buy a single plant, I want you to perform a simple ritual: get to know the light in your space. This is the single most important factor, and it’s where most people go wrong. A plant tag that says “full sun” doesn’t understand that the sun reflecting off a brick wall at 4 PM is a blowtorch, not a gentle bath of light. To create a harmonious space, you have to match the plant’s nature to the light’s energy.
The easiest way to do this is to simply step outside three times in one day: once in the morning (around 9 AM), once at midday, and once in the late afternoon (around 4 PM). Notice where the light is direct and intense, and where it’s soft and dappled. Make a mental map. That spot that gets baked all afternoon is perfect for something that loves heat, like rosemary or lavender. The corner that gets gentle morning sun is a haven for delicate ferns or shade-loving flowers. You’re not just finding a spot for a plant; you’re creating a relationship between the two.
Now that you’ve become an observer of your own space, we can think about the home we’re going to give these plants.
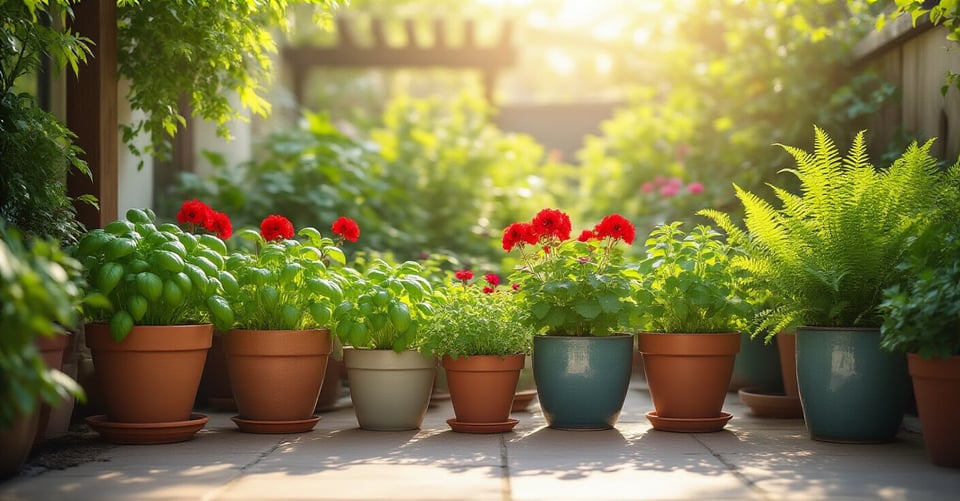
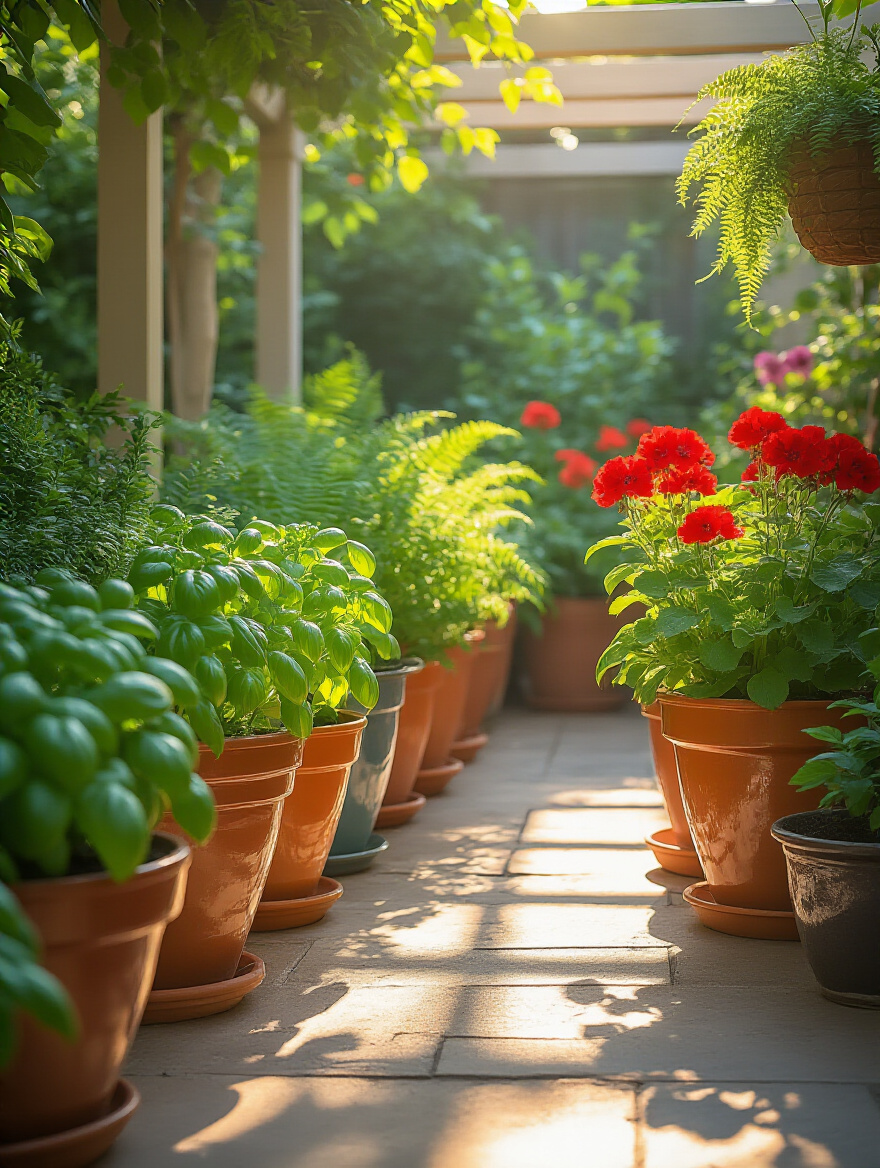
2. Select Container Materials Based on Aesthetics and Plant Needs
The container you choose is more than just a decorative pot; it’s your plant’s home, its skin. The material directly impacts the moisture and temperature of the soil, which affects the roots—the very soul of the plant. A glossy, glazed ceramic pot will hold water like a fortress, perfect for a thirsty fern. A classic unglazed terra cotta pot, however, breathes. It lets moisture evaporate through its porous walls, which is wonderful for succulents and herbs that hate having ‘wet feet’.
Think about the sensory experience, too. A collection of warm, earthy terra cotta pots feels rustic and Mediterranean. Sleek, dark fiberglass containers create a modern, minimalist vibe. But remember my story about a client whose beautiful black metal pots essentially cooked the roots of her basil on a sunny city balcony. Dark materials absorb heat intensely. If your space gets a lot of direct sun, choose lighter-colored or thicker-walled pots made of wood, concrete, or light-colored ceramic to protect those delicate root systems.
Choosing the right home is one thing, but ensuring it has a proper exit strategy for water is even more crucial.
3. Ensure Adequate Drainage Holes to Prevent Root Rot
Can we please talk about the most common and easily avoidable plant killer? A pot without a drainage hole. I’ve seen so many beautiful, expensive pots that are essentially beautiful, expensive coffins because there’s nowhere for excess water to go. When water sits at the bottom, it suffocates the roots, creating a swampy environment where root rot thrives. The plant looks thirsty on top, so you water it more, and the tragic cycle continues.
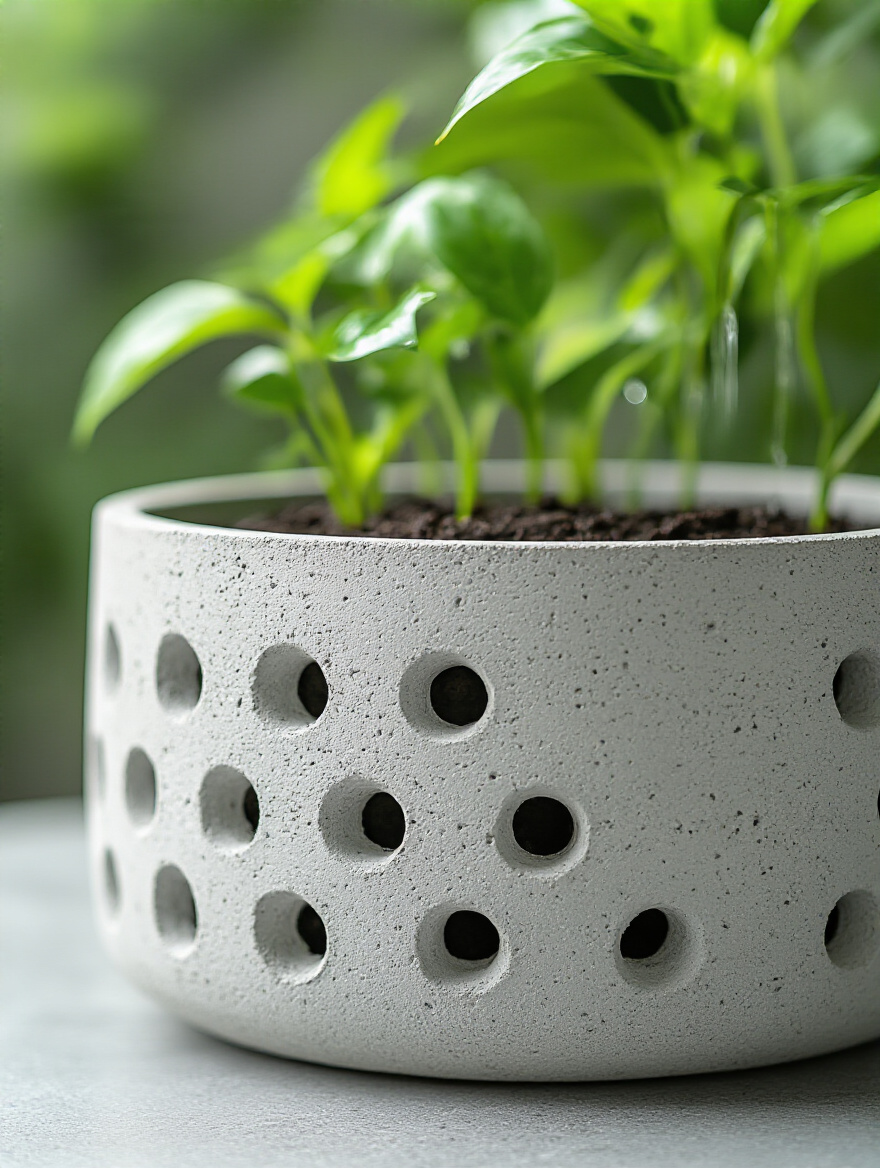
And here’s the biggest myth I need you to forget forever: adding a layer of gravel to the bottom of a pot does not help with drainage. It actually makes it worse by raising the soggy water level closer to the roots. Just don’t do it. The only thing that ensures good drainage is a hole. If you fall in love with a pot that doesn’t have one, get a drill with a masonry bit and gently make your own. Your plant will thank you for it.
With drainage handled, let’s make sure we’re giving our plants enough room to truly breathe and grow.
4. Match Container Size Precisely to Your Plant’s Mature Growth
This is a shortcut I wish I’d learned earlier. It’s so tempting to buy a small pot for a small plant, but that’s like buying shoes for a baby that only fit them for a month. Plants, especially vegetables and fast-growing annuals, need room for their roots to expand. A cramped root system leads to a stressed plant that won’t give you the lush foliage or abundant fruit you’re dreaming of.
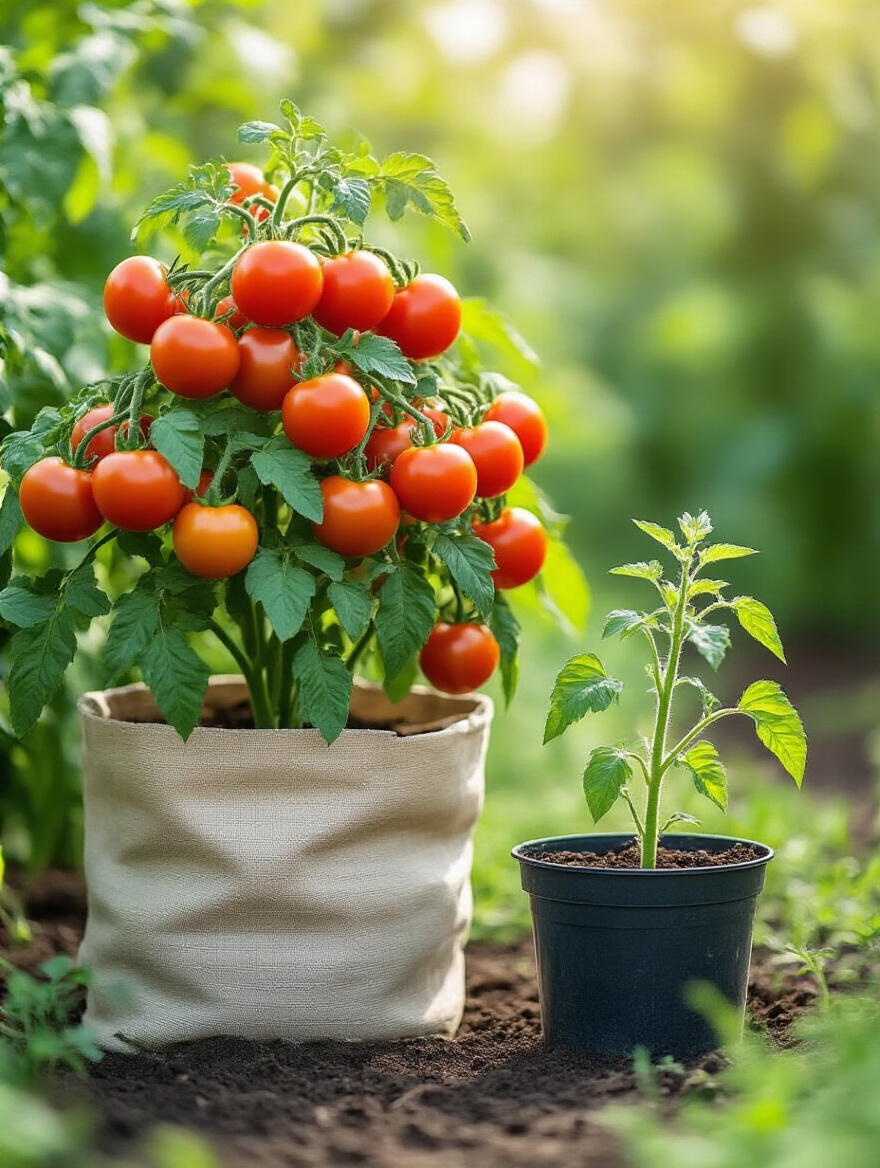
Do a tiny bit of research on the plant’s mature size before you buy the pot. A determinate tomato plant might seem small now, but it will be much happier and more productive in a 5-gallon container than in a 3-gallon one. A bigger pot holds more soil, which in turn holds more moisture and nutrients, meaning you’ll have to water and fertilize less often. You’re not just giving the plant more space; you’re giving yourself more peace of mind and a more resilient garden.
Getting Started: Planning Your Portable Oasis (Part 2)
We’ve found the light, we’ve chosen the perfect home with proper drainage, and we know to give it room to grow. Now comes the most nurturing part of the foundation: the soil itself.
5. Choose Premium Potting Mix Over Standard Garden Soil
I have a little confession: I used to think all dirt was the same. Then I watched my first-ever container herbs wither and die in dense, heavy soil I scooped from my backyard. Garden soil in the ground is a beautiful thing, full of life and clay and structure. But put that same soil in a pot, and it becomes a dense, compacted brick that chokes roots and refuses to drain.
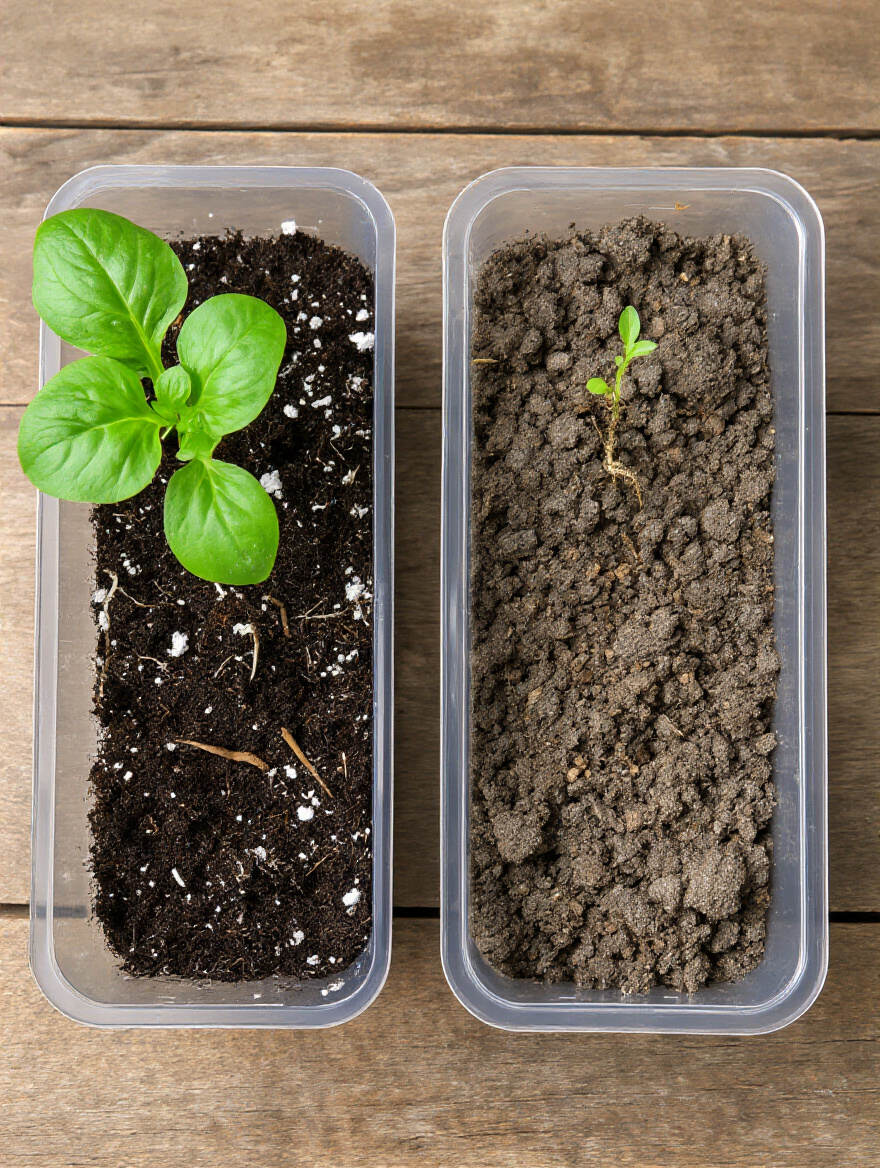
Please, invest in a high-quality potting mix. It’s not “dirt”; it’s an engineered medium. It’s light and fluffy, specifically designed with ingredients like peat moss, perlite, and vermiculite to hold the perfect balance of moisture and air for container environments. It’s the difference between asking your plants to live in a stuffy, windowless room versus a breezy, sunlit studio. Starting with a premium mix is the ultimate shortcut to a healthy, thriving container garden.
Building Your Container Garden: Plant Selection & Setup (Part 1)
Now for the truly fun part: bringing your plants home and creating living art. This is where your intuition and your senses really come into play. We’re going to move beyond just sticking a plant in a pot and start designing compositions that feel as good as they look.
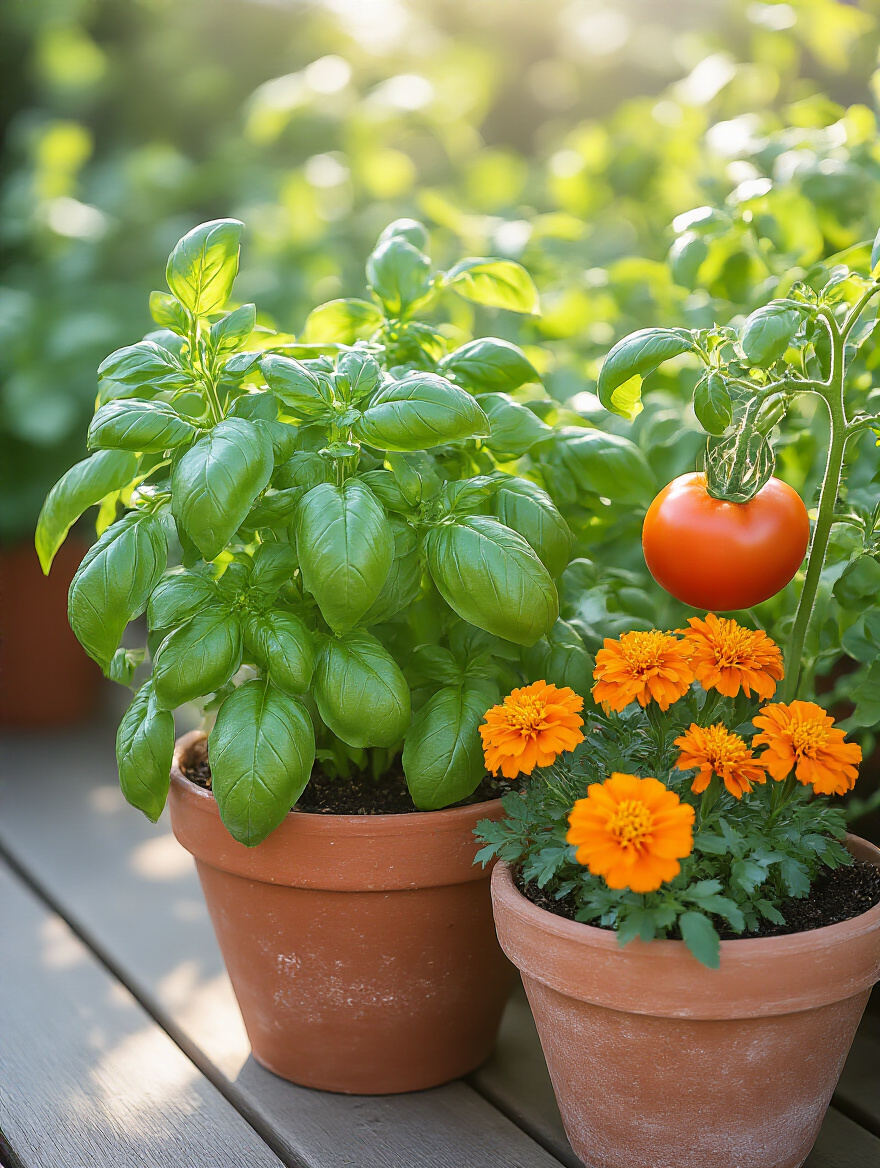
6. Select Companion Plants for Harmonious Container Pairings
In the close quarters of a container, plants are literally roommates. And just like people, some get along better than others. Companion planting is the beautiful practice of grouping plants that help each other thrive. It’s nature’s own wisdom. For example, planting basil next to your tomatoes is said to deter pests like whiteflies and even improve the tomato’s flavor. It’s a sensory partnership—the spicy scent of basil protects the sweet fruit.

Don’t overthink this. A simple and effective strategy is to plant aromatic herbs among your flowers and vegetables. The strong scents of rosemary, thyme, or marigolds can confuse pests looking for your precious peppers. You’re creating a multi-sensory shield. Just be careful with mint—it’s a wonderful plant, but it’s an aggressive roommate that will take over the whole pot. Give it its own container to flourish in.
This idea of thoughtful pairing is the heart of creating a visually stunning arrangement.
7. Master the Thriller, Filler, Spiller Technique for Dynamic Designs
You know those breathtaking container arrangements you see at boutique nurseries? They almost all follow one simple, intuitive design principle: Thriller, Filler, and Spiller. It’s a recipe for creating a living sculpture that has height, depth, and movement. It’s the secret to making your containers look lush and professionally designed, rather than just a few plants stuck in a pot.
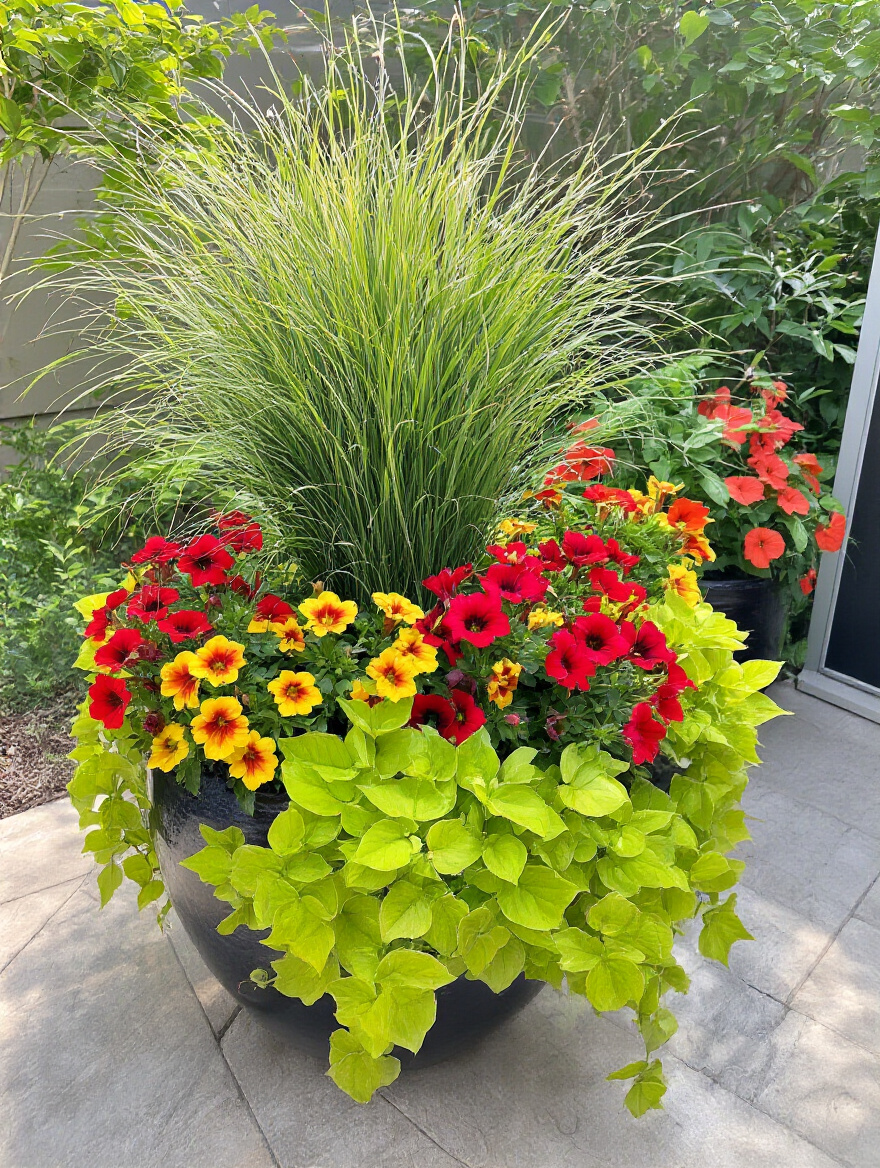
The ‘Thriller’ is your star—a tall, dramatic plant that creates a focal point, like a spiky ornamental grass or a vibrant Canna Lily. The ‘Filler’ plants are the supporting cast; they are mounded and bushy, filling the space around the thriller with color and texture, like petunias or coleus. Finally, the ‘Spiller’ is what softens the edges, trailing gracefully over the side of the pot and connecting it to the space around it, like a sweet potato vine or creeping jenny. This technique isn’t a rigid rule; it’s a gentle guide to creating balance and flow.
Once you’ve chosen your beautiful cast of characters, it’s time to help them settle into their new home.
8. Properly Pot Plants to Avoid Transplant Shock and Promote Vigour
Bringing a plant home and moving it into a new container can be a stressful experience for it, a bit like us moving to a new city. Our goal is to make this transition as gentle and seamless as possible to avoid “transplant shock,” which is when a plant wilts and struggles after being repotted. The secret is all in the gentle handling of the roots.
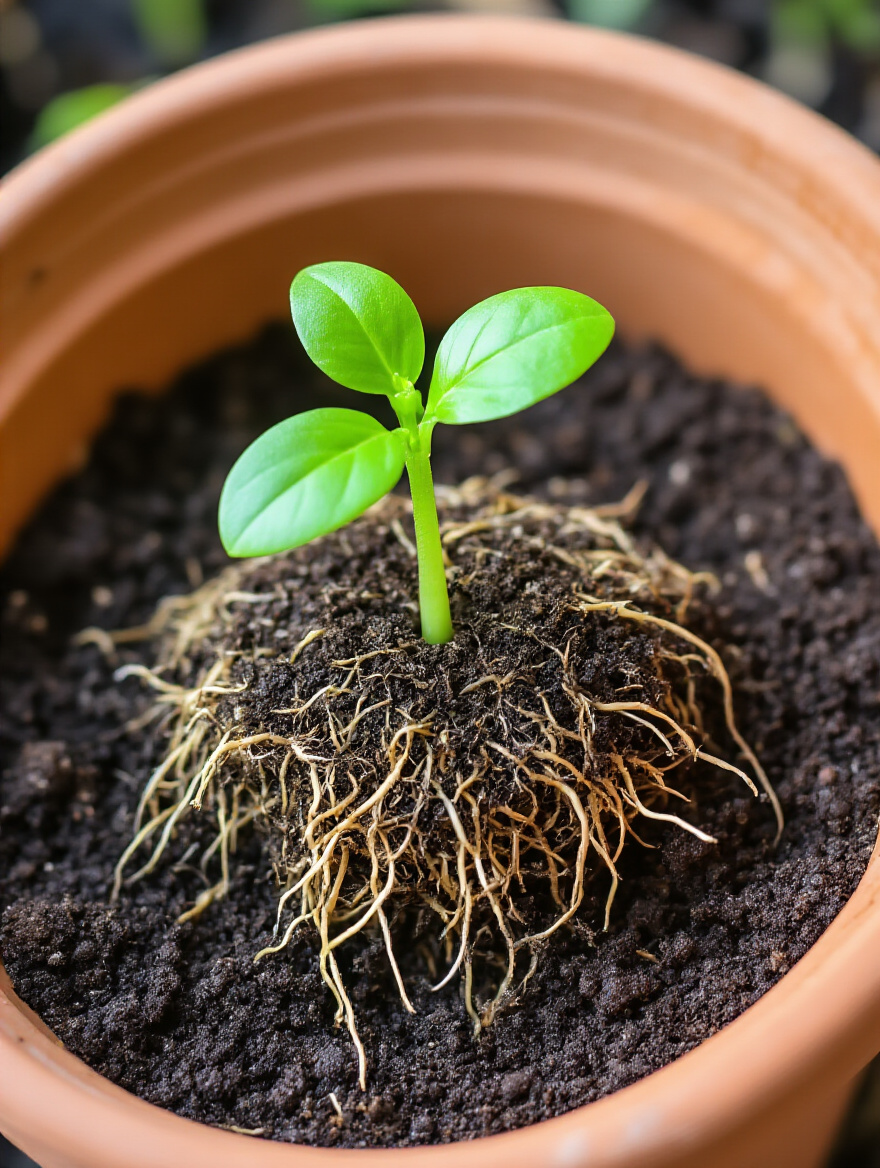
Before you take the plant out of its nursery pot, give it a good drink of water an hour or so beforehand. This hydrates the roots and helps the soil ball slide out more easily. When you’re ready, gently tip the pot over and squeeze the sides, letting the plant slide into your hand. Never, ever pull it out by the stem. If the roots are tightly wound in a circle at the bottom, gently tease them apart with your fingers to encourage them to grow outwards into their new, spacious home. It’s a small act of kindness that signals to the plant that it’s safe to expand and thrive.
A proper welcome into a new home always includes a good drink, and the same is true for your plants.
9. Implement Consistent Watering Practices to Keep Roots Hydrated
Everyone thinks overwatering is the big danger, but in my experience, inconsistent watering is the real villain. A plant in a container is in a tiny desert island; it’s completely reliant on you for every drop. Letting the soil go bone dry and then flooding it creates a stressful boom-and-bust cycle for the roots. The key is to aim for soil that feels like a well-wrung-out sponge—consistently moist, but never soggy.
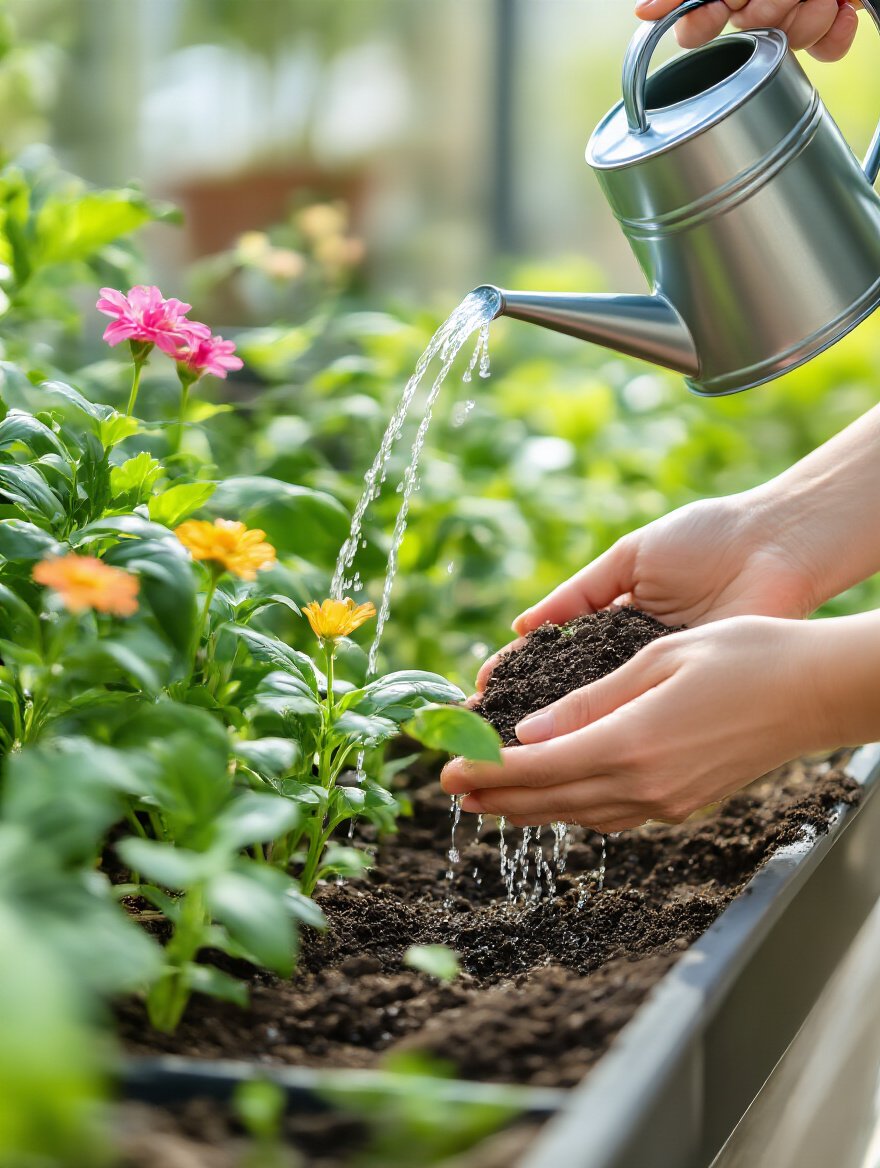
The best tool for this is your own finger. Forget rigid schedules. Every morning, or every evening on hot days, just stick your finger an inch or two into the soil. If it feels dry, it’s time to water. And when you do, water deeply and slowly until you see it running out of the drainage hole. This ensures the entire root ball is hydrated, not just the top surface. This simple, daily check-in is a meditative practice that connects you to the rhythm of your garden.
Building Your Container Garden: Plant Selection & Setup (Part 2)
Your garden is planted and starting to settle in. This next phase is about nurturing that initial growth into a lush, season-long display. Think of it as tending to the well-being of your little sanctuary, providing the nourishment and support it needs to truly flourish.
10. Establish a Regular Fertilizing Schedule for Containerized Plants
Here’s something many people don’t realize: every time you water your container plants, you’re not just giving them a drink; you’re also washing tiny amounts of nutrients out of the soil through the drainage hole. Potting mix has a finite amount of food, and over a few weeks, your plants will have eaten it all. A hungry plant is a stressed plant, more susceptible to pests and diseases.
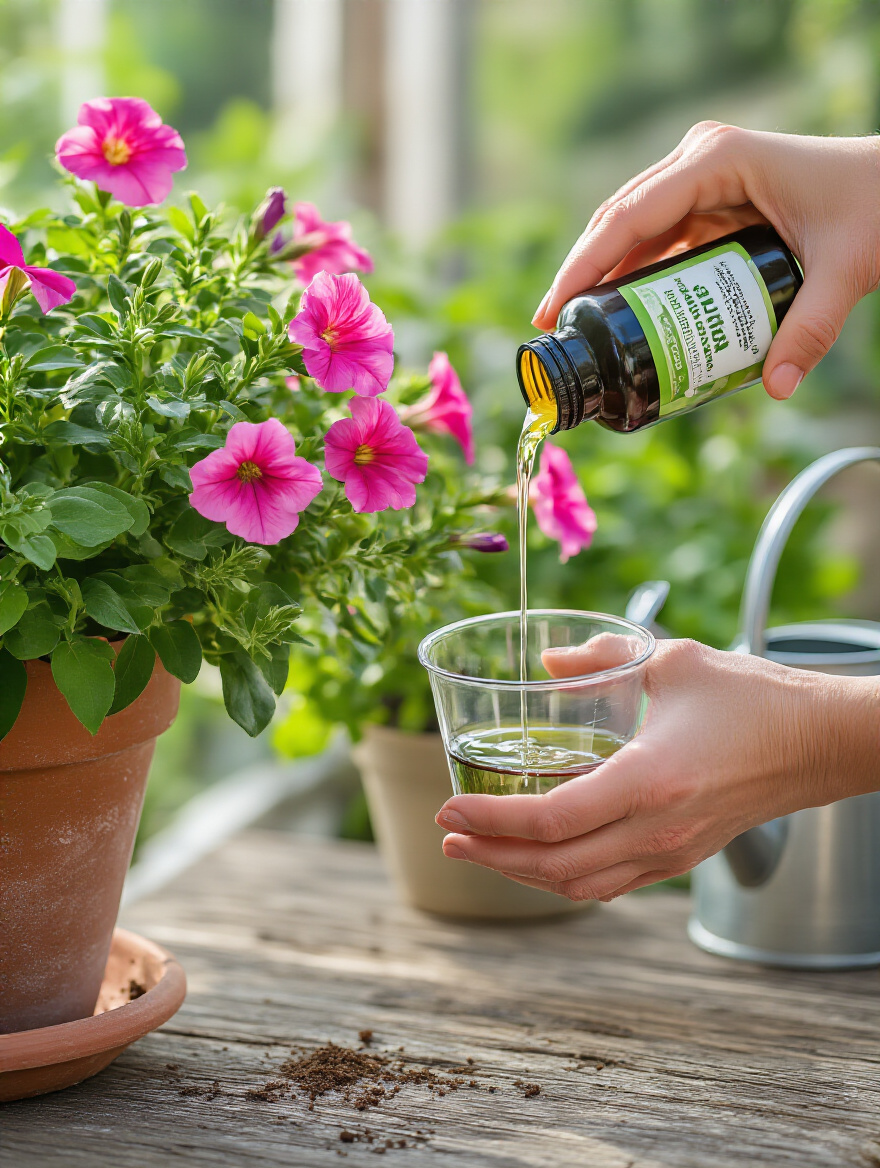
Think of fertilizer as a vitamin supplement for your plants. You don’t need to get complicated with this. For busy people, the shortcut I adore is using a slow-release granular fertilizer. You just mix it into the soil when you plant, and it provides a steady, gentle feed for several months. If you prefer a more hands-on ritual, a weekly or bi-weekly feeding with a diluted liquid organic fertilizer (like fish emulsion or seaweed) during the growing season is a wonderful way to provide consistent nourishment.
Providing food is one half of preventative care; the other is protecting your plants from unwanted guests.
11. Proactively Prevent Pests and Diseases with Organic Strategies
The best way to deal with pests and diseases is to create an environment where they don’t want to live in the first place. A healthy, well-watered, and well-fed plant is its own best defense. Before reaching for a chemical spray, your first line of defense should be observation. Take a moment each day to really look at your plants. Check under the leaves. Notice anything unusual.
Catching a problem early is key. If you see a few aphids, you can often just wipe them off with your fingers or a strong spray of water from a hose. Keeping leaves dry by watering the soil, not the foliage, helps prevent fungal diseases like powdery mildew. And encouraging beneficial insects like ladybugs by planting things they love (like dill or sweet alyssum) brings natural predators right into your garden. It’s about creating a balanced little ecosystem, not a sterile environment.
Just as a balanced ecosystem needs diversity, some of our plants need a little extra physical help to reach their full potential.
12. Provide Essential Support for Tall or Vining Plant Varieties
For plants that love to climb and ramble, like indeterminate tomatoes or climbing peas, providing support is an act of empowerment. Without a stake, cage, or trellis, these plants will sprawl, leading to broken stems, fruit rotting on the soil, and poor air circulation which invites disease. Giving them a structure to climb isn’t just about keeping things tidy; it’s about helping the plant devote its energy to making fruit, not to just holding itself up.
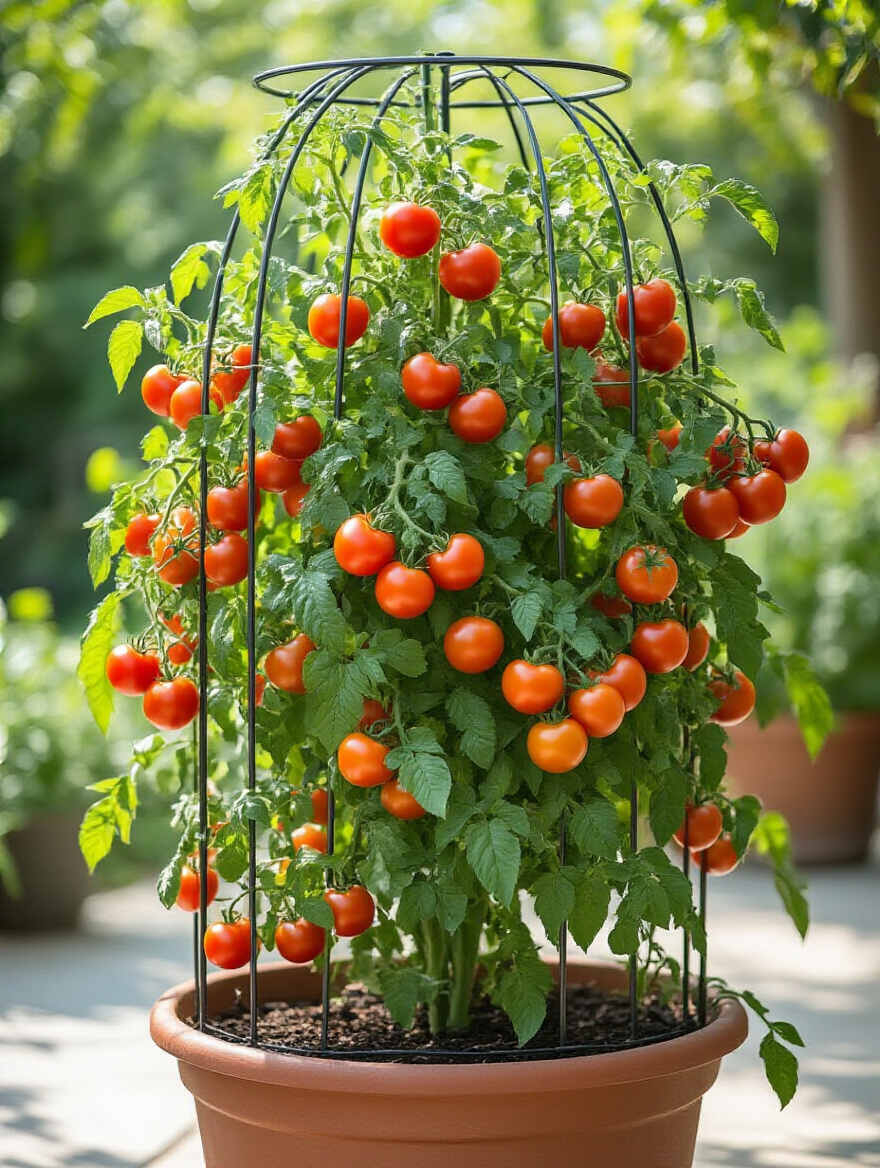
The crucial trick here is to put the support in place when you plant. Trying to wrestle a cage over a half-grown tomato plant is a recipe for broken branches and a very unhappy gardener. Installing a stake or cage early allows the plant to grow up and into its support system naturally. As it grows, you can gently guide and tie the stems to the support with soft plant ties or strips of old t-shirt, allowing it to reach for the sun.
Maximizing Beauty & Harvest: Care & Advanced Techniques (Part 1)
Your garden is growing beautifully. Now we’re getting into the little refinements—the techniques that take a garden from just surviving to truly thriving. These are the practices that create continuous blooms and keep your plants looking lush and vibrant all season long.
13. Understand When to Prune and Deadhead for Continuous Blooms and Health
This is one of my favorite garden rituals. Deadheading, which is simply pinching or snipping off faded flowers, is a powerful signal to your plant. A flower’s ultimate goal is to create a seed. Once it does that, it thinks its job is done. By removing the spent bloom before it goes to seed, you’re tricking the plant into thinking, “Oh, I haven’t reproduced yet! I’d better make more flowers!”
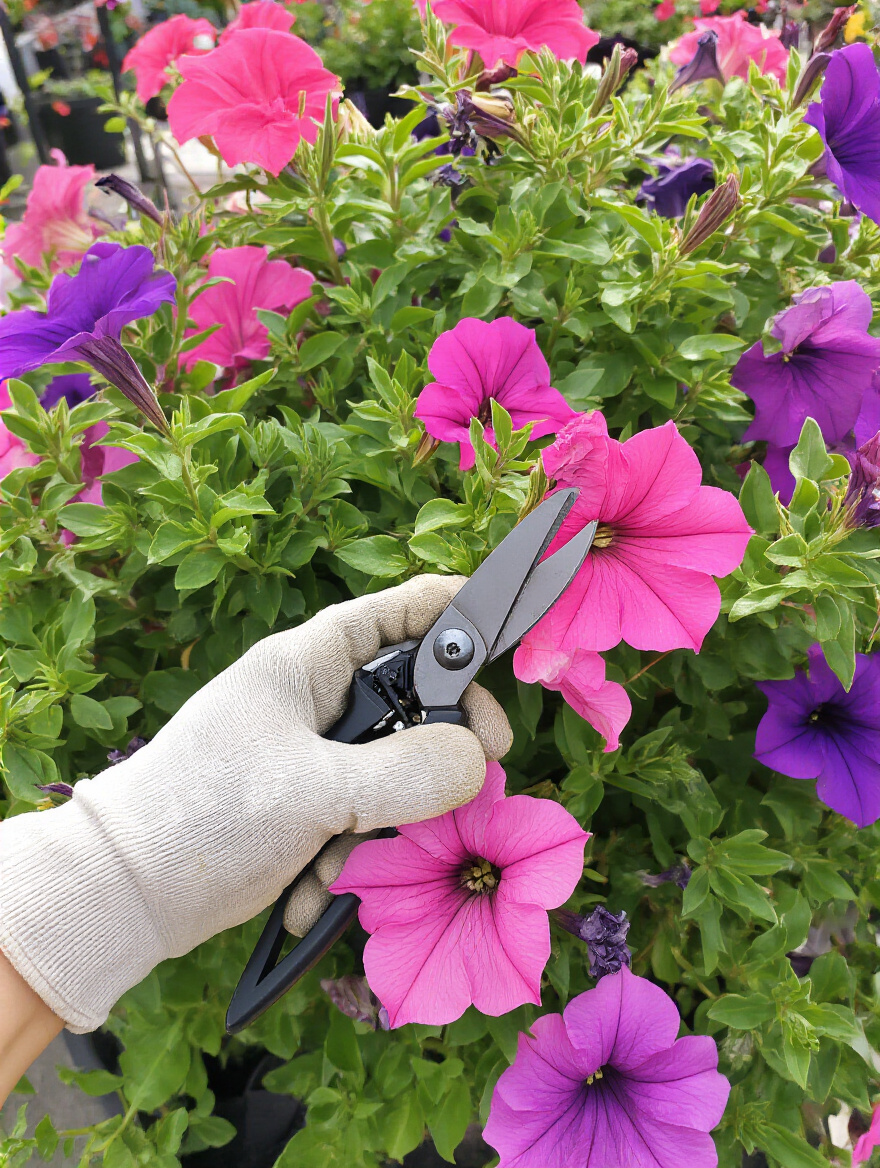
This simple act can dramatically increase the number of blooms you get and extend the flowering season by weeks. It keeps the plant’s energy focused on creating beauty rather than on making seeds. Pruning is similar; trimming back leggy stems encourages the plant to become bushier and more compact. It’s a gentle way to shape the plant’s energy, resulting in a healthier, more beautiful form. Use a clean, sharp pair of snips and think of it as a conversation with your plant.
Just as shaping the top is important, ensuring there’s breathing room at the bottom is vital.
14. Optimize Drainage and Airflow by Elevating Your Containers
This is such a simple trick, but it makes a huge difference. Lifting your pots just an inch off the ground with “pot feet,” bricks, or small blocks accomplishes two crucial things. First, it ensures that the drainage hole is completely clear, allowing excess water to escape freely and preventing the dreaded ‘wet feet’ that lead to root rot. Second, it allows air to circulate underneath the pot.
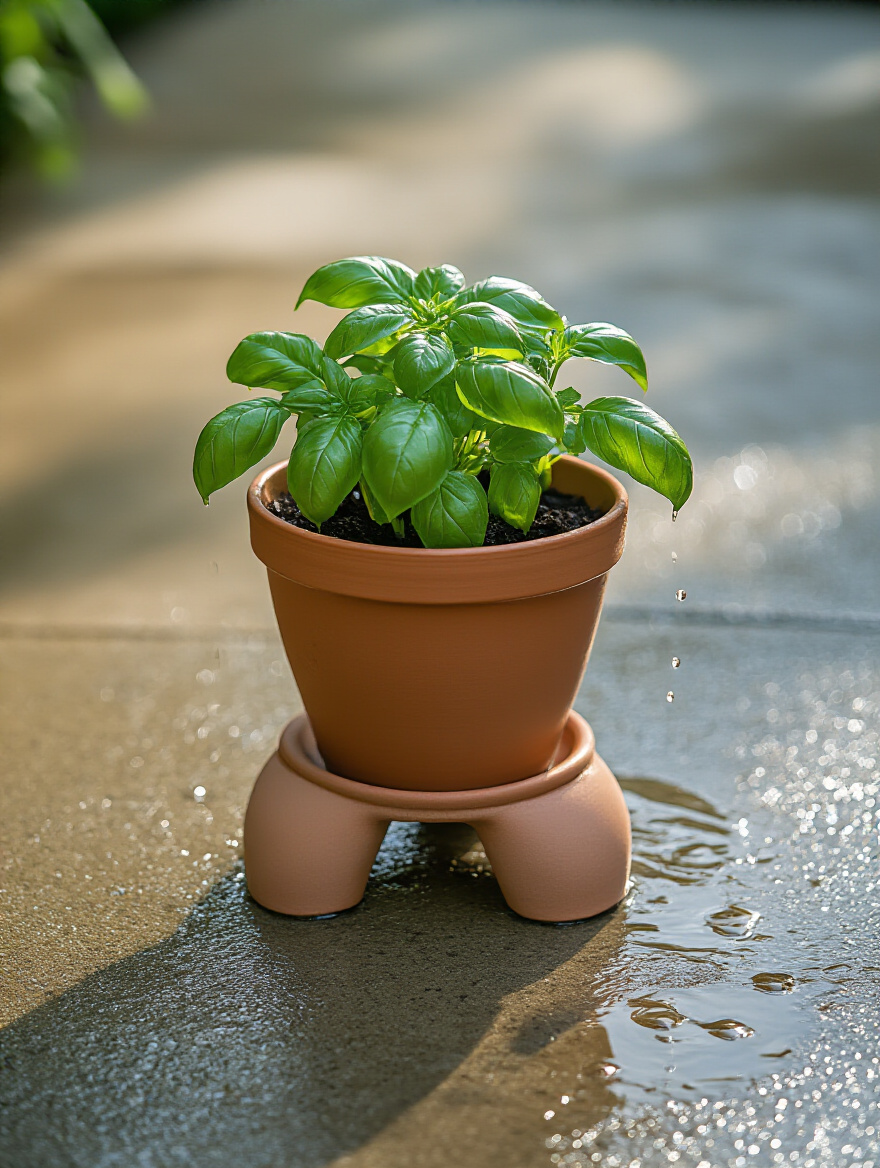
This airflow is incredibly beneficial, especially on hot surfaces like concrete or stone patios, which can get hot enough to bake the roots inside a pot. The circulation helps to moderate the soil temperature, keeping the roots cooler and healthier. As a bonus, it prevents moisture from getting trapped under the pot, which can stain your deck or patio and create a haven for pests like slugs. It’s an effortless way to improve the health of your entire garden.
Now, let’s talk about the natural cycle of things and how to keep your sanctuary vibrant through every season.
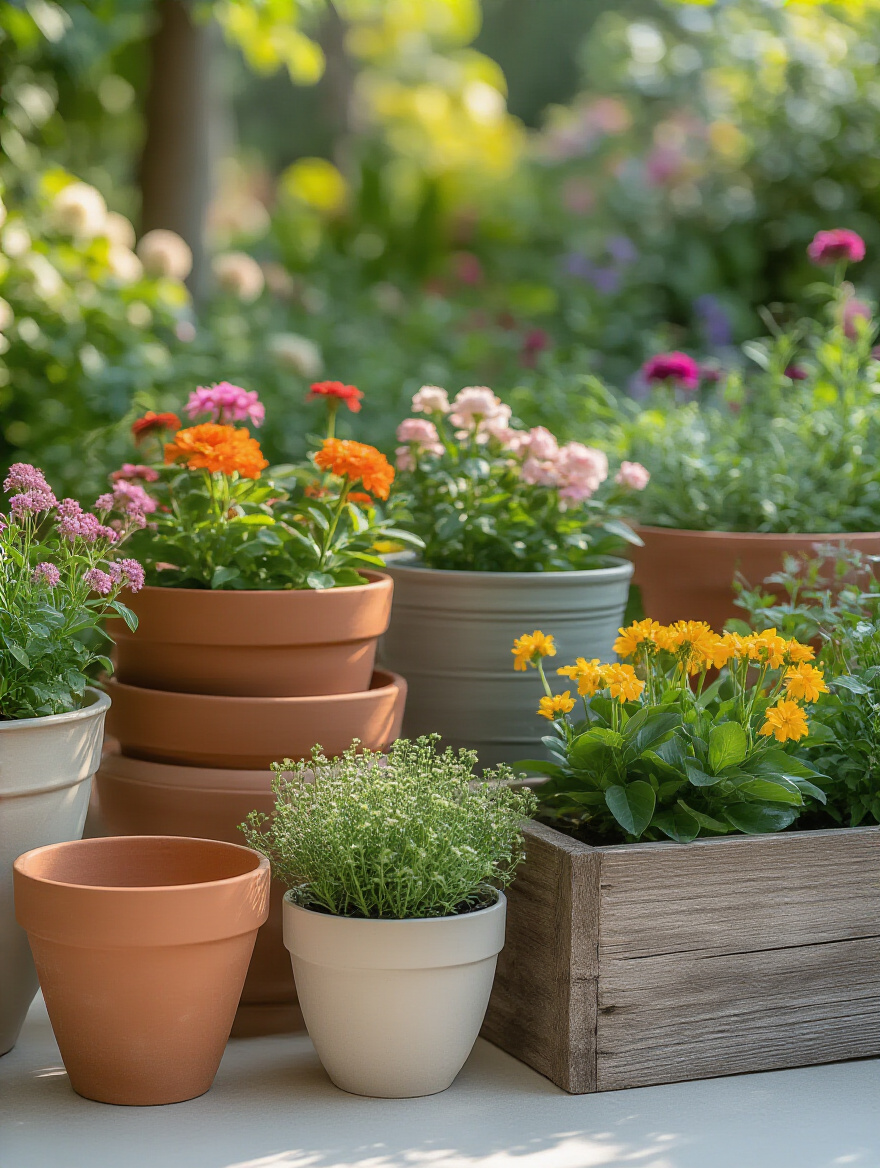
15. Master the Art of Seasonal Refresh and Plant Rotation
A container garden is not a static display; it’s a living, evolving space. Embracing the rhythm of the seasons by refreshing your containers keeps them looking vibrant and beautiful year-round. When your spring pansies start to fade in the summer heat, don’t just let them suffer. Gently remove them and replace them with heat-loving annuals like zinnias or lantana. In the fall, swap those out for ornamental kale and chrysanthemums.
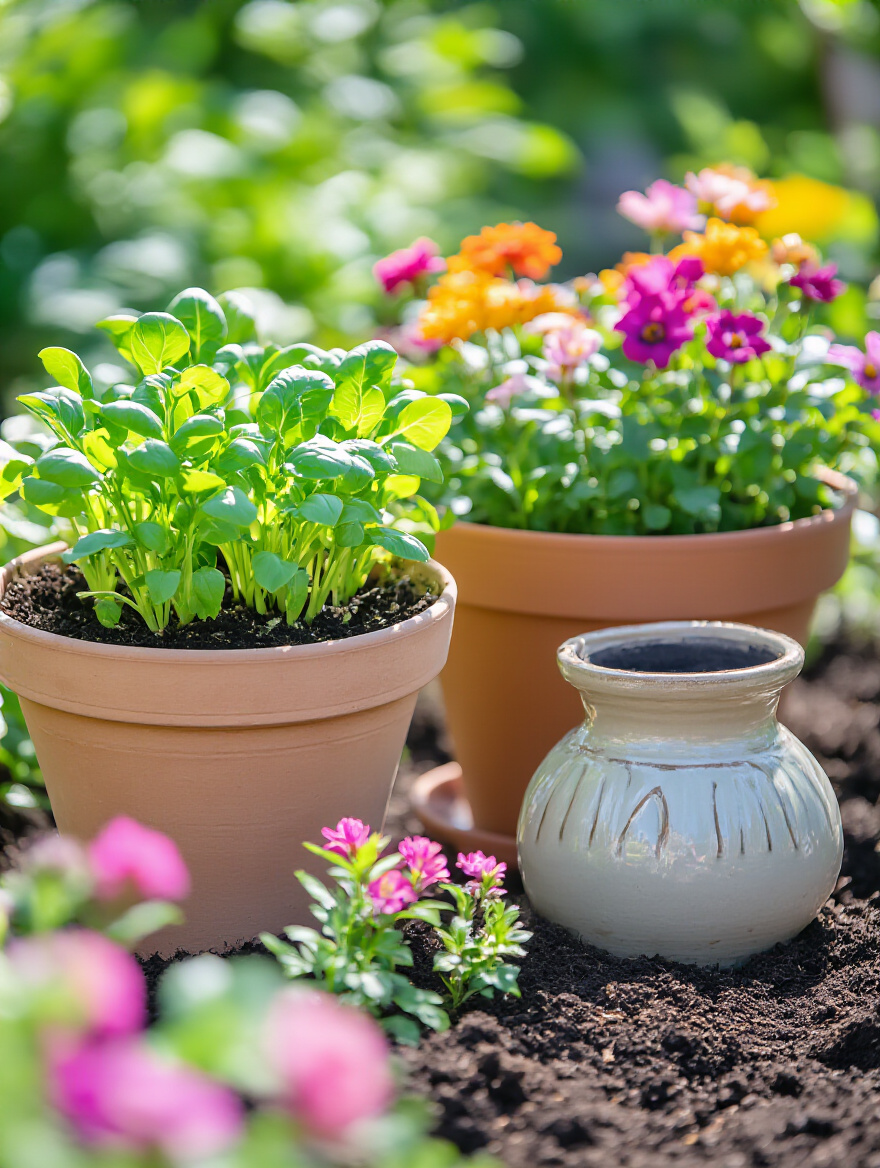
This isn’t just about aesthetics; it’s also incredibly healthy for your soil. Planting different types of plants in the same pot from season to season (a practice known as crop rotation) helps prevent the buildup of specific pests and diseases. When you make the switch, it’s the perfect time to refresh the soil by removing the top third and mixing in some fresh potting mix and compost to replenish the nutrients for the new arrivals. This ensures your sanctuary is always at its peak.
To keep a garden thriving, it helps to know how to read its signals when it’s not feeling its best.
16. Identify and Effectively Troubleshoot Common Container Garden Issues
Even the most well-tended garden will face challenges. The key is to see them not as failures, but as messages from your plants. Yellowing leaves, for example, aren’t just an eyesore; they’re a communication. Are the lower leaves yellowing? It could be a nitrogen deficiency. Are the new leaves yellow with green veins? That might signal an iron deficiency. Don’t just guess; become a gentle detective.
Start with the simplest explanations first. Most issues in container gardens boil down to water (too much or too little) or nutrients. Check the soil moisture with your finger before you do anything else. Observe the plant closely. The wonderful thing about container gardening is that you’re working with a manageable ecosystem. If you suspect a pest, you can often isolate that pot to treat it without affecting your whole garden. Learning to listen to your plants is the most valuable skill a gardener can have.
Maximizing Beauty & Harvest: Care & Advanced Techniques (Part 2)
We’re in the home stretch now, focused on those clever strategies that make a big impact. These are the techniques that amplify your results, allowing you to grow more in less space and to make your care routine more efficient and peaceful.
17. Explore Vertical Gardening Solutions for Maximizing Small Spaces
When you can’t build out, build up. Vertical gardening is a transformative way to think about space. A bare wall or balcony railing can become a lush, living tapestry of herbs, greens, and flowers. Systems like wall-mounted pockets, tiered planters, or simple trellises allow you to multiply your growing area without taking up any more floor space.
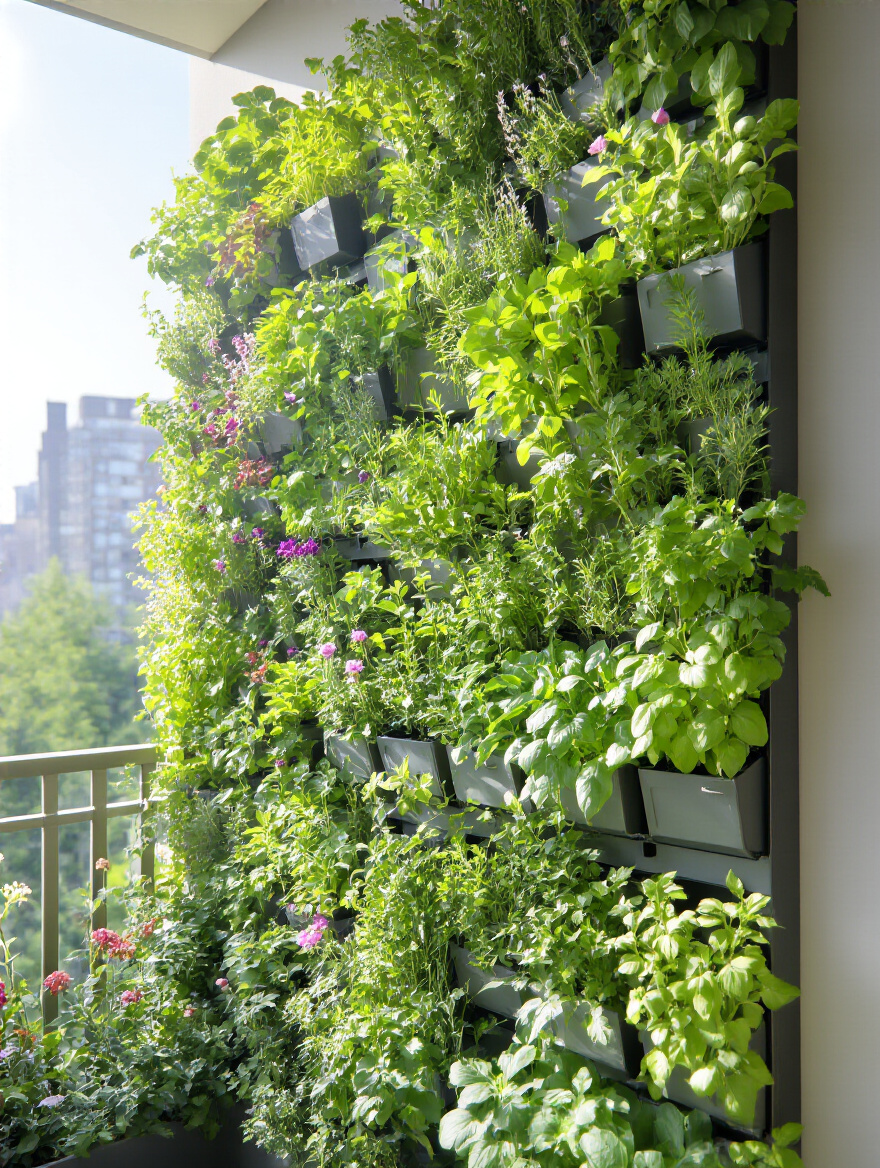
This is perfect for creating that immersive sanctuary feeling. A wall of herbs outside your kitchen door isn’t just convenient; it creates a fragrant, green enclosure that delights the senses. Strawberries are wonderful in vertical planters, as the fruit can hang down cleanly, away from pests on the ground. It’s an incredibly efficient, beautiful, and ergonomic way to garden, bringing the plants up to your level.
To make tending to a lush vertical garden effortless, consider this final, game-changing tip.
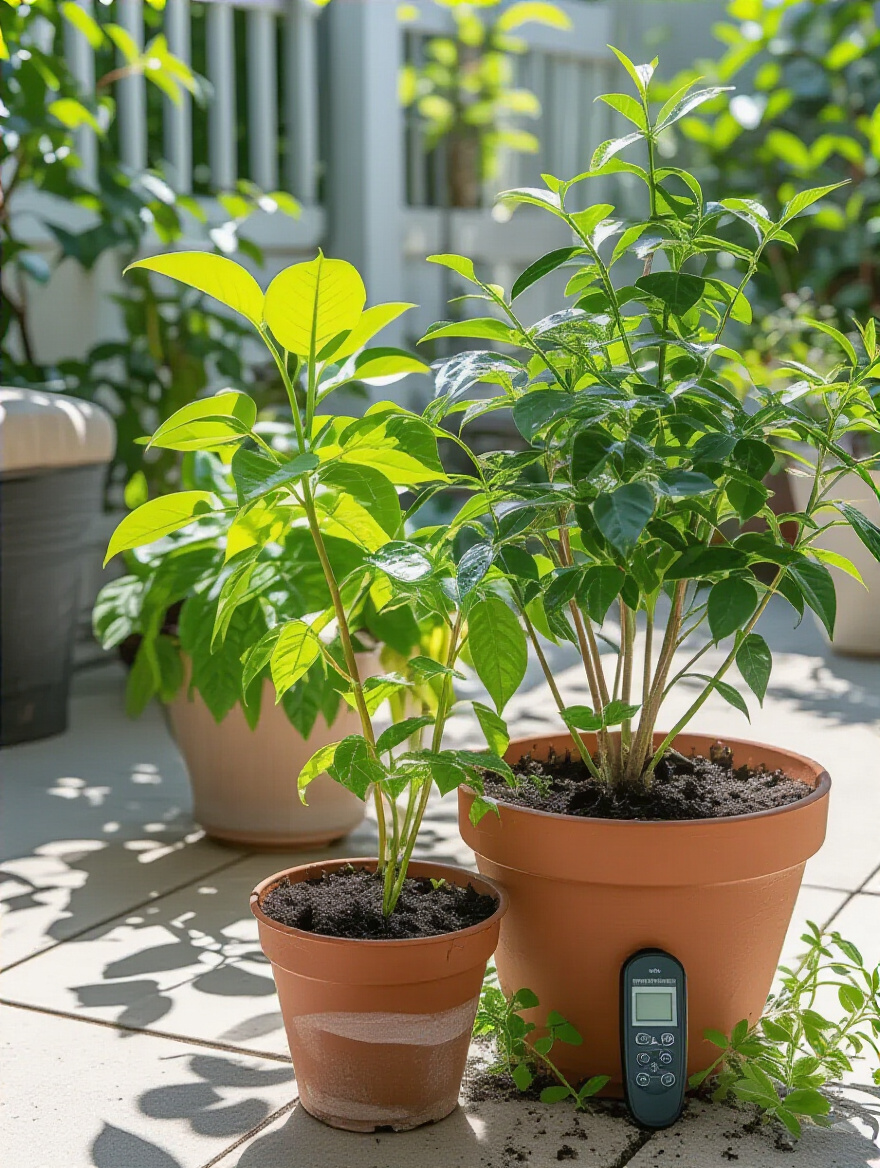
18. Consider Drip Irrigation Systems for Efficient and Consistent Watering
If you truly want to make your container garden a low-stress sanctuary, a simple drip irrigation system on a timer is the single best investment you can make. It takes the guesswork and the daily chore out of watering, delivering water slowly and directly to the roots where it’s needed most. This is incredibly efficient, saving water and preventing the leaf fungus that can come from overhead watering.
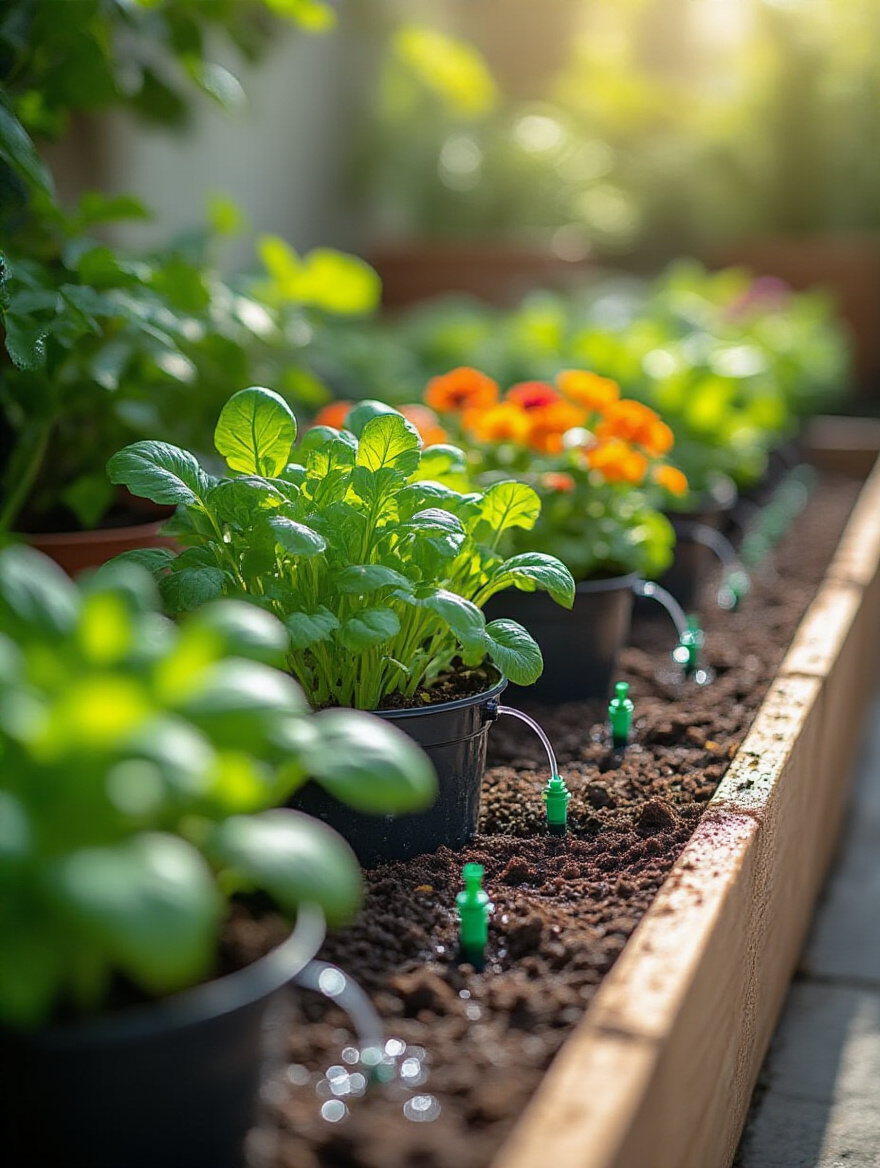
You don’t need a fancy, expensive system. You can buy simple, affordable kits online or at any garden center. Setting one up is like a fun project with building blocks. Once it’s in place, you can go on vacation without having to ask a neighbor to water your plants. You’re giving your garden the gift of consistency, and giving yourself the gift of time and peace. It automates the most crucial task, leaving you more time for the pure joy of it all—the harvesting, the smelling, and the simple being.
Conclusion
Creating a thriving container garden is so much more than following a list of instructions. It’s a practice of mindfulness, a sensory dialogue between you and the living things in your care. By understanding the fundamentals of light, water, soil, and support, you are creating the conditions for life to flourish. You are becoming a caretaker of a small, beautiful world that, in return, will care for you—offering you beauty for your eyes, fragrance for your spirit, and perhaps even fresh flavors for your table.
Don’t feel like you have to do all 18 of these things at once. Start small. Pick one pot, one plant that speaks to you, and begin there. Let your sanctuary grow organically, one container at a time. The real magic happens in the daily moments of connection—the feeling of cool soil on your fingers, the joy of seeing the first new leaf unfurl. This is your invitation to roll up your sleeves, to get your hands dirty, and to cultivate a space that truly nourishes your soul. Your sanctuary is waiting.


