Darlings, imagine transforming your kitchen into a bohemian paradise without emptying your treasure chest! As I sit here, sipping chai and reminiscing about the kaleidoscope of tiles I encountered in Marrakech’s bustling bazaars, I can’t help but feel a surge of excitement. Today, we’re embarking on a magical journey to discover budget-friendly backsplash ideas that will make your heart sing and your wallet sigh with relief.
Close your eyes and picture this: a kitchen that whispers tales of far-off lands, where every glance at your backsplash ignites your culinary creativity. It’s not just a dream, my free spirits! With a dash of imagination and a sprinkle of thrifty wisdom, we’ll unveil ten wallet-friendly tile ideas that will turn your cooking space into a masterpiece. So, grab your metaphorical magic carpet, and let’s soar into the world of affordable artistry!
Unveiling the Allure of Affordable Tiles
As I sit here, sipping my chai latte and reminiscing about the kaleidoscope of tiles I encountered in the bustling bazaars of Marrakech, I can’t help but smile at the thought of transforming your kitchen without emptying your wallet. Let’s embark on a journey to discover the magic of budget-friendly backsplashes, shall we?

The Power of a Backsplash
Picture this: a kitchen that whispers tales of culinary adventures, where every glance at the wall behind your stove sparks joy and inspiration. That’s the transformative power of a well-chosen backsplash, my friends. It’s like adding a statement necklace to your favorite outfit – it elevates the entire look without breaking the bank.
Did you know that a thoughtfully selected backsplash can increase your home’s resale value? It’s true! This small change can make a big impact, turning a potential buyer’s “maybe” into an enthusiastic “yes, please!”
Budget-Friendly Doesn’t Mean Boring
Now, let’s dispel a myth that’s been floating around like a persistent autumn leaf – affordable tiles are not synonymous with dull designs. Oh no, darlings! The world of budget-friendly backsplashes is a treasure trove of textures, colors, and patterns waiting to be discovered.
Imagine the satisfaction of telling your guests, “Oh, this stunning backsplash? I did it myself on a shoestring budget!” It’s like finding that perfect vintage scarf at a flea market – a little effort yields a priceless reward.
Here’s a little secret: replacing your backsplash is far less daunting (and less expensive) than refacing cabinets or swapping out countertops. It’s the perfect project for those of us who crave change but aren’t quite ready to commit to a full-scale kitchen renovation.
Crafting Your Backsplash Budget
Before we dive into the sea of affordable tile options, let’s talk numbers. The average cost of a kitchen backsplash renovation can range from $600 to $1,300, depending on the size of your space and the materials you choose. But fear not! With a bit of creativity and savvy shopping, you can achieve a magazine-worthy look for even less.

To determine your realistic backsplash budget, consider these factors:
- The square footage of your backsplash area
- The cost of materials (tiles, grout, adhesive)
- Any necessary tools or equipment
- Installation costs (if you’re not going the DIY route)
Remember, investing in a new backsplash isn’t just about immediate gratification – it’s about adding long-term value to your home. On average, a fresh backsplash can boost your home’s value by 25% of the project cost. Not too shabby for a weekend’s work, wouldn’t you agree?
As we prepare to explore the world of budget-friendly tile options, I encourage you to keep an open mind and let your imagination run wild. Create a mood board with colors, textures, and patterns that speak to your soul. Collect tile samples that catch your eye, and don’t be afraid to mix and match!
In our next adventure, we’ll dive into “10 Budget-Friendly Tile Stars” that will have you itching to start your backsplash makeover. From classic subway tiles with a twist to unexpected materials that will make your heart skip a beat, get ready to discover options that will transform your kitchen from drab to fab without draining your savings account. Let’s continue our journey into the world of wallet-friendly wonders!
10 Budget-Friendly Tile Stars
Let’s embark on a journey through ten budget-friendly tile options that will transform your kitchen into a vibrant tapestry of style and personality. Each of these little squares holds the power to breathe new life into your space without emptying your wallet.

Classic Choices
- Ceramic Tiles
- Material: Clay, kiln-fired and glazed
- Average cost: $0.50 – $7 per square foot
- Style versatility: Endless patterns and colors
- Pros: Affordable, durable, easy to clean
- Cons: Can chip or crack if heavy objects are dropped
Ceramic tiles are like the trusty camels of the Sahara – reliable, versatile, and able to withstand the test of time. I once saw a kitchen in Marrakech where vibrant blue ceramic tiles danced across the walls, creating a symphony of color that still echoes in my memory.
- Porcelain Tiles
- Material: Dense clay, fired at high temperatures
- Average cost: $3 – $10 per square foot
- Style versatility: Can mimic natural stone or wood
- Pros: Extremely durable, water-resistant, low maintenance
- Cons: Slightly more expensive than ceramic
Porcelain tiles are like the chameleons of the design world – they can effortlessly blend into any environment. I’ve seen them masquerade as weathered wood in a rustic farmhouse kitchen and pose as sleek marble in a modern city apartment.

- Glass Tiles
- Material: Recycled glass
- Average cost: $7 – $30 per square foot
- Style versatility: Shimmering, translucent beauty
- Pros: Eco-friendly, reflective properties enhance light
- Cons: Can be more expensive, may require professional installation
Glass tiles remind me of the glistening waters of the Mediterranean – they catch the light and dance with it, bringing a touch of magic to any space. In a friend’s tiny Parisian kitchen, glass tiles transformed a dark corner into a sparkling oasis.
Trendy & Affordable
- Peel-and-Stick Tiles
- Material: Vinyl or gel-like substance
- Average cost: $8 – $15 per square foot
- Style versatility: Endless designs, easy to change
- Pros: DIY-friendly, renter-friendly, no grout needed
- Cons: May not be as durable as traditional tiles
Peel-and-stick tiles are the free spirits of the tile world – here today, potentially gone tomorrow, but always ready for an adventure. They’re perfect for those of us who, like me, love to change our surroundings as often as we change our minds.

- Subway Tiles
- Material: Ceramic or porcelain
- Average cost: $2 – $7 per square foot
- Style versatility: Classic look, various layouts
- Pros: Timeless appeal, easy to clean
- Cons: Can look generic if not styled creatively
Subway tiles are like the little black dress of kitchen design – eternally chic and infinitely adaptable. I once saw them arranged in a herringbone pattern in a Brooklyn brownstone, and it was nothing short of breathtaking.
- Penny Tiles
- Material: Ceramic, porcelain, or glass
- Average cost: $5 – $15 per square foot
- Style versatility: Retro charm, various color combinations
- Pros: Creates visual interest, works well in small spaces
- Cons: More grout lines to clean
Penny tiles remind me of a rainy day in London – each tiny circle is like a drop of water, coming together to create a mesmerizing pattern. They’re particularly charming when used to create an accent wall or backsplash focal point.

- Mosaic Tiles
- Material: Various (glass, stone, ceramic)
- Average cost: $7 – $20 per square foot
- Style versatility: Endless patterns and color combinations
- Pros: Creates unique, artistic designs
- Cons: Can be busy if not balanced with simpler elements
Mosaic tiles are like the street markets of Marrakech – a riot of color and pattern that somehow comes together in perfect harmony. They’re ideal for creating a statement piece in your kitchen that reflects your unique style.
- Natural Stone-Look Tiles
- Material: Porcelain or ceramic printed to mimic stone
- Average cost: $3 – $10 per square foot
- Style versatility: Mimics expensive natural stone
- Pros: More affordable and durable than real stone
- Cons: May not have the exact look and feel of natural stone
These tiles are like the skilled artisans I’ve met on my travels – masters of illusion who can make one material look convincingly like another. They bring the organic beauty of stone to your kitchen without the hefty price tag.

- Hexagon Tiles
- Material: Ceramic, porcelain, or natural stone
- Average cost: $5 – $15 per square foot
- Style versatility: Modern or vintage look depending on size and color
- Pros: Creates visual interest, works in various styles
- Cons: Installation can be tricky due to shape
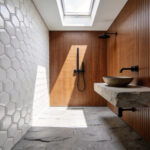
Hexagon tiles remind me of the honeycomb I once tasted at a lavender farm in Provence – sweet, geometric perfection. They add a subtle yet intriguing pattern to your kitchen, especially when played with different colors or sizes.
- Terracotta Tiles
-
- Material: Clay, often unglazed
- Average cost: $5 – $15 per square foot
- Style versatility: Rustic, Mediterranean charm
- Pros: Natural, warm appearance, durable
- Cons: Requires sealing, can be porous if not properly maintained
Terracotta tiles transport me back to sun-drenched afternoons in Tuscany, where every surface seemed to glow with warmth. They bring a piece of that timeless, earthy beauty to your kitchen, creating a cozy and inviting atmosphere.
When it comes to durability in high-traffic kitchens, porcelain takes the crown. Its dense composition makes it highly resistant to wear and tear. For easy cleaning and maintenance, both ceramic and porcelain are top contenders, with their smooth, non-porous surfaces that wipe clean with ease.

As we wrap up our tile tour, remember that the most beautiful kitchens are those that reflect the soul of their owners. Whether you choose the timeless charm of subway tiles or the bohemian allure of mosaics, let your backsplash be a canvas for your creativity.
Now that we’ve explored these budget-friendly tile options, you might be wondering if you should tackle the installation yourself or call in the pros. Let’s dive into the world of DIY backsplash installation and weigh the pros and cons in our next section, “DIY or Not to DIY?”
DIY or Not to DIY?
Ah, the age-old question that’s been puzzling homeowners since the dawn of renovation shows and Pinterest boards! As I sit here in my cozy nook, sipping chai and reminiscing about my backsplash adventures, I can’t help but smile at the memories of tile triumphs and grout-related grief. Let’s dive into this tiled topic together, shall we?
The DIY Advantage: A Bohemian’s Budget Dream
Picture this: you, armed with a trowel and a spirit of adventure, transforming your kitchen into a masterpiece worthy of a Moroccan bazaar. DIY tile installation isn’t just a way to save money; it’s a journey of self-discovery and creative expression. By taking on the task yourself, you could potentially save a small fortune – enough to fund your next exotic getaway or splurge on that handcrafted ceramic vase you’ve been eyeing.

But before you dive headfirst into a sea of mortar, let’s get real for a moment. DIY isn’t for the faint of heart. It requires patience, precision, and a willingness to learn from your mistakes. Trust me, I’ve been there – covered in thin-set, questioning my life choices, but ultimately emerging victorious (and with a killer backsplash to boot).
Knowing Your Limits: When to Call in the Cavalry
As much as I adore a good DIY challenge, there comes a time when we must bow to the wisdom of the professionals. Like that time I attempted to recreate an intricate Moroccan tile pattern and ended up with something that looked more like a toddler’s finger painting – charming, but not quite what I was going for.
Here are some signs it might be time to hang up your trowel and dial a pro:
- Your project involves complex cuts or patterns
- You’re working with delicate or expensive materials
- Time is of the essence (DIY often takes longer than expected)
- You have about as much confidence in your tiling skills as a fish has in its ability to climb trees
Remember, there’s no shame in seeking help. A professional can ensure your backsplash is installed correctly, potentially saving you from costly repairs down the road. Plus, it frees up your time to focus on what you do best – curating the perfect collection of globally-inspired knick-knacks to adorn your newly tiled space.

DIY Dos and Don’ts: Lessons from the Tile Trenches
For those brave souls ready to embark on their DIY journey, here are some pearls of wisdom I’ve gathered along the way:
- Do invest in quality tools. Your future self will thank you.
- Don’t rush the process. Tiling is a bit like meditation – it requires focus and patience.
- Do plan your layout meticulously. Nothing’s worse than reaching the end and realizing you’re left with an awkward sliver of space.
- Don’t forget to seal your grout. Trust me on this one – it’s a step you don’t want to skip.
- Do embrace imperfections. They add character, like the lines on a well-traveled face.
For those seeking inspiration or guidance, I’ve found this DIY tile installation tutorial to be as helpful as a friendly local’s advice in a bustling bazaar.
Finding Your Tile Tribe: Sourcing Professional Help
If you’ve decided to leave it to the experts, fear not – finding a reputable tile installer doesn’t have to be as challenging as haggling in a Marrakech market. Start by asking for recommendations from friends or local home improvement stores. Websites like Angie’s List or HomeAdvisor can also be treasure troves of information.

When vetting potential installers, don’t be shy about asking for references or examples of their work. A true artisan will be proud to showcase their craft. And remember, the cheapest option isn’t always the best – sometimes it’s worth investing a little more for quality workmanship that will stand the test of time.
As we wrap up our tiling talk, remember that whether you choose to DIY or hire a pro, the most important thing is that your backsplash brings you joy. After all, your home should be a reflection of your unique spirit and the adventures that have shaped you.
Now, let’s embark on our next journey into the world of budget-friendly design. In our upcoming section, “Design on a Dime,” we’ll explore how to create a backsplash that’s as kind to your wallet as it is pleasing to the eye. Get ready to unleash your inner decorator and prove that style doesn’t have to come with a hefty price tag!
Design on a Dime
As I’ve learned from my wanderings through Moroccan souks and Parisian flea markets, it’s not about how much you spend, but how you orchestrate the elements at hand. So, grab your imaginary paintbrush, and let’s splash some budget-friendly magic onto your backsplash canvas!

Layout Magic
Picture this: you’re strolling through a quaint Italian village, marveling at the intricate patterns beneath your feet. That’s the power of layout, my free spirits! Even the most modest tiles can become showstoppers with the right arrangement. For small kitchens, vertical layouts are your best friend – they draw the eye upward, creating an illusion of height and space. Try a sleek column stack or, if you’re feeling adventurous, a daring vertical herringbone.
Speaking of herringbone, this pattern is like the little black dress of tile layouts – timeless, versatile, and oh-so-chic. It adds a touch of luxury without the hefty price tag, perfect for our wallet-friendly makeover. For a modern twist, consider an oversized herringbone with rectangular subway tiles – it’s unexpected and utterly fabulous!
Don’t shy away from mixing it up, either. Combine different layouts in the same space to create visual interest. A classic running bond pattern framed by a border of diagonal tiles can transform your backsplash into a work of art. Remember, my dears, in the world of design, rules are meant to be beautifully broken.
Grout Power
Now, let’s talk about the unsung hero of tile design – grout! This humble filler is like the spice in your favorite curry – it can completely transform the flavor of your space. Dark grout paired with light tiles creates a striking graphic effect that can elevate even the most budget-friendly options. It’s also forgiving of imperfections, making it perfect for DIY enthusiasts or less expensive tiles.

But why stop at dark? The world of grout is your oyster! Current trends are embracing bold, colorful grouts that add an unexpected pop to neutral tiles. Imagine a soft gray tile paired with vibrant turquoise grout – it’s like adding a splash of the Mediterranean to your kitchen!
For a subtle yet sophisticated look, try tone-on-tone grouting. A slightly darker or lighter shade than your tile can add depth and texture without overwhelming the space. It’s like contouring for your backsplash, darlings!
Remember, the width of your grout lines can also impact the overall look. Thin lines create a sleek, modern aesthetic, while wider lines can lend a more rustic, handcrafted feel. Play around with different combinations until you find your perfect match.
In the end, my free spirit, designing on a dime is all about creativity and confidence. Trust your instincts, embrace the unexpected, and don’t be afraid to let your personality shine through. After all, the most beautiful spaces are those that tell a story – your story.
As we wrap up our design journey, let’s peek beyond the tiles and explore some additional ways to stretch your budget without sacrificing style. In our next section, “Beyond the Tiles: Cost-Saving Tips,” we’ll uncover clever tricks to make your backsplash makeover truly shine without breaking the bank. Are you ready to dive deeper into the world of wallet-friendly wonders? Let’s go!
Beyond the Tiles: Cost-Saving Tips
Ah, my fellow budget-conscious dreamers! Now that we’ve explored the realm of wallet-friendly tiles, let’s venture into the uncharted territories of backsplash brilliance. There’s a whole world of cost-saving magic waiting to be discovered, and I’m here to guide you through it like a thrifty fairy godmother with a penchant for DIY.

Smart Shopping Secrets
Picture this: you’re wandering through a bustling Moroccan bazaar, haggling over vibrant textiles and intricate ceramics. That same savvy spirit can be applied to your backsplash hunt! Many tile retailers have hidden treasure troves of clearance sections, where discontinued styles languish like forgotten genies in dusty lamps. These gems are just waiting for you to release their potential at a fraction of the cost.
Online retailers can be your magic carpet to savings. Websites like Overstock, Wayfair, and even Amazon often offer jaw-dropping deals on tiles. Pro tip: set up price alerts and pounce like a nimble cat when the perfect tile goes on sale. And don’t forget to check for seasonal sales – just as the desert blooms after a rare rain, your dream tiles might suddenly become attainable during end-of-season clearances.
Thinking Outside the (Tile) Box
Now, let’s embark on a journey beyond the realm of traditional tiles. Imagine your kitchen as a blank canvas, ready to be transformed by your creative spirit. Peel-and-stick wallpaper can be your secret weapon, mimicking the look of tiles with the ease of applying a temporary tattoo. It’s like dressing up your walls in a chic disguise!
But why stop there? Channel your inner artisan and consider these unconventional backsplash ideas:
- Beadboard: A charming cottage-inspired look that’s as easy on the eyes as it is on the wallet.
- Stenciling: Transform plain walls into works of art with intricate patterns and a touch of paint.
- Reclaimed wood: Bring a slice of rustic paradise to your kitchen, each plank telling its own story.
These alternatives not only save you money but also infuse your space with a unique, handcrafted charm that mass-produced tiles simply can’t match.

Now, I know what you’re thinking – “Willow, what about those peel-and-stick tiles? Are they too good to be true?” Well, my curious friends, let’s weigh the pros and cons:
Pros:
- Budget-friendly (like finding a designer dress at a thrift store)
- Easy installation (even for those of us who are DIY-challenged)
- Removable (perfect for renters or the chronically indecisive)
Cons:
- May not be as durable as traditional tiles (treat them gently, like a delicate flower)
- Limited design options (but still enough to spark joy!)
- Potential for peeling over time (especially in humid areas – looking at you, tropical bathroom oasis)
Remember, darlings, saving on your backsplash renovation is about more than just pinching pennies on tiles. It’s about embracing your inner creative goddess and seeing the potential in unexpected places. Who knows? Your next great backsplash idea might be inspired by a vintage scarf or a piece of driftwood from your last beach adventure.
As we wrap up our journey through the land of budget-friendly backsplashes, let’s take a moment to reflect on the creative possibilities we’ve uncovered. From clever shopping strategies to thinking outside the box, you’re now armed with a treasure trove of ideas to transform your kitchen without breaking the bank. But our adventure doesn’t end here, my free-spirited friends. Let’s glide seamlessly into our final thoughts, where we’ll tie all these wonderful ideas together like the intricate patterns of a hand-woven tapestry.

Conclusion
As our journey through the land of budget-friendly backsplashes comes to a close, I hope your mind is swirling with possibilities like the intricate patterns of a Turkish rug. Remember, my fellow dreamers, that creating a space that speaks to your soul doesn’t require a sultan’s fortune. It’s about infusing your personality into every nook and cranny, just as you would carefully curate souvenirs from your travels.
Whether you choose the timeless charm of subway tiles, the bohemian allure of mosaics, or venture into the realm of unconventional materials, let your backsplash be a canvas for your creativity. Embrace the imperfections, for they add character like the lines on a well-traveled face. And as you stand back to admire your handiwork, know that you’ve not just transformed a wall – you’ve woven a piece of your story into the very fabric of your home. Now, go forth and create, my darlings. Your kitchen adventure awaits!


